
EasyUSB AudioBRIDGE - Uncategorized Vaddio - Free user manual and instructions
Find the device manual for free EasyUSB AudioBRIDGE Vaddio in PDF.


| Product Type | Audio Bridge |
| Brand | Vaddio |
| Model | EasyUSB AudioBRIDGE |
| Connectivity | USB 2.0 |
| Dimensions (WxDxH) | Approx. 120 x 80 x 30 mm |
| Weight | Approx. 300 g |
| Power Source | USB bus-powered (5V, 500mA) |
| Audio Input | 3.5mm stereo line-in (unbalanced) |
| Audio Output | 3.5mm stereo line-out (unbalanced) |
| Sample Rate | Up to 48 kHz, 16-bit |
| Primary Function | Bi-directional audio bridging between analog and USB |
| Compatible Systems | Windows, macOS, Linux (USB Audio Class) |
| LED Indicators | Power/Activity (blue) |
| Cable Length | Integrated USB cable: 1.5 m |
| Enclosure Material | Metal chassis with rubber feet |
| Operating Temperature | 0°C to 40°C |
| Storage Temperature | -20°C to 60°C |
| Mounting | Desk or wall mountable (screws included) |
| Box Contents | EasyUSB AudioBRIDGE, USB cable, quick start guide |
| Maintenance | Clean with a dry, soft cloth. Do not use liquids. |
| Safety | Use only with supplied USB cable. Avoid moisture. |
| Spare Parts & Repairability | Contact Vaddio support for spare parts. No user-serviceable parts inside. |
Frequently Asked Questions - EasyUSB AudioBRIDGE Vaddio
User questions about EasyUSB AudioBRIDGE Vaddio
0 question about this device. Answer the ones you know or ask your own.
Ask a new question about this device
Download the instructions for your Uncategorized in PDF format for free! Find your manual EasyUSB AudioBRIDGE - Vaddio and take your electronic device back in hand. On this page are published all the documents necessary for the use of your device. EasyUSB AudioBRIDGE by Vaddio.
USER MANUAL EasyUSB AudioBRIDGE Vaddio
Vaddio™ EasyUSB™ AudioBRIDGE™
Analog Audio to USB 2.0 Audio Converter for UC Conferencing Applications
Part Numbers:
999-8536-000: EasyUSB AudioBRIDGE (North America)
999-8536-001: EasyUSB AudioBRIDGE (International)
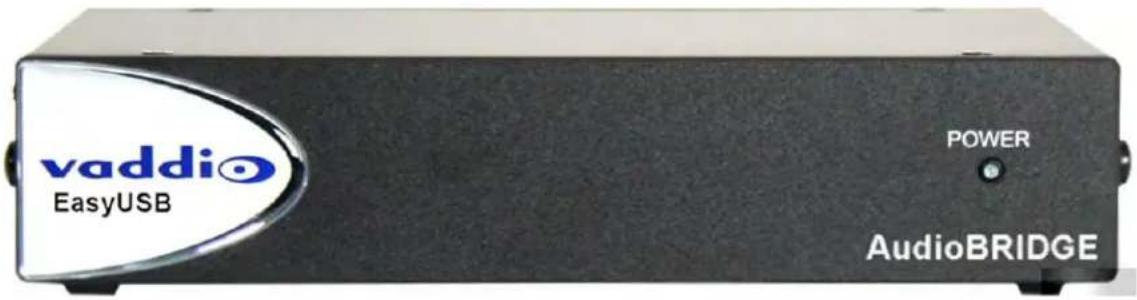
Table of Contents
Overview....3
Unpacking....4
Equipment Descriptions and Call-outs 4
Image: EasyUSB AudioBRIDGE Front Panel 4
Image: EasyUSB AudioBRIDGE Rear Panel Connections 4
PC-based USB Conferencing Application 5
Diagram: PC with USB 2.0 Basic Conferencing Connection Diagram....5
Step-by-Step Installation Instructions....5
EasyUSB AudioBRIDGE Installation....5
System Configuration and Programming....6
EasyUSB AudioBRIDGE 6
Table: EasyUSB AudioBRIDGE Dip Switch Configuration Settings 6
Mixing Modes....7
Table: AudioBRIDGE Routing Table 7
Advanced Audio Operational Functions 7
User Operations....8
Connecting to a PC....8
The Mixer in the PC....10
A Note about Working with Unified Communications Soft Clients 10
Firmware Updates 10
Warranty Information....11
Compliance and CE Declaration of Conformity 12
Technical Specifications 13
Appendix 1: Connector Pin-outs....14
Table: RS-232 Port on EasyUSB AudioBRIDGE 14
Table: RS-232 DE-9 to RJ-45 Control Adapter Pins 14
Appendix 2: EasyUSB AudioBRIDGE Serial Commands (ASCII) 14
Table: EasyUSB AudioBRIDGE Commands.... 15
Overview
The EasyUSB AudioBRIDGE is an elegant solution to enable existing professional audio equipment to go digital by converting the analog audio signals to USB 2.0 for use with Unified Communication soft clients like Microsoft Lync, Cisco Jabber, Google+ WebEx, GoToMeeting and more!

Professional audio equipment can connect to the AudioBRIDGE with balanced line level inputs and outputs on a 3-pin Euro terminal block connector or unbalanced, consumer level inputs and outputs on RCA connectors. The AudioBRIDGE converts the analog audio to a USB microphone and loudspeaker channel for connection to a PC application.
The AudioBRIDGE is optimized for use with many UC clients including Microsoft Lync. A unique feature of the AudioBRIDGE is the user configuration of USB terminal type. The AudioBRIDGE is configurable as a USB speakerphone (Type 403) or a USB echo canceling speakerphone (Type 405). Use Type 405 when connecting to professional audio conferencing DSP mixers with echo cancellation. Use Type 403 when connecting to audio equipment that does not have internal echo cancellation. This feature improves performance with Microsoft Lync and other soft client's internal echo canceling routines.
The AudioBRIDGE includes independent USB and analog gain stages. Gain structures can be configured between the pro audio equipment without being impacted by PC volume controls. Additionally, the AudioBRIDGE even includes a serial control (RS-232) port for use with external control systems.
While the EasyUSB AudioBRIDGE is a simple idea, execution of the idea is one of the most important aspects of selecting an analog audio to USB 2.0 converter. This solution offers many desirable features specifically included to perform flawlessly for mission critical UC applications using new or existing audio systems.
Intended Use:
Before operating the device, please read the entire manual thoroughly. The system was designed, built and tested for use indoors, and with the provided power supply and cabling. The use of a power supply other than the one provided or outdoor operation has not been tested and could damage the device and/or create a potentially unsafe operating condition.
Important Safeguards:
Read and understand all instructions before using. Do not operate any device if it has been dropped or damaged. In this case, a Vaddio technician must examine the product before operating. To reduce the risk of electric shock, do not immerse in water or other liquids and avoid extremely humid conditions. Do not connect Ethernet or Power over Ethernet (PoE) cables directly to the RJ-45 ports on the device as damage may result.

Use only the power supply provided with the system. Use of any unauthorized or extended power supply will void any and all warranties.
Please do not use "pass-thru" type RJ-45 connectors. These pass-thru type connectors do not work well for professional installations and can be the cause of intermittent connections which can result in the RS-232 control line failing and locking up. For best results please use standard RJ-45 connectors and test all cables for proper pin-outs prior to use.
Save These Instructions:
The information contained in this manual will help you install and operate your product. If these instructions are misplaced, Vaddio keeps copies of Specifications, Installation and User Guides and most pertinent product drawings for the Vaddio product line on the Vaddio website. These documents can be downloaded from www.vaddio.com free of charge.
Unpacking
Open the box and carefully remove the product and all of the included parts from the packaging. Identify the following parts for each AudioBRIDGE:
EasyUSB AudioBRIDGE:
999-8536-000: EasyUSB AudioBRIDGE - North America
999-8536-001: EasyUSB AudioBRIDGE - International*
Pack-out includes:
• One (1) EasyUSB AudioBRIDGE
- One (1) 18 VDC, 1.0 Amp Switching Power Supply with AC Clips*
• One (1) 6' (1.83m) USB Type-A to Type-B Cable (Black)
• One (1) 998-1001-232 Control Adapter (DE-9-F to RJ-45-F) for serial updating or external control systems
- Four (4) Rubber Feet (used if AudioBRIDGE is not rack mounted
* International AudioBRIDGE Kits get Euro, UK and AUS AC Clips.
Equipment Descriptions and Call-outs
Image: EasyUSB AudioBRIDGE Front Panel
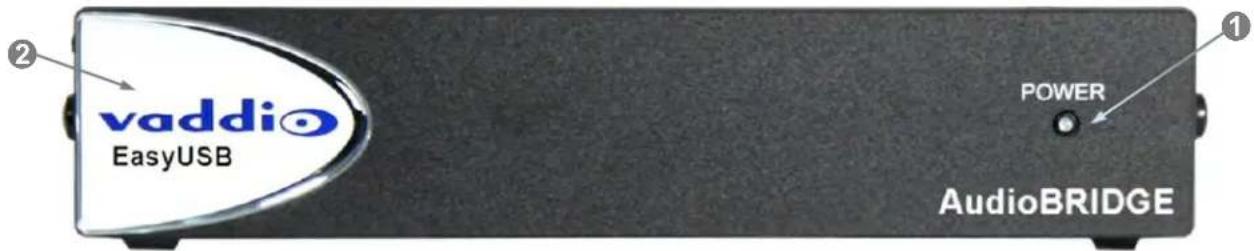
1) Power LED: Blue LED indicates system is powered and operational. Flashing blue indicates a system error.
2) RCLB: Really cool logo badge
Image: EasyUSB AudioBRIDGE Rear Panel Connections

1) Power Connector: 5.5mm OD x 2.5mm ID, positive center coaxial connector for 18 VDC, 1.0 Amp Switching Power Supply.
2) Settings: 8-position dip switches for configuration of advanced operational modes.
3) USB: USB Type B-Female connector for interface with Host PC. This connector allows for Streaming audio to and from the EasyUSB AudioBRIDGE. It emulates a standard USB Audio Class (UAC) device and eliminates need for customer drivers.
4) RS-232: RJ-45 connector with RS-232 functionality (see appendix for pin-out). Control port for use with third party control systems (AMX and Crestron). This port supports Vaddio ASCII command protocol.
5) Unbalanced Line Input & Line Output: Unbalanced RCA line level input and output port for connection to external A/V devices such as video conferencing codec, external amplifier, or recorder. It supports a nominal level of -10dBV.
6) Balanced Line Input & Line Output: Balanced line level input and output port on 3-pin Euro terminal connectors for interface with external A/V equipment. It supports a nominal level of +4dBu.
PC-based USB Conferencing Application
The diagram below depicts a typical AudioBRIDGE connection diagram when used with PC soft-clients (Jabber, Skype, Lync, etc...) for the group audio system. Simply connect the AudioBRIDGE to the room's existing professional A/V equipment. Send local microphone (near-end) audio to the Line Input of the AudioBRIDGE. Connect the AudioBRIDGE Line Output to the room's sound system for playback of USB audio from the far-end. Use type 405 when connecting to professional audio conferencing DSP mixers with echo cancellation.
Diagram: PC with USB 2.0 Basic Conferencing Connection Diagram

flowchart
graph TD
    A["EasyUSB AudioBRIDGE Rear Panel"] --> B["18 VDC Power Supply"]
    B --> C["PC with UC Client Software (Turn off internal echo canceler)"]
    C --> D["18 VDC 1.0 A"]
    D --> E["SETTINGS"]
    E --> F["USB"]
    F --> G["RS-232"]
    G --> H["LINE IN"]
    H --> I["LINE OUT"]
    I --> J["BALANCED AUDIO"]
    J --> K["Line IN"]
    K --> L["LINE OUT"]
    L --> M["+ - ▼"]
    M --> N["+ - ▼"]
    N --> O["Local Near-end Mic Audio to Line Input"]
    O --> P["Far-end Audio (from USB connection) to Pro Mixer"]
    P --> Q["Room’s Pro DSP Mixer with AEC"]
    Q --> R["Balanced Line Output"]
    R --> S["Balance Line Input"]
    S --> T["PRO Amplifier"]
    T --> U["Room Microphones"]
    U --> V["Line Level Audio"]
    V --> W["Room Speakers"]
    W --> X["Network Switch"]
    X --> Y["Ethernet"]
    Y --> Z["Supplied 6' (1.83M) USB 2.0 Cable"]
    Z --> AA["Network"]
    AA --> AB["Network with PC"]
Step-by-Step Installation Instructions
EasyUSB AudioBRIDGE Installation
Position the EasyUSB AudioBRIDGE in a centralized location within the conference room, 6' (1.83m) from the PC. Follow steps below to install devices:
STEP 1: Plug in the 18 VDC power supply into the AudioBRIDGE power connector, but don't plug in the AC side yet.
STEP 2: Plug USB Type-B Male connector of the USB 2.0 cable into the AudioBRIDGE. Plug the Type-A Male connector into the PC USB port.
STEP 3: Connect the balanced line output on the room's DSP mixer into the balanced line input 3-pin phoenix-type wire terminals of the AudioBRIDGE. Connect the AudioBRIDGE's balanced line output cable on the 3-pin phoenix-type wire terminals and connect the other end of the cable to a line input on the room's DSP mixer.
NOTE: Maintain the positive, negative and ground terminals between the AudioBRIDGE and the room's Pro DSP mixer.
STEP 4: Set the dip switches to the appropriate USB Terminal mode (see table on the next page).
STEP 5: Plug in the AC for the AudioBRIDGE and a blue power LED will light on the front panel (a flashing blue LED indicates a fault condition). Once the AudioBRIDGE has power and is connected to the PC, the PC will recognize the AudioBRIDGE as both a USB Microphone and USB Speaker device in the operating system. With the PC connected to the network, launch the UC application.
Optional Accessories
The EasyUSB AudioBRIDGE has three optional accessory kits:
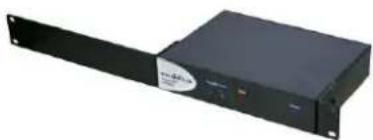
- Optional Rack Mounting Kit: The 12 -rack kit (PN: 998-6000-004) provides a method for the EasyUSB AudioBRIDGE to be installed in a 1-RU space within a rack. The Rack Kit includes two rack ears (one long and one short). The rack ears are mounted on the sides of the AudioBRIDGE using the existing screws included on the enclosure.
natural_image
Black industrial rack-mounted device with a white label on the front panel (no visible text or symbols on the device body)- Optional Under-Table Mounting Bracket: Fits Vaddio 12 rack enclosures and securely mounts the AudioBRIDGE to the underside of the conference room table to remain close to the PC used for the UC conferencing application (PN: 998-6000-005)

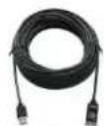
- USB 2.0 Extension Kit: An optional Active USB 2.0 Extension Cable extends the USB 2.0 connection between the AudioBRIDGE and the PC to 65.6'/20m (PN: 440-1005-020).
System Configuration and Programming
EasyUSB AudioBRIDGE
The EasyUSB AudioBRIDGE has an 8-position dip switch on the rear panel of the device for allowing installers to customize product for the desired conferencing application. Available configuration functions are listed in the Table below. The "up" position on the dip switch represents enable and the "down" position represents disable.

Table: EasyUSB AudioBRIDGE Dip Switch Configuration Settings
| Dip Switch Function Description | ||
| SW 1 HID Volume Lock HID Volume | Lock disallows the Host PC from adjusting the line input and line output gains on the AudioBRIDGE. Down (disable) = PC can adjust line input and line output gains Up (enable) = HID lock enabled and PC cannot control input and output analog gains. Gain will be locked at current value when feature enabled. ** Requires a power cycle of AudioBRIDGE when changed** | |
| SW 2 USB Terminal Type The USB Terminal Type defines the type of audio device connected to the Host PC according to the USB 2.0 device specifications. Some software applications (including Microsoft Lync) use this setting to modify PC's audio processing functions accordingly. Down (type 405) = Echo Canceling Speakerphone USB Terminal Type Up (type 403) = Non-Echo Canceling Speakerphone USB Terminal Type ** Requires a power cycle of AudioBRIDGE when changed** | ||
| SW 3 | Input Attenuation | Applies 6dB attenuation to the line input mix. The unbalanced input and balanced input are automatically summed before sending to the USB TX channel. Down (Disable) = No line input attenuation is applied to mix Up (enable) = 6dB attenuation is applied to the unbalanced and balanced line input mix. |
| SW 4-7 | Not Used | Reserved for future features |
| SW 8 | Firmware Update | This switch places the AudioBRIDGE in firmware update mode allowing integrators to upgrade the device using Vaddio software. When enabled, the audio operations will be disabled during the firmware update procedure. ** Requires a power cycle of AudioBRIDGE to take affect** |
Mixing Modes
The EasyUSB AudioBRIDGE supports a single mixing mode. The Unbalanced & Balanced Line Inputs will be automatically summed and sent to the USB TX (Recording) channel on the PC. The USB RX (Playback) channel from the PC will be routed to both the unbalanced and balanced line outputs of the AudioBRIDGE.
Table: AudioBRIDGE Routing Table
| Matrix Mixer | USB TX (Recording) | Balanced Line Output | Unbalanced Line Output |
| Balanced Line Input X | Not Available Not Available | ||
| Unbalanced Line Input X | Not Available Not Available | ||
| USB RX (Playback) Not | Available X X |
“X”- represents an internal cross-point within the matrix.
Advanced Audio Operational Functions
HID Volume Lock (Dip Switch 1): The HID Volume Lock function can be used in applications where it is desirable that the PC does not change analog gain settings on the AudioBRIDGE. When in locked mode, the gain structures between the AudioBRIDGE and the connected AV equipment (Room DSP) cannot be modified by the Host PC. This can be desirable to maintain constant cross-point levels on a room's mixer that is combining multiple audio sources preventing the USB audio levels over-riding other sources in the mix.
USB Terminal Type (Dip Switch 2): The USB Terminal Type is useful for deployments using Microsoft Lync. Microsoft Lync uses the terminal type to automatically enable or disable the software acoustical echo cancellation. There recommended settings for Terminal Type are:
- Type 405: Set AudioBRIDGE to Type 405 if the connected professional audio equipment has built in echo cancellation. Microsoft Lync will disable its internal echo cancellation. This typically will yield better audio performance in terms of duplex operation.
- Type 403: Set AudioBRIDGE to Type 403 if the connected professional audio equipment does not have built-in echo cancellation. Microsoft Lync will enable its internal echo cancellation. Note that Microsoft Lync is a single echo canceler. Summing multiple microphones into the software based echo canceler can yield poor performance depending upon acoustical characteristics of the room.
Input Attenuation (Dip Switch 3): Enabling (up) dip switch 3 will automatically apply 6dB attenuation to the audio mix being sent the USB TX (Record) channel. Note that the AudioBRIDGE will sum the Unbalanced Line Input and the Balanced Line Input. If both inputs are active in the application, enabling the 6dB attenuation will provide a higher dynamic range.
User Operations
Connecting to a PC
The EasyUSB AudioBRIDGE is connected to the PC with a simple USB cable. Once connected, the PC's operating system will recognize the AudioBRIDGE as a USB sound device. The sound device will be identified as an echo canceling speakerphone (or non-echo canceling speakerphone) with one playback channel (speaker) and one recording channel (microphone). The AudioBRIDGE is designed as a USB Audio Class (UAC) device. There are no requirements for pesky custom drivers on the Host PC for operations.
To use the AudioBRIDGE as the PC sound device, the user will be required to select it as the default audio device within the sound manager in the operating system. The example below shows the selection process for a PC using Windows 7.
STEP 1: Go to the Windows Control Panel and select the Sound icon

STEP 2: Go to the Playback Tab on Sound pop-up window. Select the EasyUSB device in the list. Press the arrow on the "Set Default" button at the bottom. Select the "Default Communication Device" in the list. Windows 7 allows the user to set the sound device as either the default sound device or the default communication device. If set as the default communication device all UC soft-client applications will automatically be routed to this sound device. The recommendation is to configure the AudioBRIDGE as the default communication device. A handset icon represents this selection in the list.

STEP 3: Move to the Recording Tab of the Sound pop-up window. Select the AudioBRIDGE within the list and click the Set Default button. This sets the EasyUSB AudioBRIDGE as the default communication device for the microphone.


Note that some UC soft clients will automatically store the Operating System sound device configurations within the application. This function will automatically reconfigure the sound device when application is launched.
The Mixer in the PC
The AudioBRIDGE volume and mute audio controls are mapped to the operating system sound device controls used by the software application (when HID Lock is not enabled). This allows the software application to change the loudspeaker volume or mute microphones from the PC (if supported by the software application). An example of typical speaker audio controls from the operating system is depicted below.
![Volume Mixer - Echo Cancelling Speakerphone (EasyUSB AudioBRIDGE) Device Echo Canc... Applications System Sounds Windows Media Player [VNG-2120] Crash in webex - JIRA - ...](/content/2026/05/1004744/images/56006d598da52d4860f56aa3e11bdc267d6cfd8944bff4be8ad0d9ccde8d4e38.jpg)
A Note about Working with Unified Communications Soft Clients
As the examples with Skype and Microsoft Lync indicate, the soft clients essentially all work the same way. However, each of them has their own way of getting to the proverbial finish line. The language and nomenclature is different, the file systems and drop down menus differ, but the underlying objective is to assign the AudioBRIDGE the speaker and the mic for the PC to use as I/O for the soft client application.
As more examples are gathered, each of these 1-2 page TechNotes will be posted on the Vaddio website.

The most important thing about interoperability with PCs and soft clients is to involve the IT department and Network Administrators that are responsible for their company's lifeblood (or network). In all cases it is important to work with personnel within the IT department to ensure a successful deployment of the EasyUSB Tools offered by Vaddio. While these products are easy to work with, there are always a handful of "gotchas" that baffle and confound even the brightest amateur computer guys.
Firmware Updates

The EasyUSB AudioBRIDGE can be upgraded in the field with the use of the Vaddio Loader software application. The processes for firmware updates are as follows:
STEP 1: If you are uncertain about updating or upgrading the equipment, please contact Vaddio Technical Support first. There is a possibility that any device can be turned into a brick, so give Tech Support a call first to get the dos and don'ts of updating.

STEP 2: Set Dip Switch 8 up on the back of the EasyUSB AudioBRIDGE. Power cycle the device. Connect to the RS-232 port on the AudioBRIDGE. Launch the newest available Vaddio Loader application on the PC (not a MAC) and set the COM port to the associated PC connection. Select the AudioBRIDGE in the drop down list at the top of the page. Select the load file from your local or network folders. Press the Start button on the loader. This will begin the firmware update transfer to the unit. A progress bar will indicate when the transfer is complete.

While updating a device, NEVER interrupt a transfer, even if it looks like it isn't doing anything. Interrupting a transfer may "brick" the unit and it might require emergency return to factory surgery.
Warranty Information (See Vaddio Warranty, Service and Return Policies posted on vaddio.com for complete details):
Hardware* Warranty: Two (2) year limited warranty on all parts and labor for Vaddio manufactured products. Vaddio warrants its manufactured products against defects in materials and workmanship for a period of two years from the day of purchase, to the original purchaser, if Vaddio receives notice of such defects during the warranty. Vaddio, at its option, will repair or replace products that prove to be defective. Vaddio manufactures its hardware products from parts and components that are new or equivalent to new in accordance with industry standard practices.
Exclusions: The above warranty shall not apply to defects resulting from improper or inadequate maintenance by the customer, customers applied software or interfacing, unauthorized modifications or misuse, mishandling, operation outside the normal environmental specifications for the product, use of the incorrect power supply, modified or extended power supply or improper site operation and maintenance. OEM products and products manufactured by other companies are excluded and are covered by the manufacturer's warranty.
Vaddio Customer Service: Vaddio will test, repair, or replace the product or products without charge if the unit is under warranty. If the product is out of warranty, Vaddio will test then repair the product or products. The cost of parts and labor charge will be estimated by a technician and confirmed by the customer prior to repair. All components must be returned for testing as a complete unit. Vaddio will not accept responsibility for shipment after it has left the premises.
Vaddio Technical Support: Vaddio technicians will determine and discuss with the customer the criteria for repair costs and/or replacement. Vaddio Technical Support can be contacted through one of the following resources: e-mail support at support@vaddio.com or online at vaddio.com.
Return Material Authorization (RMA) Number: Before returning a product for repair or replacement request an RMA from Vaddio's technical support. Provide the technician with a return phone number, e-mail address, shipping address, product serial numbers, and original purchase order number. Describe the reason for repairs or returns as well as the date of purchase. See the General RMA Terms and Procedures section for more information. RMA's are valid for 30 days and will be issued to Vaddio dealers only. End users must return products through Vaddio dealers. Include the assigned RMA number in all correspondence with Vaddio. Write the assigned RMA number clearly on the shipping label of the box when returning the product. All products returned for credit are subject to a restocking charge without exception.
Voided Warranty: The warranty does not apply if the original serial number has been removed or if the product has been disassembled or damaged through misuse, accident, modifications, use of incorrect power supply, use of a modified power supply or unauthorized repair.
Shipping and Handling: Vaddio will not pay for inbound shipping transportation or insurance charges or accept any responsibility for laws and ordinances from inbound transit. Vaddio will pay for outbound shipping, transportation, and insurance charges for all items under warranty but will not assume responsibility for loss and/or damage by the outbound freight carrier. If the return shipment appears damaged, retain the original boxes and packing material for inspection by the carrier. Contact your carrier immediately.
Products not under Warranty: Payment arrangements are required before outbound shipment for all out of warranty products.
Other General Information:
Care and Cleaning
Do not attempt to take this product apart at any time. There are no user-serviceable components inside.
- Do not spill liquids into the product.
- Keep this device away from food and messy stuff.
- For smears or smudges on the product, wipe with a clean, soft cloth.
- Do not use any abrasive chemicals.
Operating and Storage Conditions:
Do not store or operate the device under the following conditions:
• Temperatures above 104°F (40°C) or temperatures below 32°F (0°C)
• High humidity, condensing or wet environments
• In swimming pools or the Eisriesenwelt Ice Cave
• In inclement weather
- Dry environments with an excess of static discharge (Arrakis)
• Without with an asynchronous inertial dampening array
• Under severe vibration
Compliance and CE Declaration of Conformity: EasyUSB AudioBRIDGE
Compliance testing was performed to the following regulations:
FCC 47 CFR Part 15, Subpart B/Oct. 2009 Class A
ICES-003, Issue 4: 2004
EN-55011:2007 + A2: 2007
EN 55022:2006 + A1: 2007 Class A
CISPR 22:1997
IEC 60950-1:2005 (Second Edition); Am 1:2009
EN 60950-1:2006+A11:2009+A1:2010+A12:2011
EMC Directive 2004/108/EC
Class A
Class A
Class A
Safety
Safety
C
a

S
s
A
FC
FCC Part 15 Compliance
This equipment has been tested and found to comply with the limits for a Class A digital device, pursuant to Part 15 of the FCC Rules. These limits are designed to provide reasonable protection against harmful interference when the equipment is operated in a commercial environment. This equipment generates, uses, and can radiate radio frequency energy and, if not installed and used in accordance with the instruction manual, may cause harmful interference to radio communications. Operation of this equipment in a residential area is likely to cause harmful interference in which case the user will be required to correct the interference at his/her own expense.
- Operation is subject to the following two conditions: (1) This device may not cause interference, and (2) This device must accept any interference including interference that may cause undesired operation of the device.
- Changes or modifications not expressly approved by Vaddio can affect emission compliance and could void the user's authority to operate this equipment.

Industry Canada
Industrie Canada
ICES-003 Compliance
This digital apparatus does not exceed the Class A limits for radio noise emissions from digital apparatus set out in the Radio Interference Regulations of the Canadian Department of Communications.
This product has been evaluated for Electromagnetic Compatibility under the standards for Emissions and Immunity and meets the requirements for E4 environment. This product complies with Class A (E4 environment). In a domestic environment this product may cause radio interference in which case the user may be required to take adequate measures.
Standard(s) To Which Conformity Is Declared:
EN-55011:2007 + A2:2007
EN 55022:2006 + A1:2007
EN 61000-6-4:2007
EN 61000-3-2:2006
EN 61000-3-3:2008
EN 61000-6-2:2005
EN 55024:1998 + Amendments A1:2001 + A2: 2003
EN 61000-4-2:2008
EN 61000-4-3:2008
EN 61000-4-4:2004 + Corrigendum 1:2006 + Corr. 2:2007
EN 61000-4-5:2005
EN 61000-4-6:2008
EN 61000-4-8:2009
EN 61000-4-11: Second Edition: 2004
IEC 60950-1:2005 (Second Edition); Am 1:2009
EN 60950-1:2006+A11:2009+A1:2010+A12:2011
Emissions
Conducted
and
Radiated
Electromagnetic Compatibility
Limits for Harmonic
Content
Limits for Voltage Fluctuations and Flicker
Immunity for Industrial Environments
Immunity
Electrostatic Discharge
Radiated Immunity
Electrical Fast Transients
Surge
Immunity
Conducted Immunity
Power Frequency
Magnetic
Field
Voltage Dips, Interrupts and Fluctuations
Safety
Safety
Technical Specifications
| EasyUSB AudioBRIDGE | |
| Part Numbers | EasyUSB AudioBRIDGE 999-8536-000 (North America)EasyUSB AudioBRIDGE 999-8536-001 (International) |
| Audio Specifications | Frequency Response: 20 HZ to 20 kHzDynamic Range: >90dBTHD + Noise: <.02% |
| Unbalanced Analog Line Input | Connector: RCAImpedance: 10K ohmNominal Level: -10dBV |
| Balanced Analog Line Input | Connector: 3-Pin Euro Terminal BlockImpedance: 10K ohmNominal Level: +4dBu |
| Unbalanced Analog Line Output | Connector: RCAImpedance: 10K ohmNominal Level: -10dBV |
| Balanced Analog Line Output | Connector: 3-Pin Euro Terminal BlockImpedance: 50 ohmNominal Level: +4dBu |
| USB Audio Interface | Connector: Type-B FemaleType: USB 2.0 CompliantPC Audio Controls: Mute & VolumePC HID Controls: On/Off Hook (application dependent) |
| Dip Switch Settings | 8-Position Dip Switch, Operational Settings |
| User Indicators | Power Status (blue LED on front panel) |
| Power Supply | 18 VDC, 1.0 Amp, Switching Power Supply5.5mm OD x 2.5mm ID Coaxial Connector with Positive Center |
| Serial Control Protocol | RS-232 (external control), 38.4K baud |
| General Information | |
| Operating Temperature | 32° to 104° F (0° to 40° C), 20% to 80% Relative Humidity |
| Power Consumption | <18 watts |
| Dimensions (H x W x D) | 1.72" (43.7mm) H x 8.375" (212.73mm) W x 6.0" (152.4mm) D |
| Weight | Approximately 1.4015643 lbs. (0.63573887 kg) |
| Country of Origin | Designed and Manufactured in the USA (Vaddio HQ in Minnetonka, Minnesota) |
Appendix 1: Connector Pin-outs
Table: RS-232 Port on EasyUSB AudioBRIDGE
| Pin # RS-232 Control Port | |
| 1 | Unused |
| 2 | Unused |
| 3 | Unused |
| 4 | Unused |
| 5 | Unused |
| 6 | GND |
| 7 RXD (from TXD of control source) | ←→ |
| 8 TXD (to RXD of control source) | |
RS-232

The Control Adapter (998-1001-232)
RS-232 port to RJ-45 connector for external control systems and firmware updates over the serial port. This adapter has a DE-9-Female on one side and a RJ-45-Female on the other. The adapter takes the serial connections and routes them to the correct pins on the RJ-45.
Table: RS-232 DE-9 to RJ-45 Control Adapter Pins
| DE-9-M Pin # | DE-9 Signals | RJ-45-FPin # | RJ-45 Signals |
| 2 | RXD | 8 | TXD |
| 3 TXD | 7 | RXD (from TXD) | |
| 5 | GND | 6 | GND |
Note: The DE-9 connector, commonly called a DB-9, uses an E to sized shell, hence the DE designation. DB sized shells start at 25 pins.

Appendix 2: EasyUSB AudioBRIDGE Serial Commands (ASCII)
The EasyUSB AudioBRIDGE has an RS-232 command interface for configuration and real-time control. The interface can be used interactively with a serial terminal emulator such as AMX or Crestron Control systems. The command echo and prompt can be enabled or disabled with the 6121 command. When enabled, command input to the EasyUSB AudioBRIDGE are echoed back, and a ‘>’ prompt character is automatically output on a carriage return. When the command echo and prompt are disabled, the echo and prompt characters are suppressed.
For all commands, the termination character is a carriage return (hex 0D). Responses from the EasyUSB AudioBRIDGE will end with a carriage return followed by a line feed (hex 0A).
The baud rate of the EasyUSB AudioBRIDGE is 38,400 with following serial format:
- Stop Bit: 1
- Data: 8 bit
- Parity: None
- Flow: None
The EasyUSB AudioBRIDGE protocol is based upon a "Set" and "Get" scheme. Set commands automatically return an acknowledgement upon execution.
The "Get" command returns a string representing the current value of the queried setting.
The "Set" commands return one of three responses:
• OK (4100)
• Unknown command (4199)
• Bad parameter (4198).
"Get" commands return a response string indicating the command being responded to and the data requested. The format of a "Get" response is a 4-digit response code, a space, and a two-digit hex value. Examples of command usage are:
- Set Command Usage: > 6101 00
(unmute the microphones) - Response: >4100 00 (Microphone not muted)
- Get Command Usage:> 5101
(queries current mute state)
• Response: >4101 00 (Microphone not muted)
Table: EasyUSB AudioBRIDGE Commands
| Command | Argument | Function | Successful Response |
| 5101 Get mute status (0=mute off, 1=mute on) 4101 bb (b=00 or 01) | |||
| 5102 Get speaker volume (0 to 58 in 0.5dB steps) 4102 vv (vv = volume value) | |||
| 5103 Get mic gain (0 to 29 in 1.0 dB steps) 4103 vv (vv = gain value) | |||
| 5104 | Get balanced line input gain (-12 to 20 in 1.0 dB steps) | 4104 vv (vv= gain value) | |
| 5105 | Get unbalanced line input gain (-12 to 20 in 1.0 dB steps) | 4105 vv (vv=gain value) | |
| 5106 | Get balanced line output gain (-6 to 20 in 1.0 dB steps) | 4106 vv (vv= gain value) | |
| 5107 | Get unbalanced line output gain (-6 to 20 in 1.0 dB steps) | 4107 vv (vv= gain value) | |
| 5108 Get On/Off Hook State 4108 bb (b=00 or 01) | |||
| 5109 Get Ringer State 4109 bb (bb=00 or 01) | |||
| 5200 | Get Device ID (02 for AudioBRIDGE, version XX.YY.ZZ) | 4200 (returns device ID and firmware version) | |
| 5300 Get AudioBRIDGE Error Code | 4300 (xx=00=none, xx>00 returns error code) | ||
| 6101 0 or 1 Set mute off/on | 4100 bb (bb=00 or 01, repeats 6101 argument) | ||
| 6102 0 or 1 Decrement/increment speaker volume | 4100 bb (bb=00 or 01, repeats 6102 argument) | ||
| 6103 0 or 1 Decrement/increment mic volume | 4100 bb (bb=00 or 01, repeats 6103 argument) | ||
| 6104 | -12 to 20 | Sets balanced line input gain | 4100 bb ( bb= -vv for negative values and bb= vv for positive values) |
| 6105 | -12 to 20 | Sets unbalanced line input gain | 4100 bb ( bb= -vv for negative values and bb= vv for positive values) |
| 6106 | -6 to 20 Set balanced line output gain | 4100 bb ( bb= -vv for negative values and bb= vv for positive values) | |
| 6107 | -6 to 20 Sets unbalanced line output gain | 4100 bb ( bb= -vv for negative values and bb= vv for positive values) | |
| 6108 | 0 or 1 | Sets On/Off Hook State | 4100 bb (bb=00 or 01) |
| 6121 | 0 or 1 | Disable/enable serial echo | None if arg=0, 4100 01 if arg=1 |
vaddio
Toll Free: 800-572-2011 · Phone: 763-971-4400 · FAX: 763-971-4464
www.vaddio.com

- Vaddio™ EasyUSB™ AudioBRIDGE™
- Analog Audio to USB 2.0 Audio Converter for UC Conferencing Applications
- Table of Contents
- Overview
- Intended Use:
- Important Safeguards:
- Save These Instructions:
- Unpacking
- EasyUSB AudioBRIDGE:
- Equipment Descriptions and Call-outs
- PC-based USB Conferencing Application
- Step-by-Step Installation Instructions
- EasyUSB AudioBRIDGE Installation
- Optional Accessories
- System Configuration and Programming
- EasyUSB AudioBRIDGE
- Mixing Modes
- Advanced Audio Operational Functions
- User Operations
- Connecting to a PC
- The Mixer in the PC
- A Note about Working with Unified Communications Soft Clients
- Firmware Updates
- Other General Information:
- Care and Cleaning
- Operating and Storage Conditions:
- Compliance and CE Declaration of Conformity: EasyUSB AudioBRIDGE
- FC
- FCC Part 15 Compliance
- ICES-003 Compliance
- Appendix 1: Connector Pin-outs
- The Control Adapter (998-1001-232)
- Appendix 2: EasyUSB AudioBRIDGE Serial Commands (ASCII)
- The baud rate of the EasyUSB AudioBRIDGE is 38,400 with following serial format:
Brand : Vaddio
Model : EasyUSB AudioBRIDGE
Category : Uncategorized