
CA-HM-ISU.001 - Auto-Kit PIONEER - Kostenlose Bedienungsanleitung
Finden Sie kostenlos die Bedienungsanleitung des Geräts CA-HM-ISU.001 PIONEER als PDF.


| Produkttyp | Einbaukit (Fahrzeugmontage) |
| Marke | Pioneer |
| Modell | CA-HM-ISU.001 |
| Kompatibilität | ISUZU D-Max (ab Baujahr 2012) |
| DIN-Größe | Doppel-DIN |
| Lieferumfang | Doppel-DIN Blende, Montagebügel (2), Schrauben, 3 Adapterblenden (A, B, C) |
| Adapterblende A (innen) | 172 mm x 97 mm |
| Adapterblende B (innen) | 173 mm x 98 mm |
| Adapterblende C (innen) | 178 mm x 100 mm |
| Material | Kunststoff |
| Farbe | Schwarz |
| Gewicht | ca. 400 g |
| Montageort | Armaturenbrett |
| Montageart | Einsetzen und Verschrauben |
| Besonderheiten | Wiederverwendung der Originalclips und -schrauben; Anpassung an verschiedene Radiogrößen |
| Sicherheitshinweis | Installation nur durch Fachpersonal |
| Zubehör | Enthalten (siehe Lieferumfang) |
| Hersteller | Pioneer |
| Artikelnummer | CA-HM-ISU.001 |
| Garantie | Gemäß Herstellerangaben |
| Verpackungsinhalt | Siehe Lieferumfang |
Häufig gestellte Fragen - CA-HM-ISU.001 PIONEER
Benutzerfragen zu CA-HM-ISU.001 PIONEER
0 Frage zu diesem Gerät. Beantworten Sie die, die Sie kennen, oder stellen Sie Ihre eigene.
Eine neue Frage zu diesem Gerät stellen
Laden Sie die Anleitung für Ihr Auto-Kit kostenlos im PDF-Format! Finden Sie Ihr Handbuch CA-HM-ISU.001 - PIONEER und nehmen Sie Ihr elektronisches Gerät wieder in die Hand. Auf dieser Seite sind alle Dokumente veröffentlicht, die für die Verwendung Ihres Geräts notwendig sind. CA-HM-ISU.001 von der Marke PIONEER.
BEDIENUNGSANLEITUNG CA-HM-ISU.001 PIONEER
PLEASE NOTE

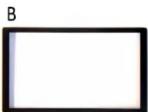

There are 3 different trim solutions for different radio units.
The measures of the inner side of the trims are the following ones:
A - width 172 mm.
height 97 mm.
B - width 173 mm.
height 98 mm.
C - width 178 mm.
height 100 mm.
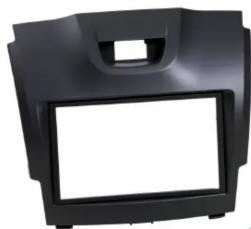
Facia plate installation kit for:
ISUZU
Model: D-Max;
Year: 2012 >
Kit content: double DIN facia plate mounting brackets + screws 3 adaptation trims
Customer code: CA-HM-ISU.001
natural_image
Black plastic car cover with a handle and rectangular panel (no text or symbols visible)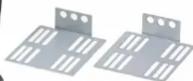


INSTALLATION MANUAL
All installation work must be performed by a qualified professional installer only. The manufacturer / dealer is not liable for any kind of incidental or indirect damages.
1 Remove the circled plastic parts from the dashboard as shown in the pictures.

natural_image
Three-panel photo showing hands interacting with a car dashboard and touchscreen device (no visible text or symbols)- Disconnect and remove the hazard lights as in the picture A switch-shown.
2 Remove and save the circled green clips on the rear panel of the radio unit as shown in the picture B.
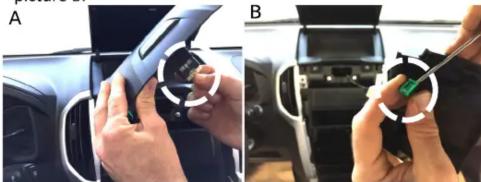
natural_image
Two-panel image showing hands installing a component on a car's side, labeled A and B (no visible text or symbols)3 Unscrew, remove and save the two air vents as shown in the pictures.
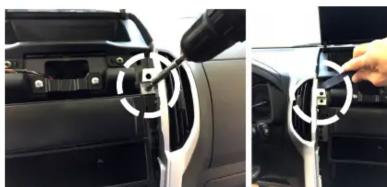
natural_image
Interior view of a car showing a hand inserting a valve into the air vent (no text or symbols visible)4 Unscrew and remove the plastic part shown in the picture. Save the removed screws.
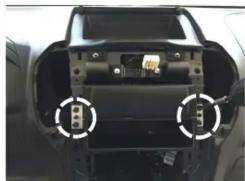
natural_image
Close-up of a mechanical component with two circular annotations highlighting internal features (no text or symbols visible)5 Mount the supplied metal brackets on both sides of the aftermarket radio by using the supplied screws.
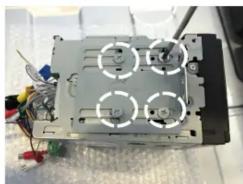
natural_image
Close-up of a mechanical device with four circular features and wiring, no visible text or symbolsMake all the connections and place the unit into the radio tunnel.
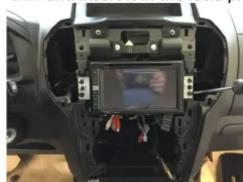
6 Fasten it to the panel with the screws previously saved. Choose the correct trim and insert it in the facia plate supplied.
natural_image
Interior view of a car dashboard with a digital display showing a person's face (no visible text or symbols)7 Fix the previously saved green clips on the supplied facia plate. Connect the hazard lights switch and put back in place all the plastic parts as before.

natural_image
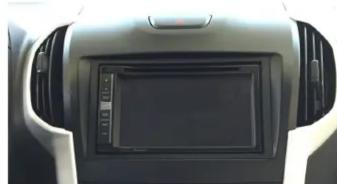
Close-up of hands adjusting a car interior panel with a green circular dial and a small tool (no visible text or symbols)8 This is the final results.
natural_image
Interior view of a car dashboard with a digital display screen (no visible text or symbols)



Marke : PIONEER
Modell : CA-HM-ISU.001
Kategorie : Auto-Kit