
Super RicohFlex - Kamera RICOH - Kostenlose Bedienungsanleitung
Finden Sie kostenlos die Bedienungsanleitung des Geräts Super RicohFlex RICOH als PDF.


| Produkttyp | Zweiäugige Spiegelreflexkamera (TLR) |
| Filmformat | 120er Rollfilm (6×6 cm) |
| Objektiv | Rikenon 80 mm f/3.5 |
| Sucher | Mattscheibe mit Fresnellinse |
| Verschluss | Seikosha-Schnellverschluss 1–1/500 s + B |
| Blende | f/3.5–f/22 |
| Fokussierung | Mattscheibe und Einstellrad |
| Belichtungsmessung | Keine (manuelle Einstellung) |
| Auslöser | Auslösehebel an der Seite |
| Blitzanschluss | PC-Stecker (M-Synchronisation) |
| Filmtransport | Kurbel mit Bildzählwerk |
| Stativgewinde | 1/4 Zoll |
| Abmessungen (B×H×T) | ca. 110 × 150 × 100 mm |
| Gewicht | ca. 900 g |
| Gehäusematerial | Metall (Aluminiumdruckguss) mit Kunstlederbezug |
| Stromversorgung | Keine (rein mechanisch) |
| Besonderheiten | Doppelbelichtungssperre, Selbstauslöser |
| Reinigung | Linsen mit weichem Tuch und Blasebalg reinigen; Gehäuse mit feuchtem Tuch abwischen |
| Ersatzteile | Ersatzfilme, Sucherlupen, Linsenschutz |
| Reparatur | Fachwerkstatt für Analogkameras empfohlen |
Häufig gestellte Fragen - Super RicohFlex RICOH
Benutzerfragen zu Super RicohFlex RICOH
0 Frage zu diesem Gerät. Beantworten Sie die, die Sie kennen, oder stellen Sie Ihre eigene.
Eine neue Frage zu diesem Gerät stellen
Laden Sie die Anleitung für Ihr Kamera kostenlos im PDF-Format! Finden Sie Ihr Handbuch Super RicohFlex - RICOH und nehmen Sie Ihr elektronisches Gerät wieder in die Hand. Auf dieser Seite sind alle Dokumente veröffentlicht, die für die Verwendung Ihres Geräts notwendig sind. Super RicohFlex von der Marke RICOH.
BEDIENUNGSANLEITUNG Super RicohFlex RICOH
natural_image
Pixelated illustration of a device with two screens and a face, no visible text or symbols
YOUR MARK OF QUALITY
Tokyo office
33, 4-chome, Magome, Ota-ku, Tokyo
New York Office
521 Fifth Avenue, New York 17, New York
RIKEN OPTICAL INDUSTRIES, LTD.
Printed in Japan E0215 KOYOSHA
natural_image
Vintage digital camera with dual lenses and a halftone base (no visible text or symbols)SUPER
RicoH Flex
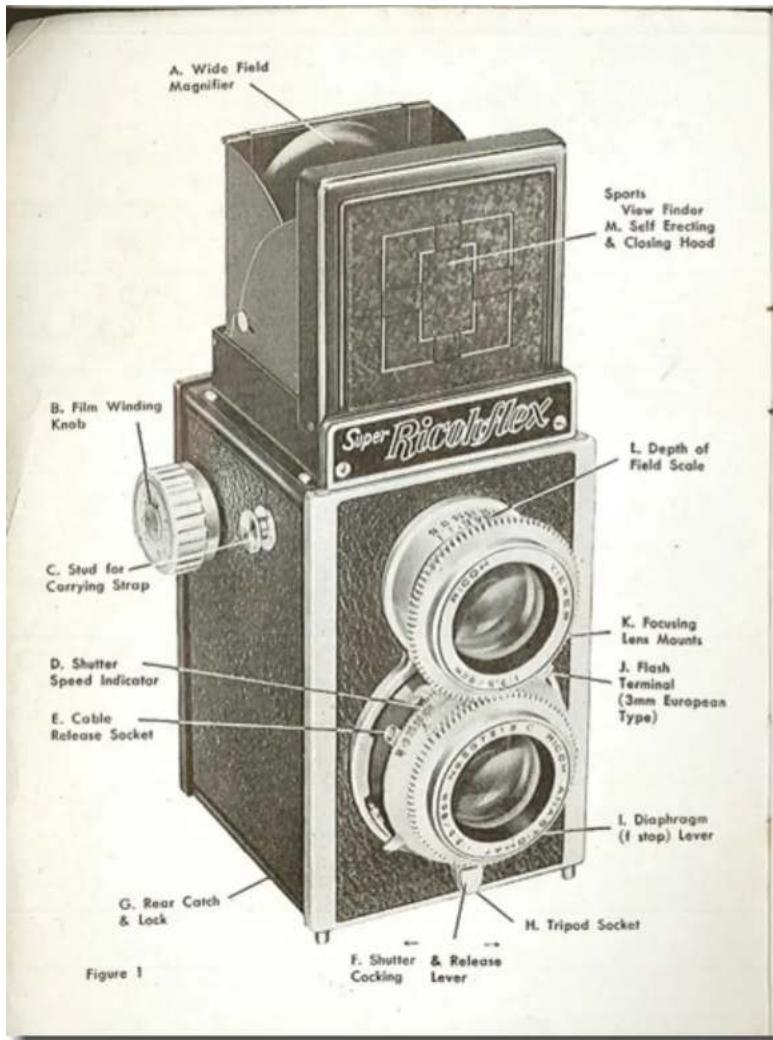
Super Ricohflex
The RICOHFLEX camera is a precision instrument, made with great care and to exacting specifications. It should therefore be handled with the care which a fine instrument deserves. The carefully ground lenses are the heart of your camera. The protective cap should be kept over the lenses whenever the camera is not being used. Should the lens surface require cleaning, brush it lightly with a fine camel's hair brush or wipe it gently with special lens tissue.
The following outline indicates the essential operating procedure for picture taking with the SUPER RICOHFLEX.
You have at your command a camera which is capable of the finest photography; the results will be limited only by your interest in developing your skill as a photographer.
LOADING THE CAMERA
Using 120 size film :
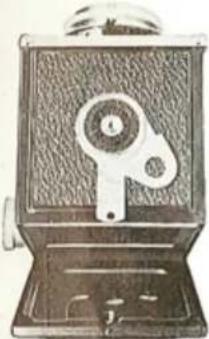
Place the camera with the lens down and turn the catch (A, fig. 2) in the direction of the arrow thus permitting the hinged back to be swung open. Now grasp the film winding knob (B, fig. 1), pull it out from the body of the camera and give it a slight turn counterclockwise. This holds the knob out in the disengaged position.
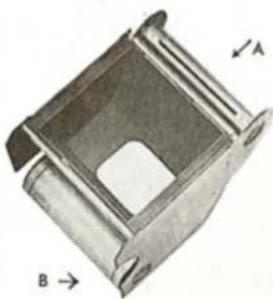
Lift the film cage (fig.3) completely out of the camera body. Place a roll of # 120 size film in the lower (B, fig. 3) film chamber and draw the paper over the two rollers and attach the tapered end to the slit in the take-up spool (A, fig. 3).
natural_image
Vintage typewriter device with mesh screen and mechanical components (no visible text or symbols)Replace the film cage into the camera body and release the film winding knob with a slight turn clockwise. Be sure that the knob engages the take-up spool and that the film is being transported as the knob is turned. Close the camera back and lock the catch.
Figure 2
Turn the circular plate on the back of the camera and match up the 6×6 mark with the center mark. Open the film counter window and wind the film until the number 1 appears in it. You are now ready to take your first picture. The protective slide should cover the film window at all times except when advancing the film. Figure 3
Figure 3 —
The Film Cage
-2-
natural_image
Metallic mechanical component with labeled arrows A and B, showing internal structure (no text or symbols beyond labels)UNLOADING
After the twelfth picture has been taken turn the film winding knob until the entire protective paper is on the take-up spool. Open the camera as before and remove the film cage. Seal the roll of film and remove it from the cage by releasing the pressure of the flat spring on the left end of the spool. Place the empty spool in the take-up position and reload with fresh film.
FOCUSING
natural_image
Vintage black-and-white photograph of a vintage film camera with visible lens, frame, and control knob (no text or symbols)Figure 4
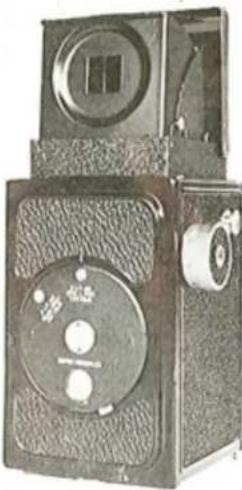
Open the hood by simply lifting upward on the back part of the hood thus allowing it to spring into the erect position. When the protective lens cap is removed, the image may be seen on the ground glass as you look into the hood. You will notice that the ground glass has four thin black lines engraved on it; the small central area is the field covered when using the RICOH COLOR-BACK "35". When using 120 size film the entire ground glass shows the picture area.
The clarity of the image may be seen on the ground glass and is adjusted by slowly rotating either lens to the left or right until the image appears as clear as possible. It is always advisable to use the wide field magnifier (A, fig. 1) to obtain critical focus. Before closing the hood be sure to fold back the magnifier to its original position.
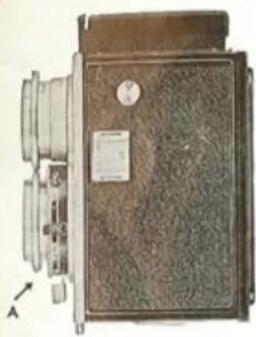
A "Depth of Field Scale" is engraved on top of the upper lens and is seen from above as two scales of numbers corresponding to the f stops on the diaphragm. After the lens has
been focused, the distance from the camera to the subject is indicated by the number opposite the center mark (△) on the Depth of Field Scale. The depth of field, of the area of sharp focus in front
natural_image
Illustration of a vintage camera with visible lens and control panel (no text or symbols)Figure 5
of and beyond the point of actual focus is dependent on the f stop. For example: with the camera focused at 10 feet and a diaphragm setting of f:16, we see on the right side of the depth of field scale opposite f:16 is 6 feet, and on the left side opposite f:16 is 30 feet, indicating that everything between 6 feet and 30 feet will be in focus if we set the diaphragm at f:16. If we stop the diaphragm down to only f:8 we see that the depth of field (or range of sharpness) now lies between 7 12 feet and 15 feet. The Depth of Field Scale will be very useful in determining what f stop will be necessary to keep objects at various distances from the camera in sharp focus.
USING THE EYELEVEL FINDER
To permit eyelevel viewing of the subject, an auxiliary finder is built into the hood of the new SUPER RICOHFLEX.
Look through the magnifying lens at the rear of the hood with one eye, while observing the subject with the other eye. The eye looking through the magnifier sees two thin white outlines. The large square outline shows the limits of the field, when 120 film is used; the small rectangular outline shows the field covered by 35mm film, used in the RICOH COLOR-BACK "35".
With a little practice, accurate eyelevel finding becomes simple and rapid. When shooting under poor light conditions, or when shooting
sport subjects, or when standing in a crowd and having to hold the camera above the crowd; these and many other occasions make eyelevel contour-type composing a great help for successful twin lens picture taking.
SETTING THE SHUTTER
The shutter is of the rim set type and the speed is selected by rotating the rim (D, Fig. 1) at the base of the lower lens so that the desired speed is opposite the black triangle on the upper left part of the rim. The shutter must be "set" before each picture is taken and this is done by lifting the shutter lever (F, Fig. 1) slightly upwards until it clicks. The necessity for setting the shutter before each picture will serve as a reminder to wind the film for the next exposure. The covenant design of the SUPER RICOHFLEX shutter combines the setting and tripping lever in one unit. After the shutter has been "set" with the upward movement, the picture is taken by releasing the shutter with a steady downward movement of the shutter lever. For time exposures, the shutter is set at "B" and the release is hold down for the desired length of exposure.
SETTING THE DIAPHRAGM
The diaphragm is set on the scale on the side of the shutter housing on the lower lens. The f value is seen in the opening on the diaphragm lever (A, Fig. 5). An exposure meter is recommended to best determine what combination of shutter speed and f stop is needed for any light condition. A basic guide for exposure is enclosed with every roll of film and excellent results can be obtained by carefully following the recommendation of such a chart or exposure calculator.
TAKING FLASH PICTURES
The SUPER RICOHFLEX shutter is internally synchronized and automatically fires the flashbulb at the same time the shutter is released.
BE SURE TO LABEL THE CARTRIDGE INDICATING THE TYPE OF FILM ENCLOSED SO THAT IT MAY BE PROCESSED PROPERLY.
2. RICOH COLOR BACK "44"
natural_image
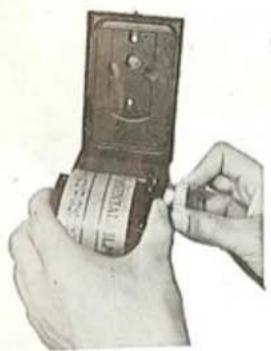
Close-up of hands holding a vintage mobile phone with a scroll (no visible text or symbols)(a) In the same manner as 120 film, the 127 film is loaded with RICOH COLOR BACK "44".
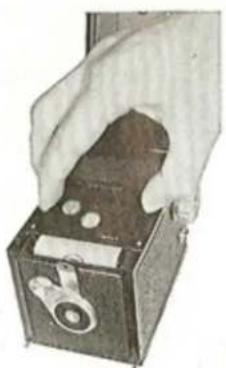
(b) After completing loading, cover the film with the auxiliary film pressure plate pointing the arrow mark up as shown in the picture and close the back.
natural_image
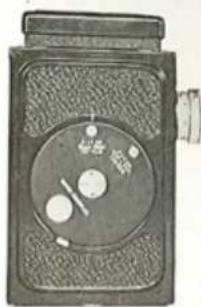
Hand holding a small electronic device with a label, no visible text or symbols(c) By turning the circular plate at the back, match up the 4×4 mark with the center mark.
natural_image
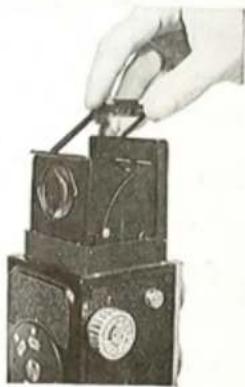
Illustration of a vintage portable device with a circular button and two white buttons, no visible text or symbols.(d) Insert the FINDER FRAME above the focusing glass. What appears inside this frame is the picture you will actually take.
natural_image
Hand holding a small object into a stacked mechanical device (no visible text or symbols)(e) Open the film counter window and wind the film until the number 1 appears in it. After you complete the operation, make doubly sure you close the window.
(f) After taking your first picture, repeat step (e) until you have exposed film number 12.
Marke : RICOH
Modell : Super RicohFlex
Kategorie : Kamera