
Discman D-34 - CD-Player SONY - Kostenlose Bedienungsanleitung
Finden Sie kostenlos die Bedienungsanleitung des Geräts Discman D-34 SONY als PDF.


| Produkttyp | Portabler CD-Player (Discman) |
| Modell | Sony Discman D-34 |
| Abmessungen (B x H x T) | ca. 137 × 35 × 155,3 mm |
| Gewicht (netto) | ca. 410 g |
| Gewicht (mit Batterien) | ca. 505 g |
| Stromversorgung | 4 AA (LR6) Alkalibatterien oder Netzteil (DC 9V) oder Autobatterie (12 V über CPM-203P) |
| Batterielebensdauer | ca. 8 Stunden |
| Stromverbrauch | 1,2 W Gleichstrom |
| Frequenzgang | 20 – 20.000 Hz ±1,5 dB |
| DA-Wandler | 1-Bit-Quarzzeitachsensteuerung |
| Kopfhörerausgang | 5 mW + 5 mW an 16 Ω |
| Line-Ausgang | 0,54 V RMS an 47 kΩ |
| Wiedergabemodi | Normal, Intro, Einzeltitel, Zufallswiedergabe, Programm (bis zu 22 Titel), Wiederholung (Disc, 1 Titel, Intro, Zufall) |
| Bass-Boost | BASS BOOST Schalter: NORM / MID / MAX |
| Resume-Funktion | Ja (HOLD/RESUME Schalter) |
| AMS (Automatic Music Sensor) | Sprung zum nächsten/vorherigen Titel; Suche vorwärts/rückwärts |
| Anzeige | LCD: Titelnummer, verstrichene Zeit, Gesamtspielzeit, Modus-Anzeigen |
| Kopfhöreranschluss | 3,5 mm Stereo-Miniklinke |
| Line-Ausgang | 3,5 mm Stereo-Miniklinke |
| Reinigung der Linse | Mit Gebläse und weichem Pinsel; bei Bedarf Sony-Händler aufsuchen |
| Gehäusereinigung | Weiches Tuch mit Wasser oder mildem Reinigungsmittel |
| Sicherheitshinweise | Nicht öffnen; Laserstrahlung; keine Gegenstände in den Sicherheitsschlitz stecken |
| Zubehör im Lieferumfang | Netzteil, Verbindungskabel (2x Cinch auf Stereo-Klinke), Stereokopfhörer |
| Optionales Zubehör | Plattenarm CPM-200A, Montageplatte CPM-203P, Auto-Anschluss-Set CPA-2/CPA-3, Autobatteriekabel DCC-E190M/E50, Aktivlautsprechersystem SRS-58 |
Häufig gestellte Fragen - Discman D-34 SONY
Benutzerfragen zu Discman D-34 SONY
0 Frage zu diesem Gerät. Beantworten Sie die, die Sie kennen, oder stellen Sie Ihre eigene.
Eine neue Frage zu diesem Gerät stellen
Laden Sie die Anleitung für Ihr CD-Player kostenlos im PDF-Format! Finden Sie Ihr Handbuch Discman D-34 - SONY und nehmen Sie Ihr elektronisches Gerät wieder in die Hand. Auf dieser Seite sind alle Dokumente veröffentlicht, die für die Verwendung Ihres Geräts notwendig sind. Discman D-34 von der Marke SONY.
BEDIENUNGSANLEITUNG Discman D-34 SONY
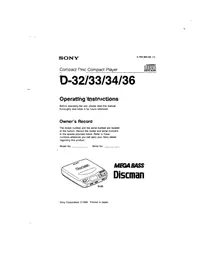
SONY
3-755-305-23 (1)
Compact Disc Compact Player

D-32/33/34/36
Bedienungsanleitung
Bitte lesen Sie diese Anleitung vor der Benutzung des Geräts gründlich durch und bewahren Sie sie für späteres Nachschlagen auf.
Besitzer-Notiz
Die Modellnummer und die Seriennummer befinden sich an der Unterseite. Notieren Sie die Modell- und Seriennummern in den unten vorgesehenen Feldern. Beziehen Sie sich auf diese Nummern, wenn Sie Ihren Sony-Händler bezüglich dieses Produkts kontaktieren.
Modell-Nr. ____ Serien-Nr. ____
MEGA BASS
Discman
Sony Corporation ©1992 Gedruckt in Japan
Stromquellen
Verwendung von Batterien
Legen Sie vier AA (LR6) Alkalibatterien ein.
Ungefähr 8 Stunden Wiedergabe mit Discs sind möglich.
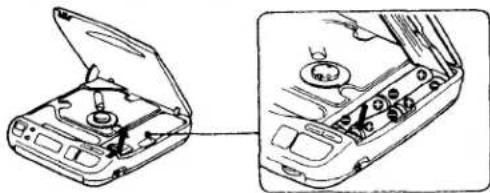
Schließen Sie den Deckel des Batteriefachs fest.
Hinweis
Die Anzeige 230 erscheint im Display, wenn das Gerät betrieben wird. Die Anzeige blinkt, wenn die Batterien schwach werden, und der Betrieb stoppt automatisch. In diesem Fall ersetzen Sie alle Batterien durch neue. Sie blinkt auch, wenn Sie ▶11 oder ■ drücken oder wenn der Player einen Stoß erhält.
Hinweise zu den Batterien
- Setzen Sie die Batterien mit korrekter Polarität ein.
- Verwenden Sie nicht alte Batterien zusammen mit neuen oder verschiedene Batterietypen gemischt.
- Sie können die Batterien nicht aufladen.
- Falls Elektrolyt aus der Batterie austreten sollte, wischen Sie die verschmutzten Teile im Batteriefach mit einem Tuch ab und ersetzen Sie die alten Batterien durch neue.
- Wenn die Batterien längere Zeit nicht verwendet werden, entfernen Sie sie.
- Wenn das Gerät mit Netzstrom oder Autobatterie betrieben wird und der Netzadapter oder das Autobatteriekabel vom DC-IN-9V-Anschluss getrennt wird, stoppt das Gerät seinen Betrieb, auch wenn Batterien eingelegt sind, um unnötigen Batterieverbrauch zu vermeiden. Um den Betrieb fortzusetzen, drücken Sie erneut die Betriebstaste.
Betrieb mit Netzstrom
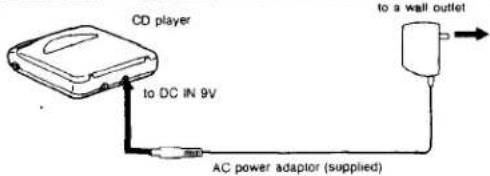
Wenn der Player nicht verwendet wird, trennen Sie unbedingt den Netzadapter vom Gerät und von der Steckdose.
Hinweis zum Netzadapter
Verwenden Sie nur den mitgelieferten Netzadapter oder den optionalen Sony-Netzadapter AC-E6M oder AC-E90M.
Verwenden Sie niemals andere Adapter von Sony, da die Polarität des mitgelieferten Adapters entgegengesetzt zu der von herkömmlichen Adaptern ist. Verwenden Sie den mitgelieferten Netzadapter nicht für andere "Discman"-CD-Player mit DC-IN-9-V-Buchse, noch den optionalen Netzadapter wie den AC-D6M.
Polarität des Steckers (Einheitspolaritätstyp)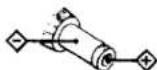
Das Gerät kann warm werden
Die Unterseite des Geräts kann während des Betriebs warm werden, was normal ist. Wenn es ungewöhnlich warm wird, trennen Sie den Netzadapter und wenden Sie sich an Ihren Sony-Händler.
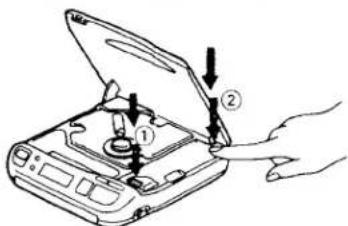
Wenn der Deckel des Batteriefachs entfernt ist
Setzen Sie ihn wieder ein, indem Sie beide Seiten in der gezeigten Reihenfolge hineindrücken.
Disc-Wiedergabe
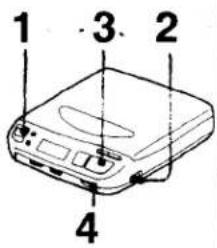
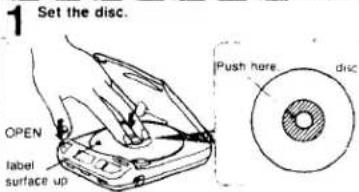
Drücken Sie die Disc vorsichtig, bis sie einrastet, sodass sie in die Achse (schwarzer Teil) passt. Schließen Sie den Deckel des Geräts, nachdem Sie die Disc eingelegt haben.
2 Schließen Sie Stereo-Kopfhörer an.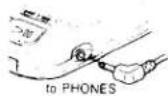
3 Drücken Sie ▶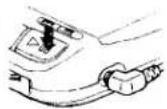
4 Stellen Sie die LAUTSTÄRKE ein.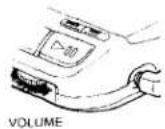
Hinweise
- Wenn Sie ▶ drücken, während die Disc mit der Beschriftung nach unten eingelegt ist, erscheint "00" im Display und es ist kein Ton zu hören. Drücken Sie ■, um die Wiedergabe zu stoppen, und legen Sie die Disc mit der Beschriftung nach oben wieder ein.
- Zum Abspielen einer 8-cm-Disc (3 Zoll) können Sie diese ohne Adapter abspielen.
Weitere Bedienvorgänge
| Operation | Button to be pressed |
| To pause | ▶H |
| To release the pause mode | ▶H |
| To stop | ■ |
Wenn Sie ■ drücken, stoppt die Disc-Wiedergabe und das Gerät schaltet sich automatisch aus.
Entfernen der Disc
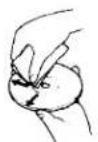
Nehmen Sie die Disc am Rand hoch, während Sie die Achse wie abgebildet sanft drücken.
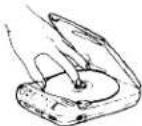
Betonung der Bässe (nur bei Verwendung von Kopfhörern)
BASS BOOST
NORM MID MAX

Stellen Sie den BASS-BOOST-Schalter je nach Musik ein. Der Bass wird betont, sodass Sie einen kräftigen und dynamischen Klang genießen können.
Die Bass-Boost-Funktion kann je nach Aufnahmepegel oder Einstellung des Lautstärkereglers reduziert sein.
Im Display
Zeitzähler
Wenn Sie ▶ drücken
Die Gesamtzahl der Titel der Disc und dann die Gesamtspielzeit erscheinen.
Während der Wiedergabe
Die Titelnnummer und die abgelaufene Spielzeit des aktuellen Titels erscheinen.
Während der Pause
Die abgelaufene Spielzeit des aktuellen Titels blinkt.
Zwischen den Titeln
Die Zeit bis zum Beginn des nächsten Titels erscheint.
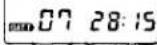
Gesamttitel Gesamtspielzeit
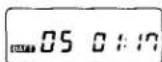
1 Minute und 17 Sekunden sind seit Beginn des fünften Titels vergangen.
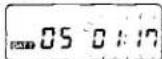
Pause-Modus an der Stelle 1 Minute und 17 Sekunden nach Beginn des fünften Titels
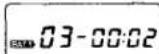
2 Sekunden bis zum Beginn des dritten Titels
Um die Wiedergabe ab der Stelle fortzusetzen, an der Sie die Wiedergabe zuletzt gestoppt haben (Fortsetzungs-Wiedergabemodus)
Sie können die Wiedergabe ab der Stelle fortsetzen, an der Sie zuletzt ■ gedrückt haben. Um diesen Modus zu aktivieren, stellen Sie den HOLD/RESUME-Schalter in die mittlere oder rechte Position. Die Fortsetzungsfunktion kann in jedem Betriebsmodus ausgeführt werden (siehe Tabelle rechts).
Sie können die Wiedergabe sperren, indem Sie die Tasten verriegeln, um ein versehentliches Drücken zu verhindern. Um diesen Modus zu aktivieren, stellen Sie den HOLD/RESUME-Schalter in die rechte Position.
Hinweis zum Anzeigefenster während der Wiedergabe
Wenn die Wiedergabe startet
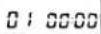
Das Anzeigefenster ändert sich wie folgt
Fortsetzungs-Wiedergabe AUS
Fortsetzungs-Wiedergabe EIN
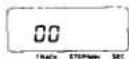
Stoppauswahlnummer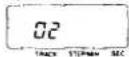
Die Positionen des HOLD/RESUME-Schalters
| 1st(left) | 2nd(center) | 3rd(right) | |
| Hold | OFF — | OFF — | ON |
| ResumePlay mode | OFF — | ON — | ON |
HOLD
RESUME OFF 1 FTON
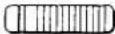
HOLD/RESUME-Schalter
Gesamtauswahlnummer
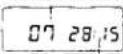
Gesamtspielzeit
Titel STEAMM SEC

304Ch STOPON SEC
Hinweise
- Wir empfehlen Ihnen, die Batterien für die Wiederaufnahmefunktion einzulegen. Der Speicher der Stoppposition wird durch die Batterien aufrechterhalten, auch wenn Sie das Autobatteriekabel oder den Netzadapter entfernen oder den Zündschlüssel in die Aus-Position stellen.
- Der Speicher der Stoppposition wird gelöscht, wenn Sie nach dem Drücken von ■ den Deckel öffnen. Nach dem Löschen des Speichers beginnt die Wiedergabe ab der ersten Auswahl der Disc.
Auffinden eines bestimmten Abschnitts
| Locating a particular selection (AMS*) | To locate the beginning of the current selection. | To locate the beginning of the next selection |
 | 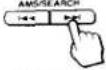 | |
| Press once | Press once | |
| Locating a particular point in a selection (SEARCH) | To go back at high speed. | To go ahead at high speed. |
 | 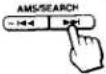 | |
| Keep pressing | Keep pressing |
Um schnell zurückzugehen: Einmal drücken, weiter drücken, weiter drücken
AMS ist die Abkürzung für Automatic Music Sensor
Hinweise zur AMS-Funktion
- Der Player pausiert am Anfang des gefundenen Titels, wenn Sie im Pausenmodus ◀◀◀ oder ▶▶◀ drücken. • Jedes Mal, wenn Sie ◀◀ drücken, sucht der Player den vorherigen Titel. Jedes Mal, wenn Sie ▶▶ drücken, sucht der Player die nächsten Titel und stoppt beim letzten Titel.
- Während der programmierten Wiedergabe arbeitet die AMS in der programmierten Reihenfolge.
Hinweis zur SEARCH-Funktion
Während der Suche erscheint die verstrichene Wiedergabezeit im Anzeigefenster.
Was bedeutet diese Anzeige?
Wenn Sie am Ende der Disc kontinuierlich ▶▶ drücken, kann _I_I erscheinen. Um zur Titelnummernanzeige zurückzukehren, drücken Sie ◀◀.
Verschiedene Wiedergabemodi
Dieses Gerät verfügt über 10 Wiedergabemodi.
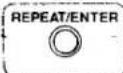
Für die Wiederholungswiedergabe drücken Sie die Taste REPEAT/ENTER. "REPEAT" erscheint im Anzeigefenster. Drücken Sie erneut, um die Wiederholungswiedergabe abzubrechen.
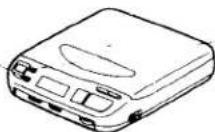

Um den Modus zu ändern, drücken Sie während der Wiedergabe die Taste PLAY MODE. Der aktuelle Modus erscheint im Anzeigefenster.
| REPEAT/ENTER button is not pressed. | REPEAT/ENTER button is pressed. | ||
| Display window | Play mode | Display window | Play mode |
| Normal play Playing the whole disc once and stops. | REPEAT | Repeats the whole disc. | |
| INTRO play Playing the first about ten seconds of all the selections. | REPEAT INTRO | Plays the first ten seconds of all the selections again and again. | |
| To start playing Press ►H. "INTRO" stops flashing and playing starts. | Press ►H again to listen to the selection to the end. | ||
| Playing a single selection Plays one selection and stops at the end of the selection | REPEAT 1 | Plays a single selection repeatedly. | |
| Shuffle play Plays the whole selection in a random order. Shuffle play starts from the next selection. | REPEAT SHUFFLE | Plays the selection in a random order repeatedly. | |
| Program play (RMS)* Playing in the desired order | REPEAT RMS | Plays the selections in the desired order repeatedly. | |
| To start the program play | |||
| 1 Press ►H or ►H to select the desired selection. Flashes RMS 05 01 Truck No of the desired selection The first selection | 2 Press REPEAT/ENTER Flashes RMS 00 02 The 2nd (next) selection | 3 Repeat the steps 1 and 2 (up to 22 selections). | |
| 4 Press the ►H of the unit, "RMS" indication stops flashing and play starts | |||
| If another selection is memorized after 22 selections have been memorized The first selection will be cleared and the new one will be memorized in its place. | |||
Während der Zufallswiedergabe: Zum Auffinden des Anfangs des gerade gespielten Titels: Drücken Sie. Zum Auffinden des nächsten Titels: Drücken Sie ▶▶▶. Sie können keinen vorherigen Titel ansteuern, auch wenn Sie ▶ ▶ gedrückt halten.
Verschiedene Verwendungsmöglichkeiten
Hören im Auto
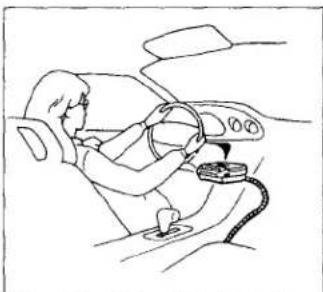
Sie können den CD-Player über ein Auto-Kassettendeck mit dem Sony CPA-2/CPA-3 Auto-Anschlussset und der CPM-203P Auto-Montageplatte hören (Der Sony CPM-200A Plattenarm erleichtert die Befestigung der Montageplatte an einem Auto).
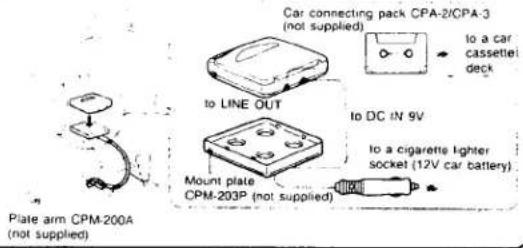
Stellen Sie das Gerät nicht auf ein Armaturenbrett und lassen Sie es nicht in einem in der Sonne geparkten Auto liegen, da die Temperatur übermäßig ansteigen kann.
Einzelheiten finden Sie in der Bedienungsanleitung des jeweiligen Produkts.
Wenn Sie den Motor ausschalten
Wenn die Alkaline-Batterien in das Gerät eingelegt sind, stoppt das Gerät den Betrieb, wenn Sie den Motor des Autos ausschalten. (Geschaltete Zündungsfunktion)
Diese Funktion ist nicht bei jedem Automodell verfügbar. Wenn nicht, drücken Sie die ■-Taste, um den Betrieb zu stoppen.
Hinweise zum Anschluss an die Autobatterie
- Wenn Sie das Gerät von der Zigarettenanzünderbuchse (oder vom Netzteil) trennen, wird die Stromquelle abgeschaltet, um den Batterieverbrauch zu schonen.
- Ziehen Sie das Gerät aus der Zigarettenanzünderbuchse, wenn es nicht verwendet wird. Andernfalls kann es die Autobatterie entladen.
- Jeder andere Anschluss als der CPA-2/CPA-3 kann Rauschen verursachen. Einige Kassettenrekorder akzeptieren den CPA-2/CPA-3 möglicherweise nicht.
Hinweis zur Montageplatte CPM-200P
Das Gerät verwendet den Stecker mit EIAJ-Standardpolarität für DC-Ausgang 9 V. Wenn Sie die CPM-200P verwenden, wenden Sie sich an Ihren Sony-Händler. Verwendung des Batteriekabels: Verwenden Sie das Autobatteriekabel DCC-E190M/DCC-E50. Empfohlenes Zubehör für das Hören im Auto (nicht im Lieferumfang enthalten): CPM-200A Plattenarm, CPM-203P Montageplatte, CPM-203PK Auto-Montagearm (Plattenarm und Montageplatte)
Anschluss an andere Geräte
Sie können den CD-Player über Lautsprecher hören oder seinen Klang aufnehmen.
Für die Überwachung über Lautsprecher und für Aufnahmen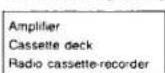
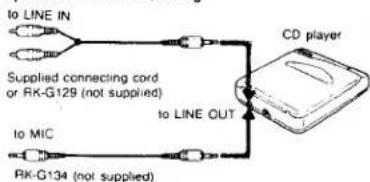
Für Aufnahmen
Hinweise zum Anschluss
- Schalten Sie den Verstärker aus, bevor Sie Verbindungen herstellen.
- Stecken Sie den weißen Stecker in die L-Buchse (linker Kanal) und den roten Stecker in die R-Buchse (rechter Kanal).
- Achten Sie darauf, die Kabelstecker fest in die Buchsen zu stecken. Lockere Verbindungen können Brummen und Rauschen verursachen.
- Achten Sie darauf, den CD-Player nicht an den PHONO-Eingang des Verstärkers anzuschließen.
- Wenn der CD-Player Störungen beim Radio- und Fernsehempfang verursacht, schalten Sie den Player aus oder stellen Sie ihn weiter vom Empfänger entfernt auf.
Wartung
Reinigung des Gehäuses
Reinigen Sie das Gehäuse mit einem weichen Tuch, das leicht mit Wasser oder einer milden Reinigungslösung angefeuchtet ist. Verwenden Sie keine Scheuerschwämme, Scheuerpulver oder Lösungsmittel wie Alkohol oder Benzin, da diese die Oberfläche des Gehäuses beschädigen können.
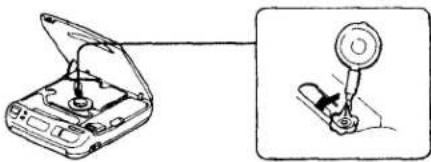
Reinigung der Linse
Wenn Sie die Linse versehentlich mit einem schmutzigen Finger berührt haben oder wenn Staub auf der Linse den ordnungsgemäßen Betrieb verhindert, öffnen Sie den Deckel des Disc-Fachs und reinigen Sie die Linse.
Zum Entfernen von Staub
Blasen Sie die Linse einige Male mit einem handelsüblichen Gebläse an, bürsten Sie den Staub in Pfeilrichtung weg und blasen Sie dann erneut auf die Linse.
Wenn die Linse nach Befolgen der obigen Anweisungen immer noch verschmutzt ist und das Gerät weiterhin nicht ordnungsgemäß funktioniert, wenden Sie sich bitte an Ihren nächsten Sony-Händler.
Hinweise zu Compact Discs
Setzen Sie die Disc nicht direktem Sonnenlicht oder Wärmequellen wie Heizungsluft aus, und lassen Sie sie nicht in einem in der prallen Sonne geparkten Auto liegen, da die Temperatur im Auto erheblich ansteigen kann.
Reinigen Sie die Disc vor dem Abspielen mit dem Reinigungstuch (nicht im Lieferumfang enthalten). Wischen Sie die Disc von der Mitte nach außen.
Verwenden Sie keine Lösungsmittel wie Benzin, Verdünner, handelsübliche Reiniger oder Antistatik-Sprays, die für analoge Discs bestimmt sind.
Bewahren Sie die Disc nach dem Abspielen in ihrer Hülle auf.
| This way[IMAGE]Handle the disc by its edge. | Not this way[IMAGE]Do not touch the surface. | Not this way[IMAGE]Do not stick paper to tape nor write anything on the surface |
Reinigen des Kopfhörersteckers
Halten Sie den Stecker Ihrer Kopfhörer sauber, um einen optimalen Klang zu erzielen. Wischen Sie ihn mit einem trockenen, weichen Tuch ab.
Position und Funktion der Bedienelemente
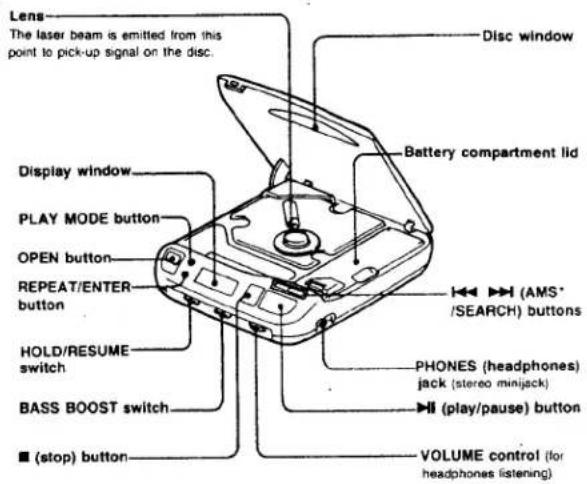
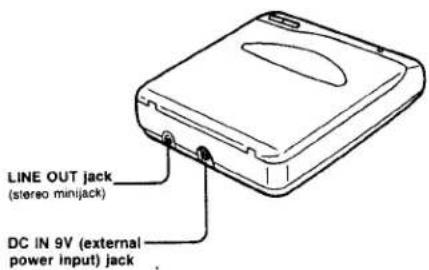
*AMS ist eine Abkürzung für Automatic Music Sensor
Technische Daten
CD-Bereich
System
Eigenschaften der Laserdiode
Digitales Audio-System für Compact Discs
Material: GaAlAs
Wellenlänge: λ = 780 nm
Emissionsdauer: Kontinuierlich
Laserausgangsleistung: Weniger als 44,6 μW {Diese Ausgangsleistung ist der
Wert, der in einem Abstand von 200 mm von der
Objektivlinsenoberfläche am optischen Abtastblock gemessen wird.)
16-Bit-linearer 8-fach-Digitalfilter (D-32, D-33)
1-Bit-Quarzzeitachsensteuerung (D-34, D-36)
D/A-Wandlung
Fehlerkorrektur
Sony Super Strategy Cross Interleave Read Solomon
Code (D-32, D-33)
Cross Interleave Read Solomon Code (D-34, D-36)
Frequenzgang
20-20.000 Hz ±15 dB
(gemessen nach EIAJ CP-307)
Ausgang (bei 9V Eingangspegel)
Line output (Stereo-Klinkenstecker)
Ausgangspegel 1 V eff. an 47 Kilohm (D-32, D-33)
Ausgangspegel 0,54 V eff. an 47 Kilohm (D-34, D-36)
Lastimpedanz über 10 Kilohm
Kopfhörer (Stereo-Klinkenstecker)
5 mW + 5 mW an 16 Ω
Allgemeines
Stromversorgung
Mitgeliefert:
- DC-IN-9V-Buchse akzeptiert das Sony-Netzteil für Verwendung an:
120 V AC, 60 Hz in den USA
240 V AC, 50 Hz in Großbritannien/Australien
Optional:
- DC-IN-9V akzeptiert die Sony-Montageplatte CPM-203P und den Plattenarm CPM-200A für Verwendung an 12-V-Autobatterie.
• DC 6 V, vier AA-Batterien (LR6) Alkaline
1,2 W Gleichstrom
Vorsichtsmaßnahmen
Zur Sicherheit
Da der in diesem CD-Player verwendete Laserstrahl für die Augen schädlich ist, versuchen Sie nicht, das Gehäuse zu zerlegen. Überlassen Sie Wartungsarbeiten nur qualifiziertem Personal.
- Legen Sie nichts in den Sicherheitsschlitz im Disc-Fach. Wenn Sie dies tun, kann der Laserstrahl beim Öffnen des Deckels austreten.
- Die Linse auf dem Disc-Tisch sollte sauber gehalten werden. Berühren Sie die Linse nicht und stochern Sie nicht darin herum. Wenn Sie dies tun, kann die Linse beschädigt werden und der Player funktioniert nicht ordnungsgemäß.
- Wenn das Gerät mit dem Netzteil verwendet wird, wickeln Sie es nicht in ein Tuch, eine Decke usw. Wenn Sie dies tun, kann die Temperatur im Inneren und Äußeren des Geräts erheblich ansteigen, was zu Fehlfunktionen des Geräts oder schweren Unfällen führen kann.
- Sollten feste Gegenstände oder Flüssigkeiten in den Player gelangen, trennen Sie die Stromquelle und lassen Sie den Player von qualifiziertem Personal überprüfen, bevor Sie ihn weiter verwenden.
- Legen Sie nichts in die DC IN 9V (externe Stromversorgung) Buchse.
- Wenn das Gerät längere Zeit nicht verwendet wird, entfernen Sie unbedingt die Batterien oder trennen Sie das Netzteil oder die Montageplatte vom Gerät. Um das Netzteil aus der Steckdose zu ziehen, fassen Sie das Netzteil selbst an; ziehen Sie niemals am Kabel.
Zu den Stromquellen
- Verwenden Sie Batterien, Haushaltsstrom oder eine Autobatterie.
- Für Wechselstrombetrieb: Verwenden Sie das mitgelieferte Netzteil. Verwenden Sie kein anderes Netzteil, da dies zu Fehlfunktionen führen kann.
- Für Autobatteriebetrieb: Verwenden Sie den optionalen Auto-Montagearm CPM-203PK (oder die Montageplatte CPM-203P) und das Auto-Verbindungsset CPA-2/CPA-3.
Zum Betrieb
Da das CD-System einen großen Dynamikbereich bietet, werden die Spitzen der Eingangssignale mit hoher Wiedergabetreue aufgezeichnet, und der Rauschpegel ist sehr niedrig. Erhöhen Sie die Lautstärke nicht, während Sie einen Abschnitt ohne Audiosignale oder mit sehr niedrigem Eingangspegel hören. Wenn Sie dies tun, können die Lautsprecher beschädigt werden, wenn ein Abschnitt mit Spitzenpegel abgespielt wird.
Zur Installation
- Platzieren Sie das Gerät niemals:
— in der Nähe von Wärmequellen wie Heizkörpern oder Luftkanälen — in direktem Sonnenlicht — in Umgebungen mit übermäßigem Staub — in Umgebungen mit Feuchtigkeit oder Regen — in Umgebungen mit mechanischen Vibrationen oder Stößen.
— in einer geneigten Position.
- Wenn der Player direkt von einem kalten Ort an einen warmen Ort gebracht wird oder in einem sehr feuchten Raum aufgestellt wird, kann Feuchtigkeit auf der Linse im Inneren des Players kondensieren. In diesem Fall funktioniert der Player nicht. Entfernen Sie in diesem Fall die Disc und lassen Sie den Player mehrere Stunden an einem warmen Ort, bis die Feuchtigkeit verdunstet ist.
- Für einen optimalen Betrieb sollte das Gerät keinen Temperaturen unter 5 °C (41 °F) oder über 35 °C (95 °F) ausgesetzt werden.
Wenn Sie Fragen oder Probleme zu Ihrem Gerät haben, wenden Sie sich bitte an Ihren nächsten Sony-Händler.
Abmessungen
Ca. 137 × 35 × 155,3 mm (5½ × 1½ × 6½ Zoll)
(B/H/T) inkl. hervorstehender Teile und Bedienelemente
Gewicht
Ca. 410 g (14,5 oz) netto
Mitgeliefertes Zubehör
Ca. 505 g (18 oz) inkl. Batterien
Netzteil (1)
Verbindungskabel
(Phonostecker × 2 → Stereoklinkenstecker × 1) (1)
Stereo-Kopfhörer (1)
Änderungen an Design und technischen Daten vorbehalten
Sonderzubehör
Tonarmplatte CPM-200A
Montageplatte CPM-203P
Auto-Montagearm CPM-203PK
Auto-Anschlusspack CPA-2/CPA-3
Auto-Batteriekabel DCC-E190M/DCC-E50
Aktiv-Lautsprechersystem SRS-58
Ihr Händler führt möglicherweise nicht alle oben aufgeführten Zubehörteile. Bitte fragen Sie den Händler nach detaillierten Informationen zu den Zubehörteilen in Ihrem Land.
Hinweis
Dieses Gerät entspricht der EG-Richtlinie 87/308/EWG zur Funkentstörung.
WARNUNG
Um Brand- oder Stromschlaggefahr zu vermeiden, setzen Sie das Gerät nicht Regen oder Feuchtigkeit aus.
Um einen elektrischen Schlag zu vermeiden, öffnen Sie nicht das Gehäuse. Überlassen Sie Wartungsarbeiten nur qualifiziertem Personal.
Für Kunden in den Vereinigten Staaten
INFORMATION
Dieses Gerät erzeugt und verwendet Hochfrequenzenergie und kann, wenn es nicht ordnungsgemäß installiert und verwendet wird, das heißt in strikter Übereinstimmung mit den Anweisungen des Herstellers, Störungen des Radio- und Fernsehempfangs verursachen. Es wurde typgeprüft und entspricht den Grenzwerten für ein Computergerät der Klasse B gemäß den Spezifikationen in Unterabschnitt J von Teil 15 der FCC-Bestimmungen, die einen angemessenen Schutz gegen solche Störungen in einer Wohnanlage bieten sollen. Es gibt jedoch keine Garantie, dass in einer bestimmten Installation keine Störungen auftreten. Wenn dieses Gerät Störungen des Radio- oder Fernsehempfangs verursacht, was durch Ein- und Ausschalten des Geräts festgestellt werden kann, wird der Benutzer aufgefordert, die Störungen durch eine oder mehrere der folgenden Maßnahmen zu beheben:
Richten Sie die Empfangsantenne neu aus.
Stellen Sie das Gerät in Bezug auf den Empfänger um.
Entfernen Sie das Gerät vom Empfänger.
Schließen Sie das Gerät an eine andere Steckdose an, sodass Gerät und Empfänger an verschiedenen Stromkreisen angeschlossen sind.
Bei Bedarf sollte der Benutzer den Händler oder einen erfahrenen Radio-/Fernsehtechniker um weitere Vorschläge bitten. Der Benutzer kann die folgende Broschüre der Federal Communications Commission als hilfreich empfinden:
"How to Identify and Resolve Radio-TV Interference Problems". Diese Broschüre ist beim U.S. Government Printing Office, Washington, DC 20402, erhältlich. Bestellnummer 004-000-00345-4.
VORSICHT
Die Verwendung optischer Instrumente mit diesem Produkt erhöht die Augengefahr.
Für Kunden im Vereinigten Königreich
CLASS 1 LASER PRODUCT
LUOKAN 1 LASERLAITE
KLASS 1 LASERAPPARAT
Dieses Compact-Disc-Gerät ist als
CLASS 1 Laserprodukt eingestuft.
Das CLASS 1 LASER PRODUCT Etikett befindet sich
auf der Unterseite des Geräts.
Wichtig
Die Adern in dieser Netzzuleitung sind gemäß folgendem Code gefärbt:
Blau: Nullleiter
Braun: Außenleiter
Da die Farben der Adern in der Netzzuleitung dieses Geräts möglicherweise nicht mit den farbigen Markierungen der Anschlüsse in Ihrem Stecker übereinstimmen, gehen Sie wie folgt vor: Die blaue Ader muss an den Anschluss angeschlossen werden, der mit dem Buchstaben N oder schwarz markiert ist. Die braune Ader muss an den Anschluss angeschlossen werden, der mit dem Buchstaben L oder rot markiert ist. Schließen Sie keine der Adern an den Erdungsanschluss im Stecker an, der mit dem Buchstaben E oder dem Schutzleiter-Symbol gekennzeichnet ist oder grün oder grün-gelb gefärbt ist.
Hinweise zu Kopfhörern
Verkehrssicherheit
Verwenden Sie Kopfhörer nicht beim Autofahren, Radfahren oder beim Bedienen eines motorisierten Fahrzeugs. Dies kann eine Verkehrsgefahr darstellen und ist in vielen Gebieten illegal. Es kann auch potenziell gefährlich sein, Ihre Kopfhörer beim Gehen mit hoher Lautstärke zu verwenden, insbesondere an Fußgängerüberwegen. Sie sollten äußerste Vorsicht walten lassen oder die Verwendung in potenziell gefährlichen Situationen einstellen.
Vermeidung von Gehörschäden
Vermeiden Sie die Verwendung von Kopfhörern bei hoher Lautstärke. Hörexperten raten von kontinuierlichem, lautem und längerem Hören ab. Wenn Sie ein Klingeln in den Ohren bemerken, reduzieren Sie die Lautstärke oder stellen Sie die Verwendung ein.
Rücksicht auf andere
Halten Sie die Lautstärke auf einem moderaten Niveau. So können Sie Umgebungsgeräusche wahrnehmen und Rücksicht auf die Menschen in Ihrer Umgebung nehmen.
Über dieses Handbuch
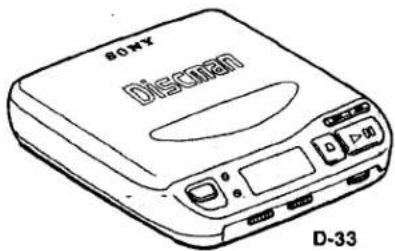
Dieses Handbuch enthält Informationen zu vier Modellen: D-32, D-33, D-34 und D-36. Schlagen Sie zunächst auf der Oberseite nach, um den Modellnamen zu sehen und festzustellen, um welches Modell es sich handelt. Unterschiede in der Bedienung der vier Modelle sind im Text deutlich gekennzeichnet, z. B. "nur D-33". Beachten Sie jedoch, dass die in diesem Handbuch verwendeten Abbildungen die des D-33 sind.
Fehlerbehebung
Sollte ein Problem nach den folgenden Überprüfungen weiterhin bestehen, wenden Sie sich an Ihre nächste Sony-Servicestelle.
| Symptom | Cause and/or solution |
| Disc play does not start. | The disc is inserted upside down or incorrectly→Insert the disc correctly with the label surface up.Dusty or defective disc.Dirty or dusty lens.The disc compartment lid is not closed.Moisture condensation.→Leave the player in a warm place until the moisture evaporates.The AC power adaptor is not plugged into the wall outlet.The cord of the mount plate (not supplied) is not firmly connected to a cigarette lighter socket.The unit is not placed on a level surface.The disc is incorrectly inserted.The HOLD/RESUME switch is set to the right position. |
| No sound from the headphones. | The headphones plug is not firmly connected to the PHONES jack.Adjust the VOLUME control.Dirty plug. |
| No sound from the connected speakers. | Dirty or defective disc.The amplifier is not turned on. |
| Skipping of sound | Dirty or defective disc.Dirty lens.Strong vibration. |
- D
- BEDIENUNGSANLEITUNG
- BESITZER-NOTIZ
- STROMQUELLEN
- VERWENDUNG VON BATTERIEN
- HINWEIS
- HINWEISE ZU DEN BATTERIEN
- BETRIEB MIT NETZSTROM
- HINWEIS ZUM NETZADAPTER
- DAS GERÄT KANN WARM WERDEN
- WENN DER DECKEL DES BATTERIEFACHS ENTFERNT IST
- DISC-WIEDERGABE
- HINWEISE
- ENTFERNEN DER DISC
- BETONUNG DER BÄSSE (NUR BEI VERWENDUNG VON KOPFHÖRERN)
- IM DISPLAY
- UM DIE WIEDERGABE AB DER STELLE FORTZUSETZEN, AN DER SIE DIE WIEDERGABE ZULETZT GESTOPPT HABEN (FORTSETZUNGS-WIEDERGABEMODUS)
- HINWEIS ZUM ANZEIGEFENSTER WÄHREND DER WIEDERGABE
- AUFFINDEN EINES BESTIMMTEN ABSCHNITTS
- HINWEISE ZUR AMS-FUNKTION
- HINWEIS ZUR SEARCH-FUNKTION
- WAS BEDEUTET DIESE ANZEIGE
- VERSCHIEDENE WIEDERGABEMODI
- VERSCHIEDENE VERWENDUNGSMÖGLICHKEITEN
- HÖREN IM AUTO
- ANSCHLUSS AN ANDERE GERÄTE
- WARTUNG
- REINIGUNG DES GEHÄUSES
- REINIGUNG DER LINSE
- ZUM ENTFERNEN VON STAUB
- HINWEISE ZU COMPACT DISCS
- REINIGEN DES KOPFHÖRERSTECKERS
- POSITION UND FUNKTION DER BEDIENELEMENTE
- TECHNISCHE DATEN
- CD-BEREICH
- ALLGEMEINES
- MITGELIEFERT
- OPTIONAL
- VORSICHTSMASSNAHMEN
- ZUR SICHERHEIT
- ZU DEN STROMQUELLEN
- ZUM BETRIEB
- ZUR INSTALLATION
- SONDERZUBEHÖR
- WARNUNG
- FÜR KUNDEN IN DEN VEREINIGTEN STAATEN
- INFORMATION
- VORSICHT
- FÜR KUNDEN IM VEREINIGTEN KÖNIGREICH
- WICHTIG
- HINWEISE ZU KOPFHÖRERN
- VERKEHRSSICHERHEIT
- VERMEIDUNG VON GEHÖRSCHÄDEN
- RÜCKSICHT AUF ANDERE
- ÜBER DIESES HANDBUCH
- FEHLERBEHEBUNG
Marke : SONY
Modell : Discman D-34
Kategorie : CD-Player