
Discman D-130 - CD-Player SONY - Kostenlose Bedienungsanleitung
Finden Sie kostenlos die Bedienungsanleitung des Geräts Discman D-130 SONY als PDF.


| Produkttyp | CD-Player (Discman) |
| Marke | Sony |
| Modell | D-130 |
| Kompatible Discs | Compact Discs (8 cm und 12 cm) |
| Abmessungen (B × H × T) | ca. 130 × 30,5 × 142 mm (inkl. hervorstehender Teile) |
| Gewicht | ca. 270 g (ohne Akku) |
| Stromversorgung | Gleichstrom 4,5 V (über Netzadapter oder Batterien) |
| Batterien | 2 × Mignon (AA, LR6) Alkali-Batterien |
| Akku (optional) | BP-DM10 (wiederaufladbar, Ni-Cd) |
| Netzadapter | Im Lieferumfang (nicht bei D-130) oder optional AC-E45L |
| Kopfhörerausgang | 15 mW + 15 mW an 16 Ω |
| Line-Ausgang | 0,7 V rms an 50 kΩ |
| Wiedergabemodi | Normal, Intro, 1-Titel, Zufall (Shuffle), Programm (RMS), Wiederholung |
| AMS (Automatic Music Sensor) | Sprung zum nächsten/vorherigen Titel durch kurzen Druck |
| BASS BOOST | Dreistufig (OFF, MAX, WORK) |
| AVLS (Automatic Volume Limiter System) | Begrenzung der Lautstärke (Stufen 1 und 2) |
| HOLD-Schalter | Tastensperre gegen versehentliche Bedienung |
| Laser | GaAlAs, λ=780 nm, Laserklasse 1 |
| Fehlerkorrektur | Super Strategy Cross Interleave Reed Solomon Code |
| Frequenzgang | 20 – 20.000 Hz ±1 dB |
| Reinigung Linse | Mit handelsüblichem Linsenreinigungsset (KK-DM10, nicht im Lieferumfang) |
| Reinigung Gehäuse | Mit weichem, leicht feuchtem Tuch (keine Lösungsmittel) |
| Reinigung Disc | Von der Mitte nach außen mit Reinigungstuch wischen |
| Sicherheitshinweis | Nicht öffnen, Laserstrahlung; nur autorisiertes Servicepersonal |
Häufig gestellte Fragen - Discman D-130 SONY
Benutzerfragen zu Discman D-130 SONY
0 Frage zu diesem Gerät. Beantworten Sie die, die Sie kennen, oder stellen Sie Ihre eigene.
Eine neue Frage zu diesem Gerät stellen
Laden Sie die Anleitung für Ihr CD-Player kostenlos im PDF-Format! Finden Sie Ihr Handbuch Discman D-130 - SONY und nehmen Sie Ihr elektronisches Gerät wieder in die Hand. Auf dieser Seite sind alle Dokumente veröffentlicht, die für die Verwendung Ihres Geräts notwendig sind. Discman D-130 von der Marke SONY.
BEDIENUNGSANLEITUNG Discman D-130 SONY
D-130
D-131
D-132CK
D-133
Bedienungsanleitung
Bitte lesen Sie diese Anleitung vor der Inbetriebnahme des Geräts sorgfältig durch und bewahren Sie sie für späteres Nachschlagen auf.
Die Anweisungen in dieser Anleitung gelten für 4 Modelle. Unterschiede in der Bedienung sind im Text deutlich gekennzeichnet, z. B. „nur bei D-133 mitgeliefert“.
Sony Corporation © 1994 Gedruckt in Malaysia
Discman
Besitzer-Notiz
Die Modellnummer und die Seriennummer befinden sich auf der Unterseite.
Notieren Sie diese Nummern in den unten vorgesehenen Feldern. Beziehen Sie sich auf diese Nummern, wenn Sie Ihren Sony-Händler zu diesem Produkt kontaktieren.
Modell-Nr. ____ Serien-Nr. ____
WARNUNG
Um Feuer- oder Stromschlaggefahr zu vermeiden, setzen Sie das Gerät nicht Regen oder Feuchtigkeit aus.
Um einen elektrischen Schlag zu vermeiden, öffnen Sie nicht das Gehäuse. Überlassen Sie Wartungsarbeiten nur qualifiziertem Fachpersonal.
VORSICHT
Die Verwendung von optischen Instrumenten mit diesem Produkt erhöht die Gefahr für die Augen.
INFORMATION (Für Kunden in den USA)
Dieses Gerät wurde getestet und entspricht den Grenzwerten für ein digitales Gerät der Klasse B gemäß Teil 15 der FCC-Bestimmungen. Diese Grenzwerte sollen einen angemessenen Schutz gegen schädliche Störungen in einer Wohnanlage bieten. Dieses Gerät erzeugt, verwendet und kann Hochfrequenzenergie ausstrahlen und kann, wenn es nicht gemäß den Anweisungen installiert und verwendet wird, schädliche Störungen des Funkverkehrs verursachen. Es gibt jedoch keine Garantie, dass in einer bestimmten Installation keine Störungen auftreten. Wenn dieses Gerät schädliche Störungen des Radio- oder Fernsehempfangs verursacht, was durch Ein- und Ausschalten des Geräts festgestellt werden kann, wird der Benutzer ermutigt, die Störungen durch eine oder mehrere der folgenden Maßnahmen zu beheben:
- Richten Sie die Empfangsantenne neu aus oder stellen Sie sie an einen anderen Ort.
- Vergrößern Sie den Abstand zwischen dem Gerät und dem Empfänger.
- Schließen Sie das Gerät an eine Steckdose an, die zu einem anderen Stromkreis gehört als der, an den der Empfänger angeschlossen ist.
- Wenden Sie sich an den Händler oder einen erfahrenen Radio-/Fernsehtechniker.
Sie werden darauf hingewiesen, dass Änderungen oder Modifikationen, die nicht ausdrücklich in dieser Anleitung genehmigt sind, Ihre Berechtigung zum Betrieb dieses Geräts aufheben können.
Für Kunden im Vereinigten Königreich
Dieser CD-Player ist als LASERPRODUKT DER KLASSE 1 klassifiziert.
Das Etikett "LASERPRODUKT DER KLASSE 1" befindet sich auf der Unterseite des Geräts.
Für Kunden in Kanada
DIESES GERÄT ENTSPRICHT DEN GRENZWERTEN DER KLASSE B FÜR FUNKSTÖRAUSSENDUNGEN, DIE IN DEN FUNKSTÖRUNGSVORSCHRIFTEN FESTGELEGT SIND.
Disc-Wiedergabe
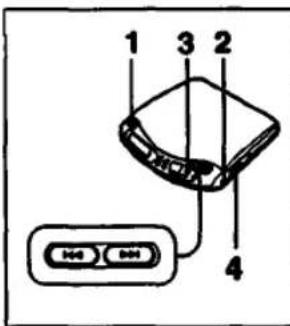
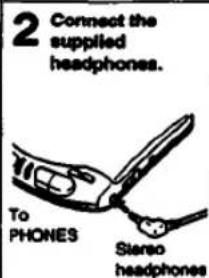
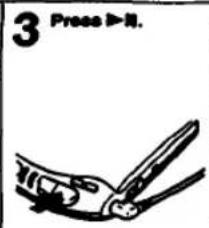
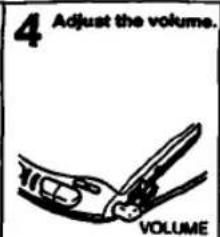
Weitere Bedienvorgänge
| Operation | Press |
| To pause | ▶II |
| To release pause | ▶II |
| To stop | ■Disc stops playing and the power is turned off automatically. |
| To locate the beginning of the current track/previous tracks—AMS | I◀◀ lightly/repeatedly |
| To locate the beginning of the next track/tracks—AMS | ▶▶I lightly/repeatedly |
| To go back at high speed (search) | Keep ◀◀◀ depressed |
| To go ahead at high speed (search) | Keep ▶▶◀ I depressed |
- Das Gerät pausiert am Anfang des gewählten Titels, wenn Sie ◀◀◀ oder ▶▶▶ im Pausenmodus kurz drücken.
- Während der RMS-Wiedergabe (Programmwiedergabe) arbeitet die AMS-Funktion in der programmierten Reihenfolge (siehe „Verschiedene Wiedergabemodi“).
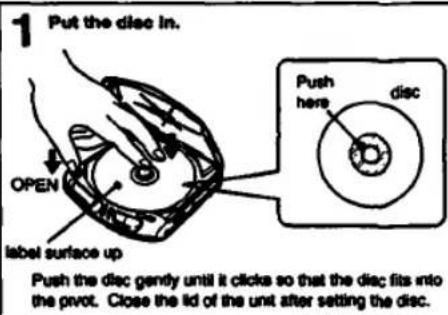
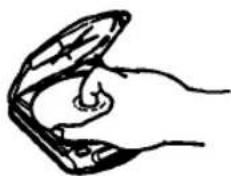
So nehmen Sie die Disc heraus
Heben Sie die Disc an den Rändern an, während Sie den Drehpunkt vorsichtig wie abgebildet drücken.
So spielen Sie eine 8-cm-Disc ab
Sie können sie ohne Adapter abspielen.
Für einen kräftigeren Bass
BASS BOOST WORK-MO-MAX

Stellen Sie BASS BOOST auf die gewünschte Position. Sie können dann einen kräftigen, bassverstärkten Klang genießen.
Hinweise
- Die Wirkung der BASS-BOOST-Funktion kann je nach Position des Lautstärkereglers oder dem Aufnahmepegel einer Disc abnehmen. • Der Klang kann verzerrt oder verzerrt sein, wenn Sie die Lautstärke zu hoch einstellen. Drehen Sie in diesem Fall die Lautstärke herunter.
So begrenzen Sie die Lautstärke auf ein moderates Niveau
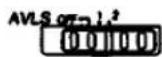
Mit dem AVLS-Wahlschalter (Automatic Volume Limiter System) können Sie die maximale Lautstärke Ihres Geräts begrenzen.
- Wenn der AVLS-Wahlschalter auf Position 1 oder 2 steht, wird die Lautstärke auf einem moderaten Niveau gehalten, auch wenn Sie versuchen, die Lautstärke höher zu drehen.
- Wenn der AVLS-Wahlschalter auf Position 1 oder 2 steht, kann der Wiedergabeklang je nach Musik (insbesondere bei bassbetonten Teilen) verzerrt oder instabil sein. Wenn dies passiert, drehen Sie die Lautstärke herunter.
- Wenn der AVLS-Wahlschalter ausgeschaltet ist, können Sie die volle Lautstärke Ihres Geräts genießen.
Verschiedene Wiedergabemodi
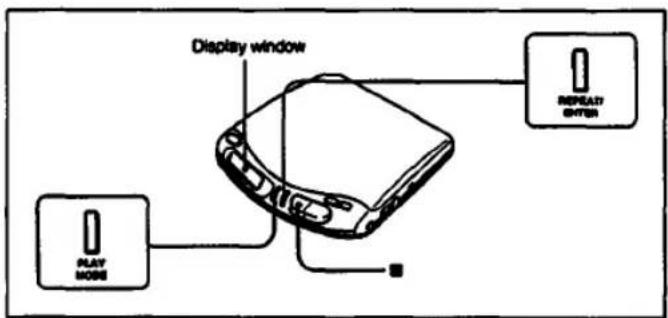
Dieses Gerät verfügt über 10 Wiedergabemodi: INTRO-Wiedergabe, Einzelauswahl-Wiedergabe, Zufallswiedergabe, RMS* (Programm)-Wiedergabe, normale Wiedergabe und Wiederholungswiedergabe jedes Modus.
* RMS: Random Music Sensor
So ändern Sie den Modus
Drücken Sie während der Wiedergabe PLAY MODE. Der aktuelle Modus erscheint im Display.
Für wiederholte Wiedergabe (Wiederholungswiedergabe)
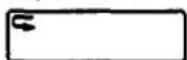
Drücken Sie REPEAT/ENTER. "G" erscheint im Display.
Drücken Sie erneut, um die Wiederholungswiedergabe abzubrechen.
Zum Stoppen der Disc drücken Sie Ⅲ.
Wiedergabe der gesamten Disc – normale Wiedergabe
Im Display erscheint keine Anzeige. Um die gesamte Disc zu wiederholen, drücken Sie REPEAT/ENTER.
Wiedergabe der ersten etwa zehn Sekunden aller Titel – INTRO-Wiedergabe
1 Drücken Sie während der Wiedergabe PLAY MODE, bis "INTRO" im Display blinkt.
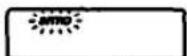
2 Drücken Sie ▶III. "INTRO" hört auf zu blinken und die Wiedergabe beginnt.
Um die INTRO-Wiedergabe zu wiederholen, drücken Sie REPEAT/ENTER.
Um während der INTRO-Wiedergabe den Titel bis zum Ende zu hören, drücken Sie ▶ erneut beim gewünschten Titel.
Drücken Sie während der Wiedergabe PLAY MODE, bis "1" im Display erscheint.
Das Gerät spielt nur einen Titel und stoppt am Ende des Titels.
Um nur einen Titel wiederholt abzuspielen, drücken Sie REPEAT/ENTER.
Wiedergabe der Titel in zufälliger Reihenfolge — Zufallswiedergabe
Drücken Sie PLAY MODE, bis "SHUF" im Display erscheint.
Die Wiedergabe beginnt mit dem nächsten Titel.
Um die Titel in zufälliger Reihenfolge wiederholt abzuspielen, drücken Sie REPEAT/ENTER. Nachdem jeder Titel in zufälliger Reihenfolge gespielt wurde, werden sie neu gemischt und in einer anderen Reihenfolge wiederholt abgespielt.
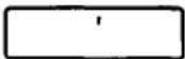
Im Display
Wenn Sie ▶II drücken
Die Anzahl der Titel auf der Disc und die Gesamtspielzeit erscheinen für 2 Sekunden.
Beispiel Anzahl der Titel Gesamtspielzeit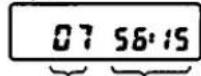
Während der Wiedergabe
Die Titelnummer und die abgelaufene Spielzeit des aktuellen Titels erscheinen.
1 Min. 17 Sek. sind seit Beginn des fünften Titels vergangen.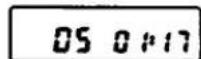
Während der Pause
Die abgelaufene Spielzeit des aktuellen Titels blinkt.
Pausenmodus an der Stelle 1 Min.
17 Sek. vom Beginn des fünften Titels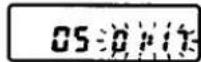
Zum Auffinden des nächsten Titels während der Zufallswiedergabe
Drücken Sie ▶▶▶. Sie können den Anfang des gerade gespielten Titels durch Drücken von ◀◀◀ finden; Sie können jedoch keinen vorherigen Titel finden, selbst wenn Sie ◀◀◀ gedrückt halten.
Wiedergabe der Titel in der gewünschten Reihenfolge — RMS (Programm) Wiedergabe
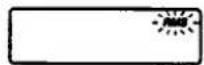
1 Drücken Sie während der Wiedergabe PLAY MODE, bis "RMS" im Anzeigefenster blinkt.
2 Drücken Sie ◀◀ oder ▶▶▶, um den gewünschten Titel auszuwählen.
3 Drücken Sie REPEAT/ENTER.
Titelnummer des gewünschten Titels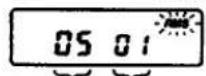
Der 2. (nächste) Titel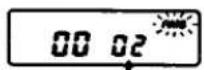
4 Wiederholen Sie die Schritte 2 und 3 (bis zu 22 Titel). Wenn nach dem Speichern von 22 Titeln ein weiterer Titel eingegeben wird, wird der erste Titel gelöscht und der neue an seiner Stelle gespeichert.
5 Drücken Sie ▶II. "RMS" hört auf zu blinken und die Wiedergabe beginnt.
Um die Programmwiedergabe zu wiederholen, drücken Sie REPEAT/ENTER.
Sperren der Tasten
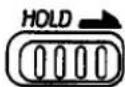
Schieben Sie den HOLD-Schalter in Pfeilrichtung, um ein versehentliches Drücken der Tasten am Gerät zu vermeiden.
Wenn der HOLD-Schalter auf ON steht, erscheint "Hold" im Display, wenn eine der Tasten am Gerät gedrückt wird.
Fehlerbehebung
Sollte ein Problem nach den folgenden Überprüfungen weiterhin bestehen, wenden Sie sich an Ihre nächste Sony-Serviceeinrichtung.
| Symptom | Causes and/or solution |
| Disc does not start playing. | The disc is inserted upside down or incorrectly. Insert the disc correctly with the label surface up.Dusty or defective discDirty or dusty lensThe disc compartment lid is not closed.Moisture condensation → Leave the unit in a warm place until the moisture evaporates.The AC power adaptor is not plugged into the wall outlet.The mount plate is not firmly connected to a cigarette lighter socket.The disc is not placed on a level surface.The HOLD switch is set to the direction of the arrow.When the 12 cm CD which contains many selections is replaced with a disc with a few selections (such as CD single or CDV, etc.), it may take more than 10 seconds before play starts.Weak rechargeable battery or alkaline batteries |
| No sound from the headphones | The headphones plug is not firmly connected to the PHONES jack.Adjust the VOLUME control.Dirty plug. |
| No sound from the connected speakers | Check the connections.The amplifier is not turned on. |
| Skipped sound | Dirty or defective discDirty lensStrong vibration |
| Disc play does not stop when you turn off the engine of the car. | Press it to stop operation. |
| The "no disc" indication appears in the display window. | Place the CD with the label surface up.Replace the CD if the CD is badly damaged. |
| The "Hi dc in" indication appears in the display window. | Input voltage is too high.Use the supplied AC power adaptor (not supplied with D-130) or an optional AC power adaptor AC-E49L. |
| When using batteries, the battery life is short. | Manganese batteries are used.→ Use alkaline batteries. |
| "Hold" appears when you press a button on the unit. | The HOLD switch on the unit is set to the direction of the arrow. |
Wartung
Reinigung der Linse
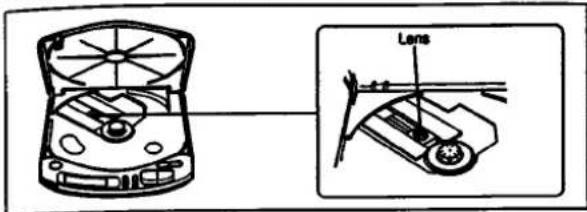
Wenn Sie die Linse versehentlich mit schmutzigen Fingern berührt haben oder Staub auf der Linse den ordnungsgemäßen Betrieb des Geräts verhindert, öffnen Sie den Deckel des Disc-Fachs und reinigen Sie die Linse mit einem Linsenreinigungsset (KK-DM10, nicht im Lieferumfang enthalten).
Reinigung des Kopfhörersteckers
Halten Sie den Stecker Ihrer Kopfhörer sauber, um einen optimalen Klang zu erzielen. Wischen Sie ihn mit einem trockenen, weichen Tuch ab.
Reinigung des Gehäuses
Reinigen Sie das Gehäuse mit einem weichen Tuch, das leicht mit Wasser oder einer milden Reinigungslösung angefeuchtet ist. Verwenden Sie keine Scheuerschwämme, Scheuerpulver oder Lösungsmittel wie Alkohol oder Benzin, da diese die Oberfläche des Gehäuses beschädigen können.
Hinweise zu Compact Discs
- Reinigen Sie die Disc vor dem Abspielen mit einem Reinigungstuch. Wischen Sie die Disc von der Mitte nach außen.
- Verwenden Sie keine Lösungsmittel wie Benzin, Verdünner, handelsübliche Reiniger oder Antistatik-Sprays, die für analoge Schallplatten bestimmt sind.
- Setzen Sie die Disc keiner direkten Sonneneinstrahlung oder Wärmequellen wie Heißluftkanälen aus, und lassen Sie sie nicht in einem in der prallen Sonne geparkten Auto liegen, da die Temperatur im Auto erheblich ansteigen kann. • Bewahren Sie die Disc nach dem Abspielen in ihrer Hülle auf.
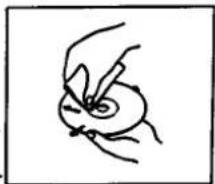
Kratzer, Schmutz oder Fingerabdrücke auf der Disc können zu Tracking-Fehlern führen.
Handhabung der Disc
Halten Sie die Disc am Rand.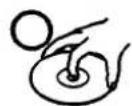
Nicht so Fassen Sie die Oberfläche nicht an.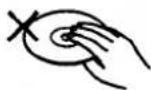
Nicht so Kleben Sie kein Papier oder Klebeband auf und schreiben Sie nichts auf die Oberfläche.
Technische Daten
System
Eigenschaften der Laserdiode
Compact-Disc-Digital-Audiosystem
Material: GaAlAs
Wellenlänge: λ = 780 nm
Emissionsdauer: Kontinuierlich
Laserausgangsleistung: Weniger als 44,6 μW
(Dieser Wert wurde in einem Abstand von 200 mm
von der Objektivlinse des optischen Abtastblocks gemessen.)
Sony Super Strategy Cross Interleave Reed Solomon Code
1-Bit-Quarz-Zeitachsensteuerung
20-20.000 Hz: 1 dB
(gemessen nach EIAJ CP-307)
Line-Ausgang (Stereo-Miniklinke)
Ausgangspegel 0,7 V effektiv bei 50 Kilohm
Lastimpedanz über 10 Kilohm
Kopfhörer (Stereo-Miniklinke)
15 mW + 15 mW an 16 Ω
Allgemein
Stromversorgung
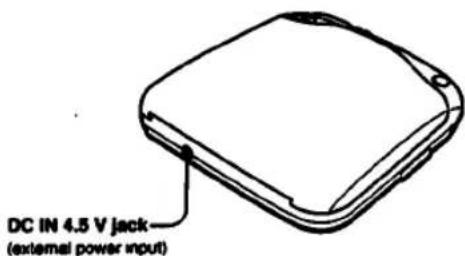
- DC IN 4.5 V Buchse akzeptiert das Sony Netzteil (nicht im Lieferumfang des D-130 enthalten) oder ein optionales Netzteil AC-E45L, zur Verwendung mit:
| Where purchased | Operating voltage |
| European and Asian countries | 220 - 230 V AC, 50 Hz |
| U.S.A., Canada, Central and South America | 120 V AC, 60 Hz |
| United Kingdom, Australia | 240 V AC, 50 Hz |
| Middle East | 110 - 240 V AC, 50/60 Hz |
| Other countries | 100 - 240 V AC, 50/60 Hz |
Abmessungen
Gewicht
Mitgeliefertes Zubehör
- DC 2,4 V Akkupack (nur beim D-133 mitgeliefert) oder optionaler Akkupack BP-DM10
- DC IN 4,5 V akzeptiert die Sony CPM-300P Montageplatte und den CPM-300PK Montagearm zur Verwendung mit der Autobatterie.
• DC 3 V zwei AA (LR6) Alkaline-Batterien
Ca. 130 × 30,5 × 142 mm (B/H/T) inkl. hervorstehender Teile und Bedienelemente
Ca. 270 g ohne Akku
Netzteil (nicht im Lieferumfang des D-130 enthalten) (1)
Verbindungskabel (Cinchstecker × 2 → Stereoklinkenstecker) (1)
Stereo-Kopfhörer (nicht im Lieferumfang des D-132CK enthalten) (1)
Akkupack (nur beim D-133 mitgeliefert) (1)

Lage und Funktion der Bedienelemente

* AMS. Automatic Music Sensor ** AVLS Automatic Volume Limiter System
Optionales Zubehör
Plattenarm CPM-300A
Montageplatte CPM-300P
Montagearm CPM-300PK
Montagesatz CPM-300PC
Montagesatz CPM-300CK
Auto-Anschlusspack CPA-4, CPA-8
Autobatteriekabel DCC-E145L
Aktivlautsprechersystem SRS-58
Akku BP-DM10
Netzteil AC-E45L
Ihr Händler führt möglicherweise nicht alle oben aufgeführten Zubehörteile. Bitte fragen Sie Ihren Händler nach detaillierten Informationen zu den Zubehörteilen in Ihrem Land.
Design und technische Daten können ohne Vorankündigung geändert werden.
Hinweis
Dieses Gerät entspricht der EG-Richtlinie 87/306/EWG bezüglich der Entstörung.
Vorsichtsmaßnahmen
Zur Sicherheit
- Da der in diesem CD-Player verwendete Laserstrahl für die Augen schädlich ist, versuchen Sie nicht, das Gehäuse zu zerlegen. Überlassen Sie Wartungsarbeiten nur qualifiziertem Personal.
- Legen Sie keine Fremdkörper in den Sicherheitsschlitz im Disc-Fach. Wenn Sie dies tun, kann der Laserstrahl beim Öffnen des Deckels austreten.
- Legen Sie keine Fremdkörper in die DC IN 4,5 V (externer Stromanschluss) Buchse.
- Falls feste Gegenstände oder Flüssigkeiten in das Gerät gelangen, trennen Sie die Stromversorgung und lassen Sie das Gerät von qualifiziertem Personal überprüfen, bevor Sie es weiter verwenden.
Zu den Stromquellen
- Verwenden Sie den wiederaufladbaren Akku (nur bei D-133 im Lieferumfang enthalten), Batterien (nicht im Lieferumfang enthalten), Haushaltsstrom oder eine Autobatterie.
- Für Wechselstrombetrieb: Verwenden Sie das mitgelieferte Netzteil (bei D-130 nicht im Lieferumfang enthalten) oder das optionale Netzteil AC-E45L. Verwenden Sie kein anderes Netzteil, da dies zu Fehlfunktionen führen kann.
- Für Autobatteriebetrieb: Verwenden Sie den Autohalter CPM-300PK (nicht im Lieferumfang enthalten) oder die Halterplatte CPM-300P (nicht im Lieferumfang enthalten) und das Auto-Anschlussset CPA-4/CPA-8 (nicht im Lieferumfang enthalten).
- Wenn das Gerät längere Zeit nicht verwendet wird, trennen Sie unbedingt die Stromversorgung (Netzteil, Batterien, Akku oder Halterplatte) vom Gerät. Um das Netzteil aus der Steckdose zu ziehen, fassen Sie das Netzteil selbst an; ziehen Sie niemals am Kabel.
- Das Typenschild mit Betriebsspannung, Leistungsaufnahme usw. befindet sich auf der Unterseite des Geräts. (Nur für Netzteil für den Nahen Osten.)
Zum Betrieb
- Da das CD-System einen großen Dynamikbereich bietet, werden die Spitzen der hochpegeligen Eingänge mit hoher Wiedergabetreue aufgezeichnet, und der Rauschpegel ist sehr niedrig. Drehen Sie die Lautstärke nicht auf, während Sie einen Teil der Disc ohne Audiosignale oder mit sehr niedrigen Eingangspegeln hören. Wenn Sie dies tun, können die Lautsprecher beschädigt werden, wenn der Spitzenpegel des Tons wiedergegeben wird.
- Die Linse auf dem Disc-Tisch sollte sauber gehalten werden. Berühren Sie die Linse nicht und stochern Sie nicht darauf herum. Wenn Sie dies tun, kann die Linse beschädigt werden und das Gerät funktioniert nicht richtig.
Bei der Installation
- Installieren Sie das Gerät niemals an Orten, an denen es folgenden Bedingungen ausgesetzt ist:
- Wärmequellen wie Heizkörpern oder Luftkanälen.
- direktem Sonnenlicht.
- übermäßigem Staub.
- Feuchtigkeit oder Regen.
- mechanischen Vibrationen oder Stößen.
- einer unebenen Oberfläche.
- Stellen Sie das Gerät nicht auf ein Armaturenbrett und lassen Sie es nicht in einem in der Sonne geparkten Auto liegen, da die Temperatur übermäßig ansteigen kann.
- Wenn das Gerät mit dem Netzteil verwendet wird, wickeln Sie es nicht in ein Tuch, eine Decke usw. Wenn Sie dies tun, kann die Temperatur im Inneren und Äußeren des Geräts erheblich ansteigen, was zu Fehlfunktionen des Geräts oder schweren Unfällen führen kann.
- Legen Sie keine schweren Gegenstände auf das Gerät.
- Wenn das Gerät direkt von einem kalten an einen warmen Ort gebracht wird oder in einem sehr feuchten Raum aufgestellt wird, kann Feuchtigkeit auf der Linse im Inneren des Geräts kondensieren. In diesem Fall funktioniert das Gerät nicht. Entfernen Sie in diesem Fall die Disc und lassen Sie das Gerät mehrere Stunden an einem warmen Ort, bis die Feuchtigkeit verdunstet ist.
- Für einen optimalen Betrieb sollte das Gerät keinen Temperaturen unter 5°C (41° F) oder über 35°C (95° F) ausgesetzt werden.
Hinweise zu Kopfhörern
- Verkehrssicherheit
Verwenden Sie die Kopfhörer nicht beim Autofahren, Fahrradfahren oder beim Bedienen eines motorisierten Fahrzeugs. Dies kann eine Verkehrsgefährdung darstellen und ist in einigen Gebieten illegal. Es kann auch potenziell gefährlich sein, die Kopfhörer beim Gehen mit hoher Lautstärke zu verwenden, insbesondere an Fußgängerüberwegen. Sie sollten äußerste Vorsicht walten lassen oder die Verwendung in potenziell gefährlichen Situationen einstellen.
• Vermeidung von Gehörschäden
Vermeiden Sie die Verwendung von Kopfhörern mit hoher Lautstärke. Hörexperten raten von kontinuierlichem, lautem und längerem Hören ab. Wenn Sie ein Klingeln in den Ohren bemerken, reduzieren Sie die Lautstärke oder stellen Sie die Verwendung ein.
• Rücksicht auf andere
Halten Sie die Lautstärke auf einem moderaten Niveau. So können Sie Umgebungsgeräusche hören und Rücksicht auf die Menschen in Ihrer Umgebung nehmen.
Wenn Sie Fragen oder Probleme bezüglich Ihres Geräts haben, wenden Sie sich bitte an Ihren nächsten Sony-Händler.
Stromquellen
(1) 2007 (nicht im Lieferumfang enthalten)
Legen Sie zwei AA-Alkalibatterien (LR8) gemäß den - und -Markierungen im Batteriefach ein.
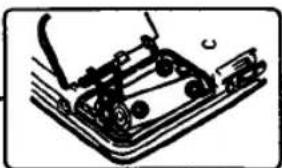
Entfernen der Batterien Drücken Sie eine Batterie wie abgebildet.
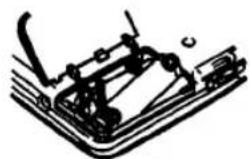
Hinweise zu Batterien
- Legen Sie die Batterien mit korrekter Polarität ein.
- Verwenden Sie keine alten Batterien zusammen mit neuen oder verschiedene Batterietypen zusammen.
- Wenn der Elektrolyt in der Batterie auslaufen sollte, wischen Sie die kontaminierten Teile im Batteriefach mit einem Tuch ab und ersetzen Sie die alten Batterien durch neue. • Laden Sie die Batterien nicht auf.
- Wenn das Gerät längere Zeit nicht verwendet wird, entfernen Sie die Batterien.
Lebensdauer der Alkalibatterie
Bei Verwendung des Geräts auf einer ebenen und stabilen Oberfläche sind ca. 8 Stunden ununterbrochene Wiedergabe möglich.
Wenn die Anzeige □ aufleuchtet
Wenn die Batterie erschöpft ist, stoppt das Gerät den Betrieb. Wenn diese Anzeige aufleuchtet, laden Sie den Akku auf oder ersetzen Sie die Batterien durch neue.
Verwendung mit Netzstrom
Schließen Sie das mitgelieferte Netzteil (bei D-130 nicht im Lieferumfang enthalten) oder ein optionales Netzteil AC-E45L auf die gleiche Weise an wie beim Laden des Akkus.
Wenn das Gerät nicht verwendet wird, trennen Sie unbedingt das Netzteil vom Stromnetz.
Für Kunden, deren Gerät mit einem Netzstecker-Adapter geliefert wird: Verwenden Sie den Netzstecker-Adapter, wenn das Netzteil nicht in die Steckdose passt.
Hinweis zum Netzteil
Verwenden Sie nur das mitgelieferte Netzteil (bei D-130 nicht im Lieferumfang enthalten) oder ein optionales Netzteil AC-E45L. Verwenden Sie niemals andere Adapter von Sony, da die Polarität des mitgelieferten Adapters entgegengesetzt zu der herkömmlicher Adapter ist. Verwenden Sie weder das mit anderen "Discman"-CD-Playern mitgelieferte Netzteil noch optionale Netzteile wie das AC-D6M.
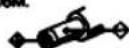
Polarität des Steckers (Einheitspolaritätstyp)
Wenn Sie den mitgelieferten Akku (nur bei D-133) oder einen optionalen Akku BP-DM10 zum ersten Mal verwenden, laden Sie ihn unbedingt 3 Stunden lang auf.
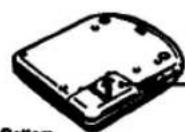
Einlegen eines Akkus
Öffnen Sie den Deckel und legen Sie den Akku wie in der vergrößerten Abbildung dargestellt ein.
Unterseite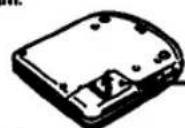
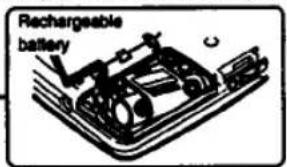
Laden des Akkus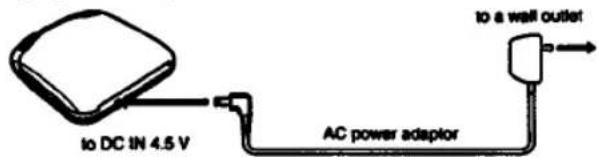
1 Schließen Sie das mitgelieferte Netzteil (bei D-130 nicht im Lieferumfang enthalten) an, wenn sich das Gerät im Stoppmodus befindet. 2 Der Ladevorgang startet sofort. "CHG" erscheint im Display und die Zahl "1" wechselt wiederholt ihre Position. Das Display erlischt, wenn der Ladevorgang abgeschlossen ist. 3 Trennen Sie das Netzteil.
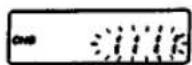
Hinweise zum Akku (Ni-Cd-Akku)
- Denken Sie daran, den Akku nach jedem Gebrauch aufzuladen. Wenn der Akku entladen bleibt, kann dies seine Lebensdauer verkürzen.
- Beim ersten Aufladen oder nach längerer Zeit kann die Spielzeit reduziert sein. In diesem Fall laden und entladen Sie ihn mehrmals. • Werfen Sie den Akku niemals ins Feuer.
- Kurzschließen Sie niemals die Akkuklemmen.
- Zerlegen Sie den Akku nicht. Wenn Elektrolyt aus dem Akku mit Kleidung oder Haut in Kontakt kommt, waschen Sie die betroffenen Stellen sofort mit Wasser.
Lebensdauer des Akkus
| Charging time | CD playing |
| Max. 3 hours* | Approx. 3 hours |
(Wenn das Gerät auf einer ebenen und stabilen Oberfläche verwendet wird.)
* Die Ladezeit variiert je nach Verwendung des Akkus.
Wann der Akku ausgetauscht werden sollte
Wenn die Betriebszeit nach vollständigem Aufladen um etwa die Hälfte reduziert ist, ersetzen Sie den Akku durch einen neuen BP-DM10 (nicht im Lieferumfang enthalten). Verwenden Sie keinen BP-DM1-Akku (nicht im Lieferumfang enthalten).
Verschiedene Verwendungsmöglichkeiten
Hören im Auto
Sie können die Disc über ein Autoradio-Kassettendeck mit folgender Ausrüstung hören:
• Montagesatz CPM-300PK (Montageplatte + Plattenarm) • Plattenarm CPM-300A • Montageplatte CPM-300P • Auto-Anschlussset CPA-4, CPA-8 - Montagesatz CPM-300PC (Montageplatte + Auto-Anschlussset) - Montagesatz CPM-300CK (Plattenarm + Montageplatte + Auto-Anschlussset)
Ihr Händler führt möglicherweise nicht alle oben aufgeführten Zubehörteile. Bitte fragen Sie den Händler nach detaillierten Informationen über das Zubehör in Ihrem Land.
Wenn Sie die Montageplatte CPM-300P verwenden
Befestigen Sie den mitgelieferten Auto-Montageadapter an der CPM-300P, bevor Sie den CD-Player installieren.
Wenn Sie den Motor abstellen
Auch wenn der Akku oder die Alkaline-Batterien in das Gerät eingelegt sind, stoppt das Gerät den Betrieb, wenn Sie den Motor des Autos abstellen. (Zündungsabhängige Funktion) Diese Funktion ist nicht bei jedem Automodell verfügbar. Wenn nicht, drücken Sie ■, um den Betrieb zu stoppen.
Hinweis
Jeder andere Anschluss als ein Sony Auto-Anschlussset kann Störungen verursachen.
Anschluss an andere Geräte
- zur Tonwiedergabe über Lautsprecher - zum Aufnehmen
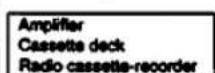
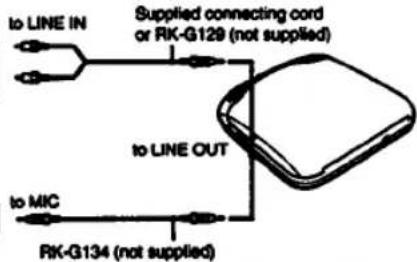
• zum Aufnehmen
Kassettenrekorder

RK-G134 (nicht im Lieferumfang enthalten)
Hinweise zum Anschluss
• Schalten Sie jedes Gerät aus, bevor Sie Verbindungen herstellen. - Stecken Sie den weißen Stecker in die L-Buchse (linker Kanal) und den roten Stecker in die R-Buchse (rechter Kanal). - Verbinden Sie den Ausgang von LINE OUT nicht mit den PHONO-Buchsen des Verstärkers. • Achten Sie darauf, die Stecker des Kabels fest in die Buchsen zu stecken. Eine lose Verbindung kann ein Brummen verursachen. - Wenn das Gerät Störungen beim Radio- oder Fernsehempfang verursacht, schalten Sie das Gerät aus oder entfernen Sie es vom Empfänger.
- D
- D-132CK
- BEDIENUNGSANLEITUNG
- DISCMAN
- BESITZER-NOTIZ
- WARNUNG
- VORSICHT
- INFORMATION (FÜR KUNDEN IN DEN USA)
- FÜR KUNDEN IM VEREINIGTEN KÖNIGREICH
- FÜR KUNDEN IN KANADA
- DISC-WIEDERGABE
- HINWEISE
- VERSCHIEDENE WIEDERGABEMODI
- WIEDERGABE DER GESAMTEN DISC – NORMALE WIEDERGABE
- WIEDERGABE DER ERSTEN ETWA ZEHN SEKUNDEN ALLER TITEL – INTRO-WIEDERGABE
- WIEDERGABE DER TITEL IN ZUFÄLLIGER REIHENFOLGE — ZUFALLSWIEDERGABE
- IM DISPLAY
- WÄHREND DER WIEDERGABE
- WÄHREND DER PAUSE
- ZUM AUFFINDEN DES NÄCHSTEN TITELS WÄHREND DER ZUFALLSWIEDERGABE
- WIEDERGABE DER TITEL IN DER GEWÜNSCHTEN REIHENFOLGE — RMS (PROGRAMM) WIEDERGABE
- SPERREN DER TASTEN
- FEHLERBEHEBUNG
- WARTUNG
- REINIGUNG DER LINSE
- REINIGUNG DES KOPFHÖRERSTECKERS
- REINIGUNG DES GEHÄUSES
- HINWEISE ZU COMPACT DISCS
- HANDHABUNG DER DISC
- TECHNISCHE DATEN
- LAGE UND FUNKTION DER BEDIENELEMENTE
- VORSICHTSMASSNAHMEN
- ZUR SICHERHEIT
- ZU DEN STROMQUELLEN
- ZUM BETRIEB
- BEI DER INSTALLATION
- HINWEISE ZU KOPFHÖRERN
- VERKEHRSSICHERHEIT
- STROMQUELLEN
- (NICHT IM LIEFERUMFANG ENTHALTEN)
- HINWEISE ZU BATTERIEN
- LEBENSDAUER DER ALKALIBATTERIE
- WENN DIE ANZEIGE □ AUFLEUCHTET
- VERWENDUNG MIT NETZSTROM
- HINWEIS ZUM NETZTEIL
- EINLEGEN EINES AKKUS
- HINWEISE ZUM AKKU (NI-CD-AKKU)
- WANN DER AKKU AUSGETAUSCHT WERDEN SOLLTE
- VERSCHIEDENE VERWENDUNGSMÖGLICHKEITEN
- HÖREN IM AUTO
- WENN SIE DIE MONTAGEPLATTE CPM-300P VERWENDEN
- WENN SIE DEN MOTOR ABSTELLEN
- HINWEIS
- ANSCHLUSS AN ANDERE GERÄTE
- HINWEISE ZUM ANSCHLUSS
Marke : SONY
Modell : Discman D-130
Kategorie : CD-Player