
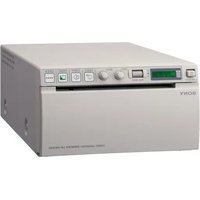
CVP-M1 - Drucker SONY - Kostenlose Bedienungsanleitung
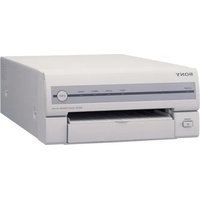
Finden Sie kostenlos die Bedienungsanleitung des Geräts CVP-M1 SONY als PDF.


| Produkttyp | Farbvideodrucker (Sublimations-Wärmeübertragungsdruck) |
| Modell | Sony CVP-M1 |
| Abmessungen (B x H x T) | ca. 260 x 106 x 364 mm (ohne Überstände) |
| Gewicht | ca. 3,8 kg |
| Stromversorgung | 120 V AC, 60 Hz |
| Leistungsaufnahme | 100 W (Drucken), 13 W (Bereitschaft) |
| Bildpunkte (Vollbild) | 448 (V) x 708 (H) Punkte |
| Graustufen | 256 Stufen (8 Bit) |
| Druckzeit (Vollbild) | ca. 60 Sekunden pro Blatt |
| Druckformate | Vollbild, Halbbild, 1/4- und 1/16-Bild |
| Mehrfachdruck | Bis zu 25 identische Abzüge automatisch |
| Vorlagenfunktionen | Kalender (bis Dez. 2004), Namensschild, Videocassettenetikett, Zuschneiden (Herz, Oval, Welle, Pinsel, Gobelin), Bild-in-Bild |
| Bildeinstellung | Helligkeit, Schärfe, Farbton, Farbe |
| Eingangsanschlüsse | VIDEO (Composite), S-VIDEO (Mini-DIN 4-pol), LANC (Stereo-Miniklinke) |
| Ausgangsanschluss | MONITOR OUT (Composite, Cinch) |
| Kompatible Verbrauchsmaterialien | VP-markierte Druckpatronen und Druckpapiere (100 x 140 mm) |
| Papierkapazität | Bis zu 25 Blatt in der Papierkassette |
| Fernbedienung | Infrarot-Fernbedienung im Lieferumfang (Reichweite ca. 5 m) |
| Reinigung | Gehäuse mit weichem, trockenem Tuch; keine Lösungsmittel |
| Sicherheitshinweise | Nur 120 V AC; nicht öffnen; vor Feuchtigkeit schützen; kein schwerer Gegenstand auf Kabel |
| Lieferumfang | Netzkabel, Fernbedienung, Batterien (AA), Videokabel, Test-Druckpack (15 Normalblätter, 10 Aufkleberblätter, 1 Patrone) |
Häufig gestellte Fragen - CVP-M1 SONY
Benutzerfragen zu CVP-M1 SONY
0 Frage zu diesem Gerät. Beantworten Sie die, die Sie kennen, oder stellen Sie Ihre eigene.
Eine neue Frage zu diesem Gerät stellen
Laden Sie die Anleitung für Ihr Drucker kostenlos im PDF-Format! Finden Sie Ihr Handbuch CVP-M1 - SONY und nehmen Sie Ihr elektronisches Gerät wieder in die Hand. Auf dieser Seite sind alle Dokumente veröffentlicht, die für die Verwendung Ihres Geräts notwendig sind. CVP-M1 von der Marke SONY.
BEDIENUNGSANLEITUNG CVP-M1 SONY
Color Video Printer
Operating Instructions
Before operating the unit, please read this manual thoroughly and retain it for future reference.
Color Video Printer

This PRINTER is designed to use PRINT PACK bearing the VP trademark to yield quality prints. VP and Design is a trademark used under license.
CVP-M1
WARNING
To prevent fire or shock hazard, do not expose the unit to rain or moisture.
To avoid electrical shock, do not open the cabinet. Refer servicing to qualified personnel only.

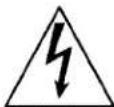
This symbol is intended to alert the user to the presence of uninsulated "dangerous voltage" within the product's enclosure that may be of sufficient magnitude to constitute a risk of electric shock to persons.

This symbol is intended to alert the user to the presence of important operating and maintenance (servicing) instructions in the literature accompanying the appliance.
Owner's Record
The serial number is located and the model number is located at the rear. Record the serial number in the space provided below. Refer to them whenever you call upon your Sony dealer regarding this product.
Model No. CVP-M1
Serial No.
Information
This equipment has been tested and found to comply with the limits for a Class B digital device, pursuant to Part 15 of the FCC rules. These limits are designed to provide reasonable protection against harmful interference in a residential installation. This equipment generates, uses, and can radiate radio frequency energy and, if not installed and used in accordance with the instructions, may cause harmful interference to radio communications.
However, there is no guarantee that interference will not occur in a particular installation. If this equipment does cause harmful interference to radio or television reception, which can be determined by turning the equipment off and on, the user is encouraged to try to correct the interference by one or more of the following measures:
- Reorient or relocate the receiving antenna.
- Increase the separation between the equipment and receiver.
- Connect the equipment into an outlet on a circuit different from that to which the receiver is connected.
- Consult the dealer or an experienced radio/TV technician for help.
You are cautioned that any changes or modifications not expressly approved in this manual could void your authority to operate this equipment.
CAUTION
TV programs, films, video tapes and other materials may be copyrighted.
Unauthorized video printing of such materials may be contrary to the provisions of the copyright laws.
Table of Contents
Getting Started
Inserting the ink (print cartridge) 4
Inserting the print paper 5
Hooking up 6
Connecting to a camcorder 6
Connecting to a VCR....7
Checking the connections 8
Printing
Printing a full-size picture 9
Printing half-size pictures 11
Printing 1/4- or 1/16-size pictures ....12
Making multiple prints....13
Other Print Options
Printing with a calendar 14
Printing on sticker papers 15
Creating a video cassette label 16
Cropping a picture 17
Combining several pictures 18
Adjusting the picture 19
Adjusting the picture quality of prints....19
Adjusting the source picture quality 19
For Your Information
Precautions 20
Troubleshooting 21
If these error messages appear 22
If the print paper jams 22
Specifications 23
Index to parts and controls 24
Main unit 24
Remote commander 26
Index Back cover
Inserting the ink (print cartridge)

natural_image
Line drawing of a rectangular electronic device with ports and buttons (no text or symbols)Insert the video print cartridge with the VP mark according to the steps below. Use only the video print cartridge supplied with the video print paper packed in the same carton.
3
Insert the print cartridge firmly and close the cartridge compartment lid.

If the cartridge compartment lid does not close
Remove the print cartridge, and then reinsert it.
1
While pressing down the lever, open the cartridge compartment lid.

Side of the unit
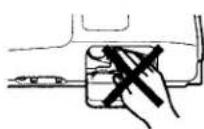
Caution
Never put your hand into the cartridge compartment. The thermal head reaches high temperatures, especially after repeated printing.
Notes
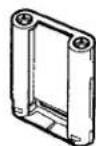
- When you put the print cartridge down, stand it as illustrated so that dust will not get on the ink ribbon.
- Do not touch the ink ribbon or place the print cartridge in a dusty location. Fingerprints or dust on the ink ribbon may result in imperfect printing.
2
Wind up the ink ribbon to remove the slack.

Remove any slack (①). Then, while pressing the center of the reel, wind the ink ribbon until the black bar appears on the left (②).
Inserting the print papers

natural_image
Line drawing of a rectangular electronic device with ports and connectors (no text or symbols)You can insert up to 25 sheets.
1 Push the paper tray.
The paper tray comes out from the printer.
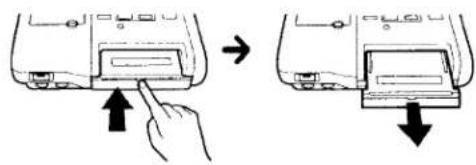
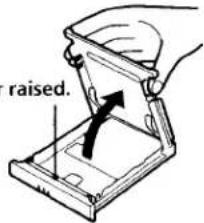
2 Open the lid of the paper tray and make sure that the spacer is raised.
Keep the spacer raised.
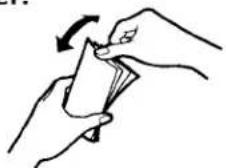
3 Shuffle the print papers to prevent them from sticking together.
4 Check that the corners of the print papers are not bent, then set the papers in the paper tray with the printing surface facing up.
The paper tray holds up to 25 sheets. Do not set different types or sizes of papers in the tray at the same time.

Make sure that the print paper is placed below the paper holder.
5 Close the lid and push the paper tray back into the printer.
Notes
- Do not touch the printing surface (the side where nothing is printed).
- Do not place print papers in a dusty location. Fingerprints or dust on the printing surface may result in imperfect printing.
- Use the print paper recommended for this printer only. If you use a different type of paper, it may cause problems and the printer may not print properly.
Hooking up
Connecting to a camcorder
Connect your camcorder to play back the tape you want to print from. Then, connect a TV so that you can monitor the pictures to be printed.
1 Connect the printer's INPUT: VIDEO to the camcorder's VIDEO output jack, using a video cable (not supplied).

If your camcorder has an S VIDEO output connector
Connect the printer's INPUT: S VIDEO to the camcorder's S VIDEO output connector, using the S VIDEO cable (not supplied). This connection results in better print quality.
If you use both S VIDEO connector and VIDEO jack simultaneously, the printer automatically selects the S VIDEO input as the input video signal.
If your camcorder has a ◎LANC jack
Connect the printer's CLANC to the camcorder's CLANC jack, using the CLANC cable (not supplied). The printer automatically stops the camcorder when you select the picture on the printer.
Note that the QLANC jack on this printer does not correspond to CONTROL L or REMOTE jacks.
2 Connect the printer's MONITOR OUT to the TV's VIDEO input jack, using the supplied video cable.

flowchart
graph TD
    A["Device"] --> B["INPUT S VIDEO VIDEO"]
    B --> C["MONITOR OUT"]
    C --> D["Video cable (supplied)"]
    D --> E["Computer"]
    E --> F["VIDEO INPUT"]
    style A fill:#f9f,stroke:#333
    style B fill:#ccf,stroke:#333
    style C fill:#cfc,stroke:#333
    style D fill:#fcc,stroke:#333
    style E fill:#cff,stroke:#333
    style F fill:#ffc,stroke:#333
    note right of F: :Signal flow
3 Connect the supplied AC power cord to AC IN of the printer and a wall outlet.

Note
You cannot use a television with an antenna input only.
Connecting to a VCR
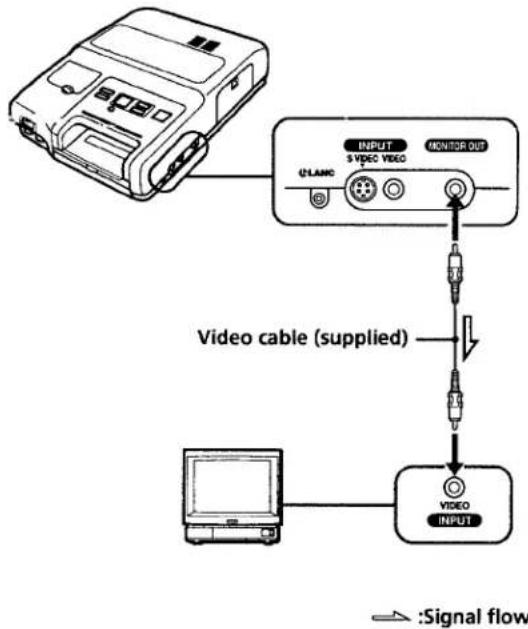
You can also print from a VCR or laser disc player. Connect your VCR (or laser disc player) as follows:
1 Connect the printer's INPUT: VIDEO to the VCR's VIDEO output jack, using a video cable (not supplied).

If your VCR has an S VIDEO output connector
Connect the printer's INPUT: S VIDEO to the VCR's S VIDEO output connector, using the S VIDEO cable (not supplied). This connection results in better print quality.
If you use both S VIDEO connector and VIDEO jack simultaneously, the printer automatically selects the S VIDEO input as the input video signal.
If your VCR has a QLANC jack
Connect the printer's L LANC to the VCR's L LANC jack, using the L LANC cable (not supplied). The printer automatically stops the VCR when you select the picture on the printer. If your VCR has the LANC M/S mode switching function, set to "S" mode.
Note that the ⬆LANC jack on this printer does not correspond to CONTROL L or REMOTE jacks.
2 Connect the printer's MONITOR OUT to the TV's VIDEO input jack, using the supplied video cable.
flowchart
graph TD
    A["Device"] --> B["INPUT SVIDEO VIDEO"]
    B --> C["MONITOR OUT"]
    C --> D["Video cable (supplied)"]
    D --> E["Computer"]
    E --> F["VIDEO INPUT"]
    style A fill:#f9f,stroke:#333
    style F fill:#ccf,stroke:#333
    note right of F: :Signal flow
3 Connect the supplied AC power cord to the AC IN jack of the printer and a wall outlet.

Note You cannot use a television with an antenna input only.
(continued)
Hooking up
“
When you want to print TV programs
If your VCR has a built-in TV tuner, you can make prints of the TV programs without recording them onto the tape.
1 Connect the printer to the VCR and TV as described on the previous page.
2 Set the TV's input selector to video input.
3 Press the VCR's channel selection button so that the program you want appears on the TV screen.
4 Print the picture.
Note
For details, see the following pages.
If you use a VCR that does not have a TV tuner, you cannot print TV programs directly.
Checking the connections
Check the connections you've made by playing back the tape on the camcorder (or VCR).
1 Turn on the power of the printer, cancorder and TV.
2 Set the TV's input selector to video input.
3 Start playing back the camcorder (or VCR).
The playback picture appears on the TV screen. If not, make sure you've made connections correctly and securely.
Printing a full-size picture
natural_image
Black and white photo of a rabbit standing in a natural setting (no text or symbols visible)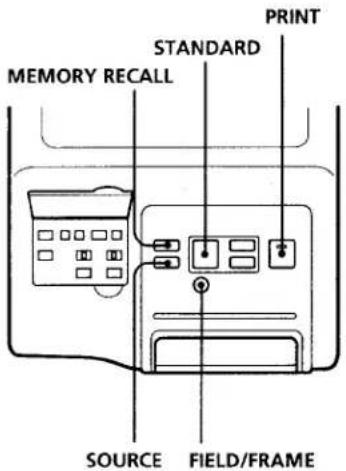
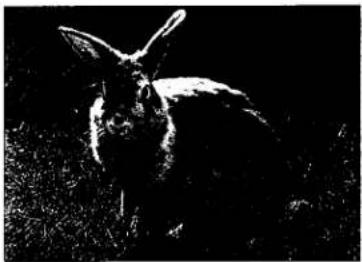
1 Start playing back the camcorder.
The playback picture appears on the TV screen.
SOURCE
"SOURCE" appears.
2 Press STANDARD when the picture you want to print appears on the TV screen.
CONFIRM
"CONFIRM" appears.
3 Press FIELD/FRAME if the designated picture is blurred.
4 Make sure that "CONFIRM" appears on the TV screen, then press PRINT.
The designated picture disappears and printing starts. When printing ends, the designated picture appears on the TV screen again and a print emerges from the print outlet.
5 Remove the print from the printer.
To re-designate the picture before printing
Press SOURCE so that the playback picture appears on the TV screen. When the desired picture appears, press STANDARD.
The newly designated picture is stored to print instead of the previous one.
(continued)
Printing a full-size picture
To check the designated picture while the playback picture appears on the TV screen
Press MEMORY RECALL. The designated picture appears on the TV. The designated picture is stored until you designate a new picture or turn off the printer. To return to the playback picture, press SOURCE.
To print the designated picture again
Make sure that the desired picture is still on the TV screen, then press PRINT again. You cannot use any printer's button except PRINT CANCEL while printing.
The camcorder automatically pauses when you press STANDARD
(If you connect the printer to the camcorder using the LANC cable) When you press SOURCE, playback starts automatically again. However, if about 5 minutes pass after you press STANDARD, the camcorder stops playback.
Note
To avoid malfunction, do not unplug the power cord from the wall outlet during printing or other operation.
When you press STANDARD while pausing (precise memory function)
If your camcorder has a fine-synchro edit function, the camcorder automatically rewinds, resumes playback, and pauses at the point you designated (precise memory function). This function improves the print picture quality.
Notes
- If you do not use a CLANC cable to connect the printer to the camcorder, precise memory function is not available. The print quality may be poor if you designate the picture during pause.
- The picture designated using precise memory function may not be the very exact picture you designated when pressing STANDARD.
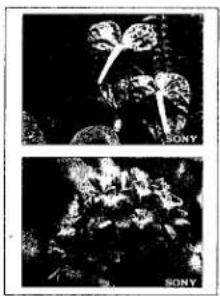
Printing half-size pictures
natural_image
Two grayscale microscopic images showing cellular or tissue structures labeled 'SONY' (no text or symbols present)
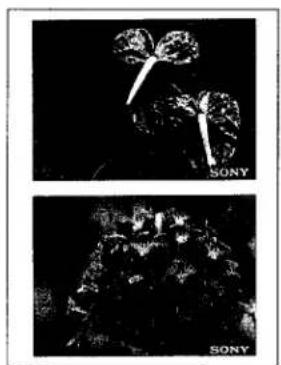
To print only the upper or lower half Press only UPPER or LOWER, then press PRINT.
You can check the pictures before printing
Press MEMORY RECALL. Each time you press the button, the upper half picture and lower half picture appear on the TV screen alternately.
To print the designated picture again
Press PRINT while the selected pictures appear sideways on the TV screen.
You can print two half-size pictures on the upper and lower halves of a print paper.
1 Start playing back the camcorder.
2 Press UPPER when the picture you want to print on the upper half appears on the TV screen.
CONFIRM
3 Press SOURCE.
The playback picture appears on the TV screen again.
4 Press LOWER when the picture you want to print on the lower half appears on the TV screen.
CONFIRM
5 Press PRINT.
The designated picture disappears and the printer starts preparing pictures for printing. Then, printing starts. When printing ends, the designated pictures appear sideways on the TV screen as shown on the right.

natural_image
Black-and-white photo of a person in camouflage uniform with a white object, no visible text or symbolsPrinting 1/4- or 1/16-size pictures
“

natural_image
Black-and-white collage of four animal photos: a parrot, a rabbit, a monkey, and a dog (no visible text or symbols)You can make prints divided into 1/4- or 1/16-size pictures. Each print has 4 (when 1/4-size) or 16 (when 1/16-size) pictures.
The pictures are designated from the upper left to the lower right. You can also directly designate where to put each picture.
1
Press SPLIT MODE until "SPLIT 4" or "SPLIT 16" appears on the TV screen.
The flashing frame on the TV screen shows that the picture is to be printed on the corresponding position of the print.

natural_image
Simple line drawing of a sunburst with four square targets (no text or symbols)
2
Start playing back the camcorder.
3
When the playback picture you want to print appears on the TV screen, press STANDARD.

natural_image
Black-and-white photo of a parrot perched on a surface, no visible text or symbols4
Press SOURCE.
The playback picture appears on the TV screen again. The frame where you've stored the picture changes to a painted square. The frame where you'll store the next picture starts flashing.
5
Repeat steps 3 and 4 until you have designated 4 (or 16) pictures.
The designated pictures appear on the TV screen in 1/4- or 1/16-size.
When the playback picture is displayed on the TV screen, you can check the pictures by pressing MEMORY RECALL.
6
Press PRINT.
To return to normal print mode Press SPLIT MODE until "SPLIT 4 and "SPLIT 16" disappear.
You can designate the position for the pictures
Press POSITION repeatedly until the frame you want to designate flashes.
To re-designate printing pictures
Press SOURCE, and press POSITION repeatedly until the frame you want to designate flashes. Then store the picture again.
Making multiple prints

natural_image
Black-and-white abstract image with layered textures and no visible text or symbols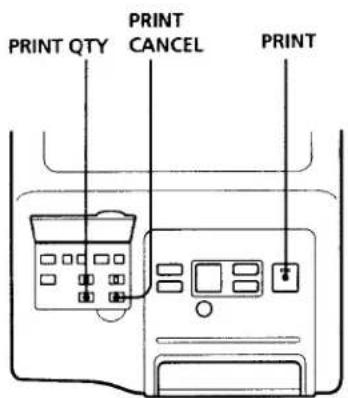
You can automatically make up to 25 sheets of the same print consecutively. Before printing, designate the picture and set the number of prints. Multiple printing is available for every print feature that this printer supports.
1 Designate the picture tc print.
2 Press PRINT QTY so that the number of prints you want appears on the TV screen.
Each time you press the button, the number increases by one. If you press PRINT QTY while "25" appears on the TV screen, the number returns to 1.
| CONFIRM | QTY:12 |
3 Press PRINT.
Each time the printer completes a print, the number displayed on the TV screen decreases by one.
To stop printing
Press PRINT CANCEL. Multiple printing stops. The number of prints returns to 1.
Printing with a calendar
“
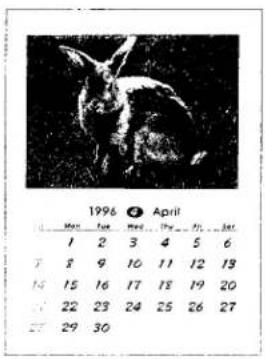

You can create a calendar with a picture printed on the upper half for any month until December 2004.
1 Designate the picture to print.
2 Press TEMPLATE until "CALENDAR" appears on the TV screen.
CALENDAR▶1.95
3 Press NEXT until the desired date appears.
Each time you press the button, the date increases by one month. The date returns to the first by holding NEXT down. The display "1.96" indicates January 1996.
CALENDAR▶4.96
4 Press EXEC.
The designated picture disappears and the printer starts preparing the picture for printing.
Then, the picture shown on the right appears.

To reset to normal printing
Press TEMPLATE until no template indication is displayed.
When designating two pictures in half-size mode
The picture displayed when you press EXEC is printed on the upper half of the calendar.
The other picture is deleted.
Note
This calendar prints only Sundays in red. National holidays are printed in black.
5 Press PRINT.
Printing on sticker papers
“

natural_image
Grid of 16 identical black-and-white portrait images arranged in 3x3 grid, no text or symbols visible.You can print the same 16 pictures divided into 1/16-size on a sticker paper to create your own labels, name cards, and so on.
Examples

1 Designate the picture to print.
2 Press TEMPLATE until "NAME CARD" appears on the TV screen.


3 Press PRINT.
To reset to normal printing
Press TEMPLATE until no template indication is displayed.
You can make a print with the shorter side at the top
When you record pictures on the camcorder, shoot the picture with the shorter side at the top by turning the camcorder sideways on a tripod. Then make a print of the picture.
Creating a video cassette label
natural_image
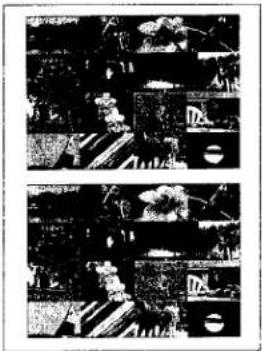
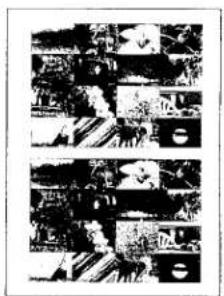
Two identical black-and-white panels showing abstract landscape scenes with no visible text, numbers, or symbols.You can create video cassette labels to identify the contents of your video tapes.
The print size is roughly the same as the index label of an 8mm video cassette or the cassette label of a VHS video cassette. The print has two same pictures on the upper and lower halves of a print paper.
You can designate the 1/4- or 1 '16- size picture, or a cropped picture as the printed picture. For easy creation of labels, use the VPM-P50WS video print pack (sticker type).

1 Designate the picture to print.
2 Press TEMPLATE until "LABEL" appears on the TV screen.

3 Press PRINT.
To reset to normal printing
Press TEMPLATE until no template indication is displayed.
If you designate two pictures in half-size print mode
The picture that appears on TV screen is printed up and down.
Cropping a picture
“
natural_image
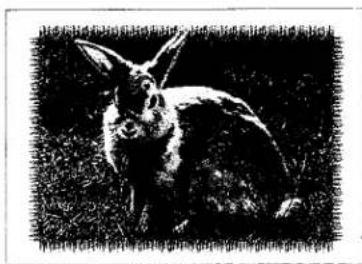
Black-and-white illustration of a fox standing on grass (no text or symbols visible)You can crop the picture using the following five patterns: Heart, Oval, Wave, Brush, Tapestry
1 Designate the picture to be cropped.
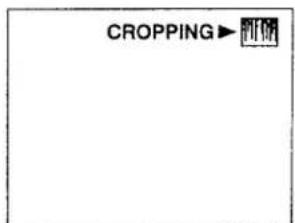
2 Press TEMPLATE until "CROPPING" appears on the TV screen.


3 Press NEXT until the desired crop pattern appears.
Each time you press the button, the pattern changes in the following order: Heart → Oval → Wave → Brush → Tapestry → Heart → ....
4 Press EXEC.
The designated crop pattern and the picture to be cropped are stored in the printer.
5 Press PRINT.
To reset to normal printing
Press TEMPLATE until no template indication is displayed.
Note
Once you press EXEC, you cannot change the picture or the crop pattern. To change the picture, start again from step 1.
Combining several pictures
“

natural_image
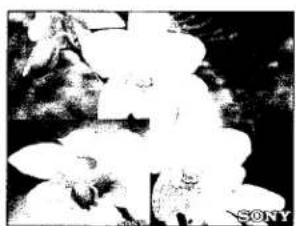
Black-and-white illustration of two orchid flowers with visible petals and centers, labeled 'SONY' in the corner (no other text or symbols)You can make prints that combine several pictures, such as the 1/4- or 1/16-size pictures with a full-size picture (picture in picture).
1 Designate the background picture using STANDARD.
2 Press SOURCE. The playback picture appears on the TV screen.
3 Press SPLIT MODE until "SPLIT 4" or "SPLIT 16" appears.
4 Press POSITION until the frame you want to designate flashes.


flowchart
graph TD
    A["Input 1"] --> C["Central Node"]
    B["Input 2"] --> C
    D["Input 3"] --> C
    E["Output 1"] --> C
    F["Output 2"] --> C
5 When the playback picture you want to print appears on the TV screen, press STANDARD.
The designated picture is stored in the designated position.

natural_image
Black-and-white photo of a cluster of white flowers with visible petals and stems (no text or symbols)6 Repeat steps 2 to 5 until you designate all desired pictures.
7 Press PRINT.
To reset to normal printing Press SPLIT MODE until the "SPLIT 4" or "SPLIT 16" disappears.
Note
Press STANDARD to designate the background picture in step 1. The picture designated by pressing the UPPER or LOWER button cannot be used for the background picture.
Adjusting the picture

You can adjust the quality of prints.
You can also adjust the source (input) picture quality if the picture quality differs between the printer and the camcorder.
Adjusting the picture quality of prints
Since you cannot determine the adjusted picture quality on the TV screen, check the printed picture.
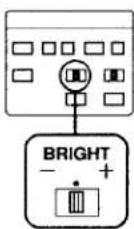
To adjust the brightness of prints
Set BRIGHT to the desired position.
- Set to “-” to decrease the brightness of the print.
- Set to “+” to increase the brightness of the print.
To adjust the sharpness of prints
Set SHARP to the desired position.
- Set to “-” to decrease the sharpness of the print.
- Set to "+" to increase the sharpness of the print.

Adjusting the source picture quality
You can also adjust the source (input) picture quality before designating the picture. Normally, since you do not have to adjust it, keep the controls at the center position.
To adjust the hue of the source picture
Adjust the hue of the picture by turning the HUE control.
- Turning to the left makes the hue redder.
- Turning to the right makes the hue greener.

To adjust the color of the source picture
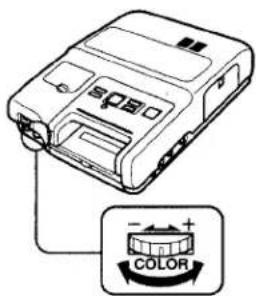
Adjust the color of the picture by turning the COLOR control.
- Turning to the left makes the color lighter.
- Turning to the right makes the color darker.
Precautions
“
On safety
- Operate the printer on 120 V AC, 60 Hz only.
- Be careful not to set or drop any heavy objects on the power cord, or to damage the cord in any way. Never operate this printer with a damaged power cord.
- Should any solid object or liquid fall into the cabinet, unplug the printer and have it checked by qualified personnel before operating it any further.
- Never disassemble the printer.
- To disconnect the cord, pull it out by the plug. Never pull the cord itself.
- When the printer is not going to be used for an extended period of time, disconnect the power cord from the wall outlet.
- Do not handle the printer roughly.
- To reduce the risk of electrical shock, always unplug the printer from electrical outlet before cleaning and servicing the printer.
On installation
- Avoid placing the unit in a location subject to:
- vibration
- high humidity
- excessive dust
- direct sunlight
- extremely high or low temperatures
- Do not use electronic equipment near the unit. The unit will not work properly in electromagnetic fields.
- The unit is designed to operate horizontally. Never attempt to operate the printer in a tilted position. If the unit was placed on its side or with its top panel facing down, make sure to remove the paper tray and check that print papers are set properly before starting operation.
- Do not place heavy objects on the printer.
- Leave enough room around the printer so that the ventilation holes are not blocked. Blocking these holes may cause internal heat build-up.
On operation
- If the temperature inside the unit rises too high, the internal fan automatically starts rotating to keep the appropriate temperature for printing.
- To avoid malfunction, do not record on the VCR the output signal from the MONITOR OUT jack of the unit.
On moisture condensation
If the printer is brought directly from a cold location to warm location or placed in an extremely warm or humid room, moisture may condense inside the unit. In such cases the printer will probably not work properly and may even develop a fault if you persist in using it. If moisture condensation occurs, turn off the power and do not use the printer for at least one hour.
On cleaning
Clean the cabinet, panel and controls with a soft dry cloth, or a soft cloth lightly moistened with a mild detergent solution. Do not use any type of solvent, such as alcohol or benzine, which may damage the finish.
On the print cartridge and print paper
On the print cartridge
To replace the print cartridge
If the completely used print cartridge is still inserted in the unit, the error message "Out of ink ribbon. Insert new cartridge." appears on the TV screen. Pull down the lever and remove the print cartridge as illustrated below to replace the print cartridge with a new one. You cannot reuse a print cartridge that has been completely used.

When you use a partially-used print cartridge
Remove any slack (①). Then, wind the ink ribbon until the black bar appears on the left (②).

While pressing the center of the reel, wind the ink ribbon until the black bar appears on the left.
Troubleshooting
“
If the ink ribbon should tear
Repair the ribbon with transparent tape. There should be no problem with using the remaining portion of the ribbon.

natural_image
Simple line drawing of a rectangular electronic component with a curved arrow indicating direction (no text or symbols)Repair the ribbon with transparent tape.
Notes on storing the print cartridge
- Avoid placing the cartridge in a location subject to:
- high temperatures
-high humidity
- excessive dust
- direct sunlight
- When you are going to store a partially-used cartridge for an extended period of time, store it in its original bag.
On the print paper
Notes on storing the print paper
- Avoid placing the print paper in a location subject to:
– high temperatures
-high humidity
- excessive dust
- direct sunlight
- When you are going to store a partially-used print paper for an extended period of time, store it in its original bag.
Before printing
Do not write or print patterns and characters on the print paper before printing.
If you run into any problem using the printer, use the following check list.
Should any problem persist after you have made the checks below, consult your nearest Sony dealer or Sony service facility.
If the error message appears on the TV screen, see "If these error messages appear" on the next page.
The power is not on.
- Connect the AC power cord to a AC outlet securely.
There is no picture on the TV screen.
- Set the TV's input selector to video input.
Turn on the power of the TV, camcorder and printer. The camcorder's power may be turned off if the camcorder stands by for recording for about five minutes. Turn the power on again in this case.
◆ Connect the printer to the camcorder and TV correctly.
◆ Start playback on the camcorder (or VCR).
Cannot print.
◆ Insert the print paper into the paper tray.
◆ Press MEMORY RECALL and then press PRINT.
- Designate the picture by pressing STANDARD (or, UPPER or LOWER).
- Remove the jammed paper.
See "If the print paper jams" on the next page.
The color of the print is too light, or too dark.
- Set BRIGHT on the upper panel to "+" or "-"
The outline of the print is too dull, or too sharp.
- Set SHARP on the upper panel to "+" or "-"
The beeps sound.
- An unavailable button has been pressed during operation.
Cannot remove the print cartridge.
- Turn the power off. Remove the print cartridge when the rotation sound of the printer stops.
(continued)
Troubleshooting
If these error messages appear
Check the following to troubleshoot problems.
Please place Video Print Paper in tray.
→ Make sure that print papers are inserted in the paper tray.
→ Make sure that the paper tray is inserted firmly into place.
Please insert Video Print Cartridge.
→ Make sure that the print cartridge is inserted.
Please remove jammed paper from rear of unit.
- Remove the jammed print paper from the rear of the unit.
Please open paper tray and remove jammed paper.
- Remove the paper tray and remove the jammed print paper.
Out of ink ribbon. Insert new cartridge.
- The ink ribbon has been completely used up. Replace the print cartridge with a new one.
Print paper and ink ribbon are mismatched.
- Use the print cartridge and the print paper supplied in the same carton.
Please remove printed paper.
Too many prints are left on the paper outlet. Remove the prints.
Please wait while printer resets itself.
The temperature inside the printer is not suitable for printing. Wait until the unit starts printing again automatically. If the printer does not start printing even when the message disappears, press the PRINT.
Cannot print images. See instruction manual.
◆ Make sure that the camcorder starts playback.
If you use the CLANC cable to connect the printer, make sure that the CLANC cable is connected correctly and securely. If you use the VCR with the CLANC M/S mode switch, set to the "S" position.
If the print paper jams
If the print paper jams, the error message appears on the screen and printing stops. Remove the jammed paper according to the following procedures.
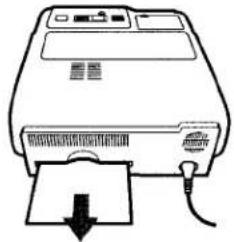
If the error message "Please remove jammed paper from rear of unit." appears on the TV screen
Remove the jammed paper from the rear of the unit.
natural_image
Line drawing of a printer with a download arrow indicating print (no text or symbols present)Remove the jammed paper.
If the error message "Please open paper tray and remove jammed paper."
Remove the paper tray and remove the jammed paper. Then make sure that the print papers are set in the tray properly and reinsert the tray.

Note
If the error message still appears on the TV screen after having removed the jammed paper, turn the power off and on again. In this case, the stored picture and various settings in memory will be canceled.
Specifications
“
Printing system Sublimation heat transfer printing
Number of picture elements
448 (V) x 708 (H) dot (for full-size printout)
Printing size 79 (V) x 109 (H) mm (3 1/4 x 4 3/8
inches) (for full-size printout)
Total gradation 256 levels (8 bits)
Printing time
Standard size printing:
Approx. 60 seconds per sheet
Half size printing:
Approx. 85 to 100 seconds per sheet
TV signal NTSC color system, EIA standard
Input/output connectors
INPUT VIDEO (NTSC composite video signal) input
Phono connector x1
1 Vp-p, 75 ohms (unbalanced), sync negative
INPUT S VIDEO (separate luminance (Y) and chrominance (C) signals) input
Mini DIN 4-pin connector x1, automatically selectable
Y: 1 Vp-p, 75 ohms (unbalanced), sync negative
C:0.28 Vp-p (color burst) 75 ohms (unbalanced)
MONITOR OUT (NTSC composite video signal) output
Phono connector x1
1 Vp-p, 75 ohms (unbalanced), sync negative
CLANC Stereo mini-mini jack x1
Video Print Cartridge and Video Print Paper
Video Print Cartridge for regular and sticker print paper for use only with PRINTERS bearing the VP trademark.
Video Print Paper for use only with PRINTERS bearing the VP trademark (100 x 140 mm (4 x 5 5/8 inches) sheets)
Power requirements
120 V AC, 60 Hz
Power consumption
100 W (when printing), 13 W (when not printing)
Operating temperature
5^ to 35^ (40^ to 95^)
Operating humidity
20% to 80%
Dimensions Approx. 260 x 106 x 364 mm (w/h/
d, excluding protruding parts)
(10^3/8 × 4^1/4 × 15^1/4 inches)
Mass Approx. 3.8 kg (9 lb 15 oz)
Supplied accessories
AC power cord (1)
Remote commander (1)
Size AA (R6) battery for remote commander (2)
Video connecting cable (1.5 m) (5 feet) (1)
Video print pack for trial use (1)
- Regular print paper (15 sheets)
- Sticker print paper (10 sheets)
- Video print cartridge (1 cartridge for 25 prints)
Design and specifications are subject to change without notice.
Optional print paper
Listed below are optional print packs.
Video Print Pack VPM-P50ST
One print cartridge for 50 prints and two 25-sheet packs of regular print paper
Video Print Pack VPM-P100ST
One print cartridge for 100 prints and four 25-sheet packs of regular print paper
Video Print Pack VPM-P50WS
One print cartridge for 50 prints and two 25-sheet packs of sticker print paper
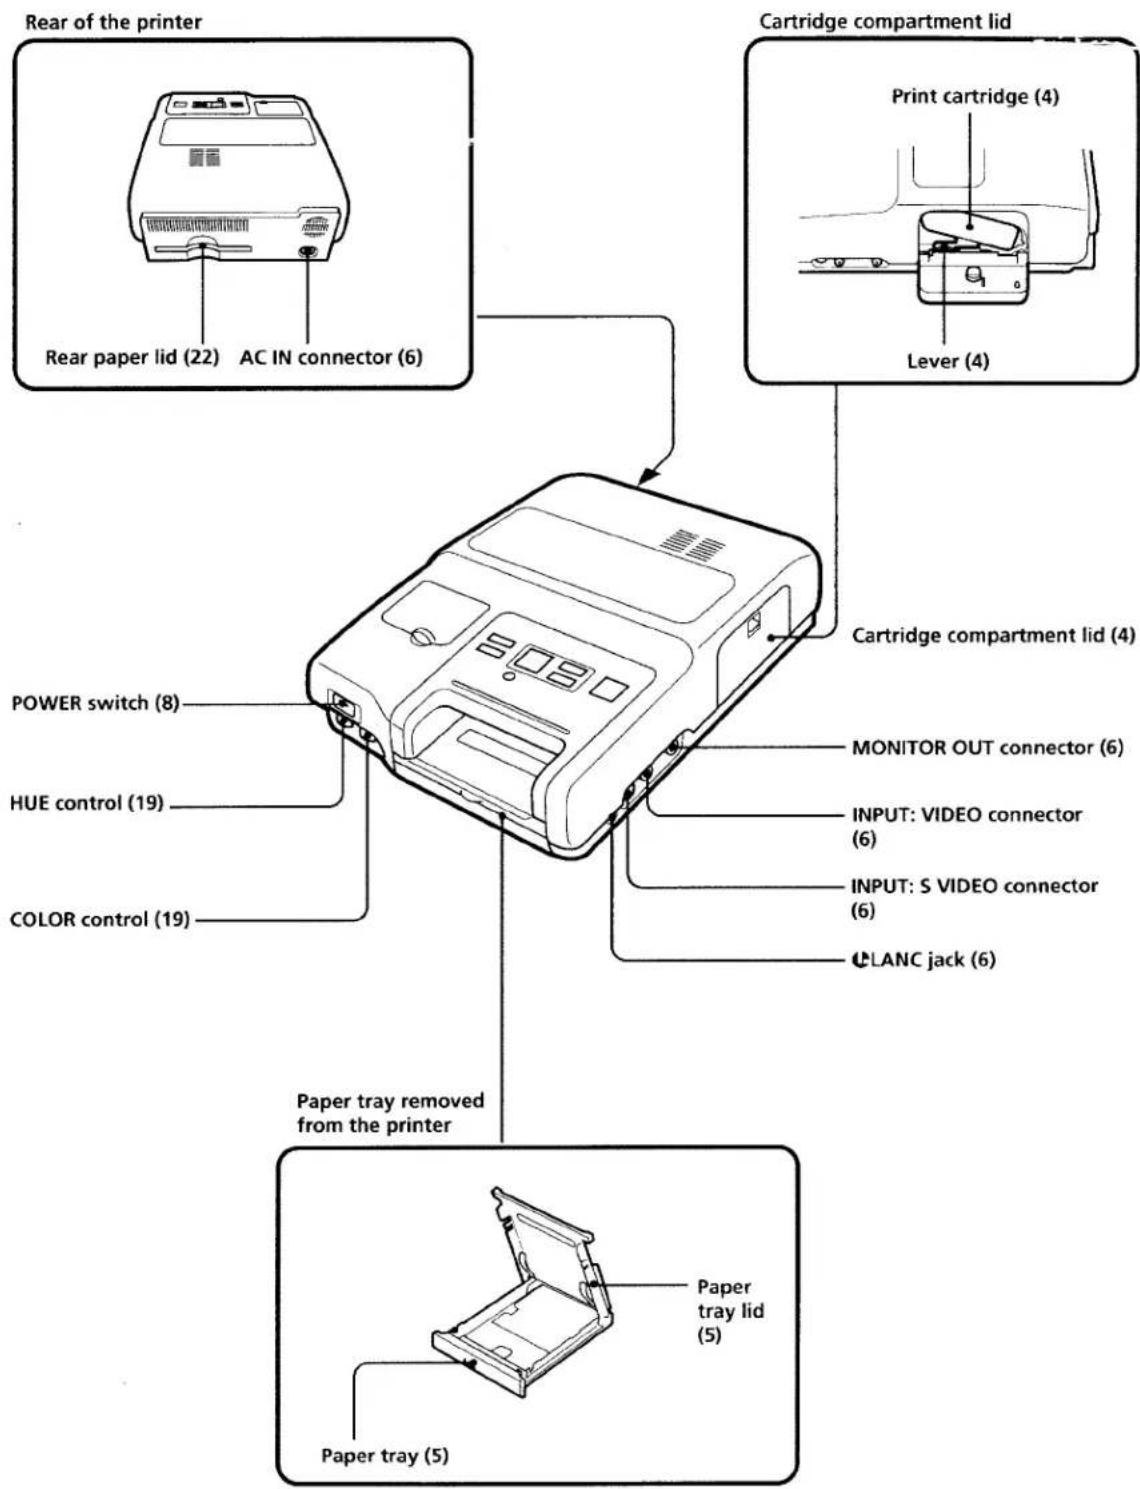
Index to parts and controls
For explanation of the use of each part, refer to the pages indicated in ().
Main unit

Index to parts and controls
7
Remote commander
The supplied remote commander has the same basic operation buttons as the main unit.
Point the head of the remote commander toward the remote sensor on the printer. You can operate the printer with the remote commander within 5 m (16 feet 5 inches) of the printer.

Notes
- Keep the remote sensor of the printer away from direct sunlight or the strong light of lighting equipment.
- Be careful that there is no obstacle between the printer and the remote commander.
Installing the batteries
1 Push to open the lid.

3 Replace the lid.

2 Install two size AA (R6) batteries as shown below.

Note
To avoid damage from possible battery leakage, remove the batteries when the commander will not be used for a long time.

[Unreadable]

7

[Non-Text]

[Non-Text]

[Non-Text]

[Non-Text]

[Non-Text]

[Non-Text]

[Non-Text]

[Non-Text]

[Non-Text]

[Non-Text]

[Non-Text]

[Non-Text]

[Non-Text]

[Non-Text]

[Non-Text]

[Non-Text]

[Non-Text]

[Non-Text]

[Non-Text]

[Non-Text]

[Non-Text]

[Non-Text]

[Non-Text]

[Non-Text]

[Non-Text]

[Non-Text]

[Non-Text]

[Non-Text]

[Non-Text]

[Non-Text]

[Non-Text]

[Non-Text]

[Non-Text]

[Non-Text]

[Non-Text]

[Non-Text]

[Non-Text]

[Non-Text]

[Non-Text]

[Non-Text]

[Non-Text]

“

[Non-Text]

[Non-Text]

[Non-Text]

[Non-Text]
[Non-Text]
[Non-Text]

•

[Non-Text]

[Non-Text]
[Non-Text]

[Non-Text]

[Non-Text]

[Non-Text]

[Non-Text]
[Non-Text]

[Non-Text]

[Non-Text]

[Non-Text]
[Non-Text]
[Non-Text]
[Non-Text]
[Non-Text]
[Non-Text]
[Non-Text]

[Non-Text]
[Non-Text]
[Non-Text]
[Non-Text]
[Non-Text]
[Non-Text]
[Non-Text]
[Non-Text]

[Non-Text]

[Non-Text]
[Non-Text]
[Non-Text]
[Non-Text]
[Non-Text]
[Non-Text]
[Non-Text]
[Non-Text]
[Non-Text]
[Non-Text]
[Non-Text]
[Non-Text]
[Non-Text]
[Non-Text]
[Non-Text]
[Non-Text]
[Non-Text]

•

[Non-Text]
[Non-Text]
[Non-Text]
[Non-Text]
[Non-Text]
[Non-Text]
[Non-Text]
[Non-Text]
[Non-Text]
[Non-Text]
[Non-Text]
[Non-Text]
[Non-Text]
[Non-Text]
[Non-Text]
[Non-Text]
[Non-Text]
[Non-Text]
[Non-Text]
[Non-Text]
[Non-Text]
[Non-Text]
[Non-Text]
[Non-Text]
[Non-Text]
[Non-Text]
[Non-Text]
[Non-Text]
[Non-Text]
[Non-Text]
[Non-Text]
[Non-Text]
(1)
•
[Non-Text]
[Non-Text]
[Non-Text]
[Non-Text]
[Non-Text]
[Non-Text]
[Non-Text]

[Non-Text]
[Non-Text]
[Non-Text]
[Non-Text]
[Non-Text]
[Non-Text]
[Non-Text]
[Non-Text]
[Non-Text]
[Non-Text]
[Non-Text]
[Non-Text]
[Non-Text]
[Non-Text]
[Non-Text]
[Non-Text]
[Non-Text]
[Non-Text]
[Non-Text]
Index
Full-size picture 9

natural_image
Black-and-white photo of a rabbit standing on grass (no text or symbols visible)1/4- or 1/16-size picture 12
natural_image
Black-and-white photo of two people in a natural setting, one standing on the ground and the other seated, with no visible text or symbols.Name card 15

natural_image
Grid of 16 identical black-and-white portraits of a man, no text or symbols presentHalf-size picture 11
natural_image
Two-panel scientific image showing plant structures with labeled 'SONY' in corners (no text or symbols within the images)Calendar 14

Cassette label 16
natural_image
Black-and-white illustration of two identical scenes with figures and animals, no visible text or symbolsCropped picture 17

natural_image
Black-and-white photo of a rabbit standing on grass (no text or symbols visible)Combined picture 18
natural_image
Black-and-white photo of a stylized, rounded creature resembling a rabbit or serpent-like form (no text or symbols visible)Others
Adjusting the picture 19 Hooking up
Connecting to a camcorder 6
Connecting to a VCR 7
Inserting the ink (print cartridge) 4
Inserting the print papers 5
Making multiple prints 13
Optional print paper 23
Precise memory function 10
Printing TV programs 8
Troubleshooting 21


- Color Video Printer
- WARNING
- Owner's Record
- Information
- CAUTION
- Table of Contents
- Getting Started
- Printing
- Other Print Options
- For Your Information
- Inserting the ink (print cartridge)
- 3
- If the cartridge compartment lid does not close
- 1
- Notes
- 2
- Inserting the print papers
- Push the paper tray.
- Open the lid of the paper tray and make sure that the spacer is raised.
- Shuffle the print papers to prevent them from sticking together.
- Check that the corners of the print papers are not bent, then set the papers in the paper tray with the printing surface facing up.
- Close the lid and push the paper tray back into the printer.
- Hooking up
- Connecting to a camcorder
- If your camcorder has an S VIDEO output connector
- If your camcorder has a ◎LANC jack
- Note
- Connecting to a VCR
- Connect the printer's INPUT: VIDEO to the VCR's VIDEO output jack, using a video cable (not supplied).
- If your VCR has an S VIDEO output connector
- If your VCR has a QLANC jack
- Connect the printer's MONITOR OUT to the TV's VIDEO input jack, using the supplied video cable.
- Connect the supplied AC power cord to the AC IN jack of the printer and a wall outlet.
- When you want to print TV programs
- Checking the connections
- Printing a full-size picture
- Start playing back the camcorder.
- Press STANDARD when the picture you want to print appears on the TV screen.
- Press FIELD/FRAME if the designated picture is blurred.
- Make sure that "CONFIRM" appears on the TV screen, then press PRINT.
- Remove the print from the printer.
- To re-designate the picture before printing
- To check the designated picture while the playback picture appears on the TV screen
- To print the designated picture again
- The camcorder automatically pauses when you press STANDARD
- When you press STANDARD while pausing (precise memory function)
- Printing half-size pictures
- You can check the pictures before printing
- Press UPPER when the picture you want to print on the upper half appears on the TV screen.
- Press SOURCE.
- Press LOWER when the picture you want to print on the lower half appears on the TV screen.
- Press PRINT.
- Printing 1/4- or 1/16-size pictures
- 4
- 5
- 6
- Making multiple prints
- Designate the picture tc print.
- Press PRINT QTY so that the number of prints you want appears on the TV screen.
- Press PRINT.
- To stop printing
- Printing with a calendar
- Printing on sticker papers
- To reset to normal printing
- You can make a print with the shorter side at the top
- Creating a video cassette label
- Cropping a picture
- Combining several pictures
- Adjusting the picture
- Adjusting the picture quality of prints
- To adjust the brightness of prints
- To adjust the sharpness of prints
- Adjusting the source picture quality
- To adjust the hue of the source picture
- To adjust the color of the source picture
- Precautions
- On safety
- On installation
- On operation
- On moisture condensation
- On cleaning
- On the print cartridge and print paper
- On the print cartridge
- To replace the print cartridge
- When you use a partially-used print cartridge
- Troubleshooting
- If the ink ribbon should tear
- Notes on storing the print cartridge
- On the print paper
- Notes on storing the print paper
- Before printing
- The power is not on.
- There is no picture on the TV screen.
- Cannot print.
- The color of the print is too light, or too dark.
- The outline of the print is too dull, or too sharp.
- The beeps sound.
- Cannot remove the print cartridge.
- If these error messages appear
- Please place Video Print Paper in tray.
- Please insert Video Print Cartridge.
- Please remove jammed paper from rear of unit.
- Please open paper tray and remove jammed paper.
- Out of ink ribbon. Insert new cartridge.
- Print paper and ink ribbon are mismatched.
- Please remove printed paper.
- Please wait while printer resets itself.
- Cannot print images. See instruction manual.
- If the print paper jams
- If the error message "Please remove jammed paper from rear of unit." appears on the TV screen
- If the error message "Please open paper tray and remove jammed paper."
- Specifications
- “
- Supplied accessories
- Optional print paper
- Video Print Pack VPM-P50ST
- Video Print Pack VPM-P100ST
- Video Print Pack VPM-P50WS
- Index to parts and controls
- Main unit
- Remote commander
- Installing the batteries
- Index
- Others
Marke : SONY
Modell : CVP-M1
Kategorie : Drucker