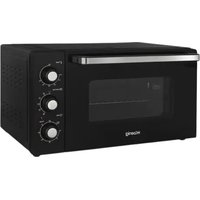
fo42 - Ofen H.KOENIG - Kostenlose Bedienungsanleitung
Finden Sie kostenlos die Bedienungsanleitung des Geräts fo42 H.KOENIG als PDF.


Waehlen Sie Ihre Sprache und Ihre E-Mail-Adresse: wir senden Ihnen eine speziell uebersetzte Version.
| Produkttyp | Elektroofen |
| Marke | H.Koenig |
| Modell | fo42 |
| Kapazität | 42 Liter |
| Nennleistung | 2000 W |
| Spannung / Frequenz | 230-240 V ~ 50-60 Hz |
| Temperaturbereich | 90 °C bis 230 °C (Low-Modus für Garen bei Raumtemperatur) |
| Gararten | Heißluft + Ober- und Unterhitze, Heißluft + Oberhitze, Ober- und Unterhitze, Grill + Oberhitze, alle Elemente + Heißluft + Grill |
| Timer | Bis zu 90 Minuten oder Dauerbetrieb (Position Stay On) |
| Mitgeliefertes Zubehör | Metallgitter, herausnehmbare Schale, Krümelblech, Drehspieß mit Gabeln, Griff für Schale |
| Türmaterial | Gehärtetes Sicherheitsglas |
| Drehspießfunktion | Ja, mit rotierendem Spieß |
| Reinigung | Innen und außen: feuchtes Seifentuch; nicht in Wasser eintauchen |
| Garantie | 2 Jahre |
| Maximales Gewicht auf Gitter/Schale | 3,0 kg (gleichmäßig verteilt) |
| Betriebsanzeige | Leuchtanzeige |
| Sicherheitsvorrichtung | Automatische Abschaltung bei Timer-Ende, Warmhinweise für heiße Oberflächen, keine nicht empfohlenen Metallutensilien verwenden |
Häufig gestellte Fragen - fo42 H.KOENIG
Wie reinige ich den H.Koenig fo42 Ofen?
Trennen Sie das Gerät vom Stromnetz und lassen Sie es abkühlen. Entfernen Sie das Zubehör (Gitter, Schale, Krümelblech) und waschen Sie es mit milder Seifenlauge. Reinigen Sie das Innere und die Glastür mit einem feuchten Seifentuch und wischen Sie dann mit einem trockenen Tuch nach. Die Außenseite wird mit einem feuchten Tuch gereinigt. Verwenden Sie niemals scheuernde Reinigungsmittel oder Metallschwämme. Tauchen Sie den Ofen niemals in Wasser.
Kann ich Alufolie im Ofen verwenden?
Nein, es ist verboten, das Krümelblech oder andere Teile des Ofens mit Alufolie abzudecken, da dies zu Überhitzung führen kann.
Wie verwende ich die Drehspießfunktion?
Fädeln Sie das Fleisch auf den Spieß, befestigen Sie es mit den Gabeln und Rändelschrauben. Setzen Sie die Schale in die untere Position, um die Säfte aufzufangen (fügen Sie etwas Wasser hinzu). Stecken Sie den Spieß in den Ofen: eine Seite in die Stützöffnung, die andere auf die Stütze. Stellen Sie den Funktionsschalter auf den Modus Drehspieß + Oberhitze, den Thermostat auf 230 °C und den Timer entsprechend der gewünschten Garzeit ein.
Was ist die maximale Temperatur des Ofens?
Die maximale Temperatur beträgt 230 °C. Der Thermostat bietet auch einen Low-Modus (Garen bei Raumtemperatur) und Stufen von 90 °C, 120 °C, 150 °C, 180 °C, 210 °C und 230 °C.
Schaltet sich der Ofen nach dem Garen automatisch aus?
Ja, wenn der Timer auf Null geht, ertönt ein Signalton und der Schalter kehrt automatisch in die Position Off zurück und unterbricht die Stromzufuhr. Sie können auch die Position 'Stay On' für den Dauerbetrieb ohne automatische Abschaltung verwenden.
Kann ich tiefgekühlte Lebensmittel direkt garen?
Ja, aber die Garzeiten sind länger als bei Lebensmitteln mit Raumtemperatur. Verwenden Sie vorzugsweise ein Fleischthermometer, um den Garzustand zu überprüfen.
Was tun, wenn der Ofen nicht heizt?
Überprüfen Sie, ob der Stecker richtig eingesteckt ist und der Funktionsschalter auf einer anderen Position als Bereitschaft (Symbol □) steht. Stellen Sie sicher, dass der Thermostat auf eine geeignete Temperatur eingestellt ist. Wenn das Problem weiterhin besteht, wenden Sie sich an den H.Koenig Kundendienst.
Wie stelle ich den Timer auf Dauerbetrieb ein?
Drehen Sie den Timer-Knopf nach links (gegen den Uhrzeigersinn) bis zur Position 'Stay On'. Der Ofen bleibt so lange eingeschaltet, bis Sie ihn manuell auf Off drehen.
Kann das Zubehör in die Spülmaschine?
Ja, das Gitter und die Schale können in der Spülmaschine oder von Hand mit heißem Seifenwasser gereinigt werden. Trocknen Sie sie gründlich, bevor Sie sie wieder einsetzen.
Was tun bei einer Störung oder Fehlfunktion?
Besuchen Sie den Hilfebereich auf der SAV H.Koenig Website (https://sav.hkoenig.com) oder füllen Sie das Support-Formular aus. Die 2-jährige Garantie deckt normale Ausfälle ab, nicht jedoch Schäden durch unsachgemäße Verwendung.
Benutzerfragen zu fo42 H.KOENIG
0 Frage zu diesem Gerät. Beantworten Sie die, die Sie kennen, oder stellen Sie Ihre eigene.
Eine neue Frage zu diesem Gerät stellen
Noch keine Fragen. Stellen Sie die erste.
Laden Sie die Anleitung für Ihr Ofen kostenlos im PDF-Format! Finden Sie Ihr Handbuch fo42 - H.KOENIG und nehmen Sie Ihr elektronisches Gerät wieder in die Hand. Auf dieser Seite sind alle Dokumente veröffentlicht, die für die Verwendung Ihres Geräts notwendig sind. fo42 von der Marke H.KOENIG.
BEDIENUNGSANLEITUNG fo42 H.KOENIG
H
fo42
Instruction Manual
Manuel d'instructions
Bedienungsanleitung
Gebruiksaanwijzing
Manual de instrucciones
Manuale d'uso

natural_image
Exterior view of a black Koenig microwave oven with control knobs and a clear glass door (no text or symbols on the device itself)
Electric oven
Four électrique
Elektrobackofen
Elektrische oven
Horno elèctrico
Forno elettrico

ENGLISH
IMPORTANT SAFEGUARDS
When using an electrical appliance, basic safety precautions should always be followed, including the following:
1. Read all instructions.
2. Do not touch hot surfaces. Use handles or knobs.
3. Close supervision is necessary when any appliance is used by or near children.
4. To protect against electric shock, do not place any part of the electric oven in water or other liquid.
5. Do not let cord hang over edge of table or counter, or touch hot surfaces.
6. Do not operate appliance with damaged cord or plug or after the appliance malfunctions, or has been damaged in any manner, return appliance to the nearest Authorized Service Center for examination, repair, or adjustment.
7. The use of accessory attachments not recommended by the appliance manufacturer may cause hazard or injury.
8. When operating the oven, keep at least four inches of space on all sides of the oven to allow for adequate air circulation.
9. Unplug from outlet when not in use, or before cleaning. Let it to cool before putting on or taking parts, or before cleaning.
10. To disconnect, turn the control to STOP, then unplug the plug. Always hold the plug, but never pull the cord.
11. Do not cover CRUMB TRAY or any part of the oven with metal foil. This may cause overheating of the oven.
12. Do not clean with metal scouring pads. Pieces can break off the pad and touch electrical parts, creating a risk of
electric shock.
13. Oversized foods or metal utensils must not be inserted in a electric oven as they may create a fire or risk of electric shock.
14. A fire may occur if the oven is covered or touching flammable material, including curtains, draperies, walls, and the like, when in operation. Do not store any item on the oven during operation.
15. Extreme caution should be exercised when using containers constructed if anything other than metal or glass.
16. Do not place any of the following materials in the oven: cardboard, plastic, paper, or anything similar.
17. Do not store any materials, other than manufacturer's recommended accessories, in this oven when not in use.
18. Always wear protective, insulated oven mitts when inserting or removing items from the hot oven.
19. This appliance has a tempered, safety glass door. The glass is stronger than ordinary glass and more resistant to breakage. Tempered glass can break, but the pieces will not have sharp edges. Avoid scratching door surface or nicking edges. If the door gas a scratch or nick, contact our consumer relations line before using the oven.
20. Do not use outdoors.
21. Do not use appliance for other than intended use.
22. This appliance is for HOUSEHOLD USE ONLY.
23. The temperature of the door or the outer surface may be higher when the appliance is working.
24. Protect against hurt by sharp edge when action.
25. Temperature of accessible surfaces may be high when the appliance is operating.
26. Do not rest cooking utensils or baking dishes on glass door.
27. This appliance may be used by persons with reduced physical, sensory or mental capabilities or lack of experience or knowledge, provided that they are supervised or instructed in the safe use of the appliance and that they fully understand the potential hazards.
28. Children should be supervised to ensure that they do not play with the appliance.
29. The weight of the food which is put on the S3 Food Tray/Wire Rack can not be over 3.0kg. (just for reference) (The food can not concentrate on one side of the S3 Food Tray/Wire Rack, you would better try you best to make the food put on the S3 Food Tray/Wire Rack evenly).
30. For appliance with type Y attachment, if the supply cord is damaged, it must be replaced by the manufacturer, its services agent or similarly qualified persons in order to avoid a hazard.
31. Rear surface of appliances should be placed against a wall.
32. WARNING: This appliance includes a heating function. Surfaces, other than the functional surfaces may develop high temperatures. Since temperatures are perceived differently by different people, this device should be used with CAUTION. Hold the appliance exclusively to grip surfaces intended to hold and use such heat protection measures as heat protection Gloves or pot holders. Areas which are not intended to grips must be given sufficient time to cool.
33. Do not place on or near a hot gas or electric burner, or in a heated oven.
34. Extreme caution must be used when moving an appliance containing hot oil or other hot liquids.
35. Turn the timer knob to "off" position to shut off the appliance.
36. Appliances are not intended to be operated by means of an external timer or separate remote-control system.
37. This appliance may be used by children of at least 8 years of age, as long as they are supervised and have been given instructions about using the appliance safely and are fully aware of the dangers involved.
38. Cleaning and maintenance should not be carried out by children unless they are at least 8 years of age and are supervised by an adult.
39. Keep the appliance and its power cord out of reach of children under 8 years of age.
40. When using electrical equipment, safety precautions must always be taken to prevent the risk of fire, electric shock and/or injury in the event of misuse.
41. Make sure that the voltage rating on the typeplate corresponds to your main voltage of your installation. If this is not the case, contact the dealer and do not connect the unit.
42. Never leave the unit unattended while in operation.
43. Never open the appliance from the front, always position yourself slightly to the side to avoid burning yourself with steam.
44. The device must not be used if it has been dropped, it obvious signs of damage are visible or if it has leaks.
45. Your appliance has been designed for household use only. It was not designed to be used in the following cases which are not covered by the warranty:
- in kitchen areas reserved for staff in shops, offices and other professional environments,
- in farm inns,
- by customers of hotels, motels and other residential environments,
- in bed and breakfast type environments.
CAUTION: APPLIANCE SURFACES ARE HOT AFTER USE.ALWAYS wear protective, insulated oven gloves when touching hot oven or hot dishes and food, or when inserting or removing rack, pans or baking dishes.
SAVE THESE INSTRUCTIONS
Before Using Your Electric Oven
Before using your convection electric oven for the first time, be sure to:
1. Unpack the unit.
2. Remove the baking tray and the grill. Wash the racks and pans in hot sudsy water or in dishwasher.
3. Thoroughly dry all accessories and re-assemble in oven. Plug oven into outlet and you are ready to use your new Electric Oven.
4. After re-assembling your oven, we recommend that you run it at MAX temperature for approximately 15 minutes to eliminate the smells of oil that may remain after shipping.
COMPONENTS:


1 Rotisserie rod 7 Function knob 2 Wire rack 8 Indicator 3 Food tray 9 Timer knob 4 Crumb tray 10 Heating element 5 Food tray handle 11 Glass door 6 Thermostat knob 12 Door handle
USING YOUR ELECTRIC OVEN
Please familiarize yourself with the following oven functions and accessories prior to first use:
① Wire Rack: For toasting, baking, and general cooking in casserole dishes and standard pans.
② Food Tray: For use in broiling and roasting meat, poultry, fish, and various other foods.
③ Rotisserie Rod: Use to roast a variety of meats and poultry.
④ Crumb Tray: For collecting fallen oil or crumb.
⑤ Food Tray Handle: For removing tray or rack.
⑥ Thermostat knob: choose desired temperature from Low-90°C-230°C (Low is cooking at room temperature).
⑦ Timer knob: turn control to the left (counter - clockwise) and the oven will Stay On until manually shut off. To activate timer, turn to right (clockwise) for other use. A bell will sound at end of programmed time.
⑧ Function knob: there are five modes(□ stand-by mode, 📋 convection + upper and lower heating elements, 🌐 convection + upper heating elements, 🌐 upper and lower heating elements, 🌒 rotisserie + upper heating elements, 🌘 upper and lower heating elements + convection + rotisserie)
⑨ Indicator: it is illuminated whenever oven is turned on.
ROTISSERIE ROD USING TIPS
1. Insert the fork into the rod until near the end of the rod and then secure with thumbscrew
2. Insert the food from the other side of the rod.
3. Place second fort into other side of the rod, and then secure with thumbscrew. Check that the food is in the center of the rod firmly.
4. Insert the rod with food into the oven. Insert the one side of the rod into the support-hole of the oven. And then place the other side of the rod onto the support-bracket of the oven.
CONTROL PANEL

radar
| Time | Temperature (°C) |
|------|-------------------|
| 0 | 230 |
| 1 | 210 |
| 2 | 180 |
| 3 | 150 |
| 4 | 120 |
| 5 | 90 |
| 6 | Off |
| 7 | Off |
| 8 | Off |
| 9 | Off |
| 10 | Off |
| 11 | Off |
| 12 | Off |
| 13 | Off |
| 14 | Off |
| 15 | Off |
| 16 | Off |
| 17 | Off |
| 18 | Off |
| 19 | Off |
| 20 | Off |
| 21 | Off |
| 22 | Off |
| 23 | Off |
| 24 | Off |
| 25 | Off |
| 26 | Off |
| 27 | Off |
| 28 | Off |
| 29 | Off |
| 30 | Off |
| 31 | Off |
| 32 | Off |
| 33 | Off |
| 34 | Off |
| 35 | Off |
| 36 | Off |
| 37 | Off |
| 38 | Off |
| 39 | Off |
| 40 | Off |
| 41 | Off |
| 42 | Off |
| 43 | Off |
| 44 | Off |
| 45 | Off |
| 46 | Off |
| 47 | Off |
| 48 | Off |
| 49 | Off |
| 50 | Off |
| 51 | Off |
| 52 | Off |
| 53 | Off |
| 54 | Off |
| 55 | Off |
| 56 | Off |
| 57 | Off |
| 58 | Off |
| 59 | Off |
| 60 | Off |
| 61 | Off |
| 62 | Off |
| 63 | Off |
| 64 | Off |
| 65 | Off |
| 66 | Off |
| 67 | Off |
| 68 | Off |
| 69 | Off |
| 70 | Off |
| 71 | Off |
| 72 | Off |
| 73 | Off |
| 74 | Off |
| 75 | Off |
| 76 | Off |
| 77 | Off |
| 78 | Off |
| 79 | Off |
| 80 | Off |
| 81 | Off |
| 82 | Off |
| 83 | Off |
| 84 | Off |
| 85 | Off |
| 86 | Off |
| 87 | Off |
| 88 | Off |
| 89 | Off |
| 90 | Off |
| 91 | Off |
| 92 | Off |
| 93 | Off |
| 94 | Off |
| 95 | Off |
| 96 | Off |
| 97 | Off |
| 98 | Off |
| 99 | Off |
| 100 | Off |
OPERATION INSTRUCTIONS
1. FUNCTION

This function is ideal for baking pork slice, chicken legs, chicken wings, potato flakes, poultry meat, chops, fish and so on with more evenly heating up.
Note: All toasting times are based on meats at refrigerator temperature. Frozen meats may takes considerably longer. Therefore, use of a meat thermometer is highly recommended.
Operation
(1) Place the food to be cooked on the Wire rack / food tray. Insert the rack/tray into the middle support guide of the oven.
(2) Turn the Function knob to &
(3) Set the Thermostat knob to the desired temperature as needed or recipe.
(4) Set the Timer knob to the desired cooking time.
(5) Check the baked goods for doneness 5\~10 minutes before expected completion.
(6) When toasting is complete, a bell will sound and the Timer knob will back to Off position automatically. Open the door completely and remove the food.
CAUTION: Cooked food, metal rack/tray, and door can be very hot, handle with care. Do not leave the Oven unattended.
2. FUNCTION

This function is ideal for cooking bread, pizza, and fowl in general.
Operation
(1) Place the food to be cooked on the Wire rack / food tray. Insert the rack/tray into the middle support guide of the oven.
(2) Turn the Function knob to
(3) Set the Thermostat knob to the desired temperature as needed or recipe.
(4) Set the Timer knob to the desired cooking time
(5) To check or remove food, use a handle to help side food in and out.
(6) When toasting is complete, a bell will sound and the Timer knob will back to Off position automatically. Open door completely and remove the food immediately or the heat remaining in the oven will continue to toast and dry out your toast.
CAUTION: Cooked food, metal rack/tray, and door can be very hot, handle with care.
3. FUNCTION

This function is ideal for cooking whole chickens and fowl in general.
Note: All toasting times are based on meats at refrigerator temperature. Frozen meats may takes considerably longer. Therefore, use of a meat thermometer is highly recommended.
Operation
(1) Place whole chicken on the rotisserie rod and fixed by the fork both side, insert the rod into the rotisserie hole position and close the door.
NOTE: Need put the Food tray at bottom rack slot to collect oil drip during cooking, and put some water in food tray before cooking, it will make good effect for rotisserie..
(2) Turn the Function knob to ☐ & ☒
(3) Set the Thermostat knob to 230°C.
(4) Set the Timer knob to the desired cooking time.
(5) Check the baked goods for doneness 5\~10 minutes before expected completion.
(6) When toasting is complete, a bell will sound and the Timer knob will back to Off position automatically. Open door completely and remove the food.
CAUTION: Cooked food, metal rod/tray, and door can be very hot, handle with care.
CLEANING INSTRUCTIONS
CAUTION: To protect against electrical shock, DO NOT IMMERSE THE OVEN IN WATER OR ANY OTHER LIQUIDS.
Your toaster oven should be cleaned regularly for best performance and long life. Regular cleaning will also reduce the risk of fire hazard.
Step 1. Remove plug from electrical outlet. Allow it to cool.
Step 2. Remove the Removable Crumb Tray, Rack, Tray by pulling out of the oven. Clean them with damp, soapy cloth.
Make sure to only use mild, soapy water.
Step 3. To clean inside of oven, wipe the oven walls, bottom of oven, and glass door with a damp, soapy cloth. Repeat with a dry, clean cloth.
Step 4. Wipe outside of oven with a damp cloth.
CAUTION: DO NOT USE ABRASIVE CLEANERS OR METAL SCOURING PADS. Make sure to only use mild, soapy water. Abrasive cleaners, scrubbing brushes and chemical cleaners will damage the coating on this unit. Pieces can break off the and touch electrical parts involving a risk of electrical shock.
Step 5. Allow the appliance to cool and dry completely before storing.
If storing the oven for long periods of time make certain that the oven is clean and free of food particles. Store the oven in a dry location such as on a table or countertop or cupboard shelf. Other than the recommended cleaning, no further user maintenance should be necessary.
Any other servicing should be performed by an authorized service representative.
SPECIFICATION:
Rated voltage 230V-240V Rated frequency 50 Hz -60Hz Rated power 2000W Oven capacity 42Litres Household use only, DO NOT IMMERSE IN WATER
WARRANTY
The warranty period for our products is 2 years, unless otherwise stated, starting from the date of initial purchase or the date of delivery.
If you have any problems or questions, you can easily access our help pages, troubleshooting tips, FAQ, and user manuals on our service site: https://sav.hkoenig.com.
By typing the reference name of your device in the search bar, you can access all available online support, designed to best meet your needs.
If you still cannot find an answer to your question or problem, then click on “Did the answer solve your problem?”. This will direct you to the Customer Support Request Form, which you can fill out to validate your request and get help.
WARRANTY CONDITIONS
The warranty covers all failures occurring under normal use, in accordance with the usage and specifications in the user's manual.
This warranty does not apply to packaging or transportation problems during shipment of the product by the owner. It also does not include normal wear and tear of the product, nor maintenance or replacement of consumable parts.
EXCLUSION OF WARRANTY
- Accessories and wearing parts (\*).
- Normal maintenance of the device.
- All breakdowns resulting from improper use (shocks, failure to comply with power supply recommendations, poor conditions of use, etc.), insufficient maintenance or misuse of the device, as well as the use of unsuitable accessories.
- Damage of external origin: fire, water damage, electrical surge, etc.
- Any equipment that has been disassembled, even partially, by persons other than those authorized to do so (notably the user).
- The products whose serial number would be missing, deteriorated or illegible that would not allow its identification.
- The products subjected to leasing, demonstration, or exhibition.
(\*) Some parts of your device, called wear parts or consumables, deteriorate with time and frequency of use of your device. This wear and tear are normal but can be accentuated by poor conditions of use or maintenance of your device. These parts are therefore not covered by the warranty.
The accessories supplied with the device are also excluded from the warranty. They cannot be exchanged or refunded. However, some accessories can be purchased directly through our website: https://sav.hkoenig.com/.
ENVIRONMENT
CAUTION:

Do not dispose of this product as it has with other household products. There is a separation of this waste product into communities, you will need to inform your local authorities about the places where you can return this product. In fact, electrical and electronic products contain
hazardous substances that have harmful effects on the environment or human health and should be recycled. The symbol here indicates that electrical and electronic equipment should be chosen carefully, a wheeled waste container is marked with a cross.
Adeva SAS / H.Koenig Europe - 8 rue Marc Seguin - 77290 Mitry Mory - France www.hkoenig.com - sav@hkoenig.com - contact@hkoenig.com - Tél: +33 1 64 67 00 05
FRANÇAIS
CONSIGNES DE SÉCURITÉ IMPORTANTES
Lorsque vous utilisez cet appareil électrique, il est important de toujours respecter les consignes de sécurité élémentaires. En outre :
1. Lisez toutes les instructions.
2. Ne touchez pas les surfaces chaudes. Utiliser les poignées ou les commandes.
3. Une attention particulière est requise lors de l'utilisation d'un appareil par des enfants ou près d'eux.
4. Pour vous protéger contre les chocs électriques, ne placez aucune partie du four électrique dans l'eau ou tout autre liquide.
5. Ne laissez jamais le cordon dépasser d'une table ou d'un comptoir, ou bien toucher des surfaces chaudes.
6. N'utilisez pas l'appareil avec un cordon ou une fiche endommagée, après un dysfonctionnement ou s'il est abîmé d'une quelconque manière. Renvoyez l'appareil au centre technique agréé le plus proche pour qu'il soit examiné et réparé.
7. L'utilisation d'accessoires non recommandés par le fabricant pourrait créer un accident ou des blessures.
8. Quand l'appareil est en cours d'utilisation, laissez un espace de 10 cm minimum autour du four afin de permettre une circulation d'air appropriée.
9. Débranchez l'appareil lorsque qu'il n'est pas utilisé ou avant de le nettoyer. Laissez-le refroidir avant de mettre ou enlever des pièces, et avant de le nettoyer.
10. Pour débrancher l'appareil, tournez la commande sur STOP, puis débranchez la fiche. Saisissez toujours la fiche, ne tirez jamais sur le cordon d'alimentation.
11. Ne couvrez pas le PLATEAU ni aucune partie du four avec une feuille d'aluminium. Cela peut entraîner une surchauffe du four.
12. Ne nettoyez pas le four avec une éponge à récurer métallique. Des morceaux peuvent se détacher de l'éponge et entrer en contact avec des éléments électroniques, créant un risque d'électrocution.
13. Les aliments trop grands ou des ustensiles en métal ne peuvent être mis dans le four, ils pourraient créer un risque d'incendie ou d'électrocution.
14. Il y a un risque d'incendie si le four est recouvert ou touche un matériau inflammable, y compris les rideaux, tentures, murs et autres, alors qu'il est en fonctionnement. Ne placez aucun objet sur le four pendant que vous l'utilisez.
15. Soyez très vigilant lorsque vous utilisez des contenants autres qu'en métal ou en verre.
16. Ne placez aucun des matériaux suivants dans le four : carton, plastique, papier ou quelque chose de similaire.
17. Ne placez aucun des accessoires, autres que ceux recommandés par le fabricant, dans ce four lorsqu'il n'est pas en fonctionnement.
18. Portez toujours des gants isolants lorsque vous introduisez ou retirez des éléments d'un four chaud.
19. Cet appareil a une vitre de sécurité trempée. Elle est plus résistante que le verre ordinaire et particulièrement aux chocs thermiques. Le verre trempé peut se briser, mais les morceaux n'auront pas d'arêtes vives. Évitez d'égratigner la vitre ou de faire des entailles aux bords. Si la porte est rayée ou entaillée, contactez notre service client avant d'utiliser le four.
20. Ne l'utilisez pas en plein air.
21. Ne l'utilisez pas à toute autre fin que celle prévue.
22. Cet appareil est UNIQUEMENT destiné à un USAGE DOMESTIQUE.
23. La température de la porte ou des surfaces extérieures peut être plus élevée lorsque l'appareil fonctionne.
24. Faites attention de ne pas vous blesser contre les arêtes vives du four.
25. La température des surfaces accessibles peut être très élevée lorsque l'appareil fonctionne.
26. Ne posez pas d'ustensiles de cuisine ou de plats de cuisson sur la porte vitrée.
27. Cet appareil peut être utilisé par des personnes dont les capacités physiques, sensorielles ou mentales sont réduites ou dont l'expérience ou les connaissances ne sont pas suffisantes, à condition qu'elles bénéficient d'une surveillance ou qu'elles aient reçu des instructions quant à l'utilisation de l'appareil en toute sécurité et qu'elles en comprennent bien les dangers potentiels.
28. Les enfants doivent être surveillés pour s'assurer qu'ils ne jouent pas avec l'appareil.
29. Le poids des aliments placés sur le plateau / grille métallique S3 ne peut pas dépasser 3,0 kg (juste pour référence). Les aliments ne peuvent pas se concentrer sur un côté du plateau / grille S3, mais ils doivent être répartis uniformément.
30. Pour un appareil avec une fixation de type Y, si le cordon d'alimentation est endommagé, il doit être remplacé par le fabricant, son technicien ou une personne de qualification similaire afin d'éviter un accident.
31. La surface arrière de l'appareil doit être placée contre un mur.
32. ATTENTION : Cet appareil comprend une fonction de chauffage. Les surfaces autres que les surfaces fonctionnelles peuvent atteindre des températures élevées. Étant donné que les températures sont perçues différemment par les personnes, cet appareil doit être utilisé avec PRÉCAUTION. Tenez l'appareil exclusivement par les poignées prévues à cet effet, et utilisez des gants de protection contre la chaleur. Les zones qui ne sont pas destinées à être manipulées nécessitent du temps pour refroidir.
33. Ne placez pas le four sur ou près d'un brûleur à gaz ou électrique chaud, ni dans un four chaud.
34. Il faut faire preuve d'une extrême prudence lorsqu'on déplace un appareil contenant de l'huile chaude ou d'autres liquides brûlants.
35. Tournez le bouton de la minuterie sur Off pour éteindre l'appareil.
36. L'appareil n'est pas conçu pour fonctionner avec un minuteur externe ou un système de télécommande.
37. Cet appareil peut être utilisé par des enfants d'au moins 8 ans, à condition qu'ils soient surveillés et qu'ils aient reçu des instructions pour utiliser l'appareil en toute sécurité et qu'ils soient pleinement conscients des dangers encourus.
38. Le nettoyage et l'entretien ne doivent pas être effectués par des enfants à moins qu'ils aient au moins 8 ans et qu'ils soient surveillés par un adulte.
39. Gardez l'appareil et son cordon d'alimentation hors de portée des enfants de moins de 8 ans.
40. Lors de l'utilisation d'équipements électriques, des précautions de sécurité doivent toujours être prises pour éviter les risques d'incendie, d'électrocution et / ou de blessure en cas de mauvaise utilisation.
41. Assurez-vous que la tension nominale sur la plaque signalétique corresponde à la tension principale de votre installation. Si ce n'est pas le cas, contactez le revendeur et ne branchez pas l'appareil.
42. Ne laissez jamais l'appareil sans surveillance pendant son fonctionnement.
43. N'ouvrez jamais l'appareil devant vous, placez-vous toujours légèrement sur le côté pour éviter de vous brûler avec la vapeur.
44. L'appareil ne doit pas être utilisé s'il est tombé, s'il présente des signes évidents de dommages ou des fuites.
45. Votre appareil a été conçu pour un usage domestique seulement. Elle n'a pas été conçue pour être utilisée dans les cas suivants qui ne sont pas couverts par la garantie :
- dans des coins de cuisines réservés au personnel dans des magasins, bureaux et autres environnements professionnels,
– dans des fermes auberges,
– par les clients des hôtels, motels et autres environnements à caractère résidentiel,
- dans des environnements de type chambres d'hôtes.
ATTENTION : LES SURFACES DE L'APPAREIL SONT CHAUDES APRÈS SON UTILISATION. Portez TOUJOURS des gants isolants lorsque vous touchez un four ou des plats chauds et des aliments, ou lorsque vous insérez / retirez le plateau / grille, des casseroles ou des plats de cuisson.
CONSERVEZ CES INSTRUCTION
Avant d'utiliser votre four électrique
Avant d'utiliser votre four électrique à convection pour la première fois, assurez-vous de :
1. Déballer l'appareil.
2. Retirer le plateau de cuisson et le grill. Lavez-les à l'eau savonneuse chaude ou au lave-vaisselle.
3. Sécher soigneusement tous les accessoires et de les replacer dans le four. Branchez le four dans la prise : vous voici prêt à utiliser votre nouveau four électrique !
4. Après avoir remonté votre four, nous vous recommandons de le faire fonctionner à température MAX pendant environ 15 minutes pour éliminer toutes les odeurs d'huiles d'emballage qui pourrait rester.
COMPOSANTS


12
1 Broche de rôtissoire 7 Bouton des fonctions 2 Grille 8 Témoin lumineux 3 Bac 9 Bouton de minuterie 4 Plateau 10 Résistance 5 Poignée du plateau 11 Porte en verre 6 Bouton du thermostat 12 Poignée de porte
UTILISATION DE VOTRE FOUR ÉLECTRIQUE
Veuillez vous familiariser avec les fonctions et accessoires du four avant de l'utiliser :
① Grille: Pour griller, cuire au four et cuisiner en général dans des casseroles et des poêles standard.
② Bac : À utiliser pour griller et rôtir de la viande, de la volaille, du poisson et divers autres aliments.
③ Broche de rôtissoire : Utilisez-la pour rôtir une variété de viandes et de volailles.
④ Plateau : Pour récupérer l'huile ou les résidus.
⑤ Poignée du bac : Pour retirer le bac ou la grille.
⑥ Bouton du thermostat : Choisir la température désirée de Low à 90°C - 230°C (Low est la cuisson à température ambiante).
⑦ Bouton de minuterie : Tourner le bouton vers la gauche (dans le sens inverse des aiguilles d'une montre) et le four restera allumé jusqu'à l'arrêt manuel. Pour activer la minuterie, tourner vers la droite (dans le sens des aiguilles d'une montre) pour une autre utilisation. Une sonnerie retentira à la fin du temps programmé.
⑧ Bouton des fonctions : Il y a cinq modes : veille □ convection + résistances supérieure et inférieure
convection + résistance supérieure 📁, résistances supérieure et inférieure 📁, rôtissoire + résistance supérieure 📁, résistances supérieure et inférieure + convection + rôtissoire 📁
⑨ Témoin lumineux : Il s'allume chaque fois que le four est allumé.
UTILISATION DE LA BROCHE DE RÔTISSOIRE
1. Insérer la fourche dans la broche près de son extrémité puis fixez-la avec la vis moletée.
2. Insérer les aliments de l'autre côté de la broche.
3. Placer la deuxième fourche de l'autre côté de la broche, puis fixez-la avec la vis moletée. Vérifier que la nourriture soit bien au centre de la broche.
4. Insérer la broche avec les aliments dans le four. Insérez un côté de la broche dans le trou de support du four, puis placer l'autre côté de la broche sur le support du four.
PANNEAU DE COMMANDE

TEMP

radar
| Value |
|---|
| 230 |
| 210 |
| 180 |
| 150 |
| 120 |
| 90 |
Low |

FUNCTION

flowchart
graph TD
    A[" "] --> B[" "]
    B --> C[" "]
    C --> D[" "]
    D --> E[" "]
    E --> F[" "]
    F --> G[" "]
    G --> H[" "]
    H --> I[" "]
    I --> J[" "]
    J --> K[" "]
    K --> L[" "]
    L --> M[" "]
    M --> N[" "]
    N --> O[" "]
    O --> P[" "]
    P --> Q[" "]
    Q --> R[" "]
    R --> S[" "]
    S --> T[" "]
    T --> U[" "]
    U --> V[" "]
    V --> W[" "]
    W --> X[" "]
    X --> Y[" "]
    Y --> Z[" "]

TIME

flowchart
graph TD
    A["Stay On"] --> B["Off"]
    B --> C["Power"]
    C --> D["15"]
    D --> E["30"]
    E --> F["45"]
    F --> G["60"]
    G --> H["75"]
    H --> I["90"]
INSTRUCTIONS D'UTILISATION
4. FONCTIONS

&

Cette fonction est idéale pour cuire des tranches de porc, des cuisses et des ailes de poulet, des chips, de la viande de volaille, des côtelettes, du poisson, etc. avec un chauffage plus uniforme.
Remarque : Tous les temps de rôtissage sont basés sur des viandes à la température du réfrigérateur. Les viandes congelées peuvent prendre beaucoup plus de temps. Par conséquent, l'utilisation d'un thermomètre à viande est fortement recommandée.
Fonctionnement
(1) Placer les aliments à cuire sur la grille ou le plateau, puis placez celui-ci ou celle-ci dans le guide de support central du four.
(2) Tourner le bouton des fonctions sur

&

(3) Régler le bouton de thermostat à la température désirée selon les besoins ou la recette.
(4) Régler le bouton de minuterie sur temps de cuisson souhaité.
(5) Vérifier la cuisson des aliments 5 à 10 minutes avant la fin prévue.
(6) Une fois le rôtissage terminé, une alarme retentira et le bouton de minuterie reviendra automatiquement à la position Off. Ouvrez complètement la porte et retirez les aliments.
ATTENTION : Les aliments rôtis, la grille, le plateau en métal et la porte peuvent être très chauds, manipulez-les donc avec précaution. Ne laissez pas le four sans surveillance.
5. FONCTION

Cette fonction est idéale pour la cuisson du pain, des pizzas et des volailles en général.
Fonctionnement
(1) Placer les aliments à cuire sur la grille ou le plateau, puis placer celui-ci ou celle-ci dans le guide de support central du four.
(2) Tourner le bouton des fonctions sur
(3) Régler le bouton de thermostat à la température désirée selon les besoins ou la recette.
(4) Régler le bouton de minuterie sur temps de cuisson souhaité.
(5) Pour vérifier ou retirer les aliments, utiliser une poignée pour faciliter leur manipulation.
(6) Une fois le rôtissage terminé, une alarme retentira et le bouton de minuterie reviendra automatiquement à la position Off. Ouvrir complètement la porte et retirer immédiatement les aliments, sinon la chaleur restante dans le four continuera à les rôtir.
ATTENTION : Les aliments rôtis, la grille, le plateau en métal et la porte peuvent être très chauds, manipulez-les donc avec précaution.
6. FONCTIONS

&

Cette fonction est idéale pour la cuisson de poulets entiers et de volailles en général.
Remarque : Tous les temps de rôtissage sont basés sur des viandes à la température du réfrigérateur. Les viandes congelées peuvent prendre beaucoup plus de temps. Par conséquent, l'utilisation d'un thermomètre à viande est fortement recommandée.
Fonctionnement
(1) Placer le poulet entier sur la broche de la rôtissoire et le fixer avec les fourches des deux côtés, insérer la broche dans le four et fermer la porte.
REMARQUE : Il faut mettre le plateau dans le trou du panier inférieur pour collecter les gouttes d'huile pendant la cuisson et verser un peu d'eau dans le plateau avant la cuisson ; cela aura un bon effet sur le rôtissage.
(2) Tourner le bouton des fonctions sur 📌 & 📌
(3) Régler le bouton de thermostat sur 230°C.
(4) Régler le bouton de minuterie sur le temps de cuisson souhaité.
(5) Vérifier la cuisson des aliments 5 à 10 minutes avant la fin prévue.
(6) Une fois le rôtissage terminé, une alarme retentira et le bouton de minuterie reviendra automatiquement à la position Off. Ouvrir complètement la porte et retirer les aliments.
ATTENTION : Les aliments rôtis, la grille, le plateau en métal et la porte peuvent être très chauds, manipulez-les donc avec précaution.
ENTRETIEN
Cet appareil nécessite peu d'entretien et ne contient pas de pièces réparables par l'utilisateur. Ne tentez donc pas de le réparer vous-même. Contactez un technicien agréé s'il nécessite une réparation.
NETTOYAGE
ATTENTION : Pour vous protéger contre les chocs électriques, NE PLONGEZ PAS LE FOUR DANS L'EAU OU TOUT AUTRE LIQUIDE.
Votre four doit être nettoyé régulièrement pour conserver un fonctionnement optimal et une longue durée de vie. Un nettoyage régulier réduira également le risque d'incendie.
Étape 1. Retirez la fiche de la prise électrique. Laissez alors refroidir le four.
Étape 2. Retirez les accessoires en les tirant hors du four.
Nettoyez-les avec de l'eau savonneuse humide.
Assurez-vous de n'utiliser que de l'eau savonneuse douce.
Étape 3. Pour nettoyer l'intérieur, essuyez les parois du four, le bas du four et la porte vitrée avec un chiffon humide savonneux. Répétez l'opération avec un chiffon sec et propre.
Étape 4. Essuyez l'extérieur du four avec un chiffon humide.
ATTENTION : N'UTILISEZ PAS DE NETTOYANTS ABRASIFS OU D'ÉPONGES À RÉCURER MÉTALLIQUES. Assurez-vous d'utiliser uniquement de l'eau douce savonneuse. Les nettoyants abrasifs, les brosses à récurer et les nettoyants chimiques endommageront le revêtement de cet appareil. Les éléments peuvent se rompre et toucher les pièces électriques, ce qui présente un risque d'électrocution.
Étape 5. Laisser l'appareil refroidir complètement avant de le ranger. Si vous stockez le four pendant une longue période, assurez-vous qu'il soit propre et exempt de particules alimentaires. Rangez le four dans un endroit sec, comme une table ou une étagère, ou bien dans un placard. Il n'y a pas d'autre nettoyage à effectuer que celui décrit dessus.
Toute autre opération d'entretien doit être effectuée par un technicien agréé.
CARACTÉRISTIQUES
Tension nominale 230 V – 240 V Fréquence nominale 50 Hz - 60 Hz Puissance nominale 2000 W Capacité du four : 42 l Usage domestique uniquement. NE PAS PLONGER DANS L’EAU
GARANTIE
La durée de garantie de nos produits est de 2 ans, sauf décret en vigueur, à compter de la date d'achat initiale ou la date de livraison.
En cas de problèmes ou d'interrogations, vous pouvez facilement accéder à nos pages d'aides, conseils de dépannage, FAQ et modes d'emplois sur notre site SAV : https://sav.hkoenig.com.
En tapant le nom de référence de votre appareil dans la barre de recherche, vous accédez à tous les supports en ligne disponibles, conçus pour vous répondre au mieux à vos besoins.
Si vous ne trouvez toujours pas de réponse à votre question ou votre problème, alors cliquez sur « Est-ce que la réponse a résolu votre problème ? ». Vous accéderez alors au formulaire de demande d'assistance SAV, qu'il vous suffira de compléter pour valider votre demande et obtenir de l'aide.
CONDITIONS DE GARANTIE
La garantie couvre l'ensemble des pannes survenant dans le cadre d'une utilisation normale, conforme aux usages et spécifications présentes sur le manuel d'utilisation.
Cette garantie ne s'applique pas aux problèmes d'emballage ou de transport pendant l'expédition du produit par son propriétaire. Elle n'inclut également pas l'usure normale du produit, ni la maintenance ou le remplacement de pièces consommables.
EXCLUSION DE GARANTIE
- Les accessoires et les pièces d'usure (\*).
- L'entretien normal de l'appareil.
- Toutes pannes survenant par suite d'une mauvaise utilisation (chocs, non-respect des préconisations d'alimentation électrique, mauvaises conditions d'utilisation, etc.), d'un entretien insuffisant ou d'un détournement de fonction de l'appareil, ainsi que l'usage d'accessoires non appropriés.
- Les dommages d'origine externe : incendie, dégâts des eaux, surtension électrique, etc.
- Tout matériel qui aura été démonté même partiellement par des personnes autres que celles habilitées (notamment l'utilisateur).
- Les produits dont le numéro de série serait absent, détérioré ou illisible que ne permettrait pas son identification.
- Les produits soumis à la location, à la démonstration ou à l'exposition.
(\*) Certaines pièces de votre appareil dites pièces d'usure ou consommables se détériorent avec le temps et la fréquence d'usage de votre appareil. Cette usure est normale, mais peut être accentuée par des mauvaises conditions d'utilisation ou entretien de votre appareil. Ces pièces ne sont donc pas couvertes par la garantie.
Les accessoires fournis avec l'appareil sont également exclus du champ de la garantie. Ils ne peuvent donc être ni échangés, ni remboursés. Toutefois, certains accessoires peuvent être directement achetés via notre site : https://sav.hkoenig.com/.
ENVIRONNEMENT
ATTENTION :

Ne jetez pas cet appareil avec d'autres produits ménagers. Il existe un tri sélectif de ces déchets dans les municipalités. Demandez-leur quels sont les endroits où vous pouvez jeter cet appareil. En fait, les produits électriques et électroniques contiennent des substances dangereuses qui ont des effets nocifs sur l'environnement et la santé humaine, c'est pour cette raison qu'il doit être recyclé. Le symbole ici, un conteneur à déchets sur roues marqué d'une croix, indique que les équipements électriques et électroniques doivent être choisis avec soin.
Adeva SAS / H.Koenig Europe - 8 rue Marc Seguin - 77290 Mitry Mory - France www.hkoenig.com - sav@hkoenig.com - contact@hkoenig.com - Tél: +33 1 64 67 00 05
DEUTSCH
WICHTIGE SICHERHEITSANWEISUNGEN
Während der Nutzung von elektrischen Geräten müssen grundliegende Sicherheitsvorkehrungen immer beachtet werden, einschließlich der Folgenden:
1. Lesen Sie alle Anweisungen.
2. Fassen Sie heiße Flächen nicht an. Benutzen Sie Griffe oder Regler.
3. Besondere Aufsicht ist notwendig, wenn jegliches Gerät von/ in der Nähe von Kindern benutzt wird.
4. Um sich vor einem Stromschlag zu schützen, platzieren Sie keine Teile des Elektrobackofens in Wasser oder anderen Flüssigkeiten.
5. Lassen Sie das Kabel über die Kante eines Tisches oder einer Theke nicht herunterhängen, oder mit heißen Flächen in Kontakt kommen.
6. Bedienen Sie das Gerät nicht, wenn das Kabel oder der Stecker beschädigt sind, wenn es eine Fehlfunktion hat, oder in jeglicher Weise beschädigt wurde; bringen Sie das Gerät zu einer nächstliegenden autorisierten Servicestelle für eine Inspektion, Reparatur oder Anpassung zurück.
7. Die Nutzung des Zubehörs, das nicht von dem Hersteller empfohlen wurde, kann zu Gefahren und Verletzungen führen.
8. Während der Nutzung des Gerätes, lassen Sie einen Mindestabstand von 4 Zoll von allen Seiten des Ofens, um eine angemessene Belüftung zu ermöglichen.
9. Trennen Sie das Gerät beim Nichtgebrauch vom Netz. Lassen Sie dieses abkühlen, bevor Sie die Teile abnehmen oder montieren, und vor der Reinigung.
10. Um das Gerät von der Stromversorgung zu trennen, drehen Sie den Regler auf STOPP, dann ziehen Sie den Stecker. Greifen Sie immer am Stecker, und niemals am Kabel.
11. Bedecken Sie das KRÜMMELFACH oder andere Teile des Ofens nicht mit Metallfolie. Dies kann zu Überhitzung des Ofens führen.
12. Benutzen Sie für die Reinigung keinen Scheuerschwamm aus Metall. Kleine Stückchen können von dem Schwamm abbrechen und elektrische Teile berühren, wobei das Risiko eines Stromschlages entsteht.
13. Überdimensionale Lebensmittel oder Utensilien aus Metall dürfen in den Elektrobackofen nicht eingesetzt werden, da dies zu einem Brand oder dem Risiko eines Stromschlages führen kann.
14. Ein Brand kann entstehen, wenn der Ofen bedeckt wird oder wenn dieser während der Nutzung mit entflammbaren Stoffen in Kontakt kommt, einschließlich Vorhängen, Gardienen, Wänden und ähnlichen.
15. Besondere Vorsicht ist während der Nutzung der Behälter aus anderen Materiallien als Metall oder Glass geboten.
16. Platzieren Sie keine folgenden Materiallien im Ofen: Karton, Plastik, Papier, oder ähnliche.
17. Lagern Sie beim Nichtgebrauch keine Materialien in diesem Ofen, außer dem von dem Hersteller empfohlenen Zubehör.
18. Tragen Sie immer schützende, isolierte Ofenhandschuhe, wenn Sie Gegenstände in den Ofen stellen und diese herausnehmen.
19. Dieses Gerät verfügt über eine Tür aus gehärtetem Sicherheitsglas. Dieses Glas ist starker und viermal bruchsicherer als normales Glas. Gehärtetes Glas kann zerbrechen, aber die Bruchstücke werden keine scharfen Kanten haben. Vermeiden Sie das Kratzen der Türfläche und das Einkerben der Rände. Wenn die Glastür eine Kratze oder eine Kerbe hat, kontaktieren Sie unsere Verbraucherleitung, bevor Sie den Ofen nutzen.
20. Benutzen Sie das Gerät nicht draußen.
21. Benutzen Sie das Gerät nur zum dafür vorgesehenen Zweck.
22. Dieses Gerät ist AUSSCHLIEßLICH FÜR DIE HAUSHALTSNUTZUNG geeignet.
23. Die Temperatur der Tür und der Außenfläche kann höher sein, wenn das Gerät im Betrieb ist.
24. Schützen Sie sich während der Bedienung vor Verletzungen durch scharfe Kanten.
25. Die Temperatur der erreichbaren Flächen während des Betriebs des Gerätes kann hoch sein.
26. Stellen Sie keine Kochutensilien oder Backformen an der Glastür ab.
27. Dieses Gerät kann von Personen mit eingeschränkten körperlichen, sensorischen oder geistigen Fähigkeiten oder mangelnder Erfahrung und Kenntnis benutzt werden, vorausgesetzt, dass sie beaufsichtigt oder in der sicheren Benutzung des Gerätes unterwiesen werden und die möglichen Gefahren vollständig verstehen.
28. Kinder müssen beaufsichtigt werden, um sicherzustellen, dass sie mit dem Gerät nicht spielen.
29. Das Gewicht der Zutaten, die auf dem S3 Essenstablett/Drahtgestell platziert werden, darf 3.0kg nicht überschreiten (nur als Information). Die Zutaten sollten nicht auf einer Seite des S3 Essenstabletts/ Drahtgestells konzentriert werden, versuchen Sie, die Lebensmittel so gut wie es geht über das S3 Essenstablett/ Drahtgestell zu verteilen.
30. Für Geräte mit der Anbindungsart Y, wenn das Stromkabel beschädigt ist, muss es von dem Hersteller, seinem Dienstleister oder einer ähnlich qualifizierten Person ersetzt werden, um Gefahren zu vermeiden.
31. Hintere Fläche des Gerätes muss gegen eine Wand gestellt werden.
32. WARNUNG: Dieses Gerät beinhaltet eine Heizfunktion. Die Flächen, außer der funktionalen Flächen, können höhe Temperaturen erreichen. Da Temperaturen von verschiedenen Menschen unterschiedlich empfunden werden, sollte dieses Gerät mit VORSICHT benutzt werden. Halten Sie das Gerät ausschließlich an den geeigneten Grifflächen und treffen Sie solche hitzeschutztechnische Maßnahmen wie hitzebeständige Handschuhe oder Topflappen.
33. Platzieren Sie das Gerät nicht auf/ in der Nähe von einem heißen Gas- oder Elektrobrenner, oder in einem erhitzen Ofen.
34. Seien Sie besonders vorsichtig, wenn Sie das Gerät verstellen, welches heißes Öl oder andere heiße Flüssigkeiten beinhaltet.
35. Drehen Sie den Timerregler in die "OFF" Position, um das Gerät auszuschalten.
36. Das Gerät ist nicht dafür geeignet, mithilfe einer externen Schaltuhr oder einer getrennten Fernbedienungssystem bedient zu werden.
37. Dieses Gerät darf von Kindern ab 8 Jahre benutzt werden, wenn sie beaufsichtigt werden und Anweisungen erhielten, wie das Gerät zu benutzen ist und kennen die damit angebundenen Gefahren.
38. Die Reinigung und Wartung dürfen nicht von Kindern durchgeführt werden, es sei denn sie sind über 8 Jahre alt und werden von einem Erwachsenen beaufsichtigt.
39. Halten Sie das Gerät und sein Stromkabel außer Reichweite von Kindern unter 8 Jahren auf.
40. -Während der Nutzung des elektrischen Gerätes müssen Sicherheitsvorkehrungen immer beachtet werden, um das Risiko eines Brandes, eines Stromschlages und/oder einer Verletzung im Falle eines Missbrauchs zu vermeiden.
41. Vergewissern Sie sich, dass der Spannungswert auf dem Typenschild mit der Spannung Ihrer Einrichtung übereinstimmt. Wenn dies nicht der Fall ist, kontaktieren Sie den Händler und schließen Sie das Gerät nicht an.
42. Lassen Sie das Gerät niemals während des Betriebs unbeaufsichtigt.
43. Öffnen Sie das Gerät niemals von vorne, positionieren Sie sich immer leicht zur Seite, um Verbrühungen durch Dampf zu vermeiden.
44. Das Gerät darf nicht benutzt werden, wenn es fallen gelassen wurde, wenn es sichtbare Anzeichen einer Beschädigung aufweist oder eine Leckage hat.
45. Ihr Gerät ist nur für den Hausgebrauch bestimmt. Es wurde nicht für die Verwendung in den folgenden Fällen entwickelt, die nicht von der Garantie abgedeckt sind:
- in Küchenbereichen, die dem Personal in Geschäften, Büros und anderen beruflichen Umgebungen vorbehalten sind,
- in Bauerngasthöfen,
- von Kunden von Hotels, Motels und anderen Wohnumgebungen,
- in Umgebungen vom Typ Bed & Breakfast.
ACHTUNG: DIE FLÄCHEN DES GERÄTES SIND NACH DER NUTZUNG HEIß. Tragen Sie IMMER schützende, isolierte Ofenhandschuhe, wenn Sie heißen Ofen oder heißes Geschirr und Lebensmittel anfassen, oder wenn Sie das Gestell, Pfannen oder Backformen in den Ofen stellen und diese herausnehmen.
BEWAHREN SIE DIESE ANWEISUNGEN AUF
Vor der Nutzung Ihres Elektrobackofens
Vor der ersten Nutzung Ihres Umluftbackofen, führen Sie das Folgende aus:
5. Packen Sie das Gerät aus.
6. Entfernen Sie das Backblech und den Grill. Spülen Sie die Gestelle und Pfannen mit heißem Seifenwasser oder in einer Spülmaschine.
7. Trocknen Sie sorgfältig das gesamte Zubehör und sezten Sie es wieder in den Ofen ein. Schließen Sie den Ofen an, und damit sind Sie bereit, Ihren neuen Elektrobackofen zu nutzen.
8. Nachdem Sie Ihren Ofen wieder zusammengebaut haben, empfehlen wir Ihnen, diesen bei der MAX Temperatur für ca. 15 Minuten laufen zu lassen, um jegliches Öl riecht, das nach der Lieferung bleiben konnte, zu entfernen.
KOMPONENTEN:


1 Drehspieß 7 Funktionsknopf 2 Drahtgitter 8 Anzeige 3 Essenstablett 9 Zeitschalter 4 Crumb tray Krümelblech 10 Heizer 5 Krümelauffangblech 11 Glastür 6 Thermostatknopf 12 Türgriff
VERWENDUNG DES ELEKTROOFENS
Bitte machen Sie sich vor dem ersten Gebrauch mit den folgenden Funktionen und Zubehörteilen des Ofens vertraut:
① Drahtgitter: Zum Rösten, Backen und allgemein Kochen in Auflaufformen und Standardpfannen.
② Essenstablett: Zum Braten und Rösten von Fleisch, Geflügel, Fisch und verschiedene andere Lebensmittel.
③ Drehspieß: Zum Braten von verschiedenen Fleischsorten und Geflügel.
④ Krümelauffangblech: Zum Auffangen von Öl oder Krümeln.
⑤ Griff für das Essenstablett: Zum Herausnehmen von Tabletts
⑥ Thermostatknopf: Wählen Sie die gewünschte Temperatur von Niedrig-90°C-230°C (Niedrig bedeutet Garen bei Raumtemperatur).
⑦ Zeitschalter: Drehen Sie den Regler nach links (gegen den Uhrzeigersinn) und der Ofen bleibt eingeschaltet, bis er manuell ausgeschaltet wird. Um den Timer zu aktivieren, drehen Sie den Regler nach rechts (im Uhrzeigersinn) für eine andere Verwendung. Am Ende der programmierten Zeit ertönt ein Signal.
⑧ Funktionsknopf: es gibt fünf Modi(□Stand-by-Modus, □Konvektion + obere und untere Heizelemente, ✉Konvektion + obere Heizelemente, ▽obere und untere Heizelemente, ▽Rotisserie + obere Heizelemente, ▽obere und untere Heizelemente + Konvektion + Drehspieß)
⑨ Anzeige: Sie leuchtet auf, wenn der Ofen eingeschaltet ist.
TIPPS ZUR VERWENDUNG VON GRILLSTÄBEN
1. Führen Sie die Gabel bis zum Ende der Stange ein und befestigen Sie sie dann mit der Rändelschraube.
2. Führen Sie die Lebensmittel von der anderen Seite des Stabes ein.
3. Setzen Sie das zweite Lebensmittel in die andere Seite des Stabes und befestigen Sie es mit der Rändelschraube. Prüfen Sie, ob das Essen fest in der Mitte der Stange sitzt.
4. Schieben Sie den Stab mit dem Gargut in den Backofen. Stecken Sie die eine Seite des Stabs in das Aufnahmeloch des Backofens. Setzen Sie dann die andere Seite des Stabs auf die Halterung des Backofens.
KONTROLLPANEL

radar
| Time | Temp (°C) |
|------|-----------|
| 0 | 230 |
| 1 | 210 |
| 2 | 180 |
| 3 | 150 |
| 4 | 120 |
| 5 | 90 |
| 6 | 60 |
| 7 | 75 |
| 8 | 90 |
| 9 | 120 |
| 10 | 150 |
| 11 | 180 |
| 12 | 210 |
| 13 | 230 |
| 14 | Low |
| 15 | High |
| 16 | High |
| 17 | High |
| 18 | High |
| 19 | High |
| 20 | High |
| 21 | High |
| 22 | High |
| 23 | High |
| 24 | High |
| 25 | High |
| 26 | High |
| 27 | High |
| 28 | High |
| 29 | High |
| 30 | High |
| 31 | High |
| 32 | High |
| 33 | High |
| 34 | High |
| 35 | High |
| 36 | High |
| 37 | High |
| 38 | High |
| 39 | High |
| 40 | High |
| 41 | High |
| 42 | High |
| 43 | High |
| 44 | High |
| 45 | High |
| 46 | High |
| 47 | High |
| 48 | High |
| 49 | High |
| 50 | High |
| 51 | High |
| 52 | High |
| 53 | High |
| 54 | High |
| 55 | High |
| 56 | High |
| 57 | High |
| 58 | High |
| 59 | High |
| 60 | High |
| 61 | High |
| 62 | High |
| 63 | High |
| 64 | High |
| 65 | High |
| 66 | High |
| 67 | High |
| 68 | High |
| 69 | High |
| 70 | High |
| 71 | High |
| 72 | High |
| 73 | High |
| 74 | High |
| 75 | High |
| 76 | High |
| 77 | High |
| 78 | High |
| 79 | High |
| 80 | High |
| 81 | High |
| 82 | High |
| 83 | High |
| 84 | High |
| 85 | High |
| 86 | High |
| 87 | High |
| 88 | High |
| 89 | High |
| 90 | High |
| 91 | High |
| 92 | High |
| 93 | High |
| 94 | High |
| 95 | High |
| 96 | High |
| 97 | High |
| 98 | High |
| 99 | High |
| 100 | Low |
BETRIEBSANLEITUNG
1. FUNKTION

Diese Funktion ist ideal zum Backen von Schweinefleisch, Hähnchenkeulen, Hähnchenflügeln, Kartoffeln, Geflügelfleisch, Koteletts, Fisch usw. mit gleichmäßiger Erwärmung.
Hinweis: Alle Toastzeiten beziehen sich auf Fleisch bei Kühlschranktemperatur. Bei gefrorenem Fleisch kann es erheblich länger dauern. Daher wird die Verwendung eines Fleischthermometers dringend empfohlen.
Betrieb
(1) Legen Sie das Gargut auf den Gitterrost/das Backblech. Schieben Sie den Rost/das Tablett in die mittlere Führung des Backofens ein.
(2) Drehen Sie den Funktionsknopf auf &
(3) Stellen Sie den Thermostatknopf je nach Bedarf oder Rezept auf die gewünschte Temperatur ein.
(4) Stellen Sie den Zeitschalter auf die gewünschte Garzeit ein.
(5) Prüfen Sie die Backwaren 5 bis 10 Minuten vor der erwarteten Fertigstellung auf ihren Gargrad.
(6) Nach Beendigung des Toastvorgangs ertönt ein Signalton und der Zeitschalter kehrt automatisch in die Aus-Stellung zurück. Öffnen Sie die Tür vollständig und nehmen Sie die Lebensmittel heraus.
ACHTUNG: Gekochte Speisen, das Metallgitter und die Tür können sehr heiß sein, seien Sie vorsichtig. Lassen Sie den Backofen nicht unbeaufsichtigt.
2. FUNKTION

Diese Funktion ist ideal zum Backen von Brot, Pizza und Geflügel im Allgemeinen.
Betrieb
(1) Legen Sie das Gargut auf den Gitterrost/das Backblech. Schieben Sie den Rost/das Tablett in die mittlere Führung des Backofens ein.
(2) Drehen Sie den Funktionsknopf auf
(3) Stellen Sie den Thermostatknopf je nach Bedarf oder Rezept auf die gewünschte Temperatur ein.
(4) Stellen Sie den Zeitschalter auf die gewünschte Garzeit ein.
(5) Verwenden Sie zum Prüfen oder Entnehmen von Lebensmitteln einen Griff, um die Lebensmittel hinein- und herauszuschieben.
(6) Nach Beendigung des Toastvorgangs ertönt ein Signalton, und der Zeitschalter kehrt automatisch in die Aus-Stellung zurück. Öffnen Sie die Tür vollständig und nehmen Sie die Speisen sofort heraus, da sonst die Resthitze des Ofens das Toastbrot weiter röstet und austrocknet.
ACHTUNG: Gekochte Speisen, das Metallgitter und die Tür können sehr heiß sein, seien Sie vorsichtig.
3. FUNKTION

Diese Funktion ist ideal für das Garen von ganzen Hühnern und Geflügel im Allgemeinen.
Hinweis: Alle Toastzeiten beziehen sich auf Fleisch bei Kühlschranktemperatur. Bei gefrorenem Fleisch kann es erheblich länger dauern. Daher wird die Verwendung eines Fleischthermometers dringend empfohlen.
Betrieb
(1) Das ganze Hähnchen auf den Drehspieß stecken und mit der Gabel an beiden Seiten fixieren, den Spieß in die Drehspießöffnung einführen und die Tür schließen.
HINWEIS: Es ist notwendig, die Lebensmittelschale in den unteren Einschub zu stellen, um die Öltropfen während des Kochens aufzufangen, und vor dem Kochen etwas Wasser in die Lebensmittelschale zu geben, um einen guten Effekt für den Drehspieß zu erzielen..
(2) Drehen Sie den Funktionsknopf auf

(3) Stellen Sie den Thermostatknopf auf 230°C.
(4) Stellen Sie den Zeitschalter auf die gewünschte Garzeit ein.
(5) Prüfen Sie die Backwaren 5 bis 10 Minuten vor der erwarteten Fertigstellung auf ihren Gargrad.
(6) Nach Beendigung des Toastvorgangs ertönt ein Signalton und der Zeitschalter kehrt automatisch in die Aus-Stellung zurück. Öffnen Sie die Tür vollständig und nehmen Sie die Lebensmittel heraus.
ACHTUNG: Gekochte Speisen, Metallstäbe/-behälter und die Tür können sehr heiß sein, seien Sie vorsichtig.
WARTUNGSANWEISUNGEN
Dieses Gerät benötigt wenig Wartung. Es beinhaltet keine durch den Anwender zu wartenden Teile. Versuchen Sie nicht, das Gerät selber zu reparieren. Kontaktieren Sie einen qualifizierten Techniker, wenn das Produkt eine Wartung benötigt.
REINIGUNGSANWEISUNGEN
ACHTUNG: Um sich vor einem Stromschlag zu schützen, TAUCHEN SIE DEN OFEN NICHT IN WASSER ODER ANDERE FLÜSSIGKEITEN.
Ihr Toaster soll für die beste Leistung und eine lange Lebensdauer regelmäßig gereinigt werden. Eine regelmäßige Wartung wird auch das Risiko eines Brandes verringern.
Schritt 1. Entfernen Sie den Stecker aus der Steckdose. Lassen Sie das Gerät abkühlen.
Schritt 2. Entnehmen Sie das abnehmbare Krümmelfach, das Gestell, das Tablett, indem Sie diese aus dem Ofen herausziehen.
Reinigen Sie diese mit einem feuchten Tuch mit etwas Seife. Vergewissern Sie sich, dass Sie nur ein mildes Seifenwasser benutzen.
Schritt 3. Um die Innenseite des Ofens zu reinigen, wischen Sie die Ofenswände, den Boden und die Glastür mit einem feuchten Tuch mit Seife ab. Danach den Vorgang mit einem trockenen, sauberen Tuch wiederholen.
Schritt 4. Wischen Sie die Außenseite des Ofens mit einem feuchten Tuch ab.
ACHTUNG: BENUTZEN SIE KEINE ÄTZENDEN REINIGUNGSMITTEL ODER SCHEUERSCHWÄMME AUS METALL. Benutzen Sie ausschließlich mildes Seifenwasser. Ätzende Reinigungsmittel, Scheuerbürsten und chemische Reiniger werden die Beschichtung des Gerätes beschädigen. Kleine Stückchen können von dem Schwamm abbrechen und elektrische Teile berühren, wobei das Risiko eines Stromschlages entsteht.
Schritt 5. Lassen Sie das Gerät vor der Lagerung abkühlen und vollständig trocknen. Wenn Sie den Ofen für eine längere Zeit lagern, vergewissern Sie sich, dass der Ofen sauber und frei von Speiserückständen ist. Lagern Sie den Ofen an einer trockenen Stelle wie z. B. auf einem Tisch, einer Arbeitsplatte oder einem Schrankregal. Außer der empfohlenen Reinigung ist keine weitere Wartung seitens Benutzer notwendig.
Jegliche andere Wartungsarbeiten sollten von einem autorisirten Fachhändler durchgeführt werden.
SPEZIFIKATIONEN:
Nennspannung 230V-240V Nennfrequenz 50 Hz -60Hz Nennleistung 2000W Kapazität des Ofens 42 Liter Nur für den Hausgebrauch, NICHT IN WASSER EINTAUCHEN
GARANTIE
Die Garantiezeit für unsere Produkte beträgt 2 Jahre, sofern keine anderen Bestimmungen gelten, ab dem Datum des ursprünglichen Kaufs oder ab dem Lieferdatum.
Bei Problemen oder Fragen können Sie sich an unsere Hilfeseiten, Tipps zur Fehlerbehebung, FAQs und Bedienungsanleitungen auf unserer Kundendienst-Website wenden: https://sav.hkoenig.com.
Wenn Sie den Referenznamen Ihres Geräts in die Suchleiste eingeben, erhalten Sie Zugang zu allen verfügbaren Online-Supports.
Wenn Sie immer noch keine Antwort auf Ihre Frage oder Ihr Problem finden, dann klicken Sie auf "Hat die Antwort Ihr Problem gelöst?". Sie können dieses Formular ausfüllen, um Ihre Anfrage zu bestätigen und Hilfe zu erhalten.
GARANTIEBEDINGUNGEN
Die Garantie deckt alle Defekte ab, die bei normalem, bestimmungsgemäßem Gebrauch und den in der Bedienungsanleitung enthaltenen Spezifikationen auftreten.
Diese Garantie gilt nicht für Probleme mit der Verpackung oder dem Transport während des Versands des Produkts durch den Eigentümer. Sie umfasst auch nicht den normalen Verschleiß des Produkts, die Wartung oder den Austausch von Verschleißteilen.
AUSSCHLUSS DER GARANTIE
- Zubehör und Verschleißteile (\*).
- Die normale Wartung des Geräts.
- Alle Defekte, die durch unsachgemäßen Gebrauch (Stöße, Nichteinhaltung der empfohlenen Stromzufuhr, schlechte Nutzungsbedingungen usw.), unzureichende Wartung oder Zweckentfremdung des Geräts auftreten, sowie die Verwendung von ungeeignetem Zubehör.
- Schäden durch äußere Einflüsse: Brand, Wasserschäden, elektrische Überspannung usw.
- Alle Geräte, die von anderen als den befugten Personen (insbesondere dem Nutzer) auch nur teilweise auseinandergebaut wurden.
- Produkte, deren Seriennummer fehlt, beschädigt oder unleserlich ist, sodass sie nicht identifiziert werden können.
- Produkte, die vermietet, vorgeführt oder ausgestellt werden.
(\*) Einige Teile Ihres Geräts, die als Verschleißteile oder Verbrauchsmaterialien bezeichnet werden, verschleßen mit der Zeit und der Häufigkeit der Nutzung Ihres Geräts. Diese Abnutzung ist normal, kann aber durch falsche Nutzung oder Pflege Ihres Geräts noch verstärkt werden. Diese Teile sind daher nicht durch die Garantie abgedeckt.
Das mit dem Gerät gelieferte Zubehör ist ebenfalls von der Garantie ausgeschlossen. Sie können daher weder umgetauscht noch erstattet werden. Einige Zubehörteile können jedoch direkt über unsere Website https://sav.hkoenig.com/ erworben werden.
UMWELT
ACHTUNG:

Entsorgen Sie dieses Produkt nicht mit anderen Haushaltsgegenständen. Dieses Produkt muss separat bei bestimmten Stellen entsorgt werden, informieren Sie sich bei lokalen Behörden über die Stellen, wohin das Produkt gebracht werden kann. In der Tat, elektrische und elektronische Produkte beinhalten gefährliche Stoffe, die eine schädliche Auswirkung auf die Umwelt und menschliche Gesundheit haben und recycelt werden müssen. Dieses Symbol bedeutet, dass elektrische und elektronische Geräte vorsichtig gewählt werden müssen, die Rollcontainer werden mit einem Kreuz markiert.
Adeva SAS / H.Koenig Europe - 8 rue Marc Seguin - 77290 Mitry Mory - France www.hkoenig.com - sav@hkoenig.com - contact@hkoenig.com - Tél: +33 1 64 67 00 05
NEDERLANDS
BELANGRIJKE VEILIGHEIDSREGELS
Bij het gebruik van elektrische apparaten moeten de standaard veiligheidsregels worden opgevolgd, inclusief de volgende:
1. Lees alle instructies.
2. Raak geen hete oppervlakken aan. Gebruik de handgrepen en knoppen.
3. Toezicht is noodzakelijk bij of door gebruik van kinderen.
4. Ter bescherming tegen elektrische schokken, mag u geen enkel onderdeel van de elektrische oven in water of een andere vloeistof dompelen.
5. Laat de kabel niet hangen over de rand van een tafel of aanrecht of boven een heet oppervlak.
6. Gebruik geen apparaat met een beschadigde kabel of stekker, of als het apparaat niet correct functioneert of op welke manier dan ook beschadigd is. Breng het apparaat naar het dichtstbijzijnde geautoriseerde reparatiecentrum voor inspectie, reparatie of mechanische of elektrische aanpassingen.
7. Het gebruik van accessoires die niet worden aanbevolen door de fabrikant kunnen gevaar of verwondingen opleveren.
8. Bij het gebruik van deze oven dient minimaal 10 centimeter ruimte aan alle zijden vrij te worden gehouden voor een juiste luchtcirculatie.
9. Haal de stekker uit het stopcontact als het niet gebruikt wordt of voor het schoonmaken. Laat het afkoelen voor de verwijdering van onderdelen of voor het schoonmaken.
10. Eerst de knop op STOP zetten en dan de stekker uit het stopcontact halen. Altijd aan de stekker vasthouden en nooit aan de kabel trekken.
11. Dek de KRUIMELPLAAT of een ander onderdeel van de oven nooit af met een metalen folie. Dit kan tot oververhitting van de oven leiden.
12. Niet schoonmaken met metalen schuursponzen. Er kunnen stukjes van de spons afbreken en elektrische onderdelen aanraken en zo een elektrische schok geven.
13. Te groot voedsel of metalen gereedschap mag niet in een elektrische oven worden geplaatst omdat het een risico vormt voor brand of elektrische schok.
14. Er kan vuur ontstaan als de oven tijdens gebruik afgedekt wordt of in aanraking komt met brandbare materialen, waaronder gordijnen, lakens, muren, etc. Plaats geen items op de oven als deze in gebruik is.
15. Wees extreem voorzichtig bij bakjes die niet gemaakt zijn van metaal of glas.
16. Plaats geen spullen in de oven die de volgende materialen bevatten: karton, plastic, papier of iets soortgelijks.
17. Bewaar geen andere spullen, afgezien van de door de fabrikant geadviseerde spullen als de oven niet in gebruik is.
18. Draag altijd beschermende geïsoleerde ovenwanten bij het plaatsen of verwijderen van items in/uit de hete oven.
19. Dit apparaat heeft gehard veiligheidsglas in de deur. Dit glas is sterker dan normaal glas en breekt minder snel. Gehard glas kan wel breken, maar de stukken zullen geen scherpe randen hebben. Vermijd krassen op de deur of het beschadigen van de hoeken.
Als de deur een kras of een beschadiging heeft, neem dan contact op met onze klantenservice voordat u de oven gebruikt.
20. Niet buiten gebruiken.
21. Gebruik het apparaat alleen voor het beoogde gebruik.
22. Dit apparaat is ALLEEN voor HUISHOUDELIJK GEBRUIK.
23. De temperatuur van de buitenkant van de deur of de behuizing kan hoog oplopen als het apparaat in gebruik is.
24. Vermijd tijdens gebruik dat ergens een scherpe rand tegenaan komt.
25. De temperatuur van tastbare oppervlaktes kunnen hoog oplopen als het apparaat in gebruik is.
26. Leg geen kookgerei of bakplaten op de glazen deur.
27. Dieses Gerät kann von Personen mit eingeschränkten körperlichen, sensorischen oder geistigen Fähigkeiten oder mangelnder Erfahrung und Kenntnis benutzt werden, vorausgesetzt, dass sie beaufsichtigt oder in der sicheren Benutzung des Gerätes unterwiesen werden und die möglichen Gefahren vollständig verstehen.
28. Kinderen moeten onder toezicht worden gehouden, om te verzekeren dat ze niet met het apparaat spelen.
29. Het gewicht van het eten dat op de S3 plaat/rooster gelegd wordt mag niet zwaarder zijn dan 3,0 kg. (ter referentie) (het eten mag niet aan een kant van de S3 plaat/rooster liggen, het is beter als u het eten gelijkmatig over de S3 plaat/rooster verdeelt).
30. Voor een apparaat met een Y-aansluiting, als de stroomkabel beschadigd is, moet het worden vervangen door de fabrikant, een servicemonteur of een gelijkwaardig gekwalificeerd persoon om gevaren te.
31. De achterkant van het apparaat dient voor een muur geplaatst te worden.
32. WAARSCHUWING: Dit apparaat heeft een opwarmingsfunctie. Oppervlaktes, ook andere naast de functionerende, kunnen erg heet worden. Omdat temperaturen door verschillende personen anders kunnen worden waargenomen, moet dit apparaat VOORZICHTIG worden gebruikt. Houd het apparaat alleen vast aan de oppervlaktes die daarvoor bedoeld zijn en bescherm uzelf tegen de hitte met ovenwanten of pannenlappen. De oppervlaktes die bedoeld zijn om aangeraakt te worden, dienen eerst af te koelen.
33. Plaats het niet op of vlakbij een hete gas of elektrisch fornuis, of in een hete oven.
34. Uitermate voorzichtigheid is altijd geboden bij het verplaatsen van een apparaat met hete olie of andere hete vloeistof.
35. Draai de timerknop naar 'off' om het apparaat uit te schakelen.
36. Het apparaat is niet bedoeld om gebruikt te worden met een externe timer of een apart besturingssysteem.
37. Dit apparaat mag gebruikt worden door kinderen van minimaal 8 jaar als er toezicht wordt gehouden en ze instructies hebben gehad over hoe ze het apparaat moeten gebruiken en ze de gevaren begrijpen.
38. Het schoonmaken en onderhoud mag niet worden uitgevoerd door kinderen tenzij ze 8 jaar of ouder zijn en er toezicht is.
39. Houd het apparaat en de stroomkabel uit de buurt van kinderen jonger dan 8 jaar.
40. Bij het gebruik van elektrische apparaten moeten altijd de standaard veiligheidsinstructies worden opgevolgd om de kans op vuur, elektrische schokken en/of verwondingen te voorkomen.
41. Controleer dat de aangegeven spanning op het typeplaatje overeenkomt met de spanning van uw spanningsbron. Als dit niet het geval is, neem dan contact op met de dealer en sluit het apparaat niet aan.
42. Laat het apparaat nooit onbeheerd achter tijdens gebruik.
43. Nooit het apparaat van voren openen, plaats uzelf iets naar de zijkant ter vermijding dat u verbrandt door stoom.
44. Het apparaat mag niet gebruikt worden als het gevallen is, als er duidelijk zichtbare schade is of als het lekt.
45. Ihr Gerät ist nur für den Hausgebrauch bestimmt. Es wurde nicht für die Verwendung in den folgenden Fällen entwickelt, die nicht von der Garantie abgedeckt sind:
\- in Küchenbereichen, die dem Personal in Geschäften, Büros und anderen beruflichen Umgebungen vorbehalten sind,
\- in Bauerngasthöfen,
\- von Kunden von Hotels, Motels und anderen Wohnumgebungen,
\- in Umgebungen vom Typ Bed & Breakfast.
LET OP: HET APPARAAT IS HEET NA GEBRUIK. ALTIJD beschermende, isolerende ovenwanten gebruiken bij het aanraken van de oven of het verwijderen van heet eten, of bij het plaatsen of verwijderen van rooster, pannen of schalen.
BEWAAR DEZE INSTRUCTIES
Voordat u uw elektrische oven gebruikt
Voordat u uw heteluchtoven gebruikt, dient u te zorgen dat:
1. U het apparaat uitpakt.
2. Verwijder de bakplaat en de grill. U de roosters en pannen wast in hete sop of in de vaatwasser.
3. Droog alle accessoires zorgvuldig en plaats terug in de oven wat u nodig heeft. Sluit de oven aan op een stopcontact en u kunt de oven gaan gebruiken.
4. Nadat u alles weer heeft teruggeplaatst raden we u aan dat u 15 de MAX-temperatuur aanzet om aanwezige de geuren verpakkingsolie dat na het vervoer is achtergebleven te verwijderen.
ONDERDELEN:


1 Rotisseriespit 7 Functieknop 2 Rooster 8 Indicator 3 Voedselbak 9 Timerknop 4 Kruimella 10 Verwarmingselement 5 Voedselbakhandgreep 11 Glazen deur 6 Thermostaatknop 12 Deurhandgreep
UW ELEKTRISCHE OVEN GEBRUIKEN
Maak uw bekend met de volgende ovenfuncties en accessoires voor het eerste gebruik:
① Rooster: Voor het roosteren, bakken en het bereiden van schotels en standaard pannen.
② Voedselbak: Voor het grillen van vlees, gevogelte, vis en ander voedsel.
③ Rotisseriespit: Voor het roosteren van verschillende soorten vlees en gevogelte.
④ Kruimella: Voor het opvangen van olie of kruimels.
⑤ Voedselbakhandgreep: Voor het verwijderen van de bak of het rooster.
⑥ Thermostaatknop: kies de gewenste temperatuur Low-90°C-230°C (Low is bereiden bij kamertemperatuur).
⑦ Timerknop: draai de knop naar links (tegen de klok in) en de oven Blijft Aan tot deze handmatig wordt uitgeschakeld. Om de timer te activeren, naar rechts draaien (met de klok mee) voor ander gebruik. Er klinkt een bel aan het einde van de ingestelde tijd.
⑧ Functieknokp: er zijn vijf modi( □ stand-by-modus, 📋 convectie + bovenste en onderste verwarmingselementen, 🌐 convectie + bovenste verwarmingselementen, 🌐 bovenste en onderste verwarmingselementen, 🌐 rotisserie + bovenste verwarmingselementen, 🌐 bovenste en onderste verwarmingselementen +convectie + rotisserie)
⑨ Indicator: die brandt als de oven is ingeschakeld.
TIPS VOOR GEBRUIK VAN ROTISSERIESPIT
1. Plaats de vork in het spit tot aan het einde van het spit en zet deze vast met de schroef.
2. Plaats het voedsel via de andere kant van het spit.
3. Plaats de tweede vork aan de andere kant van het spit en zet deze vast met de schroef. Controleer dat het voedsel stevig op het midden van het spit zit.
4. Plaats het spit met voedsel in de oven. Plaats een kant van het spit in de inkeping in de oven. Plaats de andere kant van het spit op de steun in de oven.
BEDIENINGSPANEEEL

radar
| Metric | Value |
| ------------ | ----- |
| TEMP | 230 |
| LOW | 210 |
| 90 | 180 |
| 120 | 150 |
| FUNCTION | - |
| TIME | - |
| Off | 30 |
| Power | 15 |
| Stay On | 60 |
| Off | 45 |
| Stay On | 75 |
| Stay On | 90 |
GEBRUIKERSINSTRUCTIES
7. FUNCTIE

Deze functie is ideaal voor het bakken van varkensvlees, kippenpoten, kippenvleugels, aardappelschijfjes, gevogelte, karbonades, vlees en alles wat meer gelijkmatig gebakken dient te worden.
Opmerking: Alle bereidingstijden zijn gebaseerd op vlees van koelkasttemperatuur. Bevroren vlees zal aanzienlijk langer duren. Daarom wordt een vleesthermometer aanbevolen.
Gebruik
(1) Plaats het voedsel dat bereid moet worden op het rooster / voedselbak. Plaats het rooster / de bak op de middelste ondersteuning
in de oven.
(2) Draai de Functieknop naar &
(3) Zet de Thermostaatknop op de gewenste temperatuur volgens het recept.
(4) Stel de Timerknop in op de gewenste bereidingstijd.
(5) Controleer het bereidde voedsel op gaarheid zo'n 5\~10 minuten voor de verwachtte eindtijd.
(6) Als de bereiding klaar is, klinkt er een bel en de Timerknop gaat automatisch terug naar de Off-stand. Open de deur helemaal en verwijder het voedsel.
LET OP: Bereid voedsel, het metalen rooster/bak en de deur kunnen erg heet zijn, wees voorzichtig. Laat de oven niet onbeheerd achter.
8. FUNCTIE

Deze functie is ideaal voor het bereiden van brood, pizza en gevogelte.
Gebruik
(1) Plaats het voedsel dat bereid moet worden op het rooster / voedselbak. Plaats het rooster / de bak op de middelste ondersteuning
in de oven.
(2) Draai de Functieknop naar
(3) Zet de Thermostaatknop op de gewenste temperatuur volgens het recept.
(4) Stel de Timerknop in op de gewenste bereidingstijd
(5) Om het te controleren of om voedsel te verwijderen, gebruik een handgreep om het voedsel erin of eruit te halen.
(6) Als de bereiding klaar is, klinkt er een bel en de Timerknop gaat automatisch terug naar de Off-stand. Open de deur helemaal en verwijder direct het voedsel, anders kan de overgebleven hitte in de oven blijven verwarmen en uw toast uitdrogen.
LET OP: Bereid voedsel, het metalen rooster/bak en de deur kunnen erg heet zijn, wees voorzichtig.
9. FUNCTIE

Deze functie is ideaal voor het bereiden van kip en gevogelte.
Opmerking: Alle bereidingstijden zijn gebaseerd op vlees van koelkasttemperatuur. Bevroren vlees zal aanzienlijk langer duren. Daarom wordt een vleesthermometer aanbevolen.
Gebruik
(1) Plaats de hele kip op de rotisseriespit en plaats aan beide zijden een vork, plaats het spit in de inkeping en sluit de deur.
OPMERKING: Plaats de voedselbak in de onderste stand voor het opvangen van olie dat tijdens de bereiding eraf druppelt en plaats wat water voor de bereiding in de bak, dat geeft de rotisserie een goed resultaat.
(2) Draai de Functieknop naar &
(3) Stel de Thermostaatknop in op 230°C.
(4) Stel de Timerknop in op de gewenste bereidingstijd.
(5) Controleer het bereidde voedsel op gaarheid zo'n 5\~10 minuten voor de verwachtte eindtijd.
(6) Als de bereiding klaar is, klinkt er een bel en de Timerknop gaat automatisch terug naar de Off-stand. Open de deur helemaal en verwijder het voedsel.
LET OP: Bereid voedsel, het metalen spit/bak en de deur kunnen erg heet zijn, wees voorzichtig.
ONDERHOUDINSTRUCTIES VOOR GEBRUIK
Dit apparaat vergt weinig onderhoud. Er zijn geen onderdelen die gebruikers kunnen onderhouden. Probeer het niet zelf te repareren. Neem contact op met een gekwalificeerd reparateur als het apparaat onderhoud nodig heeft.
SCHOONMAAKINSTRUCTIES
LET OP: Ter bescherming tegen een elektrische schok, NIET DE OVEN ONDERDOMPELEN IN WATER OF EEN ANDERE VLOEISTOF.
Uw oven dient regelmatig schoongemaakt te worden voor de beste prestaties en een lang leven. Regelmatig schoonmaken verkleint ook het risico op brand.
Stap 1. Verwijder de stekker uit het stopcontact. Laat het apparaat afkoelen.
Stap 2. Verwijder de verwijderbare kruimella, rooster en plaat uit de oven. Maak ze schoon met een vochtige doek met zeep. Gebruik alleen een mild sopje.
Stap 3. Maak de binnenkant van de oven schoon met een vochtige doek met sop. Veeg de ovenwanden, de bodem en de glazen deur schoon. Herhaal dat met een droge, schone doek.
Stap 4. Veeg de buitenkant van de oven af met een vochtige doek.
LET OP: GEBRUIK GEEN BIJTENDE MIDDELEN OF METALEN SCHUURSPONSJES. Gebruik een mild sopje. Bijtende middelen, schrobborstels en chemische middelen zullen de coating van het apparaat beschadigen. Er kunnen stukjes afbreken en elektrische onderdelen aanraken en zo mogelijk een elektrische schok geven.
Stap 5. Laat het apparaat afkoelen en helemaal drogen voor het wegzetten. Als u het voor langere tijd wegzet, zorg dan dat de oven schoon is en er geen etensresten meer in zitten. Bewaar de oven op een droge locatie zoals op een tafel, aanrecht of schap. Op het aanbevolen schoonmaken na is er geen ander gebruikersonderhoud.
Al het andere onderhoud moet door een erkend servicecentrum gebeuren.
SPECIFICATIES:
Spanning 230V-240V Frequentie 50 Hz -60Hz Vermogen: 2000W Capaciteit over 42Liter Alleen voor huishoudelijk gebruik, NIET ONDERDOMPELEN IN WATER
GARANTIE
De garantieperiode op onze producten is 2 jaar, tenzij anders vermeld, beginnend vanaf de datum van de initiele aankoop of bezorgdatum.
Als u problemen of vragen heeft, kunt u eenvoudig onze hulppagina's bezoeken voor tips om problemen op te lossen, de FAQ's en andere gebruikershandleidingen op onze website:
https://sav.hkoenig.com.
Door de referentienaam van uw apparaat in de zoekbalk te typen, krijgt u toegang tot alle beschikbare online hulpmiddelen, ontworpen om aan uw behoeften te voldoen.
Als u toch niet geen antwoord op uw vraag kunt vinden, klik dan op "Heeft het antwoord uw probleem opgelost? Hierdoor gaat u naar het Aanvraagformulier voor Klantenondersteuning, dat u in kunt vullen om uw verzoek te valideren en hulp te ontvangen.
GARANTIEVOORWAARDEN
De garantie dekt alle mankementen die voortkomen uit normaal gebruik, volgens de sectie gebruik en specificaties in de gebruikershandleiding.
Deze garantie omvat niet verpakkings- of transportproblemen tijdens het vervoer van het product door de eigenaar. Het omvat ook niet de normale slijtage van het product, noch het onderhoud of vervangen van verbruiksartikelen.
UITSLUITINGEN VAN DE GARANTIE
- Accessoires en verbruiksartikelen (\*).
- Normaal onderhoud van het apparaat.
- Alle mankementen veroorzaakt door verkeerd gebruik (schokken, het niet opvolgen van de aanbevolen stroomvoorziening, in slechte omstandigheden gebruiken, etc.), onvoldoende onderhoud of ondeugdelijk gebruik van het apparaat, alsook het gebruik van ongeschikte accessoires.
- Schade van buitenaf: vuur, waterschade, elektrische stroompiek, etc.
- Apparaten die uit elkaar zijn gehaald, ook gedeeltelijk, door personen die niet er niet gekwalificeerd voor zijn (zoals de gebruiker).
- Producten waarvan het serienummer verdwenen, beschadigd of onleesbaar is, waardoor we het niet kunnen identificeren.
- Producten die verhuurd werden of ter demonstratie of showmodel waren.
(\*) Sommige onderdelen van uw apparaat, genaamd verbruiksartikelen, slijten naar verloop van tijd en bij veel gebruik van uw apparaat. Deze slijtage is normaal, maar kan verergerd worden door slechte omstandigheden of onderhoud van uw apparaat. Deze onderdelen worden daarom niet gedekt door de garantie.
De accessoires meegeleverd met het apparaat zijn ook uitgesloten van de garantie. Ze kunnen niet vervangen of gerestitueerd worden. Echter, sommige accessoires zijn te koop via onze website: https://sav.hkoenig.com/.
MILIEU
LET OP:

Gooi dit apparaat niet weg als normaal huishoudelijk afval. Er is een scheiding voor afgedankte elektrische apparaten, vraag uw lokale overheid waar u dit apparaat kunt inleveren. Elektrische producten bevatten gevaarlijke stoffen die schadelijk kunnen zijn voor het milieu of mensen en dienen te worden gerecycled. Dit symbool geeft aan dat elektrische apparaten niet bij normaal afval mag, een rolcontainer gemarkeerd met een kruis.
Adeva SAS / H.Koenig Europe - 8 rue Marc Seguin - 77290 Mitry Mory - France www.hkoenig.com - sav@hkoenig.com - contact@hkoenig.com - Tél: +33 1 64 67 00 05
ESPANOL
MEDIDAS DE SEGURIDAD IMPORTANTES
Para utilizar cualquier electrodoméstico, siempre se deben tomar las precauciones básicas de seguridad, dentro de las cuales se incluyen las siguientes:
1. Lea todas las instrucciones antes de usar el aparato.
2. No toque las superficies calientes.
3. Se requiere una estricta supervisión cuando cualquier dispositivo eléctrico está siendo utilizado por niños o cerca de ellos.
4. Para evitar el riesgo de choques eléctricos, nunca sumerja el cable de alimentación, el enchufe ni cualquier otra parte del horno en agua u otros líquidos.
5. No deje que el cable de alimentación cuelgue del borde de la mesa o mostrador, ni que entre en contacto con superficies calientes.
6. No use este aparato si su cable de alimentación o enchufe están dañados, si no está funcionando correctamente, está en mal estado o se ha caído. Si el cable de alimentación está deteriorado deberá ser remplazado por el fabricante, su personal técnico o un especialista similar para evitar riesgos potenciales.
7. El uso de accesorios no recomendados por el fabricante puede causar accidentes y/o lesiones.
8. Cuando opere el horno, mantenga al menos cuatro pulgadas de espacio en todos los lados para permitir una circulación de aire adecuada.
9. Desconecte el horno del tomacorriente cuando no esté en uso y antes de limpiarlo. Deje que se enfríe totalmente antes de poner, quitar o limpiar cualquier pieza.
10. Para desconectar el horno, gire el Dial de Control a la posición de APAGADO antes de quitar el enchufe. Siempre sostenga el enchufe y no tire del cable.
11. No cubra ninguna parte del horno con papel de aluminio. Esto puede causar sobrecalentamiento.
12. No limpiar con esponjas de fibras metálicas. Las fibras pueden desprenderse de la almohadilla y tocar las partes eléctricas, creando una descarga eléctrica.
13. No introduzca alimentos grandes o utensilios de metal en el horno debido a que puede provocar un incendio o choques eléctricos.
14. No coloque ningún artefacto sobre el horno ni lo cubra con material inflamable durante la operación, ya que puede provocar un incendio.
15. Cuidado extremo al usar contenedores construidos con cualquier material que no sea metal o vidrio.
16. No coloque ninguno de los siguientes materiales dentro del horno: cartón, plástico, papel, o similares.
17. Cuando el horno no esté en uso no lo utilice para almacenar ningún material que no sean los accesorios recomendados por el fabricante.
18. Use guantes aislantes y protectores cuando opere el horno caliente.
19. Este electrodoméstico tiene una puerta de seguridad de vidrio templada. El vidrio templado es más fuerte que el vidrio ordinario y más resistente a la rotura, puede romperse, pero las piezas no tendrán bordes afilados.
Evite rayar la superficie de la puerta o mellar los bordes. Si el vidrio de la puerta se raya o mella, comuníquese con nuestra línea de atención al cliente antes de usar el horno.
20. No utilizar en exteriores.
21. Use este aparato sólo para los fines previstos en este manual.
22. Este aparato es para USO DOMÉSTICO exclusivamente.
23. La temperatura de la puerta o la superficie exterior puede ser mayor cuando el aparato está funcionando.
24. Protección contra el peligro de heridas por filo.
25. La temperatura de las superficies puede ser alta cuando el aparato está funcionando.
26. No coloque utensilios de cocina o platos para hornear en la puerta de vidrio.
27. Este aparato puede ser utilizado por personas con capacidades físicas, sensoriales o mentales reducidas o con falta de experiencia o conocimientos, siempre que sean supervisadas o instruidas en el uso seguro del aparato y que entiendan perfectamente los peligros potenciales.
28. Los niños deben ser supervisados para asegurarse de que no jueguen con el aparato.
29. El peso de la comida que se coloca en el sartén S3 o la parrilla de acero no puede superar los 3.0 kg. (Solo como referencia) (La comida no puede concentrarse en un lado del sartén o la parrilla, colóquela siempre de manera uniforme).
30. Si el cable de alimentación está deteriorado deberá ser remplazado por el fabricante, su personal técnico o un especialista similar para evitar riesgos potenciales.
31. Coloque a superficie superior del horno contra la pared.
32. ADVERTENCIA: Las superficies no funcionales pueden alcanzar altas temperaturas.
Dado que las temperaturas son percibidas de manera diferente por diferentes personas, este aparato debe usarse con PRECAUCIÓN. Use exclusivamente para sujetar las superficies destinadas a sostener y utilice medidas de protección contra el calor como guantes o soportes para ollas. Las superficies no funcionales deben tener suficiente tiempo para enfriarse.
33. No coloque el aparato sobre o cerca de hornillas calientes, ya sean de gas o eléctricas, ni de cualquier otro artefacto que produzca calor.
34. Debe tener mucho cuidado al mover cualquier artefacto que contenga aceite caliente u otros líquidos calientes.
35. Gire el Dial de Control a la posición de APAGADO para apagar el aparato.
36. Este aparato no está destinado para ser operado por medio de un temporizador externo o un sistema de control remoto.
37. Este aparato puede ser utilizado por niños mayores de 8 años siempre que sean supervisados o hayan sido instruidos en el uso del aparato de forma segura y entienden los peligros involucrados.
38. La limpieza y el mantenimiento a cargo del usuario no deben ser realizados por niños a menos que tengan al menos 8 años y estén supervisados por un adulto.
39. Mantenga el aparato y su cable de alimentación fuera del alcance de los niños menores de 8 años.
40. Cuando utilice equipos eléctricos, siempre tome las debidas precauciones de seguridad para evitar riesgos de
incendios, descargas eléctricas y/o lesiones en caso de mal uso.
41. Asegúrese de que la tensión de su red eléctrica sea compatible con la indicada en la placa de características del horno. Si este no es el caso, no lo conecte y póngase en contacto con el distribuidor.
42.
43. Nunca deje el horno desatendido mientras esté en funcionamiento.
44. Nunca abra el aparato desde el frente, siempre colóquese ligeramente hacia un lado para evitar quemarse con el vapor.
45. El aparato no debe usarse si se ha caído, si tiene fugas o si hay signos evidentes de daños visibles.
46. Su aparato ha sido diseñado para uso doméstico únicamente. No fue diseñado para usarse en los siguientes casos que no están cubiertos por la garantía:
- en áreas de cocina reservadas para el personal en tiendas, oficinas y otros entornos profesionales,
- en posadas agrícolas,
- por clientes de hoteles, moteles y otros entornos residenciales,
- en entornos de tipo alojamiento y desayuno.
PRECAUCIÓN: LAS SUPERFICIES DEL APARATO ESTÁN CALIENTES DESPUÉS DEL USO. Use guantes protectores cuando toque el horno, platos y alimentos calientes, o cuando inserte/retire la parrilla, los sartenes o los platos para hornear.
GUARDA ESTE MANUAL DE INSTRUCCIONES.
ANTES DEL PRIMER USO
Antes de usar su horno eléctrico por primera vez, asegúrese de:
1. Desembale el aparato.
2. Retire la bandeja para hornear y la parrilla. Lávelos con agua jabonosa caliente o en el lavavajillas.
3. Seque completamente todos los accesorios y vuelva a colocarlos en el horno. Conecte el horno al tomacorriente y estará listo para su uso.
4. Después de armar su horno, le recomendamos que lo haga funcionar a la temperatura MÁXIMA durante aproximadamente 15 minutos para eliminar cualquier olor a aceite de embalaje que pueda quedar después del envío.
DESCRIPCIÓN DEL PRODUCTO


1. Varilla para asar 7. Dial de control 2. Rejilla de acero 8. Luz de encendido 3. Sartén para hornear 9. Temporizador 4. Bandeja para migas 10. Elemento de calefacción 5. Mango para sartén 11. Puerta de cristal 6. Termostato 12. Manija de la puerta
USANDO SU HORNO ELÉCTRICO
Familiarícese con las siguientes funciones y accesorios del horno antes del primer uso:
① Rejilla de acero: para tostar, hornear y cocinar en general en cazuelas y sartenes estándar.
② Sartén para hornear: para asar carnes, aves, pescado y otros alimentos.
③ Varilla para asar: utilícela para asar carnes y aves.
④ Bandeja para migas: para recoger el aceite o las migas caídas.
⑤ Mango para sartén: para quitar el sartén o la rejilla.
⑥ Termostato: elija la temperatura deseada entre Baja-90°C – Alta-230°C (Baja es cocinar a temperatura ambiente).
⑦ Temporizador: gire el control hacia la izquierda (en sentido contrario a las agujas del reloj) y el horno permanecerá encendido hasta que se apague manualmente. Para activar el temporizador, gire a la derecha (en el sentido de las agujas del reloj) para otro uso. Sonará una campana al final del tiempo programado.
⑧ Dial de control: hay cinco funciones (□ modo de espera, 📋 convección + elementos calefactores superior e inferior, convección + elementos calefactores superiores,
elementos calefactores superior e inferior, asador + elementos calefactores superiores, elementos calefactores superior e inferior + convección + asador).
⑨ Luz de encendido: se ilumina cada vez que se enciende el horno.
CONSEJOS PARA UTILIZAR LA VARILLA DE ASAR
1. Inserte la horquilla en la varilla hasta que esté cerca del extremo y luego asegúrela con un tornillo de mariposa.
2. Inserte la comida del otro lado de la varilla.
3. Coloque la segunda horquilla en el otro lado de la varilla y asegúrela con un tornillo de mariposa. Compruebe que la comida esté firmemente en el centro de la varilla.
4. Introduzca la varilla con la comida en el horno. Inserte un lado de la varilla en el orificio de soporte del horno. Y luego coloque el otro lado de la varilla en el soporte del horno.
PANEL DE CONTROL

radar
| Metric | Value |
| ------------ | ----- |
| TEMPERATURE | 230 |
| FUNCTION | Low |
| TIME | Off |
| POWER | 30 |
INSTRUCCIONES DE OPERACIÓN
1. FUNCIÓN


Esta función es ideal para hornear chuletas de cerdo, muslos de pollo, alitas de pollo, hojuelas de papa, carne de ave, chuletas, pescado, etc., con un calentamiento más uniforme.
Nota: Todos los tiempos de asado se basan en carnes a la temperatura del refrigerador. Las carnes congeladas pueden tardar mucho más. Por lo tanto, se recomienda encarecidamente el uso de un termómetro para carne.
Operación
① Coloque los alimentos a cocinar en la parrilla o sartén. Inserte la parrilla o sartén en la guía de soporte central del horno.
② Gire el dial de control a la función ☐.
③ Ajuste el termostato a la temperatura deseada según sea necesario o según la receta.
④ Fije el temporizador en el tiempo de cocción deseado.
⑤ Compruebe que los productos horneados estén cocidos 5 \~ 10 minutos antes de la finalización prevista.
⑥ Cuando se completa el asado, sonará una campana y la perilla del temporizador volverá a la posición de apagado automáticamente. Abra la puerta por completo y retire la comida.
PRECAUCIÓN: Los alimentos cocidos, la parrilla/sartén y la puerta pueden estar muy calientes, manipúlelos con cuidado. No deje el horno desatendido.
2. FUNCIÓN

Esta función es ideal para cocinar pan, pizza y aves en general.
Operación
① Coloque los alimentos a cocinar en la parrilla o sartén. Inserte la parrilla o sartén en la guía de soporte central del horno.
② Gire el dial de control a la función
③ Ajuste el termostato a la temperatura deseada según sea necesario o según la receta.
④ Fije el temporizador en el tiempo de cocción deseado.
⑤ Para revisar o quitar la comida, use el mango para ayudar a que la comida entre y salga.
⑥ Cuando se completa el asado, sonará una campana y la perilla del temporizador volverá a la posición de apagado automáticamente. Abra la puerta por completo y retire la comida.
PRECAUCIÓN: Los alimentos cocidos, la parrilla/sartén y la puerta pueden estar muy calientes, manipúlelos con cuidado.
3. FUNCIÓN


Esta función es ideal para cocinar pollos enteros y aves en general.
Nota: Todos los tiempos de asado se basan en carnes a la temperatura del refrigerador. Las carnes congeladas pueden tardar mucho más. Por lo tanto, se recomienda encarecidamente el uso de un termómetro para carne.
Operación
① Coloque el pollo entero en la varilla de asar y fijelo con la horquilla a ambos lados, inserte la varilla en el orificio que se encuentra dentro del horno y cierre la puerta.
② Gire el dial de control a la función & .
③ Ajuste el termostato a 230°C.
④ Fije el temporizador en el tiempo de cocción deseado.
⑤ Compruebe que los productos horneados estén cocidos 5 \~ 10 minutos antes de la finalización prevista.
⑥ Cuando se completa el asado, sonará una campana y la perilla del temporizador volverá a la posición de apagado automáticamente. Abra la puerta por completo y retire la comida.
PRECAUCIÓN: Los alimentos cocidos, la parrilla/sartén y la puerta pueden estar muy calientes, manipúlelos con cuidado.
MANTENIMIENTO
Este aparato requiere poco mantenimiento. No contiene partes reparables por el usuario. No intente repararlo usted mismo. Póngase en contacto con un técnico calificado.
LIMPIEZA
PRECAUCIÓN: Para evitar descargas eléctricas, NO SUMERJA EL HORNO EN AGUA NI EN NINGÚN OTRO LÍQUIDO.
El horno debe limpiarse regularmente para obtener el mejor rendimiento y alargar la vida útil. La limpieza regular también reducirá riesgos de incendio.
1. Desenchufe el horno del tomacorriente y permita que se enfríe antes de efectuar la limpieza.
2. Retire la bandeja extraíble para migajas, la parrilla y el sartén. Límpielos con paño húmedo. Asegúrese de usar solo agua jabonosa suave.
3. Limpie las paredes del horno, la parte inferior del horno y la puerta de vidrio con un paño húmedo en agua jabonosa. Repita con un paño seco y limpio.
4. Limpie el exterior del horno con un paño húmedo.
PRECAUCIÓN: NO USE LIMPIADORES ABRASIVOS NI ALMOHADILLAS METÁLICAS. Asegúrese de usar solo agua jabonosa suave. Los limpiadores abrasivos, los cepillos de fregado y los limpiadores químicos dañarán el revestimiento de este aparato. Además, las piezas metálicas pueden desprenderse y tocar partes eléctricas implicando un riesgo de descarga eléctrica.
5. Permita que el horno se enfríe y seque por completo antes de guardarlo. Si almacena el horno durante largos períodos de tiempo, asegúrese de que esté limpio y libre de partículas de alimentos. Guarde el horno en un lugar seco, como una mesa, mostrador o estante de armario. Aparte de la limpieza recomendada, no será necesario más mantenimiento por parte del usuario. Cualquier otro servicio debe ser realizado por un técnico calificado.
ESPECIFICACIONES
Voltaje nominal 230 V – 240 V Frecuencia nominal 50 Hz – 60 Hz Potencia nominal 2000 W Capacidad del horno 42 litros Solo para uso doméstico, NO SUMERGIR EN EL AGUA
GARANTÍA
El periodo de garantía de nuestros productos es de 2 años, salvo que la ley estipule lo contrario, a partir de la fecha de la compra inicial o de la fecha de entrega.
Si tiene algún problema o pregunta, puede acceder fácilmente a nuestras páginas de ayuda, consejos para solucionar problemas, preguntas frecuentes y manuales de usuario en nuestro sitio de servicio: https://sav.hkoenig.com.
Al escribir el nombre de referencia de su dispositivo en la barra de búsqueda, puede acceder a toda la asistencia en línea disponible, diseñada para satisfacer mejor sus necesidades.
Si sigue sin encontrar una respuesta a su pregunta o problema, haga clic en "¿La respuesta ha resuelto su problema? Esto le llevará al formulario de solicitud de asistencia posventa, que puede rellenar para validar su solicitud y obtener ayuda.
CONDICIONES DE GARANTÍA
La garantía cubre todos los fallos que se produzcan en el contexto de un uso normal, de acuerdo con los usos y especificaciones del manual de usuario.
Esta garantía no se aplica a los problemas de embalaje o transporte durante el envío del producto por parte del propietario. Tampoco incluye el desgaste normal del producto, ni el mantenimiento o la sustitución de piezas consumibles.
EXCLUSIÓN DE GARANTÍA
- Accesorios y piezas de desgaste (\*).
- Mantenimiento normal del aparato.
- Todas las averías derivadas de un uso incorrecto (golpes, incumplimiento de las recomendaciones de alimentación eléctrica, malas condiciones de uso, etc.), de un mantenimiento insuficiente o de un mal uso del aparato, así como del uso de accesorios inadecuados.
- Daños de origen externo: incendio, daños por agua, sobrecarga eléctrica, etc.
- Cualquier equipo que haya sido desmontado, incluso parcialmente, por personas que no estén autorizadas a hacerlo (en particular el usuario).
- Productos cuyo número de serie falte, esté dañado o sea ilegible, lo que no permitiría su identificación.
- Productos sujetos a alquiler, demostración o exposición.
(\*) Algunas piezas de su aparato, conocidas como piezas de desgaste o consumibles, se deterioran con el tiempo y la frecuencia de uso de su aparato. Este desgaste es normal, pero puede acentuarse por las malas condiciones de uso o de mantenimiento de su aparato. Por lo tanto, estas piezas no están cubiertas por la garantía.
Los accesorios suministrados con el aparato también están excluidos de la garantía. No se pueden cambiar ni reembolsar. No obstante, algunos accesorios pueden adquirirse directamente en nuestro sitio web: https://sav.hkoenig.com/
MEDIO AMBIENTE
ELIMINACIÓN APROPIADA DE ESTE APARATO

Esta marca indica que el producto no debe desecharse en la basura doméstica, porque las sustancias peligrosas pueden filtrarse en el agua subterránea y entrar en la cadena alimentaria, dañando su salud y bienestar. Para reciclarlo utilice los sistemas de devolución y recolección de su localidad o póngase en contacto con el distribuidor donde adquirió el aparato. Al reemplazar los electrodomésticos antiguos por otros nuevos, el minorista está legalmente obligado a recuperar sus electrodomésticos viejos de forma gratuita.
Adeva SAS / H.Koenig Europe - 8 rue Marc Seguin - 77290 Mitry Mory - France
www.hkoenig.com - sav@hkoenig.com - contact@hkoenig.com - Tél: +33 1 64 67 00 05
ITALIANO IMPORTANTI ISTRUZIONI DI SICUREZZA
Quando si utilizza un apparecchio elettrico, è necessario seguire sempre alcune precauzioni di sicurezza di base, tra cui:
1. Leggere tutte le istruzioni
2. Non toccare le superfici calde. Usare le maniglie o le manopole.
3. È necessaria una stretta supervisione quando qualsiasi apparecchio viene utilizzato da o vicino ai bambini.
4. Per proteggersi da scosse elettriche, non mettere parti del forno elettrico in acqua o altri liquidi.
5. Non lasciare che il cavo penda dal bordo del tavolo o del bancone o tocchi le superfici calde.
6. Non utilizzare l'apparecchio con cavo o spina danneggiati o dopo che l'apparecchio non ha funzionato correttamente o è stato danneggiato in un qualsiasi modo, consegnare l'apparecchio al centro di assistenza autorizzato più vicino per l'esame, la riparazione o la regolazione.
7. L'uso di accessori non raccomandati dal produttore dell'apparecchio può causare rischi o lesioni.
8. Durante il funzionamento del forno, lasciare almeno dieci centimetri di spazio su tutti i lati del forno per consentire un'adeguata circolazione dell'aria.
9. Scollegare dalla presa quando l'apparecchio non viene utilizzato o prima di pulirlo. Lascialo raffreddare prima di smontare o rimuovere parti o prima della pulizia.
10. Per disconnetterlo, ruotare il controllo su STOP, quindi scollegare la spina. Afferrare sempre la spina e non tirare mai il cavo.
11. Non coprire il raccoglibriciole o qualsiasi altra parte del forno con un foglio d'alluminio o carta stagnola. Ciò può causare il surriscaldamento del forno.
12. Non pulire con spugne metalliche. La spugna potrebbe toccare le parti elettriche, creando il rischio di scosse elettriche.
13. Gli alimenti di grandi dimensioni o gli utensili di metallo non devono essere inseriti in un forno elettrico poiché potrebbero causare incendi o rischi di scosse elettriche.
14. Esiste un pericolo d'incendio se il forno è coperto o tocca materiale infiammabile, comprese tende, tendaggi, pareti e simili, durante il funzionamento. Non conservare oggetti sul forno durante il funzionamento.
15. È necessaria estrema cautela quando si usano contenitori realizzati con materiali diversi dal metallo o dal vetro.
16. Non mettere i seguenti materiali nel forno: cartone, plastica, carta o simili.
17. Non conservare materiali diversi dagli accessori consigliati dal produttore in questo forno quando non viene utilizzato.
18. Indossare sempre guanti isolanti protettivi da forno quando si inseriscono o si rimuovono oggetti dal forno caldo.
19. Questo apparecchio ha una porta in vetro temperato. Questo tipo di vetro è più forte del normale vetro e più resistente alla rottura. Il vetro temperato può rompersi, ma i pezzi non avranno bordi taglienti. Evitare di graffiare la superficie della porta o tagliare i bordi. Se lo sportello si dovesse graffiare o rovinare, contattare il nostro servizio clienti prima di utilizzare il forno.
20. Non usare all'aperto.
21. Non utilizzare l'apparecchio per usi diversi da quelli previsti.
22. Questo apparecchio è SOLO PER USO DOMESTICO.
23. La temperatura della porta o della superficie esterna potrebbe essere più alta quando l'apparecchio è in funzione.
24. Proteggersi dagli spigoli vivi durante l'utilizzo.
25. La temperatura delle superfici accessibili può essere elevata quando l'apparecchio è in funzione.
26. Non appoggiare utensili da cucina o stoviglie sulla porta di vetro.
27. Este aparato puede ser utilizado por personas con capacidades físicas, sensoriales o mentales reducidas o con falta de experiencia o conocimientos, siempre que sean supervisadas o instruidas en el uso seguro del aparato y que entiendan perfectamente los peligros potenciales.
28. I bambini devono essere sorvegliati per assicurarsi che non giochino con l'apparecchio.
29. Il peso del cibo che viene inserito sul vassoio / griglia metallica S3 non può essere superiore ai 3.0kg. (Solo per riferimento)( Il cibo non va posizionato su un lato del vassoio/griglia per alimenti S3, è meglio che venga distribuito uniformemente sul vassoio/griglia per alimenti S3)。
30. Per apparecchi con attacco di tipo Y, se il cavo di alimentazione è danneggiato, esso deve essere sostituito dal produttore, da un suo agente di servizio o da persone qualificate per evitare pericoli.
31. La superficie posteriore degli apparecchi deve essere posizionata contro una parete.
32. ATTENZIONE: questo apparecchio include una funzione di riscaldamento. Superfici diverse dalle superfici funzionali possono sviluppare temperature elevate. Poiché le temperature sono percepite in modo diverso da persone diverse, questo dispositivo deve essere utilizzato con ATTENZIONE. Afferrare l'apparecchio esclusivamente tramite le superfici destinate allo scopo e utilizzare misure di protezione dal calore come guanti protettivi o presine. Le aree che non sono destinate all'impugnatura devono avere il tempo sufficiente per raffreddarsi.
33. Non posizionare sopra o vicino a un fornello a gas o elettrico o in un forno riscaldato.
34. Prestare la massima attenzione quando si sposta un apparecchio contenente olio caldo o altri liquidi caldi.
35. Ruotare la manopola del timer su "Off" per spegnere l'apparecchio.
36. Questo apparecchio non deve essere azionato mediante un timer esterno o un sistema di controllo remoto separato.
37. Questo apparecchio può essere utilizzato da bambini di almeno 8 anni, a condizione che siano sorvegliati e che abbiano ricevuto istruzioni sull'uso sicuro dell'apparecchio e siano pienamente consapevoli dei pericoli correlati.
38. La pulizia e la manutenzione non devono essere eseguite da bambini a meno che non abbiano almeno 8 anni e siano sorvegliati da un adulto.
39. Tenere l'apparecchio e il suo cavo di alimentazione fuori dalla portata dei bambini di età inferiore agli 8 anni.
40. Quando si utilizzano apparecchiature elettriche, è necessario prendere sempre precauzioni di sicurezza per prevenire il rischio di incendi, scosse elettriche e/ lesioni in caso di uso improprio.
41. Accertarsi che la tensione nominale presente sulla targhetta corrisponda alla tensione del vostro impianto elettrico. In caso contrario, contattare il rivenditore e non collegare l'unità.
42. Non lasciare mai l'unità incustodita mentre è in funzione.
43. Non aprire mai l'apparecchio stando sulla parte anteriore, posizionarsi sempre leggermente di lato per evitare di bruciarsi con il vapore.
44. Il dispositivo non deve essere utilizzato se è stato fatto cadere, se ci sono evidenti segni di danni o se presenta perdite.
45. Su aparato ha sido diseñado para uso doméstico únicamente. No fue diseñado para usarse en los siguientes casos que no están cubiertos por la garantía:
- en áreas de cocina reservadas para el personal en tiendas, oficinas y otros entornos profesionales,
- en posadas agrícolas,
- por clientes de hoteles, moteles y otros entornos residenciales,
- en entornos de tipo alojamiento y desayuno.
ATTENZIONE: LE SUPERFICI DELL'APPARECCHIO SONO CALDE DOPO L'USO. Indossare SEMPRE guanti da forno protettivi e isolanti quando si toccano il forno caldo, piatti e cibi caldi o quando si inseriscono o rimuovono la griglia, le teglie o i piatti da forno.
CONSERVARE QUESTE ISTRUZIONI
Prima di usare il forno elettrico
Prima di utilizzare il forno elettrico a convezione per la prima volta, assicurarsi di:
9. Disimballare l'unità.
10. Rimuovere la teglia e la griglia. Lavare le griglie e le padelle in acqua calda e fredda o in lavastoviglie.
11. Asciugare accuratamente tutti gli accessori e rimontarli nel forno. Collegare il forno alla presa e sarete pronti ad usare il vostro nuovo forno elettrico.
12. Dopo aver riassemblato il forno, si consiglia di farlo funzionare alla temperatura MAX per circa 15 minuti per eliminare eventuali odori di olio di imballaggio che potrebbero rimanere dopo l'imballaggio.
COMPONENTI:


1 Accessorio girarrosto 7 Manopola funzioni 2 Griglia 8 Indicatore 3 Vassoio alimenti 9 Manopola del timer 4 Vassoio briciole 10 Temosifone 5 Maniglia vassoio alimenti 11 Porta di vetro 6 Manopola termostato 12 Maniglia
UTILIZZO DEL FORNO ELETTRICO
Si prega di conoscere le seguenti funzioni e accessori del forno prima del primo utilizzo:
1 Griglia metallica: Per tostare, cuocere al forno e per cotture in genere in casseruole e padelle standard.
2 Vassoio alimenti: Per l'uso nella cottura alla griglia e arrosto di carne, pollame, pesce e vari altri alimenti.
3 Accessorio girarrosto: Utilizzare per arrostire varietà di carni e pollame.
4 Vassoio briciole: Per raccogliere olio o briciole.
5 Maniglia del vassoio per alimenti: Per rimuovere vassoio o griglia.
6 Manopola termostato: per selezionare la temperatura desiderata tra Bassa-90°C-230°C (Bassa è la cottura a temperatura ambiente).
7 Manopola del timer: ruotando il comando a sinistra (senso antiorario) il forno resterà acceso fino allo spegnimento manuale. Per attivare il timer, girare a destra (in senso orario) per altri usi. Alla fine del tempo programmato verrà emesso un segnale acustico.
8 Manopola delle funzioni: ci sono cinque modalità (☐modalità standby, ☑convezione + resistenze superiori e inferiori, ☑convezione + resistenze superiori, ☑resistenze superiori e inferiori, ☑girarrosto + resistenze superiori, ☑resistenze superiori e inferiori +convezione + girarrosto)
9 Indicatore: si accende ogni volta che si accende il forno.
ACCESSORIO GIRARROSTO UTILIZZO PUNTE
1. Inserire la forcchetta nell'asta fino all'estremità dell'asta e quindi fissare con la vite a testa zigrinata
2. Inserire il cibo dall'altro lato dell'asta.
3. Posiziona la seconda forchetta nell'altro lato dell'asta, quindi fissare con la vite a testa zigrinata. Controllare che il cibo sia saldamente al centro dell'asta.
4. Inserire l'asta con il cibo nel forno. Inserire un lato dell'asta nel foro di supporto del forno. Quindi posizionare l'altro lato dell'asta sulla staffa di supporto del forno.
PANNELLO DI CONTROLLO

radar
TEMP
| Temperature (°C) | Value |
| :--- | :--- |
| Low | 230 |
| 90 | 210 |
| 120 | 180 |
| 150 | 150 |
| Temp | 230 |
FUNCTION

flowchart
graph TD
    A[" "] --> B[" "]
    B --> C[" "]
    C --> D[" "]
    D --> E[" "]
    E --> F[" "]
    F --> G[" "]
    G --> H[" "]
    H --> I[" "]
    I --> J[" "]
    J --> K[" "]
    K --> L[" "]
    L --> M[" "]
    M --> N[" "]
    N --> O[" "]
    O --> P[" "]
    P --> Q[" "]
    Q --> R[" "]
    R --> S[" "]
    S --> T[" "]
    T --> U[" "]
    U --> V[" "]
    V --> W[" "]
    W --> X[" "]
    X --> Y[" "]
    Y --> Z[" "]
TIME

flowchart
graph TD
    A["90"] --> B["75"]
    B --> C["60"]
    C --> D["45"]
    D --> E["30"]
    E --> F["15"]
    F --> G["Off"]
    G --> H["Stay On"]
    H --> I["Power"]
ISTRUZIONI PER L'USO
1. FUNZIONE

Questa funzione è ideale per cuocere fette di maiale, cosce di pollo, ali di pollo, patate, pollame, braciole, pesce e così via con un riscaldamento più uniforme.
Nota: Tutti i tempi di cottura sono basati su carni a temperatura di frigorifero. Le carni congelate possono richiedere molto più tempo. Pertanto, l'uso di un termometro per carne è altamente raccomandato.
Funzionamento
(1) Posizionare il cibo da cuocere sulla griglia/vassoio per alimenti. Inserire la griglia/vassoio nella guida di supporto centrale del forno.
2) Ruotare la manopola delle funzioni su &
(3) Impostare la manopola del termostato sulla temperatura desiderata secondo necessità o ricetta.
(4) Impostare la manopola Timer sul tempo di cottura desiderato.
(5) Controllare la cottura dei prodotti da forno 5\~10 minuti prima del termine cottura previsto.
(6) Quando la cottura è completa, suonerà un campanello e la manopola del timer tornerà automaticamente in posizione Off. Aprire completamente la porta e rimuovere il cibo.
ATTENZIONE: Il cibo cotto, la griglia/vassoio in metallo e la porta possono essere molto caldi, maneggiare con cura. Non lasciare il forno incustodito.
2. FUNZIONE

Questa funzione è ideale per la cottura di pane, pizza e pollame in genere.
Funzionamento
(1) Posizionare il cibo da cuocere sulla griglia/vassoio per alimenti. Inserire la griglia/vassoio nella guida di supporto centrale del forno.
2) Ruotare la manopola delle funzioni su
(3) Impostare la manopola del termostato sulla temperatura desiderata secondo necessità o ricetta.
(4) Impostare la manopola Timer sul tempo di cottura desiderato
5) Per controllare o rimuovere il cibo, utilizzare una maniglia per aiutarsi ad inserire ed estrarre il cibo.
(6) Quando la cottura è completa, suonerà un campanello e la manopola del timer tornerà automaticamente in posizione Off. Aprire completamente la porta e rimuovere immediatamente il cibo, altrimenti il calore rimasto nel forno continuerà a cuocere e ad asciugare il cibo.
ATTENZIONE: Il cibo cotto, la griglia/vassoio in metallo e la porta possono essere molto caldi, maneggiare con cura.
3. FUNZIONE

Questa funzione è ideale per la cottura di polli interi e volatili in genere.
Nota: Tutti i tempi di tostatura sono basati su carni a temperatura di frigorifero. Le carni congelate possono richiedere molto più tempo. Pertanto, l'uso di un termometro per carne è altamente raccomandato.
Funzionamento
(1) Posizionare il pollo intero sull'asta del girarrosto e fissarlo con la forchetta su entrambi i lati, inserire l'asta nella posizione del foro del girarrosto e chiudere la porta.
NOTA: È necessario posizionare il vassoio del cibo nella fessura del cestello inferiore per raccogliere l'olio durante la cottura e mettere dell'acqua nel vassoio del cibo prima della cottura, sarà utile per il girarrosto.
2) Ruotare la manopola delle funzioni su &
(3) Impostare la manopola del termostato su 230°C.
(4) Impostare la manopola Timer sul tempo di cottura desiderato.
(5) Controllare la cottura dei prodotti da forno 5\~10 minuti prima del termine cottura previsto.
(6) Quando la cottura è completa, verrà emesso un segnale acustico e la manopola del timer tornerà automaticamente in posizione Off. Aprire completamente la porta e rimuovere il cibo.
ATTENZIONE: Il cibo cotto, l'asta/vassoio di metallo e la porta possono essere molto caldi, maneggiare con cura.
ISTRUZIONI PER LA PULIZIA
ATTENZIONE: Per proteggersi da scosse elettriche, NON IMMERGERE IL FORNO IN ACQUA O QUALSIASI ALTRO LIQUIDO.
Il forno deve essere pulito regolarmente per mantenere prestazioni ottimali e durare a lungo. Una pulizia regolare riduce anche il rischio di incendio.
Passaggio 1. Rimuovere la spina dalla presa elettrica. Lasciare raffreddare l'apparecchio.
Passaggio 2. Rimuovere il vassoio briciole rimovibile, la griglia e il vassoio estraendoli dal forno. Pulirli con un panno umido e sapone. Assicurati di usare solo sapone delicato e acqua.
Passaggio 3. Per pulire l'interno del forno, le pareti, il fondo e lo sportello di vetro con un panno umido e insaponato.
Ripetere l'operazione con un panno asciutto e pulito.
Passaggio 4. Pulire l'esterno del forno con un panno umido.
ATTENZIONE:NON UTILIZZARE PULITORI ABRASIVI O PAGLIETTE METALLICHE. Assicuratevi di usare solo acqua saponata. Detergenti abrasivi, spazzole e detergenti chimici danneggiano il rivestimento di questa unità. I pezzi delle pagliette metalliche possono rompersi e toccare parti elettriche con rischio di scosse elettriche.
Passaggio 5. Lasciare raffreddare e asciugare completamente l'apparecchio prima di riporlo. Se si conserva il forno per lunghi periodi di tempo assicurarsi che sia pulito e privo di particelle di cibo. Conservare il forno in un luogo asciutto come ad esempio un tavolo o il ripiano di un mobile da cucina. Oltre alla pulizia consigliata, non dovrebbero essere necessary altri tipi di u manutenzione da parte dell'utente.
Qualsiasi altra manutenzione deve essere eseguita da un rappresentante dell'assistenza autorizzato.
SPECIFICAAZIONE:
Tensionenominale 230V-240V Frequenza nominale 50Hz-60Hz Potenza nominale 2000W Capacità del forno 42Litri Solo per uso domestico, NON IMMERGERE IN ACQUA
GARANZIA
Il periodo di garanzia per i nostri prodotti è di 2 anni, se non diversamente stabilito dalla legge, a partire dalla data di acquisto iniziale o di consegna.
Se avete problemi o domande, potete facilmente accedere alle nostre pagine di aiuto, consigli per la risoluzione dei problemi, FAQ e manuali d'uso sul nostro sito post-vendita: https://sav.hkoenig.com. Digitando il nome di riferimento del tuo dispositivo nella barra di ricerca, puoi accedere a tutto il supporto online disponibile, progettato per soddisfare al meglio le tue esigenze.
Se ancora non riesci a trovare una risposta alla tua domanda o al tuo problema, allora clicca su "La risposta ha risolto il tuo problema? Questo vi porterà al modulo di richiesta di supporto post-vendita, che potete completare per convalidare la vostra richiesta e ottenere aiuto.
CONDIZIONI DI GARANZIA
La garanzia copre tutti i guasti derivanti da un uso normale, in conformità con gli usi e le specifiche del manuale utente.
Questa garanzia non si applica a problemi di imballaggio o di trasporto durante la spedizione del prodotto da parte del proprietario. Non include inoltre la normale usura del prodotto, né la manutenzione o la sostituzione delle parti di consumo.
ESCLUSIONE DELLA GARANZIA
- Accessori e parti soggette a usura (\*).
- Normale manutenzione dell'apparecchio.
- Tutti i guasti derivanti da un uso improprio (urti, mancato rispetto delle raccomandazioni sull'alimentazione, cattive condizioni d'uso, ecc.), da una manutenzione inadeguata o da un uso improprio dell'apparecchio, nonché dall'uso di accessori inadeguati.
- Danni di origine esterna: incendio, danni d'acqua, sovratensione elettrica, ecc.
- Qualsiasi attrezzatura che sia stata smontata, anche parzialmente, da persone diverse da quelle autorizzate a farlo (in particolare l'utente).
- Prodotti per i quali il numero di serie è mancante, danneggiato o illeggibile, il che non permetterebbe la sua identificazione.
- Prodotti soggetti a noleggio, dimostrazione o esposizione.
(\*) Alcune parti del suo apparecchio, note come parti soggette a usura o materiali di consumo, si deteriorano con il tempo e la frequenza d'uso del suo apparecchio. Questa usura è normale, ma può essere accentuata da cattive condizioni d'uso o di manutenzione del vostro apparecchio. Queste parti non sono quindi coperte dalla garanzia.
Anche gli accessori forniti con l'apparecchio sono esclusi dalla garanzia. Non possono essere scambiati o rimborsati. Tuttavia, alcuni accessori possono essere acquistati direttamente dal nostro sito web: https://sav.hkoenig.com/.
AMBIENTE
TUTELA AMBIENTALE:

Non gettare questo prodotto come gli altri prodotti per la casa. È necessario smaltire questo prodotto come da norme locali, è necessario informarsi presso le autorità locali sui luoghi in cui è possibile consegnare questo prodotto. Questo perché, i prodotti elettrici ed elettronici contengono
sostanze pericolose che hanno effetti dannosi sull'ambiente o sulla salute umana e dovrebbero essere riciclati. Il simbolo qui accanto (un contenitore per rifiuti con route, contrassegnato da una croce) indica che le apparecchiature elettriche ed elettroniche dovrebbero essere smaltite con cura.
Adeva SAS / H.Koenig Europa - 8 rue Marc Seguin - 77290 Mitry Mory - Francia www.hkoenig.com - sav@hkoenig.com - contact@hkoenig.com - Tél: +33 1 64 67 00 05
Instruction Manual
Manuel d'instructions Bedienungsanleitung Gebruiksaanwijzing Manual de instrucciones Manuale d'uso natural_image
Exterior view of a black Koenig microwave oven with control knobs and a clear glass door (no text or symbols on the device itself)Electric oven
Four électrique Elektrobackofen Elektrische oven Horno elèctrico Forno elettrico ENGLISH
IMPORTANT SAFEGUARDS
When using an electrical appliance, basic safety precautions should always be followed, including the following: 1. Read all instructions. 2. Do not touch hot surfaces. Use handles or knobs. 3. Close supervision is necessary when any appliance is used by or near children. 4. To protect against electric shock, do not place any part of the electric oven in water or other liquid. 5. Do not let cord hang over edge of table or counter, or touch hot surfaces. 6. Do not operate appliance with damaged cord or plug or after the appliance malfunctions, or has been damaged in any manner, return appliance to the nearest Authorized Service Center for examination, repair, or adjustment. 7. The use of accessory attachments not recommended by the appliance manufacturer may cause hazard or injury. 8. When operating the oven, keep at least four inches of space on all sides of the oven to allow for adequate air circulation. 9. Unplug from outlet when not in use, or before cleaning. Let it to cool before putting on or taking parts, or before cleaning. 10. To disconnect, turn the control to STOP, then unplug the plug. Always hold the plug, but never pull the cord. 11. Do not cover CRUMB TRAY or any part of the oven with metal foil. This may cause overheating of the oven. 12. Do not clean with metal scouring pads. Pieces can break off the pad and touch electrical parts, creating a risk of electric shock. 13. Oversized foods or metal utensils must not be inserted in a electric oven as they may create a fire or risk of electric shock. 14. A fire may occur if the oven is covered or touching flammable material, including curtains, draperies, walls, and the like, when in operation. Do not store any item on the oven during operation. 15. Extreme caution should be exercised when using containers constructed if anything other than metal or glass. 16. Do not place any of the following materials in the oven: cardboard, plastic, paper, or anything similar. 17. Do not store any materials, other than manufacturer's recommended accessories, in this oven when not in use. 18. Always wear protective, insulated oven mitts when inserting or removing items from the hot oven. 19. This appliance has a tempered, safety glass door. The glass is stronger than ordinary glass and more resistant to breakage. Tempered glass can break, but the pieces will not have sharp edges. Avoid scratching door surface or nicking edges. If the door gas a scratch or nick, contact our consumer relations line before using the oven. 20. Do not use outdoors. 21. Do not use appliance for other than intended use. 22. This appliance is for HOUSEHOLD USE ONLY. 23. The temperature of the door or the outer surface may be higher when the appliance is working. 24. Protect against hurt by sharp edge when action. 25. Temperature of accessible surfaces may be high when the appliance is operating. 26. Do not rest cooking utensils or baking dishes on glass door. 27. This appliance may be used by persons with reduced physical, sensory or mental capabilities or lack of experience or knowledge, provided that they are supervised or instructed in the safe use of the appliance and that they fully understand the potential hazards. 28. Children should be supervised to ensure that they do not play with the appliance. 29. The weight of the food which is put on the S3 Food Tray/Wire Rack can not be over 3.0kg. (just for reference) (The food can not concentrate on one side of the S3 Food Tray/Wire Rack, you would better try you best to make the food put on the S3 Food Tray/Wire Rack evenly). 30. For appliance with type Y attachment, if the supply cord is damaged, it must be replaced by the manufacturer, its services agent or similarly qualified persons in order to avoid a hazard. 31. Rear surface of appliances should be placed against a wall. 32. WARNING: This appliance includes a heating function. Surfaces, other than the functional surfaces may develop high temperatures. Since temperatures are perceived differently by different people, this device should be used with CAUTION. Hold the appliance exclusively to grip surfaces intended to hold and use such heat protection measures as heat protection Gloves or pot holders. Areas which are not intended to grips must be given sufficient time to cool. 33. Do not place on or near a hot gas or electric burner, or in a heated oven. 34. Extreme caution must be used when moving an appliance containing hot oil or other hot liquids. 35. Turn the timer knob to "off" position to shut off the appliance. 36. Appliances are not intended to be operated by means of an external timer or separate remote-control system. 37. This appliance may be used by children of at least 8 years of age, as long as they are supervised and have been given instructions about using the appliance safely and are fully aware of the dangers involved. 38. Cleaning and maintenance should not be carried out by children unless they are at least 8 years of age and are supervised by an adult. 39. Keep the appliance and its power cord out of reach of children under 8 years of age. 40. When using electrical equipment, safety precautions must always be taken to prevent the risk of fire, electric shock and/or injury in the event of misuse. 41. Make sure that the voltage rating on the typeplate corresponds to your main voltage of your installation. If this is not the case, contact the dealer and do not connect the unit. 42. Never leave the unit unattended while in operation. 43. Never open the appliance from the front, always position yourself slightly to the side to avoid burning yourself with steam. 44. The device must not be used if it has been dropped, it obvious signs of damage are visible or if it has leaks. 45. Your appliance has been designed for household use only. It was not designed to be used in the following cases which are not covered by the warranty: - in kitchen areas reserved for staff in shops, offices and other professional environments, - in farm inns, - by customers of hotels, motels and other residential environments, - in bed and breakfast type environments. CAUTION: APPLIANCE SURFACES ARE HOT AFTER USE.ALWAYS wear protective, insulated oven gloves when touching hot oven or hot dishes and food, or when inserting or removing rack, pans or baking dishes.SAVE THESE INSTRUCTIONS
Before Using Your Electric Oven
Before using your convection electric oven for the first time, be sure to: 1. Unpack the unit. 2. Remove the baking tray and the grill. Wash the racks and pans in hot sudsy water or in dishwasher. 3. Thoroughly dry all accessories and re-assemble in oven. Plug oven into outlet and you are ready to use your new Electric Oven. 4. After re-assembling your oven, we recommend that you run it at MAX temperature for approximately 15 minutes to eliminate the smells of oil that may remain after shipping.COMPONENTS:
 | 1 | Rotisserie rod | 7 | Function knob |
| 2 | Wire rack | 8 | Indicator |
| 3 | Food tray | 9 | Timer knob |
| 4 | Crumb tray | 10 | Heating element |
| 5 | Food tray handle | 11 | Glass door |
| 6 | Thermostat knob | 12 | Door handle |
USING YOUR ELECTRIC OVEN
Please familiarize yourself with the following oven functions and accessories prior to first use: ① Wire Rack: For toasting, baking, and general cooking in casserole dishes and standard pans. ② Food Tray: For use in broiling and roasting meat, poultry, fish, and various other foods. ③ Rotisserie Rod: Use to roast a variety of meats and poultry. ④ Crumb Tray: For collecting fallen oil or crumb. ⑤ Food Tray Handle: For removing tray or rack. ⑥ Thermostat knob: choose desired temperature from Low-90°C-230°C (Low is cooking at room temperature). ⑦ Timer knob: turn control to the left (counter - clockwise) and the oven will Stay On until manually shut off. To activate timer, turn to right (clockwise) for other use. A bell will sound at end of programmed time. ⑧ Function knob: there are five modes(□ stand-by mode, 📋 convection + upper and lower heating elements, 🌐 convection + upper heating elements, 🌐 upper and lower heating elements, 🌒 rotisserie + upper heating elements, 🌘 upper and lower heating elements + convection + rotisserie) ⑨ Indicator: it is illuminated whenever oven is turned on.ROTISSERIE ROD USING TIPS
1. Insert the fork into the rod until near the end of the rod and then secure with thumbscrew 2. Insert the food from the other side of the rod. 3. Place second fort into other side of the rod, and then secure with thumbscrew. Check that the food is in the center of the rod firmly. 4. Insert the rod with food into the oven. Insert the one side of the rod into the support-hole of the oven. And then place the other side of the rod onto the support-bracket of the oven.CONTROL PANEL
radar
| Time | Temperature (°C) | |------|-------------------| | 0 | 230 | | 1 | 210 | | 2 | 180 | | 3 | 150 | | 4 | 120 | | 5 | 90 | | 6 | Off | | 7 | Off | | 8 | Off | | 9 | Off | | 10 | Off | | 11 | Off | | 12 | Off | | 13 | Off | | 14 | Off | | 15 | Off | | 16 | Off | | 17 | Off | | 18 | Off | | 19 | Off | | 20 | Off | | 21 | Off | | 22 | Off | | 23 | Off | | 24 | Off | | 25 | Off | | 26 | Off | | 27 | Off | | 28 | Off | | 29 | Off | | 30 | Off | | 31 | Off | | 32 | Off | | 33 | Off | | 34 | Off | | 35 | Off | | 36 | Off | | 37 | Off | | 38 | Off | | 39 | Off | | 40 | Off | | 41 | Off | | 42 | Off | | 43 | Off | | 44 | Off | | 45 | Off | | 46 | Off | | 47 | Off | | 48 | Off | | 49 | Off | | 50 | Off | | 51 | Off | | 52 | Off | | 53 | Off | | 54 | Off | | 55 | Off | | 56 | Off | | 57 | Off | | 58 | Off | | 59 | Off | | 60 | Off | | 61 | Off | | 62 | Off | | 63 | Off | | 64 | Off | | 65 | Off | | 66 | Off | | 67 | Off | | 68 | Off | | 69 | Off | | 70 | Off | | 71 | Off | | 72 | Off | | 73 | Off | | 74 | Off | | 75 | Off | | 76 | Off | | 77 | Off | | 78 | Off | | 79 | Off | | 80 | Off | | 81 | Off | | 82 | Off | | 83 | Off | | 84 | Off | | 85 | Off | | 86 | Off | | 87 | Off | | 88 | Off | | 89 | Off | | 90 | Off | | 91 | Off | | 92 | Off | | 93 | Off | | 94 | Off | | 95 | Off | | 96 | Off | | 97 | Off | | 98 | Off | | 99 | Off | | 100 | Off |OPERATION INSTRUCTIONS
1. FUNCTION
 This function is ideal for baking pork slice, chicken legs, chicken wings, potato flakes, poultry meat, chops, fish and so on with more evenly heating up. Note: All toasting times are based on meats at refrigerator temperature. Frozen meats may takes considerably longer. Therefore, use of a meat thermometer is highly recommended.Operation
(1) Place the food to be cooked on the Wire rack / food tray. Insert the rack/tray into the middle support guide of the oven. (2) Turn the Function knob to & (3) Set the Thermostat knob to the desired temperature as needed or recipe. (4) Set the Timer knob to the desired cooking time. (5) Check the baked goods for doneness 5\~10 minutes before expected completion. (6) When toasting is complete, a bell will sound and the Timer knob will back to Off position automatically. Open the door completely and remove the food. CAUTION: Cooked food, metal rack/tray, and door can be very hot, handle with care. Do not leave the Oven unattended.2. FUNCTION
 This function is ideal for cooking bread, pizza, and fowl in general.Operation
(1) Place the food to be cooked on the Wire rack / food tray. Insert the rack/tray into the middle support guide of the oven. (2) Turn the Function knob to (3) Set the Thermostat knob to the desired temperature as needed or recipe. (4) Set the Timer knob to the desired cooking time (5) To check or remove food, use a handle to help side food in and out. (6) When toasting is complete, a bell will sound and the Timer knob will back to Off position automatically. Open door completely and remove the food immediately or the heat remaining in the oven will continue to toast and dry out your toast. CAUTION: Cooked food, metal rack/tray, and door can be very hot, handle with care.3. FUNCTION
 This function is ideal for cooking whole chickens and fowl in general. Note: All toasting times are based on meats at refrigerator temperature. Frozen meats may takes considerably longer. Therefore, use of a meat thermometer is highly recommended.Operation
(1) Place whole chicken on the rotisserie rod and fixed by the fork both side, insert the rod into the rotisserie hole position and close the door. NOTE: Need put the Food tray at bottom rack slot to collect oil drip during cooking, and put some water in food tray before cooking, it will make good effect for rotisserie.. (2) Turn the Function knob to ☐ & ☒ (3) Set the Thermostat knob to 230°C. (4) Set the Timer knob to the desired cooking time. (5) Check the baked goods for doneness 5\~10 minutes before expected completion. (6) When toasting is complete, a bell will sound and the Timer knob will back to Off position automatically. Open door completely and remove the food. CAUTION: Cooked food, metal rod/tray, and door can be very hot, handle with care.CLEANING INSTRUCTIONS
CAUTION: To protect against electrical shock, DO NOT IMMERSE THE OVEN IN WATER OR ANY OTHER LIQUIDS. Your toaster oven should be cleaned regularly for best performance and long life. Regular cleaning will also reduce the risk of fire hazard. Step 1. Remove plug from electrical outlet. Allow it to cool. Step 2. Remove the Removable Crumb Tray, Rack, Tray by pulling out of the oven. Clean them with damp, soapy cloth. Make sure to only use mild, soapy water. Step 3. To clean inside of oven, wipe the oven walls, bottom of oven, and glass door with a damp, soapy cloth. Repeat with a dry, clean cloth. Step 4. Wipe outside of oven with a damp cloth. CAUTION: DO NOT USE ABRASIVE CLEANERS OR METAL SCOURING PADS. Make sure to only use mild, soapy water. Abrasive cleaners, scrubbing brushes and chemical cleaners will damage the coating on this unit. Pieces can break off the and touch electrical parts involving a risk of electrical shock. Step 5. Allow the appliance to cool and dry completely before storing. If storing the oven for long periods of time make certain that the oven is clean and free of food particles. Store the oven in a dry location such as on a table or countertop or cupboard shelf. Other than the recommended cleaning, no further user maintenance should be necessary. Any other servicing should be performed by an authorized service representative. SPECIFICATION:| Rated voltage | 230V-240V |
| Rated frequency | 50 Hz -60Hz |
| Rated power | 2000W |
| Oven capacity | 42Litres |
| Household use only, DO NOT IMMERSE IN WATER | |
WARRANTY
The warranty period for our products is 2 years, unless otherwise stated, starting from the date of initial purchase or the date of delivery. If you have any problems or questions, you can easily access our help pages, troubleshooting tips, FAQ, and user manuals on our service site: https://sav.hkoenig.com. By typing the reference name of your device in the search bar, you can access all available online support, designed to best meet your needs. If you still cannot find an answer to your question or problem, then click on “Did the answer solve your problem?”. This will direct you to the Customer Support Request Form, which you can fill out to validate your request and get help.WARRANTY CONDITIONS
The warranty covers all failures occurring under normal use, in accordance with the usage and specifications in the user's manual. This warranty does not apply to packaging or transportation problems during shipment of the product by the owner. It also does not include normal wear and tear of the product, nor maintenance or replacement of consumable parts.EXCLUSION OF WARRANTY
- Accessories and wearing parts (\*). - Normal maintenance of the device. - All breakdowns resulting from improper use (shocks, failure to comply with power supply recommendations, poor conditions of use, etc.), insufficient maintenance or misuse of the device, as well as the use of unsuitable accessories. - Damage of external origin: fire, water damage, electrical surge, etc. - Any equipment that has been disassembled, even partially, by persons other than those authorized to do so (notably the user). - The products whose serial number would be missing, deteriorated or illegible that would not allow its identification. - The products subjected to leasing, demonstration, or exhibition. (\*) Some parts of your device, called wear parts or consumables, deteriorate with time and frequency of use of your device. This wear and tear are normal but can be accentuated by poor conditions of use or maintenance of your device. These parts are therefore not covered by the warranty. The accessories supplied with the device are also excluded from the warranty. They cannot be exchanged or refunded. However, some accessories can be purchased directly through our website: https://sav.hkoenig.com/.ENVIRONMENT
CAUTION:
 Do not dispose of this product as it has with other household products. There is a separation of this waste product into communities, you will need to inform your local authorities about the places where you can return this product. In fact, electrical and electronic products contain hazardous substances that have harmful effects on the environment or human health and should be recycled. The symbol here indicates that electrical and electronic equipment should be chosen carefully, a wheeled waste container is marked with a cross. Adeva SAS / H.Koenig Europe - 8 rue Marc Seguin - 77290 Mitry Mory - France www.hkoenig.com - sav@hkoenig.com - contact@hkoenig.com - Tél: +33 1 64 67 00 05FRANÇAIS
CONSIGNES DE SÉCURITÉ IMPORTANTES
Lorsque vous utilisez cet appareil électrique, il est important de toujours respecter les consignes de sécurité élémentaires. En outre : 1. Lisez toutes les instructions. 2. Ne touchez pas les surfaces chaudes. Utiliser les poignées ou les commandes. 3. Une attention particulière est requise lors de l'utilisation d'un appareil par des enfants ou près d'eux. 4. Pour vous protéger contre les chocs électriques, ne placez aucune partie du four électrique dans l'eau ou tout autre liquide. 5. Ne laissez jamais le cordon dépasser d'une table ou d'un comptoir, ou bien toucher des surfaces chaudes. 6. N'utilisez pas l'appareil avec un cordon ou une fiche endommagée, après un dysfonctionnement ou s'il est abîmé d'une quelconque manière. Renvoyez l'appareil au centre technique agréé le plus proche pour qu'il soit examiné et réparé. 7. L'utilisation d'accessoires non recommandés par le fabricant pourrait créer un accident ou des blessures. 8. Quand l'appareil est en cours d'utilisation, laissez un espace de 10 cm minimum autour du four afin de permettre une circulation d'air appropriée. 9. Débranchez l'appareil lorsque qu'il n'est pas utilisé ou avant de le nettoyer. Laissez-le refroidir avant de mettre ou enlever des pièces, et avant de le nettoyer. 10. Pour débrancher l'appareil, tournez la commande sur STOP, puis débranchez la fiche. Saisissez toujours la fiche, ne tirez jamais sur le cordon d'alimentation. 11. Ne couvrez pas le PLATEAU ni aucune partie du four avec une feuille d'aluminium. Cela peut entraîner une surchauffe du four. 12. Ne nettoyez pas le four avec une éponge à récurer métallique. Des morceaux peuvent se détacher de l'éponge et entrer en contact avec des éléments électroniques, créant un risque d'électrocution. 13. Les aliments trop grands ou des ustensiles en métal ne peuvent être mis dans le four, ils pourraient créer un risque d'incendie ou d'électrocution. 14. Il y a un risque d'incendie si le four est recouvert ou touche un matériau inflammable, y compris les rideaux, tentures, murs et autres, alors qu'il est en fonctionnement. Ne placez aucun objet sur le four pendant que vous l'utilisez. 15. Soyez très vigilant lorsque vous utilisez des contenants autres qu'en métal ou en verre. 16. Ne placez aucun des matériaux suivants dans le four : carton, plastique, papier ou quelque chose de similaire. 17. Ne placez aucun des accessoires, autres que ceux recommandés par le fabricant, dans ce four lorsqu'il n'est pas en fonctionnement. 18. Portez toujours des gants isolants lorsque vous introduisez ou retirez des éléments d'un four chaud. 19. Cet appareil a une vitre de sécurité trempée. Elle est plus résistante que le verre ordinaire et particulièrement aux chocs thermiques. Le verre trempé peut se briser, mais les morceaux n'auront pas d'arêtes vives. Évitez d'égratigner la vitre ou de faire des entailles aux bords. Si la porte est rayée ou entaillée, contactez notre service client avant d'utiliser le four. 20. Ne l'utilisez pas en plein air. 21. Ne l'utilisez pas à toute autre fin que celle prévue. 22. Cet appareil est UNIQUEMENT destiné à un USAGE DOMESTIQUE. 23. La température de la porte ou des surfaces extérieures peut être plus élevée lorsque l'appareil fonctionne. 24. Faites attention de ne pas vous blesser contre les arêtes vives du four. 25. La température des surfaces accessibles peut être très élevée lorsque l'appareil fonctionne. 26. Ne posez pas d'ustensiles de cuisine ou de plats de cuisson sur la porte vitrée. 27. Cet appareil peut être utilisé par des personnes dont les capacités physiques, sensorielles ou mentales sont réduites ou dont l'expérience ou les connaissances ne sont pas suffisantes, à condition qu'elles bénéficient d'une surveillance ou qu'elles aient reçu des instructions quant à l'utilisation de l'appareil en toute sécurité et qu'elles en comprennent bien les dangers potentiels. 28. Les enfants doivent être surveillés pour s'assurer qu'ils ne jouent pas avec l'appareil. 29. Le poids des aliments placés sur le plateau / grille métallique S3 ne peut pas dépasser 3,0 kg (juste pour référence). Les aliments ne peuvent pas se concentrer sur un côté du plateau / grille S3, mais ils doivent être répartis uniformément. 30. Pour un appareil avec une fixation de type Y, si le cordon d'alimentation est endommagé, il doit être remplacé par le fabricant, son technicien ou une personne de qualification similaire afin d'éviter un accident. 31. La surface arrière de l'appareil doit être placée contre un mur. 32. ATTENTION : Cet appareil comprend une fonction de chauffage. Les surfaces autres que les surfaces fonctionnelles peuvent atteindre des températures élevées. Étant donné que les températures sont perçues différemment par les personnes, cet appareil doit être utilisé avec PRÉCAUTION. Tenez l'appareil exclusivement par les poignées prévues à cet effet, et utilisez des gants de protection contre la chaleur. Les zones qui ne sont pas destinées à être manipulées nécessitent du temps pour refroidir. 33. Ne placez pas le four sur ou près d'un brûleur à gaz ou électrique chaud, ni dans un four chaud. 34. Il faut faire preuve d'une extrême prudence lorsqu'on déplace un appareil contenant de l'huile chaude ou d'autres liquides brûlants. 35. Tournez le bouton de la minuterie sur Off pour éteindre l'appareil. 36. L'appareil n'est pas conçu pour fonctionner avec un minuteur externe ou un système de télécommande. 37. Cet appareil peut être utilisé par des enfants d'au moins 8 ans, à condition qu'ils soient surveillés et qu'ils aient reçu des instructions pour utiliser l'appareil en toute sécurité et qu'ils soient pleinement conscients des dangers encourus. 38. Le nettoyage et l'entretien ne doivent pas être effectués par des enfants à moins qu'ils aient au moins 8 ans et qu'ils soient surveillés par un adulte. 39. Gardez l'appareil et son cordon d'alimentation hors de portée des enfants de moins de 8 ans. 40. Lors de l'utilisation d'équipements électriques, des précautions de sécurité doivent toujours être prises pour éviter les risques d'incendie, d'électrocution et / ou de blessure en cas de mauvaise utilisation. 41. Assurez-vous que la tension nominale sur la plaque signalétique corresponde à la tension principale de votre installation. Si ce n'est pas le cas, contactez le revendeur et ne branchez pas l'appareil. 42. Ne laissez jamais l'appareil sans surveillance pendant son fonctionnement. 43. N'ouvrez jamais l'appareil devant vous, placez-vous toujours légèrement sur le côté pour éviter de vous brûler avec la vapeur. 44. L'appareil ne doit pas être utilisé s'il est tombé, s'il présente des signes évidents de dommages ou des fuites. 45. Votre appareil a été conçu pour un usage domestique seulement. Elle n'a pas été conçue pour être utilisée dans les cas suivants qui ne sont pas couverts par la garantie : - dans des coins de cuisines réservés au personnel dans des magasins, bureaux et autres environnements professionnels, – dans des fermes auberges, – par les clients des hôtels, motels et autres environnements à caractère résidentiel, - dans des environnements de type chambres d'hôtes. ATTENTION : LES SURFACES DE L'APPAREIL SONT CHAUDES APRÈS SON UTILISATION. Portez TOUJOURS des gants isolants lorsque vous touchez un four ou des plats chauds et des aliments, ou lorsque vous insérez / retirez le plateau / grille, des casseroles ou des plats de cuisson.CONSERVEZ CES INSTRUCTION
Avant d'utiliser votre four électrique
Avant d'utiliser votre four électrique à convection pour la première fois, assurez-vous de : 1. Déballer l'appareil. 2. Retirer le plateau de cuisson et le grill. Lavez-les à l'eau savonneuse chaude ou au lave-vaisselle. 3. Sécher soigneusement tous les accessoires et de les replacer dans le four. Branchez le four dans la prise : vous voici prêt à utiliser votre nouveau four électrique ! 4. Après avoir remonté votre four, nous vous recommandons de le faire fonctionner à température MAX pendant environ 15 minutes pour éliminer toutes les odeurs d'huiles d'emballage qui pourrait rester.COMPOSANTS
  12| 1 | Broche de rôtissoire | 7 | Bouton des fonctions |
| 2 | Grille | 8 | Témoin lumineux |
| 3 | Bac | 9 | Bouton de minuterie |
| 4 | Plateau | 10 | Résistance |
| 5 | Poignée du plateau | 11 | Porte en verre |
| 6 | Bouton du thermostat | 12 | Poignée de porte |
UTILISATION DE VOTRE FOUR ÉLECTRIQUE
Veuillez vous familiariser avec les fonctions et accessoires du four avant de l'utiliser : ① Grille: Pour griller, cuire au four et cuisiner en général dans des casseroles et des poêles standard. ② Bac : À utiliser pour griller et rôtir de la viande, de la volaille, du poisson et divers autres aliments. ③ Broche de rôtissoire : Utilisez-la pour rôtir une variété de viandes et de volailles. ④ Plateau : Pour récupérer l'huile ou les résidus. ⑤ Poignée du bac : Pour retirer le bac ou la grille. ⑥ Bouton du thermostat : Choisir la température désirée de Low à 90°C - 230°C (Low est la cuisson à température ambiante). ⑦ Bouton de minuterie : Tourner le bouton vers la gauche (dans le sens inverse des aiguilles d'une montre) et le four restera allumé jusqu'à l'arrêt manuel. Pour activer la minuterie, tourner vers la droite (dans le sens des aiguilles d'une montre) pour une autre utilisation. Une sonnerie retentira à la fin du temps programmé. ⑧ Bouton des fonctions : Il y a cinq modes : veille □ convection + résistances supérieure et inférieure convection + résistance supérieure 📁, résistances supérieure et inférieure 📁, rôtissoire + résistance supérieure 📁, résistances supérieure et inférieure + convection + rôtissoire 📁 ⑨ Témoin lumineux : Il s'allume chaque fois que le four est allumé.UTILISATION DE LA BROCHE DE RÔTISSOIRE
1. Insérer la fourche dans la broche près de son extrémité puis fixez-la avec la vis moletée. 2. Insérer les aliments de l'autre côté de la broche. 3. Placer la deuxième fourche de l'autre côté de la broche, puis fixez-la avec la vis moletée. Vérifier que la nourriture soit bien au centre de la broche. 4. Insérer la broche avec les aliments dans le four. Insérez un côté de la broche dans le trou de support du four, puis placer l'autre côté de la broche sur le support du four.PANNEAU DE COMMANDE
 TEMP radar
| Value | |---| | 230 | | 210 | | 180 | | 150 | | 120 | | 90 | Low |flowchart
graph TD
A[" "] --> B[" "]
B --> C[" "]
C --> D[" "]
D --> E[" "]
E --> F[" "]
F --> G[" "]
G --> H[" "]
H --> I[" "]
I --> J[" "]
J --> K[" "]
K --> L[" "]
L --> M[" "]
M --> N[" "]
N --> O[" "]
O --> P[" "]
P --> Q[" "]
Q --> R[" "]
R --> S[" "]
S --> T[" "]
T --> U[" "]
U --> V[" "]
V --> W[" "]
W --> X[" "]
X --> Y[" "]
Y --> Z[" "]
flowchart
graph TD
A["Stay On"] --> B["Off"]
B --> C["Power"]
C --> D["15"]
D --> E["30"]
E --> F["45"]
F --> G["60"]
G --> H["75"]
H --> I["90"]
INSTRUCTIONS D'UTILISATION
4. FONCTIONS
 &  Cette fonction est idéale pour cuire des tranches de porc, des cuisses et des ailes de poulet, des chips, de la viande de volaille, des côtelettes, du poisson, etc. avec un chauffage plus uniforme. Remarque : Tous les temps de rôtissage sont basés sur des viandes à la température du réfrigérateur. Les viandes congelées peuvent prendre beaucoup plus de temps. Par conséquent, l'utilisation d'un thermomètre à viande est fortement recommandée.Fonctionnement
(1) Placer les aliments à cuire sur la grille ou le plateau, puis placez celui-ci ou celle-ci dans le guide de support central du four. (2) Tourner le bouton des fonctions sur  &  (3) Régler le bouton de thermostat à la température désirée selon les besoins ou la recette. (4) Régler le bouton de minuterie sur temps de cuisson souhaité. (5) Vérifier la cuisson des aliments 5 à 10 minutes avant la fin prévue. (6) Une fois le rôtissage terminé, une alarme retentira et le bouton de minuterie reviendra automatiquement à la position Off. Ouvrez complètement la porte et retirez les aliments. ATTENTION : Les aliments rôtis, la grille, le plateau en métal et la porte peuvent être très chauds, manipulez-les donc avec précaution. Ne laissez pas le four sans surveillance.5. FONCTION
 Cette fonction est idéale pour la cuisson du pain, des pizzas et des volailles en général.Fonctionnement
(1) Placer les aliments à cuire sur la grille ou le plateau, puis placer celui-ci ou celle-ci dans le guide de support central du four. (2) Tourner le bouton des fonctions sur (3) Régler le bouton de thermostat à la température désirée selon les besoins ou la recette. (4) Régler le bouton de minuterie sur temps de cuisson souhaité. (5) Pour vérifier ou retirer les aliments, utiliser une poignée pour faciliter leur manipulation. (6) Une fois le rôtissage terminé, une alarme retentira et le bouton de minuterie reviendra automatiquement à la position Off. Ouvrir complètement la porte et retirer immédiatement les aliments, sinon la chaleur restante dans le four continuera à les rôtir. ATTENTION : Les aliments rôtis, la grille, le plateau en métal et la porte peuvent être très chauds, manipulez-les donc avec précaution.6. FONCTIONS
 &  Cette fonction est idéale pour la cuisson de poulets entiers et de volailles en général. Remarque : Tous les temps de rôtissage sont basés sur des viandes à la température du réfrigérateur. Les viandes congelées peuvent prendre beaucoup plus de temps. Par conséquent, l'utilisation d'un thermomètre à viande est fortement recommandée.Fonctionnement
(1) Placer le poulet entier sur la broche de la rôtissoire et le fixer avec les fourches des deux côtés, insérer la broche dans le four et fermer la porte. REMARQUE : Il faut mettre le plateau dans le trou du panier inférieur pour collecter les gouttes d'huile pendant la cuisson et verser un peu d'eau dans le plateau avant la cuisson ; cela aura un bon effet sur le rôtissage. (2) Tourner le bouton des fonctions sur 📌 & 📌 (3) Régler le bouton de thermostat sur 230°C. (4) Régler le bouton de minuterie sur le temps de cuisson souhaité. (5) Vérifier la cuisson des aliments 5 à 10 minutes avant la fin prévue. (6) Une fois le rôtissage terminé, une alarme retentira et le bouton de minuterie reviendra automatiquement à la position Off. Ouvrir complètement la porte et retirer les aliments. ATTENTION : Les aliments rôtis, la grille, le plateau en métal et la porte peuvent être très chauds, manipulez-les donc avec précaution.ENTRETIEN
Cet appareil nécessite peu d'entretien et ne contient pas de pièces réparables par l'utilisateur. Ne tentez donc pas de le réparer vous-même. Contactez un technicien agréé s'il nécessite une réparation.NETTOYAGE
ATTENTION : Pour vous protéger contre les chocs électriques, NE PLONGEZ PAS LE FOUR DANS L'EAU OU TOUT AUTRE LIQUIDE. Votre four doit être nettoyé régulièrement pour conserver un fonctionnement optimal et une longue durée de vie. Un nettoyage régulier réduira également le risque d'incendie. Étape 1. Retirez la fiche de la prise électrique. Laissez alors refroidir le four. Étape 2. Retirez les accessoires en les tirant hors du four. Nettoyez-les avec de l'eau savonneuse humide. Assurez-vous de n'utiliser que de l'eau savonneuse douce. Étape 3. Pour nettoyer l'intérieur, essuyez les parois du four, le bas du four et la porte vitrée avec un chiffon humide savonneux. Répétez l'opération avec un chiffon sec et propre. Étape 4. Essuyez l'extérieur du four avec un chiffon humide. ATTENTION : N'UTILISEZ PAS DE NETTOYANTS ABRASIFS OU D'ÉPONGES À RÉCURER MÉTALLIQUES. Assurez-vous d'utiliser uniquement de l'eau douce savonneuse. Les nettoyants abrasifs, les brosses à récurer et les nettoyants chimiques endommageront le revêtement de cet appareil. Les éléments peuvent se rompre et toucher les pièces électriques, ce qui présente un risque d'électrocution. Étape 5. Laisser l'appareil refroidir complètement avant de le ranger. Si vous stockez le four pendant une longue période, assurez-vous qu'il soit propre et exempt de particules alimentaires. Rangez le four dans un endroit sec, comme une table ou une étagère, ou bien dans un placard. Il n'y a pas d'autre nettoyage à effectuer que celui décrit dessus. Toute autre opération d'entretien doit être effectuée par un technicien agréé. CARACTÉRISTIQUES| Tension nominale | 230 V – 240 V |
| Fréquence nominale | 50 Hz - 60 Hz |
| Puissance nominale | 2000 W |
| Capacité du four : | 42 l |
| Usage domestique uniquement. NE PAS PLONGER DANS L’EAU | |
GARANTIE
La durée de garantie de nos produits est de 2 ans, sauf décret en vigueur, à compter de la date d'achat initiale ou la date de livraison. En cas de problèmes ou d'interrogations, vous pouvez facilement accéder à nos pages d'aides, conseils de dépannage, FAQ et modes d'emplois sur notre site SAV : https://sav.hkoenig.com. En tapant le nom de référence de votre appareil dans la barre de recherche, vous accédez à tous les supports en ligne disponibles, conçus pour vous répondre au mieux à vos besoins. Si vous ne trouvez toujours pas de réponse à votre question ou votre problème, alors cliquez sur « Est-ce que la réponse a résolu votre problème ? ». Vous accéderez alors au formulaire de demande d'assistance SAV, qu'il vous suffira de compléter pour valider votre demande et obtenir de l'aide.CONDITIONS DE GARANTIE
La garantie couvre l'ensemble des pannes survenant dans le cadre d'une utilisation normale, conforme aux usages et spécifications présentes sur le manuel d'utilisation. Cette garantie ne s'applique pas aux problèmes d'emballage ou de transport pendant l'expédition du produit par son propriétaire. Elle n'inclut également pas l'usure normale du produit, ni la maintenance ou le remplacement de pièces consommables.EXCLUSION DE GARANTIE
- Les accessoires et les pièces d'usure (\*). - L'entretien normal de l'appareil. - Toutes pannes survenant par suite d'une mauvaise utilisation (chocs, non-respect des préconisations d'alimentation électrique, mauvaises conditions d'utilisation, etc.), d'un entretien insuffisant ou d'un détournement de fonction de l'appareil, ainsi que l'usage d'accessoires non appropriés. - Les dommages d'origine externe : incendie, dégâts des eaux, surtension électrique, etc. - Tout matériel qui aura été démonté même partiellement par des personnes autres que celles habilitées (notamment l'utilisateur). - Les produits dont le numéro de série serait absent, détérioré ou illisible que ne permettrait pas son identification. - Les produits soumis à la location, à la démonstration ou à l'exposition. (\*) Certaines pièces de votre appareil dites pièces d'usure ou consommables se détériorent avec le temps et la fréquence d'usage de votre appareil. Cette usure est normale, mais peut être accentuée par des mauvaises conditions d'utilisation ou entretien de votre appareil. Ces pièces ne sont donc pas couvertes par la garantie. Les accessoires fournis avec l'appareil sont également exclus du champ de la garantie. Ils ne peuvent donc être ni échangés, ni remboursés. Toutefois, certains accessoires peuvent être directement achetés via notre site : https://sav.hkoenig.com/.ENVIRONNEMENT
ATTENTION :
 Ne jetez pas cet appareil avec d'autres produits ménagers. Il existe un tri sélectif de ces déchets dans les municipalités. Demandez-leur quels sont les endroits où vous pouvez jeter cet appareil. En fait, les produits électriques et électroniques contiennent des substances dangereuses qui ont des effets nocifs sur l'environnement et la santé humaine, c'est pour cette raison qu'il doit être recyclé. Le symbole ici, un conteneur à déchets sur roues marqué d'une croix, indique que les équipements électriques et électroniques doivent être choisis avec soin. Adeva SAS / H.Koenig Europe - 8 rue Marc Seguin - 77290 Mitry Mory - France www.hkoenig.com - sav@hkoenig.com - contact@hkoenig.com - Tél: +33 1 64 67 00 05DEUTSCH
WICHTIGE SICHERHEITSANWEISUNGEN
Während der Nutzung von elektrischen Geräten müssen grundliegende Sicherheitsvorkehrungen immer beachtet werden, einschließlich der Folgenden: 1. Lesen Sie alle Anweisungen. 2. Fassen Sie heiße Flächen nicht an. Benutzen Sie Griffe oder Regler. 3. Besondere Aufsicht ist notwendig, wenn jegliches Gerät von/ in der Nähe von Kindern benutzt wird. 4. Um sich vor einem Stromschlag zu schützen, platzieren Sie keine Teile des Elektrobackofens in Wasser oder anderen Flüssigkeiten. 5. Lassen Sie das Kabel über die Kante eines Tisches oder einer Theke nicht herunterhängen, oder mit heißen Flächen in Kontakt kommen. 6. Bedienen Sie das Gerät nicht, wenn das Kabel oder der Stecker beschädigt sind, wenn es eine Fehlfunktion hat, oder in jeglicher Weise beschädigt wurde; bringen Sie das Gerät zu einer nächstliegenden autorisierten Servicestelle für eine Inspektion, Reparatur oder Anpassung zurück. 7. Die Nutzung des Zubehörs, das nicht von dem Hersteller empfohlen wurde, kann zu Gefahren und Verletzungen führen. 8. Während der Nutzung des Gerätes, lassen Sie einen Mindestabstand von 4 Zoll von allen Seiten des Ofens, um eine angemessene Belüftung zu ermöglichen. 9. Trennen Sie das Gerät beim Nichtgebrauch vom Netz. Lassen Sie dieses abkühlen, bevor Sie die Teile abnehmen oder montieren, und vor der Reinigung. 10. Um das Gerät von der Stromversorgung zu trennen, drehen Sie den Regler auf STOPP, dann ziehen Sie den Stecker. Greifen Sie immer am Stecker, und niemals am Kabel. 11. Bedecken Sie das KRÜMMELFACH oder andere Teile des Ofens nicht mit Metallfolie. Dies kann zu Überhitzung des Ofens führen. 12. Benutzen Sie für die Reinigung keinen Scheuerschwamm aus Metall. Kleine Stückchen können von dem Schwamm abbrechen und elektrische Teile berühren, wobei das Risiko eines Stromschlages entsteht. 13. Überdimensionale Lebensmittel oder Utensilien aus Metall dürfen in den Elektrobackofen nicht eingesetzt werden, da dies zu einem Brand oder dem Risiko eines Stromschlages führen kann. 14. Ein Brand kann entstehen, wenn der Ofen bedeckt wird oder wenn dieser während der Nutzung mit entflammbaren Stoffen in Kontakt kommt, einschließlich Vorhängen, Gardienen, Wänden und ähnlichen. 15. Besondere Vorsicht ist während der Nutzung der Behälter aus anderen Materiallien als Metall oder Glass geboten. 16. Platzieren Sie keine folgenden Materiallien im Ofen: Karton, Plastik, Papier, oder ähnliche. 17. Lagern Sie beim Nichtgebrauch keine Materialien in diesem Ofen, außer dem von dem Hersteller empfohlenen Zubehör. 18. Tragen Sie immer schützende, isolierte Ofenhandschuhe, wenn Sie Gegenstände in den Ofen stellen und diese herausnehmen. 19. Dieses Gerät verfügt über eine Tür aus gehärtetem Sicherheitsglas. Dieses Glas ist starker und viermal bruchsicherer als normales Glas. Gehärtetes Glas kann zerbrechen, aber die Bruchstücke werden keine scharfen Kanten haben. Vermeiden Sie das Kratzen der Türfläche und das Einkerben der Rände. Wenn die Glastür eine Kratze oder eine Kerbe hat, kontaktieren Sie unsere Verbraucherleitung, bevor Sie den Ofen nutzen. 20. Benutzen Sie das Gerät nicht draußen. 21. Benutzen Sie das Gerät nur zum dafür vorgesehenen Zweck. 22. Dieses Gerät ist AUSSCHLIEßLICH FÜR DIE HAUSHALTSNUTZUNG geeignet. 23. Die Temperatur der Tür und der Außenfläche kann höher sein, wenn das Gerät im Betrieb ist. 24. Schützen Sie sich während der Bedienung vor Verletzungen durch scharfe Kanten. 25. Die Temperatur der erreichbaren Flächen während des Betriebs des Gerätes kann hoch sein. 26. Stellen Sie keine Kochutensilien oder Backformen an der Glastür ab. 27. Dieses Gerät kann von Personen mit eingeschränkten körperlichen, sensorischen oder geistigen Fähigkeiten oder mangelnder Erfahrung und Kenntnis benutzt werden, vorausgesetzt, dass sie beaufsichtigt oder in der sicheren Benutzung des Gerätes unterwiesen werden und die möglichen Gefahren vollständig verstehen. 28. Kinder müssen beaufsichtigt werden, um sicherzustellen, dass sie mit dem Gerät nicht spielen. 29. Das Gewicht der Zutaten, die auf dem S3 Essenstablett/Drahtgestell platziert werden, darf 3.0kg nicht überschreiten (nur als Information). Die Zutaten sollten nicht auf einer Seite des S3 Essenstabletts/ Drahtgestells konzentriert werden, versuchen Sie, die Lebensmittel so gut wie es geht über das S3 Essenstablett/ Drahtgestell zu verteilen. 30. Für Geräte mit der Anbindungsart Y, wenn das Stromkabel beschädigt ist, muss es von dem Hersteller, seinem Dienstleister oder einer ähnlich qualifizierten Person ersetzt werden, um Gefahren zu vermeiden. 31. Hintere Fläche des Gerätes muss gegen eine Wand gestellt werden. 32. WARNUNG: Dieses Gerät beinhaltet eine Heizfunktion. Die Flächen, außer der funktionalen Flächen, können höhe Temperaturen erreichen. Da Temperaturen von verschiedenen Menschen unterschiedlich empfunden werden, sollte dieses Gerät mit VORSICHT benutzt werden. Halten Sie das Gerät ausschließlich an den geeigneten Grifflächen und treffen Sie solche hitzeschutztechnische Maßnahmen wie hitzebeständige Handschuhe oder Topflappen. 33. Platzieren Sie das Gerät nicht auf/ in der Nähe von einem heißen Gas- oder Elektrobrenner, oder in einem erhitzen Ofen. 34. Seien Sie besonders vorsichtig, wenn Sie das Gerät verstellen, welches heißes Öl oder andere heiße Flüssigkeiten beinhaltet. 35. Drehen Sie den Timerregler in die "OFF" Position, um das Gerät auszuschalten. 36. Das Gerät ist nicht dafür geeignet, mithilfe einer externen Schaltuhr oder einer getrennten Fernbedienungssystem bedient zu werden. 37. Dieses Gerät darf von Kindern ab 8 Jahre benutzt werden, wenn sie beaufsichtigt werden und Anweisungen erhielten, wie das Gerät zu benutzen ist und kennen die damit angebundenen Gefahren. 38. Die Reinigung und Wartung dürfen nicht von Kindern durchgeführt werden, es sei denn sie sind über 8 Jahre alt und werden von einem Erwachsenen beaufsichtigt. 39. Halten Sie das Gerät und sein Stromkabel außer Reichweite von Kindern unter 8 Jahren auf. 40. -Während der Nutzung des elektrischen Gerätes müssen Sicherheitsvorkehrungen immer beachtet werden, um das Risiko eines Brandes, eines Stromschlages und/oder einer Verletzung im Falle eines Missbrauchs zu vermeiden. 41. Vergewissern Sie sich, dass der Spannungswert auf dem Typenschild mit der Spannung Ihrer Einrichtung übereinstimmt. Wenn dies nicht der Fall ist, kontaktieren Sie den Händler und schließen Sie das Gerät nicht an. 42. Lassen Sie das Gerät niemals während des Betriebs unbeaufsichtigt. 43. Öffnen Sie das Gerät niemals von vorne, positionieren Sie sich immer leicht zur Seite, um Verbrühungen durch Dampf zu vermeiden. 44. Das Gerät darf nicht benutzt werden, wenn es fallen gelassen wurde, wenn es sichtbare Anzeichen einer Beschädigung aufweist oder eine Leckage hat. 45. Ihr Gerät ist nur für den Hausgebrauch bestimmt. Es wurde nicht für die Verwendung in den folgenden Fällen entwickelt, die nicht von der Garantie abgedeckt sind: - in Küchenbereichen, die dem Personal in Geschäften, Büros und anderen beruflichen Umgebungen vorbehalten sind, - in Bauerngasthöfen, - von Kunden von Hotels, Motels und anderen Wohnumgebungen, - in Umgebungen vom Typ Bed & Breakfast. ACHTUNG: DIE FLÄCHEN DES GERÄTES SIND NACH DER NUTZUNG HEIß. Tragen Sie IMMER schützende, isolierte Ofenhandschuhe, wenn Sie heißen Ofen oder heißes Geschirr und Lebensmittel anfassen, oder wenn Sie das Gestell, Pfannen oder Backformen in den Ofen stellen und diese herausnehmen.BEWAHREN SIE DIESE ANWEISUNGEN AUF
Vor der Nutzung Ihres Elektrobackofens
Vor der ersten Nutzung Ihres Umluftbackofen, führen Sie das Folgende aus: 5. Packen Sie das Gerät aus. 6. Entfernen Sie das Backblech und den Grill. Spülen Sie die Gestelle und Pfannen mit heißem Seifenwasser oder in einer Spülmaschine. 7. Trocknen Sie sorgfältig das gesamte Zubehör und sezten Sie es wieder in den Ofen ein. Schließen Sie den Ofen an, und damit sind Sie bereit, Ihren neuen Elektrobackofen zu nutzen. 8. Nachdem Sie Ihren Ofen wieder zusammengebaut haben, empfehlen wir Ihnen, diesen bei der MAX Temperatur für ca. 15 Minuten laufen zu lassen, um jegliches Öl riecht, das nach der Lieferung bleiben konnte, zu entfernen.KOMPONENTEN:
 | 1 | Drehspieß | 7 | Funktionsknopf |
| 2 | Drahtgitter | 8 | Anzeige |
| 3 | Essenstablett | 9 | Zeitschalter |
| 4 | Crumb tray Krümelblech | 10 | Heizer |
| 5 | Krümelauffangblech | 11 | Glastür |
| 6 | Thermostatknopf | 12 | Türgriff |
VERWENDUNG DES ELEKTROOFENS
Bitte machen Sie sich vor dem ersten Gebrauch mit den folgenden Funktionen und Zubehörteilen des Ofens vertraut: ① Drahtgitter: Zum Rösten, Backen und allgemein Kochen in Auflaufformen und Standardpfannen. ② Essenstablett: Zum Braten und Rösten von Fleisch, Geflügel, Fisch und verschiedene andere Lebensmittel. ③ Drehspieß: Zum Braten von verschiedenen Fleischsorten und Geflügel. ④ Krümelauffangblech: Zum Auffangen von Öl oder Krümeln. ⑤ Griff für das Essenstablett: Zum Herausnehmen von Tabletts ⑥ Thermostatknopf: Wählen Sie die gewünschte Temperatur von Niedrig-90°C-230°C (Niedrig bedeutet Garen bei Raumtemperatur). ⑦ Zeitschalter: Drehen Sie den Regler nach links (gegen den Uhrzeigersinn) und der Ofen bleibt eingeschaltet, bis er manuell ausgeschaltet wird. Um den Timer zu aktivieren, drehen Sie den Regler nach rechts (im Uhrzeigersinn) für eine andere Verwendung. Am Ende der programmierten Zeit ertönt ein Signal. ⑧ Funktionsknopf: es gibt fünf Modi(□Stand-by-Modus, □Konvektion + obere und untere Heizelemente, ✉Konvektion + obere Heizelemente, ▽obere und untere Heizelemente, ▽Rotisserie + obere Heizelemente, ▽obere und untere Heizelemente + Konvektion + Drehspieß) ⑨ Anzeige: Sie leuchtet auf, wenn der Ofen eingeschaltet ist.TIPPS ZUR VERWENDUNG VON GRILLSTÄBEN
1. Führen Sie die Gabel bis zum Ende der Stange ein und befestigen Sie sie dann mit der Rändelschraube. 2. Führen Sie die Lebensmittel von der anderen Seite des Stabes ein. 3. Setzen Sie das zweite Lebensmittel in die andere Seite des Stabes und befestigen Sie es mit der Rändelschraube. Prüfen Sie, ob das Essen fest in der Mitte der Stange sitzt. 4. Schieben Sie den Stab mit dem Gargut in den Backofen. Stecken Sie die eine Seite des Stabs in das Aufnahmeloch des Backofens. Setzen Sie dann die andere Seite des Stabs auf die Halterung des Backofens.KONTROLLPANEL
radar
| Time | Temp (°C) | |------|-----------| | 0 | 230 | | 1 | 210 | | 2 | 180 | | 3 | 150 | | 4 | 120 | | 5 | 90 | | 6 | 60 | | 7 | 75 | | 8 | 90 | | 9 | 120 | | 10 | 150 | | 11 | 180 | | 12 | 210 | | 13 | 230 | | 14 | Low | | 15 | High | | 16 | High | | 17 | High | | 18 | High | | 19 | High | | 20 | High | | 21 | High | | 22 | High | | 23 | High | | 24 | High | | 25 | High | | 26 | High | | 27 | High | | 28 | High | | 29 | High | | 30 | High | | 31 | High | | 32 | High | | 33 | High | | 34 | High | | 35 | High | | 36 | High | | 37 | High | | 38 | High | | 39 | High | | 40 | High | | 41 | High | | 42 | High | | 43 | High | | 44 | High | | 45 | High | | 46 | High | | 47 | High | | 48 | High | | 49 | High | | 50 | High | | 51 | High | | 52 | High | | 53 | High | | 54 | High | | 55 | High | | 56 | High | | 57 | High | | 58 | High | | 59 | High | | 60 | High | | 61 | High | | 62 | High | | 63 | High | | 64 | High | | 65 | High | | 66 | High | | 67 | High | | 68 | High | | 69 | High | | 70 | High | | 71 | High | | 72 | High | | 73 | High | | 74 | High | | 75 | High | | 76 | High | | 77 | High | | 78 | High | | 79 | High | | 80 | High | | 81 | High | | 82 | High | | 83 | High | | 84 | High | | 85 | High | | 86 | High | | 87 | High | | 88 | High | | 89 | High | | 90 | High | | 91 | High | | 92 | High | | 93 | High | | 94 | High | | 95 | High | | 96 | High | | 97 | High | | 98 | High | | 99 | High | | 100 | Low |BETRIEBSANLEITUNG
1. FUNKTION
 Diese Funktion ist ideal zum Backen von Schweinefleisch, Hähnchenkeulen, Hähnchenflügeln, Kartoffeln, Geflügelfleisch, Koteletts, Fisch usw. mit gleichmäßiger Erwärmung. Hinweis: Alle Toastzeiten beziehen sich auf Fleisch bei Kühlschranktemperatur. Bei gefrorenem Fleisch kann es erheblich länger dauern. Daher wird die Verwendung eines Fleischthermometers dringend empfohlen.Betrieb
(1) Legen Sie das Gargut auf den Gitterrost/das Backblech. Schieben Sie den Rost/das Tablett in die mittlere Führung des Backofens ein. (2) Drehen Sie den Funktionsknopf auf & (3) Stellen Sie den Thermostatknopf je nach Bedarf oder Rezept auf die gewünschte Temperatur ein. (4) Stellen Sie den Zeitschalter auf die gewünschte Garzeit ein. (5) Prüfen Sie die Backwaren 5 bis 10 Minuten vor der erwarteten Fertigstellung auf ihren Gargrad. (6) Nach Beendigung des Toastvorgangs ertönt ein Signalton und der Zeitschalter kehrt automatisch in die Aus-Stellung zurück. Öffnen Sie die Tür vollständig und nehmen Sie die Lebensmittel heraus. ACHTUNG: Gekochte Speisen, das Metallgitter und die Tür können sehr heiß sein, seien Sie vorsichtig. Lassen Sie den Backofen nicht unbeaufsichtigt.2. FUNKTION
 Diese Funktion ist ideal zum Backen von Brot, Pizza und Geflügel im Allgemeinen.Betrieb
(1) Legen Sie das Gargut auf den Gitterrost/das Backblech. Schieben Sie den Rost/das Tablett in die mittlere Führung des Backofens ein. (2) Drehen Sie den Funktionsknopf auf (3) Stellen Sie den Thermostatknopf je nach Bedarf oder Rezept auf die gewünschte Temperatur ein. (4) Stellen Sie den Zeitschalter auf die gewünschte Garzeit ein. (5) Verwenden Sie zum Prüfen oder Entnehmen von Lebensmitteln einen Griff, um die Lebensmittel hinein- und herauszuschieben. (6) Nach Beendigung des Toastvorgangs ertönt ein Signalton, und der Zeitschalter kehrt automatisch in die Aus-Stellung zurück. Öffnen Sie die Tür vollständig und nehmen Sie die Speisen sofort heraus, da sonst die Resthitze des Ofens das Toastbrot weiter röstet und austrocknet. ACHTUNG: Gekochte Speisen, das Metallgitter und die Tür können sehr heiß sein, seien Sie vorsichtig.3. FUNKTION
 Diese Funktion ist ideal für das Garen von ganzen Hühnern und Geflügel im Allgemeinen. Hinweis: Alle Toastzeiten beziehen sich auf Fleisch bei Kühlschranktemperatur. Bei gefrorenem Fleisch kann es erheblich länger dauern. Daher wird die Verwendung eines Fleischthermometers dringend empfohlen.Betrieb
(1) Das ganze Hähnchen auf den Drehspieß stecken und mit der Gabel an beiden Seiten fixieren, den Spieß in die Drehspießöffnung einführen und die Tür schließen. HINWEIS: Es ist notwendig, die Lebensmittelschale in den unteren Einschub zu stellen, um die Öltropfen während des Kochens aufzufangen, und vor dem Kochen etwas Wasser in die Lebensmittelschale zu geben, um einen guten Effekt für den Drehspieß zu erzielen.. (2) Drehen Sie den Funktionsknopf auf  (3) Stellen Sie den Thermostatknopf auf 230°C. (4) Stellen Sie den Zeitschalter auf die gewünschte Garzeit ein. (5) Prüfen Sie die Backwaren 5 bis 10 Minuten vor der erwarteten Fertigstellung auf ihren Gargrad. (6) Nach Beendigung des Toastvorgangs ertönt ein Signalton und der Zeitschalter kehrt automatisch in die Aus-Stellung zurück. Öffnen Sie die Tür vollständig und nehmen Sie die Lebensmittel heraus. ACHTUNG: Gekochte Speisen, Metallstäbe/-behälter und die Tür können sehr heiß sein, seien Sie vorsichtig.WARTUNGSANWEISUNGEN
Dieses Gerät benötigt wenig Wartung. Es beinhaltet keine durch den Anwender zu wartenden Teile. Versuchen Sie nicht, das Gerät selber zu reparieren. Kontaktieren Sie einen qualifizierten Techniker, wenn das Produkt eine Wartung benötigt.REINIGUNGSANWEISUNGEN
ACHTUNG: Um sich vor einem Stromschlag zu schützen, TAUCHEN SIE DEN OFEN NICHT IN WASSER ODER ANDERE FLÜSSIGKEITEN. Ihr Toaster soll für die beste Leistung und eine lange Lebensdauer regelmäßig gereinigt werden. Eine regelmäßige Wartung wird auch das Risiko eines Brandes verringern. Schritt 1. Entfernen Sie den Stecker aus der Steckdose. Lassen Sie das Gerät abkühlen. Schritt 2. Entnehmen Sie das abnehmbare Krümmelfach, das Gestell, das Tablett, indem Sie diese aus dem Ofen herausziehen. Reinigen Sie diese mit einem feuchten Tuch mit etwas Seife. Vergewissern Sie sich, dass Sie nur ein mildes Seifenwasser benutzen. Schritt 3. Um die Innenseite des Ofens zu reinigen, wischen Sie die Ofenswände, den Boden und die Glastür mit einem feuchten Tuch mit Seife ab. Danach den Vorgang mit einem trockenen, sauberen Tuch wiederholen. Schritt 4. Wischen Sie die Außenseite des Ofens mit einem feuchten Tuch ab. ACHTUNG: BENUTZEN SIE KEINE ÄTZENDEN REINIGUNGSMITTEL ODER SCHEUERSCHWÄMME AUS METALL. Benutzen Sie ausschließlich mildes Seifenwasser. Ätzende Reinigungsmittel, Scheuerbürsten und chemische Reiniger werden die Beschichtung des Gerätes beschädigen. Kleine Stückchen können von dem Schwamm abbrechen und elektrische Teile berühren, wobei das Risiko eines Stromschlages entsteht. Schritt 5. Lassen Sie das Gerät vor der Lagerung abkühlen und vollständig trocknen. Wenn Sie den Ofen für eine längere Zeit lagern, vergewissern Sie sich, dass der Ofen sauber und frei von Speiserückständen ist. Lagern Sie den Ofen an einer trockenen Stelle wie z. B. auf einem Tisch, einer Arbeitsplatte oder einem Schrankregal. Außer der empfohlenen Reinigung ist keine weitere Wartung seitens Benutzer notwendig. Jegliche andere Wartungsarbeiten sollten von einem autorisirten Fachhändler durchgeführt werden.SPEZIFIKATIONEN:
| Nennspannung | 230V-240V |
| Nennfrequenz | 50 Hz -60Hz |
| Nennleistung | 2000W |
| Kapazität des Ofens | 42 Liter |
| Nur für den Hausgebrauch, NICHT IN WASSER EINTAUCHEN | |
GARANTIE
Die Garantiezeit für unsere Produkte beträgt 2 Jahre, sofern keine anderen Bestimmungen gelten, ab dem Datum des ursprünglichen Kaufs oder ab dem Lieferdatum. Bei Problemen oder Fragen können Sie sich an unsere Hilfeseiten, Tipps zur Fehlerbehebung, FAQs und Bedienungsanleitungen auf unserer Kundendienst-Website wenden: https://sav.hkoenig.com. Wenn Sie den Referenznamen Ihres Geräts in die Suchleiste eingeben, erhalten Sie Zugang zu allen verfügbaren Online-Supports. Wenn Sie immer noch keine Antwort auf Ihre Frage oder Ihr Problem finden, dann klicken Sie auf "Hat die Antwort Ihr Problem gelöst?". Sie können dieses Formular ausfüllen, um Ihre Anfrage zu bestätigen und Hilfe zu erhalten.GARANTIEBEDINGUNGEN
Die Garantie deckt alle Defekte ab, die bei normalem, bestimmungsgemäßem Gebrauch und den in der Bedienungsanleitung enthaltenen Spezifikationen auftreten. Diese Garantie gilt nicht für Probleme mit der Verpackung oder dem Transport während des Versands des Produkts durch den Eigentümer. Sie umfasst auch nicht den normalen Verschleiß des Produkts, die Wartung oder den Austausch von Verschleißteilen.AUSSCHLUSS DER GARANTIE
- Zubehör und Verschleißteile (\*). - Die normale Wartung des Geräts. - Alle Defekte, die durch unsachgemäßen Gebrauch (Stöße, Nichteinhaltung der empfohlenen Stromzufuhr, schlechte Nutzungsbedingungen usw.), unzureichende Wartung oder Zweckentfremdung des Geräts auftreten, sowie die Verwendung von ungeeignetem Zubehör. - Schäden durch äußere Einflüsse: Brand, Wasserschäden, elektrische Überspannung usw. - Alle Geräte, die von anderen als den befugten Personen (insbesondere dem Nutzer) auch nur teilweise auseinandergebaut wurden. - Produkte, deren Seriennummer fehlt, beschädigt oder unleserlich ist, sodass sie nicht identifiziert werden können. - Produkte, die vermietet, vorgeführt oder ausgestellt werden. (\*) Einige Teile Ihres Geräts, die als Verschleißteile oder Verbrauchsmaterialien bezeichnet werden, verschleßen mit der Zeit und der Häufigkeit der Nutzung Ihres Geräts. Diese Abnutzung ist normal, kann aber durch falsche Nutzung oder Pflege Ihres Geräts noch verstärkt werden. Diese Teile sind daher nicht durch die Garantie abgedeckt. Das mit dem Gerät gelieferte Zubehör ist ebenfalls von der Garantie ausgeschlossen. Sie können daher weder umgetauscht noch erstattet werden. Einige Zubehörteile können jedoch direkt über unsere Website https://sav.hkoenig.com/ erworben werden.UMWELT
ACHTUNG:
 Entsorgen Sie dieses Produkt nicht mit anderen Haushaltsgegenständen. Dieses Produkt muss separat bei bestimmten Stellen entsorgt werden, informieren Sie sich bei lokalen Behörden über die Stellen, wohin das Produkt gebracht werden kann. In der Tat, elektrische und elektronische Produkte beinhalten gefährliche Stoffe, die eine schädliche Auswirkung auf die Umwelt und menschliche Gesundheit haben und recycelt werden müssen. Dieses Symbol bedeutet, dass elektrische und elektronische Geräte vorsichtig gewählt werden müssen, die Rollcontainer werden mit einem Kreuz markiert. Adeva SAS / H.Koenig Europe - 8 rue Marc Seguin - 77290 Mitry Mory - France www.hkoenig.com - sav@hkoenig.com - contact@hkoenig.com - Tél: +33 1 64 67 00 05NEDERLANDS
BELANGRIJKE VEILIGHEIDSREGELS
Bij het gebruik van elektrische apparaten moeten de standaard veiligheidsregels worden opgevolgd, inclusief de volgende: 1. Lees alle instructies. 2. Raak geen hete oppervlakken aan. Gebruik de handgrepen en knoppen. 3. Toezicht is noodzakelijk bij of door gebruik van kinderen. 4. Ter bescherming tegen elektrische schokken, mag u geen enkel onderdeel van de elektrische oven in water of een andere vloeistof dompelen. 5. Laat de kabel niet hangen over de rand van een tafel of aanrecht of boven een heet oppervlak. 6. Gebruik geen apparaat met een beschadigde kabel of stekker, of als het apparaat niet correct functioneert of op welke manier dan ook beschadigd is. Breng het apparaat naar het dichtstbijzijnde geautoriseerde reparatiecentrum voor inspectie, reparatie of mechanische of elektrische aanpassingen. 7. Het gebruik van accessoires die niet worden aanbevolen door de fabrikant kunnen gevaar of verwondingen opleveren. 8. Bij het gebruik van deze oven dient minimaal 10 centimeter ruimte aan alle zijden vrij te worden gehouden voor een juiste luchtcirculatie. 9. Haal de stekker uit het stopcontact als het niet gebruikt wordt of voor het schoonmaken. Laat het afkoelen voor de verwijdering van onderdelen of voor het schoonmaken. 10. Eerst de knop op STOP zetten en dan de stekker uit het stopcontact halen. Altijd aan de stekker vasthouden en nooit aan de kabel trekken. 11. Dek de KRUIMELPLAAT of een ander onderdeel van de oven nooit af met een metalen folie. Dit kan tot oververhitting van de oven leiden. 12. Niet schoonmaken met metalen schuursponzen. Er kunnen stukjes van de spons afbreken en elektrische onderdelen aanraken en zo een elektrische schok geven. 13. Te groot voedsel of metalen gereedschap mag niet in een elektrische oven worden geplaatst omdat het een risico vormt voor brand of elektrische schok. 14. Er kan vuur ontstaan als de oven tijdens gebruik afgedekt wordt of in aanraking komt met brandbare materialen, waaronder gordijnen, lakens, muren, etc. Plaats geen items op de oven als deze in gebruik is. 15. Wees extreem voorzichtig bij bakjes die niet gemaakt zijn van metaal of glas. 16. Plaats geen spullen in de oven die de volgende materialen bevatten: karton, plastic, papier of iets soortgelijks. 17. Bewaar geen andere spullen, afgezien van de door de fabrikant geadviseerde spullen als de oven niet in gebruik is. 18. Draag altijd beschermende geïsoleerde ovenwanten bij het plaatsen of verwijderen van items in/uit de hete oven. 19. Dit apparaat heeft gehard veiligheidsglas in de deur. Dit glas is sterker dan normaal glas en breekt minder snel. Gehard glas kan wel breken, maar de stukken zullen geen scherpe randen hebben. Vermijd krassen op de deur of het beschadigen van de hoeken. Als de deur een kras of een beschadiging heeft, neem dan contact op met onze klantenservice voordat u de oven gebruikt. 20. Niet buiten gebruiken. 21. Gebruik het apparaat alleen voor het beoogde gebruik. 22. Dit apparaat is ALLEEN voor HUISHOUDELIJK GEBRUIK. 23. De temperatuur van de buitenkant van de deur of de behuizing kan hoog oplopen als het apparaat in gebruik is. 24. Vermijd tijdens gebruik dat ergens een scherpe rand tegenaan komt. 25. De temperatuur van tastbare oppervlaktes kunnen hoog oplopen als het apparaat in gebruik is. 26. Leg geen kookgerei of bakplaten op de glazen deur. 27. Dieses Gerät kann von Personen mit eingeschränkten körperlichen, sensorischen oder geistigen Fähigkeiten oder mangelnder Erfahrung und Kenntnis benutzt werden, vorausgesetzt, dass sie beaufsichtigt oder in der sicheren Benutzung des Gerätes unterwiesen werden und die möglichen Gefahren vollständig verstehen. 28. Kinderen moeten onder toezicht worden gehouden, om te verzekeren dat ze niet met het apparaat spelen. 29. Het gewicht van het eten dat op de S3 plaat/rooster gelegd wordt mag niet zwaarder zijn dan 3,0 kg. (ter referentie) (het eten mag niet aan een kant van de S3 plaat/rooster liggen, het is beter als u het eten gelijkmatig over de S3 plaat/rooster verdeelt). 30. Voor een apparaat met een Y-aansluiting, als de stroomkabel beschadigd is, moet het worden vervangen door de fabrikant, een servicemonteur of een gelijkwaardig gekwalificeerd persoon om gevaren te. 31. De achterkant van het apparaat dient voor een muur geplaatst te worden. 32. WAARSCHUWING: Dit apparaat heeft een opwarmingsfunctie. Oppervlaktes, ook andere naast de functionerende, kunnen erg heet worden. Omdat temperaturen door verschillende personen anders kunnen worden waargenomen, moet dit apparaat VOORZICHTIG worden gebruikt. Houd het apparaat alleen vast aan de oppervlaktes die daarvoor bedoeld zijn en bescherm uzelf tegen de hitte met ovenwanten of pannenlappen. De oppervlaktes die bedoeld zijn om aangeraakt te worden, dienen eerst af te koelen. 33. Plaats het niet op of vlakbij een hete gas of elektrisch fornuis, of in een hete oven. 34. Uitermate voorzichtigheid is altijd geboden bij het verplaatsen van een apparaat met hete olie of andere hete vloeistof. 35. Draai de timerknop naar 'off' om het apparaat uit te schakelen. 36. Het apparaat is niet bedoeld om gebruikt te worden met een externe timer of een apart besturingssysteem. 37. Dit apparaat mag gebruikt worden door kinderen van minimaal 8 jaar als er toezicht wordt gehouden en ze instructies hebben gehad over hoe ze het apparaat moeten gebruiken en ze de gevaren begrijpen. 38. Het schoonmaken en onderhoud mag niet worden uitgevoerd door kinderen tenzij ze 8 jaar of ouder zijn en er toezicht is. 39. Houd het apparaat en de stroomkabel uit de buurt van kinderen jonger dan 8 jaar. 40. Bij het gebruik van elektrische apparaten moeten altijd de standaard veiligheidsinstructies worden opgevolgd om de kans op vuur, elektrische schokken en/of verwondingen te voorkomen. 41. Controleer dat de aangegeven spanning op het typeplaatje overeenkomt met de spanning van uw spanningsbron. Als dit niet het geval is, neem dan contact op met de dealer en sluit het apparaat niet aan. 42. Laat het apparaat nooit onbeheerd achter tijdens gebruik. 43. Nooit het apparaat van voren openen, plaats uzelf iets naar de zijkant ter vermijding dat u verbrandt door stoom. 44. Het apparaat mag niet gebruikt worden als het gevallen is, als er duidelijk zichtbare schade is of als het lekt. 45. Ihr Gerät ist nur für den Hausgebrauch bestimmt. Es wurde nicht für die Verwendung in den folgenden Fällen entwickelt, die nicht von der Garantie abgedeckt sind: \- in Küchenbereichen, die dem Personal in Geschäften, Büros und anderen beruflichen Umgebungen vorbehalten sind, \- in Bauerngasthöfen, \- von Kunden von Hotels, Motels und anderen Wohnumgebungen, \- in Umgebungen vom Typ Bed & Breakfast. LET OP: HET APPARAAT IS HEET NA GEBRUIK. ALTIJD beschermende, isolerende ovenwanten gebruiken bij het aanraken van de oven of het verwijderen van heet eten, of bij het plaatsen of verwijderen van rooster, pannen of schalen.BEWAAR DEZE INSTRUCTIES
Voordat u uw elektrische oven gebruikt
Voordat u uw heteluchtoven gebruikt, dient u te zorgen dat: 1. U het apparaat uitpakt. 2. Verwijder de bakplaat en de grill. U de roosters en pannen wast in hete sop of in de vaatwasser. 3. Droog alle accessoires zorgvuldig en plaats terug in de oven wat u nodig heeft. Sluit de oven aan op een stopcontact en u kunt de oven gaan gebruiken. 4. Nadat u alles weer heeft teruggeplaatst raden we u aan dat u 15 de MAX-temperatuur aanzet om aanwezige de geuren verpakkingsolie dat na het vervoer is achtergebleven te verwijderen.ONDERDELEN:
 | 1 | Rotisseriespit | 7 | Functieknop |
| 2 | Rooster | 8 | Indicator |
| 3 | Voedselbak | 9 | Timerknop |
| 4 | Kruimella | 10 | Verwarmingselement |
| 5 | Voedselbakhandgreep | 11 | Glazen deur |
| 6 | Thermostaatknop | 12 | Deurhandgreep |
UW ELEKTRISCHE OVEN GEBRUIKEN
Maak uw bekend met de volgende ovenfuncties en accessoires voor het eerste gebruik: ① Rooster: Voor het roosteren, bakken en het bereiden van schotels en standaard pannen. ② Voedselbak: Voor het grillen van vlees, gevogelte, vis en ander voedsel. ③ Rotisseriespit: Voor het roosteren van verschillende soorten vlees en gevogelte. ④ Kruimella: Voor het opvangen van olie of kruimels. ⑤ Voedselbakhandgreep: Voor het verwijderen van de bak of het rooster. ⑥ Thermostaatknop: kies de gewenste temperatuur Low-90°C-230°C (Low is bereiden bij kamertemperatuur). ⑦ Timerknop: draai de knop naar links (tegen de klok in) en de oven Blijft Aan tot deze handmatig wordt uitgeschakeld. Om de timer te activeren, naar rechts draaien (met de klok mee) voor ander gebruik. Er klinkt een bel aan het einde van de ingestelde tijd. ⑧ Functieknokp: er zijn vijf modi( □ stand-by-modus, 📋 convectie + bovenste en onderste verwarmingselementen, 🌐 convectie + bovenste verwarmingselementen, 🌐 bovenste en onderste verwarmingselementen, 🌐 rotisserie + bovenste verwarmingselementen, 🌐 bovenste en onderste verwarmingselementen +convectie + rotisserie) ⑨ Indicator: die brandt als de oven is ingeschakeld.TIPS VOOR GEBRUIK VAN ROTISSERIESPIT
1. Plaats de vork in het spit tot aan het einde van het spit en zet deze vast met de schroef. 2. Plaats het voedsel via de andere kant van het spit. 3. Plaats de tweede vork aan de andere kant van het spit en zet deze vast met de schroef. Controleer dat het voedsel stevig op het midden van het spit zit. 4. Plaats het spit met voedsel in de oven. Plaats een kant van het spit in de inkeping in de oven. Plaats de andere kant van het spit op de steun in de oven.BEDIENINGSPANEEEL
radar
| Metric | Value | | ------------ | ----- | | TEMP | 230 | | LOW | 210 | | 90 | 180 | | 120 | 150 | | FUNCTION | - | | TIME | - | | Off | 30 | | Power | 15 | | Stay On | 60 | | Off | 45 | | Stay On | 75 | | Stay On | 90 |GEBRUIKERSINSTRUCTIES
7. FUNCTIE
 Deze functie is ideaal voor het bakken van varkensvlees, kippenpoten, kippenvleugels, aardappelschijfjes, gevogelte, karbonades, vlees en alles wat meer gelijkmatig gebakken dient te worden. Opmerking: Alle bereidingstijden zijn gebaseerd op vlees van koelkasttemperatuur. Bevroren vlees zal aanzienlijk langer duren. Daarom wordt een vleesthermometer aanbevolen.Gebruik
(1) Plaats het voedsel dat bereid moet worden op het rooster / voedselbak. Plaats het rooster / de bak op de middelste ondersteuning in de oven. (2) Draai de Functieknop naar & (3) Zet de Thermostaatknop op de gewenste temperatuur volgens het recept. (4) Stel de Timerknop in op de gewenste bereidingstijd. (5) Controleer het bereidde voedsel op gaarheid zo'n 5\~10 minuten voor de verwachtte eindtijd. (6) Als de bereiding klaar is, klinkt er een bel en de Timerknop gaat automatisch terug naar de Off-stand. Open de deur helemaal en verwijder het voedsel. LET OP: Bereid voedsel, het metalen rooster/bak en de deur kunnen erg heet zijn, wees voorzichtig. Laat de oven niet onbeheerd achter.8. FUNCTIE
 Deze functie is ideaal voor het bereiden van brood, pizza en gevogelte.Gebruik
(1) Plaats het voedsel dat bereid moet worden op het rooster / voedselbak. Plaats het rooster / de bak op de middelste ondersteuning in de oven. (2) Draai de Functieknop naar (3) Zet de Thermostaatknop op de gewenste temperatuur volgens het recept. (4) Stel de Timerknop in op de gewenste bereidingstijd (5) Om het te controleren of om voedsel te verwijderen, gebruik een handgreep om het voedsel erin of eruit te halen. (6) Als de bereiding klaar is, klinkt er een bel en de Timerknop gaat automatisch terug naar de Off-stand. Open de deur helemaal en verwijder direct het voedsel, anders kan de overgebleven hitte in de oven blijven verwarmen en uw toast uitdrogen. LET OP: Bereid voedsel, het metalen rooster/bak en de deur kunnen erg heet zijn, wees voorzichtig.9. FUNCTIE
 Deze functie is ideaal voor het bereiden van kip en gevogelte. Opmerking: Alle bereidingstijden zijn gebaseerd op vlees van koelkasttemperatuur. Bevroren vlees zal aanzienlijk langer duren. Daarom wordt een vleesthermometer aanbevolen.Gebruik
(1) Plaats de hele kip op de rotisseriespit en plaats aan beide zijden een vork, plaats het spit in de inkeping en sluit de deur. OPMERKING: Plaats de voedselbak in de onderste stand voor het opvangen van olie dat tijdens de bereiding eraf druppelt en plaats wat water voor de bereiding in de bak, dat geeft de rotisserie een goed resultaat. (2) Draai de Functieknop naar & (3) Stel de Thermostaatknop in op 230°C. (4) Stel de Timerknop in op de gewenste bereidingstijd. (5) Controleer het bereidde voedsel op gaarheid zo'n 5\~10 minuten voor de verwachtte eindtijd. (6) Als de bereiding klaar is, klinkt er een bel en de Timerknop gaat automatisch terug naar de Off-stand. Open de deur helemaal en verwijder het voedsel. LET OP: Bereid voedsel, het metalen spit/bak en de deur kunnen erg heet zijn, wees voorzichtig.ONDERHOUDINSTRUCTIES VOOR GEBRUIK
Dit apparaat vergt weinig onderhoud. Er zijn geen onderdelen die gebruikers kunnen onderhouden. Probeer het niet zelf te repareren. Neem contact op met een gekwalificeerd reparateur als het apparaat onderhoud nodig heeft.SCHOONMAAKINSTRUCTIES
LET OP: Ter bescherming tegen een elektrische schok, NIET DE OVEN ONDERDOMPELEN IN WATER OF EEN ANDERE VLOEISTOF. Uw oven dient regelmatig schoongemaakt te worden voor de beste prestaties en een lang leven. Regelmatig schoonmaken verkleint ook het risico op brand. Stap 1. Verwijder de stekker uit het stopcontact. Laat het apparaat afkoelen. Stap 2. Verwijder de verwijderbare kruimella, rooster en plaat uit de oven. Maak ze schoon met een vochtige doek met zeep. Gebruik alleen een mild sopje. Stap 3. Maak de binnenkant van de oven schoon met een vochtige doek met sop. Veeg de ovenwanden, de bodem en de glazen deur schoon. Herhaal dat met een droge, schone doek. Stap 4. Veeg de buitenkant van de oven af met een vochtige doek. LET OP: GEBRUIK GEEN BIJTENDE MIDDELEN OF METALEN SCHUURSPONSJES. Gebruik een mild sopje. Bijtende middelen, schrobborstels en chemische middelen zullen de coating van het apparaat beschadigen. Er kunnen stukjes afbreken en elektrische onderdelen aanraken en zo mogelijk een elektrische schok geven. Stap 5. Laat het apparaat afkoelen en helemaal drogen voor het wegzetten. Als u het voor langere tijd wegzet, zorg dan dat de oven schoon is en er geen etensresten meer in zitten. Bewaar de oven op een droge locatie zoals op een tafel, aanrecht of schap. Op het aanbevolen schoonmaken na is er geen ander gebruikersonderhoud. Al het andere onderhoud moet door een erkend servicecentrum gebeuren. SPECIFICATIES:| Spanning | 230V-240V |
| Frequentie | 50 Hz -60Hz |
| Vermogen: | 2000W |
| Capaciteit over | 42Liter |
| Alleen voor huishoudelijk gebruik, NIET ONDERDOMPELEN IN WATER | |
GARANTIE
De garantieperiode op onze producten is 2 jaar, tenzij anders vermeld, beginnend vanaf de datum van de initiele aankoop of bezorgdatum. Als u problemen of vragen heeft, kunt u eenvoudig onze hulppagina's bezoeken voor tips om problemen op te lossen, de FAQ's en andere gebruikershandleidingen op onze website: https://sav.hkoenig.com. Door de referentienaam van uw apparaat in de zoekbalk te typen, krijgt u toegang tot alle beschikbare online hulpmiddelen, ontworpen om aan uw behoeften te voldoen. Als u toch niet geen antwoord op uw vraag kunt vinden, klik dan op "Heeft het antwoord uw probleem opgelost? Hierdoor gaat u naar het Aanvraagformulier voor Klantenondersteuning, dat u in kunt vullen om uw verzoek te valideren en hulp te ontvangen.GARANTIEVOORWAARDEN
De garantie dekt alle mankementen die voortkomen uit normaal gebruik, volgens de sectie gebruik en specificaties in de gebruikershandleiding. Deze garantie omvat niet verpakkings- of transportproblemen tijdens het vervoer van het product door de eigenaar. Het omvat ook niet de normale slijtage van het product, noch het onderhoud of vervangen van verbruiksartikelen.UITSLUITINGEN VAN DE GARANTIE
- Accessoires en verbruiksartikelen (\*). - Normaal onderhoud van het apparaat. - Alle mankementen veroorzaakt door verkeerd gebruik (schokken, het niet opvolgen van de aanbevolen stroomvoorziening, in slechte omstandigheden gebruiken, etc.), onvoldoende onderhoud of ondeugdelijk gebruik van het apparaat, alsook het gebruik van ongeschikte accessoires. - Schade van buitenaf: vuur, waterschade, elektrische stroompiek, etc. - Apparaten die uit elkaar zijn gehaald, ook gedeeltelijk, door personen die niet er niet gekwalificeerd voor zijn (zoals de gebruiker). - Producten waarvan het serienummer verdwenen, beschadigd of onleesbaar is, waardoor we het niet kunnen identificeren. - Producten die verhuurd werden of ter demonstratie of showmodel waren. (\*) Sommige onderdelen van uw apparaat, genaamd verbruiksartikelen, slijten naar verloop van tijd en bij veel gebruik van uw apparaat. Deze slijtage is normaal, maar kan verergerd worden door slechte omstandigheden of onderhoud van uw apparaat. Deze onderdelen worden daarom niet gedekt door de garantie. De accessoires meegeleverd met het apparaat zijn ook uitgesloten van de garantie. Ze kunnen niet vervangen of gerestitueerd worden. Echter, sommige accessoires zijn te koop via onze website: https://sav.hkoenig.com/.MILIEU
LET OP:  Gooi dit apparaat niet weg als normaal huishoudelijk afval. Er is een scheiding voor afgedankte elektrische apparaten, vraag uw lokale overheid waar u dit apparaat kunt inleveren. Elektrische producten bevatten gevaarlijke stoffen die schadelijk kunnen zijn voor het milieu of mensen en dienen te worden gerecycled. Dit symbool geeft aan dat elektrische apparaten niet bij normaal afval mag, een rolcontainer gemarkeerd met een kruis. Adeva SAS / H.Koenig Europe - 8 rue Marc Seguin - 77290 Mitry Mory - France www.hkoenig.com - sav@hkoenig.com - contact@hkoenig.com - Tél: +33 1 64 67 00 05ESPANOL
MEDIDAS DE SEGURIDAD IMPORTANTES
Para utilizar cualquier electrodoméstico, siempre se deben tomar las precauciones básicas de seguridad, dentro de las cuales se incluyen las siguientes: 1. Lea todas las instrucciones antes de usar el aparato. 2. No toque las superficies calientes. 3. Se requiere una estricta supervisión cuando cualquier dispositivo eléctrico está siendo utilizado por niños o cerca de ellos. 4. Para evitar el riesgo de choques eléctricos, nunca sumerja el cable de alimentación, el enchufe ni cualquier otra parte del horno en agua u otros líquidos. 5. No deje que el cable de alimentación cuelgue del borde de la mesa o mostrador, ni que entre en contacto con superficies calientes. 6. No use este aparato si su cable de alimentación o enchufe están dañados, si no está funcionando correctamente, está en mal estado o se ha caído. Si el cable de alimentación está deteriorado deberá ser remplazado por el fabricante, su personal técnico o un especialista similar para evitar riesgos potenciales. 7. El uso de accesorios no recomendados por el fabricante puede causar accidentes y/o lesiones. 8. Cuando opere el horno, mantenga al menos cuatro pulgadas de espacio en todos los lados para permitir una circulación de aire adecuada. 9. Desconecte el horno del tomacorriente cuando no esté en uso y antes de limpiarlo. Deje que se enfríe totalmente antes de poner, quitar o limpiar cualquier pieza. 10. Para desconectar el horno, gire el Dial de Control a la posición de APAGADO antes de quitar el enchufe. Siempre sostenga el enchufe y no tire del cable. 11. No cubra ninguna parte del horno con papel de aluminio. Esto puede causar sobrecalentamiento. 12. No limpiar con esponjas de fibras metálicas. Las fibras pueden desprenderse de la almohadilla y tocar las partes eléctricas, creando una descarga eléctrica. 13. No introduzca alimentos grandes o utensilios de metal en el horno debido a que puede provocar un incendio o choques eléctricos. 14. No coloque ningún artefacto sobre el horno ni lo cubra con material inflamable durante la operación, ya que puede provocar un incendio. 15. Cuidado extremo al usar contenedores construidos con cualquier material que no sea metal o vidrio. 16. No coloque ninguno de los siguientes materiales dentro del horno: cartón, plástico, papel, o similares. 17. Cuando el horno no esté en uso no lo utilice para almacenar ningún material que no sean los accesorios recomendados por el fabricante. 18. Use guantes aislantes y protectores cuando opere el horno caliente. 19. Este electrodoméstico tiene una puerta de seguridad de vidrio templada. El vidrio templado es más fuerte que el vidrio ordinario y más resistente a la rotura, puede romperse, pero las piezas no tendrán bordes afilados. Evite rayar la superficie de la puerta o mellar los bordes. Si el vidrio de la puerta se raya o mella, comuníquese con nuestra línea de atención al cliente antes de usar el horno. 20. No utilizar en exteriores. 21. Use este aparato sólo para los fines previstos en este manual. 22. Este aparato es para USO DOMÉSTICO exclusivamente. 23. La temperatura de la puerta o la superficie exterior puede ser mayor cuando el aparato está funcionando. 24. Protección contra el peligro de heridas por filo. 25. La temperatura de las superficies puede ser alta cuando el aparato está funcionando. 26. No coloque utensilios de cocina o platos para hornear en la puerta de vidrio. 27. Este aparato puede ser utilizado por personas con capacidades físicas, sensoriales o mentales reducidas o con falta de experiencia o conocimientos, siempre que sean supervisadas o instruidas en el uso seguro del aparato y que entiendan perfectamente los peligros potenciales. 28. Los niños deben ser supervisados para asegurarse de que no jueguen con el aparato. 29. El peso de la comida que se coloca en el sartén S3 o la parrilla de acero no puede superar los 3.0 kg. (Solo como referencia) (La comida no puede concentrarse en un lado del sartén o la parrilla, colóquela siempre de manera uniforme). 30. Si el cable de alimentación está deteriorado deberá ser remplazado por el fabricante, su personal técnico o un especialista similar para evitar riesgos potenciales. 31. Coloque a superficie superior del horno contra la pared. 32. ADVERTENCIA: Las superficies no funcionales pueden alcanzar altas temperaturas. Dado que las temperaturas son percibidas de manera diferente por diferentes personas, este aparato debe usarse con PRECAUCIÓN. Use exclusivamente para sujetar las superficies destinadas a sostener y utilice medidas de protección contra el calor como guantes o soportes para ollas. Las superficies no funcionales deben tener suficiente tiempo para enfriarse. 33. No coloque el aparato sobre o cerca de hornillas calientes, ya sean de gas o eléctricas, ni de cualquier otro artefacto que produzca calor. 34. Debe tener mucho cuidado al mover cualquier artefacto que contenga aceite caliente u otros líquidos calientes. 35. Gire el Dial de Control a la posición de APAGADO para apagar el aparato. 36. Este aparato no está destinado para ser operado por medio de un temporizador externo o un sistema de control remoto. 37. Este aparato puede ser utilizado por niños mayores de 8 años siempre que sean supervisados o hayan sido instruidos en el uso del aparato de forma segura y entienden los peligros involucrados. 38. La limpieza y el mantenimiento a cargo del usuario no deben ser realizados por niños a menos que tengan al menos 8 años y estén supervisados por un adulto. 39. Mantenga el aparato y su cable de alimentación fuera del alcance de los niños menores de 8 años. 40. Cuando utilice equipos eléctricos, siempre tome las debidas precauciones de seguridad para evitar riesgos de incendios, descargas eléctricas y/o lesiones en caso de mal uso. 41. Asegúrese de que la tensión de su red eléctrica sea compatible con la indicada en la placa de características del horno. Si este no es el caso, no lo conecte y póngase en contacto con el distribuidor. 42. 43. Nunca deje el horno desatendido mientras esté en funcionamiento. 44. Nunca abra el aparato desde el frente, siempre colóquese ligeramente hacia un lado para evitar quemarse con el vapor. 45. El aparato no debe usarse si se ha caído, si tiene fugas o si hay signos evidentes de daños visibles. 46. Su aparato ha sido diseñado para uso doméstico únicamente. No fue diseñado para usarse en los siguientes casos que no están cubiertos por la garantía: - en áreas de cocina reservadas para el personal en tiendas, oficinas y otros entornos profesionales, - en posadas agrícolas, - por clientes de hoteles, moteles y otros entornos residenciales, - en entornos de tipo alojamiento y desayuno. PRECAUCIÓN: LAS SUPERFICIES DEL APARATO ESTÁN CALIENTES DESPUÉS DEL USO. Use guantes protectores cuando toque el horno, platos y alimentos calientes, o cuando inserte/retire la parrilla, los sartenes o los platos para hornear.GUARDA ESTE MANUAL DE INSTRUCCIONES.
ANTES DEL PRIMER USO
Antes de usar su horno eléctrico por primera vez, asegúrese de: 1. Desembale el aparato. 2. Retire la bandeja para hornear y la parrilla. Lávelos con agua jabonosa caliente o en el lavavajillas. 3. Seque completamente todos los accesorios y vuelva a colocarlos en el horno. Conecte el horno al tomacorriente y estará listo para su uso. 4. Después de armar su horno, le recomendamos que lo haga funcionar a la temperatura MÁXIMA durante aproximadamente 15 minutos para eliminar cualquier olor a aceite de embalaje que pueda quedar después del envío.DESCRIPCIÓN DEL PRODUCTO
 | 1. Varilla para asar | 7. Dial de control |
| 2. Rejilla de acero | 8. Luz de encendido |
| 3. Sartén para hornear | 9. Temporizador |
| 4. Bandeja para migas | 10. Elemento de calefacción |
| 5. Mango para sartén | 11. Puerta de cristal |
| 6. Termostato | 12. Manija de la puerta |
USANDO SU HORNO ELÉCTRICO
Familiarícese con las siguientes funciones y accesorios del horno antes del primer uso: ① Rejilla de acero: para tostar, hornear y cocinar en general en cazuelas y sartenes estándar. ② Sartén para hornear: para asar carnes, aves, pescado y otros alimentos. ③ Varilla para asar: utilícela para asar carnes y aves. ④ Bandeja para migas: para recoger el aceite o las migas caídas. ⑤ Mango para sartén: para quitar el sartén o la rejilla. ⑥ Termostato: elija la temperatura deseada entre Baja-90°C – Alta-230°C (Baja es cocinar a temperatura ambiente). ⑦ Temporizador: gire el control hacia la izquierda (en sentido contrario a las agujas del reloj) y el horno permanecerá encendido hasta que se apague manualmente. Para activar el temporizador, gire a la derecha (en el sentido de las agujas del reloj) para otro uso. Sonará una campana al final del tiempo programado. ⑧ Dial de control: hay cinco funciones (□ modo de espera, 📋 convección + elementos calefactores superior e inferior, convección + elementos calefactores superiores, elementos calefactores superior e inferior, asador + elementos calefactores superiores, elementos calefactores superior e inferior + convección + asador). ⑨ Luz de encendido: se ilumina cada vez que se enciende el horno.CONSEJOS PARA UTILIZAR LA VARILLA DE ASAR
1. Inserte la horquilla en la varilla hasta que esté cerca del extremo y luego asegúrela con un tornillo de mariposa. 2. Inserte la comida del otro lado de la varilla. 3. Coloque la segunda horquilla en el otro lado de la varilla y asegúrela con un tornillo de mariposa. Compruebe que la comida esté firmemente en el centro de la varilla. 4. Introduzca la varilla con la comida en el horno. Inserte un lado de la varilla en el orificio de soporte del horno. Y luego coloque el otro lado de la varilla en el soporte del horno. PANEL DE CONTROL radar
| Metric | Value | | ------------ | ----- | | TEMPERATURE | 230 | | FUNCTION | Low | | TIME | Off | | POWER | 30 |INSTRUCCIONES DE OPERACIÓN
1. FUNCIÓN
  Esta función es ideal para hornear chuletas de cerdo, muslos de pollo, alitas de pollo, hojuelas de papa, carne de ave, chuletas, pescado, etc., con un calentamiento más uniforme. Nota: Todos los tiempos de asado se basan en carnes a la temperatura del refrigerador. Las carnes congeladas pueden tardar mucho más. Por lo tanto, se recomienda encarecidamente el uso de un termómetro para carne.Operación
① Coloque los alimentos a cocinar en la parrilla o sartén. Inserte la parrilla o sartén en la guía de soporte central del horno. ② Gire el dial de control a la función ☐. ③ Ajuste el termostato a la temperatura deseada según sea necesario o según la receta. ④ Fije el temporizador en el tiempo de cocción deseado. ⑤ Compruebe que los productos horneados estén cocidos 5 \~ 10 minutos antes de la finalización prevista. ⑥ Cuando se completa el asado, sonará una campana y la perilla del temporizador volverá a la posición de apagado automáticamente. Abra la puerta por completo y retire la comida. PRECAUCIÓN: Los alimentos cocidos, la parrilla/sartén y la puerta pueden estar muy calientes, manipúlelos con cuidado. No deje el horno desatendido.2. FUNCIÓN
 Esta función es ideal para cocinar pan, pizza y aves en general.Operación
① Coloque los alimentos a cocinar en la parrilla o sartén. Inserte la parrilla o sartén en la guía de soporte central del horno. ② Gire el dial de control a la función ③ Ajuste el termostato a la temperatura deseada según sea necesario o según la receta. ④ Fije el temporizador en el tiempo de cocción deseado. ⑤ Para revisar o quitar la comida, use el mango para ayudar a que la comida entre y salga. ⑥ Cuando se completa el asado, sonará una campana y la perilla del temporizador volverá a la posición de apagado automáticamente. Abra la puerta por completo y retire la comida. PRECAUCIÓN: Los alimentos cocidos, la parrilla/sartén y la puerta pueden estar muy calientes, manipúlelos con cuidado.3. FUNCIÓN
  Esta función es ideal para cocinar pollos enteros y aves en general. Nota: Todos los tiempos de asado se basan en carnes a la temperatura del refrigerador. Las carnes congeladas pueden tardar mucho más. Por lo tanto, se recomienda encarecidamente el uso de un termómetro para carne.Operación
① Coloque el pollo entero en la varilla de asar y fijelo con la horquilla a ambos lados, inserte la varilla en el orificio que se encuentra dentro del horno y cierre la puerta. ② Gire el dial de control a la función & . ③ Ajuste el termostato a 230°C. ④ Fije el temporizador en el tiempo de cocción deseado. ⑤ Compruebe que los productos horneados estén cocidos 5 \~ 10 minutos antes de la finalización prevista. ⑥ Cuando se completa el asado, sonará una campana y la perilla del temporizador volverá a la posición de apagado automáticamente. Abra la puerta por completo y retire la comida. PRECAUCIÓN: Los alimentos cocidos, la parrilla/sartén y la puerta pueden estar muy calientes, manipúlelos con cuidado.MANTENIMIENTO
Este aparato requiere poco mantenimiento. No contiene partes reparables por el usuario. No intente repararlo usted mismo. Póngase en contacto con un técnico calificado.LIMPIEZA
PRECAUCIÓN: Para evitar descargas eléctricas, NO SUMERJA EL HORNO EN AGUA NI EN NINGÚN OTRO LÍQUIDO. El horno debe limpiarse regularmente para obtener el mejor rendimiento y alargar la vida útil. La limpieza regular también reducirá riesgos de incendio. 1. Desenchufe el horno del tomacorriente y permita que se enfríe antes de efectuar la limpieza. 2. Retire la bandeja extraíble para migajas, la parrilla y el sartén. Límpielos con paño húmedo. Asegúrese de usar solo agua jabonosa suave. 3. Limpie las paredes del horno, la parte inferior del horno y la puerta de vidrio con un paño húmedo en agua jabonosa. Repita con un paño seco y limpio. 4. Limpie el exterior del horno con un paño húmedo. PRECAUCIÓN: NO USE LIMPIADORES ABRASIVOS NI ALMOHADILLAS METÁLICAS. Asegúrese de usar solo agua jabonosa suave. Los limpiadores abrasivos, los cepillos de fregado y los limpiadores químicos dañarán el revestimiento de este aparato. Además, las piezas metálicas pueden desprenderse y tocar partes eléctricas implicando un riesgo de descarga eléctrica. 5. Permita que el horno se enfríe y seque por completo antes de guardarlo. Si almacena el horno durante largos períodos de tiempo, asegúrese de que esté limpio y libre de partículas de alimentos. Guarde el horno en un lugar seco, como una mesa, mostrador o estante de armario. Aparte de la limpieza recomendada, no será necesario más mantenimiento por parte del usuario. Cualquier otro servicio debe ser realizado por un técnico calificado. ESPECIFICACIONES| Voltaje nominal | 230 V – 240 V |
| Frecuencia nominal | 50 Hz – 60 Hz |
| Potencia nominal | 2000 W |
| Capacidad del horno | 42 litros |
| Solo para uso doméstico, NO SUMERGIR EN EL AGUA | |
GARANTÍA
El periodo de garantía de nuestros productos es de 2 años, salvo que la ley estipule lo contrario, a partir de la fecha de la compra inicial o de la fecha de entrega. Si tiene algún problema o pregunta, puede acceder fácilmente a nuestras páginas de ayuda, consejos para solucionar problemas, preguntas frecuentes y manuales de usuario en nuestro sitio de servicio: https://sav.hkoenig.com. Al escribir el nombre de referencia de su dispositivo en la barra de búsqueda, puede acceder a toda la asistencia en línea disponible, diseñada para satisfacer mejor sus necesidades. Si sigue sin encontrar una respuesta a su pregunta o problema, haga clic en "¿La respuesta ha resuelto su problema? Esto le llevará al formulario de solicitud de asistencia posventa, que puede rellenar para validar su solicitud y obtener ayuda.CONDICIONES DE GARANTÍA
La garantía cubre todos los fallos que se produzcan en el contexto de un uso normal, de acuerdo con los usos y especificaciones del manual de usuario. Esta garantía no se aplica a los problemas de embalaje o transporte durante el envío del producto por parte del propietario. Tampoco incluye el desgaste normal del producto, ni el mantenimiento o la sustitución de piezas consumibles.EXCLUSIÓN DE GARANTÍA
- Accesorios y piezas de desgaste (\*). - Mantenimiento normal del aparato. - Todas las averías derivadas de un uso incorrecto (golpes, incumplimiento de las recomendaciones de alimentación eléctrica, malas condiciones de uso, etc.), de un mantenimiento insuficiente o de un mal uso del aparato, así como del uso de accesorios inadecuados. - Daños de origen externo: incendio, daños por agua, sobrecarga eléctrica, etc. - Cualquier equipo que haya sido desmontado, incluso parcialmente, por personas que no estén autorizadas a hacerlo (en particular el usuario). - Productos cuyo número de serie falte, esté dañado o sea ilegible, lo que no permitiría su identificación. - Productos sujetos a alquiler, demostración o exposición. (\*) Algunas piezas de su aparato, conocidas como piezas de desgaste o consumibles, se deterioran con el tiempo y la frecuencia de uso de su aparato. Este desgaste es normal, pero puede acentuarse por las malas condiciones de uso o de mantenimiento de su aparato. Por lo tanto, estas piezas no están cubiertas por la garantía. Los accesorios suministrados con el aparato también están excluidos de la garantía. No se pueden cambiar ni reembolsar. No obstante, algunos accesorios pueden adquirirse directamente en nuestro sitio web: https://sav.hkoenig.com/MEDIO AMBIENTE
ELIMINACIÓN APROPIADA DE ESTE APARATO
 Esta marca indica que el producto no debe desecharse en la basura doméstica, porque las sustancias peligrosas pueden filtrarse en el agua subterránea y entrar en la cadena alimentaria, dañando su salud y bienestar. Para reciclarlo utilice los sistemas de devolución y recolección de su localidad o póngase en contacto con el distribuidor donde adquirió el aparato. Al reemplazar los electrodomésticos antiguos por otros nuevos, el minorista está legalmente obligado a recuperar sus electrodomésticos viejos de forma gratuita. Adeva SAS / H.Koenig Europe - 8 rue Marc Seguin - 77290 Mitry Mory - France www.hkoenig.com - sav@hkoenig.com - contact@hkoenig.com - Tél: +33 1 64 67 00 05ITALIANO IMPORTANTI ISTRUZIONI DI SICUREZZA
Quando si utilizza un apparecchio elettrico, è necessario seguire sempre alcune precauzioni di sicurezza di base, tra cui: 1. Leggere tutte le istruzioni 2. Non toccare le superfici calde. Usare le maniglie o le manopole. 3. È necessaria una stretta supervisione quando qualsiasi apparecchio viene utilizzato da o vicino ai bambini. 4. Per proteggersi da scosse elettriche, non mettere parti del forno elettrico in acqua o altri liquidi. 5. Non lasciare che il cavo penda dal bordo del tavolo o del bancone o tocchi le superfici calde. 6. Non utilizzare l'apparecchio con cavo o spina danneggiati o dopo che l'apparecchio non ha funzionato correttamente o è stato danneggiato in un qualsiasi modo, consegnare l'apparecchio al centro di assistenza autorizzato più vicino per l'esame, la riparazione o la regolazione. 7. L'uso di accessori non raccomandati dal produttore dell'apparecchio può causare rischi o lesioni. 8. Durante il funzionamento del forno, lasciare almeno dieci centimetri di spazio su tutti i lati del forno per consentire un'adeguata circolazione dell'aria. 9. Scollegare dalla presa quando l'apparecchio non viene utilizzato o prima di pulirlo. Lascialo raffreddare prima di smontare o rimuovere parti o prima della pulizia. 10. Per disconnetterlo, ruotare il controllo su STOP, quindi scollegare la spina. Afferrare sempre la spina e non tirare mai il cavo. 11. Non coprire il raccoglibriciole o qualsiasi altra parte del forno con un foglio d'alluminio o carta stagnola. Ciò può causare il surriscaldamento del forno. 12. Non pulire con spugne metalliche. La spugna potrebbe toccare le parti elettriche, creando il rischio di scosse elettriche. 13. Gli alimenti di grandi dimensioni o gli utensili di metallo non devono essere inseriti in un forno elettrico poiché potrebbero causare incendi o rischi di scosse elettriche. 14. Esiste un pericolo d'incendio se il forno è coperto o tocca materiale infiammabile, comprese tende, tendaggi, pareti e simili, durante il funzionamento. Non conservare oggetti sul forno durante il funzionamento. 15. È necessaria estrema cautela quando si usano contenitori realizzati con materiali diversi dal metallo o dal vetro. 16. Non mettere i seguenti materiali nel forno: cartone, plastica, carta o simili. 17. Non conservare materiali diversi dagli accessori consigliati dal produttore in questo forno quando non viene utilizzato. 18. Indossare sempre guanti isolanti protettivi da forno quando si inseriscono o si rimuovono oggetti dal forno caldo. 19. Questo apparecchio ha una porta in vetro temperato. Questo tipo di vetro è più forte del normale vetro e più resistente alla rottura. Il vetro temperato può rompersi, ma i pezzi non avranno bordi taglienti. Evitare di graffiare la superficie della porta o tagliare i bordi. Se lo sportello si dovesse graffiare o rovinare, contattare il nostro servizio clienti prima di utilizzare il forno. 20. Non usare all'aperto. 21. Non utilizzare l'apparecchio per usi diversi da quelli previsti. 22. Questo apparecchio è SOLO PER USO DOMESTICO. 23. La temperatura della porta o della superficie esterna potrebbe essere più alta quando l'apparecchio è in funzione. 24. Proteggersi dagli spigoli vivi durante l'utilizzo. 25. La temperatura delle superfici accessibili può essere elevata quando l'apparecchio è in funzione. 26. Non appoggiare utensili da cucina o stoviglie sulla porta di vetro. 27. Este aparato puede ser utilizado por personas con capacidades físicas, sensoriales o mentales reducidas o con falta de experiencia o conocimientos, siempre que sean supervisadas o instruidas en el uso seguro del aparato y que entiendan perfectamente los peligros potenciales. 28. I bambini devono essere sorvegliati per assicurarsi che non giochino con l'apparecchio. 29. Il peso del cibo che viene inserito sul vassoio / griglia metallica S3 non può essere superiore ai 3.0kg. (Solo per riferimento)( Il cibo non va posizionato su un lato del vassoio/griglia per alimenti S3, è meglio che venga distribuito uniformemente sul vassoio/griglia per alimenti S3)。 30. Per apparecchi con attacco di tipo Y, se il cavo di alimentazione è danneggiato, esso deve essere sostituito dal produttore, da un suo agente di servizio o da persone qualificate per evitare pericoli. 31. La superficie posteriore degli apparecchi deve essere posizionata contro una parete. 32. ATTENZIONE: questo apparecchio include una funzione di riscaldamento. Superfici diverse dalle superfici funzionali possono sviluppare temperature elevate. Poiché le temperature sono percepite in modo diverso da persone diverse, questo dispositivo deve essere utilizzato con ATTENZIONE. Afferrare l'apparecchio esclusivamente tramite le superfici destinate allo scopo e utilizzare misure di protezione dal calore come guanti protettivi o presine. Le aree che non sono destinate all'impugnatura devono avere il tempo sufficiente per raffreddarsi. 33. Non posizionare sopra o vicino a un fornello a gas o elettrico o in un forno riscaldato. 34. Prestare la massima attenzione quando si sposta un apparecchio contenente olio caldo o altri liquidi caldi. 35. Ruotare la manopola del timer su "Off" per spegnere l'apparecchio. 36. Questo apparecchio non deve essere azionato mediante un timer esterno o un sistema di controllo remoto separato. 37. Questo apparecchio può essere utilizzato da bambini di almeno 8 anni, a condizione che siano sorvegliati e che abbiano ricevuto istruzioni sull'uso sicuro dell'apparecchio e siano pienamente consapevoli dei pericoli correlati. 38. La pulizia e la manutenzione non devono essere eseguite da bambini a meno che non abbiano almeno 8 anni e siano sorvegliati da un adulto. 39. Tenere l'apparecchio e il suo cavo di alimentazione fuori dalla portata dei bambini di età inferiore agli 8 anni. 40. Quando si utilizzano apparecchiature elettriche, è necessario prendere sempre precauzioni di sicurezza per prevenire il rischio di incendi, scosse elettriche e/ lesioni in caso di uso improprio. 41. Accertarsi che la tensione nominale presente sulla targhetta corrisponda alla tensione del vostro impianto elettrico. In caso contrario, contattare il rivenditore e non collegare l'unità. 42. Non lasciare mai l'unità incustodita mentre è in funzione. 43. Non aprire mai l'apparecchio stando sulla parte anteriore, posizionarsi sempre leggermente di lato per evitare di bruciarsi con il vapore. 44. Il dispositivo non deve essere utilizzato se è stato fatto cadere, se ci sono evidenti segni di danni o se presenta perdite. 45. Su aparato ha sido diseñado para uso doméstico únicamente. No fue diseñado para usarse en los siguientes casos que no están cubiertos por la garantía: - en áreas de cocina reservadas para el personal en tiendas, oficinas y otros entornos profesionales, - en posadas agrícolas, - por clientes de hoteles, moteles y otros entornos residenciales, - en entornos de tipo alojamiento y desayuno. ATTENZIONE: LE SUPERFICI DELL'APPARECCHIO SONO CALDE DOPO L'USO. Indossare SEMPRE guanti da forno protettivi e isolanti quando si toccano il forno caldo, piatti e cibi caldi o quando si inseriscono o rimuovono la griglia, le teglie o i piatti da forno.CONSERVARE QUESTE ISTRUZIONI
Prima di usare il forno elettrico
Prima di utilizzare il forno elettrico a convezione per la prima volta, assicurarsi di: 9. Disimballare l'unità. 10. Rimuovere la teglia e la griglia. Lavare le griglie e le padelle in acqua calda e fredda o in lavastoviglie. 11. Asciugare accuratamente tutti gli accessori e rimontarli nel forno. Collegare il forno alla presa e sarete pronti ad usare il vostro nuovo forno elettrico. 12. Dopo aver riassemblato il forno, si consiglia di farlo funzionare alla temperatura MAX per circa 15 minuti per eliminare eventuali odori di olio di imballaggio che potrebbero rimanere dopo l'imballaggio.COMPONENTI:
 | 1 | Accessorio girarrosto | 7 | Manopola funzioni |
| 2 | Griglia | 8 | Indicatore |
| 3 | Vassoio alimenti | 9 | Manopola del timer |
| 4 | Vassoio briciole | 10 | Temosifone |
| 5 | Maniglia vassoio alimenti | 11 | Porta di vetro |
| 6 | Manopola termostato | 12 | Maniglia |
UTILIZZO DEL FORNO ELETTRICO
Si prega di conoscere le seguenti funzioni e accessori del forno prima del primo utilizzo: 1 Griglia metallica: Per tostare, cuocere al forno e per cotture in genere in casseruole e padelle standard. 2 Vassoio alimenti: Per l'uso nella cottura alla griglia e arrosto di carne, pollame, pesce e vari altri alimenti. 3 Accessorio girarrosto: Utilizzare per arrostire varietà di carni e pollame. 4 Vassoio briciole: Per raccogliere olio o briciole. 5 Maniglia del vassoio per alimenti: Per rimuovere vassoio o griglia. 6 Manopola termostato: per selezionare la temperatura desiderata tra Bassa-90°C-230°C (Bassa è la cottura a temperatura ambiente). 7 Manopola del timer: ruotando il comando a sinistra (senso antiorario) il forno resterà acceso fino allo spegnimento manuale. Per attivare il timer, girare a destra (in senso orario) per altri usi. Alla fine del tempo programmato verrà emesso un segnale acustico. 8 Manopola delle funzioni: ci sono cinque modalità (☐modalità standby, ☑convezione + resistenze superiori e inferiori, ☑convezione + resistenze superiori, ☑resistenze superiori e inferiori, ☑girarrosto + resistenze superiori, ☑resistenze superiori e inferiori +convezione + girarrosto) 9 Indicatore: si accende ogni volta che si accende il forno.ACCESSORIO GIRARROSTO UTILIZZO PUNTE
1. Inserire la forcchetta nell'asta fino all'estremità dell'asta e quindi fissare con la vite a testa zigrinata 2. Inserire il cibo dall'altro lato dell'asta. 3. Posiziona la seconda forchetta nell'altro lato dell'asta, quindi fissare con la vite a testa zigrinata. Controllare che il cibo sia saldamente al centro dell'asta. 4. Inserire l'asta con il cibo nel forno. Inserire un lato dell'asta nel foro di supporto del forno. Quindi posizionare l'altro lato dell'asta sulla staffa di supporto del forno.PANNELLO DI CONTROLLO
radar
TEMP | Temperature (°C) | Value | | :--- | :--- | | Low | 230 | | 90 | 210 | | 120 | 180 | | 150 | 150 | | Temp | 230 |flowchart
graph TD
A[" "] --> B[" "]
B --> C[" "]
C --> D[" "]
D --> E[" "]
E --> F[" "]
F --> G[" "]
G --> H[" "]
H --> I[" "]
I --> J[" "]
J --> K[" "]
K --> L[" "]
L --> M[" "]
M --> N[" "]
N --> O[" "]
O --> P[" "]
P --> Q[" "]
Q --> R[" "]
R --> S[" "]
S --> T[" "]
T --> U[" "]
U --> V[" "]
V --> W[" "]
W --> X[" "]
X --> Y[" "]
Y --> Z[" "]
flowchart
graph TD
A["90"] --> B["75"]
B --> C["60"]
C --> D["45"]
D --> E["30"]
E --> F["15"]
F --> G["Off"]
G --> H["Stay On"]
H --> I["Power"]
ISTRUZIONI PER L'USO
1. FUNZIONE
 Questa funzione è ideale per cuocere fette di maiale, cosce di pollo, ali di pollo, patate, pollame, braciole, pesce e così via con un riscaldamento più uniforme. Nota: Tutti i tempi di cottura sono basati su carni a temperatura di frigorifero. Le carni congelate possono richiedere molto più tempo. Pertanto, l'uso di un termometro per carne è altamente raccomandato.Funzionamento
(1) Posizionare il cibo da cuocere sulla griglia/vassoio per alimenti. Inserire la griglia/vassoio nella guida di supporto centrale del forno. 2) Ruotare la manopola delle funzioni su & (3) Impostare la manopola del termostato sulla temperatura desiderata secondo necessità o ricetta. (4) Impostare la manopola Timer sul tempo di cottura desiderato. (5) Controllare la cottura dei prodotti da forno 5\~10 minuti prima del termine cottura previsto. (6) Quando la cottura è completa, suonerà un campanello e la manopola del timer tornerà automaticamente in posizione Off. Aprire completamente la porta e rimuovere il cibo. ATTENZIONE: Il cibo cotto, la griglia/vassoio in metallo e la porta possono essere molto caldi, maneggiare con cura. Non lasciare il forno incustodito.2. FUNZIONE
 Questa funzione è ideale per la cottura di pane, pizza e pollame in genere.Funzionamento
(1) Posizionare il cibo da cuocere sulla griglia/vassoio per alimenti. Inserire la griglia/vassoio nella guida di supporto centrale del forno. 2) Ruotare la manopola delle funzioni su (3) Impostare la manopola del termostato sulla temperatura desiderata secondo necessità o ricetta. (4) Impostare la manopola Timer sul tempo di cottura desiderato 5) Per controllare o rimuovere il cibo, utilizzare una maniglia per aiutarsi ad inserire ed estrarre il cibo. (6) Quando la cottura è completa, suonerà un campanello e la manopola del timer tornerà automaticamente in posizione Off. Aprire completamente la porta e rimuovere immediatamente il cibo, altrimenti il calore rimasto nel forno continuerà a cuocere e ad asciugare il cibo. ATTENZIONE: Il cibo cotto, la griglia/vassoio in metallo e la porta possono essere molto caldi, maneggiare con cura.3. FUNZIONE
 Questa funzione è ideale per la cottura di polli interi e volatili in genere. Nota: Tutti i tempi di tostatura sono basati su carni a temperatura di frigorifero. Le carni congelate possono richiedere molto più tempo. Pertanto, l'uso di un termometro per carne è altamente raccomandato.Funzionamento
(1) Posizionare il pollo intero sull'asta del girarrosto e fissarlo con la forchetta su entrambi i lati, inserire l'asta nella posizione del foro del girarrosto e chiudere la porta. NOTA: È necessario posizionare il vassoio del cibo nella fessura del cestello inferiore per raccogliere l'olio durante la cottura e mettere dell'acqua nel vassoio del cibo prima della cottura, sarà utile per il girarrosto. 2) Ruotare la manopola delle funzioni su & (3) Impostare la manopola del termostato su 230°C. (4) Impostare la manopola Timer sul tempo di cottura desiderato. (5) Controllare la cottura dei prodotti da forno 5\~10 minuti prima del termine cottura previsto. (6) Quando la cottura è completa, verrà emesso un segnale acustico e la manopola del timer tornerà automaticamente in posizione Off. Aprire completamente la porta e rimuovere il cibo. ATTENZIONE: Il cibo cotto, l'asta/vassoio di metallo e la porta possono essere molto caldi, maneggiare con cura.ISTRUZIONI PER LA PULIZIA
ATTENZIONE: Per proteggersi da scosse elettriche, NON IMMERGERE IL FORNO IN ACQUA O QUALSIASI ALTRO LIQUIDO.
Il forno deve essere pulito regolarmente per mantenere prestazioni ottimali e durare a lungo. Una pulizia regolare riduce anche il rischio di incendio. Passaggio 1. Rimuovere la spina dalla presa elettrica. Lasciare raffreddare l'apparecchio. Passaggio 2. Rimuovere il vassoio briciole rimovibile, la griglia e il vassoio estraendoli dal forno. Pulirli con un panno umido e sapone. Assicurati di usare solo sapone delicato e acqua. Passaggio 3. Per pulire l'interno del forno, le pareti, il fondo e lo sportello di vetro con un panno umido e insaponato. Ripetere l'operazione con un panno asciutto e pulito. Passaggio 4. Pulire l'esterno del forno con un panno umido. ATTENZIONE:NON UTILIZZARE PULITORI ABRASIVI O PAGLIETTE METALLICHE. Assicuratevi di usare solo acqua saponata. Detergenti abrasivi, spazzole e detergenti chimici danneggiano il rivestimento di questa unità. I pezzi delle pagliette metalliche possono rompersi e toccare parti elettriche con rischio di scosse elettriche. Passaggio 5. Lasciare raffreddare e asciugare completamente l'apparecchio prima di riporlo. Se si conserva il forno per lunghi periodi di tempo assicurarsi che sia pulito e privo di particelle di cibo. Conservare il forno in un luogo asciutto come ad esempio un tavolo o il ripiano di un mobile da cucina. Oltre alla pulizia consigliata, non dovrebbero essere necessary altri tipi di u manutenzione da parte dell'utente. Qualsiasi altra manutenzione deve essere eseguita da un rappresentante dell'assistenza autorizzato. SPECIFICAAZIONE:| Tensionenominale | 230V-240V |
| Frequenza nominale | 50Hz-60Hz |
| Potenza nominale | 2000W |
| Capacità del forno | 42Litri |
| Solo per uso domestico, NON IMMERGERE IN ACQUA | |
GARANZIA
Il periodo di garanzia per i nostri prodotti è di 2 anni, se non diversamente stabilito dalla legge, a partire dalla data di acquisto iniziale o di consegna. Se avete problemi o domande, potete facilmente accedere alle nostre pagine di aiuto, consigli per la risoluzione dei problemi, FAQ e manuali d'uso sul nostro sito post-vendita: https://sav.hkoenig.com. Digitando il nome di riferimento del tuo dispositivo nella barra di ricerca, puoi accedere a tutto il supporto online disponibile, progettato per soddisfare al meglio le tue esigenze. Se ancora non riesci a trovare una risposta alla tua domanda o al tuo problema, allora clicca su "La risposta ha risolto il tuo problema? Questo vi porterà al modulo di richiesta di supporto post-vendita, che potete completare per convalidare la vostra richiesta e ottenere aiuto.CONDIZIONI DI GARANZIA
La garanzia copre tutti i guasti derivanti da un uso normale, in conformità con gli usi e le specifiche del manuale utente. Questa garanzia non si applica a problemi di imballaggio o di trasporto durante la spedizione del prodotto da parte del proprietario. Non include inoltre la normale usura del prodotto, né la manutenzione o la sostituzione delle parti di consumo.ESCLUSIONE DELLA GARANZIA
- Accessori e parti soggette a usura (\*). - Normale manutenzione dell'apparecchio. - Tutti i guasti derivanti da un uso improprio (urti, mancato rispetto delle raccomandazioni sull'alimentazione, cattive condizioni d'uso, ecc.), da una manutenzione inadeguata o da un uso improprio dell'apparecchio, nonché dall'uso di accessori inadeguati. - Danni di origine esterna: incendio, danni d'acqua, sovratensione elettrica, ecc. - Qualsiasi attrezzatura che sia stata smontata, anche parzialmente, da persone diverse da quelle autorizzate a farlo (in particolare l'utente). - Prodotti per i quali il numero di serie è mancante, danneggiato o illeggibile, il che non permetterebbe la sua identificazione. - Prodotti soggetti a noleggio, dimostrazione o esposizione. (\*) Alcune parti del suo apparecchio, note come parti soggette a usura o materiali di consumo, si deteriorano con il tempo e la frequenza d'uso del suo apparecchio. Questa usura è normale, ma può essere accentuata da cattive condizioni d'uso o di manutenzione del vostro apparecchio. Queste parti non sono quindi coperte dalla garanzia. Anche gli accessori forniti con l'apparecchio sono esclusi dalla garanzia. Non possono essere scambiati o rimborsati. Tuttavia, alcuni accessori possono essere acquistati direttamente dal nostro sito web: https://sav.hkoenig.com/.AMBIENTE
TUTELA AMBIENTALE:
 Non gettare questo prodotto come gli altri prodotti per la casa. È necessario smaltire questo prodotto come da norme locali, è necessario informarsi presso le autorità locali sui luoghi in cui è possibile consegnare questo prodotto. Questo perché, i prodotti elettrici ed elettronici contengono sostanze pericolose che hanno effetti dannosi sull'ambiente o sulla salute umana e dovrebbero essere riciclati. Il simbolo qui accanto (un contenitore per rifiuti con route, contrassegnato da una croce) indica che le apparecchiature elettriche ed elettroniche dovrebbero essere smaltite con cura. Adeva SAS / H.Koenig Europa - 8 rue Marc Seguin - 77290 Mitry Mory - Francia www.hkoenig.com - sav@hkoenig.com - contact@hkoenig.com - Tél: +33 1 64 67 00 05
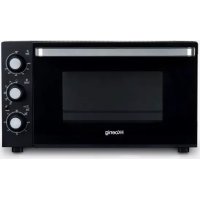
Inhaltsverzeichnis
Klicken Sie auf einen Titel, um darauf zuzugreifen
- H fo42 Instruction Manual
- Electric oven
- ENGLISH
- IMPORTANT SAFEGUARDS
- SAVE THESE INSTRUCTIONS
- Before Using Your Electric Oven
- COMPONENTS:
- USING YOUR ELECTRIC OVEN
- ROTISSERIE ROD USING TIPS
- CONTROL PANEL
- OPERATION INSTRUCTIONS
- FUNCTION
- Operation
- FUNCTION
- FUNCTION
- CLEANING INSTRUCTIONS
- WARRANTY
- WARRANTY CONDITIONS
- EXCLUSION OF WARRANTY
- ENVIRONMENT
- CAUTION:
- FRANÇAIS
- CONSIGNES DE SÉCURITÉ IMPORTANTES
- CONSERVEZ CES INSTRUCTION
- Avant d'utiliser votre four électrique
- COMPOSANTS
- UTILISATION DE VOTRE FOUR ÉLECTRIQUE
- UTILISATION DE LA BROCHE DE RÔTISSOIRE
- PANNEAU DE COMMANDE
- INSTRUCTIONS D'UTILISATION
- FONCTIONS
- Fonctionnement
- FONCTION
- FONCTIONS
- ENTRETIEN
- NETTOYAGE
- GARANTIE
- CONDITIONS DE GARANTIE
- EXCLUSION DE GARANTIE
- ENVIRONNEMENT
- ATTENTION :
- DEUTSCH
- WICHTIGE SICHERHEITSANWEISUNGEN
- BEWAHREN SIE DIESE ANWEISUNGEN AUF
- Vor der Nutzung Ihres Elektrobackofens
- KOMPONENTEN:
- VERWENDUNG DES ELEKTROOFENS
- TIPPS ZUR VERWENDUNG VON GRILLSTÄBEN
- KONTROLLPANEL
- BETRIEBSANLEITUNG
- FUNKTION
- Betrieb
- FUNKTION
- FUNKTION
- WARTUNGSANWEISUNGEN
- REINIGUNGSANWEISUNGEN
- SPEZIFIKATIONEN:
- GARANTIEBEDINGUNGEN
- AUSSCHLUSS DER GARANTIE
- UMWELT
- ACHTUNG:
- NEDERLANDS
- BELANGRIJKE VEILIGHEIDSREGELS
- BEWAAR DEZE INSTRUCTIES
- Voordat u uw elektrische oven gebruikt
- ONDERDELEN:
- UW ELEKTRISCHE OVEN GEBRUIKEN
- TIPS VOOR GEBRUIK VAN ROTISSERIESPIT
- BEDIENINGSPANEEEL
- GEBRUIKERSINSTRUCTIES
- FUNCTIE
- Gebruik
- FUNCTIE
- FUNCTIE
- ONDERHOUDINSTRUCTIES VOOR GEBRUIK
- SCHOONMAAKINSTRUCTIES
- GARANTIEVOORWAARDEN
- UITSLUITINGEN VAN DE GARANTIE
- MILIEU
- ESPANOL
- MEDIDAS DE SEGURIDAD IMPORTANTES
- GUARDA ESTE MANUAL DE INSTRUCCIONES.
- ANTES DEL PRIMER USO
- DESCRIPCIÓN DEL PRODUCTO
- USANDO SU HORNO ELÉCTRICO
- CONSEJOS PARA UTILIZAR LA VARILLA DE ASAR
- INSTRUCCIONES DE OPERACIÓN
- FUNCIÓN
- Operación
- FUNCIÓN
- FUNCIÓN
- MANTENIMIENTO
- LIMPIEZA
- GARANTÍA
- CONDICIONES DE GARANTÍA
- EXCLUSIÓN DE GARANTÍA
- MEDIO AMBIENTE
- ELIMINACIÓN APROPIADA DE ESTE APARATO
- ITALIANO IMPORTANTI ISTRUZIONI DI SICUREZZA
- CONSERVARE QUESTE ISTRUZIONI
- Prima di usare il forno elettrico
- COMPONENTI:
- UTILIZZO DEL FORNO ELETTRICO
- ACCESSORIO GIRARROSTO UTILIZZO PUNTE
- PANNELLO DI CONTROLLO
- ISTRUZIONI PER L'USO
- FUNZIONE
- Funzionamento
- FUNZIONE
- FUNZIONE
- ISTRUZIONI PER LA PULIZIA
- ATTENZIONE: Per proteggersi da scosse elettriche, NON IMMERGERE IL FORNO IN ACQUA O QUALSIASI ALTRO LIQUIDO.
- GARANZIA
- CONDIZIONI DI GARANZIA
- ESCLUSIONE DELLA GARANZIA
- AMBIENTE
- TUTELA AMBIENTALE:
Handbuch-Assistent
Angetrieben von Anthropic
Warten auf Ihre Nachricht
Produktinformationen
Marke : H.KOENIG
Modell : fo42
Kategorie : Ofen