PT-E550WVP - Drukarka BROTHER - Bezpłatna instrukcja obsługi
Znajdź bezpłatnie instrukcję urządzenia PT-E550WVP BROTHER w formacie PDF.

Pytania użytkowników dotyczące PT-E550WVP BROTHER
0 pytanie dotyczące tego urządzenia. Odpowiedz na te, które znasz, lub zadaj własne.
Zadaj nowe pytanie dotyczące tego urządzenia
Pobierz instrukcję dla swojego Drukarka w formacie PDF za darmo! Znajdź swoją instrukcję PT-E550WVP - BROTHER i weź swoje urządzenie elektroniczne z powrotem w ręce. Na tej stronie opublikowane są wszystkie dokumenty niezbędne do korzystania z urządzenia. PT-E550WVP marki BROTHER.
INSTRUKCJA OBSŁUGI PT-E550WVP BROTHER
brother

USER'S GUIDE


P-touch ELECTRONIC LABELING SYSTEM
PT-E550W

In order to use your P-touch labeling system safely, read the included Quick Setup Guide first.
Read this guide before you start using your P-touch labeling system.
Keep this guide in a handy place for future reference.
Please visit us at http://solutions.brother.com/ where you can get product support and answers to frequently asked questions (FAQs).

natural_image
Line drawing of a handheld electronic device with keypad and display (no text or symbols)www.brother.com
1 INTRODUCTION
2 EDITING A LABEL
3 LABEL PRINTING
4 USING THE FILE MEMORY
5 USING P-TOUCH SOFTWARE
6 NETWORK
⑦ RESETTING & MAINTENANCE
8 TROUBLESHOOTING
9 APPENDIX
Contents
EDITING A LABEL....3
Entering and Editing Text 3
Entering Text from the Keyboard 3
Adding a New Line....3
Adding a New Block....3
Moving the Cursor 3
Inserting Text 3
Deleting Text....3
Entering Symbols 4
Entering Symbols Using the Symbol Function....4
Entering the User-defined Character Using the Symbol Function 5
Using Symbol History 5
Entering Accented Characters 6
Setting Character Attributes 7
Setting Character Attributes by Label 7
Setting Character Attributes by Each Line 7
Setting Auto Fit Style 8
Setting Frames 8
Tape Cutting Options 9
LABEL PRINTING 11
Label Preview 11
Printing a Label 11
Printing a Single Page 12
Printing a Range of Pages....12
Printing Multiple Copies 12
Attaching Labels 13
USING THE FILE MEMORY 14
Storing a Label into Memory 14
Opening a Stored Label File....14
Printing a Stored Label File 15
Deleting a Stored Label File 15
USING P-TOUCH SOFTWARE....16
Using P-touch Editor 16
Using P-touch Editor (For Windows ^® ) 16
Using P-touch Editor (For Macintosh)....20
Updating P-touch Editor....22
Using P-touch Transfer Manager (For Windows ^ )......25
How to Use P-touch Transfer Manager 25
Transferring the Label Template to P-touch Transfer Manager....26
Using P-touch Transfer Manager....27
Transferring Templates or Other Data from the Computer to the P-touch Labeling
System....29
Backing Up Templates or Other Data Saved in the P-touch Labeling System....33
INTRODUCTION
Deleting All the P-touch Labeling System data 34
Using the Data Transferred to the P-touch Labeling System.... 35
A User-defined Character Image 35
Printing the Transferred Template 35
Using Transferred Database Data 37
Deleting the Transferred Data 41
Using P-touch Library 43
Starting P-touch Library 43
Opening and Editing Templates....44
Printing Templates 45
Searching for Templates or Other Data 45
NETWORK 47
Configuring the Network Settings 47
RESETTING & MAINTENANCE 48
Resetting the P-touch Labeling System....48
Resetting the Data to Factory Settings Using the P-touch Labeling System
Keyboard 48
Resetting the Data Using the Menu Key 48
Maintenance 49
Cleaning the Unit....49
Cleaning the Print Head 49
Cleaning the Tape Cutter 49
TROUBLESHOOTING 50
What to do when....50
Error Messages....52
APPENDIX....56
Specifications 56
Symbols 58
Accented Characters 59
Character Attribute....60
Frames 62
Bar Codes 62
Bar Code Settings Table 62
Special Character List....63
Notes on Using P-touch Transfer Manager (For Windows ^® )....64
Notes on Creating Templates 64
Notes on Transferring Templates....64
Notes on Transferring Data Other Than Templates 64
EDITING A LABEL
Entering and Editing Text
Entering Text from the Keyboard
- The keyboard of your P-touch labeling system can be used in the same way as a standard computer keyboard.
Adding a New Line
- To end the current line of text and start a new line, press the Enter key. A return mark appears at the end of the line and the cursor moves to the start of the new line.
• Maximum number of lines
- 0.94" (24 mm) tape: 7 lines
- 0.70" (18 mm) tape: 5 lines
- 0.47" (12 mm) tape: 3 lines
- 0.35" (9 mm) and 0.23" (6 mm) tape: 2 lines
- 0.13" (3.5 mm) tape: 1 line
Adding a New Block
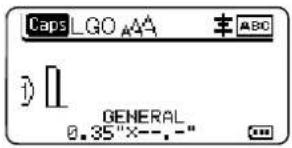
- When GENERAL is selected, you can create up to 99 new blocks. To create a new block of text/lines to the right of your current text, press the Shift key and then press the Enter key. The cursor moves to the start of the new block. In other labeling application types, you can set the number of blocks when pressing a label application key. Some labeling application types are not required.
Moving the Cursor
- Press the ▲, ▼, ◀ or ▶ key to move the cursor one space or line.
- To move the cursor to the beginning or end of the current line, press the Shift key and then press the ◀ or ▶ key.
- To move the cursor to the beginning of the previous or next block, press the Shift key and then press the ▲ or ▼ key.
Inserting Text
- To insert additional text into an existing line of text, move the cursor to the character at the right of the position where you want to start inserting text, and then enter the additional text. The new text is inserted to the left of the cursor.
Deleting Text
■ Deleting one character at a time
- To delete a character from an existing line of text, move the cursor to the character at the right of the position you want to start deleting text, and then press the BS (backspace) key. The character to the left of the cursor is deleted each time the BS (backspace) key is pressed.

If you hold down the BS (backspace) key, the characters left of the cursor are continuously deleted.
■ Deleting all text at once
Use the Clear key to delete all text at once.
1 Press the Clear key. The Clear options are displayed.
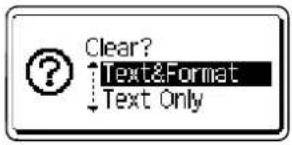
2 Using the ▲ or ▼ key, select "Text Only" to delete all text while retaining the current format settings, or select "Text&Format" to delete all text and format settings.

- Press the Esc key to return to the text entry screen, without erasing (or clearing) text or format.
- When "Text&Format" is selected, all text is cleared and the P-touch labeling system set to the default settings.
3| Press the OK or Enter key.
All text is deleted. All format settings are also deleted if "Text&Format" was selected.
Entering Symbols
In addition to the symbols available on the keyboard, there are various symbols (including international, extended ASCII characters and the user-defined characters ^*1 ) available with the symbol function.
To enter a symbol, use the Symbol function (see below).
Alternatively, press the Shift key and then press a key on the keyboard to enter the symbol printed on the selected key's upper-right corner.
Selectable "Symbols" (excluding the user-defined characters) are listed in the Appendix. (See page 58)
To use the user-defined characters, transfer the bitmap image to the P-touch labeling system using the P-touch Transfer Manager.
*1 A bitmap image of a user-created character that is not pre-installed on the P-touch labeling system.
Entering Symbols Using the Symbol Function
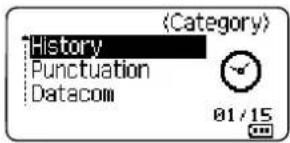
1 Press the Symbol key. A list of symbol categories and symbols in that category is displayed.

The last symbol entered is selected in the displayed list.
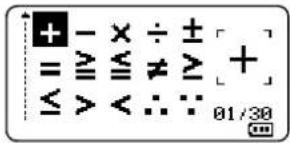
2 Select a symbol category (Punctuation, Mathematics, etc.) using the ▲ or ▼ key and then press the OK or Enter key.
3 Select a symbol using the ▲, ▼, ◀ or ▶ key, and then press the OK or Enter key. The selected symbol is inserted into the line of text.

When selecting a symbol:
- Press the Shift key and Symbol key to return to the previous page.
- Press the Symbol key to go to the next page.

Press the Esc key to return to the previous step.
Entering the User-defined Character Using the Symbol Function
Before using the user-defined character images, transfer the images to the P-touch labeling system using the P-touch Transfer Manager. For the P-touch Transfer Manager refer to "Using P-touch Transfer Manager (For Windows®)" on page 25.
1 | Press the Symbol key.
A list of symbol categories and symbols in that category is displayed. If a user-defined character has been transferred, "Custom" is also displayed.

The last symbol entered is selected in the displayed list.
2| Select "Custom" using the ▲ or ▼ key and then press the OK or Enter key.
3 Select a user-defined character image using the ▲ or ▼ key, and then press the OK or Enter key.
The selected image is inserted into the line of text.

- When selecting a symbol, press the Symbol key to go to the next page.
- The inserted user-defined character image is displayed as a highlighted user-defined character mark (☐) in the text entry screen.
- To view the user-defined character image in the text entry screen, move the cursor to the image and press the Symbol key.

Press the Esc key to return to the previous step.
Using Symbol History
You can create your personal category of symbols by using the Symbol History. The "History" will appear first when selecting the symbols, to help you locate the desired symbols quickly.
User-defined characters cannot be added to the Symbol History even if they are transferred to the P-touch labeling system.
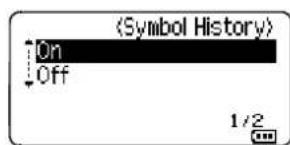
1 Press the Menu key, select "Advanced" using the ▲ or ▼ key and then press the OK or Enter key.
2 Select "Symbol History" using the ▲ or ▼ key and press the OK or Enter key. Then select "On" to create your personal category by using the ▲ or ▼ key.
3 Press the OK or Enter key to apply the setting. The screen returns to the text entry screen.

4| Enter the symbol you wish to add to your History.

Refer to "Entering Symbols Using the Symbol Function" on page 4 for detail.
5| Press the Symbol key.
The "History" appears, including the symbol entered in step 4.

- Up to 30 symbols can be added to the "History". The oldest symbol will be deleted from the category when the symbols added to the "History" exceed 30 symbols.
• To stop using the Symbol History, select "Off" in the "Symbol History" screen.
Entering Accented Characters
The P-touch labeling system can display and print a set of accented characters such as other language specific characters. Selectable "Accented Characters" are listed in the Appendix. (See page 59)
1| Enter the character you wish to change to an accented character.

Caps mode can be used with the Accent function.
2| Press the Accent key.
The character you entered will change to an accented character.
3 Press the Accent key repeatedly until the desired accented character is selected, or select it by using the ◀ or ▶ key.

The order of accented characters displayed will differ depending on the selected LCD language.
4| Press the OK or Enter key.
The selected accented character is inserted into the line of text.

Press the Esc key to return to the previous step.
Setting Character Attributes
Setting Character Attributes by Label
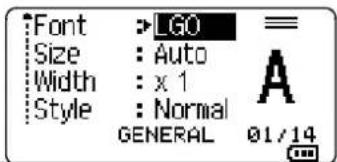
Using the Style key, you can select a font and apply size, width, style, line, and alignment attributes. Selectable "Character Attribute" options are listed in the Appendix. (See page 60)
1) Press the Style key. The current settings are displayed.
2 Select an attribute using the ▲ or ▼ key, and then set a value for that attribute using the ◀ or ▶ key.
3 | Press the OK or Enter key to apply the settings.

New settings are NOT applied if you do not press the OK or Enter key.

- Press the Esc key to return to the previous step.
- Press the Space key to set the selected attribute to the default value.
- Small characters may be difficult to read when certain styles are applied (e.g. Shadow + Italic).
- Depending on the labeling application type, you cannot change the value in Style setting. In this case, 🔒 is displayed on the preview in the right side of the screen.
Setting Character Attributes by Each Line
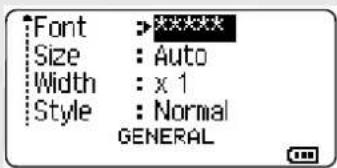
When a label consists of two or more lines of text, you can set different values of character attributes (font, size, width, style, line and alignment) for each line.
Move the cursor to the line you wish to modify by using the ▲, ▼, ◀ or ▶ key. Next, press the Shift key and then press the Style key to display the attributes. (= on the screen indicates that you are now applying the attribute for that specific line only.)
When different attribute values are set for each line, the value will be displayed as ***** when you press the Style key. When you change the setting on this screen by using the ▲ or ▼ key, the same change will be applied to all lines of the label.
Setting Auto Fit Style
When "Size" of the Style key is set to "Auto" and label length is set to a specific length, you can select the way of reducing the text size to fit within the label length.
1 Press the Menu key, select "Advanced" using the ▲ or ▼ key, and then press the OK or Enter key.
2 Select "Auto Fit Style" using the ▲ or ▼ key and then press the OK or Enter key.
3| Select the style using the ▲ or ▼ key.

- When "Text Size" is selected, the total text size is modified to fit within the label. - When "Text Width" is selected, the text width will be reduced to the size of x1/2 setting. (If further size reduction is required to fit the text into the selected label length, the total text size will be modified after reducing the text width to x1/2 setting.)
4 Press the OK or Enter key to apply the settings.

- Press the Esc key to return to the previous step.
- Press the Space key to set the style to the default setting ("Text Size").
Setting Frames
You can select the frame of the label by using the Style key. Selectable "Frames" are listed in the Appendix. (See page 62)
1 Press the Style key. The current settings are displayed.

2 Select an attribute using the ▲ or ▼ key until the "Frame" is selected, and then select a frame by using the ◀ or ▶ key.
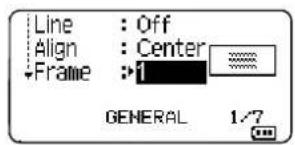
3| Press the OK or Enter key to apply the settings.

New settings are NOT applied if you do not press the OK or Enter key.

- Press the Esc key to return to the previous step. - Press the Space key to set the selected attribute to the default value.
Tape Cutting Options
The tape cutting options allow you to specify how the tape is fed and cut when printing labels.
1 Press the Menu key.
2 Select "Cut Option" using the ▲ or ▼ key, and then press the OK or Enter key.
3 Set the value by using the ▲ or ▼ key, and then press the OK or Enter key to apply the settings.

New settings are NOT applied if you do not press the OK or Enter key.

- Press the Esc key to return to the previous step.
-
Refer to the Tape Cutting Options table for a list of all available settings.
-
Tape Cutting Options
| No | Full cut | Half cut | Chain | Image |
| 1 | No | Yes | No | 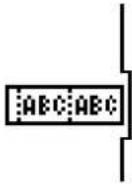 |
| 2 | Yes | Yes | No | 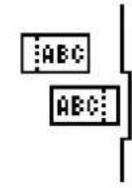 |
| 3 | No | No | No | 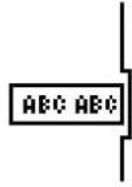 |
| 4 | Yes | No | No | 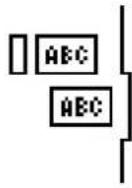 |
| 5 | No | Yes | Yes | 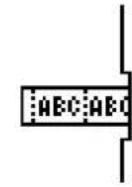 |
EDITING A LABEL
| No | Full cut | Half cut | Chain | Image |
| 6 | Yes | Yes | Yes | 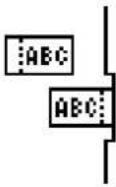 |
| 7 | No | No | Yes | 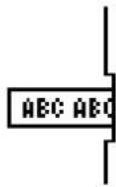 |
| 8 | Yes | No | Yes | [ 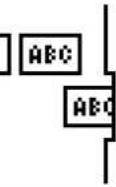 |
| 9 | Special tape | [ 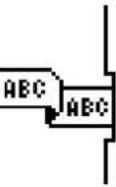 | ||
LABEL PRINTING
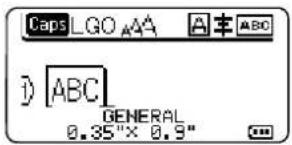
Label Preview
You can preview the current page and check the layout before printing.
1 | Press the Preview key.
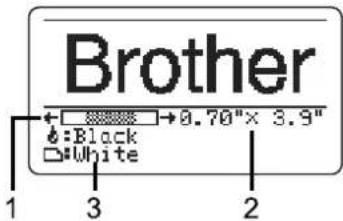
An image of the label is displayed on the screen.
- The bar indicates the position of the currently displayed portion of the label.
-
The tape width of the installed tape cassette and the label length are indicated as follows: Tape width x Label length
-
The information for the installed tape cassette is detected and indicated. The first line indicates the character color and the second line indicates the tape color.
Press the ◀ or ▶ key to scroll the preview to the left or right.
Press the ▲ or ▼ key to change the magnification of the preview.

- Press the Esc, OK or Enter key to return to the text entry screen.
- To scroll the preview to the left or right end, press the Shift key and then press the ◀ or ▶ key.
- To print the label directly from the preview screen, press the Print key or open the print options screen and select a print option. Refer to "Printing a Label" on page 11 for details.
- The print preview is a generated image of the label, and may differ from the actual label when printed.
• The character color and tape color cannot be detected for some tape cassettes.
Printing a Label
Labels can be printed once text entry and formatting is complete.

- Do not pull the label coming out of the tape exit slot. Doing so will cause the ink ribbon to be discharged with the tape, making the tape no longer usable.
- Do not block the tape exit slot during printing or when feeding tape. Doing so will cause the tape to jam.
- Be sure to check that there is enough tape remaining when printing several labels continuously. If tape is running low, set fewer copies, print labels one at a time, or replace the tape cassette.
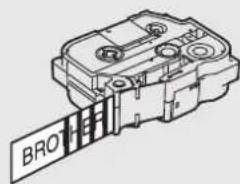
- Striped tape indicates the end of the tape cassette. If this appears during printing, press and hold the Power key to turn the P-touch labeling system off. Attempting to print with an empty tape cassette may damage the P-touch labeling system.
natural_image
Technical line drawing of a mechanical component with no visible text or symbolsLABEL PRINTING
Printing a Single Page
Press Print key to start printing.
Printing a Range of Pages
When there are multiple pages, you can specify the range of pages to print.
1 Press the Print key. The screen you can specify the range is displayed.
2 Select "All", "Current" or "Range" by using ▲ or ▼ key. If you select "All" or "Current", go to step 4.
3| Specify the first page and the last page.
Blank pages are not printed.
4| Press the OK or Enter key to print.

Printing Multiple Copies
Using this function you can print up to 99 copies of the same label.
1] Make sure that the appropriate tape cassette is inserted and ready for printing.
2| Press the Shift key and then press the Print key to display the Copies screen, and then select the number of copies to be printed using the ▲ or ▼ key, or type the number using the number keys.

Hold down the ▲ or ▼ key to change the number of copies quickly.
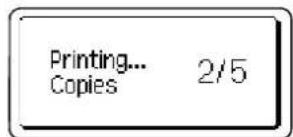
3 Press the OK or Enter key. "Printing... Copies" is displayed while the labels are being printed.

If you select an automatic cutting option when printing multiple copies of a label, a message will be displayed to confirm whether you want the labels to be cut after each label is printed. To disable the message display, press the Menu key, select "Advanced" using the ▲ or ▼ key, and then press the OK or Enter key. Select "Cut Pause" using the ▲ or ▼ key, and then press the OK or Enter key. Select "Off" using the ▲ or ▼ key, and then press the OK or Enter key.

- Press the Esc key to return to the previous step.
- The figures shown on the screen during printing indicate the "count / number of copies set".
- Pressing the Space key when setting the number of copies resets the value to 01, the default.
- When the message "Press Print to Cut Tape and Continue" is displayed, press the Print key. To set whether the tape is cut after each label is printed, use "Cut Option". For details, refer to "Tape Cutting Options" on page 9.
- To print a label created using the transferred template, refer to "Using the Data Transferred to the P-touch Labeling System" on page 35.
Attaching Labels
1 If necessary, trim the printed label to the desired shape and length using scissors, etc.
2| Peel the backing from the label.
3 Position the label and then press firmly from top to bottom with your finger to attach the label.

- The backing of some types of tapes may be pre-cut to make it easier to peel the backing. To remove the backing, simply fold the label lengthwise with the text facing inward, to expose the inside edges of the backing. Next, peel off the backing one piece at a time.
- Labels may be difficult to attach to surfaces that are wet, dirty, or uneven. The labels may peel off easily from these surfaces.
- Be sure to read the instructions provided with Fabric Tapes, Extra Strength Adhesive Tapes or other special tapes and observe all precautions noted in the instructions.
USING THE FILE MEMORY
You can store up to 99 of your most frequently used labels in the file memory. Each label is stored as a file, allowing you to quickly and easily recall your label when needed again.

- When the file memory is full, each time you save a file you will need to overwrite one of your stored files.
- The available space in the file memory can be confirmed using the following procedure. Press the Menu key, select "Usage" using the ▲ or ▼ key, and then press the OK or Enter key. Select "Local Content" using the ▲ or ▼ key and press the OK or Enter key.
* The available space that is displayed in "Available : XXXXchrs" may be different from the actual available space.
Storing a Label into Memory
1 After entering the text and formatting the label, press the File key.

If one or more of the labels are a transferred, a screen will be displayed to select "Local Files" or "Transferred Templates" when you press the File key. Select "Local Files".
2| Select "Save" using the ▲ or ▼ key and press the OK or Enter key. A file number is displayed.
A label text is also displayed if a label is already stored in that file number.
3| Select a file number using the ▲ or ▼ key, and then press the OK or Enter key.

When there is already a stored file in the selected number, the data will be overwritten by the file you try to save.
4| Enter the file name and then press the OK or Enter key.
The file is saved and the screen returns to the text entry screen.

Press the Esc key to return to the previous step.
Opening a Stored Label File
1 Press the File key.

If one or more of the labels are transferred, a screen will be displayed to select "Local Files" or "Transferred Templates" when you press the File key. Select "Local Files".
2| Select "Open" using the ▲ or ▼ key and press the OK or Enter key. The file number of a stored label is displayed.
The label text is also displayed to identify the label.
3 Select a file number using the ▲ or ▼ key, and then press the OK or Enter key to open the selected file. The file is opened and displayed on the text entry screen.

Press the Esc key to return to the previous step.
Printing a Stored Label File
To print a label created using the transferred template, refer to "Using the Data Transferred to the P-touch Labeling System" on page 35.
1 | Press the File key.
2| Select "Print" using the ▲ or ▼ key, and then press the OK or Enter key. The file number of a stored label is displayed. The label text is also displayed to identify the label.
3| Select a file number using the ▲ or ▼ key, and then press the Print, OK or Enter key.
- Printing a single page: A single page is printed immediately.
- Printing a range of pages: The screen you can specify the range is displayed. Select "All" or "Range" by using the ▲ or ▼ key, and then press the OK or Enter key.

If you select "Range", specify the first page and the last page.

- Press the Esc key to return to the previous step.
- The message "No Text!" is displayed when you try to print a file with no text.
- When the message "Press Print to Cut Tape and Continue" is displayed, press the Print key. To set whether the tape is cut after each label is printed, use "Cut Option". For details, refer to "Tape Cutting Options" on page 9.
Deleting a Stored Label File
To delete a label using the transferred template, refer to "Deleting the Transferred Data" on page 41.
1 Press the File key.
2| Select "Delete" using the ▲ or ▼ key and press the OK or Enter key. The file number of a stored label is displayed. The label text is also displayed to identify the label.
3 Select a file number using the ▲ or ▼ key, and then press the OK or Enter key. The message "Delete?" is displayed.
4 | Press the OK or Enter key to delete the file.

Press the Esc key to cancel deleting the file and return to the previous screen.
Using P-touch Editor
You will need to install P-touch Editor and the printer driver to use your P-touch labeling system with your computer.
For details on how to install the P-touch software, please refer to the Quick Setup Guide. Refer to the procedures below for your computer's operating system. In the screen shots, "XX-XXXX" is displayed to represent the P-touch labeling system model number.
To download the latest driver and software, please visit the Brother Solutions Center at: http://solutions.brother.com
Using P-touch Editor (For Windows®)
■ Starting P-touch Editor
1 | For Windows Vista® / Windows® 7 / Windows Server® 2008/2008 R2
From the Start button, click [All Programs]-[Brother P-touch]-[P-touch Editor 5.1].
When P-touch Editor starts, select whether you want to create a new layout or open an existing layout.

For Windows ^® 8/ Windows ^® 8.1 / Windows Server ^® 2012
Click [P-touch Editor 5.1] on [Apps] screen or double-click [P-touch Editor 5.1] on the desktop.
When P-touch Editor starts, select whether you want to create a new layout or open an existing layout.

- You can also start P-touch Editor using shortcuts, if you selected to create shortcuts during installation.
- Shortcut icon on the desktop: double-click to start P-touch Editor
- Shortcut icon in the Quick Launch bar: click to start P-touch Editor
- To change how P-touch Editor functions when it starts, click [Tools]-[Options] in the P-touch Editor menu bar to display the [Options] dialog box. On the left side, select the [General] heading and then the desired setting in the [Operations] list box under [Startup Settings]. The default setting is [Display New View].
2 Select an option in the screen.
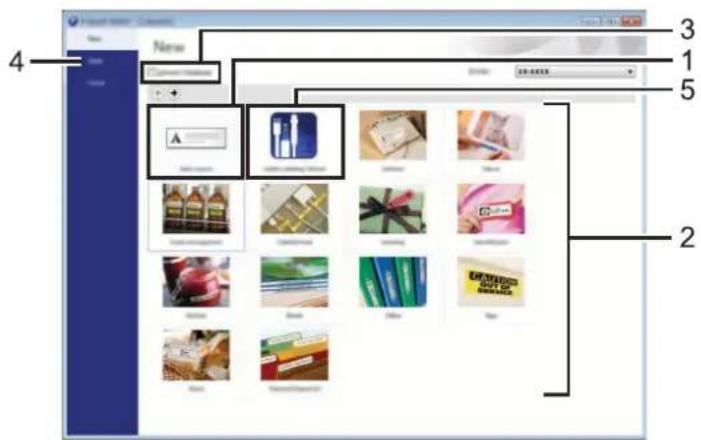
- To create a new layout, click the [New Layout] button.
- To create a new layout using a pre-set layout, select the desired category button.
- To connect a pre-set layout to a database, select the check box next to [Connect Database].
- To open an existing layout, click [Open].
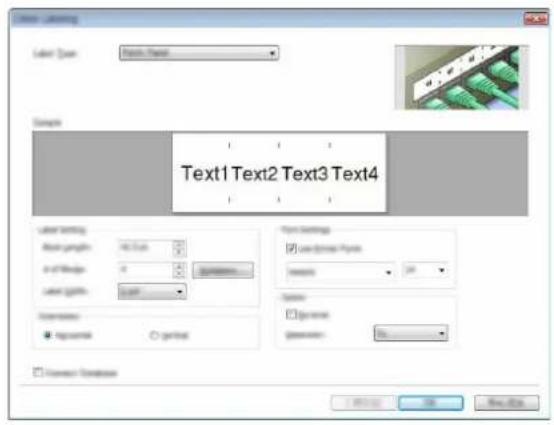
- To open the application for easily creating labels for electrical equipment management, click the [Cable Labeling Wizard] button.
USING P-TOUCH SOFTWARE
■ Operation modes
P-touch Editor has three different operation modes: [Express] mode, [Professional] mode, and [Snap] mode. You can easily switch between modes by using the mode selection buttons.
[Express] mode
This mode allows you to quickly and easily create layouts that include text and images. The [Express] mode screen is explained below:
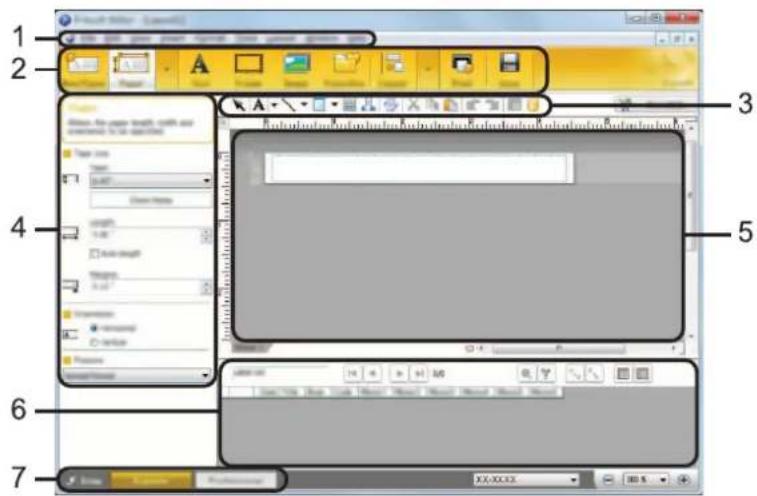
- Menu bar
- Command bar
- Draw/Edit toolbar
- Property bar
- Layout window
- Database window
- Mode selection buttons
[Professional] mode
This mode allows you to create layouts using a wide-range of advanced tools and options.
The [Professional] mode screen is explained below:
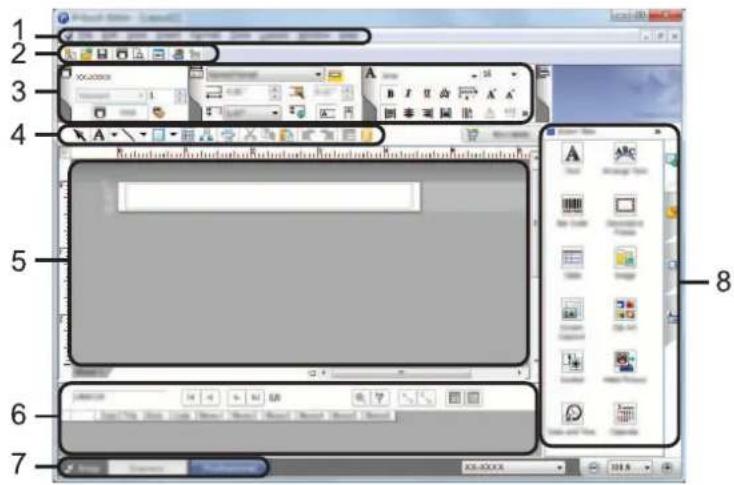
- Menu bar
- Standard toolbar
- Property palette
- Draw/Edit toolbar
- Layout window
- Database window
- Mode selection buttons
- Side bar
USING P-TOUCH SOFTWARE
[Snap] mode
This mode allows you to capture all or a portion of your computer screen content, print it as an image, and save it for future use.
1 Click the [Snap] mode selection button. The [Description of Snap mode] dialog box is displayed.
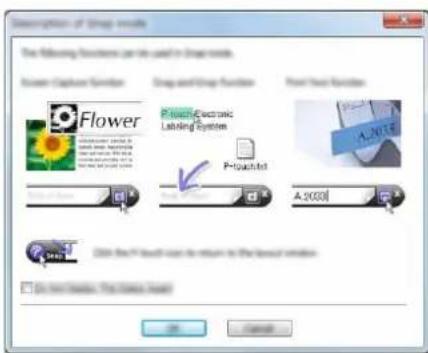
2| Click [OK]. The [Snap] mode palette is displayed.
![BROTHER PT-E550WVP - [Snap] mode - 2](/content/2026/06/1173352/images/fa04f5bd6235e0feceba6196be150aadeda1d65ed794ddb26a37ab32d76bcd3e.jpg)
![BROTHER PT-E550WVP - [Snap] mode - 3](/content/2026/06/1173352/images/b664fed5f656bfcb6a4f8eb4cb65a4ba2e6584f7d8450ac898fb56daedfeeac1.jpg)
- If you select the [Do Not Display This Dialog Again] check box in the [Description of Snap mode] dialog box, next time you will switch to [Snap] mode without displaying the dialog box.
- For Windows Vista® / Windows® 7 / Windows Server® 2008/2008 R2 You can also start P-touch Editor in [Snap] mode by clicking the Start menu -[All Programs]-[Brother P-touch]-[P-touch Editor 5.1 (Snap mode)].
- For Windows® 8 / Windows® 8.1/ Windows Server® 2012 You can also start P-touch Editor in [Snap] mode by clicking [P-touch Editor 5.1 (Snap mode)] on the [Apps] screen.
Using P-touch Editor (For Macintosh)
■ Starting P-touch Editor
1 | Double-click [P-touch Editor] icon on the desktop.

The following method can also be used to start the P-touch Editor. Double-click [Macintosh HD] - [Applications] - [P-touch Editor] and then [P-touch Editor] application icon.
P-touch Editor starts.
■ Operation modes
Standard Mode
This mode provides easy label creation with text and images.
The layout window consists of the following sections:
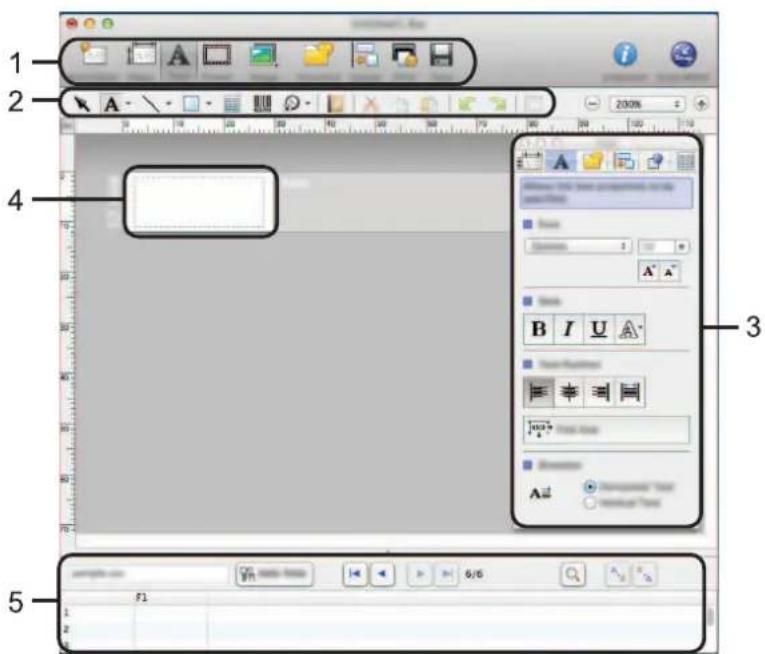
- Command bar
- Draw/Edit toolbar
- Inspector
- Layout window
- Database window
Snap Mode
With this mode, you can capture the screen, print it as an image, and save it for future use.
To start the Snap mode, follow the steps below.
1 When you click [Snap Mode], the [Description of Snap mode] dialog box appears. Click [OK].

If you select [Do Not Display This Dialog Again], you can go to Snap mode directly from the next time.
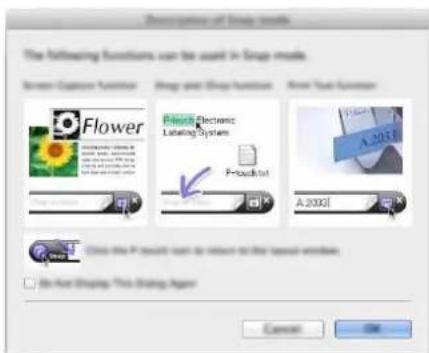
2 Snap mode appears.

Updating P-touch Editor
The software can be upgraded to the latest available version using the P-touch Update Software.
In the following steps, you will see XX-XXXX. Read "XX-XXXX" as your P-touch labeling system name.

- You must be connected to the internet in order to launch the P-touch Update Software.
- You may find that the software and the contents in this manual are different.
- Upon installation of the P-touch Update Software, an icon will be installed on your desktop for your convenience.
- Do not turn off the power when transferring data or updating software.
■ Updating P-touch Editor Software (For Windows®)

To use the P-touch Update Software, it is necessary to install it from the CD-ROM provided. You can also download the software from the Brother Solutions Center (http://solutions.brother.com).
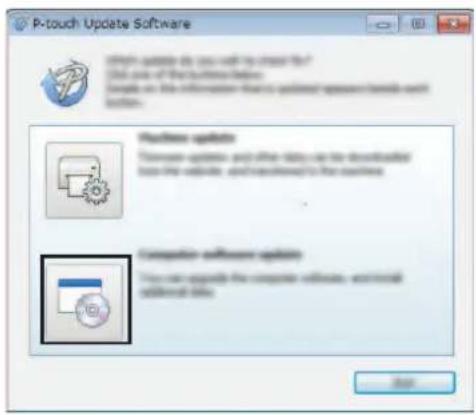
1 For Windows Vista® / Windows® 7 / Windows Server® 2008/2008 R2 Double-click the [P-touch Update Software] icon.
![BROTHER PT-E550WVP - For Windows Vista® / Windows® 7 / Windows Server® 2008/2008 R2 Double-click the [P-touch Update Software] icon. - 1](/content/2026/06/1173352/images/6ae0a28955e849a93ab715fe4ffdd95010546ae7e1814f450a7be1973a99656a.jpg)
![BROTHER PT-E550WVP - For Windows Vista® / Windows® 7 / Windows Server® 2008/2008 R2 Double-click the [P-touch Update Software] icon. - 2](/content/2026/06/1173352/images/ed633ef77726e82ea10783d7cdc854bbd4822c825dd6c7ddab79e179619a6283.jpg)
The following method can also be used to start the P-touch Update Software. Click the Start button, and then select [All Programs] - [Brother P-touch] - [P-touch Update Software].
For Windows ^® 8 / Windows ^® 8.1/ Windows Server ^® 2012
Click [P-touch Update Software] on the [Apps] screen or double-click [P-touch Update Software] on the desktop.
2 Click the [Computer software update] icon.
3 Select the [Printer] and [Language], select the check box next to P-touch Editor and then click [Install].
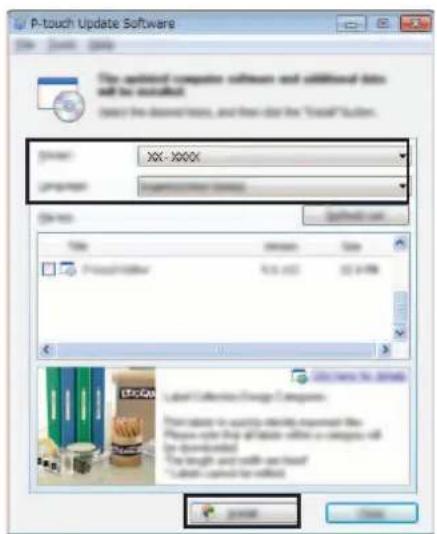
A message is displayed to indicate that installation has finished.
■ Updating P-touch Editor Software (For Macintosh)

To use the P-touch Update Software, you can download it from the Brother Solutions Center (http://solutions.brother.com). Macintosh users can access this URL directly by clicking the 🤳 icon found on the CD-ROM.
1 Double-click the [P-touch Update Software] icon.

The following method can also be used to start the P-touch Update Software. Double-click [Macintosh HD] - [Applications] - [P-touch Update Software] and then the [P-touch Update Software] application icon.

P-touch Update Softwareapp
2 Click the [Computer software update] icon.
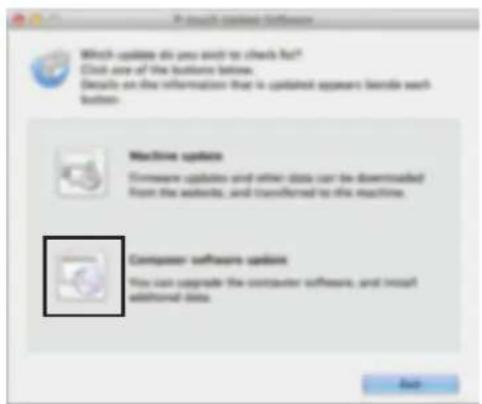
3 Select the [Printer] and [Language], select the check box next to P-touch Editor and then click [Install].
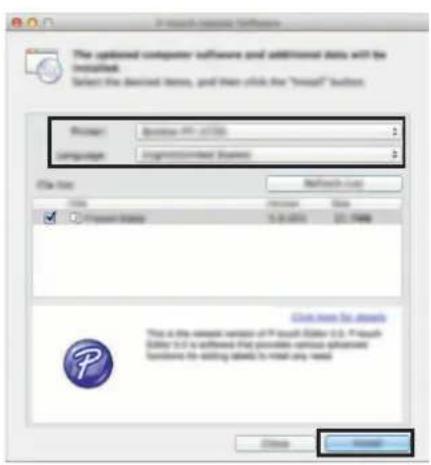
A message is displayed to indicate that installation has finished.
Using P-touch Transfer Manager (For Windows®)
This application allows you to transfer templates and other data to the P-touch labeling system and save backups of your data on the computer.
This function is not supported with Macintosh computers.
There are some restrictions regarding the templates that can be transferred to the P-touch labeling system. For details, refer to "Notes on Using P-touch Transfer Manager (For Windows®)" on page 64.
How to Use P-touch Transfer Manager
1 | Create or open a template using P-touch Editor.
• Prepare the P-touch Editor and open/edit the template.
P. 16
- Update the P-touch Editor if necessary.
P. 22
- Notes on using P-touch Transfer Manager (For Windows®)
P. 64
2| Transfer the template to P-touch Transfer Manager.
• Transferring the label template to P-touch Transfer Manager
P. 26
3| Transfer the template to the P-touch labeling system using P-touch Transfer Manager.
• Using P-touch Transfer Manager
P.27
• Transferring templates or other data from the computer to the P-touch labeling system
P.29
4 Print (without using a computer) the template that was transferred to the P-touch labeling system.
- Printing the transferred template
P. 35
Transferring the Label Template to P-touch Transfer Manager
The label templates created in P-touch Editor must first be transferred to P-touch Transfer Manager.
1 In P-touch Editor, open the label template to be transferred.
2 Click [File] - [Transfer Template] - [Preview]. You can check a preview of the printed template before the created template is sent to the P-touch labeling system and printed.
3 If there are no problems with the displayed template, click [Transfer Template]. P-touch Transfer Manager starts.

You can also start P-touch Transfer Manager using the following procedure.
- For Windows Vista® / Windows® 7 / Windows Server® 2008/2008 R2 From the Start button, click [All Programs] - [Brother P-touch] - [P-touch Tools] - [P-touch Transfer Manager 2.2].
- For Windows® 8 / Windows® 8.1/ Windows Server® 2012 Click [P-touch Transfer Manager 2.2] on [Apps] screen.
Using P-touch Transfer Manager
When P-touch Transfer Manager starts, the main window is displayed.

You can also start P-touch Transfer Manager from P-touch Editor. Click [File] - [Transfer Template] - [Transfer].
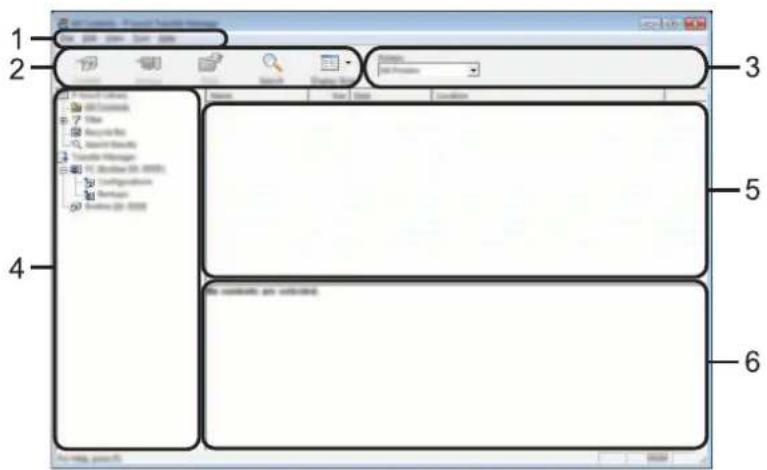
1. Menu bar
Provides access to various commands, which are grouped under each menu title ([File], [Edit], [View], [Tool], and [Help]) according to their functions.
2. Toolbar
Provides access to frequently used commands.
3. Printer selector
Allows you to select which printer or P-touch labeling system the data will be transferred to. When you select a P-touch labeling system, only the data that can be sent to the selected P-touch labeling system is displayed in the data list.
4. Folder view
Displays a list of folders and P-touch labeling systems. When you select a folder, the templates in the selected folder are displayed in the template list.
If you select a P-touch labeling system, the current templates and other data stored in the P-touch labeling system are displayed.
5. Template list
Displays a list of templates in the selected folder.
6. Preview
Displays a preview of the templates in the templates list.
Explanations of the Toolbar Icons
| Icon | Button name | Function |
 | Transfer | Transfers templates and other data from the computer to the P-touch labeling system via USB. |
| Save Transfer File(When not connected to a printer) | Changes the file type of the data to be transferred to other applications.Select "BLF" for the filename extension when transferring the data via Wi-Fi or LAN. Select "PDZ" when transferring the data via USB or Bluetooth.The available interfaces differ depending on your Brother machine. | |
 | Backup(Only for P-touch Transfer Manager) | Retrieves the templates and other data saved in the P-touch labeling system and saves it on the computer. |
 | Open | Opens the selected template. |
 | Prints the selected label template with the P-touch labeling system. | |
 | Search | Allows you to search for templates or other data that are registered to P-touch Library. |
 | Display Style | Changes the file display style. |
Transferring Templates or Other Data from the Computer to the P-touch Labeling System
Use the following procedure to transfer templates, databases and images from the computer to the P-touch labeling system.
1 | Start P-touch Transfer Manager using the following procedure.
For Windows Vista® / Windows® 7 / Windows Server® 2008/2008 R2
From the Start button, click [All Programs] - [Brother P-touch] - [P-touch Tools] - [P-touch Transfer Manager 2.2].
For Windows ^® 8 / Windows ^® 8.1/ Windows Server ^® 2012
Click [P-touch Transfer Manager 2.2] on [Apps] screen.
2 Connect the computer and the P-touch labeling system via USB and turn on the P-touch labeling system.
The P-touch labeling system model name is displayed in the folder view.
If you select a P-touch labeling system in the folder view, the current templates and other data stored in the P-touch labeling system are displayed.
3 Select the P-touch labeling system that you want to transfer the template or other data to.
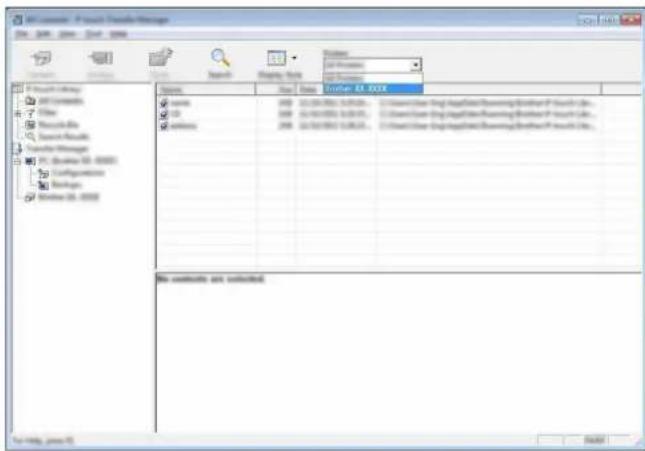
Before transferring data, check that the PC and the P-touch labeling system are correctly connected with a USB cable and that the P-touch labeling system power is On.
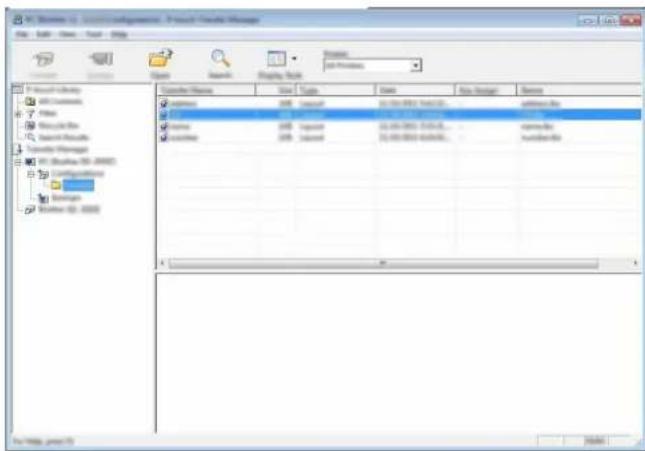
4| Right-click the [Configurations] folder, select [New], and then create a new folder.

In the example above, the folder [Transfer] is created.
5| Drag the template or other data that you want to transfer and place it in the new folder.
Transfer Function Specification
| Data type | Maximum number of transferable items | Restriction details |
| Template | 99 | Each template can contain a maximum of 50 objects.Each object can contain a maximum of 7 lines. |
| Database | 99 | Only *.csv files can be transferred.Each *.csv file can contain a maximum of 256 fields and 65000 records. |
| Image (User-defined character) | 99 | Only *.bmp files can be transferred.Monochrome *.bmp files are recommended.The size limit is 2048 × 2048 pixels.Wide images may be cropped. |

The available space in the transfer file memory can be confirmed using the following procedure. Press the Menu key, select "Usage" using the ▲ or ▼ key, and then press the OK or Enter key. Select "Transferred Content" using the ▲ or ▼ key and press the OK or Enter key.
* The available space that is displayed in "Available : X.XXMB" may be different from the actual available space.
You can view the templates and other data by selecting the folder in the [Configurations] folder, selecting [All Contents] or by selecting one of the categories under [Filter], such as [Layouts].
When transferring multiple templates or other data, drag all the files that you want to transfer and place them in the new folder.
Each file is assigned a key number (memory location in the P-touch labeling system) when it is placed in the new folder.
6 To change the key number assigned to an item, right-click the item, select [Key Assign], and then select the desired key number.
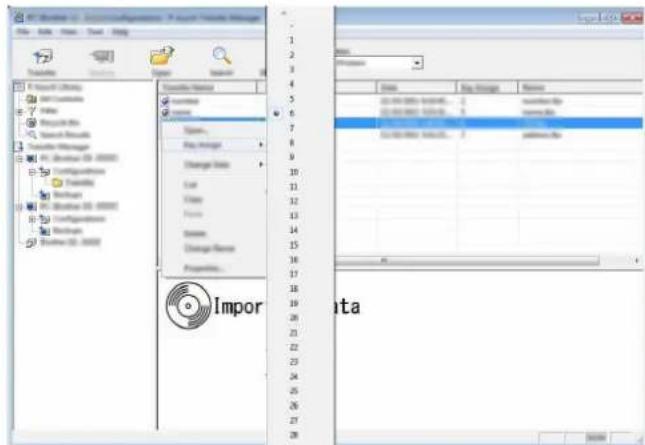

- All data transferred to the P-touch labeling system is assigned a key number.
- If the template or other data transferred to the P-touch labeling system has the same key number as another template already saved in the P-touch labeling system, the new template will overwrite the old one. You can confirm the templates key number assignments saved in the P-touch labeling system by backing up the templates or other data (refer to "Backing Up Templates or Other Data Saved in the P-touch Labeling System" on page 33).
- If the P-touch labeling system memory is full, remove one or more templates from the P-touch labeling system nonvolatile memory (refer to "Backing Up Templates or Other Data Saved in the P-touch Labeling System" on page 33).
7 To change the names of templates or other data that will be transferred, click on the desired item and enter the new name.
8 Select the folder containing the templates or other data that you want to transfer, and then click [Transfer]. A confirmation message will be displayed.
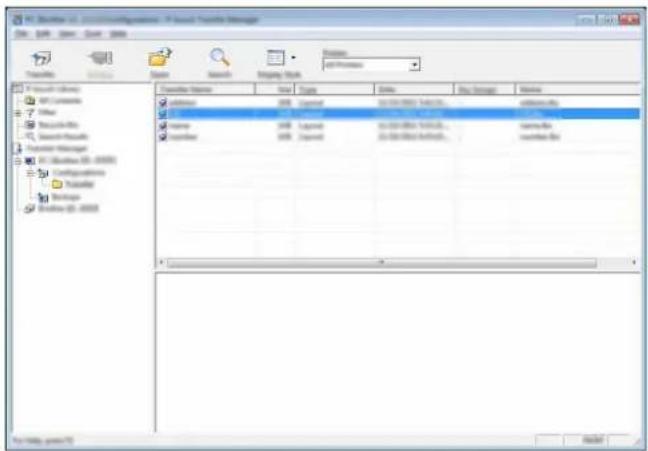

You can also transfer individual items to the P-touch labeling system. Select the template or other data that you want to transfer, and then click [Transfer].

Click [OK].
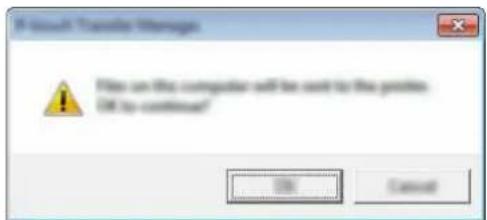
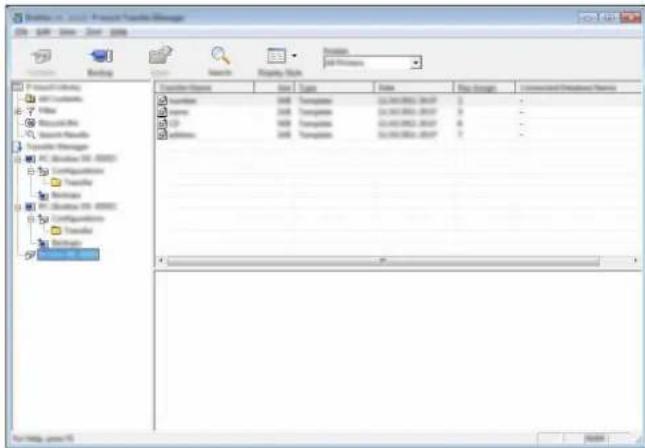
The selected templates or other data are transferred to the P-touch labeling system.
To print data that was transferred to the P-touch labeling system, the P-touch labeling system must be switched from the transfer mode to the normal mode. Turn the P-touch labeling system off and then on again.
Backing Up Templates or Other Data Saved in the P-touch Labeling System
Use the following procedure to retrieve the templates or other data saved in the P-touch labeling system and save it on the computer.
- Backed up templates or other data cannot be edited on the computer.
- Depending on the P-touch labeling system model, templates or other data backed up from one P-touch labeling system model may not be able to be transferred to another P-touch labeling system model.
1 Connect the computer and the P-touch labeling system and turn on the P-touch labeling system.
The P-touch labeling system model name is displayed in the folder view.
If you select a P-touch labeling system in the folder view, the current templates and other data stored in the P-touch labeling system are displayed.
2 Select the P-touch labeling system to back up from, and then click [Backup]. A confirmation message is displayed.
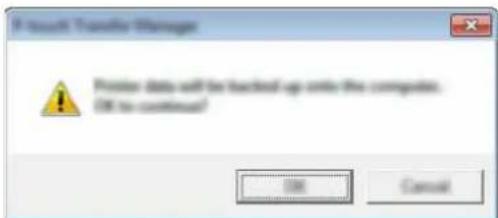
3 | Click [OK].
A new folder is created under the P-touch labeling system in the folder view. The folder name is based on the date and time of the backup. All of the P-touch labeling system templates and other data are transferred to the new folder and saved on the computer.
Deleting All the P-touch Labeling System data
Use the following procedure to delete all templates or other data that are saved in the P-touch labeling system.
1 Connect the computer and the P-touch labeling system and turn on the P-touch labeling system.
The model name is displayed in the folder view.
2| Right-click your model, and then select [Delete All].
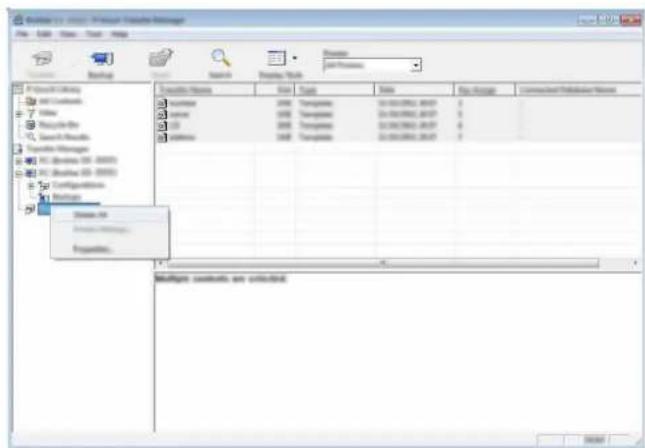
A confirmation message is displayed.
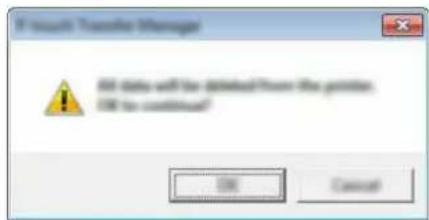
3| Click [OK].
All templates and other data saved in the P-touch labeling system are deleted.
Using the Data Transferred to the P-touch Labeling System
A template, database or user-defined character image transferred from the computer can be used to create or print the label.
To delete the transferred data, refer to "Deleting the Transferred Data" on page 41.
A User-defined Character Image
To enter the image, refer to "Entering Symbols" on page 4.
Printing the Transferred Template
A label layout created with P-touch Editor (*.Ibx file) can be transferred to the P-touch labeling system, where it can be used as a template for printing labels. Templates can be edited or printed using text from either a database, or by directly typing text in.
• Before editing a template, transfer the template to the P-touch labeling system.
- When the transfer of the data to the P-touch labeling system is complete, turn the P-touch labeling system off and then on again.
■ When the template which has no object to be edited
1 Press the File key, select "Transferred Templates" using the ▲ or ▼ key and then press the OK or Enter key.

"Transferred Templates" is displayed if a template is transferred.
2 Select the template to be printed using the ▲ or ▼ key and then press the OK or Enter key.

When the template is linked to a database, the 📋 icon appears in the upper-right corner of the screen.
3| Press the Print key to start printing.
■ When the template has an object to be edited
If necessary, the template can be temporarily edited. However, the template cannot be saved after it is changed.
When the template is not linked to a database, the label will be ready to print after you select the label template and type text into each of its fields.
When the template is linked to a database, a single record or a range of records in the database linked to the template can be printed.
• The following procedure is for printing a single database record.
• You cannot add or delete a line break.
1 Press the File key, select "Transferred Templates" using the ▲ or ▼ key and then press the OK or Enter key.

"Transferred Templates" is displayed if a template is transferred.
2 Select the template to be edited using the ▲ or ▼ key and then press the OK or Enter key.

When the template is linked to a database, the 📋 icon appears in the upper-right corner of the screen.
3 Select "Edit Label (Not Saved)" using the ▲ or ▼ key and then press the OK or Enter key.
Objects that can be edited are displayed.
4 | Select the object to be edited using the ▲ or ▼ key and then press the OK or Enter key.
■ When the template is not linked to a database:
The contents of the selected object are displayed. Edit the object and then press the OK or Enter key.
■ When the template is linked to a database:
The first record of the database is displayed. Edit the object and then press the OK or Enter key.
5 | Press the Print key to start printing.

When editing templates linked to a database:
- When an object that is not linked to the database was edited, you can press the Esc key to return to step 3, and then select "Print from Database" to print a selected range from the database. To select the range that you want to print, refer to steps 3 to 5 in "When the template is linked to the database and will not be edited".
- When an object that is linked to the database was edited, the edited contents will be deleted if you select "Print from Database". Therefore, print the template just by pressing the Print key as described in step 5 above.
■ When the template is linked to the database and will not be edited
• The following procedure is for printing database records. The database remains unchanged.
- When printing a range of database records, the text cannot be edited.
1 Press the File key, select "Transferred Templates" using the ▲ or ▼ key and then press the OK or Enter key.

"Transferred Templates" is displayed if a template is transferred.
2| Select the template to be printed using the ▲ or ▼ key and then press the OK or Enter key.

When the template is linked to a database, the icon appears at the upper-right corner of the screen.
3 Select "Print from Database" using the ▲ or ▼ key and then press the OK or Enter key. The contents of the database linked to the template are displayed.
4 Select the first record in the range that you want to print using the ▲, ▼, ◀ or ▶ key and then press the OK or Enter key.
5 Select the last record in the range that you want to print using the ▲, ▼, ◀ or ▶ key and then press the Print, OK or Enter key to start printing.
When the range is set, the selected records will be highlighted.

- Press the Esc key to return to the previous step.
- The maximum number of characters that can be printed for one transferred template is 1500 characters. However, the maximum number of characters will decrease when line breaks or blocks are added.
Using Transferred Database Data
A database converted to a *.csv file can be transferred to the P-touch labeling system. The data for a database that was transferred without a template can be imported into each label application type. The database data is imported according to the number of blocks and pages set for each label application type. Refer to "Selecting a Labeling Application Type" in the Quick Setup Guide for details on setting the number of blocks and pages for each label application type.

- Before using a database, transfer the database to the P-touch labeling system.
- If a database and template are linked and transferred together, the database can use only that template.

- If the selected database range is larger than the set number of blocks and pages, the data will be imported until the maximum number of blocks and pages is reached.
- If the set number of blocks and pages is larger than the selected database range, the operation will finish when all of the database is imported. The remaining blocks and pages will be printed blank without any data.
The print results are shown for each label application type when the databases for the following examples are imported.
■ Example 1:
| number | namr1 | type | length | Block No. |
| 1A-B01 | AA | a | 10 | #008 |
| 1A-B02 | AB | b | 20 | #009 |
| 1A-B03 | AC | c | 30 | #010 |
| 1A-B04 | AD | d | 40 | #011 |
| 1A-B05 | AE | e | 50 | #012 |
| 1A-B06 | AF | f | 60 | #013 |
| 1A-B07 | AG | g | 70 | #014 |
| 1A-B08 | AH | h | 80 | #015 |
| 1A-B09 | AI | i | 90 | #016 |
■ Example 2:
| number | name ^2 | type | length | Block No. |
| 1A-B01 | AA | a | 10 | #008 |
| 1A-B02 | AB | b | 20 | #009 |
| 1A-B03 | AC | c | 30 | #010 |
| 1A-B04 | AD | d | 40 | #011 |
| 1A-B05 | AE | e | 50 | #012 |
| 1A-B06 | AF | f | 60 | #013 |
| 1A-B07 | AG | g | 70 | #014 |
| 1A-B08 | AH | h | 80 | #015 |
| 1A-B09 | AI | i | 90 | #016 |
| Label Application Type | Data Import Method | Print Result for Example 1 (one field per record selected) | Print Result for Example 2 (two fields per record selected) | |||||||
| GENERAL | Data is imported in order according to the set number of blocks and pages | 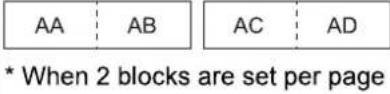 | 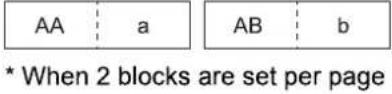 | |||||||
| FACEPLATE | For each page separately | AA AB AC AD | AA a AB b | |||||||
| Label Application Type | Data Import Method | Print Result for Example 1 (one field per record selected) | Print Result for  mple 2 (two ZXSs per record selected) mple 2 (two ZXSs per record selected) | |||||||
| CABLE WRAP | For each page separately |  | AB | AC | AD | AD | AA |  | AB | B |
| CABLE FLAG | For each page separately |  | AA | AB | AB | AA |  | a | a | |
| For each block separately |  | AB | AC | AD | AA |  | AB | b | ||
| PATCH PANEL | For each block separately |  | AA | AB | AC | A |  | a | AB | |
 | AD | AE | AF | T8A3 | AC | c | ||||
| PUNCH-DOWN BLOCK | For each block separately |  | AB | AC | AD | AE | AF | AA |  | b |
| AG | AH | AD |  | |||||||


brot brot


■ Searching the database
While selecting a database record to be used in a template or added to a label, you can search for records containing specific characters or a specific number.
The search proceeds to the right after the first matched string. Then, the database records will be searched in the same direction as the import order for the label type. The "field names" line will also be searched.
The possible search characters include uppercase and lowercase letters (including accented characters), numbers, and the upper symbols shown on the keys.
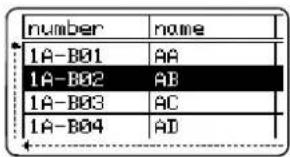
1 Press the Database key, select the database to be used and then press the OK or Enter key. The first record of the selected database is displayed.
| number | name |
| 1A-B01 | AA |
| 1A-B02 | AB |
| 1A-B03 | AC |
| 1A-B04 | AD |
2] Type in the first character (e.g., "B") that you wish to search for. Example: If you type "B", the fields will be searched from the first field for character strings containing "B".
| number | name |
| 1A-B01 | AA |
| 1A-B02 | AB |
| 1A-B03 | AC |
| 1A-B04 | AD |
If a string that contains "B" is found, the cursor will move to that data and "B" will be highlighted. In addition, "B" will be stored in the internal memory.
If a string that contains the searched character "B" is not found, the cursor will remain in its current position without moving and the character "B" will not be stored in the internal memory.
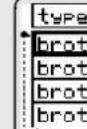
3 | Type in the 2nd character (e.g., "R") that you wish to search for. Next, if you type "R", the fields will be searched from the next field for character strings containing "BR".
| name | type |
| AA | brother-... |
| AB | brother-... |
| AC | brother-... |
| AD | brother-... |
If a string that contains "BR" is found, the cursor will move to that data and "BR" will be highlighted. In addition, "BR" will be stored in the internal memory.
4 Continue searching the database using the same procedure.

- If the character that you searched for is contained in multiple fields in the database, press the Database key to move to the next field containing the character. The character will be highlighted in the field.
- Press the Backspace key to delete the last search character that was typed. The cursor will move to the field containing the remaining search characters.
| name | type |
| AA | brother-... |
| AB | brother-... |
| AC | brother-... |
| AD | brother-... |
| number | name |
| 1A-B01 | AA |
| 1A-B02 | AB |
| 1A-B03 | AC |
| 1A-B04 | AD |
■ Editing the database
1 Press the Database key, select the database to be edited and then press the OK or Enter key.
You can also select the database to be edited by pressing the File key, and selecting "Transferred Templates" - "Print from Database" using the ▲ or ▼ key.
The first record of the selected database is displayed.
| number | name |
| ABCDEFGHIJKLMNOPQRSTUVWXYZ | 123-45 |
| ace91k | 123-89 |
| zyxuwu | 123-00 |
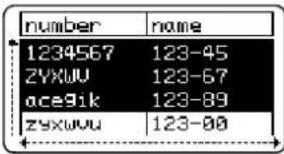
2| Select the cell to be edited using the ▲ or ▼ key. Then hold down the OK or Enter key.
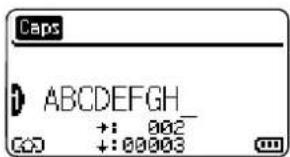
3 Enter the new text.

Press the Esc key to cancel editing the text and return to the previous screen

- You can add or delete a line break.
• Each cell can contain a maximum of 7 lines.
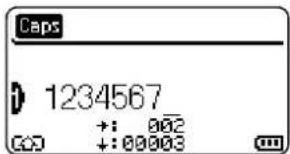
4| Press the OK key.
The new text is displayed.
| number | name |
| 1234567 | 123-45 |
| ZYXWU | 123-67 |
| ace91k | 123-89 |
| zyxuwu | 123-00 |

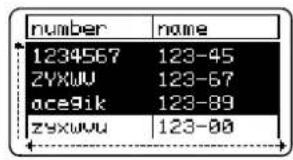
If you do not want to print the database, press the OK key and then press the Esc key. The edited data will be saved.
5| Press the OK key again.
The edited record will be highlighted.
| number | name |
| 1234567 | 123-45 |
| ZYXWU | 123-67 |
| ace9ik | 123-89 |
| zyxwvu | 123-00 |
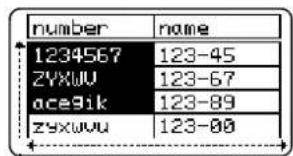
6 When the database has been transferred with a template: Select the last record in the range that you want to print using the ▲, ▼, ◀ or ▶ key and then press the Print, OK or Enter key to start printing. When the range is set, the selected records will be highlighted.
When the database has been transferred without a template: Select the last record in the range that you want to insert and then press the OK or Enter key. The selected range will be highlighted.
The contents of the selected database will be displayed.
![Caps LGO AAA J67[ZYXWV]acegik GENERAL 0.35"× 0.9"](/content/2026/06/1173352/images/aae649b8fc8d0af2a958a0b412ed4d7ebdcdc9e8f8c2a77225c1c61d297b24fd.jpg)
7 Press the Print key.
Deleting the Transferred Data
Use the following methods to delete transferred data.
Multiple items cannot be deleted together. Each item must be deleted separately.
■ Deleting user-defined character images
1 Press the Symbol key, select "Custom" using the ▲ or ▼ key and then press the OK or Enter key.
2 Select the user-defined character image to be deleted using the ▲ or ▼ key and then press the Clear key.
A message "Delete?" is displayed.
3| Press the OK or Enter key.
The selected user-defined character image is deleted and the next image is selected. If necessary, delete the next character.
■ Deleting Templates
1 Press the File key, select "Transferred Templates" using the ▲ or ▼ key and then press the OK or Enter key.
2| Select the template to be deleted using the ▲ or ▼ key and then press the OK or Enter key.
3 Select "Delete" using ▲ or ▼ key and then press the OK or Enter key. A message "Delete?" is displayed.
4 Press the OK or Enter key.
The selected template is deleted and the next template is selected. If necessary, delete the next template.
USING P-TOUCH SOFTWARE
■ Deleting database
| 1 | Press the Database key. |
| 2 | Select the database to be deleted using the ▲ or ▼ key and then press the Clear key.A message "Delete?" is displayed. |
| 3 | Press the OK or Enter key.The selected template is deleted and the next database is selected.If necessary, delete the next database. |
Using P-touch Library
P-touch Library allows you to print templates or to manage templates and other data.
Starting P-touch Library
■ For Windows Vista® / Windows® 7 / Windows Server® 2008/2008 R2
From the Start button, click [All Programs] - [Brother P-touch] - [P-touch Tools] - [P-touch Library 2.2].
■ For Windows ^® 8 / Windows ^® 8.1/ Windows Server ^® 2012
Click [P-touch Library 2.2] on [Apps] screen.
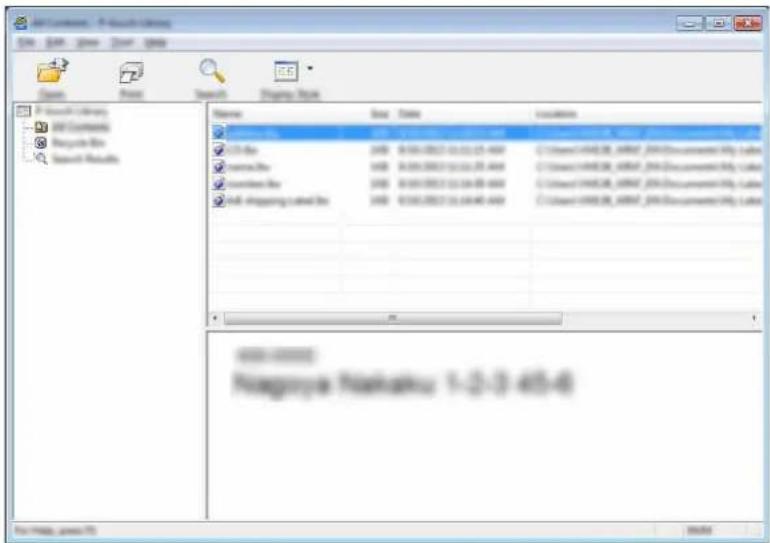
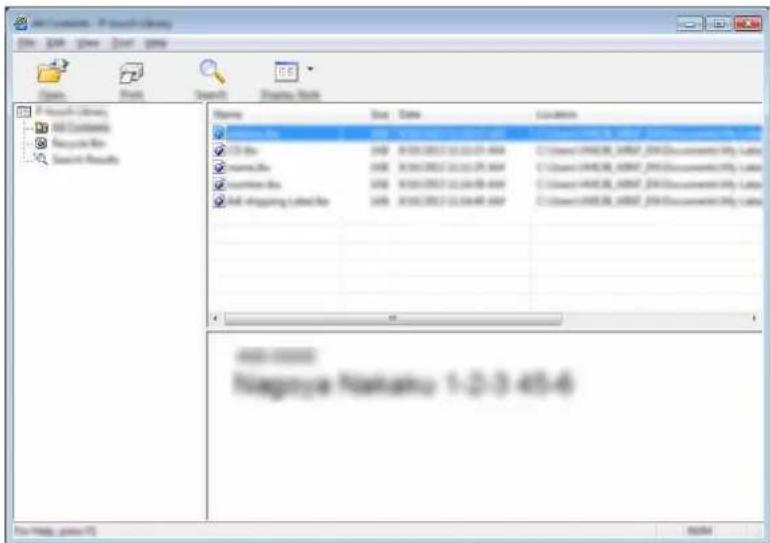
When P-touch Library starts, the main window is displayed.

- Menu bar
Provides access to all available commands, which are grouped under each menu title ([File], [Edit], [View], [Tool], and [Help]) according to their functions.
- Toolbar
Provides access to frequently used commands.
- Folder view
Displays a list of folders. When you select a folder, the templates or other data in the selected folder is displayed in the templates list.
- Templates list
Displays a list of the templates or other data in the selected folder.
- Preview
Displays a preview of the templates or other data selected in the templates list.
Explanations of the Toolbar Icons
| Icon | Button name | Function |
 | Open | Opens the selected template. |
 | Prints the selected label template with the P-touch labeling system. | |
 | Search | Allows you to search for templates or other data that are registered to P-touch Library. |
 | Display Style | Changes the file display style. |
Opening and Editing Templates
Select the template you want to open or edit, and then click [Open].
The program that is associated with the template will be started and you can edit the template.
The program that starts depends on the type of file that is selected. For example, if you select a P-touch Template, P-touch Editor starts.
Printing Templates
Select the template that you want to print and then click [Print].
The template is printed using the connected P-touch labeling system.
Searching for Templates or Other Data
You can search for templates or other data registered to P-touch Library.
1 | Click [Search].
The [Search] dialog box is displayed.
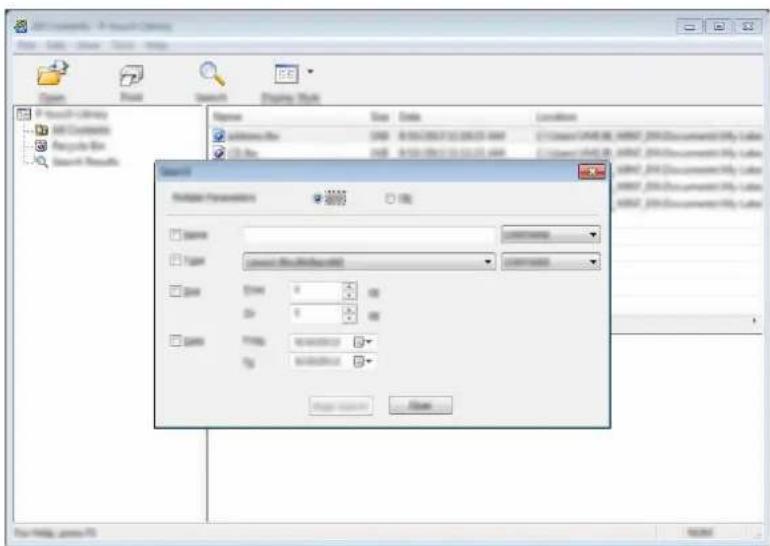
2| Specify the search criteria. The following search criteria are available.
| Setting | Details |
| Multiple Parameters | Determines how the program searches when multiple criteria are specified. If you select [AND], the program searches for files that satisfy all of the criteria.If you select [OR], the program searches for files that satisfy any of the criteria. |
| Name | Allows you to search for a template or other data by specifying the file name. |
| Type | Allows you to search for a template or other data by specifying the file type. |
| Size | Allows you to search for a template or other data by specifying the file size. |
| Date | Allows you to search for a template or other data by specifying the file date. |
3] Click [Begin Search]. The search begins.
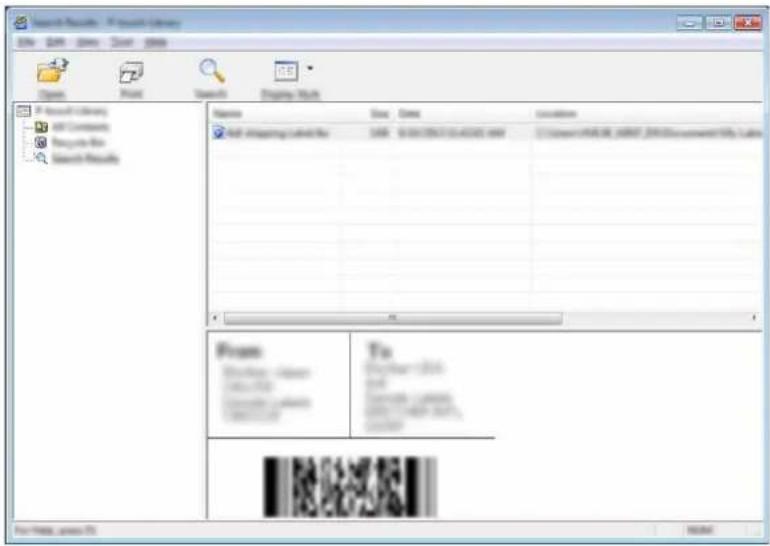
4| Close the [Search] dialog box. The search results can be confirmed by clicking [Search Results] in the folder view.

You can register templates or other data to P-touch Library by dragging and dropping it into the [All Contents] folder or to the folder view. You can also configure P-touch Editor to register templates to P-touch Library automatically, using the following procedure.
- From the P-touch Editor menu, select [Tools]-[Options].
- In the [Options] dialog box, click [Registration Settings] in the [General] tab.
- Select the timing for registering templates created with P-touch Editor, and then click [OK].
NETWORK
Configuring the Network Settings
First, you must configure the wireless network settings of your P-touch labeling system to communicate with your network.
You can select the network type, configure or display the network settings, and so on, using the Menu key.
You can also use [Communication settings] in the Printer Setting Tool for detailed configuration.
Refer to the Network User's Guide for the network settings. You can download it from the Brother Solutions Center (http://solutions.brother.com/).
RESETTING & MAINTENANCE
Resetting the P-touch Labeling System
You can reset the internal memory of your P-touch labeling system when you want to clear all saved label files, or in the event the P-touch labeling system is not operating correctly.
Resetting the Data to Factory Settings Using the P-touch Labeling System Keyboard

All text, format settings, option settings and stored label files are cleared when you reset the P-touch Labeling System. Language and unit settings will also be cleared.
■ To reset all the labels and customized settings
Turn off the P-touch labeling system. Press and hold down the Shift and Backspace keys. While holding down the Shift and Backspace keys, press the Power key once and then release the Shift and Backspace keys.

Release the Power key before releasing the other keys.
■ To reset the customized settings
Turn off the P-touch labeling system. Press and hold down the Shift and R keys. While holding down the Shift and R keys, press the Power key once and then release the Shift and R keys.

Release the Power key before releasing the other keys.
Resetting the Data Using the Menu Key
Press the Menu key, select "Reset" using the ▲ or ▼ key, and then press the OK or Enter key. Select the resetting method using the ▲ or ▼ key and press the OK or Enter key.
| Value | Details |
| Reset All Settings | Transferred data (templates, databases, and user-defined characters) and the contents in the file memory are NOT cleared. Other data is cleared and all settings except the Wi-Fi®settings are reset to the factory settings. |
| Erase All Content | Transferred data (templates, databases, and user-defined characters) and the contents in the file memory are cleared. Other data is NOT cleared and settings are NOT reset. |
| Factory Default | All labels, customized settings and the Wi-Fi settings are reset to the factory settings. |
| Reset Wi-Fi Settings | All Wi-Fi settings are reset to the factory settings. |
Maintenance
Your P-touch labeling system should be cleaned on a regular basis to maintain its performance and life span.

Always remove the batteries and disconnect the AC adapter before cleaning the P-touch labeling system.
Cleaning the Unit
Wipe any dust and marks from the main unit using a soft, dry cloth.
Use a slightly dampened cloth on difficult to remove marks.

Do not use paint thinner, benzene, alcohol or any other organic solvent. These may deform the case or damage the appearance of your P-touch labeling system.
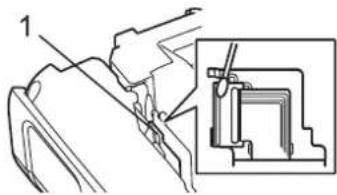
Cleaning the Print Head
Streaks or poor quality characters on printed labels generally indicates that the print head is dirty. Clean the print head using a cotton swab or the optional print head cleaning cassette (TZe-CL4).
1. Print head

- Do not touch the print head directly with your bare hands.
- Refer to the instructions provided with the print head cleaning cassette for directions on how to use it.
natural_image
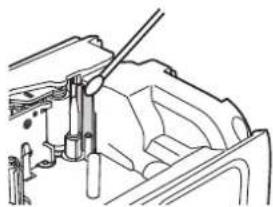
Technical diagram showing mechanical assembly with labeled component '1' and inset view (no text or symbols)Cleaning the Tape Cutter
Tape adhesive can build up on the cutter blades after repeated use, dulling the blade which may result in the tape jamming.

- About once every year, wipe the cutter blade using a cotton swab moistened with isopropyl alcohol (rubbing alcohol).
- Do not touch the cutter blade directly with your bare hands.
natural_image
Technical line drawing of a mechanical assembly with no visible text or symbolsWhat to do when...
| Problem | Solution |
| The screen "locks", or the P-touch labeling system does not respond normally. | Refer to "Resetting the P-touch Labeling System" on page 48 and reset the internal memory to the initial settings. If resetting the P-touch labeling system does not solve the problem, disconnect the AC adapter and remove the batteries for more than 10 minutes. |
| The display remains blank after turning on the power. | ·Check that the batteries are correctly installed and that the AC adapter designed exclusively for your P-touch labeling system (provided) is correctly connected. ·Check that the rechargeable Li-ion battery is fully charged. |
| The LCD messages are displayed in a foreign language. | Refer to the Quick Setup Guide to select your desired language. |
| The label is not printed after pressing the Print key. | ·Check that text has been entered and that the tape cassette is installed correctly with sufficient tape remaining. ·If the tape is bent, cut off the bent section and thread the tape through the tape exit slot. ·If the tape is jammed, remove the tape cassette and then pull out the jammed tape and cut it. Check that the end of the tape passes through the tape guide before reinstalling the tape cassette. |
| The label is not printed correctly. | ·Remove the tape cassette and reinstall it, pressing it firmly until it clicks into place. ·If the print head is dirty, clean it with a cotton swab or optional print head cleaning cassette (TZe-CL4). |
| The ink ribbon is separated from the ink roller. | If the ink ribbon is broken, replace the tape cassette. If not, leave the tape uncut and remove the tape cassette, then wind the loose ink ribbon onto the spool as shown in the figure. 1. Spool 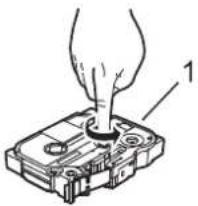 |
| The P-touch labeling system stops while printing a label. | ·Replace the tape cassette if striped tape is visible, as this indicates that you have reached the end of the tape. ·Replace all batteries or connect the AC adapter directly to the P-touch labeling system. |
| The label is not cut automatically. | ·Check the Cut Option setting. For details, refer to "Tape Cutting Options" on page 9. Alternatively, press the Feed & Cut key to feed and cut the tape. |
| A tape jam error which cannot be cleared despite following troubleshooting. | Please contact Brother customer service. Refer to the Quick Setup Guide for the contact information. |
| When printing multiple copies of a label, a message is displayed to confirm whether you want the labels to be cut after each label is printed. | Because the cut labels must not remain in the tape exit slot, the message is displayed.To disable the message display, press the Menu key, select "Cut Pause" using the ▲ or ▼ key, and then press the OK or Enter key. |
| I do not know the version number of the firmware for the P-touch labeling system. | The version number and other information for the firmware can be confirmed using the following procedure. Press the Menu key, select "Version Info." using the ▲ or ▼ key, and then press the OK or Enter key. |
| Printed bar codes cannot be read. | • Print labels so that bar codes are aligned with the print head as shown below.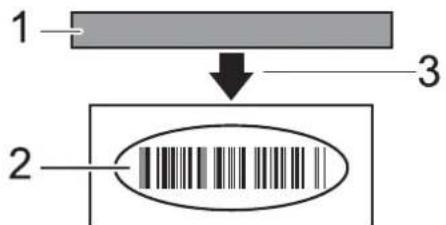 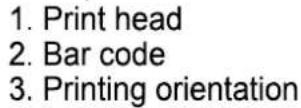 • Try using another scanner.• We recommend printing the bar codes with [Standard] selected from the [Quality] options (Windows Vista® / Windows Server® 2008)To display the [Quality] options, open the printer properties by clicking 📋 - [Control Panel] - [Hardware and Sound] - [Printers], right-clicking the printer whose settings are to be changed, then clicking [Printing Preferences]. (Windows® 7 / Windows Server® 2008 R2)To display the [Quality] options, open the printer properties by clicking 📋 - [Devices and Printers], right-clicking the printer whose settings are to be changed, then clicking [Printing Preferences]. (Windows® 8 / Windows® 8.1/ Windows Server® 2012)To display the [Quality] options, open the printer properties by clicking [Control Panel] in the [Apps] screen - [Hardware and Sound] - [Devices and Printers], right-clicking the printer whose settings are to be changed, then clicking [Printing Preferences]. • Try using another scanner.• We recommend printing the bar codes with [Standard] selected from the [Quality] options (Windows Vista® / Windows Server® 2008)To display the [Quality] options, open the printer properties by clicking 📋 - [Control Panel] - [Hardware and Sound] - [Printers], right-clicking the printer whose settings are to be changed, then clicking [Printing Preferences]. (Windows® 7 / Windows Server® 2008 R2)To display the [Quality] options, open the printer properties by clicking 📋 - [Devices and Printers], right-clicking the printer whose settings are to be changed, then clicking [Printing Preferences]. (Windows® 8 / Windows® 8.1/ Windows Server® 2012)To display the [Quality] options, open the printer properties by clicking [Control Panel] in the [Apps] screen - [Hardware and Sound] - [Devices and Printers], right-clicking the printer whose settings are to be changed, then clicking [Printing Preferences]. |
| I want to confirm whether I am using the latest version of the software. | Use the P-touch Update Software on the CD-ROM provided to confirm whether you are using the latest version of the software. Refer to the Quick Reference Guide for details about the P-touch Update Software. |
Error Messages
When an error message appears on the display, follow the directions provided below.
| Message | Cause/Remedy |
| Wrong Type Of Adapter Connected! | An incompatible AC adapter is connected. Use an appropriate AC adapter (AD-E001). |
| Low Battery! | The installed batteries are getting weak. |
| Replace Battery! | The installed batteries are about to run out. |
| Recharge Li-ion Battery! | The battery is low. Please charge the lithium-ion battery. |
| Li-ion is damaged Use other power source! | The Li-ion is damaged. Please use an AC adapter (AD-E001), AA size alkaline batteries (LR6) or AA size Ni-MH rechargeable batteries (HR6). |
| Unit Cooling Wait XX min. before restart! | High temperature error. Wait for the time stated in the message, and try again. |
| Cutter Error! | The tape cutter was closed when you tried to print or feed tape. Turn the P-touch labeling system off and then on again before continuing. If tape is twisted in the cutter, remove the tape. |
| Insert Tape Cassette! | There is no tape cassette installed when you try to print or preview a label, or feed tape. Install a tape cassette before continuing. |
| Text Full! | The maximum number of characters have already been entered. Edit the text and use fewer characters. |
| No Text! | There is no text, symbols or bar code data entered when you try to print or preview a label. Enter data before continuing. |
| Incorrect Value! | The value entered for setting the tape length, multiple copies or the numbering function is invalid. Enter a valid value for the setting. |
| Tape Cassette Changed! | The tape cassette selected for printing is different from the tape cassette installed in the P-touch labeling system. |
| Line Limit! Max 7 Lines | The maximum number of lines have already been entered. Limit the number of lines to seven. |
| Tape Width Limit! Max 5 Lines | There are more than five lines of text when you press the Print or Preview key while using 0.70" (18 mm) tape. Limit the number of lines to five, or replace with a larger width tape cassette. |
| Tape Width Limit! Max 3 Lines | There are more than three lines of text when you press the Print or Preview key while using 0.47" (12 mm) tape. Limit the number of lines to three, or replace with a larger width tape cassette. |
| Tape Width Limit! Max 2 Lines | There are more than two lines of text when you press the Print or Preview key while using 0.35" or 0.23" (9 mm or 6 mm) tape. Limit the number of lines to two, or replace with a larger width tape cassette. |
| Tape Width Limit! Max 1 Line | There is more than one line of text when you press the Print or Preview key while using 0.13" (3.5 mm) tape. Limit the number of lines to one, or replace with a larger width tape cassette. |
| Block Limit! Max 99 Blocks | Exceeded maximum block capacity. Limit the number of blocks to 99. |
| Length Limit! | The length of the label to be printed using the text entered is longer than 39.37" (1 m). Edit the text so that the length of the label is less than 39.37" (1 m). |
| Insert 0.94" Tape Cassette!Insert 24mm Tape Cassette! | A 0.94" (24 mm) tape cassette is not installed when Template or Block Layouts for 0.94" (24 mm) tape is selected. Install a 0.94" (24 mm) tape cassette. |
| Insert 0.70" Tape Cassette!Insert 18mm Tape Cassette! | A 0.70" (18 mm) tape cassette is not installed when Template or Block Layouts for 0.70" (18 mm) tape is selected. Install a 0.70" (18 mm) tape cassette. |
| Insert 0.47" Tape Cassette!Insert 12mm Tape Cassette! | A 0.47" (12 mm) tape cassette is not installed when Template or Block Layouts for 0.47" (12 mm) tape is selected. Install a 0.47" (12 mm) tape cassette. |
| Insert 0.35" Tape Cassette!Insert 9mm Tape Cassette! | A 0.35" (9 mm) tape cassette is not installed when Template or Block Layouts for 0.35" (9 mm) tape is selected. Install a 0.35" (9 mm) tape cassette. |
| Insert 0.23" Tape Cassette!Insert 6mm Tape Cassette! | A 0.23" (6 mm) tape cassette is not installed when Template or Block Layouts for 0.23" (6 mm) tape is selected. Install a 0.23" (6 mm) tape cassette. |
| Insert 0.13" Tape Cassette!Insert 3.5mm Tape Cassette! | A 0.13" (3.5 mm) tape cassette is not installed when Template or Block Layouts for 0.13" (3.5 mm) tape is selected. Install a 0.13" (3.5 mm) tape cassette. |
| Insert HS 0.93" Tube Cassette!Insert HS 23.6mm Tube Cassette! | A 0.93" (23.6 mm) Heat Shrink Tube is not installed when Template for 0.93" (23.6 mm) Heat Shrink Tube is selected. Install a 0.93" (23.6 mm) Heat Shrink Tube. |
| Insert HS 0.69" Tube Cassette!Insert HS 17.7mm Tube Cassette! | A 0.69" (17.7 mm) Heat Shrink Tube is not installed when Template for 0.69" (17.7 mm) Heat Shrink Tube is selected. Install a 0.69" (17.7 mm) Heat Shrink Tube. |
| Insert HS 0.46" Tube Cassette!Insert HS 11.7mm Tube Cassette! | A 0.46" (11.7 mm) Heat Shrink Tube is not installed when Template for 0.46" (11.7 mm) Heat Shrink Tube is selected. Install a 0.46" (11.7 mm) Heat Shrink Tube. |
| Insert HS 0.34" Tube Cassette!Insert HS 8.8mm Tube Cassette! | A 0.34" (8.8 mm) Heat Shrink Tube is not installed when Template for 0.34" (8.8 mm) Heat Shrink Tube is selected. Install a 0.34" (8.8 mm) Heat Shrink Tube. |
| Insert HS 0.23" Tube Cassette! Insert HS 5.8mm Tube Cassette! | A 0.23" (5.8 mm) Heat Shrink Tube is not installed when Template for 0.23" (5.8 mm) Heat Shrink Tube is selected. Install a 0.23" (5.8 mm) Heat Shrink Tube. |
| Text Too Long! | The length of the label to be printed using the text entered is longer than the length setting. Edit the text to fit with in the set length or change the length setting. |
| Memory Full! | There is not enough internal memory available when you try to save a label file. Delete any unnecessary files to make more memory available for the new label file. |
| Check # of Digits Entered! | The number of digits entered in the bar code data does not match the number of digits set in the bar code parameters. Enter the correct number of digits. |
| Input A,B,C or D At Start&End! | The bar code data entered does not have the required start/stop code (A, B, C, or D required at the beginning and end of the bar code data for the CODABAR protocol). Enter the bar code data correctly. |
| Maximum Of 5 Bar Codes Per Label! | There are already five bar codes entered in the text data when you try to enter a new bar code. You can only use up to five bar codes in each label. You can enter up to two bar codes when : AA is selected in flag layout. |
| Text Too Large! | The text size is too large. Select a different size option. |
| System Error 02! | Please contact Brother customer service.Refer to the Quick Setup Guide for the contact information. |
| Select Other Cut Option! | The tape length set using the tape length setting is shorter than the total length of the left and right margins applied for the "Large Margin" cutting option. You must select a different cutting option. |
| Close Cover! | The rear cover is open. Close the cover when printing. |
| Installed tape is not compatible with this machine! | Tape that is incompatible with the P-touch labeling system has been installed. Use a compatible tape. |
| Line Limit! Max 297 Lines per Label | Exceeds max. You can enter up to 297 lines in the whole page and blocks. |
| Block Function is not Allowed! | In this setting, you cannot add or delete blocks. |
| Line Limit! Max 3 Lines | PUNCH-DOWN BLOCK layout allows to print up to 3 lines / block. |
| This Function Requires 0.35" or Wider Tape! This Function Requires 9mm or Wider Tape! | PUNCH-DOWN BLOCK layout must use 9mm or wider tape cassettes. |
| Sequence Type Must be None When Editing! | Text cannot be edited when you set Sequence Type in PUNCH-DOWN BLOCK to Horizontal or Backbone. |
| No Database Found! | The Database key on the P-touch labeling system was pressed while there is no database file saved in the P-touch labeling system. |
| No Data! | You tried to open a database file which doesn't contain any data. |
| Bar Code Error! | Bar code labels were attempted to print from a database.The P-touch labeling system will display this message when the selected range of the database includes invalid characters/numbers not supported by the bar code protocol. |
| Memory Full!Reduce File Size to Proceed | The total data size exceeds the built-in flash memory after editing database records. |
| Hi-Res Print Not Supported with This Media! | Cannot print labels in high resolution mode when non-supported media (fabric tape, heat shrink tube etc.) is installed in the P-touch labeling system. |
Specifications
Main Unit
| Item | Specification | |
| Display | ||
| Character display | 15 characters x 2 lines and guidance area(128 dot x 64 dot) | |
| Screen contrast | 5 levels (+2, +1, 0, -1, -2) | |
| Printing | ||
| Print method | Thermal Transfer | |
| Print head | 128 dot / 180 dpiHigh resolution mode: Maximum 180 dpi × 360 dpi (when connected to a computer)*1 | |
| Print height | 0.71" (18.0 mm) max. (when using 0.94" [24 mm] tape)*2 | |
| Print speed | AC Adapter: Maximum 1.18" (30 mm)/sec.Batteries: Maximum 0.78" (20 mm)/sec.Actual print speed varies depending on the conditions. | |
| Tape/Tube cassette | Brother TZe tape cassette (0.13", 0.23", 0.35", 0.47", 0.70", 0.94" [3.5 mm, 6 mm, 9 mm, 12 mm, 18 mm, 24 mm] widths)Brother HGe tape cassette (0.23", 0.35", 0.47", 0.70", 0.94" [6 mm, 9 mm, 12 mm, 18 mm, 24 mm] widths)Brother HSe tube cassette (0.23", 0.34", 0.46", 0.69", 0.93" [5.8 mm, 8.8 mm, 11.7 mm, 17.7 mm, 23.6 mm] widths) | |
| No. of lines | 0.94" (24 mm) tape : 1 - 7 lines; 0.70" (18 mm) tape : 1 - 5 lines; 0.47" (12 mm) tape : 1 - 3 lines; 0.35" (9 mm) tape : 1 - 2 lines; 0.23" (6 mm) tape : 1 - 2 lines; 0.13" (3.5 mm) tape : 1 line | |
| Memory (local files) | ||
| Memory buffer size | Maximum 18297 characters | |
| File storage | Maximum 99 files | |
| Memory (transferred) | ||
| File storage | Maximum 99 templates, databases, and images each (total of 6 MB) | |
| Power Supply | ||
| Power supply | Six "AA" alkaline batteries (LR6)*3, Six "AA" Ni-MH rechargeable batteries (HR6)*3, *4, Li-ion Battery (BA-E001), AC adapter (AD-E001). | |
| Auto Power-off | Six "AA" alkaline batteries (LR6)/Six "AA" Ni-MH rechargeable batteries (HR6): 20 min.Li-ion Battery (BA-E001): 30 min.AC adapter (AD-E001): 60 min.(Use the Menu key to change the Auto Power-off setting for the Li-ion battery or AC adapter.) | |
| Interface | ||
| USB | Ver. 2.0 (Full Speed) (mini-B, Peripheral) | |
| Wireless LAN | IEEE802.11b/g/n(Infrastructure Mode/Ad-hoc mode) | |
| Size | ||
| Dimensions | Approx. 4.9" (W) x 9.8" (D) x 3.7" (H)[125.8 mm (W) x 249.9 mm (D) x 94.1 mm (H)] | |
| Weight | Approx. 2.31 lb (1048 g) (without tape cassette and batteries) | |
| Other | ||
| Operating temperature / humidity | 50 °F - 95 °F (10 °C - 35 °C) / 20 % - 80 % humidity (without condensation)Maximum wet bulb temperature: 80.6 °F (27 °C) | |
*1 The high resolution mode cannot be used with Fabric Tape and Heat Shrink Tube.
*2 Actual character size may be smaller than maximum print height.
*3 Not included.
*4 Visit us at http://solutions.brother.com/ for the latest information about recommended batteries.
Supported Protocols and Security Features
| Interface | Wireless | IEEE 802.11b/g/n (Infrastructure Mode)IEEE 802.11b (Ad-hoc Mode) |
| Network (common) | Protocol (IPv4) | ARP, RARP, BOOTP, DHCP, APIPA (Auto IP), mDNS, WINS, NetBIOS name resolution, DNS Resolver, LPR/LPD, Custom Raw Port/Port9100, FTP Server, TFTP client and server, ICMP, LLMNR responder, SNMPv1/v2c |
| Protocol (IPv6) | NDP, RA, DNS Resolver, LPR/LPD, mDNS, Custom Raw Port/Port9100, FTP Server, SNMPv1, TFTP client and server, ICMP, LLMNR responder, SNMPv1/v2c | |
| Network (Security) | Wireless | SSID (32 chr), WEP 64/128 bit, WPA2-PSK (AES), LEAP, EAP-FAST, PEAP, EAP-TLS, EAP-TTLS |
Symbols
| Category | Symbols |
| Punctuation | . , ? ! " ' : ; - _ \ / & i ~ • * @ #% | | ^ % || † ‡ |
| Datacom | |
| Audio/Visual | |
| Electrical | |
| Arrows | |
| Safety | |
| Prohibited | |
| Brackets | ( ) [ ] < > « » { } |
| Mathematics | + - × ÷ ± = ≥ ≤ ≠ ≥ ≤ > < . ∴ 1⁄4 1⁄2 3⁄4 1⁄3 3⁄31⁄5 3⁄5 3⁄5 3⁄5 1⁄6 5⁄6 1⁄8 3⁄8 5⁄8 7⁄8 |
| Greek | α β γ δ φ λ μ Ω Σ |
| Super/Subscript | ○ ® © TM 0 1 2 3 4 5 6 7 8 9 0 1 2 3 4 56 7 8 9 |
| Bullets | ✓ ✓ ● ○ ■ □ X □ X ★ ☆ ♠ ♥ ♥ ◆ ◇♣ |
| Currency | $ ¢ € £ ¥ ₺ |
| Misc. |

The symbols shown in the table may look slightly different on the P-touch labeling system LCD and when printed.
Accented Characters
| Character | Accented Characters | Character | Accented Characters | ||
| a | á à â ä æ ã a å ä ă | n | ñ ñ ñ ñ | ||
| A | Á Á Á Á Á E Á A Á Á Á | N | Ñ Ñ Ñ Ñ Ñ Ñ Ñ Ñ Ñ Ñ Ñ Ñ Ñ Ñ Ñ Ñ Ñ Ñ Ñ Ñ Ñ Ñ Ñ Ñ Ñ Ñ Ñ Ñ Ñ Ñ Ñ Ñ Ñ Ñ Ñ Ñ Ñ Ñ Ñ Ñ Ñ Ñ Ñ Ñ Ñ Ñ Ñ Ñ Ñ Ñ Ñ Ð Ñ Ñ Ñ Ñ Ñ Ñ Ñ Ñ Ñ Ñ Ñ Ñ Ñ Ñ Ñ Ñ Ñ Ñ Ñ Ñ Ñ Ñ Ñ Ñ Ñ Ñ Ñ Ñ Ñ Ñ Ñ Ñ Ñ Ñ Ñ Ñ Ñ Ñ Ñ Ñ Ñ Ñ Ñ Ñ Ñ Ñ Ñ Ñ Ñ Û Ñ Ñ Ñ Ñ Ñ Ñ Ñ Ñ Ñ Ñ Ñ Ñ Ñ Ñ Ñ Ñ Ñ Ñ Ñ Ñ Ñ Ñ Ñ Ñ Ñ Ñ Ñ Ñ Ñ Ñ Ñ Ñ Ñ Ñ Ñ Ñ Ñ Ñ Ñ Ñ Ñ Ñ Ñ Ñ Ñ Ñ Ñ Ñ Ñ Ò Ñ Ñ Ñ Ñ Ñ Ñ Ñ Ñ Ñ Ñ Ñ Ñ Ñ Ñ Ñ Ñ Ñ Ñ Ñ Ñ Ñ Ñ Ñ Ñ Ñ Ñ Ñ Ñ Ñ Ñ Ñ Ñ Ñ Ñ Ñ Ñ Ñ Ñ Ñ Ñ Ñ Ñ Ñ Ñ Ñ Ñ Ñ Ñ Ñ Ú Ñ Ñ Ñ Ñ Ñ Ñ Ñ Ñ Ñ Ñ Ñ Ñ Ñ Ñ Ñ Ñ Ñ Ñ Ñ Ñ Ñ Ñ Ñ Ñ Ñ Ñ Ñ Ñ Ñ Ñ Ñ Ñ Ñ Ñ Ñ Ñ Ñ Ñ Ñ Ñ Ñ Ñ Ñ Ñ Ñ Ñ Ñ Ñ Ñ Ó Ñ Ñ Ñ Ñ Ñ Ñ Ñ Ñ Ñ Ñ Ñ Ñ Ñ Ñ Ñ Ñ Ñ Ñ Ñ Ñ Ñ Ñ Ñ Ñ Ñ Ñ Ñ Ñ Ñ Ñ Ñ Ñ Ñ Ñ Ñ Ñ Ñ Ñ Ñ Ñ Ñ Ñ Ñ Ñ Ñ Ñ Ñ Ñ Ñ Ï Ñ Ñ Ñ Ñ Ñ Ñ Ñ Ñ Ñ Ñ Ñ Ñ Ñ Ñ Ñ Ñ Ñ Ñ Ñ Ñ Ñ Ñ Ñ Ñ Ñ Ñ Ñ Ñ Ñ Ñ Ñ Ñ Ñ Ñ Ñ Ñ Ñ Ñ Ñ Ñ Ñ Ñ Ñ Ñ Ñ Ñ Ñ Ñ Ñ Ü Ñ Ñ Ñ Ñ Ñ Ñ Ñ Ñ Ñ Ñ Ñ Ñ Ñ Ñ Ñ Ñ Ñ Ñ Ñ Ñ Ñ Ñ Ñ Ñ Ñ Ñ Ñ Ñ Ñ Ñ Ñ Ñ Ñ Ñ Ñ Ñ Ñ Ñ Ñ Ñ Ñ Ñ Ñ Ñ Ñ Ñ Ñ Ñ Ñ í Ñ Ñ Ñ Ñ Ñ Ñ Ñ Ñ Ñ Ñ Ñ Ñ Ñ Ñ Ñ Ñ Ñ Ñ Ñ Ñ Ñ Ñ Ñ Ñ Ñ Ñ Ñ Ñ Ñ Ñ Ñ Ñ Ñ Ñ Ñ Ñ Ñ Ñ Ñ Ñ Ñ Ñ Ñ Ñ Ñ Ñ Ñ Ñ Ñ Ì Ñ Ñ Ñ Ñ Ñ Ñ Ñ Ñ Ñ Ñ Ñ Ñ Ñ Ñ Ñ Ñ Ñ Ñ Ñ Ñ Ñ Ñ Ñ Ñ Ñ Ñ Ñ Ñ Ñ Ñ Ñ Ñ Ñ Ñ Ñ Ñ Ñ Ñ Ñ Ñ Ñ Ñ Ñ Ñ Ñ Ñ Ñ Ñ Ñ à Ñ Ñ Ñ Ñ Ñ Ñ Ñ Ñ Ñ Ñ Ñ Ñ Ñ Ñ Ñ Ñ Ñ Ñ Ñ Ñ Ñ Ñ Ñ Ñ Ñ Ñ Ñ Ñ Ñ Ñ Ñ Ñ Ñ Ñ Ñ Ñ Ñ Ñ Ñ Ñ Ñ Ñ Ñ Ñ Ñ Ñ Ñ Ñ Ñ ä Ñ Ñ Ñ Ñ Ñ Ñ Ñ Ñ Ñ Ñ Ñ Ñ Ñ Ñ Ñ Ñ Ñ Ñ Ñ Ñ Ñ Ñ Ñ Ñ Ñ Ñ Ñ Ñ Ñ Ñ Ñ Ñ Ñ Ñ Ñ Ñ Ñ Ñ Ñ Ñ Ñ Ñ Ñ Ñ Ñ Ñ Ñ Ñ Ñ ç Ñ Ñ Ñ Ñ Ñ Ñ Ñ Ñ Ñ Ñ Ñ Ñ Ñ Ñ Ñ Ñ Ñ Ñ Ñ Ñ Ñ Ñ Ñ Ñ Ñ Ñ Ñ Ñ Ñ Ñ Ñ Ñ Ñ Ñ Ñ Ñ Ñ Ñ Ñ Ñ Ñ Ñ Ñ Ñ Ñ Ñ Ñ Ñ Ñ ë Ñ Ñ Ñ Ñ Ñ Ñ Ñ Ñ Ñ Ñ Ñ Ñ Ñ Ñ Ñ Ñ Ñ Ñ Ñ Ñ Ñ Ñ Ñ Ñ Ñ Ñ Ñ Ñ Ñ Ñ Ñ Ñ Ñ Ñ Ñ Ñ Ñ Ñ Ñ Ñ Ñ Ñ Ñ Ñ Ñ Ñ Ñ Ñ Ñ è Ñ Ñ Ñ Ñ Ñ Ñ Ñ Ñ Ñ Ñ Ñ Ñ Ñ Ñ Ñ Ñ Ñ Ñ Ñ Ñ Ñ Ñ Ñ Ñ Ñ Ñ Ñ Ñ Ñ Ñ Ñ Ñ Ñ Ñ Ñ Ñ Ñ Ñ Ñ Ñ Ñ Ñ Ñ Ñ Ñ Ñ Ñ Ñ Ñ æ Ñ Ñ Ñ Ñ Ñ Ñ Ñ Ñ Ñ Ñ Ñ Ñ Ñ Ñ Ñ Ñ Ñ Ñ Ñ Ñ Ñ Ñ Ñ Ñ Ñ Ñ Ñ Ñ Ñ Ñ Ñ Ñ Ñ Ñ Ñ Ñ Ñ Ñ Ñ Ñ Ñ Ñ Ñ Ñ Ñ Ñ Ñ Ñ Ñ Ø Ñ Ñ Ñ Ñ Ñ Ñ Ñ Ñ Ñ Ñ Ñ Ñ Ñ Ñ Ñ Ñ Ñ Ñ Ñ Ñ Ñ Ñ Ñ Ñ Ñ Ñ Ñ Ñ Ñ Ñ Ñ Ñ Ñ Ñ Ñ Ñ Ñ Ñ Ñ Ñ Ñ Ñ Ñ Ñ Ñ Ñ Ñ Ñ Ñ × Ñ Ñ Ñ Ñ Ñ Ñ Ñ Ñ Ñ Ñ Ñ Ñ Ñ Ñ Ñ Ñ Ñ Ñ Ñ Ñ Ñ Ñ Ñ Ñ Ñ Ñ Ñ Ñ Ñ Ñ Ñ Ñ Ñ Ñ Ñ Ñ Ñ Ñ Ñ Ñ Ñ Ñ Ñ Ñ Ñ Ñ Ñ Ñ Ñ Î Ñ Ñ Ñ Ñ Ñ Ñ Ñ Ñ Ñ Ñ Ñ Ñ Ñ Ñ Ñ Ñ Ñ Ñ Ñ Ñ Ñ Ñ Ñ Ñ Ñ Ñ Ñ Ñ Ñ Ñ Ñ Ñ Ñ Ñ Ñ Ñ Ñ Ñ Ñ Ñ Ñ Ñ Ñ Ñ Ñ Ñ Ñ Ñ Ñ Ù Ñ Ñ Ñ Ñ Ñ Ñ Ñ Ñ Ñ Ñ Ñ Ñ Ñ Ñ Ñ Ñ Ñ Ñ Ñ Ñ Ñ Ñ Ñ Ñ Ñ Ñ Ñ Ñ Ñ Ñ Ñ Ñ Ñ Ñ Ñ Ñ Ñ Ñ Ñ Ñ Ñ Ñ Ñ Ñ Ñ Ñ Ñ Ñ Ñ Ê Ñ Ñ Ñ Ñ Ñ Ñ Ñ Ñ Ñ Ñ Ñ Ñ Ñ Ñ Ñ Ñ Ñ Ñ Ñ Ñ Ñ Ñ Ñ Ñ Ñ Ñ Ñ Ñ Ñ Ñ Ñ Ñ Ñ Ñ Ñ Ñ Ñ Ñ Ñ Ñ Ñ Ñ Ñ Ñ Ñ Ñ Ñ Ñ Ñ ê Ñ Ñ Ñ Ñ Ñ Ñ Ñ Ñ Ñ Ñ Ñ Ñ Ñ Ñ Ñ Ñ Ñ Ñ Ñ Ñ Ñ Ñ Ñ Ñ Ñ Ñ Ñ Ñ Ñ Ñ Ñ Ñ Ñ Ñ Ñ Ñ Ñ Ñ Ñ Ñ Ñ Ñ Ñ Ñ Ñ Ñ Ñ Ñ Ñ Õ Ñ Ñ Ñ Ñ Ñ Ñ Ñ Ñ Ñ Ñ Ñ Ñ Ñ Ñ Ñ Ñ Ñ Ñ Ñ Ñ Ñ Ñ Ñ Ñ Ñ Ñ Ñ Ñ Ñ Ñ Ñ Ñ Ñ Ñ Ñ Ñ Ñ Ñ Ñ Ñ Ñ Ñ Ñ Ñ Ñ Ñ Ñ Ñ Ñ Æ Ñ Ñ Ñ Ñ Ñ Ñ Ñ Ñ Ñ Ñ Ñ Ñ Ñ Ñ Ñ Ñ Ñ Ñ Ñ Ñ Ñ Ñ Ñ Ñ Ñ Ñ Ñ Ñ Ñ Ñ Ñ Ñ Ñ Ñ Ñ Ñ Ñ Ñ Ñ Ñ Ñ Ñ Ñ Ñ Ñ Ñ Ñ Ñ Ñ Ä Ñ Ñ Ñ Ñ Ñ Ñ Ñ Ñ Ñ Ñ Ñ Ñ Ñ Ñ Ñ Ñ Ñ Ñ Ñ Ñ Ñ Ñ Ñ Ñ Ñ Ñ Ñ Ñ Ñ Ñ Ñ Ñ Ñ Ñ Ñ Ñ Ñ Ñ Ñ Ñ Ñ Ñ Ñ Ñ Ñ Ñ Ñ Ñ Ñ ì Ñ Ñ Ñ Ñ Ñ Ñ Ñ Ñ Ñ Ñ Ñ Ñ Ñ Ñ Ñ Ñ Ñ Ñ Ñ Ñ Ñ Ñ Ñ Ñ Ñ Ñ Ñ Ñ Ñ Ñ Ñ Ñ Ñ Ñ Ñ Ñ Ñ Ñ Ñ Ñ Ñ Ñ Ñ Ñ Ñ Ñ Ñ Ñ Ñ á Ñ Ñ Ñ Ñ Ñ Ñ Ñ Ñ Ñ Ñ Ñ Ñ Ñ Ñ Ñ Ñ Ñ Ñ Ñ Ñ Ñ Ñ Ñ Ñ Ñ Ñ Ñ Ñ Ñ Ñ Ñ Ñ Ñ Ñ Ñ Ñ Ñ Ñ Ñ Ñ Ñ Ñ Ñ Ñ Ñ Ñ Ñ Ñ Ñ ã Ñ Ñ Ñ Ñ Ñ Ñ Ñ Ñ Ñ Ñ Ñ Ñ Ñ Ñ Ñ Ñ Ñ Ñ Ñ Ñ Ñ Ñ Ñ Ñ Ñ Ñ Ñ Ñ Ñ Ñ Ñ Ñ Ñ Ñ Ñ Ñ Ñ Ñ Ñ Ñ Ñ Ñ Ñ Ñ Ñ Ñ Ñ Ñ Ñ Ô Ž Ž Ž Ž Ž Ž Ž Ž Ž Ž Ž Ž Ž Ž Ž Ž Ž Ž Ž Ž Ž Ž Ž Ž Ž Ž Ž Ž Ž Ž Ž Ž Ž Ž Ž Ž Ž Ž Ž Ž Ž Ž Ž Ž Ž Ž Ž Ž Ž Ž ũ Ž Ž ũ Ž ũ ũ ũ ũ ũ ũ ũ ũ ũ ũ ũ ũ ũ ũ ũ ũ ũ ũ ũ ũ ũ ũ ũ ũ ũ ũ ũ ũ ũ ũ ũ ũ ũ ũ ũ ũ ũ ũ ũ ũ ũ ũ ũ ũ ũ ũ ũ ũ ũ ũ Ū ũ ũ ũ ũ ũ ũ ũ ũ ũ ũ ũ ũ ũ ũ ũ ũ ũ ũ ũ ũ ũ ũ ũ ũ ũ ũ ũ ũ ũ ũ ũ ũ ũ ũ ũ ũ ũ ũ ũ ũ ũ ũ ũ ũ ũ ũ ũ ũ ũ Ÿ ũ ũ ũ ũ ũ ũ ũ ũ ũ ũ ũ ũ ũ ũ ũ ũ ũ ũ ũ ũ ũ ũ ũ ũ ũ ũ ũ ũ ũ ũ ũ ũ ũ ũ ũ ũ ũ ũ ũ ũ ũ ũ ũ ũ ũ ũ ũ ũ ũ Ũ ũ ũ ũ ũ ũ ũ ũ ũ ũ ũ ũ ũ ũ ũ ũ ũ ũ ũ ũ ũ ũ ũ ũ ũ ũ ũ ũ ũ ũ ũ ũ ũ ũ ũ ũ ũ ũ ũ ũ ũ ũ ũ ũ ũ ũ ũ ũ ũ ũ ů Ũ ũ ũ ũ ũ ũ ũ ũ ũ ũ ũ ũ ũ ũ ũ ũ ũ ũ ũ ũ ũ ũ ũ ũ ũ ũ ũ ũ ũ ũ ũ ũ ũ ũ ũ ũ ũ ũ ũ ũ ũ ũ ũ ũ ũ ũ ũ ũ ũ Ũ Ū ũ ũ ũ ũ ũ ũ ũ ũ ũ ũ ũ ũ ũ ũ ũ ũ ũ ũ ũ ũ ũ ũ ũ ũ ũ ũ ũ ũ ũ ũ ũ ũ ũ ũ ũ ũ ũ ũ ũ ũ ũ ũ ũ ũ ũ ũ ũ ũ Ũ Ÿ ũ ũ ũ ũ ũ ũ ũ ũ ũ ũ ũ ũ ũ ũ ũ ũ ũ ũ ũ ũ ũ ũ ũ ũ ũ ũ ũ ũ ũ ũ ũ ũ ũ ũ ũ ũ ũ ũ ũ ũ ũ ũ ũ ũ ũ ũ ũ ũ Ũ ŧ Ÿ ũ ũ ũ ũ ũ ũ ũ ũ ũ ũ ũ ũ ũ ũ ũ ũ ũ ũ ũ ũ ũ ũ ũ ũ ũ ũ ũ ũ ũ ũ ũ ũ ũ ũ ũ ũ ũ ũ ũ ũ ũ ũ ũ ũ ũ ũ ũ ũ Ū Ũ Ÿ ũ ũ ũ ũ ũ ũ ũ ũ ũ ũ ũ ũ ũ ũ ũ ũ ũ ũ ũ ũ ũ ũ ũ ũ ũ ũ ũ ũ ũ ũ ũ ũ ũ ũ ũ ũ ũ ũ ũ ũ ũ ũ ũ ũ ũ ũ ũ Ū Ũ Ū Ũ Ÿ ũ ũ ũ ũ ũ ũ ũ ũ ũ ũ ũ ũ ũ ũ ũ ũ ũ ũ ũ ũ ũ ũ ũ ũ ũ ũ ũ ũ ũ ũ ũ ũ ũ ũ ũ ũ ũ ũ ũ ũ ũ ũ ũ ũ ũ ũ Ū Ũ Ÿ Ū Ũ Ÿ Ū Ũ Ÿ Ū Ũ Ÿ Ū Ũ Ÿ Ū Ũ Ÿ Ū Ũ Ÿ Ū Ũ Ÿ Ū Ũ Ÿ Ū Ũ Ÿ Ū Ũ Ÿ Ū Ũ Ÿ Ū Ũ Ÿ Ū Ũ Ÿ Ū Ũ Ÿ Ū Ũ Ÿ Ū Ũ Ÿ Ū ŧ Ÿ Ū Ũ Ÿ Ū Ũ Ÿ Ū Ũ Ÿ Ū Ũ Ÿ Ū Ũ Ÿ Ū Ũ Ÿ Ū Ũ Ÿ Ū Ũ Ÿ Ū Ũ Ÿ Ū Ũ Ÿ Ū Ũ Ÿ Ū Ũ Ÿ Ū Ũ Ÿ Ū Ũ Ÿ Ū Ũ Ÿ Ū Ũ Ÿ ū Ũ Ÿ Ū Ũ Ÿ Ū Ũ Ÿ Ū Ũ Ÿ Ū Ũ Ÿ Ū Ũ Ÿ Ū Ũ Ÿ Ū Ũ Ÿ Ū Ũ Ÿ Ū Ũ Ÿ Ū Ũ Ÿ Ū Ũ Ÿ Ū Ũ Ÿ Ū Ũ Ÿ Ū Ũ Ÿ Ū Ũ Ÿ Ū Ũ ũ Ÿ Ū Ũ Ÿ Ū Ũ Ÿ Ū Ũ Ÿ Ū Ũ Ÿ Ū Ũ Ÿ Ū Ũ Ÿ Ū Ũ Ÿ Ū Ũ Ÿ Ū Ũ Ÿ Ū Ũ Ÿ Ū Ũ Ÿ Ū Ũ Ÿ Ū Ũ Ÿ Ū Ũ Ÿ Ū Ũ Ÿ Ū Ũ Ÿ Ÿ Ū Ũ Ÿ Ū Ũ Ÿ Ū Ũ Ÿ Ū Ũ Ÿ Ū Ũ Ÿ Ū Ũ Ÿ Ū Ũ Ÿ Ū Ũ Ÿ Ū Ũ Ÿ Ū Ũ Ÿ Ū Ũ Ÿ Ū Ũ Ÿ Ū Ũ Ÿ Ū Ũ Ÿ Ū Ũ Ÿ Ū Ũ Ÿ ũ Ÿ Ū Ũ Ÿ Ū Ũ Ÿ Ū Ũ Ÿ Ū Ũ Ÿ Ū Ũ Ÿ Ū Ũ Ÿ Ū Ũ Ÿ Ū Ũ Ÿ Ū Ũ Ÿ Ū Ũ Ÿ Ū Ũ Ÿ Ū Ũ Ÿ Ū Ũ Ÿ Ū Ũ Ÿ Ū Ũ Ÿ Ū Ũ ũ Ũ Ÿ Ū Ũ Ÿ Ū Ũ Ÿ Ū Ũ Ÿ Ū Ũ Ÿ Ū Ũ Ÿ Ū Ũ Ÿ Ū Ũ Ÿ Ū Ũ Ÿ Ū Ũ Ÿ Ū Ũ Ÿ Ū Ũ Ÿ Ū Ũ Ÿ Ū Ũ Ÿ Ū Ũ Ÿ Ū Ũ Ÿ Ū Ũ ů |
Character Attribute
| Attribute | Value | Result | Value | Result |
| Font | LGO (Letter Gothic) | ABCabc | CAL (Calgary) | ABCabc |
| HEL (Helsinki) | ABCabc | BEL (Belgium) | ABCabc | |
| BRU (Brussels) | ABCabc | ATL (Atlanta) | ABCabc | |
| US (US) | ABCabc | ADM (Adams) | ABCabc | |
| LA (Los Angeles) | ABCabc | BRN (Brunei) | ABCabc | |
| SGO (San Diego) | ABCabc | SOF (Sofia) | ABCabc | |
| FLO (Florida) | ABCabc | GER (Germany) | ABCabc | |
| Size | Auto | When Auto is selected, the text is automatically adjusted to print in the largest size available for each tape width. | 18pt | ABCabc |
| 48pt | ABCabc | 12pt | ABCabc | |
| 42pt | ABCabc | 9pt | ABCabc g_sllty | |
| 36pt | ABCabc | 6pt | ABCabc g_sllty | |
| 24pt | ABCabc | |||
| Width | x 2 | ABCabc | x 2/3 | ABCabc |
| x 3/2 | ABCabc | x 1/2 | ABCabc | |
| x 1 | ABCabc | |||
| Style | Normal | ABCabc | ITA(Italic) | ABCabc |
| BLD(Bold) | ABCabc | I+BLD(Italic Bold) | ABCabc | |
| OUT(Outline) | ABCabc | I+OUT(Italic Outline) | ABCabc | |
| SHD(Shadow) | ABCabc | I+SHD(Italic Shadow) | ABCabc | |
| SLD(Solid) | ABCabc | I+SLD(Italic Solid) | ABCabc | |
| Line | Off | ABCabc | UND(Underline) | ABCabc |
| STR(Strikeout) | ABCabc | |||
| Align(Alignment) | Left | ABCabc | Right | ABCabc |
| Center | ABCabc | Just(Justify) | A B C a b c | |

- The actual printed font size depends on the tape width, number of characters and number of input lines. Once characters reach a minimum size, the selected font will default to a custom font which is based on the Helsinki style. This allows labels to print using the smallest text possible on narrow or multi-line labels.
- All 6 point text is printed in Helsinki except in default setting.
Frames
| Attribute | Value | Result | Value | Result | ||
| Frame | Off | ABCabc | 4 | ABCabc | ||
| 1 | ABCabc | 5 | ABCabc | |||
| 2 | ABCabc | 6 | ABCabc | |||
| 3 | ABCabc | 7 | ABC | abc | ABC | |
| ABC | abc | ABC | ||||
| ABC | abc | ABC | ||||
Bar Codes
Bar Code Settings Table
| Attribute | Value |
| Protocol | CODE39, CODE128, EAN-8, EAN-13, GS1-128 (UCC/EAN-128), UPC-A, UPC-E, I-2/5 (ITF), CODABAR |
| Width | Small |
| Large | |
| Under# (characters printed below bar code) | On |
| Off | |
| C.Digit(check digit) | Off |
| On(only available for the CODE39, I-2/5 and CODABAR protocols) |
Special Character List CODE39
| Special Character |
| - |
| - |
| (SPACE) |
| $ |
| / |
| + |
| % |
CODABAR
| Special Character |
| - |
| $ |
| : |
| / |
| . |
| + |
CODE128, GS1-128 (UCC / EAN-128)
| Special Character | Special Character | Special Character |
| (SPACE) | \ | DC3 |
| ! | ] | DC4 |
| " | ^ | NAK |
| # | - | SYN |
| $ | NUL | ETB |
| % | · | CAN |
| & | SOH | EM |
| , | STX | SUB |
| ( | ETX | ESC |
| ) | EOT | { |
| * | ENQ | FS |
| + | ACK | | |
| , | BEL | GS |
| - | BS | } |
| . | HT | RS |
| / | LF | ~ |
| : | VT | US |
| ; | FF | DEL |
| < | CR | FNC3 |
| = | SO | FNC2 |
| > | SI | FNC4 |
| ? | DLE | FNC1 |
| a | DC1 | |
| [ | DC2 |
Notes on Using P-touch Transfer Manager (For Windows®)
Since some P-touch Editor 5.1 functions are not available with the P-touch labeling system, keep the following points in mind when using P-touch Editor 5.1 to create templates.
You can check a preview of the printed template before the created template is transferred to the P-touch labeling system. Refer to "Transferring the Label Template to P-touch Transfer Manager" on page 26 for details.
Notes on Creating Templates
- The P-touch labeling system is loaded with 14 fonts. Some of the text in the template that is transferred to the P-touch labeling system will be printed using similar fonts and character sizes that are loaded in the P-touch labeling system. As a result, the printed label may differ from the image of the template created in P-touch Editor.
- Depending on the text object setting, the character size may be automatically reduced or some of the text may not be printed. If this occurs, change the text object setting.
- Although character styles can be applied to individual characters with P-touch Editor, styles can only be applied to a block of text with the P-touch labeling system. In addition, some character styles are not available on the P-touch labeling system.
- A numbering field specified with P-touch Editor cannot be transferred.
- Backgrounds specified with P-touch Editor are not compatible with the P-touch labeling system.
- Date and Time objects using the "At Printing" setting on P-touch Editor will not be printed
- A P-touch Editor layout that uses the split printing function (enlarging the label and printing it on 2 or more labels) cannot be transferred.
- Only the first seven lines of text typed into a database field is read by the P-touch labeling system.
- Fields that overflow print area may not print completely.
Notes on Transferring Templates
- The printed label may differ from the image that appears in the Preview area of P-touch Transfer Manager.
- If a bar code not loaded on the P-touch labeling system is transferred to the P-touch labeling system, the bar code will be converted into an image if it is a 2-dimensional bar code. The image of the converted bar code cannot be edited. If the bar code is a 1-dimensional bar code containing a bar code protocol not compatible with the P-touch labeling system, an error will occur and the template cannot be transferred.
- All transferred objects that cannot be edited by the P-touch labeling system are converted into images.
- Grouped objects will be converted into a single bitmap, from which the data cannot be edited with the P-touch labeling system keyboard.
Notes on Transferring Data Other Than Templates
- If the number or order of fields in a database are changed and only the database (*.csv file) is transferred to update it, the database may not link correctly with the template. In addition, the first line of data in the transferred file must be recognized by the P-touch labeling system as "field names".
- Downloaded logos, symbols and graphics into the P-touch labeling system will automatically be scaled (to 8 sizes) like the resident font or any of the resident symbol in the library.