
TX-32PK3L - Telewizor PANASONIC - Bezpłatna instrukcja obsługi
Znajdź bezpłatnie instrukcję urządzenia TX-32PK3L PANASONIC w formacie PDF.

| Typ produktu | Telewizor CRT |
| Marka | Panasonic |
| Model | TX-32PK3L |
| Przekątna ekranu (kineskop) | 76 cm (32 cale) |
| Wymiary (wys. x szer. x gł.) | 558 x 812 x 572 mm |
| Masa | 57 kg |
| Zasilanie | 220-240 V AC, 50 Hz |
| Pobór mocy (praca) | 106 W |
| Pobór mocy (standby) | 1,4 W |
| Moc wyjściowa audio | 2 x 15 W (muzyczna), 8 Ω |
| Systemy odbioru | PAL I (UHF E21-68), PAL 525/60, M.NTSC, NTSC (tylko AV) |
| Złącza tylne | AV1 (21-pin Scart: audio/wideo, RGB), AV2 (21-pin Scart: S-Video, Q-Link), 2 x RCA audio wyjście |
| Złącza przednie | AV3: S-Video, RCA audio/wideo, słuchawki (3,5 mm) |
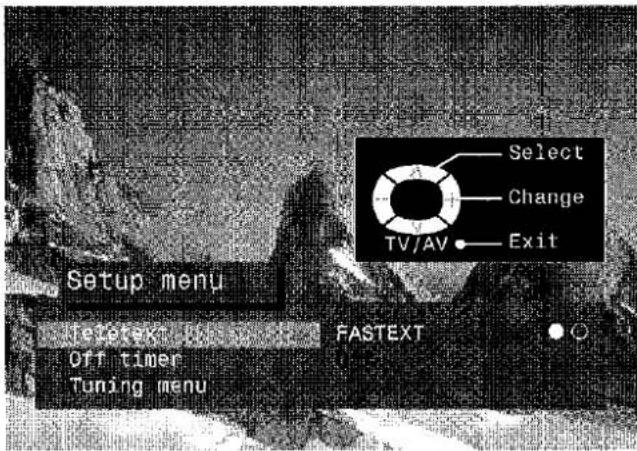
| Funkcje specjalne | Q-Link, Telegazeta (FASTEXT, LIST), Blokada programów, Wyszukiwanie automatyczne, Funkcja uśpienia (automatyczne przejście w standby po 30 min) |
| Dostępne funkcje Q-Link | Pobieranie listy programów, Nagrywanie bezpośrednie (Direct TV Record), Automatyczne włączanie TV przy odtwarzaniu VCR, Automatyczne wyłączanie VCR przy standby TV |
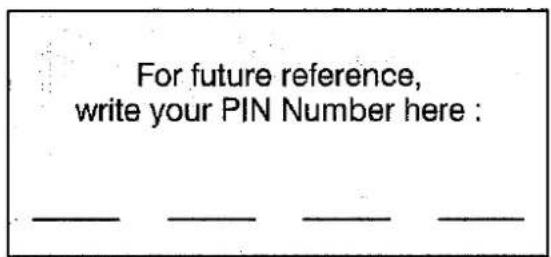
| Zabezpieczenie antykradzieżowe | Możliwość wprowadzenia kodu i danych właściciela (Owner I.D.) |
| Konserwacja i czyszczenie | Przed czyszczeniem odłączyć od zasilania. Czyścić miękką, suchą szmatką. Nie używać rozpuszczalników ani środków ściernych. |
| Uwagi dotyczące bezpieczeństwa | Nie zakrywać otworów wentylacyjnych. Nie umieszczać w pobliżu źródeł ciepła. W przypadku uszkodzenia kabla zasilającego skontaktować się z serwisem. |
| Naprawy i części zamienne | Naprawy może wykonywać wyłącznie wykwalifikowany personel. Części zamienne dostępne u autoryzowanych dealerów Panasonic. |
| Informacje ogólne | Produkt przeznaczony do użytku domowego. Nie nadaje się do podłączenia komputera z wyjściem TTL (5V). |
Często zadawane pytania - TX-32PK3L PANASONIC
Pytania użytkowników dotyczące TX-32PK3L PANASONIC
0 pytanie dotyczące tego urządzenia. Odpowiedz na te, które znasz, lub zadaj własne.
Zadaj nowe pytanie dotyczące tego urządzenia
Pobierz instrukcję dla swojego Telewizor w formacie PDF za darmo! Znajdź swoją instrukcję TX-32PK3L - PANASONIC i weź swoje urządzenie elektroniczne z powrotem w ręce. Na tej stronie opublikowane są wszystkie dokumenty niezbędne do korzystania z urządzenia. TX-32PK3L marki PANASONIC.
INSTRUKCJA OBSŁUGI TX-32PK3L PANASONIC
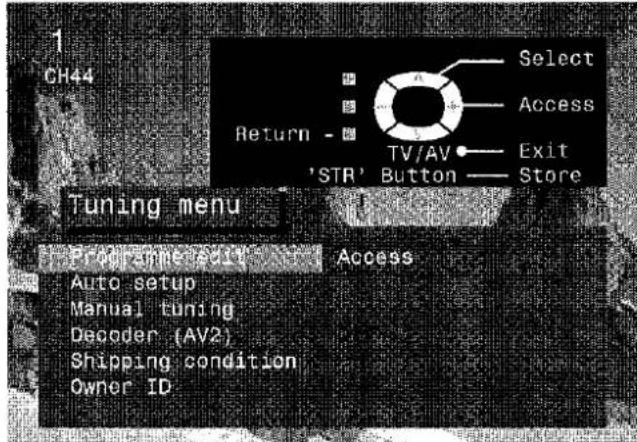
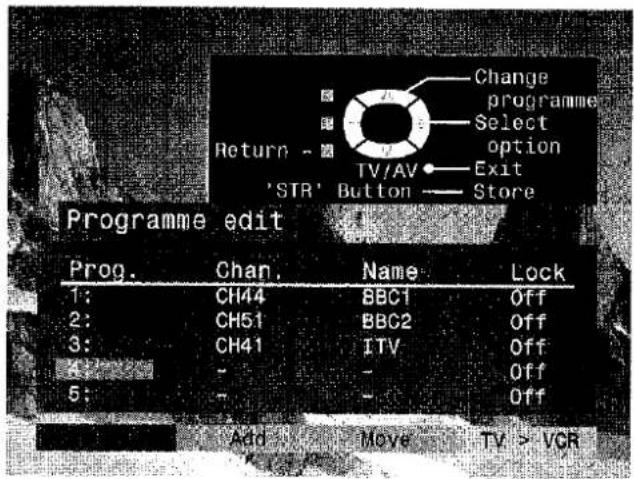
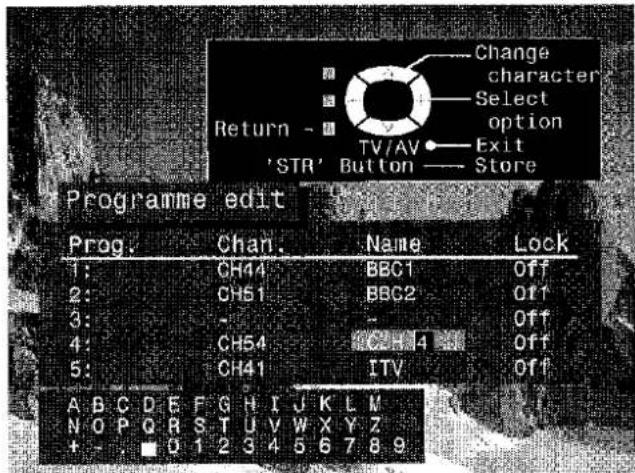
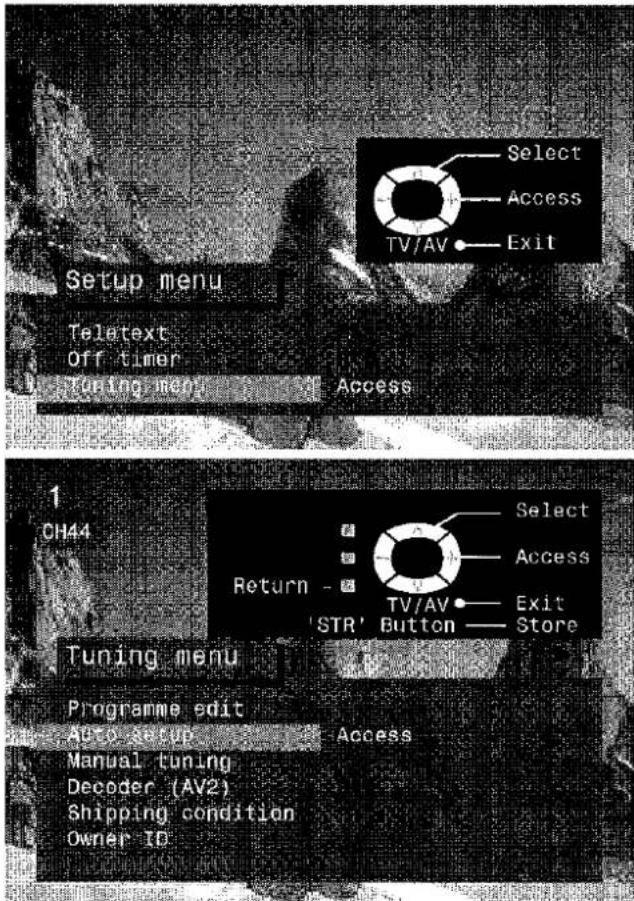
TUNING MENU - PROGRAMME EDIT
The Programme edit menu allows you to edit the programme position settings
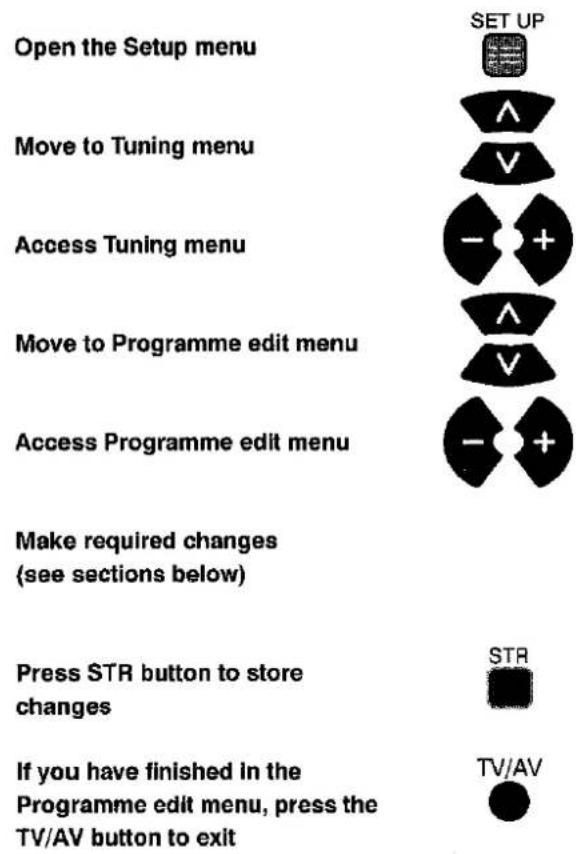
To delete an unwanted programme position
Ensure that the cursor is in the Prog. Column
Choose the programme position
Press the Red button on remote control
Press the Red button again to confirm
If you have finished in the Programme edit menu, press the TV/AV button to exit


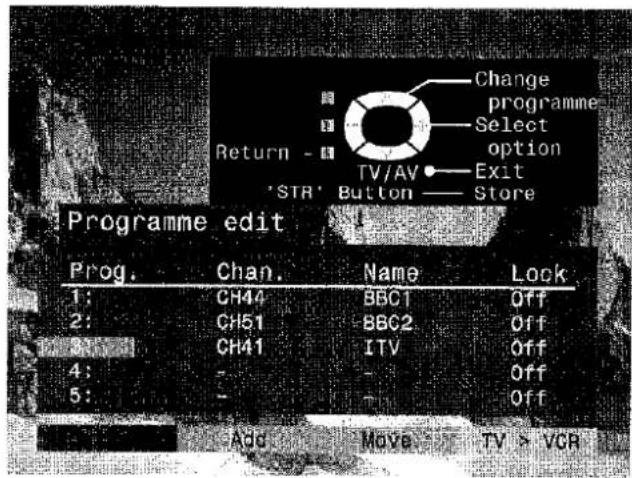
TUNING MENU - PROGRAMME EDIT
To add a programme position
Choose the programme position where the new programme is to be inserted

Press the Green button

Press the Green button again to confirm

This blank programme can then be tuned (see page 25), named (see page 22) or locked (see page 23)

Press STR to store

If you have finished in the Programme edit menu, press the TV/AV button to exit
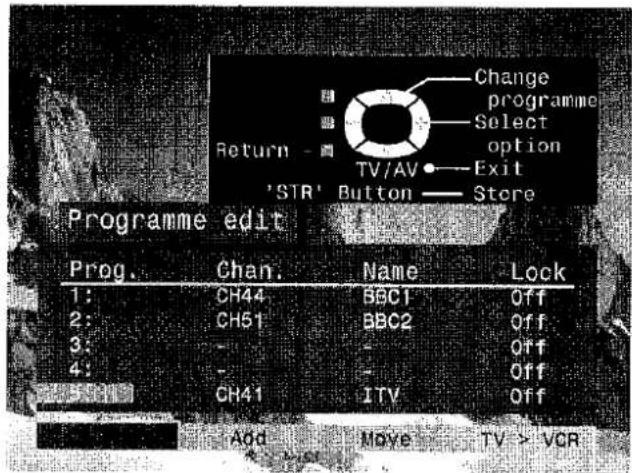
To move a programme to another position
Choose the programme position to be moved
Press the Yellow button on remote control

Choose new position

Press the Yellow button again to confirm

If you have finished in the Programme edit menu, press the TV/AV button to exit

To rename a programme position
Choose the programme position
Move to the Name column
Choose the new character

Move to the next character position

Continue until renaming is done
Press STR to store

If you have finished in the Programme edit menu, press the TV/AV button to exit

TUNING MENU - PROGRAMME EDIT
To lock a programme position to prevent access
Choose the programme position
Move to the Lock column
Choose between Lock On or Lock Off

Press STR to store

If you have finished in the
Programme edit menu, press the TV/AV button to exit

Note :
When a programme position is locked, Direct Channel Access using the 'C' and numeric keys on the remote control is not available
To copy programme information to a compatible VCR connected to AV2
Move to the Prog. column
Press the Blue button on the remote control.
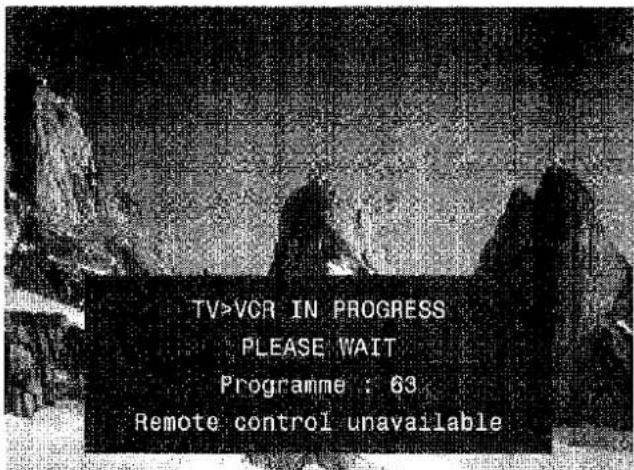
Programme data will now be sent to the VCR. This might take a while, depending on the number of stations stored. If the message "Unable to download, check your VCR" appears on the screen, the television is unable to send programme information to the VCR. See the VCR handbook for further information

If you have finished in the
Programme edit menu, press the TV/AV button to exit
TV/AV


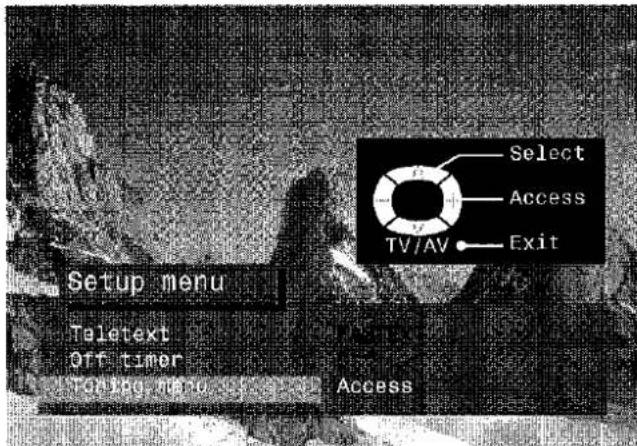
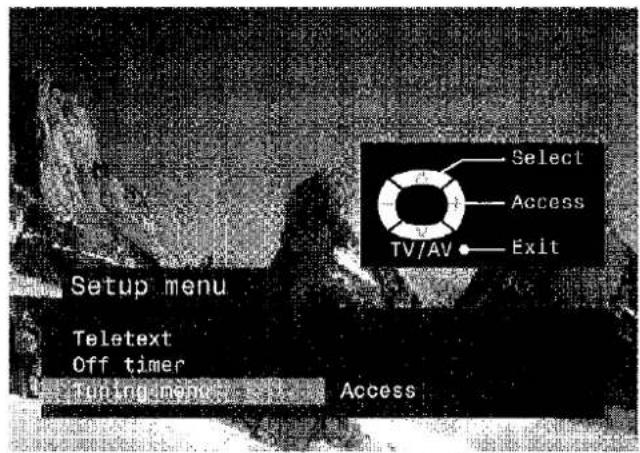
TUNING MENU - AUTO SETUP
The Auto setup menu will allow you to automatically retune the TV to your local stations. It is useful if you move to a different region

The TV will search for, locate and sort into order your local stations. If a compatible VCR is connected via the AV2 socket, programme data will be sent to the VCR via Q-Link (see page 29)
Once this operation is completed the TV will display programme position 1

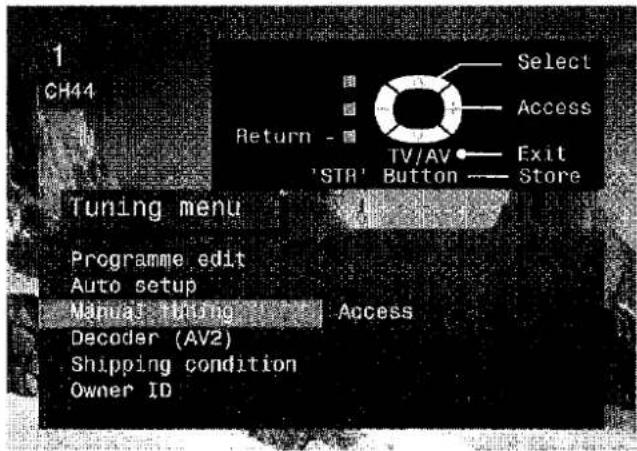
TUNING MENU - MANUAL TUNING
Manual tuning of the programme positions is available either from the On Screen Display menu or from the front panel controls
Manual tuning menu
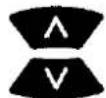
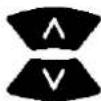
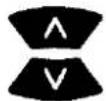
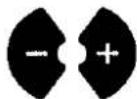
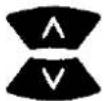
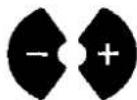
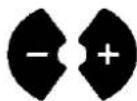
| Open the Setup menu | SET UP |
| Move to Tuning menu | A |
| V | |
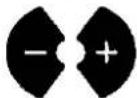
| Access Tuning menu | - + |
| Move to Manual tuning | A |
| V | |
| Access Manual tuning | - + |
| Select the programme position to be tuned | A |
| V | |
| Press repeatedly until required station is found | - + |
| When the desired station is found, press STR to store. The programme position will flash | |
| Press the TV/AV button to exit | |
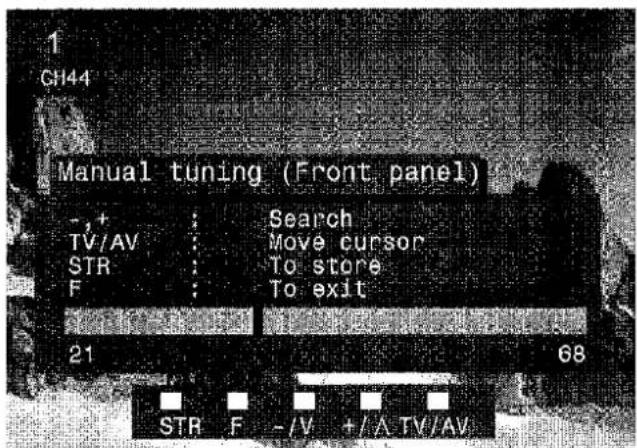
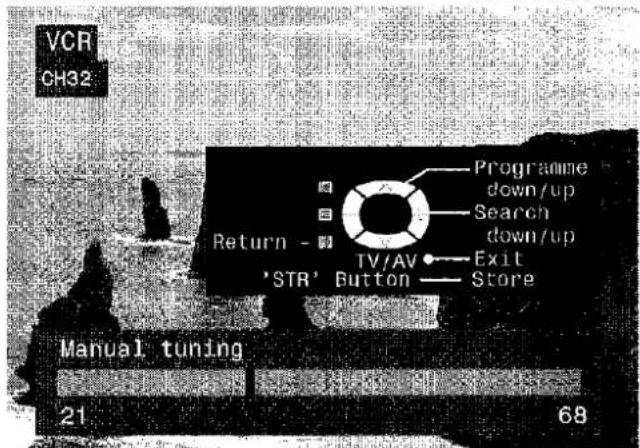
Manual tuning (Front panel)
| Press the F button (Front panel)until “Tuning mode” is reached | F |
| Press the - or + button to access Tuning mode | -/V +/-A |
| Press the TV/AV button to move between “Change programme” and “Search” | TV/AV |
| Press the - or + button to change programme position or start search | -/V +/-A |
| When the desired station is found, press STR to store. The programme position will flash | STR |
| Repeat above procedure to tune additional programmes or press the F button to exit | F |
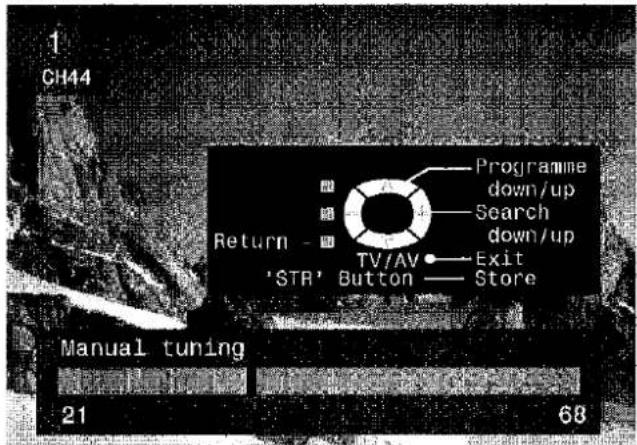
Important note :
On passing channel 68, tuning will restart at channel 21.

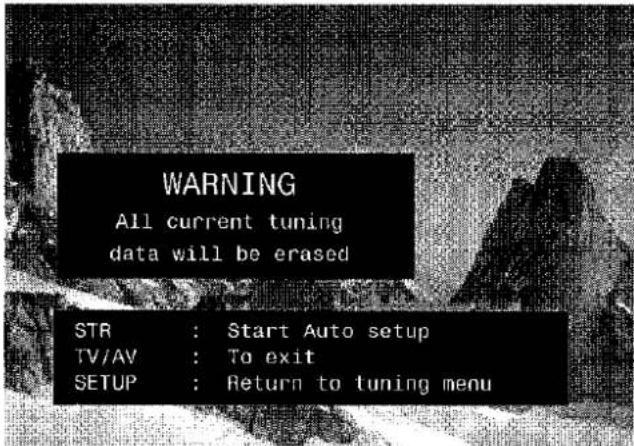
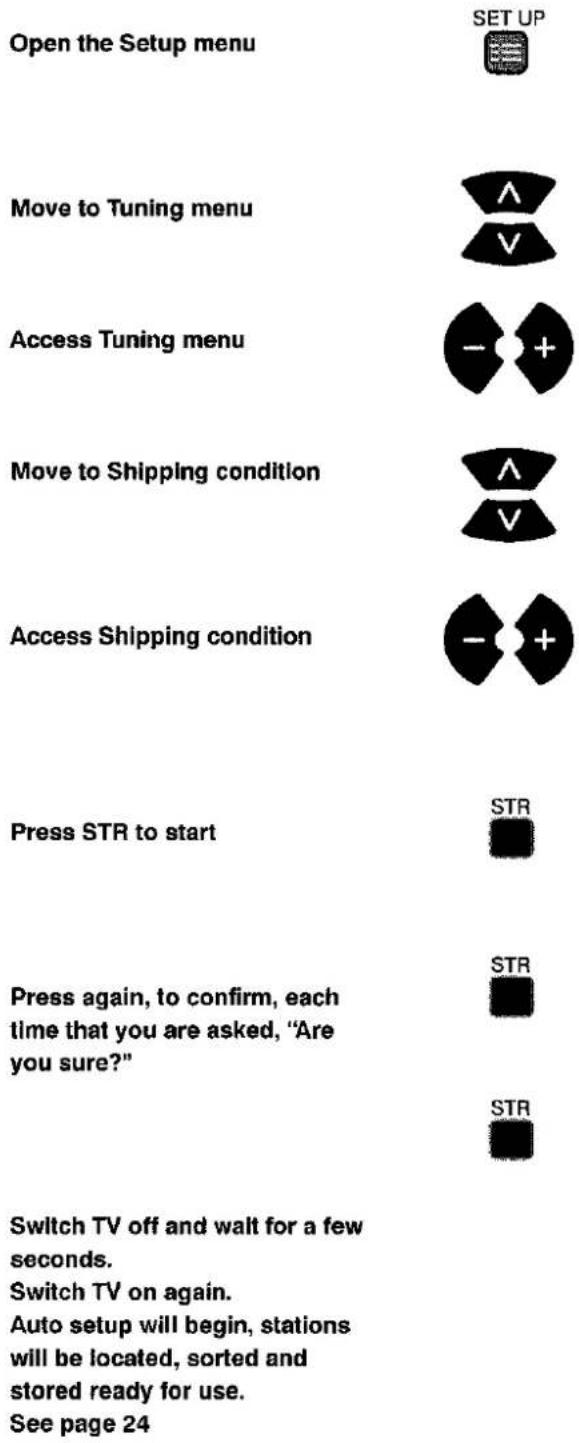
TUNING MENU - SHIPPING CONDITION
Shipping condition allows you to reset the TV to its original condition, i.e. no channels tuned in
This is useful, for example, if you move to a different area when you will probably want the TV to tune itself to your new local stations.
This can be done either through the Shipping condition menu or through the Auto setup menu.
The Shipping condition menu will reset all data, clearing all tuning information and resetting all control levels back to factory settings. You may need to adjust your VCR or programme position '0' VCR after operating the Shipping condition menu - refer to page 31.

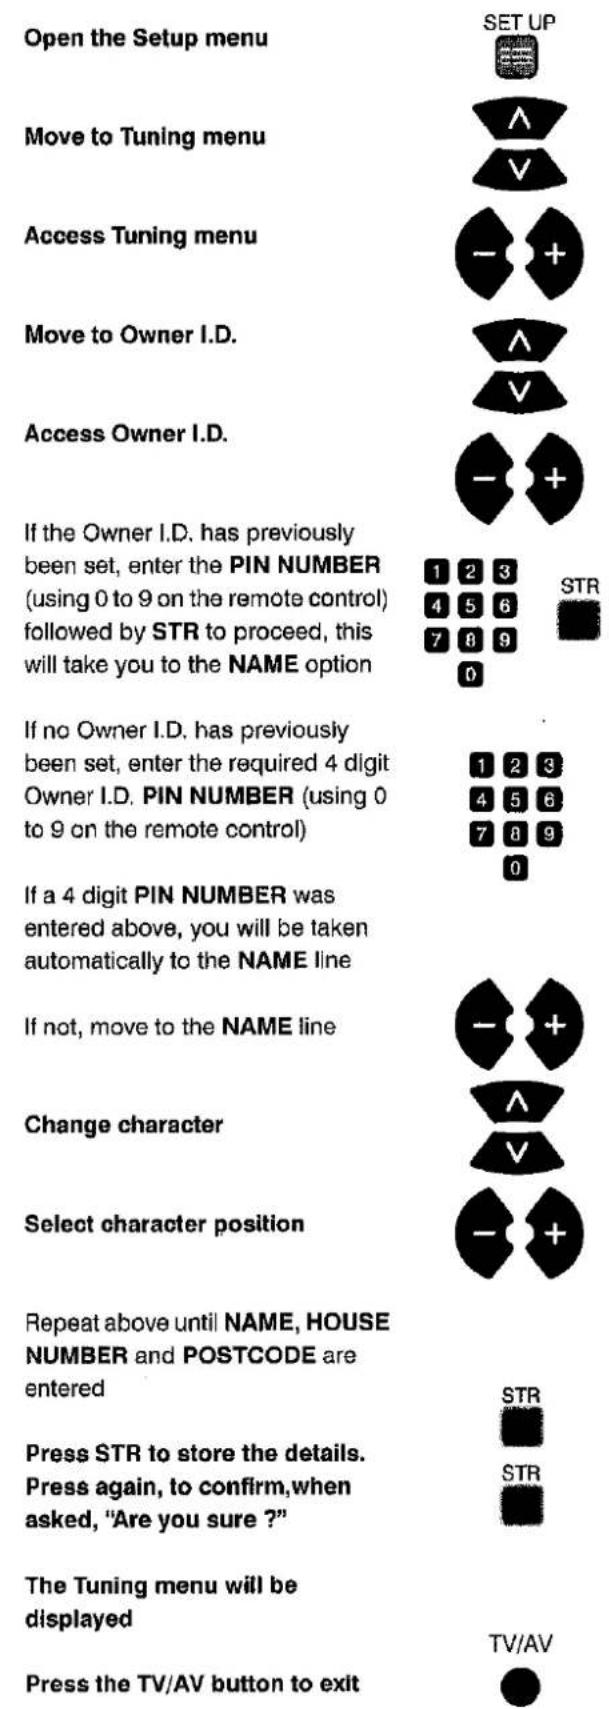
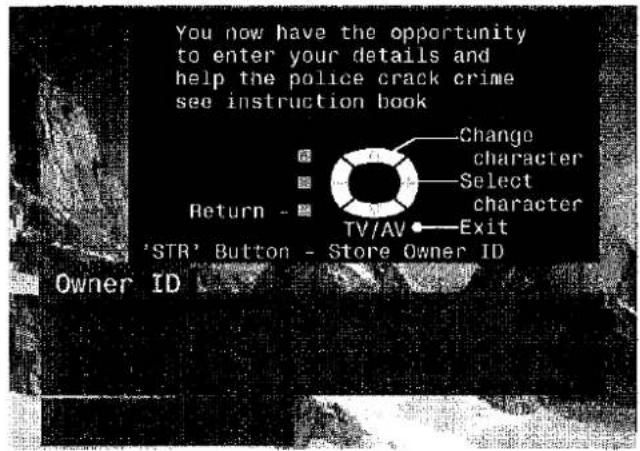
TUNING MENU - OWNER I.D.
Owner I.D. allows you to enter a security code and address information so that in the unfortunate event of theft it will help the Police to determine the owner.
If the Owner I.D. information was not entered after Auto setup or it is necessary to alter some of the I.D. information it can be re-accessed via the Tuning menu.

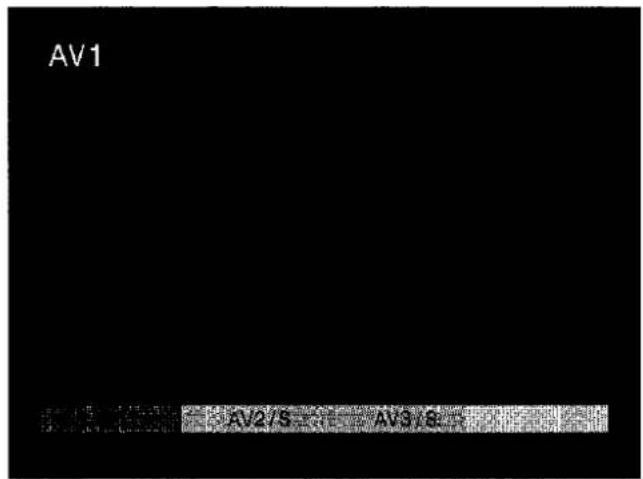
AV SELECT AND SETUP
The AV Select menu will allow you to choose which AV source to view

The options will disappear
You may wish to make adjustments in the Setup or Sound menus
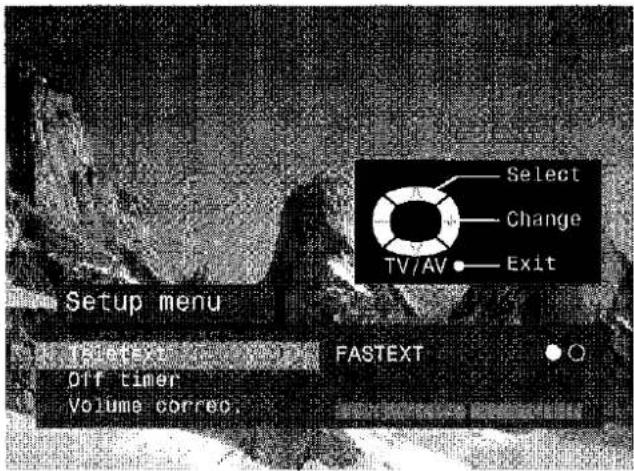
Setup menu
Open the Setup menu
Move to your choice
Access adjustments or options
Press the TV/AV button to exit


Sound menu
Open the Sound menu
Move to your choice
Access adjustments or options
Press the TV/AV button to exit


Q-LINK
Q-Link allows the television to communicate with a compatible VCR
For Q-Link communication to work, the TV must be connected to a VCR with the "Q-Link", "NEXTVIEWLINK", "DATALOGIC", "Easy Link", "Megalogic" or "SMARTLINK" logo using a "fully wired" Scart cable between the AV2 socket of the television and the appropriate socket on your VCR.
For connection to the appropriate Scart socket on the VCR, refer to the VCR operating instruction book.
When using a "NEXTVIEWLINK" VCR the main features possible are the following :
- Preset Download - Downloading of tuning information from the TV to the VCR
- Direct TV Record - For immediate recording of the current program (What You See Is What You Record).
When using a "Q-Link" VCR the main features possible are the following :
- Preset Download - Downloading of tuning information from the TV to the VCR.
- Direct TV Record - For immediate recording of the current program (What You See Is What You Record).
• TV/VCR Auto Power On - When the VCR plays a tape the TV will automatically switch On and select the AV2 input. - VCR Auto Power Standby - When the TV is switched into Standby, the VCR will also switch into Standby.
- VCR Image view - When the VCR plays a tape the TV will automatically switch On and select the AV2 input.
This TV will also communicate with other VCR's that bear the following logos :
• "DATA LOGIC" (a trademark of Metz Corporation).
- "Easy Link" (a trademark of Philips Corporation).
• "Megalogic" (a trademark of Grundig Corporation).
• "SMARTLINK" (a trademark of Sony Corporation).
These VCR's may support some or all of the above functions.
Refer to the VCR operating instruction book.
Preset Download
This allows the programme order from the TV to be downloaded to the VCR, this helps to ensure that correct recordings are made, there are several ways to perform this operation:
- During installation as explained in the 'Quick Start Guide' beginning on page 6.
- When Auto setup is started from within the Tuning menu, see page 24.
- When TV to VCR manual download is started from within 'Programme edit', see page 23.
- Preset download started from the VCR, refer to the VCR operating instruction book.
Important Note:
Not all VCRs support this type of data communication system. Some may support certain features, but not others. Refer to the VCR operating instruction book.
If Q-Link is inoperative, first confirm that your Scart cable is a "fully wired" type. Ask your dealer for further details.
What You See Is What You Record (DIRECT TV RECORDING)
This will allow the immediate recording of the program currently shown on the Television.
DIRECT
TV REC
Press the DIRECT TV REC button on the remote control

If the VCR is in Standby mode with a useable tape inserted, it will automatically switch on when you press the DIRECT TV REC button.
If a "Q-Link" VCR is connected a message will appear on the TV screen showing what is being recorded, or if it is not possible to record. Some "Q-Link" compatible VCR's will only display the message when on the VCR programme position(0) or in AV mode. Refer to the VCR operating instruction book.
VCR recording preset prog
Recording this programme now
VCR is recording the programme signal from its own tuner. If you wish you can switch off the TV and leave the VCR recording in the normal way.
VCR recording TV source
VCR is recording the programme signal from the television. You must not change programme position or switch off the TV: if you do, the VCR will automatically stop recording and switch off.
No recording - TAPE IS PROTECTED
The write protection tab on the back of the cassette has been removed.
Examples of other messages that might be displayed are:
No recording - NO TAPE
No recording - VCR IS PLAYING
VCR Recording VCR external
No recording - ALREADY RECORDING!
No recording - TAPE MAY BE DAMAGED
No recording - NO SOURCE AVAILABLE
TV / VCR Auto Power On
(With a Panasonic Q-Link VCR connected, this additional feature is available).
- If you insert a tape in the VCR and press the Play button whilst the TV is in 'Standby' mode, the TV will automatically switch On and select the AV2 input so that you can view the tape.
Some other VCR's may support this feature. Refer to the VCR operating instruction book.
VCR Auto Power Standby
(With a Panasonic Q-Link VCR connected, this additional feature is available).
When the TV is switched into 'Standby' mode, the VCR will also switch into 'Standby' mode if there is no tape in the VCR, or if there is a tape in and the VCR is in 'Rewind' or 'Stop' mode (if the VCR is rewinding a tape, it will not switch into 'Standby' mode until rewinding has finished).
Some other VCR's may support this feature. Refer to the VCR operating instruction book.
VCR Image View On
(With a Panasonic Q-Link VCR connected, this additional feature is available).
If the TV is in Standby mode and the VCR sends a menu to be displayed on the TV screen (e.g. Main menu), the TV will automatically switch On and the menu will be displayed.
Some other VCR's may support this feature. Refer to the VCR operating instruction book.
VCR AND SATELLITE RECEIVER INSTALLATION
Your new TV is supplied with programme position '0' set to receive an RF signal from your VCR, although a Scart connection is preferable if the VCR is so equipped.
However, if for some reason your VCR is tuned to a different RF channel then you will not receive any picture or sound from your VCR on programme position '0' of the TV. It will be necessary to either adjust the RF channel of your VCR (some VCR's allow adjustment of their RF channel via their remote control unit) or to adjust the tuning of the TV's programme position '0' or both until it receives the RF output channel of your VCR.
It is intended that this advice is used in conjunction with the instruction books for your additional equipment.
Use the AV1 Scart terminal for a VCR.
Use the AV2S Scart terminal for an S-Video VCR.
Use the AV2S Scart terminal for a Q-Link, NEXTVIEWLINK or compatible VCR.
To tune your TV to the VCR
Switch on the VCR, insert and play a pre-recorded tape with known content
Open the Setup menu
Move to Tuning menu
Access Tuning menu
Move to Manual tuning
Access Manual tuning
Select programme position '0' VCR
Start searching for the VCR playback of the known content tape
When the VCR playback is found, press STR to store
Press the TV/AV button to exit
See below for installation of VCR and Satellite Receiver
Notes :
- If picture patterning occurs on programme position '0' it may be necessary to adjust the RF output channel of the VCR, refer to the VCR instruction book.
- If a Satellite Receiver and a VCR are going to be used with RF cable connections it is important to avoid both units being set on the same channel. Refer to the Satellite Receiver and VCR instruction books for precise tuning information.


natural_image
Illustration of a hand opening a portable electronic device (no text or symbols visible)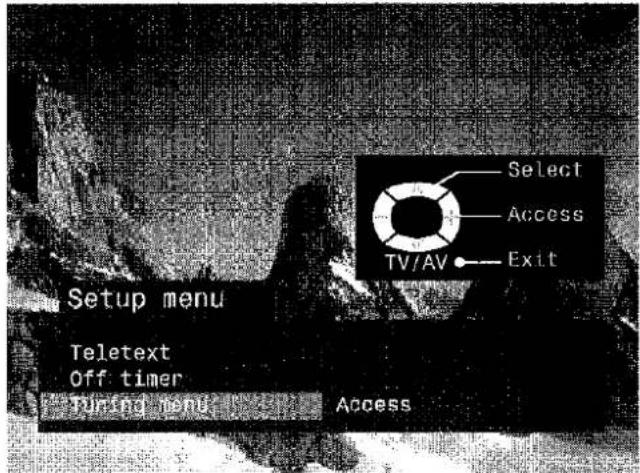
natural_image
Black-and-white photo of a coastal scene with dark silhouettes and water, no visible text or symbolsVCR / DVD OPERATION
The Remote Control is capable of operating some functions of selected Panasonic VCRs and DVD (Digital Versatile Disc) equipment. Some VCR and DVD equipment have different functions, so to ensure compatibility please refer to the equipment's instruction book or consult your dealer for details.
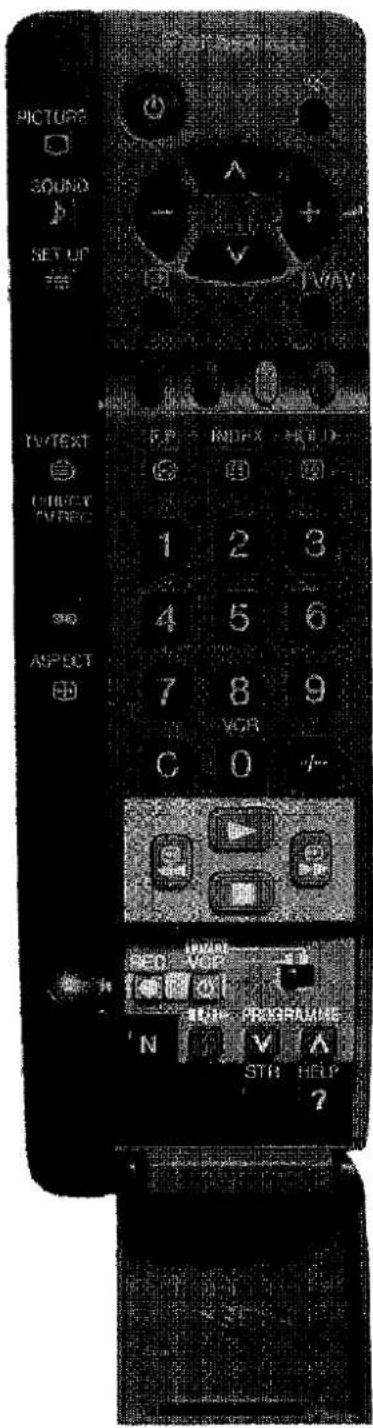
 | StandbyPress to switch the VCR or DVD to standby mode.Press again to switch back on. | |
 | VCR / DVD switchUse this switch to select whether controls operate DVD equipment or your VCR. | |
 | PlayPress to playback the tape or DVD. | |
 | StopPress to stop the tape or DVD. | |
 | Skip / Fast Forward / CueVCR: Press to fast forward the tape. In Play mode, press to view the picture rapidly forward (Cue).DVD: Press once to skip to the next track. In play mode press and hold to view the picture rapidly forward. | |
 | Skip / Rewind / ReviewVCR: Press to rewind the tape. In Play mode, press to view the picture rapidly in reverse (Review).DVD: Press once to skip to the previous track. In play mode press and hold to view the picture rapidly in reverse. | |
 | Pause / StillPress in playback mode, the picture will pause.Press again to restart play. | |
| [DSYC] [AIZH] | Programme Up / DownPress to increase or decrease the VCR programme position by one. | |
 | RecordPress this button to start recording. |
TELETEXT OPERATION
- Teletext features may vary depending on the Broadcasting Companies and is only available if the channel selected is transmitting Teletext.
- Pressing the Picture button whilst in Teletext operation will display the contrast function with a cyan bar, press ◀ to alter the setting as required.
Pressing the Setup button whilst in Teletext operation will display special function options at the bottom of the screen. - When in Teletext mode, the volume may still be altered to the desired listening level.
What is LIST mode?
In LIST mode, four differently coloured page numbers are situated at the bottom of the screen. Each of these numbers can be altered and stored in the TV's memory.
What is FASTEXT?
In FASTEXT mode, four differently coloured subjects are situated at the bottom of the display. To access more information about one of these subjects, press the appropriately coloured button. This facility enables fast access to information on the subjects shown.
TV/TEXT

TV / Teletext mode
Press the TV/TEXT button.
The screen will display the Teletext page.
Press again when you wish to return to TV mode.


Page Selection
Pages can be selected in two ways :
a. Press the Up / Down buttons to increase or decrease the page number by one.
b. By entering the page number, using 0 - 9 on the remote control.


Full / Top / Bottom
Press the SET UP button to display special functions, followed by the Green button. Press the Green button again to expand the BOTTOM half.
Press again to return to normal (FULL) size.


Reveal
Press the SET UP button to display special functions, followed by the Red button to reveal hidden words e.g. quiz page answers. Press again to hide.


Red / Green / Yellow / Blue buttons
In FASTEXT mode these correspond to the differently coloured subjects. In LIST mode they correspond to the differently coloured page numbers.


List Store
In LIST mode the four page numbers can be altered (programme positions 1 - 25 only). To do this, press one of the four coloured buttons and enter the new page number. Press and hold STR, the page numbers will change to white indicating that the page is stored.
HOLD

Hold
To hold the Teletext page when viewing multi-page information. Press again to return to automatic page update.
TELETEXT OPERATION
It is not possible to change the programme position when in News flash, Update or Sub Coded Page Access operation.


Favourite Page (F.P.)
Stores a favourite page in memory for instant recall. To store such a page, the TV must be in LIST mode, and the programme position must be from 1 - 25. Press the Blue button, select the page number, then press and hold the STR button. The page number is now stored.
Press F.P. to recall this page.


Update Display
Press the SET UP button to display special functions, followed by the Yellow button to view the TV picture whilst searching for a Teletext page. When found, the screen will display the page number at the top left. Press the Yellow button to view the page. Press TV / TEXT again to return to normal TV operation.
News Flash
When a news flash page has been selected, press SET UP, Yellow, to view the TV picture. When an update is received, the page number will be displayed on screen. Press the Yellow button to display the News Flash Press TV / TEXT to return to normal TV operation.
Update
Press SET UP, Yellow to see the update of information on certain pages. When an update is received, the page number will be displayed at the top left of the screen. Press the Yellow button to view the page. Press TV / TEXT to return to normal TV operation.


Sub Coded Page Access
When Teletext information exceeds more than one page, it may take some time for the automatic changing of the sub pages to reach the sub page you require. It is possible to enter your required sub page and continue watching the normal programme until the correct sub page is found. Select the required page number using buttons 0 - 9.
Press the SET UP button followed by the Blue button; T**** will be displayed at the top right of the screen. Enter desired sub page number before the T**** disappears. To select page 6 enter 0, 0, 0 and 6.
(If in LIST mode, a 'T' will appear in the current box at the bottom).
Press the Yellow button to view a normal TV programme. (Press SET UP, Yellow in LIST mode).
When the page is available, press the Yellow button to view the page. To clear the page perform one of the following :
- Press SET UP.
- Select a new page number.
- Press TV/TEXT to return to normal TV operation.

Index
When in FASTEXT operation
Press INDEX to return to the main index page. Depending on the way information is transmitted, this may have to be pressed more than once to return to the main index page.
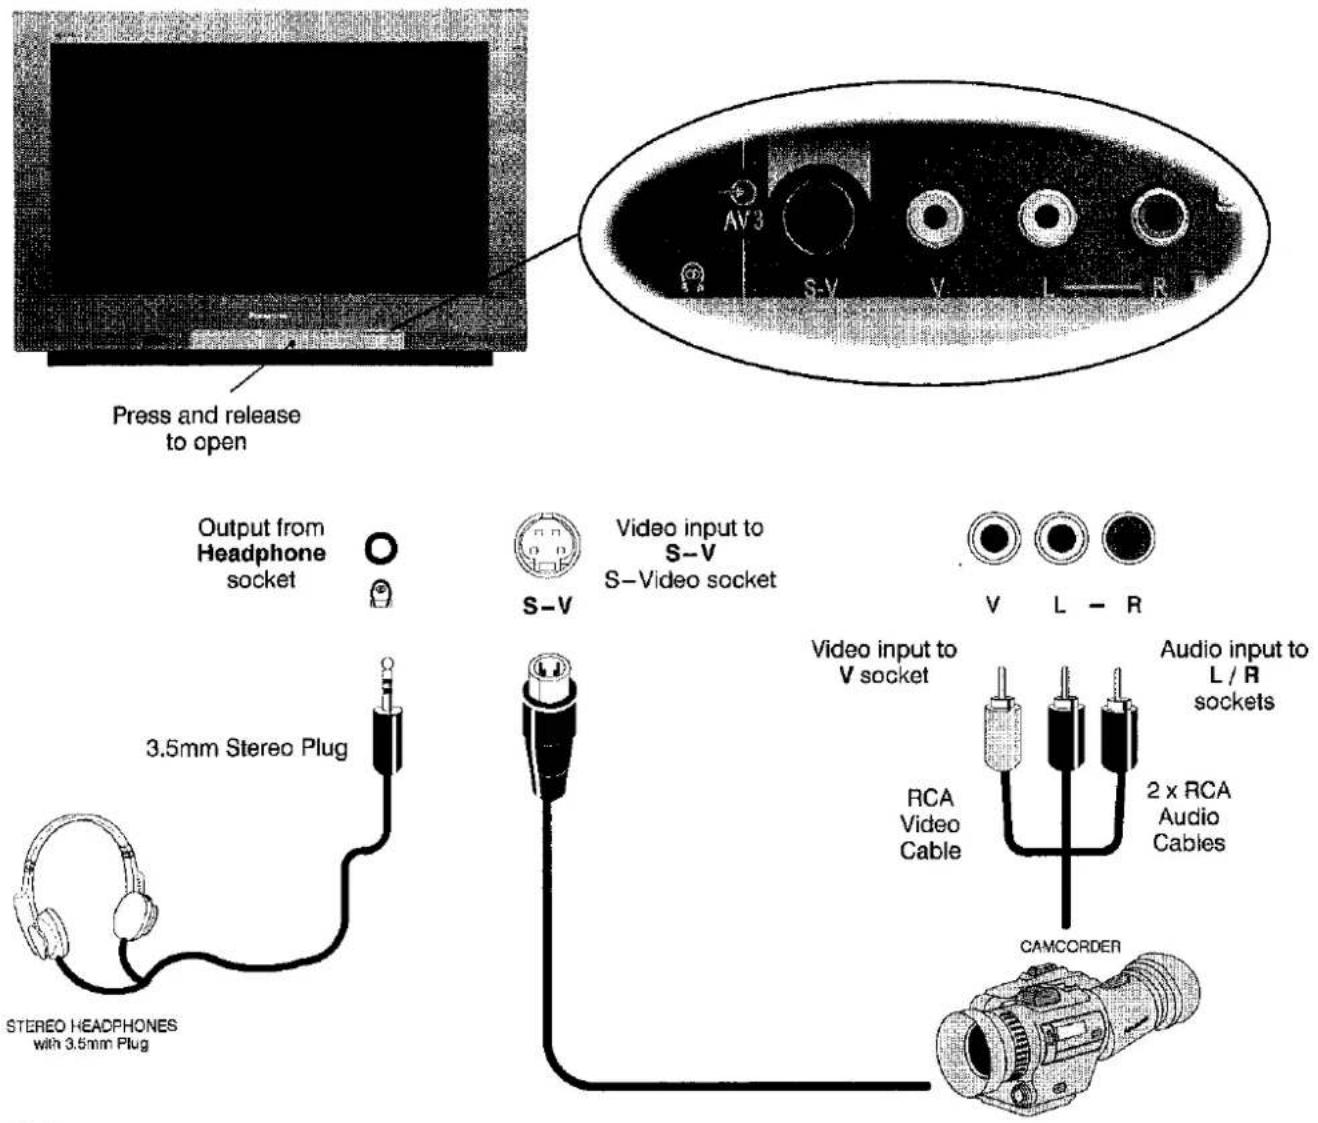
Front AV3 4 Pin S-Video, RCA Audio / Video and Headphones Sockets
Note :
Additional equipment and cables shown are not supplied with this TV set
■ Scart socket information
AV1 Scart socket
| Socket Earth | 21- | □ | - 20 | CVBS in (video) |
| CVBS out (video) | 19- | □ | - 18 | RGB status earth |
| CVBS earth | 17- | □ | - 16 | Status RGB |
| Red in | 15- | □ | - 14 | Earth |
| Red earth | 13- | □ | - 12 | -- |
| Green in | 11- | □ | - 10 | -- |
| Green earth | 9 - | □ | - 8 | Status CVBS |
| Blue in | 7 - | □ | - 6 | Audio in (L) |
| Blue earth | 5 - | □ | - 4 | Audio earth |
| Audio out (L) | 3 - | □ | - 2 | Audio in (R) |
| Audio out (R) | 1 - | □ |
Suitable inputs for AV1 include RGB (Red/Green/Blue)
AV2 Scart socket (S-Video, Q-Link)
| Socket Earth | 21- | □ | □ | - 20 | CVBS in (video) |
| CVBS out (video) | 19- | □ | □ | - 18 | Earth |
| CVBS earth | 17- | □ | □ | - 16 | -- |
| S.C. - In | 15- | □ | □ | - 14 | Earth |
| Earth | 13- | □ | □ | - 12 | -- |
| -- | 11- | □ | □ | - 10 | Q--Link data |
| Earth | 9- | □ | □ | - 8 | Status CVBS |
| -- | 7- | □ | □ | - 6 | Audio in (L) |
| Earth | 5- | □ | □ | - 4 | Audio earth |
| Audio out (L) | 3- | □ | □ | - 2 | Audio in (R) |
| Audio out (R) | 1- | □ | □ |
AV2 - Pins 15 and 20 are dependent on AV2 S-VHS / VIDEO switching
S-Video 4 pin socket
| Chrominance in | Luminance in |
| Chrominance earth | Luminance earth |
Rear AV1/AV2(S) 21 Pin Scart and RCA Audio Out Terminals
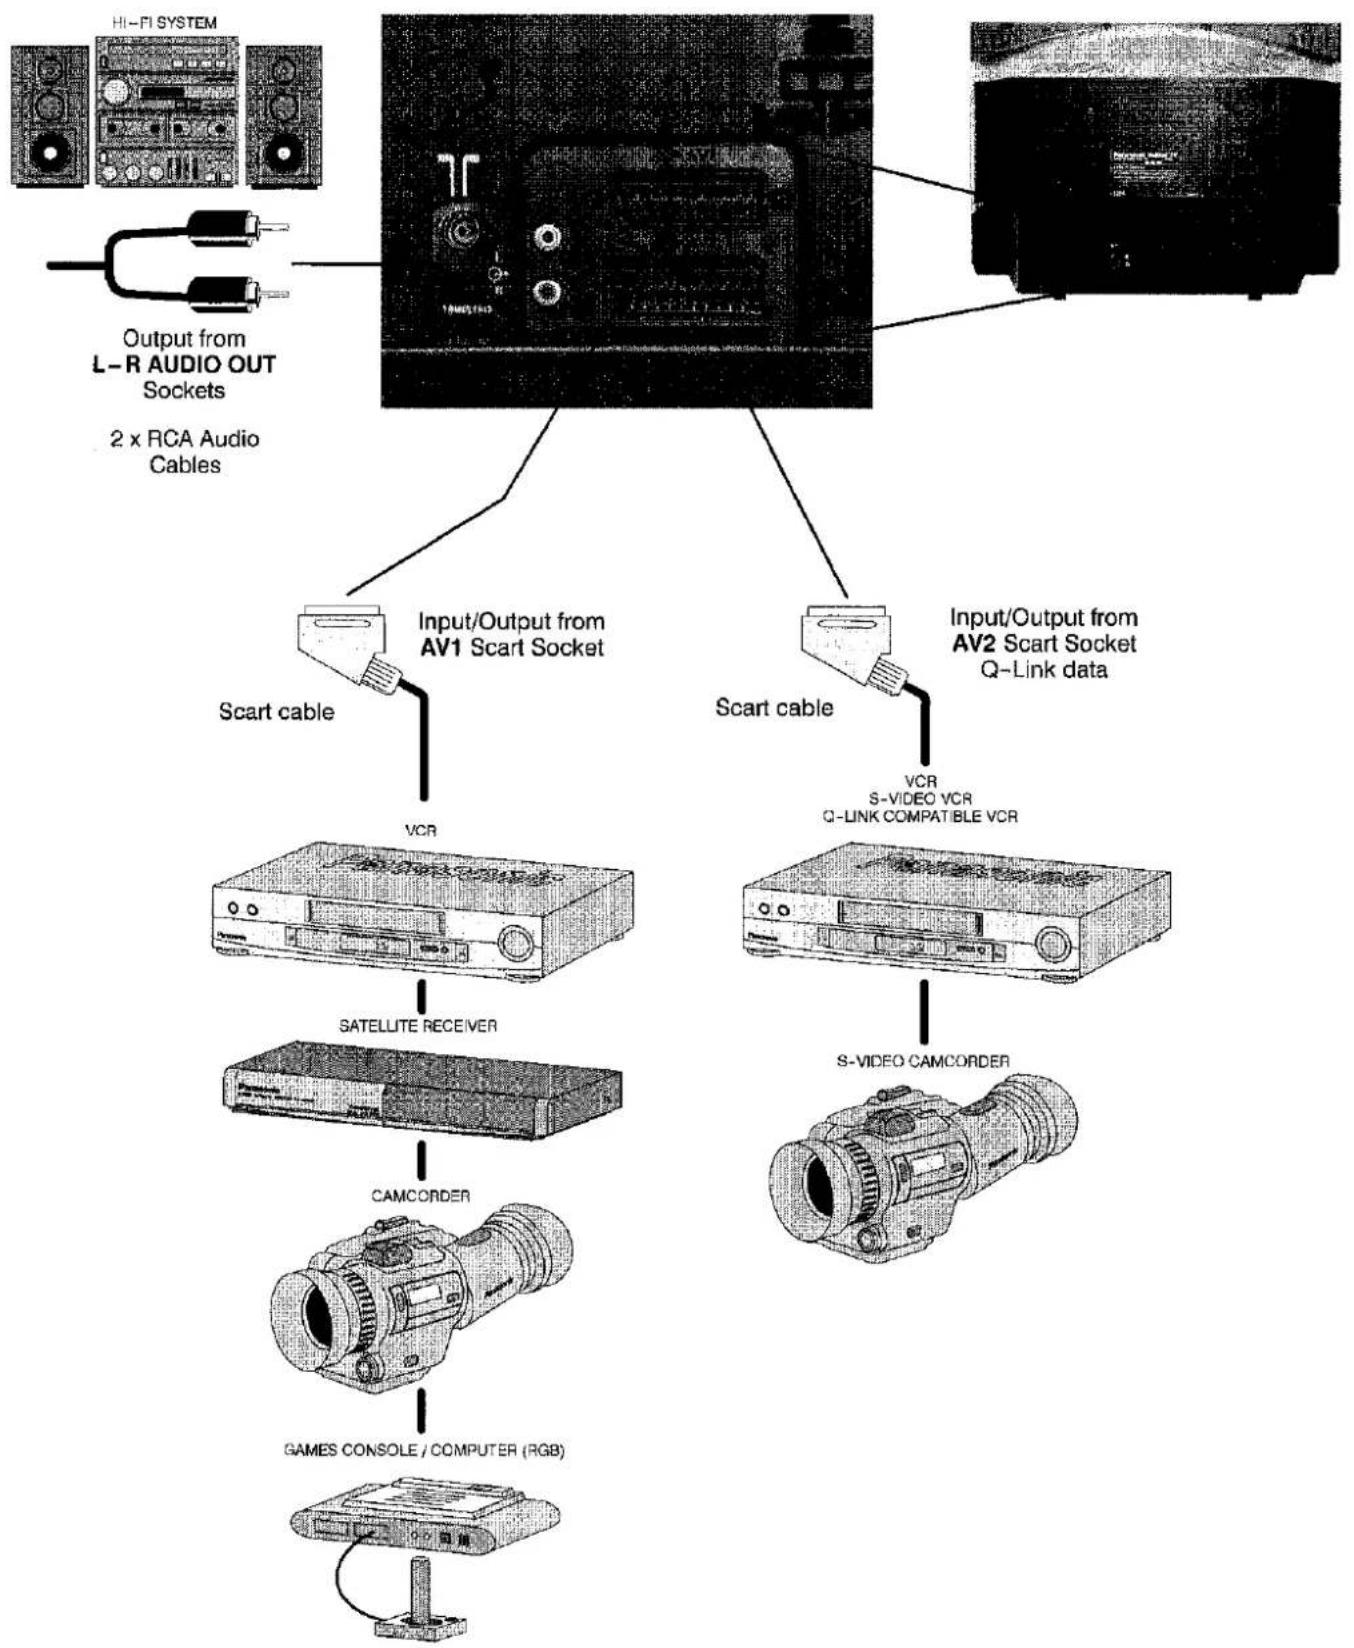
flowchart
graph TD
    A["Hi-Fi SYSTEM"] --> B["Output from L-R AUDIO OUT Sockets"]
    B --> C["2 x RCA Audio Cables"]
    D["Scart cable"] --> E["Input/Output from AV1 Scart Socket"]
    F["Scart cable"] --> G["Input/Output from AV2 Scart Socket Q-Link data"]
    E --> H["VCR"]
    G --> I["S-VIDEO VCR Q-LINK COMPATIBLE VCR"]
    H --> J["SATELLITE RECEIVER"]
    I --> K["S-VIDEO CAMCORDER"]
    J --> L["CAMCORDER"]
    K --> M["GAMES CONSOLE / COMPUTER (RGB)"]
Notes:
Additional equipment and cables shown are not supplied with this TV set.
Do not connect a computer with TTL output (5V) to this set.
TROUBLESHOOTING
| Symptoms | Checks | ||
| Picture | Sound | ||
 Snowy Picture Snowy Picture |  Noisy Sound Noisy Sound | Aerial location, direction or connection | |
 Multiple Images Multiple Images |  Normal Sound Normal Sound | Aerial location, direction or connection | |
 Interference Interference | 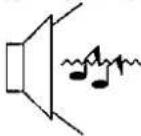 Noisy Sound Noisy Sound | Electrical appliances Cars / Motorcycles Fluorescent lights Switch on P-NR in Picture menu to reduce picture noise | |
 Normal Picture Normal Picture |  No Sound No Sound | Volume level Sound mute switched on | |
 No Picture No Picture |  No Sound No Sound | TV set to AV mode Not plugged into A.C. outlet Not switched on Picture / Sound controls set at minimum levels Check if in standby mode | |
 No Colour No Colour |  Normal Sound Normal Sound | Colour controls set at minimum levels | |
 Poor or Distorted Picture Poor or Distorted Picture | 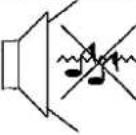 Weak or No Sound Weak or No Sound | Retune Channel(s) | |
 Coloured Patches Coloured Patches |  Normal Sound Normal Sound | Magnetic Interference from unshielded equipment Receiver moved while switched ON, switch TV off for 30 minutes. If picture is also tilted, use Geomagnetic Correction feature (see Quick Start Guide, page 11) | |
 Normal Picture Normal Picture |  Weak or distorted sound Weak or distorted sound | Sound reception may have deteriorated. Switch NICAM setting (Sound menu) to Off until reception improves. | |
FOR YOUR GUIDANCE
■ Service
Before requesting service, please refer to the trouble-shooting guide on previous page to determine the symptoms. To obtain service please contact your local Panasonic dealer quoting the model number and serial number (both are located at the rear of the TV).
■ TV Games / Home Computers
Extended use of TV games or home computers with any television set can cause a permanent 'shadow' on the screen. This type of irreversible picture tube damage, can be limited by observing the following points:
- Reduce the brightness and contrast levels to a minimum viewing level.
- Do not operate the television set for a continuous period of time while using TV games or home computers.
- This type of picture tube damage, is not an operating defect, and as such is not covered by the Panasonic warranty.
■ Last Position Memory
Certain functions have a last position memory, i.e. the setting at the time of switch-off will be the setting used when the receiver is switched on again:-
| Programme | Tint (M.NTSC / NTSC only) |
| Mode | Volume correction (in AV mode only) |
| AV Position | Contrast |
| Volume | Sharpness |
| NICAM | Aspect mode |
| Bass | Standby |
| Treble | Artificial Intelligence (AI) |
| Balance | Colour |
| Colour Balance | Brightness |
| Status | P-NR |
| Teletext mode | Decoder (AV2) |
| Ambience |
■ Sleep Feature
If the set is not switched off when the TV station stops transmitting, it will automatically go to standby mode after 30 minutes. This function will not operate when the TV is in AV mode.
SPECIFICATIONS
| TX-32PK3 | ||
| Power Source | 220 - 240V 50Hz A.C. | |
| Power Consumption | 106W | |
| Standby Consumption | 1.4W | |
| Picture TubeVisible Diagonal | 76 cm | |
| Audio OutputMusic Power | Front Left / Right 15W x 2,8Ω impedance | |
| Dimensions | H | 558 mm |
| W | 812 mm | |
| D | 572 mm | |
| Weight (Kg) | 57 | |
| Receiving Systems/ Band name | PAL I | UHF E21-68 |
| PAL 525/60 | Playback of NTSC tape from some PAL Video recorders (VCR) | |
| M.NTSC | Playback from M.NTSC Videorecorders (VCR) | |
| NTSC (AV input only) | Playback from NTSC Videorecorders (VCR) | |
| Aerial - Rear | UHF | |
| Headphones - Front | 3.5mm, 8Ω impedance | |
| AV - Rear | AV1 - 21 pin terminal - Audio / Video in / out, RGB inAV2 - 21 pin terminal - Audio / Video in/out, S-Video in, Q-Link2 x RCA Audio Monitor Out | |
| AV - Front | AV3 - S-Video in, RCA Audio / Video in | |
Specifications are subject to change without notice. Weight and dimensions shown are approximate.
