
ECJ-D55S - Cuiseur de riz SANYO - Notice d'utilisation et mode d'emploi gratuit
Retrouvez gratuitement la notice de l'appareil ECJ-D55S SANYO au format PDF.


| Type de produit | Cuiseur de riz micro-ordinateur |
| Marque | SANYO |
| Modèle | ECJ-D55S |
| Capacité de cuisson (riz blanc) | 1 à 5,5 tasses (180 ml par tasse) |
| Dimensions (L x H x P) | 245 mm x 321 mm x 214 mm |
| Poids | 2,8 kg (6,2 lb) |
| Consommation électrique (cuisson) | 610 W |
| Consommation électrique (maintien au chaud) | 30 W |
| Tension d'alimentation | 120 V AC, 60 Hz |
| Longueur du cordon d'alimentation | 1,4 m (55 1/8 po) |
| Fonctions de cuisson | Riz blanc/mélangé, riz sans rinçage, riz germé, rapide, brun, porridge, mijotage/soupe, cuisson vapeur |
| Minuterie | Programmation jusqu'à 12 heures à l'avance |
| Maintien au chaud | Jusqu'à 12 heures automatique après cuisson |
| Réchauffage | Fonction de réchauffage du riz |
| Cuisson vapeur | Avec plateau vapeur fourni |
| Affichage | Horloge numérique et minuteur |
| Pile interne | Lithium (durée de vie 4-5 ans) pour sauvegarde de l'horloge |
| Matériau de la cuve intérieure | Revêtement antiadhésif en fluororésine |
| Accessoires inclus | Spatule, support de spatule, tasse à mesurer, plateau vapeur |
| Entretien et nettoyage | Nettoyer la cuve et le couvercle intérieur avec une éponge douce et du détergent ; essuyer le corps et le couvercle extérieur avec un chiffon humide |
| Sécurité | Arrêt automatique, protection contre la surchauffe, verrouillage du couvercle |
| Réparabilité | Réparation par un centre de service agréé SANYO |
FOIRE AUX QUESTIONS - ECJ-D55S SANYO
Questions des utilisateurs sur ECJ-D55S SANYO
0 question sur cet appareil. Repondez a celles que vous connaissez ou posez la votre.
Poser une nouvelle question sur cet appareil
Téléchargez la notice de votre Cuiseur de riz au format PDF gratuitement ! Retrouvez votre notice ECJ-D55S - SANYO et reprennez votre appareil électronique en main. Sur cette page sont publiés tous les documents nécessaires à l'utilisation de votre appareil ECJ-D55S de la marque SANYO.
MODE D'EMPLOI ECJ-D55S SANYO
INSTRUCTION MANUAL
MICRO-COMPUTERIZED
RICE COOKER/WARMER
ECJ-D55S (5.5 Cups) ECJ-D100S (10 Cups)
HOUSEHOLD USE ONLY
| Thank you for your purchase of a Sanyo Rice Cooker/Warmer. Please read these instructions carefully before use and be sure to keep the manual in a safe place for future reference. | Table of Contents: PageImportant Safeguards....3Precautions....4-6Names and Function of Parts....7Setting the Clock....8How to Cook Rice....9-10How to Use Timer Cooking....11Reheating....12Steaming....13Stewing / Slow Cooking / Specifications....14Cleaning and Maintenance....15Troubleshooting....16Recipes....17-20Warranty....21 |
| 感謝您購買三洋保温電飯鍋。使用前請仔細閱讀說明書,並確保將它收藏好,以備隨時參閱。 | 目錄頁次Important Safeguards....3Precautions....4-6部件名稱與功能....22如何設定時鐘....23如何煮飯....24-25如何設定煮食時間....26如何將米飯再加熱....27蒸菜....28燉煮/煮湯/規格....29清理及保養....30故障檢查....31Recipes....17-20Warranty....21 |
| 산요 보온밥솔을 구입해 주셔서 감사합니다. 사용 전에 이 설명서를 잘 읽어보시고 나중에 참고할 수 있도록 가까운 곳에 보관 해두십시오. | 차 레페이지Important Safeguards....3Precautions....4-6각부의 명칭 및 기능 조작부....32현재 시간 맞추기....33밥 젖는 방법....34-35예약 취사 방법....36밥 재가열 방법....37채소 증기 짧 하기....38점 요리하기/제품 규격....39손질 관리하기....40고장 해결하기....41Recipes....17-20Warranty....21 |
| お買い上げまことにありがとうございます。この「取扱説明書」をよくお読みのうえ正しくお使いください。お読みになった後は、大切に保存してください。 | もくじページImportant Safeguards....3Precautions....4-6各部のなまえと使いかた....42時計の合わせかた....43ごはんの炊きかた....44-45予約炊飯のしかた....46再加熱のしかた....47野菜の蒸し方....48シチュー/スープの作り方/仕様....49お手入れのしかた....50故障かな?と思ったら....51Recipes....17-20Warranty....21 |
IMPORTANT SAFEGUARDS
When using electrical appliances, follow basic safety precautions to reduce the risk of fire, electrical shock, and/or injury:
- Read all instructions.
- Do not touch HOT surfaces. Use handles or knobs.
- To protect against fire, electrical shock, and personal injury, do not immerse cord, plugs or appliance in water or other liquid.
- Close supervision is necessary when the appliance is used by or near children.
- Unplug unit from outlet when not in use and before cleaning. Allow to cool before attaching or removing parts, and before cleaning the appliance.
- Do not operate any appliance with a damaged cord or plug after the appliance malfunctions or has been damaged in any manner. Return appliance to an authorized service facility for examination, repair or adjustment.
-
To protect against risk of electrical shock, do not force any foreign objects, such as pins and wires, into any openings.
-
The use of accessory attachments not recommended by the appliance manufacturer may result in fire, electric shock or personal injury.
- Do not use outdoors.
- Do not let cord hang over edge of table or counter, or touch hot surfaces.
- Do not place the appliance on or near a hot gas or electric burner, or in a heated oven.
- Extreme caution must be used when moving an appliance containing hot oil or other liquids.
- Do not clean the appliance with cleansers, steel wool pads, or other abrasive material.
- Always attach plug to appliance first, then plug cord into the wall outlet. To disconnect, turn the switch to its "Off" position then remove the plug from wall outlet.
- Do not use appliance for other than intended use. This product is designed for household use only.
SAVE THESE INSTRUCTIONS
Note:
A. A short power-supply cord is provided to reduce risks of becoming entangled in or tripping over a longer cord.
B. Extension cords are available and may be used if care is exercised in their use.
C. If extension cord is used:
(1) The marked electrical rating of the extension cord should be at least as great as the electrical rating of the appliance.
(2) The longer cord should be arranged so that it will not drape over the countertop or tabletop where it can be pulled on by children or tripped over.
The appliance has a polarized plug (one blade is wider than the other is).
As a safety feature, this plug will fit in a polarized outlet only one way. If the plug does not fit fully in the outlet, reverse the plug. If it still does not fit, contact a qualified electrician. Do not attempt to override this safety feature.
WARNING: Handling the cord on this product or cords associated with accessories sold with this product, will expose you to lead, a chemical known to the State of California to cause cancer, and birth defects or other reproductive harm. Wash hands after handling.
The important precautions described within this section must be followed carefully to prevent the possibility of personal injuries and/or property damage. The significance of the following cautionary symbols is explained below:
- The potential hazards that may exist if these precautions are not followed are denoted by WARNING and CAUTION.
⚠ WARNING: Circumstances that may result in serious injury or death.
⚠️ CAUTION: Circumstances that may result in personal injury or property damage.
- The explanations below describe the importance of the symbols used throughout this manual.

Indicates prohibited actions (Don't do this).

Generally prohibited.

Do not disassemble.

Do not touch with wet hands.

Indicates actions that must be performed (Do this).

Do not allow.

Do not touch.

This action must be performed.

Disconnect the power supply plug.

WARNING
- Use only 120 Volt AC electrical current.

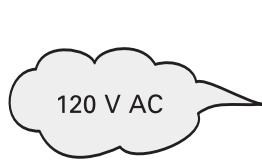
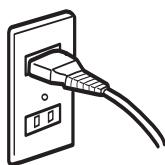
Using any other power supply voltage may result in fire and electric shock.
• Always keep the power supply plug clean.

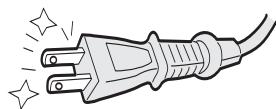
If the power supply plug blades or plug surfaces become dirty, be sure that they are cleaned thoroughly. A dirty power supply plug can potentially cause a fire.
- Do not attempt to modify the appliance.

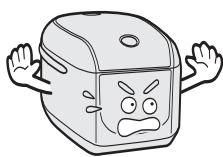
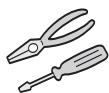
Improper repair may cause fire, electric shock and injury. All repairs must be performed by qualified technicians. If repair is necessary, take it to an authorized repair center.
- Plug the appliance into a single electrical outlet only.

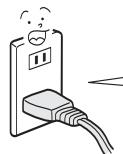
Do not share outlet with other appliances.
Use only an electrical outlet rated at 15 amperes or more. If electrical outlets are shared with other appliances, the circuit may become hot potentially causing a fire.
- Make sure that the power supply plug is firmly inserted all the way into the electrical outlet.

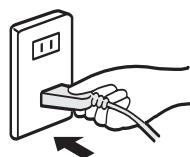
A fire, electric shock or short circuit may result if the plug is not fully inserted into the outlet.
- Do not attempt to plug in or unplug with wet hands.

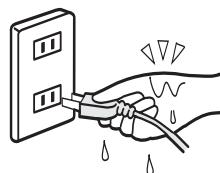
This action may cause a short circuit or electric shock.

WARNING
- Do not touch the steam vent.
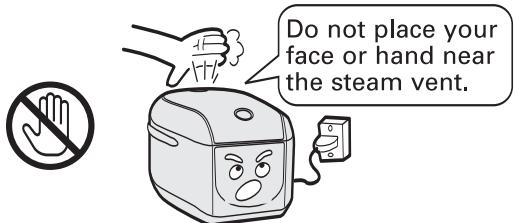
This action may result in burn injuries. Take special precautions to make sure that infants do not touch it.
- Do not operate the appliance if the power supply cord or plug has been damaged.

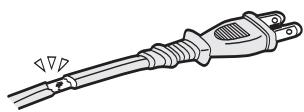
A loose or damaged plug may result in electric shock, short circuit or fire.
- Do not allow children to use this appliance without adult supervision.

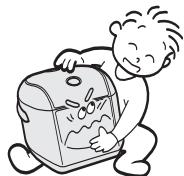
Do not operate the appliance within the reach of an infant. This may lead to electric shock, burns or other injuries.
- Do not immerse the appliance in water and do not pour water onto it.

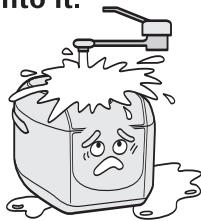
This action may cause a short circuit or electric shock.
- Do not handle the power supply cord in a rough manner.


Do not cause damage to the power supply cord by bending, pulling, twisting, or placing the cord near hot appliances. Also, do not place heavy objects on the cord. These actions may result in damage to the power supply cord, possibly leading to electric shock and fire.
- Do not insert any foreign objects into appliance openings or outlets.

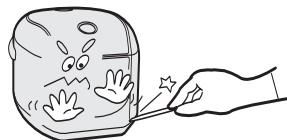
Do not insert any metallic objects, such as pins or wires into the appliance. This action may cause electric shock or appliance malfunction, resulting in injury.

CAUTIONS
- Grasp only the plug when unplugging the power supply cord.

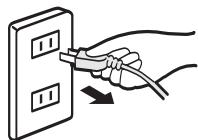
Do not pull the power supply cord itself when unplugging the electrical plug. Doing so may cause electric shock or short circuit, potentially causing a fire.
- Allow the appliance to cool off prior to cleaning. Allow the
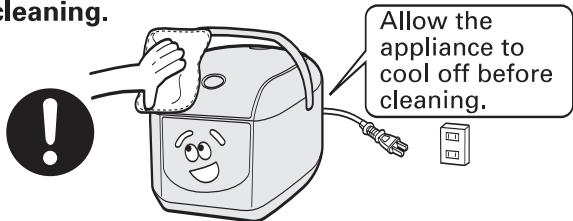
Performing maintenance while the appliance is still hot, may lead to burn injuries.
- Hold the power supply plug when rewinding the power supply cord.

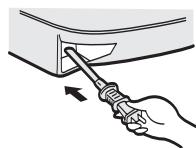
If the plug is not held, the uncontrolled moving cord may cause injury.
- Unplug the power supply plug from the outlet when the appliance is not being used.

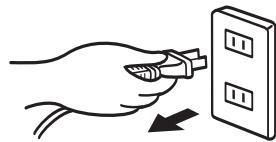
Any existing electrical insulation problems may cause electric shock or sparking, leading to burns or other injuries.

CAUTIONS
- Do not touch the metal part on the inside of the lid or inner lid during or immediately after operation.

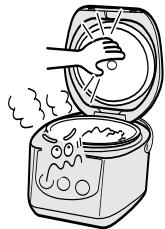
This action may cause burn injuries.
- Do not touch the Lid Release button while carrying the appliance.

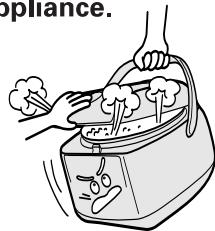
The Outer Lid may open, possibly resulting in burn injuries.
- Do not operate the appliance near flames or wet areas.

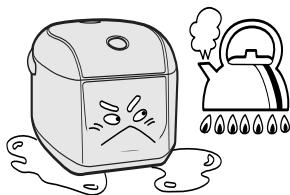
This action may cause electric shock or sparking.
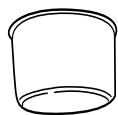
- Do not use any Inner Pot other than provided.

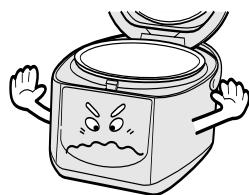
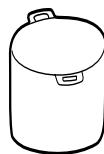
Doing so may cause overheating and leading to a malfunction.
- Do not operate the appliance on an unstable surface or on any surface that is not resistant to heat.

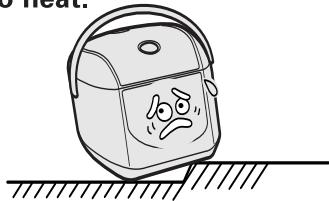
This operation may cause fire.
- Do not place the appliance near walls or furniture (within 12"/30cm).

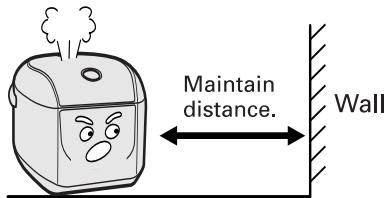
Doing so may cause damage, possibly resulting in discoloration or disfiguration of the wall or furniture.
PRECAUTIONS
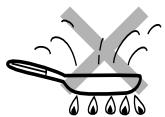
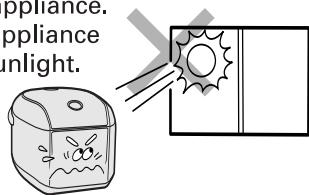
Do not place the appliance in the following locations:
- Locations where hot cooking oil may splash onto the appliance.
- Locations where the appliance is exposed to direct sunlight.
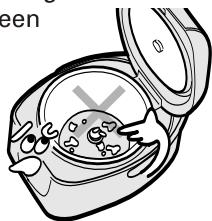
Remove all foreign substances.
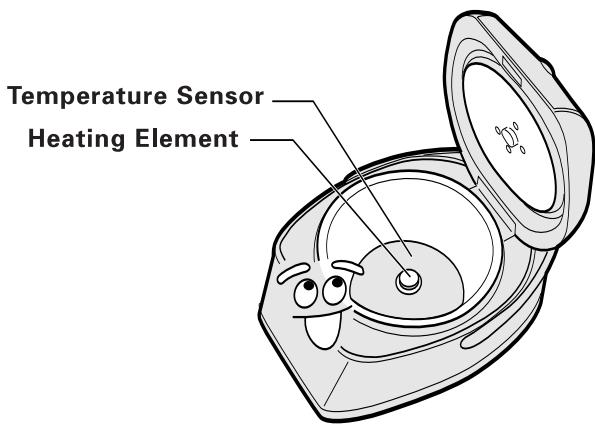
- Make sure that all rice grains and water drops on the appliance's inner wall, the outside of the Inner Pot, the lid flange, the heating element and the temperature sensor have been completely removed, before using appliance.
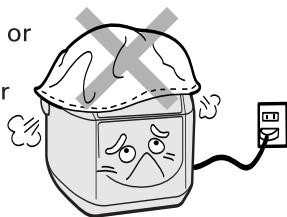
Do not place a cloth or towels over the appliance during operation.
- This action may cause appliance malfunction or result in the Outer Lid becoming deformed or discolored.
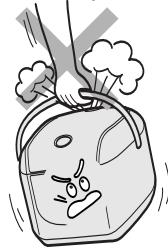
Do not shake the appliance by the handle.
- While rice is cooking, keep the handle folded down behind the appliance and do not carry it.
Not doing so may cause scalding burns or handle deformation may occur, due to escaping steam.
- If carrying the appliance immediately after use, use caution to avoid the steam that is released from the steam vent.
Inner Lid
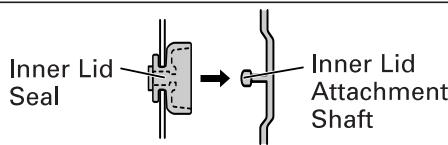
Make sure that the Inner Lid Seal is aligned with the Inner Lid Attachment Shaft.
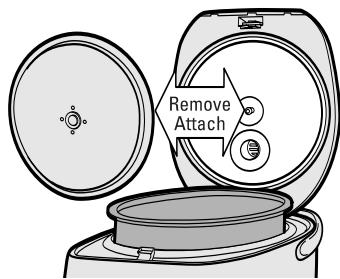
How to Remove:
Pull the Inner Lid towards you.
How to Attach:
Push the Inner Lid onto the Inner Lid Attachment Shaft.
Lid Release
Press the Lid Release to open the Outer Lid.
Inner Lid Seal
Outer Lid Seal
Handle
Use for carrying the unit.
Control Panel
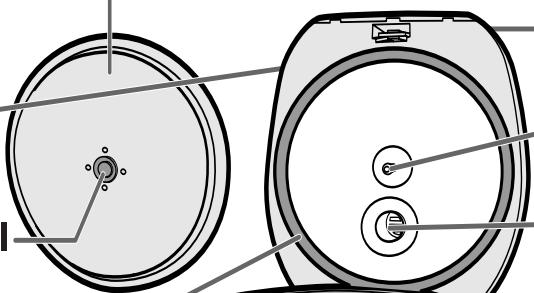
Inner Pot
Outer Lid
Inner Lid Attachment Shaft
Steam Vent
Cautions
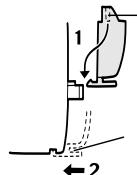
Spatula Holder
• How to Attach: Insert the hook into the support fitting.
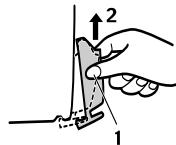
• How to Remove:
-
Press both sides to release hook.
-
Pull it up.
ACCESSORIES (one each)
Spatula
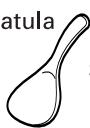
Spatula
Holder
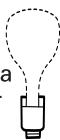
Measuring

Steaming Tray
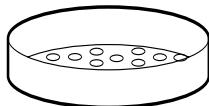
POWER SUPPLY CORD (Cord Reel)
- Hold the power supply plug and pull out the cord. Do not pull out the cord beyond the red mark.
- Tug slightly and release to reel in the cord.
CONTROL PANEL
KEEP WARM Lamp
Lights when rice is being kept warm and when rice is being reheated.
KEEP WARM/OFF Button
TIMER Button
When pressed, the TIMER lamp will flash. If the COOK/REHEAT button is pressed, the TIMER lamp will light and the timer will start. ( page 11)
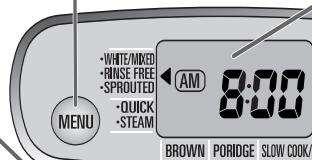
MENU Button
( page 10)
KEEP WARM
OFF
TIMER
The unit will beep each time the button is pressed.
DISPLAY PANEL
HRS/MIN Button
( page 8)
TIMER Lamp
COOK Lamp
COOK/REHEAT Button
When pressed, the COOK lamp will light, and cooking will start. (3 page 10) Reheating will start if this button is pressed during warming. (3 page 12)
HOW TO SET THE CLOCK
- The time shown on the appliance's clock has been preset to standard time.
- Set the clock according to the following procedure if the time becomes incorrect due to room temperature or other reason.
- The clock cannot be set while the timer is being used for cooking or warming.
- The current operation can be canceled by pressing the KEEP WARM/OFF button.
- Be sure to set the clock to the correct time because timed cooking will not function properly if the time is incorrect.
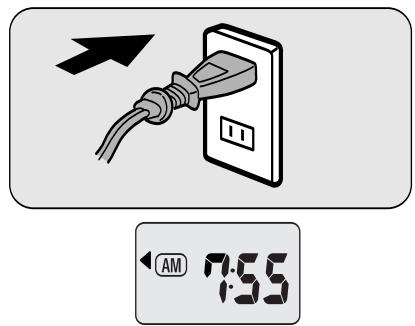
EXAMPLE: When the current time is 8:00am, but the display shows 7:55am.
1 Plug in the power supply plug.
2 Press the HRS or MIN button until the time display begins to flash.
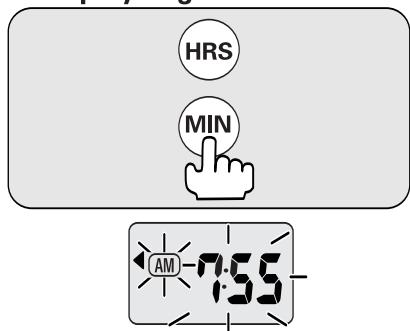
The time display will begin to flash.
3 Press HRS and MIN to set the correct time.
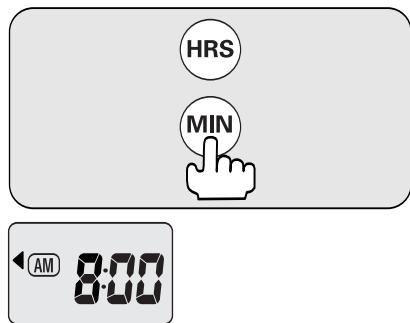
- Press HRS to set "8". Press MIN to set "00".
- Holding down the buttons will allow the display to fast forward.
- The clock display will stop flashing after 6 seconds.
- The time setting completes when the clock display stops flashing.
THE BUILT-IN LITHIUM BATTERY
- The appliance's internal lithium battery provides power to retain the time display and the timer setting, even when the power supply plug has been disconnected.
- The battery life expectancy is 4-5 years at a room temperature of 68°F / 20°C . The battery may last longer when the appliance is plugged into the wall outlet because the battery power is not consumed.
- When the battery begins reaching the end of its life, the display will appear weaker and the timer setting will not be maintained while the appliance is unplugged. When the battery weakens, the appliance can still be used as usual as long as it is plugged in.
- A replacement battery can be purchased at the store where your appliance was purchased or visit www.sanyoservice.com.
POWER FAILURE WHILE THE UNIT IS IN OPERATION
(Information given in this section includes times during operation when the plug is pulled or a circuit breaker goes out.)
- If the power fails momentarily, the appliance will return to the same mode it was in prior to the failure.
- In the event of a longer power outage, the following will occur once power is restored:.
| During Timer Operation | During Cooking | While Rice is being Kept Warm |
| The appliance will immediately begin cooking if the time has passed the cooking start time.The rice may not be cooked by the exact time programmed in the timer. | Cooking will continue, however, the rice may not be cooked properly.If a little cooking time remains, the appliance may switch to the KEEP WARM mode. | The appliance will continue to keep the rice warm. |
1 Accurately measure the rice, then wash it.
Correct

Incorrect


• Measure the rice using measuring cup provided. 1 cup equals 180 ml.
- The Inner Pot can be used to wash rice.
WATER LEVEL
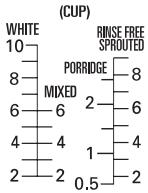
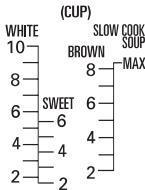
ECJ-D100S
HOW TO COOK RINSE-FREE RICE
- Fill the Inner Pot with water, up to the RINSE-FREE level. Place the Inner Pot into the main unit.
- Select WHITE/MIXED, RINSE-FREE, SPROUTED from the menu, then begin cooking.
HOW TO COOK SPROUTED BROWN RICE
- Mix washed white rice with sprouted brown rice.
- White rice to Sprouted Brown rice ratio: 2 cups of White rice to 1 cup of Sprouted Brown rice is the ideal ratio. Adjust the amount of rice based on personal preferences.
- Fill the Inner Pot with water up to the RINSE-FREE, SPROUTED level. Place the Inner Pot into the main unit.
- Select WHITE/MIXED, RINSE-FREE, SPROUTED from the menu, then begin cooking.
2 Add the correct amount of water and place the Inner Pot into main unit.
Example: To cook 3 cups of rice.
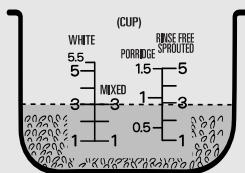
ECJ-D55S
- Choose the level of water, based on the selected menu setting and the quantity of the rice being cooked.
- If the water level is incorrect, excess water may boil over.
- To cook mixed rice, fill the Inner Pot with water up to the level for MIXED.
• To cook rinse free rice or sprouted brown rice, follow the steps described to the left.
• To cook porridge, add water according to the table below. - For more delicious results with brown rice, soak the rice in water for about two hours or more before cooking.
- Adjust the water level according to your own preference. The water level may be adjusted by up to 1/4 of a graduation level. If the amount of water is too great, it may boil over.
- Make sure that any rice grains or water droplets remaining on the outside of the Inner Pot or the inner wall of the main body are removed. Water remaining in these areas may cause noise during the cooking process.
- Gently turn the Inner Pot from side to side a few times to level the rice.
WATER MEASUREMENT GUIDELINES FOR PORRIDGE
| Quantity of Rice | Porridge Water Level | |
| Regular | Soft | |
| 0.5 cup | Up to “0.5” mark | Up to “1” mark |
| 1 cup | Up to “1” mark | Up to “2” mark(Used only for ECJ-D100S) |
3 Attach the Inner Lid and close the Outer Lid.
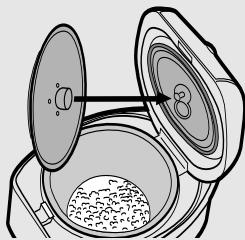
- Align the center hole located on the Inner Lid Seal with the Inner Lid Attachment Shaft.
- Securely close the Outer Lid until you hear a click.
- Make sure that there are no foreign objects such as rice grains, between the Inner Lid and the Inner Pot or between the Inner Pot and Outer Lid Seal.
- Any foreign object between them will cause steam to escape or water to boil over.
Example: To cook 3 cups of rice.

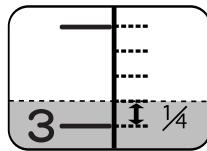
INNER POT INFORMATION
To prevent damage to the fluorine resin-coated surface:
- Do not wash rice using hard objects, such as metal whisks.
- Use provided spatula for serving rice.
- Do not wash hard objects, such as spoons or rice bowls within the Inner Pot.
- Do not use vinegar in the Inner Pot.
- Some discoloration of the Inner Pot may occur through normal use. This discoloration is completely safe and poses no health hazard.
4 Plug in power supply cord and select MENU.
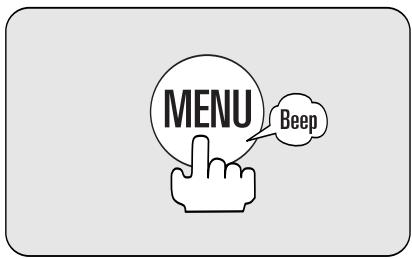
- You cannot select a menu or cook rice until the power supply plug is plugged into the outlet.
- You cannot select a menu or cook rice while the KEEP WARM lamp is on. Press KEEP WARM/OFF button to cancel KEEP WARM mode.
- Pressing the MENU button will move the ◀ mark and change the menu as follows:
![graph TD A["WHITE/MIXED"] --> B["RINSE-FREE"] B --> C["SPROUTED"] C --> D["QUICK"] D --> E["STEAM"] E --> F["BROWN"] F --> G["PORRIDGE"] G --> H["SLOW COOK/SOUP"] H --> I["Next Step"]](/content/2025/01/96739/images/49a858c066a66ffc749c8ff13622ac5fcb19e365ea604a18efe5d1d6835b052c.jpg)
- Select QUICK/STEAM for faster cooking.
- QUICK course is when you would like your rice cooked more quickly than a regular course. The rice may be slightly harder.
- If the wrong menu is selected, the water may boil over or the rice may not be cooked properly.
5 Press COOK/REHEAT button to cook.
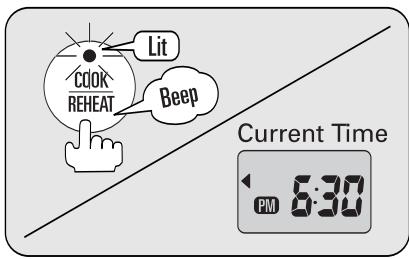
- The COOK lamp lights and begins cooking. The DISPLAY PANEL will show the current time.
- Do not press COOK/REHEAT button without the Inner Pot properly placed in the main unit.
- Be aware that if the COOK/REHEAT button is accidentally pressed without the Inner Pot, the heating element will temporarily become very hot.
- Make sure the COOK lamp is lit.
- If the COOK lamp is not on, press the KEEP WARM/OFF button to cancel cooking. Press the MENU button to reselect the menu and press the COOK/REHEAT button again.
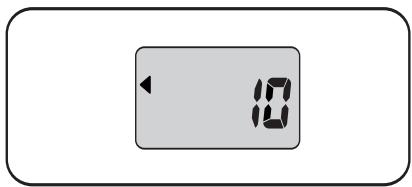
- The remaining cooking time until rice is done will be displayed beginning from 13 minutes. QUICK or PORRIDGE courses, 10 minutes prior to the completion.
Example: With 10 minutes remaining time.
6 Stir the rice before serving. Cooked rice can be kept warm for up 12 hours.
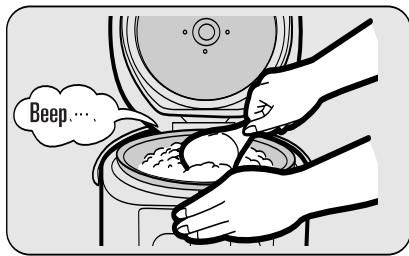
- Once the cooking is completed, the unit beeps and the COOK/REHEAT lamp goes off. Then the KEEP WARM lamp will light and the unit will automatically switch operation to keep the rice warm.
- The DISPLAY PANEL will show the current time.
Example: Cooking is done at 7:20pm.
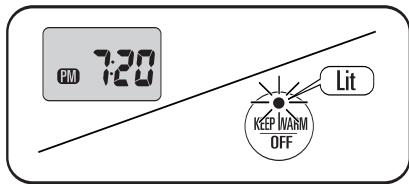
- Do not keep rice warm for more than 12 hours as rice may develop an odor, turn yellow, or dry out.
- Do not unplug unit while in KEEP WARM mode.
- Do not keep mixed rice, brown rice, sweet rice or sprouted brown rice warm as they may begin to deteriorate or develop an odor.
- Slight scorching may form on the bottom of the Inner Pot.
- Make sure to press KEEP WARM/OFF button and unplug the power cord after use. If this is not done, the unit will enter the KEEP WARM mode when it is plugged in next time.
Note
Do not keep porridge warm, as it tends to become gluey.
HOW TO USE TIMER COOKING
(Rice cooking completes at a specific time.)
1 Check the current time.
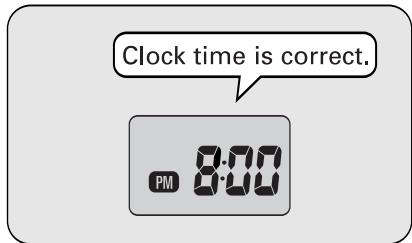
- Set the timer after preparing the rice following steps (1)-(3) in the How to Cook Rice.
- Check the current time. If the clock has not been set to the correct time, the timer cooking may not work properly. ( page 8)
The timer cannot be set if the KEEP WARM lamp is lit. Press KEEP WARM/OFF button to turn off the lamp.
4 Press the COOK/REHEAT button.
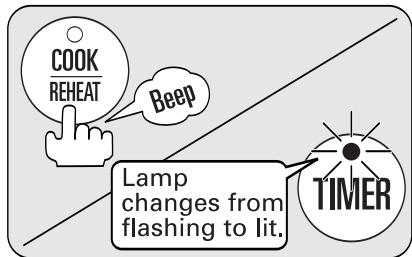
- The TIMER lamp will change from flashing to lit and the current time will be shown on the DISPLAY PANEL. This completes the timer setting.
- Make sure to press COOK/REHEAT button to complete a timer setting.
AFTER TIMER COOKING STARTS:
If you want to change the timer setting:
Press the KEEP WARM/OFF button, and then reset the timer following steps (2)-(4) described before.
If you want to check the current time:
The current time will be displayed while holding HRS and MIN buttons.
2 After selecting a MENU, press the TIMER button.
![graph TD A["MENU"] -->|Beep| B["TIMER"] C["Flashing"] --> B["TIMER"] style A fill:#fff,stroke:#000 style B fill:#fff,stroke:#000 style C fill:#fff,stroke:#000 style_D["Beep"] --> B["TIMER"] style_E["Beep"] --> B["TIMER"]](/content/2025/01/96739/images/a7d8a79157add9f8eb28765b2b6294e0b5c11853e2d5f3005f46da0ffae7af1f.jpg)
- The TIMER lamp will begin flashing and the timer setting will be shown on the DISPLAY PANEL.
Initial Setting: When the timer is set for 6:00am.
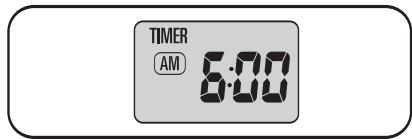
- If the existing timer setting is correct, then proceed to the operation described in section 4.
• page 10 for menu selection.
COOKING BEGINS:
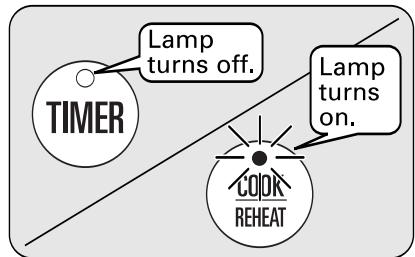
- The TIMER lamp will go off when cooking starts and the COOK lamp will light.
3 Press the HRS and MIN buttons to set the timer.
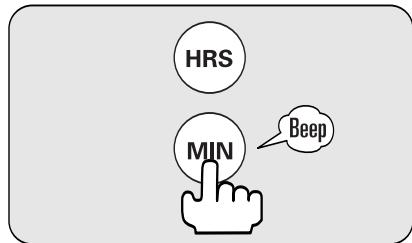
- Press HRS button to change the hour. The hours change in 1-hour increments. Press MIN button to change minutes. The minutes change in 10-minute increments.
- The timer can be fast-forwarded by holding down the HRS or MIN buttons.
- The time displayed for 12:00 noon is "0:00 PM".
Example: 12:00 noon
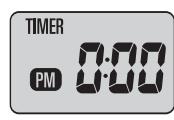
Once the timer has been set, timer cooking can be performed in two steps.
![graph TD A["Flashing"] --> B["TIMER"] C["Beep"] --> B D["Lit"] --> E["TIMER"] F["COOK"] --> G["BEep"] H["Heat"] --> I["TIMER"] B --> J["→"] E --> J style A fill:#f9f,stroke:#333 style C fill:#f9f,stroke:#333 style D fill:#f9f,stroke:#333 style F fill:#f9f,stroke:#333 style G fill:#f9f,stroke:#333 st…](/content/2025/01/96739/images/55c5b1ca27299b683f3e00866ee969c2248286bbd67f30fa681f7ce49cb40f15.jpg)
- Press TIMER button after reviewing the menu selection. Press COOK/REHEAT button after reviewing the time setting. - Previous timer settings are stored in memory.
THE TIMER COOKING:
- Timer cooking should be set to begin within 12 hours. The rice may begin to deteriorate if the rice left in the water for an extended time.
- Do not use timer cooking to prepare mixed rice or sweet rice that contains other ingredients. These ingredients or seasoning may deteriorate or settle to the bottom and fail to cook properly.
- Rice may turn out soft when cooked using the timer.
THE TIMER SETTING
Timer must be set for the minimum times listed below. Otherwise, cooking will start immediately.
| Menu | White, Rinse-Free, Sprouted Brown, Quick Rice | Brown Rice | Porridge |
| Time Required | 1 hour and 10 minutes | 2 hours and 10 minutes | 1 hour and 30 minutes |
1 Stir the rice and make it level.
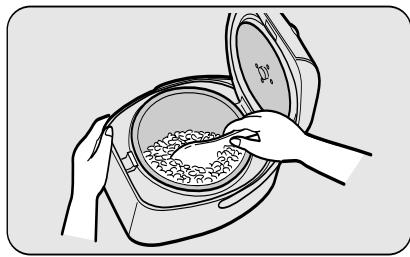
• Always stir the rice in the Inner Pot to prevent scorching.
- Level the rice.
Make sure that the KEEP WARM lamp is lit.
2 Press the COOK/REHEAT button.
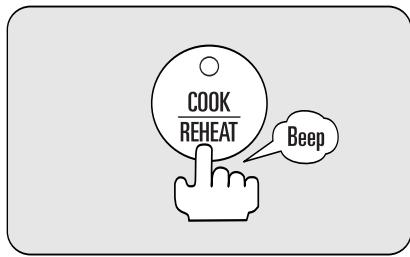
- The REHEAT lamp will flash and reheating will begin.
- The DISPLAY PANEL will show the remaining time. Reheating takes approximately 5-10 minutes depending on the rice temperature.
Example: To reheat 10 minutes.
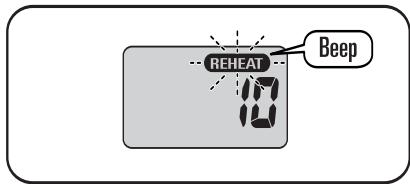
- To cancel reheating, press the COOK/REHEAT button again. The REHEAT lamp disappears from the DISPLAY PANEL and the unit will return to the KEEP WARM mode.
3 Stir the rice again when reheating is completed.
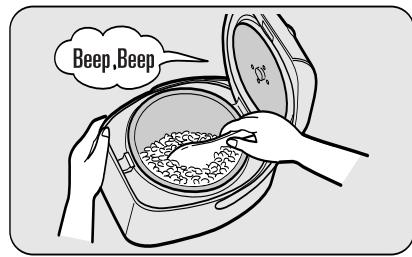
- When reheating is completed, the unit will beep and KEEP WARM lamp will light, and the unit will return to KEEP WARM mode.
- Make sure to stir the rice thoroughly as the rice at the bottom may become slightly hard.
TIPS FOR REHEATING
- For better results, reheat rice when the Inner Pot is less than half full.
- Do not reheat other than white or rinse-free rice. Do not reheat rice more than once as this may cause rice to burn, turn yellow or develop an odor.
- Sprinkle some water on the rice when reheating a small amount of the rice. This will prevent the rice from becoming dry. Sprinkle 1 tablespoon of water per 2 bowls of rice.
- Do not reheat cold rice as this may cause the rice to develop an odor.
TIME GUIDE FOR WHEN RICE IS DONE
(At the room temperature 68° F/20°C and water temperature 64° F/18°C)
| Model No. | White Rice | Mixed Rice | Quick | Sprouted Brown Rice | Rinse-Free Rice | Sweet Rice | Brown Rice | Porridge |
| ECJ-D55S | 45-49 min.(1-5.5 cups) | 48-50 min.(1-3 cups) | 35-40 min.(1-5.5 cups) | 50-55 min.(1-5 cups) | 46-53 min.(1-5 cups) | 44-46 min.(1-3 cups) | 1 hour /20 min.-1 hour/32 min.(1-4 cups) | 1 hour /5 min.-1 hour/23 min.(0.5-1.5 cups) |
| ECJ-D100S | 42-52 min.(2-10 cups) | 45-55 min.(2-6 cups) | 35-44 min.(2-10 cups) | 45-52 min.(2-9 cups) | 44-54 min.(2-9 cups) | 42-47 min.(2-6 cups) | 1 hour /15 min.-1 hour/25 min.(2-8 cups) | 1 hour -1hour/20 min.(0.5-2.5 cups) |
Select the QUICK/STEAM menu to steam vegetables. The cooking times in Chart below are approximate and should be used as a guideline.
1 Add approximately 1 and 1/2 measuring cups (300ml) of water into the Inner Pot.
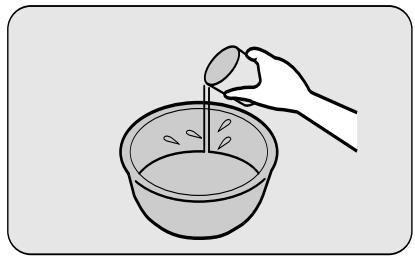
- Use the provided measuring cup.
• Always add a minimum of one measuring cup (180ml) of water.
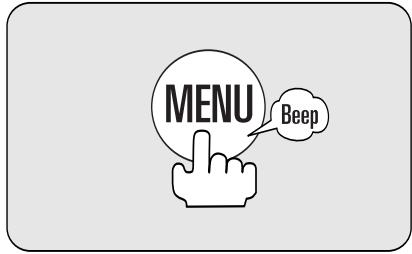
4 Press the MENU button to select QUICK/STEAM course.
2 Place the Inner Pot into the main unit. Place the Steaming Rack with vegetables in the Inner Pot.
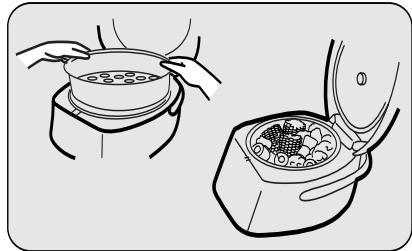
- Place the Inner Pot into the main unit.
- Place the Steaming Rack in the Inner Pot.
- Place the vegetables in the Steaming Rack.
5 Press COOK/REHEAT button.
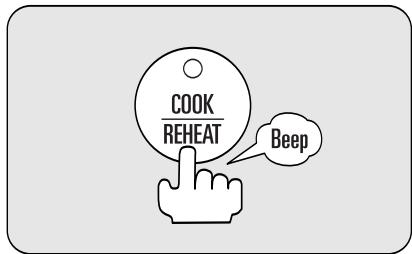
- The COOK lamp lights and begins steaming.
- Steaming takes approx. 50 minutes which includes the 10 minutes of additional steaming time after cooking. When the steaming cycle ends, the KEEP WARM lamp will light and the unit will automatically turn to the KEEP WARM mode.
- Check and stir the vegetables occasionally by opening the Outer Lid. Continue steaming until vegetables are done.
- When the vegetables are done, press KEEP WARM/OFF button to cancel steaming.
- Some experimentation may be needed to determine exact cooking times based on personal preferences for cooked vegetable tenderness or firmness.
- Press KEEP WARM/OFF button and unplug the power supply cord after use.
VEGETABLE STEAMING CHART
| Vegetable | Preparation | Quantity | Approx. Cooking Time |
| Artichokes | Cut into half | 2-4 | 25-30 min. |
| Asparagus | Whole, stems trimmed | 1 lb. | 10-15 min. |
| Broccoli | Spears | 1/2 lb. | 10-15 min. |
| Beets | Peeled, cut into 1/4 " slices | 1 lb. | 15-20 min. |
| Carrots | Cut, peeled | 1 lb. | 15-20 min. |
| Cauliflower | Spears | 1 lb. | 20-25 min. |
| Corn on the Cob | Husked, halved | 2 med. ears | 15-20 min. |
| Green Beans | Whole, trimmed | 3/4 lb. | 10-15 min. |
| Red Potatoes | Cut into half | 1 lb. | 25-30 min. |
| Snow Peas | Whole, trimmed | 1/2 lb. | 15-20 min. |
| Spinach | Leaves | 1/2 lb. | 8-10 min. |
| Sweet Potatoes or Yams | Cut into 1/2 " slices | 1 lb. | 20-25 min. |
| Zucchini | Cut into 1/4 " rounds | 1 lb. | 10-15 min. |
To make a stew or soup, select SLOW COOK/SOUP menu. You can set the cooking time from 1 hour to 8 hours in increments of 30 minutes.
1 Put the ingredients and seasonings into the Inner Pot. Place it into the main unit.
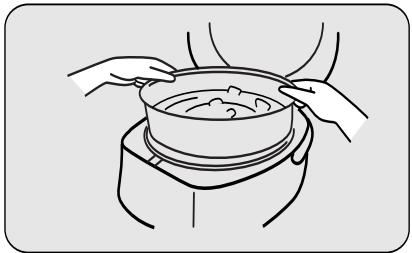
- Do not add ingredients above the maximum SLOW COOK/SOUP water level line. Doing so may cause water to overflow or the food may not be cooked properly.
2 Close the Outer Lid and plug in the power supply cord.
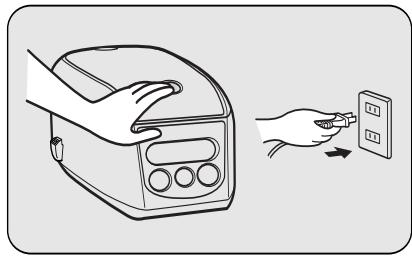
3 Press the MENU button to select SLOW COOK/SOUP course.
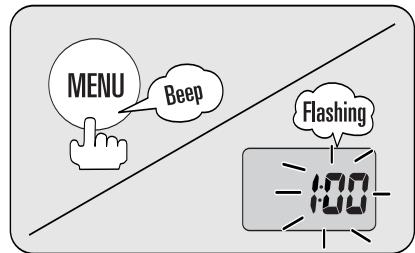
"1:00" (1 hour 00 minute) is displayed in the DISPLAY PANEL as the initial cooking time.
4 Press the HRS and MIN buttons to set the cooking time.
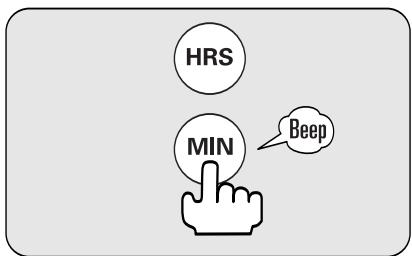
- You can set the cooking time from 1 hour to 8 hours in increments of 30 minutes.
- Each time HRS button is pressed, the hour changes from 1:00 → 2:00 → 3:00...8:00 → 1:00 in 1-hour increments.
Each time MIN button is pressed, the minutes alternate from :00→:30→:00 in 30-minute increments.
Example: To set cooking time for 3 hours and 30 minutes.
Press HRS button to set 3 hours, and then press MIN button to set 30 minutes.
5 Press COOK/REHEAT button.
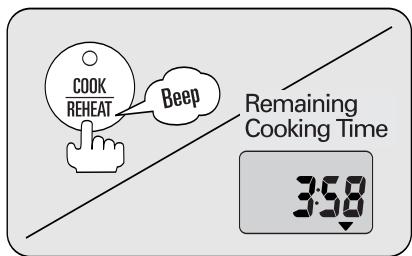
- The COOK lamp lights and cooking begins immediately.
- The DISPLAY PANEL will display the remaining cooking time.
- When the time set is reached, the unit will automatically turn to the KEEP WARM mode.
- Timer cooking cannot be used for SLOW COOK/SOUP cooking.
- SLOW COOK/SOUP course does not include steaming time after cooking.
- Press KEEP WARM/OFF button and unplug the power supply cord after use.
SPECIFICATIONS
| Model No. | ECJ-D55S | ECJ-D100S | |
| Power Consumption | Cooking | 610 Watts | 860 Watts |
| Keep Warm | 30 Wh | 44 Wh | |
| Cooking Capacity | White | 1-5.5 cups | 2-10 cups |
| Rinse-Free Rice | 1-5 cups | 2-9 cups | |
| Sprouted Brown Rice | 1-5 cups | 2-9 cups | |
| Brown Rice | 1-4 cups | 2-8 cups | |
| Porridge | 0.5-1.5 cups | 0.5-2.5 cups | |
| Mixed Rice | 1-3 cups | 2-6 cups | |
| Sweet Rice | 1-3 cups | 2-6 cups | |
| Dimensions (WxHxD) | 95/8" × 125/8" × 87/16" | 105/8" × 131/2" × 93/4" | |
| 245mm x 321mm x 214mm | 271mm x 344mm x 248mm | ||
| Weight/Cu. Ft. | 6.2lbs. / 2.8kg | 8.4 lbs. / 3.8kg | |
| Cord Length | 551/8"/1.4m | 373/8"/0.95m | |
CLEANING AND MAINTENANCE
Always unplug the power supply cord from the electric outlet and allow the unit to cool off completely prior to cleaning.
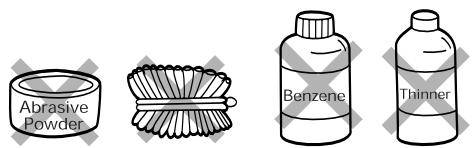
When cleaning the unit, do not use cleaning powder, scrub brush, benzene or thinner. Attach the Inner Lid properly after each cleaning.
MAIN BODY AND OUTER LID
Wipe with a damp cloth.
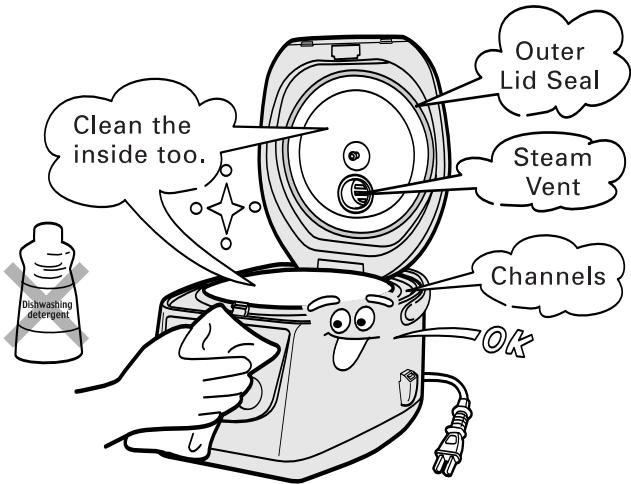
Make sure to wipe thoroughly any channels where moisture tends to accumulate.
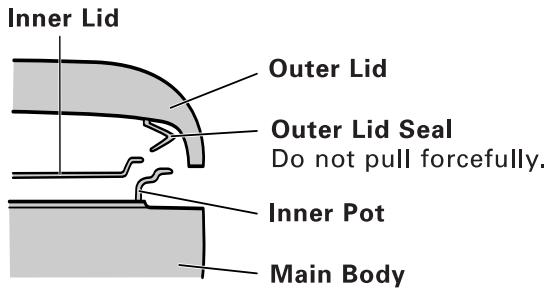
Make sure to remove any rice grains or foreign objects from the Outer Lid Seal. Not doing so may cause the steam to come out from around the Outer Lid and rice tends to become dry during KEEP WARM mode.
INNER POT AND INNER LID
Wash with dishwashing detergent and soft sponge after each use.
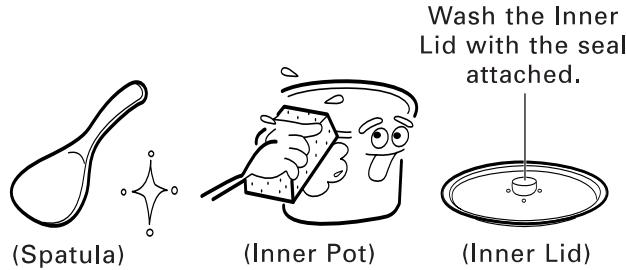
Take care not to dent or damage the Inner Pot or Inner Lid. If the Inner Pot or Inner Lid become deformed, the rice may not cook properly or water may boils over.
HEATING ELEMENT AND TEMPERATURE SENSOR
If the rice grains or other dirt becomes stuck to the heating element, gently polish with fine sandpaper (about 320 grit) and then wipe with a damp sponge.
| Symptom | Possible Cause | Reference Page # |
| Rice does not cook. | Is the COOK/REHEAT button pressed while the unit is in keeping warm mode? | 10, 11 |
| Is power supply cord plugged in properly or has any power failure occurred? | 8 | |
| Rice is hard or undercooked. | Is the water quantity correct? | 9 |
| Are there any foreign objects sticking to the outer Inner Pot, sensor or heating element? | 6, 9, 15 | |
| Is the rice stirred thoroughly after cooking? | 10 | |
| Is the correct menu selected? | 10, 11 | |
| Is power supply cord plugged in properly or has any power failure occurred? | 8 | |
| Is the inner lid attached properly? | 9 | |
| Are there any foreign objects between the Inner Pot and inner lid, or between the Inner Pot and Outer Lid seal? | 9, 15 | |
| Rice is soft or sticky. | Is the water quantity correct? | 9 |
| Are there any foreign objects sticking to the outer Inner Pot, sensor or heating element? | 6, 9, 15 | |
| Is the rice stirred thoroughly after cooking? | 10 | |
| Is the correct menu selected? | 10, 11 | |
| Rice is scorched. | Is the water quantity correct? | 9 |
| Are there any foreign objects sticking to the outer Inner Pot, sensor or heating element? | 6, 9, 15 | |
| Is the correct menu selected? | 10, 11 | |
| Is rice washed thoroughly before cooking? | 9 | |
| Rice cooking takes too long. | Is the water quantity correct? | 9 |
| Are there any foreign objects sticking to the outer Inner Pot, sensor or heating element? | 6, 9, 15 | |
| Is the correct menu selected? | 10, 11 | |
| Is power supply cord plugged in properly or has any power failure occurred? | 8 | |
| While using the Keep Warm function, the rice becomes hard, discolored or develops an odor. | Are there any foreign objects sticking to the outer Inner Pot, sensor or heating element? | 6, 9, 15 |
| Is the rice stirred thoroughly after cooking? | 10 | |
| Is rice washed thoroughly before cooking? | 9 | |
| Is power supply cord plugged in properly or has any power failure occurred? | 8 | |
| Is the rice kept warm over 12 hours? | 10 | |
| Is the inner lid attached properly? | 9 | |
| Is the cold rice kept warm or cold rice added? | 12 | |
| Are there any foreign objects between the Inner Pot and inner lid, or between the Inner Pot and Outer Lid seal? | 9, 15 | |
| Water boils over during cooking. | Is the water quantity correct? | 9 |
| Are there any foreign objects sticking to the outer Inner Pot, sensor or heating element? | 6, 9, 15 | |
| Is the correct menu selected? | 10, 11 | |
| Is rice washed thoroughly before cooking? | 9 | |
| Is the inner lid attached properly? | 9 | |
| Are there any foreign objects between the Inner Pot and inner lid, or between the Inner Pot and Outer Lid seal? | 9, 15 | |
| Steam comes out from around the Outer Lid. | Is the water quantity correct? | 9 |
| Is the correct menu selected? | 10, 11 | |
| Is the inner lid attached properly? | 9 | |
| Are there any foreign objects between the Inner Pot and inner lid, or between the Inner Pot and Outer Lid seal? | 9, 15 | |
| Rice cooking does not complete at the preset time. | Is the water quantity correct? | 9 |
| Are there any foreign objects sticking to the outer Inner Pot, sensor or heating element? | 6, 9, 15 | |
| Is the correct menu selected? | 10, 11 | |
| Is power supply cord plugged in properly or has any power failure occurred? | 8 | |
| Is the timer set properly? | 11 | |
| The control buttons won't work. | Is the COOK/REHEAT button pressed while the unit is in keeping warm mode? | 10, 11 |
| Is power supply cord plugged in properly or has any power failure occurred? | 8 | |
| There is some noise during cooking. | The clicking sound is caused by the unit adjusting power usage. It is not a malfunction. | 9 |
| Water droplets remaining on the outside of the Inner Pot or the inner wall of the main body may cause noise during cooking. It is not a malfunction. | 9 |
TIPS FOR COOKING RECIPES
- Use the provided measuring cup (6 oz. or 180 ml) for measuring rice.
- Do not measure seasonings with the provided measuring cup. Use a standard measuring cup and spoons for seasonings.
- Do not cook more than the unit allows for cooking certain type of rice or recipe.
- Mix seasonings thoroughly such as soy sauce or salt with the broth, soup, or water, and add to Inner Pot right before cooking.
- Excess ingredients or poor mixing of the seasoning may cause the rice to cook improperly.
- Use of seasonings when cooking rice causes the rice to burn more easily.
- After cooking the rice mixed with other ingredients, an odor may remain. Wash the Inner Pot and Inner Lid thoroughly after each use.
Rice with Meat and Vegetables (Kayaku Gohan)
MIXED RICE
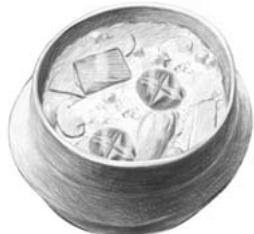
Makes 4-6 servings
Ingredients:
3 cups rice
1/3 cup burdock
1/3 cup chopped carrots
3 dried shiitake mushrooms
1.5 oz. yam cake (konnyaku)
1 sheet deep-fried tofu (abura-age)
2 oz. chicken
2 cups Japanese broth (dashi)
2 Tbs. light-colored soy sauce
3 Tbs. sake
1/2 tsp. salt
2 or 3 snow peas
Preparation:
- Wash rice and let sit for 30-60 minutes.
- Soak dried shiitake mushrooms in water and cut into thin strips.
- Remove outer skin of the burdock, shred into fine strips, and soak in water.
- Chop carrots into thin strips and cut chicken into small, bite sizes.
- Cut yam cake into thin strips and boil briefly.
- Briefly boil deep-fried tofu and cut into thin slices.
- Make seasoning by adding soy source, sake, and salt to the Japanese broth (dashi) and mix well.
- Drain rice and pour into Inner Pot. Add enough seasoning prepared in step ⑦ to fill up to "3" on the "MIXED" water level line. Then mix ingredients from steps ② through ⑥ and place on top of rice.
- Close Outer Lid and select WHITE/MIXED with the MENU button. Press the COOK/REHEAT button.
- Briefly boil snow peas in salted water and cut into thin strips.
- When rice is cooked, stir the rice. Place in bowl and garnish with snow peas.
Teriyaki Mushroom Sprouted Brown Rice
SPROUTED BROWN RICE
Makes 4-6 servings
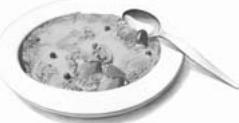
Ingredients:
2 cups rice
1 cup sprouted rice
1 can (3 oz.) chunk chicken breast, break into small pieces
1 can (7 oz.) mushrooms pieces & stems
1/2 can (10 1/2 oz.) condensed French onion soup
1 Tbs. sugar
4 Tbs. soy sauce
3 Tbs. butter or margarine
Preparation:
- Wash rice and let sit for one hour.
- Break chunk chicken breast into small bite sizes.
- Drain rice and pour into Inner Pot. Add ②, the remaining ingredients and water up to "3" on the "MIXED" water level line and mix well.
- Close Outer Lid and select "SPROUTED" with the MENU button. Press the COOK/REHEAT button.
- After approx. 20 minutes into cooking, open the lid and stir the rice quickly and close the lid. Continue cooking until rice is done.
- When rice is cooked, stir the rice gently and place in bowl.
BROWN RICE
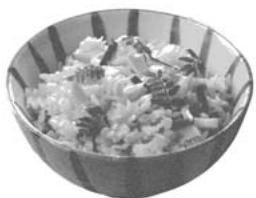
Makes 6 servings
Ingredients:
3 cups long-grain brown rice
2 cans (10.5 oz.) chicken broth
3 Tbs. margarine
1/2 tsp. crushed garlic (from jar)
1 tsp. dried parsley
Preparation:
- For better results, wash brown rice and let sit for 2 hours.
- Drain rice and pour into Inner Pot.
- Add chicken broth, margarine and crushed garlic into Inner Pot and water up to "3" on the "BROWN" water level line and mix well.
- Close Outer Lid and select "BROWN" with the MENU button. Press the COOK/REHEAT button.
- When rice is cooked, add dried parsley and stir the rice gently. Add 1 teaspoon of Poultry Seasoning, if desired.
Rice with Red Beans (Sekihan)
SWEET RICE
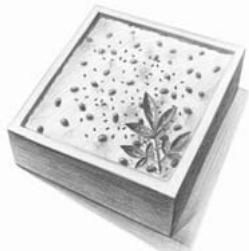
Makes 4-6 servings
Ingredients:
2 cups sweet rice (rice for making rice dumplings)
1 cup rice
1/2 cup red beans (azuki)
1 tsp. salt with black sesame (gomashio)
Preparation:
- Mix the two kinds of rice together, wash, and let sit for 30-60 minutes.
- Heat red beans in a pot full of water over strong flame. Bring to a boil and discard broth. Add another half quart of water and simmer until beans are just a little hard.
- When red beans are cooked, separate beans from broth. Scoop broth with ladle and pour back into pot four or five times to air broth.
- Drain rice and pour into Inner Pot. Add broth from step ③ and water up to "3" on the "SWEET" water level line. Place red beans on top of rice.
- Close Outer Lid and select "WHITE/MIXED" with the MENU button. Press the COOK/REHEAT button.
- When rice is cooked, stir the rice gently and place in bowl. Sprinkle with the salt with black sesame.
Kasha with Asari Clams (Russian-type Porridge)
PORRIDGE
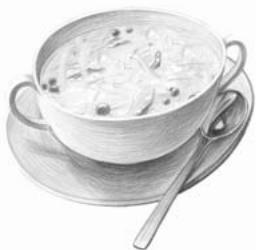
Makes 4 servings
Ingredients:
1/2 cup rice
1/2 cup asari clams (drained)
2 Tbs. and 1/2 tsp. white wine
1/2 cup shimeji mushrooms
1/3 cup green peas (frozen)
2 cubes soup broth
3/4 cup hot water
pinch of salt
2 Tbs. parsley (chopped)
Preparation:
- Wash rice and let sit for 30-60 minutes.
- Pour white wine (2 Tbs. + 1/2 tsp.) into pot and bring to boil. Add asari clams, close lid, and steam. Once clams open, sprinkle with salt. Then strain broth with cloth.
- Remove bottom of the stem of the shimeji mushrooms and separate into small pieces.
- Pour green peas into boiling water with salt, and boil briefly.
- Soak cubes in hot water to dissolve.
- Drain rice and pour into Inner Pot. Add broth from step ②, broth in step ⑤ and enough water to fill up to "1" on the "PORRIDGE" water level line. Then add the asari clams, shimeji mushrooms and green peas.
- Close Outer Lid and select "PORRIDGE" with the MENU button. Press the COOK/REHEAT button.
- When rice is cooked, stir the rice gently and place in bowl. Garnish with finely chopped parsley.
Easy Risotto (Western porridge)
PORRIDGE
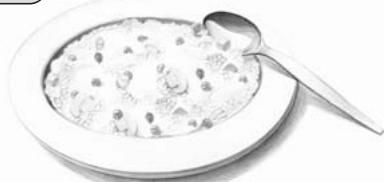
Makes 2-3 servings
Ingredients:
11/2 cups cold rice
1 cup mixed vegetables (frozen)
1 cube soup broth
2 cups hot water
4 Tbs. butter
pinch of salt
2 Tbs. parsley (chopped)
Preparation:
-
Prepare mixed vegetables according to package.
-
Soak cube in hot water to dissolve.
-
Put cold rice and ingredients in step ① and ② into Inner Pot.
-
Close Outer Lid and select "PORRIDGE" with the "MENU" button. Press the "COOK/REHEAT" button.
-
When rice is cooked, add salt and butter to taste and stir the rice gently.
-
Place in bowl and garnish with finely chopped parsley.
French Onion Soup
SOUP
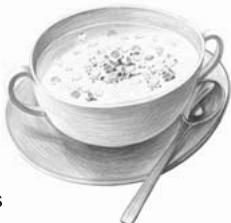
Makes 4 servings
Ingredients:
3 large onions, thinly sliced
1/2 cup butter or margarine
2 Tbs. instant beef bouillon cubes
4 cups hot water
1 tsp. worcestershire sauce
1 / 2 tsp. salt
4 slices toasted French bread
1/4 cup grated Parmesan cheese
Preparation:
-
In large skillet, cook onions in butter until lightly browned.
-
Mix hot water with beef bouillon cubes until dissolved.
-
Add cooked onions, in butter, bouillon water, Worcestershire sauce, and salt to Inner Pot and place in main unit.
-
Close Outer Lid and select "SLOW COOK/SOUP" with the MENU button. Set time to cook for approximately 3 hours. Press the COOK/REHEAT button.
-
Top each bowl with toasted French bread sprinkled with Parmesan cheese.
Split Pea Soup
SOUP
Makes 4-6 servings
Ingredients:
1 cup dried split green peas
1 can (6.5 oz.) flakes of ham, with liquid, broken up
1 medium carrot, diced
1/2 cup celery, diced
1 / 2 cup onion, finely chopped
1 / 4 tsp. salt
1/8 tsp pepper
1 tsp. parsley flakes
1 Tbs. chicken bouillon powder
1/4 tsp. ground thyme
4 cups water
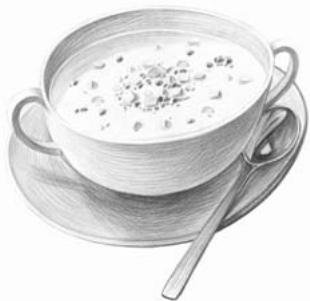
Preparation:
-
For better results, rinse beans and soak overnight.
-
Drain beans.
-
Place all ingredients in Inner Pot and place in main unit.
-
Close Outer Lid and select "SLOW COOK/SOUP" with the MENU button. Set time to cook for approximately 3 hours. Press the COOK/REHEAT button.
PUDDING
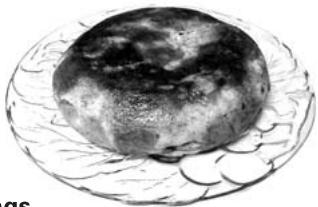
Makes 6-8 servings
Ingredients:
8 slices of bread
4 oz. butter or margarine
1 / 2 cup sugar
11/2 cup milk
5 eggs
3/4 tsp. vanilla
1 / 2 tsp. cinnamon
Preparation:
- Tear bread into bite-size pieces and place into Inner Pot.
- Heat milk, sugar and butter until butter melts in a saucepan.
- In a bowl, beat eggs and add vanilla and cinnamon. Add to ② mixture.
- Pour ③ over bread prepared in step ①.
- Place the Inner Pot in the rice cooker. Close Outer Lid and select "WHITE/MIXED" with the MENU button. Press the COOK/REHEAT button.
- After cooking is done, let stand for 5 minutes. Serve the pudding warm or cool, if desired.
Optional:
- Add 1/3 cup raisin or chopped nuts for variety.
- Sprinkle powdered sugar or liquor sauce for more flavors.
Easy Beef Stew
SLOW COOK
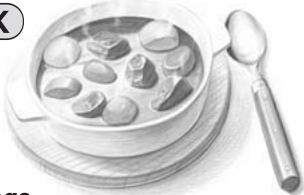
Makes 4-6 servings
Ingredients:
3 medium red potatoes
1 lb. beef stew meat
1/4 cup flour
salt and pepper to taste
1 / 2 can (14 oz.) diced tomatoes, undrained
2 cups frozen stir-fry bell peppers and onions
1/2 cup water
1 tsp. worcestershire sauce
Preparation:
- Scrub potatoes and cut each into quarters. Place in bottom of Inner Pot.
- Mix flour, salt and pepper and toss with beef to coat and add to Inner Pot.
- Add undrained tomatoes and place Inner Pot in main unit.
- Close Outer Lid and select "SLOW COOK/SOUP" with the MENU button. Set time to cook for approximately 3 hours. Press the COOK/REHEAT button.
- Cook until beef and potatoes are tender.
- Add stir-fry vegetables to Inner Pot and continue cooking for 30-40 minutes until vegetables are hot and tender.
Chili
SLOW COOK
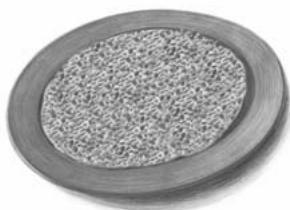
Makes 6 servings
Ingredients:
1/2 lb. ground beef
1/2 medium onion, chopped
1 / 2 green pepper, chopped
3/4 tsp. salt
1/2 Tbs. chili powder
1 tsp. worcestershire sauce
1 can (9 oz.) tomato sauce
1 can (16 oz.) kidney beans, drained
1 can (14 1/2 oz.) crushed tomatoes
2 cups grated cheddar cheese
Preparation:
- In large skillet, cook meat until browned. Add onion and green pepper to same skillet and continue cooking until thoroughly browned. Drain and pour into the Inner Pot.
- Add the remaining ingredients into the Inner Pot except cheddar cheese and stir well.
- Close Outer Lid and select SLOW COOK/SOUP with the MENU button. Set time to cook for approximately 3 hours. Press the COOK/REHEAT button.
- Serve in bowls or over cooked rice topped with cheddar cheese.
SANYO COMFORT WARRANTY
WARRANTY APPLICATION
New, unused SANYO products purchased through a SANYO authorized dealer in Canada are warranted against manufacturing defects in materials and workmanship for ONE YEAR from the date of purchase by the original retail purchaser for non-commercial use. This Warranty only applies in favour of the original retail purchaser of the warranted product.
SANYO CANADA INC.'S RESPONSIBILITY
During the warranty period, SANYO Canada Inc. will repair, or at our option, replace a product which shows evidence of a manufacturing defect in materials or workmanship. Replacement PARTS are warranted for the remaining portion of the warranty period.
WHAT IS NOT COVERED
(a) Products purchased outside Canada.
(b) Products purchased in a used condition.
(c) Problems due to product set up and installation.
(d) Adjustments that are outlined in the Operating Manual.
(e) Accessory items including antenna, batteries.
(f) Damage in or due to transportation.
(g) Damage due to improper maintenance, improper wiring, accident, abuse, misuse or negligence.
(h) Damage caused by lightning and power surges.
(i) The cost of removal and reinstallation of a product designed for automobile use.
(j) The rubber seal of the water-proof digital movie camera.
ORIGINAL RETAIL PURCHASER'S RESPONSIBILITY
You, the original retail purchaser, must present your original, dated bill of sale together with this Warranty to SANYO Canada Inc. or to an authorized SANYO Service Depot when you make a claim under this Warranty.
You, the original retail purchaser, are responsible for any costs of TRANSPORTING the product to and from SANYO Canada Inc. or an authorized SANYO Service Depot. You also are responsible for the cost of any MAINTENANCE necessary in respect of the product.
WARRANTY BECOMES VOID
This Warranty becomes void if the product's serial numbers are altered or removed or if any repair to the product is made other than by SANYO Canada Inc. or by an authorized SANYO Service Depot.
LIMITATIONS
(a) SANYO Canada Inc. reserves the right to change or improve the design of the model of the product warranted hereunder without incurring any obligation to make any modifications to or to install any improvement in or on the product.
(b) In no event shall SANYO Canada Inc. or any of its Authorized Dealers be liable for special or consequential damage arising from the use of this product.
STATUTORY WARRANTIES
The above provisions do not preclude the operation of any applicable provincial statute which in certain circumstances may not allow some of the limitations and exclusions described in this Warranty. Where any terms of this Warranty are prohibited by such a statute, they shall be deemed null and void but the remainder of this Warranty shall remain in effect.
HOW TO OBTAIN WARRANTY SERVICE
Please contact SANYO at:
SANYO Canada Inc.
1-300 Applewood Cres.
Concord, Ontario L4K 5C7
1-800-263-2244
www.sanyo.ca
- ECJ-D55S (5.5 CUPS) ECJ-D100S (10 CUPS)
- IMPORTANT SAFEGUARDS
- SAVE THESE INSTRUCTIONS
- NOTE
- WARNING
- DO NOT TOUCH THE STEAM VENT
- DO NOT OPERATE THE APPLIANCE IF THE POWER SUPPLY CORD OR PLUG HAS BEEN DAMAGED
- DO NOT ALLOW CHILDREN TO USE THIS APPLIANCE WITHOUT ADULT SUPERVISION
- DO NOT IMMERSE THE APPLIANCE IN WATER AND DO NOT POUR WATER ONTO IT
- DO NOT HANDLE THE POWER SUPPLY CORD IN A ROUGH MANNER
- DO NOT INSERT ANY FOREIGN OBJECTS INTO APPLIANCE OPENINGS OR OUTLETS
- CAUTIONS
- GRASP ONLY THE PLUG WHEN UNPLUGGING THE POWER SUPPLY CORD
- ALLOW THE APPLIANCE TO COOL OFF PRIOR TO CLEANING. ALLOW THE
- HOLD THE POWER SUPPLY PLUG WHEN REWINDING THE POWER SUPPLY CORD
- UNPLUG THE POWER SUPPLY PLUG FROM THE OUTLET WHEN THE APPLIANCE IS NOT BEING USED
- PRECAUTIONS
- DO NOT PLACE THE APPLIANCE IN THE FOLLOWING LOCATIONS
- REMOVE ALL FOREIGN SUBSTANCES
- DO NOT PLACE A CLOTH OR TOWELS OVER THE APPLIANCE DURING OPERATION
- DO NOT SHAKE THE APPLIANCE BY THE HANDLE
- HOW TO REMOVE
- HOW TO ATTACH
- LID RELEASE
- INNER LID SEAL
- OUTER LID SEAL
- HANDLE
- CONTROL PANEL
- OUTER LID
- INNER LID ATTACHMENT SHAFT
- STEAM VENT
- SPATULA HOLDER
- POWER SUPPLY CORD (CORD REEL)
- KEEP WARM LAMP
- KEEP WARM/OFF BUTTON
- TIMER BUTTON
- MENU BUTTON
- DISPLAY PANEL
- HRS/MIN BUTTON
- TIMER LAMP
- COOK LAMP
- COOK/REHEAT BUTTON
- HOW TO SET THE CLOCK
- THE BUILT-IN LITHIUM BATTERY
- POWER FAILURE WHILE THE UNIT IS IN OPERATION
- 1 ACCURATELY MEASURE THE RICE, THEN WASH IT
- HOW TO COOK RINSE-FREE RICE
- HOW TO COOK SPROUTED BROWN RICE
- 2 ADD THE CORRECT AMOUNT OF WATER AND PLACE THE INNER POT INTO MAIN UNIT
- 3 ATTACH THE INNER LID AND CLOSE THE OUTER LID
- INNER POT INFORMATION
- 4 PLUG IN POWER SUPPLY CORD AND SELECT MENU
- 5 PRESS COOK/REHEAT BUTTON TO COOK
- 6 STIR THE RICE BEFORE SERVING. COOKED RICE CAN BE KEPT WARM FOR UP 12 HOURS
- HOW TO USE TIMER COOKING
- 1 CHECK THE CURRENT TIME
- 4 PRESS THE COOK/REHEAT BUTTON
- AFTER TIMER COOKING STARTS
- IF YOU WANT TO CHANGE THE TIMER SETTING
- IF YOU WANT TO CHECK THE CURRENT TIME
- 2 AFTER SELECTING A MENU, PRESS THE TIMER BUTTON
- COOKING BEGINS
- 3 PRESS THE HRS AND MIN BUTTONS TO SET THE TIMER
- ONCE THE TIMER HAS BEEN SET, TIMER COOKING CAN BE PERFORMED IN TWO STEPS
- THE TIMER COOKING
- 1 STIR THE RICE AND MAKE IT LEVEL
- 2 PRESS THE COOK/REHEAT BUTTON
- 3 STIR THE RICE AGAIN WHEN REHEATING IS COMPLETED
- TIPS FOR REHEATING
- TIME GUIDE FOR WHEN RICE IS DONE
- CLEANING AND MAINTENANCE
- MAIN BODY AND OUTER LID
- INNER POT AND INNER LID
- HEATING ELEMENT AND TEMPERATURE SENSOR
- TIPS FOR COOKING RECIPES
- RICE WITH MEAT AND VEGETABLES (KAYAKU GOHAN)
- MIXED RICE
- MAKES 4-6 SERVINGS
- INGREDIENTS
- PREPARATION
- TERIYAKI MUSHROOM SPROUTED BROWN RICE
- SPROUTED BROWN RICE
- BROWN RICE
- MAKES 6 SERVINGS
- RICE WITH RED BEANS (SEKIHAN)
- SWEET RICE
- KASHA WITH ASARI CLAMS (RUSSIAN-TYPE PORRIDGE)
- PORRIDGE
- MAKES 4 SERVINGS
- EASY RISOTTO (WESTERN PORRIDGE)
- MAKES 2-3 SERVINGS
- FRENCH ONION SOUP
- SOUP
- SPLIT PEA SOUP
- PUDDING
- MAKES 6-8 SERVINGS
- OPTIONAL
- EASY BEEF STEW
- SLOW COOK
- CHILI
- SANYO COMFORT WARRANTY
- WARRANTY APPLICATION
- SANYO CANADA INC.'S RESPONSIBILITY
- WHAT IS NOT COVERED
- ORIGINAL RETAIL PURCHASER'S RESPONSIBILITY
- WARRANTY BECOMES VOID
- LIMITATIONS
- STATUTORY WARRANTIES
- HOW TO OBTAIN WARRANTY SERVICE
Marque : SANYO
Modèle : ECJ-D55S
Catégorie : Cuiseur de riz