ICR 110 - Dictaphone numérique MPMAN - Notice d'utilisation et mode d'emploi gratuit
Retrouvez gratuitement la notice de l'appareil ICR 110 MPMAN au format PDF.


| Type d'appareil | Dictaphone numérique |
| Enregistrement audio | Oui |
| Qualité d'enregistrement | Indicateurs de qualité disponibles |
| Affichage | Écran LCD avec indicateurs |
| Formats audio | Non précisé |
| Microphone intégré | Oui |
| Contrôle du volume | Oui |
| Fonction lecture | Oui, avec indicateur de lecture |
| Fonction répétition | Oui, indicateurs de répétition |
| Indicateur de batterie | Oui |
| Indicateur de date | Oui |
| Minuteur | Indicateur minute/seconde |
| Fonction mémoire | Indicateur de dossier de fichiers |
| Connectivité écouteurs | Prise jack 3,5 mm |
| Alimentation | Non précisé |
| Dimensions | Non précisées |
| Poids | Non précisé |
FOIRE AUX QUESTIONS - ICR 110 MPMAN
Questions des utilisateurs sur ICR 110 MPMAN
0 question sur cet appareil. Repondez a celles que vous connaissez ou posez la votre.
Poser une nouvelle question sur cet appareil
Téléchargez la notice de votre Dictaphone numérique au format PDF gratuitement ! Retrouvez votre notice ICR 110 - MPMAN et reprennez votre appareil électronique en main. Sur cette page sont publiés tous les documents nécessaires à l'utilisation de votre appareil ICR 110 de la marque MPMAN.
MODE D'EMPLOI ICR 110 MPMAN

DIGITAL VOICE REORDER
MODEL:ICR-110 BEFORE OPERATING THIS PRODUCT, PLEASE READ THESE INSTRUCTIONS COMPLETELY.
CE
LOCATION OF INDICATORS
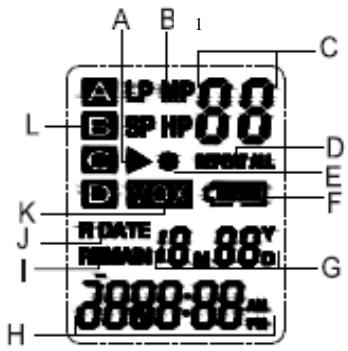
A. Play Indicator
B. Recording Quality Indicators
C. Message/Year Indicator
D. REPEAT 1/ALL Indicators
E. Record Indicator
F. Battery Indicator
G. Date Indicator
H. Minute/Second (Timer)
Indicator
I. REMAIN Indicator
J. R(Record)DATE Indicator
K. VOX Indicator
L. Message File Folder
Indicators
SAFETY PRECAUTIONS
"Read all instruction before use" and save for future reference PRECAUTIONS
To maintain optimum performance:
Do not use unit in places which are extremely hot, cold, dusty or humid.
Do not use or keep the unit in following places.
- In a high humidity area such as a bathroom or near a hearer.
- In an area exposed to direct sunlight (e.g, inside car where it become extremely hot).
- Near sources of strong magnetism, such as television, speakers or magnets.
- Where there is a lot of movement or vibration, such as on a car dashboard or an unstable shelf.
For safety
- Do not attempt to disassemble this unit.
- make sure that pins or other foreign objects to not get inside the Unit.
- Take care not to drop the unit or subject it to strong shocks.
Note no listening with the earphones
- listen at moderate volumes to avoid hearing damage.
- Do not wear the earphones while driving or cycling. It may create a traffic hazard.
- you should use extreme caution or temporarily discontinue use in potentially hazardous situations such as walking, Jogging, etc.
- If you hear no sound, DO NOT turn the volume up high because the music could suddenly begin at high volume. To avoid hurting your ears or damaging the headphones turn the volume control to the lowest level before starting playback and slowly turn it up to the desired level.
LOCATION OF CONTROLS
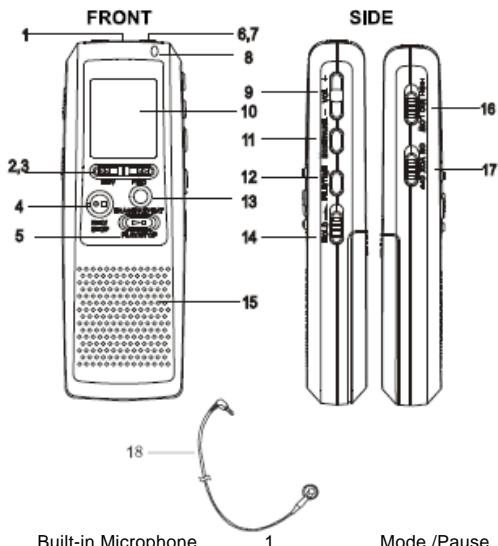
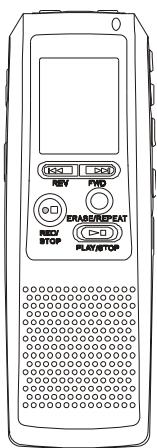
Built-in Microphone
2.3
REV/FWD button
2,3
REC/STOP button
4
PLAY/STOP button
5
MIC/EAR(Earphone)
6,7
Record indicator
8
Volume 9
9
LCD display(see next page) 10
Mod
File/Time
Erase/Repeat
Hold knob
Speaker
MIC sense knob
Vox (Voice active system)
Earphone
POWER SOURCE
BATTERY INSTALLATION
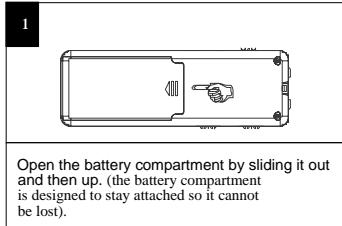
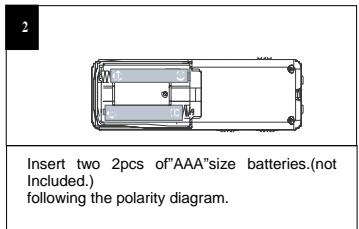
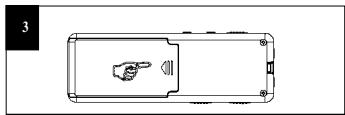
Slide the battery compartment back in place.
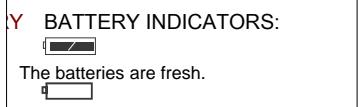
The batteries are weak or dead, replace.
NOTE: When replacing the batteries, the recorded messages will be saved, but the date and time will have to be reset.
BATTERY PRECAUTIONS
Follow these precautions when using batteries in this device:
1. Use only the size and type of batteries specified.
2. Be sure to follow the correct polarity when installing the batteries as indicated in the battery compartment. Reversed batteries may cause damage to the device.
3. Do not mix different types of batteries together (e.g. Alkaline and Carbon-zinc) or old batteries with fresh ones.
4. If the device is not to be used for a long period of time, remove the batteries to prevent damage or injury from possible battery leakage.
5. Do not try to recharge batteries not intended to be recharged;they can overheat and rupture.(Follow battery manufacturer's directions.)
4
OPERATION(CONTINUED)
TO TURN THE UNIT ON & OFF
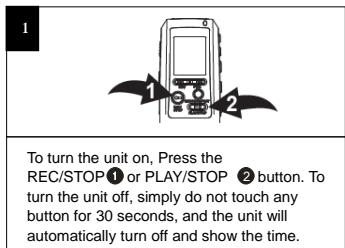
TO SWITCH BETWEEN MODES
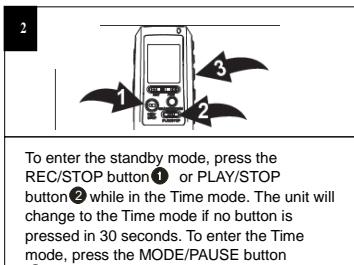
- while in the standby mode.
RECORDING QUALITY
You can choose between there voice recording quality modes. For best sound quality, select HP(High play);for very good sound quality, select MP(Medium Play);for longer recording time (reasonable sound quality),select LP(long Play).
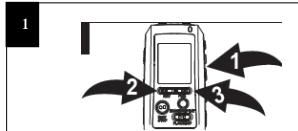
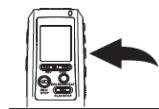
Press and hold the MODE/PAUSE button for two seconds; "SET" will appear and the recording quality will blink press the REV or FWD button to select the desired recording quality.
When the desired recording quality appears, press the MODE/PAUSE button twice to confirm and return to the Time mode or it will change to the Time mode if no button is pressed in 30 seconds.
High Play: 878 min.
Medium Play: 1759 min.
Long Play: 3369 min.
OPERATION
SETTING THE TIME AND DATE
When the batteries are inserted, 0 hour and 0 min and Jan01 will appear in the display. Set the time and date as follows:
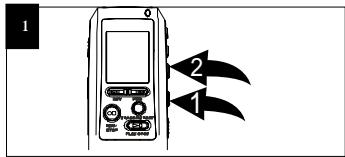
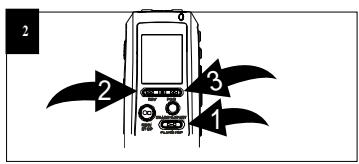
While the date/time appears in the display, press the FILE/TIME button to shift between 12 or 24 time display.
Press and hold the Mode/Pause button for two seconds, then release, 'SET' will appear in the display. Press the Mode/Pause button once again to enter the Date/Time set mode.
Press the PLAY/STOP button to confirm and the year will blink. Set the year using the REV and FWD buttons, then press the PLAY/STOP button again to confirm.
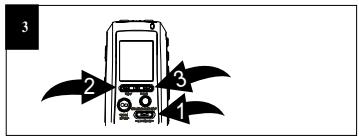
Set the Month using the REV2 and FWD 3 buttons, then press the PLAY/STOP button again to confirm. Repeat this step to set the Day, Hour and Minute.
OPERATION(CONTINUED)
SELECTING A FILE FOLDER
This unit has four memory storage areas(file folders)to choose from, labelled A,B,C and D. You can store 99 messages in each individual file folder, for four file folder you can totally save 396pcs of messages.
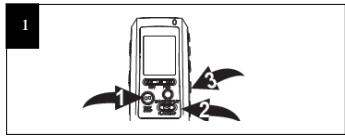
NOTE: Each time you record a message, The unit will assign a number, counting up 1 from the last message number, which will be shown on the display.
Press the REC/STOP 1 or PLAY/STOP 2 button to enter the standby mode. Press the FILE/TIME button 3 to select the desired file folder (A,B,C,D). The number at the top right of the display indicates the total messages recorded. The number at the bottom of the display will indicate the total time recorded for the selected message.
If the unit is full, FULL will appear in the display. Delete messages in this case.
RECORDING SENSITIVITY
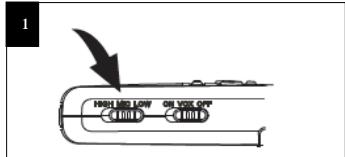
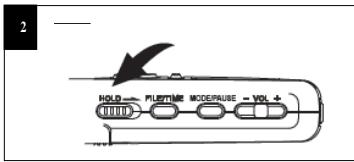
HOLD SWITCH
Slide the MIC SENS switch to the LOW position if recording sounds that are close. Select the HIGH position if recording sounds that are further away.
Slide the HOLD switch to the LOCK position to disable the buttons; HOLD will appear in the display. Slide the HOLD switch to the OFF Position to enable the buttons again.
OPERATION(CONTINUED)
NORMAL RECORDING
This unit is capable of recording only when sound is heard. To use this feature, see the next page. For normal recording, follow steps below.
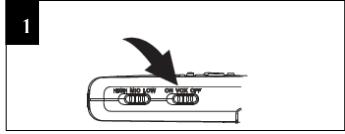
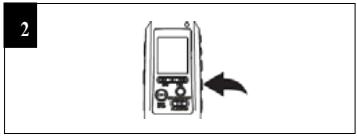
Make sure the VOX switch on the side of unit is set to OFF. Turn the unit on, and select the desired sound quality as described on page 6.
Select a File Folder by pressing the FILE/TIME button (see page7).
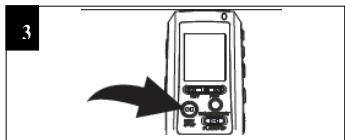
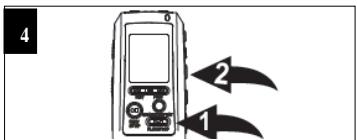
While in the standby mode, press the REC/STOP button and the REC indicator will light and the elapsed time will appear.
Press the PLAY/STOP button to see the remaining recording time during recording. To pause recording, press the MODE/PAUSE
Speak into the built-in microphone or insert a microphone into the MIC jack and speak to it with a normal tone of voice. Press the REC /STOP button again to stop recording.
button 2; PAUSE will blink in the display. To release pause press the MODE/PAUSE button again.
OPERATION(CONTINUED)
TO PLAY BACK MESSAGES
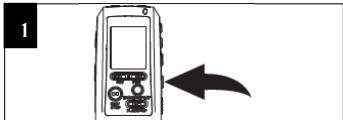
Turn the unit on and select a File Folder by pressing the FILE/TIME button(see page7).
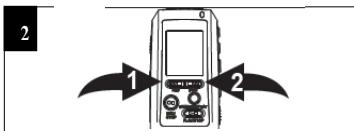
Select the desired message number by pressing the REV or FWD button; the message number and the message length will appear in the display.
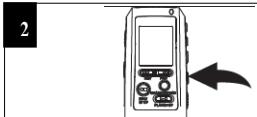
While in the standby mode, press the PLAY/STOP button; the unit will play the currently selected message, then stop. During playback, the play indicator and the elapsed time of the message will appear in the display. You can check the message recording time and date by pressing the REC/STOP button.
NOTES:
To pause, press the MODE/ PAUSE button; PAUSE will blink in the display. To release pause, press the MODE/PAUSE button again.
For Clue and Review during playback, simply press and hold the desired REV or FWD button.
A chattering sound will be heard. Release the button when the desired point is reached.
To skip or go back messages, simply press and release the desired REV or FWD button until the desired message number is reached.
NOTES:
. The built-in audio level automatically sets the recording level.
. To record another message, simply repeat step 3,the message number will increase by one.
1. For normal voice levels, a distance of 5-9 inches is appropriate.
8
EARHONE JACK
For private listening, connect an earphone (not included) to this jack.
The speaker is automatically disconnected when the earphone plug is inserted in the jack.
OPERATION(CONTINUED)
VOICE ACTIVATED (VOX)RECORDING
Voice activated recording will allow dictation only when you speak.
When the unit detects a pause of a few seconds, it will temporarily stop recording until it detects sound again.
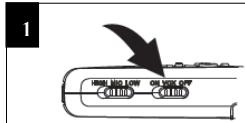
Slide the VOX switch on the side of the unit to the ON position. Turn the unit on, and select the described sound quality as described on page 6.
Select a FILE Folder by pressing the FILE/TIME button(see page7).
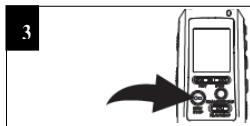
Press the REC/STOP button and the REC indicator will light and the elapsed time will appear. Speak into the built-in microphone or insert a micro-phone into the MIC jack and when the unit picks up sound, it will record. When not recording, the REC indicator will blink and PAUSE will blink in the display until sound is detected. Press the REC/STOP button again to stop recording.
NOTES:
The first few sounds activate the recorder and may not be recorded.
A variation in voice level
during recording will not
stop the unit. two seconds of silence is required to stop the recording.
For constant recording, see previous page.
To pause, press the MODE/PAUSE
The built-in audio level automatically sets the recording level.
For normal voice levels, a distance of 5-9 inches is appropriate.
OPERATION(CONTINUED)
TO REPEATEDLY PLAY BACK MESSAGES
You can set the unit to repeat1 or all messages as follows:
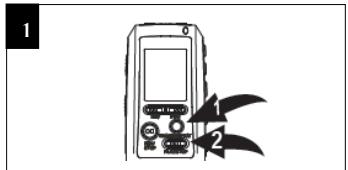
REPEATMESSAGE:While playing back a message,press the ERASE/REPEAT button once,"REPEAT"will appear in the display and the message playing will repeat over and over until the PLAY/STOP button 2 is pressed.
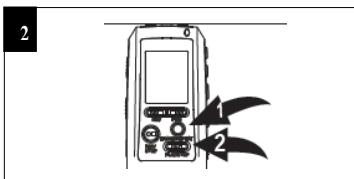
REPEAT ALL MESSAGES: While Playing back a message, press the ERASE/REPEAT button twice; "REPEAT ALL" will appear in the display and all messages in the selected file folder will repeat over and over until the PLAY/STOP button is pressed.
TO CANCEL REPEAT PLAYBACK:
To cancel repeat playback, press the ERASE/REPEAT button once or twice until the REPEAT indicator disappears from the display.
TO PAUSE AMESSAGE
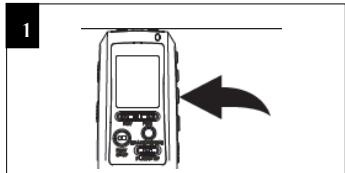
To pause Recording or playback, press the MODE/PAUSE button; PAUSE will blink in the display.
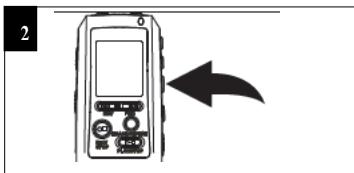
Press the MODE/PAUSE button again to resume recording or playback.
OPERATION(CONTINUED)
SCAN PLAYBACK
This unit can play back the first five seconds of each recorded message, which is useful in locating a particular recording.
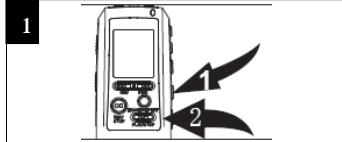
While in the standby mode,
select the file folder(A,B,C,D) using the
FILE/TIME button 1, Press and hold the
PLAY/STOP button 2 for 2 seconds; SCAN
will appear in the display. The unit will
appear in the display. The unit will
automatically scan and play the first five
seconds of each message in the selected
file folder, starting at message one.
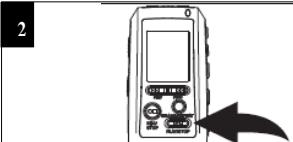
The unit will automatically stop after all Messages have been played. To playback the message during scanning, press the change to playback mode. To stop scan playback, Press the PLAY/STOP button twice.
12
SPECIFICATIONS
Recording System. Built-in Flash Memory
Recording time 3369 minutes in LP mode
Speaker. 0.2W(8 Ohm
Output Power. 80mW
Power Source. 3V, "AAA" size×2 batteries(Not Included)
Battery life........................Approx 10 hours at recording mode
5 hours at play mode at volume level Max.
Dimensions. 106(H)×36(W)×17(D)mm
Weight. .50g(without batteries)
Specifications are subject to change without notice.
OPERATION(CONTINUED)
ERASING A SINGLE MESSAGES

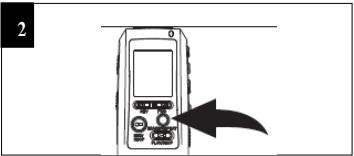
While in the standby mode, select the
desired file folder using the FILE/TIME
button , and the desired message to delete
using the REV 2 or FWD button 3.
the message number and the message length
will appear in the display.
Press the ERASE/REPEAT button; ERASE will
appear in the display and the first 5 seconds of
the message will play. To erase, press the
ERASE/REPEAT button within the 5 seconds it
is playing and the rest of the messages will be
renumbered. If you do not want to erase, do
not press the ERASE/REPEAT button while it
is playing.
ERASING ALL MESSAGES IN THE 4 FILE FOLDERS
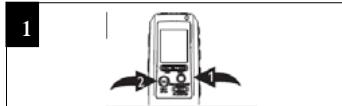
While in the standby mode, press and hold
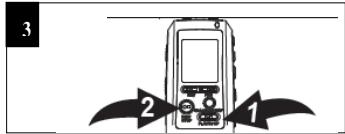
the ERASE/REPEAT button 1 first, then
press and hold the REC/STOP button 2 for
two seconds: ALL and ERASE will blink in
the display.
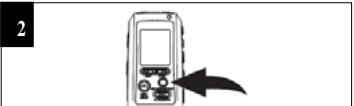
To erase all messages, press the
ERASE/REPEAT button again within 5
seconds. If the ERASE button is not pressed
again within the first 5 seconds, the messages
will not erase.
IMPORTANT NOTES:
.Once message(s)are deleted, they cannot be recovered.
. When the memory is full, Full will appear in the display.