
DVF-8100 - Lecteur dvd KENWOOD - Notice d'utilisation et mode d'emploi gratuit
Retrouvez gratuitement la notice de l'appareil DVF-8100 KENWOOD au format PDF.

| Type de produit | Lecteur DVD |
| Marque | KENWOOD |
| Modèle | DVF-8100 |
| Dimensions (L x H x P) | 440 x 44 x 249 mm |
| Poids net | 2,3 kg |
| Consommation électrique | 12 W |
| Alimentation | AC 110-240 V, 50/60 Hz |
| Formats de disque compatibles | DVD Video, CD Audio, CD-R/RW, VCD, SVCD, MP3, WMA, JPEG |
| Sorties vidéo | Composite, S-Vidéo, Composante (Y/Cb/Cr), SCART (RGB) |
| Sorties audio | Analogique stéréo (RCA), Numérique coaxiale, Numérique optique (Europe) |
| Résolution horizontale | Plus de 500 lignes |
| Rapport signal/bruit audio | Plus de 100 dB |
| Gamme dynamique audio | Plus de 92 dB |
| Fonctions principales | Lecture aléatoire, répétition, programmation, zoom, angle de caméra, contrôle parental, écran de veille, lecture MP3/WMA/JPEG |
| Entretien et nettoyage | Nettoyer avec un chiffon doux et sec. Ne pas utiliser de solvants ni de nettoyants pour contacts. |
| Sécurité | Produit laser de classe 1. Ne pas exposer à l'humidité. Ne pas ouvrir le boîtier. |
| Pièces détachées et réparabilité | Aucune pièce réparable par l'utilisateur. Confier toute réparation à un professionnel qualifié. |
| Accessoires fournis | Télécommande, piles, câble audio, câble vidéo, câble coaxial |
FOIRE AUX QUESTIONS - DVF-8100 KENWOOD
Questions des utilisateurs sur DVF-8100 KENWOOD
0 question sur cet appareil. Repondez a celles que vous connaissez ou posez la votre.
Poser une nouvelle question sur cet appareil
Téléchargez la notice de votre Lecteur dvd au format PDF gratuitement ! Retrouvez votre notice DVF-8100 - KENWOOD et reprennez votre appareil électronique en main. Sur cette page sont publiés tous les documents nécessaires à l'utilisation de votre appareil DVF-8100 de la marque KENWOOD.
MODE D'EMPLOI DVF-8100 KENWOOD
KENWOOD
DVD/VCD/CD PLAYER
DVF-8100
DVF-3080
INSTRUCTION MANUAL
KENWOOD CORPORATION
This instruction manual is for some models. Model availability and features (functions) may differ depending on the country and sales area.
Before applying power
Caution: Read this page carefully to ensure safe operation.
Units are designed for operation as follows.
U.S.A.and Canada.. AC 120 Vonly
Europe and U.K. AC 230 V only
Australia AC 240 Vonly
Other countries.. AC 110-240 V
Safety precautions
Caution: Read this page carefully to ensure safe operation.
WARNING: TO PREVENT FIRE OR ELECTRIC SHOCK, DO NOT EXPOSE THIS APPLIANCE TO RAIN OR MOISTURE.
| CAUTION RISK OF ELECTRIC SHOCK DO NOT OPEN | CAUTION: TO REDUCE THE RISK OF ELECTRIC SHOCK, DO NOT REMOVE COVER (OR BACK). NO USER-SERVICEABLE PARTS INSIDE. REFER SERVICING TO QUALIFIED SERVICE PERSONNEL. |
| THE LIGHTNING FLASH WITH ARROWHEAD SYMBOL, WITHIN AN EQUILATERAL TRIANGLE, IS INTENDED TO ALERT THE USER TO THE PRESENCE OF UNINSULATED “DANGEROUS VOLTAGE”WITHIN THE PRODUCT’S ENCLOSURE THAT MAY BE OF SUFFICIENT MAGNITUDE TO CONSTITUTE A RISK OF ELECTRIC SHOCK TO PERSONS. | |
| THE EXCLAMATION POINT WITHIN AN EQUILATERAL TRIANGLE IS INTENDED TO ALERT THE USER TO THE PRESENCE OF IMPORTANT OPERATING AND MAINTENANCE (SERVICING) IN-STRUCTIONS IN THE LITERATURE ACCOMPANYING THE APPLIANCE. | |
The marking of products using lasers
(For countries other than U.S.A. and U.S.-Military)
CLASS 1
LASER PRODUCT
The marking this product has been classified as Class 1. It means that there is no danger of hazardous radiation outside the product.
Location: Back panel
Unpacking
DVF-3080/DVF-8100 (EN/K,P,E,X,Y)
Unpack the unit carefully and make sure that all the accessories are present.
If any accessories are missing, or if the unit is damaged or fails to operate, notify your dealer immediately. If the unit was shipped to you directly, notify your shipper immediately. Kenwood recommends that you retain the original carton and packing materials in case you need to move or ship the unit in the future.
Keep this manual handy for future reference.
Accessories
Please confirm that the following accessories are present.
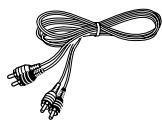
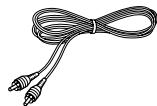
Audio cord (Red, White) ...(1)
Remote control unit...1
Video cable(Yellow) ... (1)

Batteries (R03/“AAA”-size) ...(2)

Coaxial cable (Black) ...(1)
Screen saver
The screen saver appears when you leave the DVD player in stop mode for about 5 minutes. If the Screen saver is displayed for 5 minutes, the DVD player automatically turns itself off.
For the U.S.A.
CAUTION:
Use of controls or adjustments or performance of procedures other than those specified herein may result in hazardous radiation exposure.
In compliance with Federal Regulations, the following are reproductions of labels on, or inside the product relating to laser product safety.
KENWOOD CORPORATION
2967-3, ISHIKAWA-CHO,
HACHIOJI-SHI,
TOKYO, JAPAN
KENWOOD CORP. CERTIFIES THIS EQUIPMENT CONFORMS TO DHHS REGULATIONS NO. 21 CFR 1040.10, CHAPTER 1, SUBCHAPTER J.
Location: Back Panel
For the U.S.A.
FCC WARNING
This equipment may generate or use radio frequency energy. Changes or modifications to this equipment may cause harmful interference unless the modifications are expressly approved in the instruction manual. The user could lose the authority to operate this equipment if an unauthorized change or modification is made.
NOTE:
This equipment has been tested and found to comply with the limits for a Class B digital device, pursuant to Part 15 of the FCC Rules. These limits are designed to provide reasonable protection against harmful interference in a residential installation. This equipment may cause harmful interference to radio communications, if it is not installed and used in accordance with the instructions. However, there is no guarantee that interference will not occur in a particular installation. If this equipment does cause harmful interference to radio or television reception, which can be determined by turning the equipment off and on, the user is encouraged to try to correct the interference by one or more of the following measures:
-- Reorient or relocate the receiving antenna.
-- Increase the separation between the equipment and receiver.
- - Connect the equipment into an outlet on a circuit different from that to which the receiver is connected.
-- Consult the dealer or an experienced radio / TV technician for help.
For Canada
NOTICE: This Class B digital apparatus complies with Canadian ICES-003.
Special features
This document classifies the applications of each feature using the following marks.
DVD : Description of a feature that can be used with DVD.
: Description of a feature that can be used with CD.
VCD : Description of a feature that can be used with VCD.

Higher video quality than S-VHS video and LaserDisc

Higher audio quality than music CD


On screen Display (OSD)
MP3, WMA and JPEG files playback
Contents
Caution: Read the pages marked carefully to ensure safe operation.
Preparations
Introduction 2
Before applying power 2
Safety precautions 2
Special features and Contents 4
Special features 4
Contents 4
Discs information 5
Types of playable discs 5
Unplayable discs 5
Icons on the DVD VIDEO discs 5
Region Codes 6
Region codes in the world 6
Video formats. 7
Important items 8
Maintenance 8
Reference 8
System Connections 9
Controls and indicators 11
Operation of remote control unit 12
Set Up functions 13
Preparation for Set Up 13
Set up menu 13
Language 14
DISPLAY 14
AUDIO 14
LOCK (Parental Control) 15
OTHERS 16
Hierarchical structure of VCD menus (P.B.C. function) 16
DVD menu language code list 17
Country Code list 17
Operations
Playback of disc 18
On screen display 18
Last Scene Memory 18
Basic play 19
Disc playback features 20
Various playback functions 22
Select Audio Language 22
Select the Audio channel 22
Select Subtitle Language 22
Using Marker 22
Select Camera angle 23
Random play 23
Repeat play 24
A-B Repeat play 24
Zoom function 24
Using the TV screen to start CD playback 24
3D Surround for DVD or VCD 25
3D Surround for CD 25
Time Search 25
Program play 26
MP3/WMA/JPEG media playback 28
Guidance of MP3/WMA/JPEG 28
Playing back MP3/WMA/JPEG files 29
Repeat play (only for MP3/WMA files) 30
Zoom function (only for JPEG files) 30
To rotate picture (only for JPEG files) 30
Slide show (only for JPEG files) 30
To listen to music watching picture (only for JPEG files) 30
MP3/WMA program playback 31
Knowledge
In case of difficulty 32
Specifications 35
Types of playable discs
The system using this unit does not only play music from CD but can also play the discs listed below to offer you high-quality entertainment of video of movies and live concerts.
| Playable Disc | DVD VIDEO | CD (CD-R, CD-RW) | VCD (SVCD*) | ||||
| Logo mark on disc | DVDVIDEO | DVDVIDEO | COMPACTDIGITAL AUDIO | COMPACTDIGITAL AUDIO | COMPACTDIGITAL | ||
| Disc size | 8cm | 12cm | 8cm | 12cm | 8cm | 12cm | |
| Played sides | One or both | One or both | One side only | One side only | One side only | One side only | |
| Contents | Video + Audio | Approx. 41 min.(1 side, 1 layer)Approx. 75 min.(1 side, 2 layers)Approx. 82 min.(2 sides, 1 layer)Approx. 150 min.(2 sides, 2 layers) | Approx. 133 min.(1 side, 1 layer)Approx. 242 min.(1 side, 2 layers)Approx. 266 min.(2 sides, 1 layer)Approx. 484 min.(2 sides, 2 layers) | Max. 20 min. | Max. 74 min. | ||
| (In case of an SVCD, the possible play-back time becomes shorter.) | |||||||
| Audio | Max. 20 min., digital | Max. 80 min., digital | |||||
MP3, WMA media and JPEG picture CD those can be played back with this equipment (CD-R, CD-RW)
- * This unit can play SVCDs, but some functions will not work.
This unit can play back DVD-R and DVD-RW discs recorded in the DVD VIDEO format and DVD+R and DVD+RW discs, but depending on the recording unit, the disc manufacturer, etc., playback sometimes may not be possible.
This unit may also be incapable of playing certain CD-R/RW discs depending on their properties, recording conditions, etc.
Unplayable discs
This player cannot play back any of the following discs.
DVD AUDIO discs
DVD-ROM discs
DVD-RAM discs
SACD discs
CD-ROM discs (Except MP3 and JPEG discs [ISO 9660 level 1])
VSD discs
CDV discs (Only the audio part can be reproduced.)
CD-G/CD-EG/CD-EXTRA discs (Only the audio can be reproduced.)
Photo CD discs (Never attempt to play them.)
- A DVD VIDEO disc with a region code which does not match this unit or without a region code. For details, see "Region Codes".
- When the video format of a disc differs from that of the TV in use, the disc cannot be played normally. For details, see "Video Formats".
Icons on the DVD VIDEO discs
| Icon | Description |
| ALL | Indicates the region code where the disc can be played. |
| 8 | Number of voice languages recorded with the audio function. The number in the icon indicates the number of voice languages. (Max. 8 languages) |
| 32 | Number of subtitle languages recorded with the subtitle function. The number in the icon indicates the number of subtitle languages. (Max. 32 languages) |
| 9 | Number of angles provided by the angle function. The number in the icon indicates the number of angles. (Max. 9 angles) |
| 16:9 LB | Aspect ratios that can be selected. "LB" stands for Letter Box and "PS" for Pan/Scan. -14 In the example on the left, the 16:9 video can be converted into letter box video. |
Every player of this model has a certain region code assigned to it based on the country where the player is used. When the player is used to play back DVD VIDEO discs, it can only play the DVD VIDEO discs carrying the region codes matching the region code of the player.
The region code for this player is described on the rear panel of the player.
Region codes in the world
The DVD players are given a region code according to the country or area it is marketed, as shown in the following map.
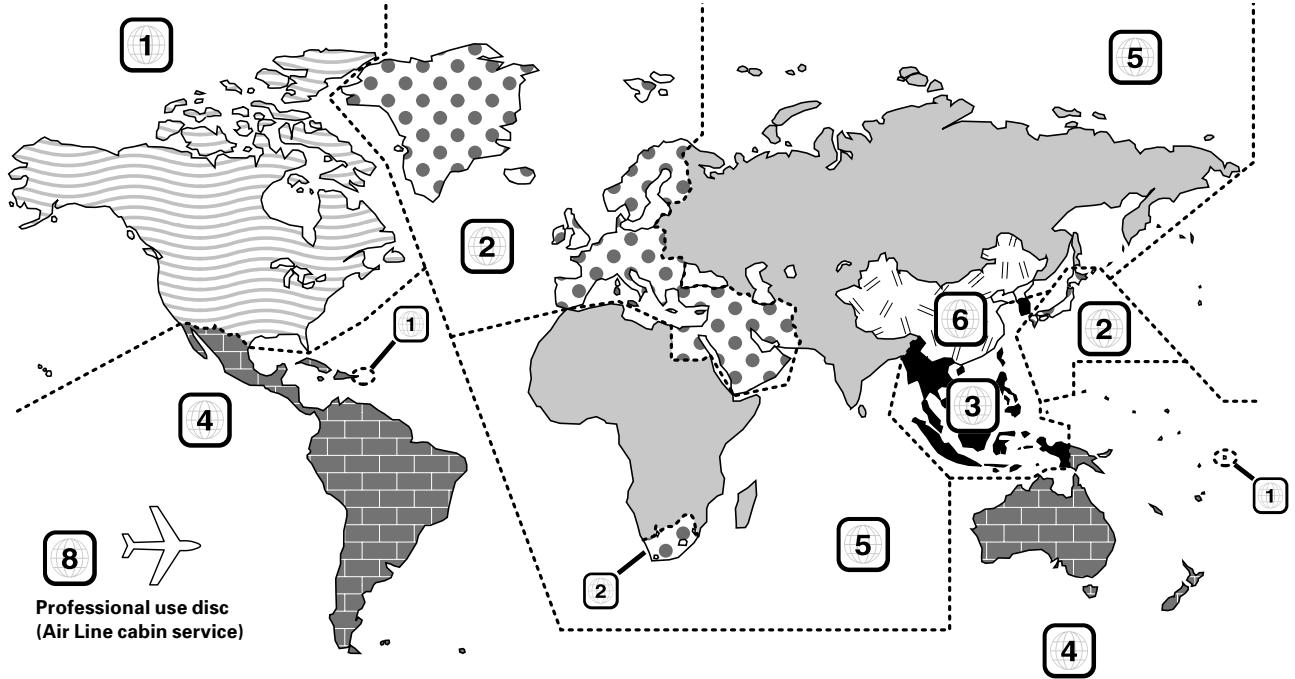
Region codes of the DVD VIDEO discs that can be played with this player
This player can play back a DVD VIDEO disc which carries the corresponding code to the region code of the player shown in the table above, a marking containing the region code of the player or the "ALL" marking shown below. Even when a DVD VIDEO disc does not carry any indication of the region code, it may sometimes unable to be played on this player due to certain restrictions.

Restrictions due to difference between discs
Some DVD and VCD discs can be played only in certain playback modes according to the intentions of the software producers. As this player plays discs according to their intentions, some functions may not work as intended by you. Please be sure to read the instructions provided with each disc. When an inhibition icon is displayed on the TV screen connected to the player, it indicates that the disc being played is under the restriction as described above.
Inhibition icon

The TV picture display and disc signal systems can be divided roughly into two TV formats (NTSC and PAL).
They are variable depending on countries and areas.
TV formats of major countries
| TV Format | Major Countries & Areas |
| NTSC | Japan, Taiwan, Korea, USA, Canada, Mexico, Philippines, Chile, etc. |
| PAL | China, U.K., Germany, Australia, New Zealand, Kuwait, Singapore, etc. |
This unit has a function for changing the video format according to the TV type. Please confirm the type of your TV.
Checking the Video Format
Check the video format of the TV to be used
When the video formats are different :
Try playing the disc. If the video formats of the disc and TV do not match, the played video may be black and white or become as shown below.
Top and bottom edges are not displayed.
Top and bottom areas are dark.
Picture turbulence due to sync unmatched.
To select TV Type
Remove the disc from the unit, then close the tray.

Press and hold the PAUSE key on the front panel for more than 5 seconds to be able to select a TV type (PAL, NTSC or AUTO).

Maintenance
Maintenance of the unit
When the front panel or case becomes dirty, wipe with a soft, dry cloth. Do not use thinner, benzine, alcohol, etc. for these agents may cause discoloration.
In regard to contact cleaner
Do not use contact cleaners because it could cause a malfunction. Be specially careful not to use contact cleaners containing oil, for they may deform the plastic component.
Reference
Disc handling precautions
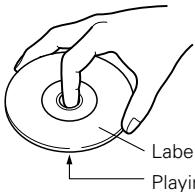
Handling
Hold the disc so that you do not touch the playing surface.
Do not attach paper or tape to either the playing side or the label side of the disc.
Sticky paste
Cleaning
If there are fingerprint marks or foreign matter found on the disc, lightly wipe the disc with a soft cotton cloth (or similar) from the center of the disc outwards in a radial manner.
Storage
When a disc is not to be played for a long period of time, remove it from the player and store it in its case.
Never play a cracked or warped disc
During playback, the disc rotates at high speed in the player. Therefore, to avoid danger, never use a cracked or deformed disc or a disc repaired with tape or adhesive agent. Please do not use discs which are not round because they may cause malfunction.
Disc accessories
The disc accessories (stabilizer, protection sheet, protection ring, etc.) which are marketed for improving the sound quality or protecting discs as well as the disc cleaner should not be used with this system because they may cause malfunction.
Note related to transportation and movement
Before transporting or moving this unit, carry out the following operations.
- Set the POWER ON/OFF switch to the ON without loading a disc.
- Wait a few seconds and verify that the display shown appears.
"NO DISC"
- Set the POWER ON/OFF switch to OFF.
Caution on condensation
Condensation (of dew) may occur inside the unit when there is a great difference in temperature between this unit and the outside. This unit may not function properly if condensation occurs. In this case, leave the unit for a few hours and restart the operation after the condensation has dried up.
Be specially cautious against condensation in the following circumstances:
When this unit is carried from one place to another across a large difference in temperature, when the humidity in the room where this unit is installed increases, etc.
Caution:
Do not plug in the power lead until all connections are completed.
Make connections as shown below.
When connecting the related system components, refer also to the instruction manuals of the related components.
Malfunction of microcomputer
If operation is not possible or erroneous display appears even though all connections have been made properly, reset the microcomputer referring to "In case of difficulty".
Connecting to a TV with video (composite) or S-video input terminal
S-video cord (Commercially available)
Except for Europe
Connect only either the video (com pose) cord or the S-video cord.
Connecting to a TV with SCART input terminal (For Europe)
TV
Rear panel example (DVF-8100 for Europe)
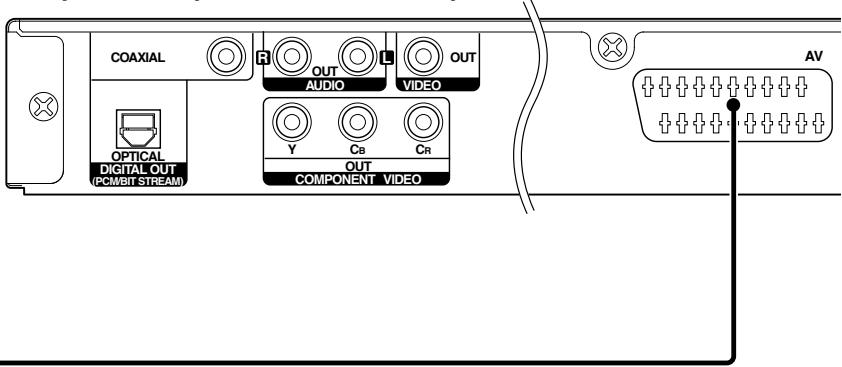
SCART cable (Commercially available)

Make sure the DVD player is connected directly to the TV and not to a VCR, otherwise the DVD image could be distorted by the copy protection system.
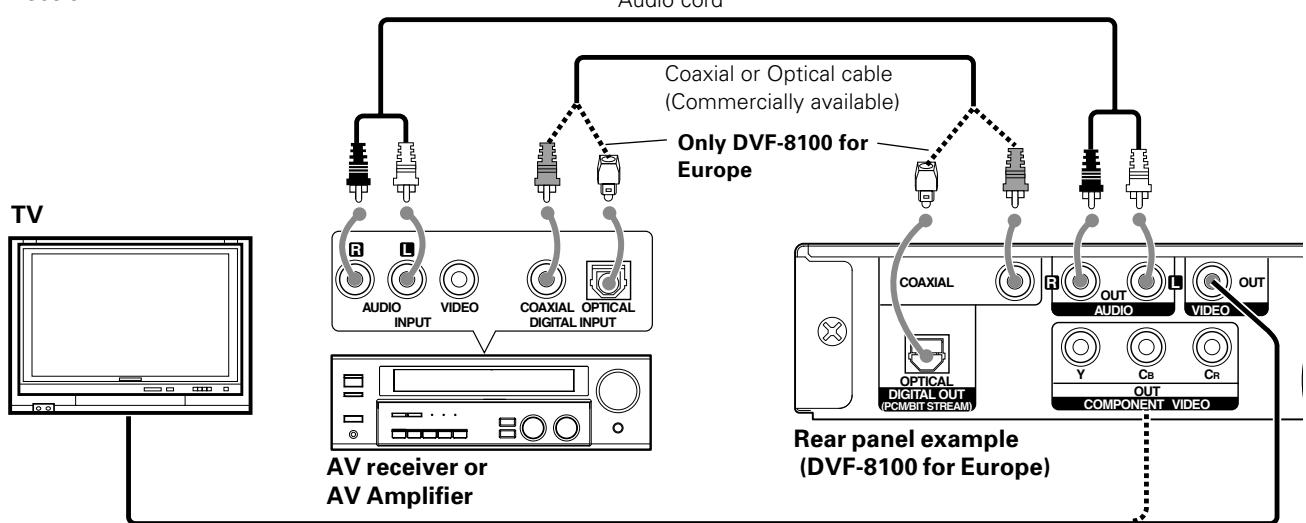
DTS disclaimer clause
When playing DTS-encoded (CDs, DVDs), excessive noise will be exhibited from the analog stereo outputs. To avoid possible damage to the audio system, the consumer should take proper precautions when the analog stereo outputs of the DVD player is connected to an amplification system.
To enjoy DTS Digital Surround™ playback, an external 5.1 channel DTS Digital Surround™ decoder system must be connected to the digital output (S/P DIF, AES/EBU, or TosLink) of the DVD player.
Connecting to a TV with Component input terminals
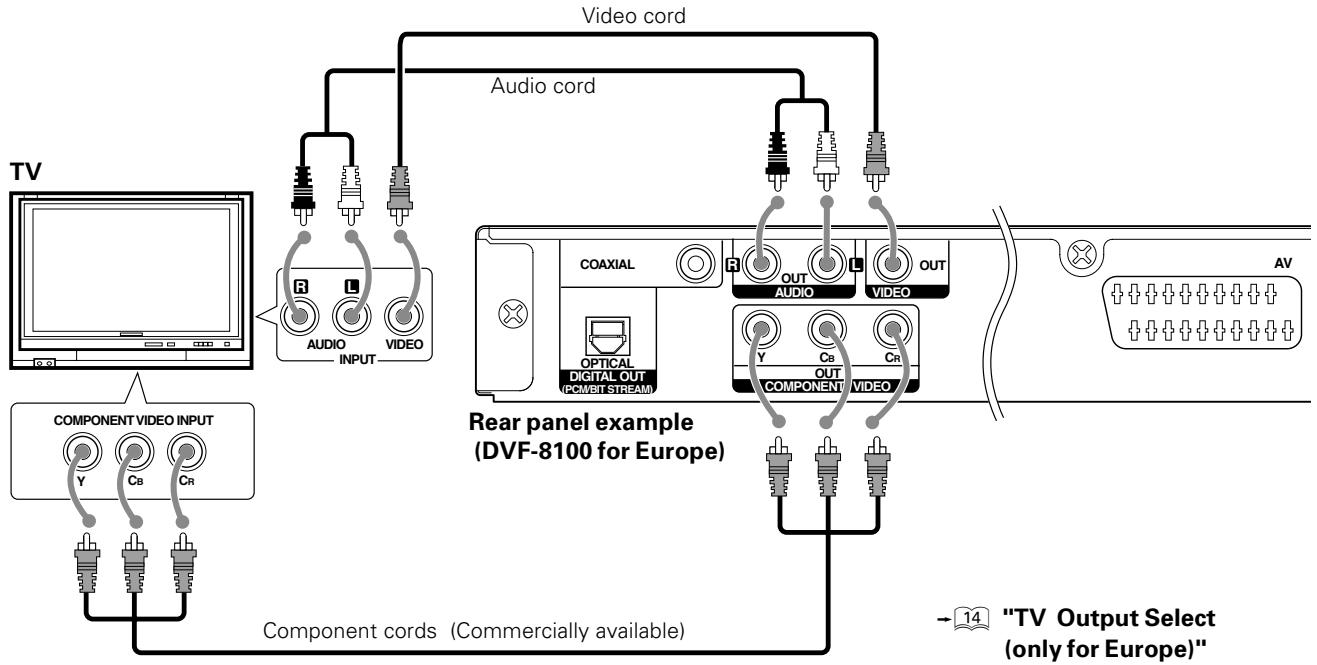
Connecting to an Audio component
For playback of DTS audio, please connect an AV receiver or an AV amplifier which can decode DTS by digital connection. Audio cord
Video cord or Component cords (Commercially available) ( 9)
Amplifier equipped with 2-channel analog stereo or Dolby Pro Logic II / Pro Logic:
Connect the left and right AUDIO OUT jacks on the DVD player to the audio left and right IN jacks on your amplifier, receiver, or stereo system, using the audio cables.
Amplifier equipped with 2-channel digital stereo (PCM) or a multi-channel decoder (Dolby Digital™, MPEG 2, or DTS):
Connect one of the DVD Player's DIGITAL OUT jacks (COAXIAL or OPTICAL) to the corresponding in jack on your amplifier. Use an optional digital (coaxial or optical) cable.

- In case an associated system component is connected, also read the instruction manual of the component.
- If the audio format of the digital output does not match the capabilities of your receiver (amplifier), the receiver produces a strong, distorted sound or no sound at all.
- Insert the optical-fiber cable straight into the connector until it clicks.
- Never bend or bundle the optical-fiber cable.
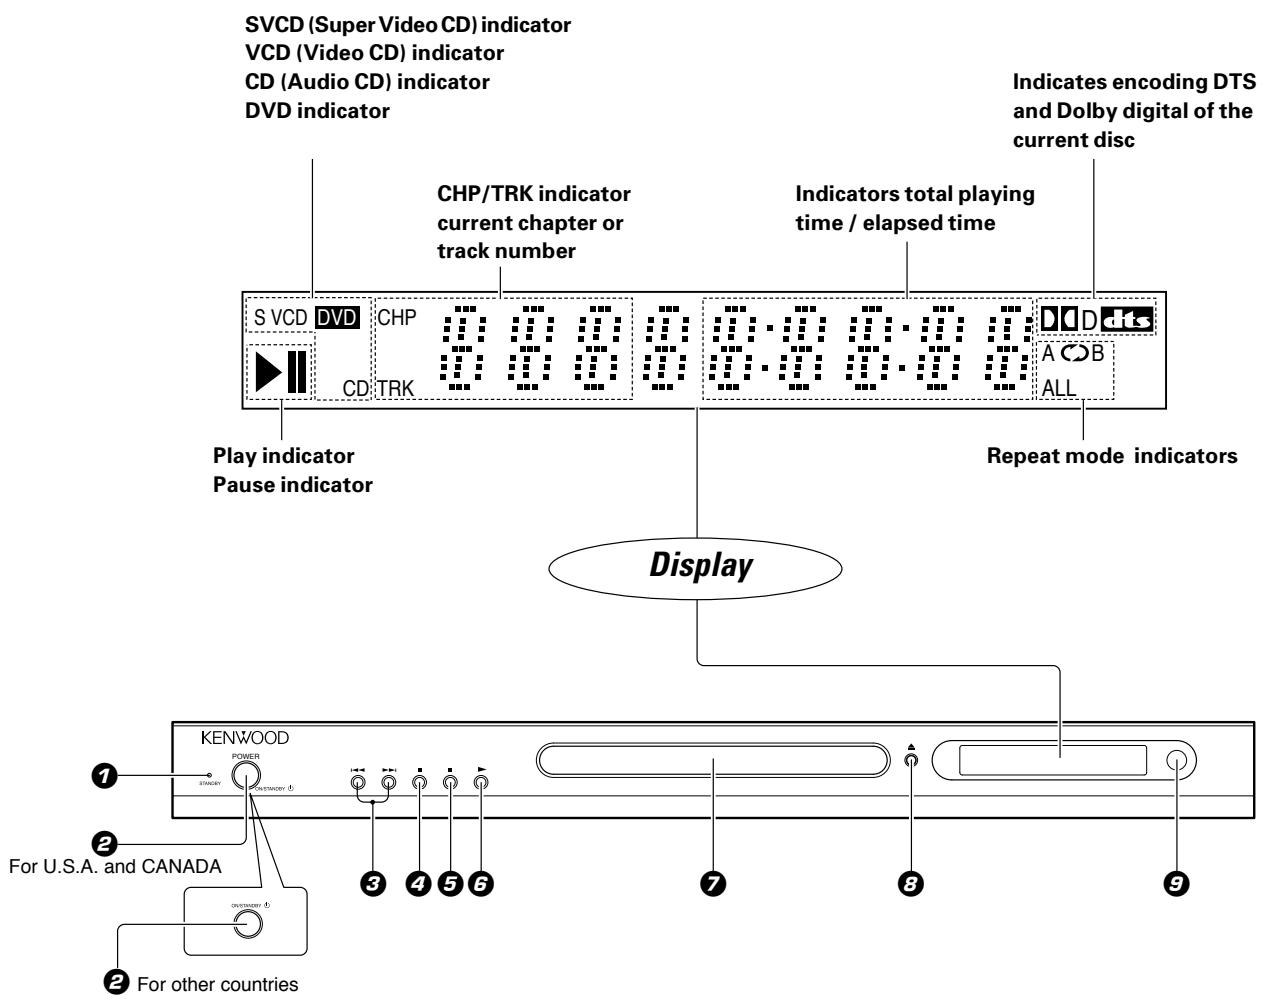
STANDBY indicator
POWER on/off (ON/STANDBY) key (For U.S.A. and CANADA) 13 19
ON/STANDBY key (For other countries)
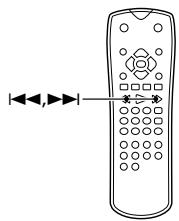
(Prev.), (NEXT) / Search keys
4 (Stop) key
⑤ II (Pause) key
(Play) key
7 Disc tray
(Open/Close) key
Remote sensor
STANDBY MODE
While the standby indicator is lit, a small amount of power is supplied to the system to back up the memory. This is called standby mode. Under the condition, the system can be turned ON by the remote control unit.
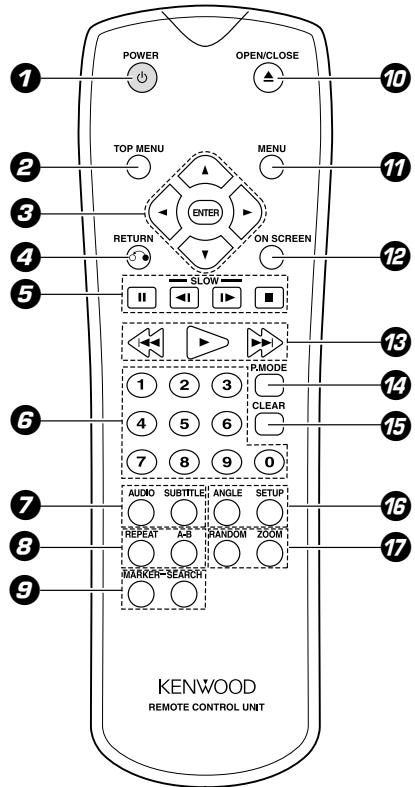
The keys on the remote control unit with the same names as on the main unit have the same function as the keys on the main unit.
7 POWER key
TOP MENU key
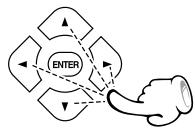
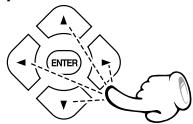
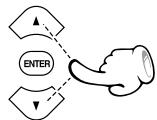
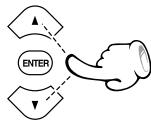
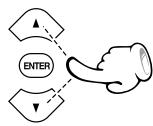
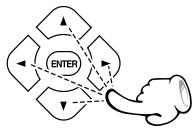
Cursor (▲) Up, (▼) Down, (▲) Left and (▶) Right keys
ENTER key
$$ = \boxed {1 3} \rightarrow \boxed {1 5} \rightarrow \boxed {2 2} \rightarrow \boxed {2 4} \sim \boxed {3 2} $$
4 RETURN key
⑤ II (Pause) key -19
<1 / 1> (Back slow/
Forward slow) keys 21
■ (Stop) key
6 Numeric keys -21-25
7 AUDIOkey -22-25
SUBTITLE key
REPEAT key
$$ - \boxed {2 3} - \boxed {2 4} - \boxed {3 0} $$
A-B (A-B repeat) key -24
MARKERkey
(MARKER) SEARCH key
$$ \rightarrow \boxed {2 2} $$
70 (△)OPEN/CLOSE key - 19
7 MENU key
ON SCREEN key-21-25
(Prev.) key/▶ (NEXT) key (Skip key) -20
▶(Play) key
- 19 - 21 - 24 - 29 - 32
P.MODE key -26-31
CLEARkey 14-22
16 ANGLE key -23
SETUP -13
7 RANDOM key 23 ZOOM key 24
Model: RC-D0313 (Infrared ray system)
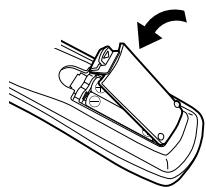
Loading batteries
Remove the cover.
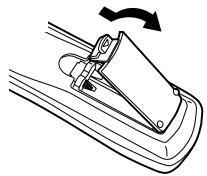
Insert batteries.
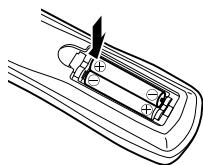
- Insert two R03 ("AAA"-size) batteries following the polarity indications.
Close the cover.
Operation
Insert the power plug into a power outlet, press the POWER (ON/STANDBY) key of the main unit to on, then press the desired remote control key.
- When pressing more than one remote control keys successively, press the keys securely by leaving an interval of 1 second or more between pressing of keys.


- The provided batteries are intended for use in operation checking, and their service life may be short.
- When the remote controllable distance becomes short, replace both of the batteries with new ones.
- If direct sunlight or the light of a high-frequency fluorescent lamp (inverter type, etc.) is incident to the remote sensor, malfunction may occur. In such a case, change the installation position to avoid malfunction.
Preparation for Set Up
7 Set the POWER key (ON/STANDBY key) to power on.
Set Video Format according to the connected TV type. (To select TV Type -)
MAIN UNIT

If the video formats of the disc and TV do not mach, press and hold PAUSE key on the front panel for more than 5 seconds to be able to select a TV type (PAL, NTSC or AUTO). (No disc inserted)
Setup menu
Initial Settings
By using the Setup menu, you can make various adjustments to items such as picture and sound. You can also set a language for the subtitles and the Setup menu, among other things. For details on each Setup menu item, see pages 14 to 16.
To display and exit the Menu:
Press SETUP key to display the menu. A second press of SETUP key will take you back to initial screen.

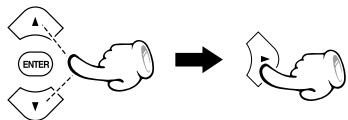
To go to the next level:
Press the Cursor right (▶) key on the remote.
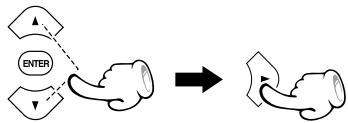
To go back to the previous level:
Press the Cursor left ( ) key on the remote.

General Operation
7 Press SETUP key.
The Setup menu appears.

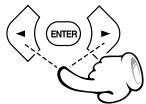
Use the Cursor up/down ( /) keys on the remote to select the desired option, then press the Cursor right () key to move to the second level.
The screen shows the current setting for the selected item, as well as alternate setting(s).
Use the Cursor up/down ( /) keys on the remote to select the second desired option, then press the Cursor right () key to move to the third level.
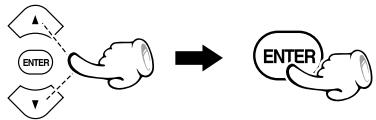
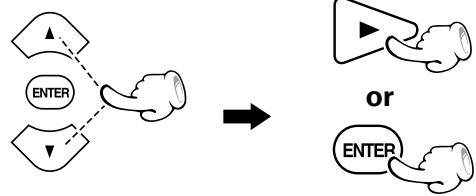
Use the Cursor up/down ( /) keys on the remote to select the desired setting, then press ENTER key to confirm your selection. Some items require additional steps.
Press SETUP key or PLAY key to exit the Setup menu.
LANGUAGE
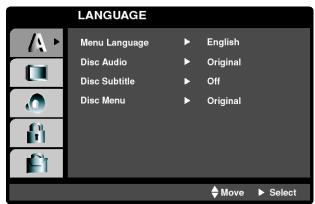
Menu Language
Select a language for the Setup menu and on-screen display.
Disc Audio/subtitle/Menu
Select the language you prefer for the audio Track (disc audio), subtitles, and the disc menu
Original: Refers to the original language in which the disc was recorded.
Other: To select another language, press number buttons then ENTER key to enter the corresponding digit number according to the language code list in the reference chapter. If You enter the wrong Language code, press CLEAR key.
DVD DISPLAY
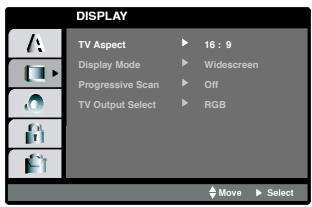
TV Aspect DVD
4:3: Select when a standard 4:3 TV is connected.
16:9: Select when a 16:9 wide TV is connected.
Display Mode DVD
Display Mode setting works only when the TV Aspect mode is set to "4:3".
Letterbox: Displays a wide picture with bands on the upper and lower portions of the screen.
Panscan: Automatically displays the wide Picture on the entire screen and cuts off the portions that do not fit.
Progressive Scan
When ON is selected, the confirmation screen for switching to Progressive Scan appears.
In case of a TV not compatible with Progressive Scan, the screen disappears and return to the original display is made after 10 seconds.
TV Output Select (only for Europe)
The TV Output Select mode is switched to RGB or YCbCr.
DVD AUDIO
Each DVD disc has a variety of audio output options. Set the player's AUDIO options according to the type of audio system you use.
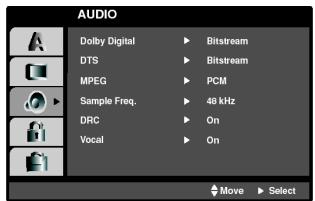
Dolby Digital/ DTS/ MPEG
Bitstream: Select "Bit stream" if you connect the DVD Player's DIGITAL OUT jack to an amplifier or other equipment with a Dolby Digital, DTS or MPEG decoder.
PCM (for Dolby Digital/ MPEG): Select when connected to a two-channel digital stereo amplifier. DVDs encoded in Dolby Digital or MPEG will be automatically down mixed to two-channel PCM audio.
Off (for DTS): If you select "Off", the DTS signal is not output through the DIGITAL OUT jack.
Sample Freq. (Frequency) DVD
If you receiver or amplifier is NOT capable of handling 96 kHz signals, select 48 kHz. When this choice is made, this unit automatically converts any 96 kHz signals to 48 kHz so your system can decode them.
If your receiver or amplifier is capable of handling 96 kHz signals, select 96 kHz. When this choice is made, this unit passes each type of signal through without any further processing.
Check the documentation for your amplifier to verify its capabilities.
When the disc prohibits 96kHz digital output, the signal always is put out after down-conversion.
Dynamic Range Control (DRC) DvD
With the DVD format, you can hear a program's soundtrack in the most accurate and realistic presentation possible, thanks to digital audio technology. However, you may wish to compress the dynamic range of the audio output (the difference between the loudest sounds and the quietest ones). This allows you to listen to a movie at a lower volume without losing clarity of sound. Set DRC to On for this effect.
This function operates only at the time of playback of DVDs recorded with Dolby Digital.
Vocal
Set to on only when a multi-channel karaoke DVD is playing. The karaoke channels on the disc mix into normal stereo sound.
LOCK(Parental Control)
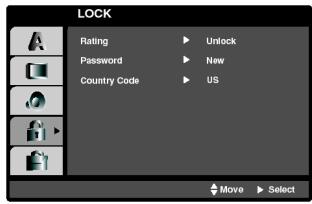
Rating DVD
Some movies contain scenes that may not be suitable for children to view. Many of these discs contain parental control information that applies to the complete disc or to certain scenes on the disc. Movies and scenes are rated from 1 to 8, depending on the country. Some discs offer more suitable scenes as an alternative.
The parental control feature allows you to block access to scenes below the rating you input, thereby preventing your children from being able to view material you believe is unsuitable.
1 Select "Rating" on the LOCK menu then press the Cursor right (▶) key.
To access the Rating, Password and Country Code features, you must input the 4-digit security code you created. If you have not yet entered a security code you are prompted to do so.
Input a digit code and press ENTER key. Enter it again and press ENTER key to verify. If you make a mistake before pressing ENTER key, press CLEAR key.
Select a rating from 1 to 8 using the Cursor up/ down ( /) keys.
Rating 1-8: Rating one (1) has the most restrictions and rating eight (8) is the least restrictive.
Unlock
If you select unlock, parental control is not active and the disc plays in full.

If you set a rating for the player, all disc scenes with the same rating or lower are played. Higher rated scenes are not played unless an alternate scene is available on the disc. The alternative must have the same rating or a lower one. If no suitable alternative is found, playback stops. You must enter the 4-digit password or change the rating level in order to play the disc.
Press ENTER key to confirm your rating selection, then press SETUP key to exit the menu.
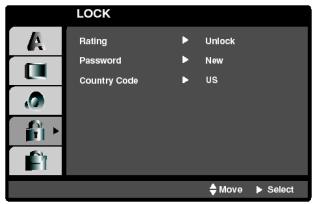
Password (Security Code)
You can enter or change password.
1 Select Password on the LOCK menu then press the Cursor right (▶) key.
2 Follow step 3 as shown left column (Rating). "Change" or "New" is highlighted.
Enter the new 4-digit code, then press ENTER key. Input it again to verify.
Press SETUP key to exit the menu.
If you forget Security Code
If you forget your security code you can clear using the following steps:
Press SETUP key to display the Setup menu.
Input the 6-digit number "210499" and the security code is cleared.
Enter a new code as described above.
Country Code DvD
Enter the code of the country/area whose standards were used to rate the DVD video disc, based on the list in the reference chapter.
Ratings are country-dependent.
1 Select "Country Code" on the LOCK menu, then press the Cursor right ()
Follow step as shown left column (Rating).
Select the first character using the Cursor up/down ( /) keys.
Shift the cursor using the Cursor right () key. and select the second character using the Cursor up/down ( /) keys.
Press ENTER to confirm your country code selection.
OTHERS
The PBC and B.L.E. settings can be changed.
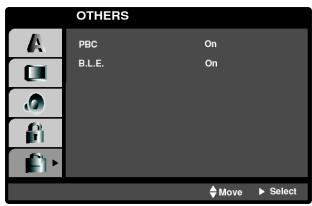
PBC VCD
SetPlaybackControl(PBC)toOnorOff.
On: Video CDs with PBC are played according to the PBC.
Off: Video CDs with PBC are played the same way as Audio CDs.
B.L.E. (Black Level Expansion)

To select the black level of playback pictures.
Set your preference and monitor's ability.
On: Expanded grey scale. (0 IRE cut off)
Off: Standard grey scale. (7.5 IRE cut off)

The B.L.E. function works NTSC system only.

Hierarchical structure of VCD menus (P.B.C. function)
When an item is selected on the menu screen during playback of a P.B.C.-compatible VCD, another menu with more details items may be displayed. When a number of menus are connected in multiple layers in this way, it is said that the menus have a hierarchical structure. In this structure, the desired scene can be reached by repeating item selections on the menu screens.
Example for a hierarchical structure
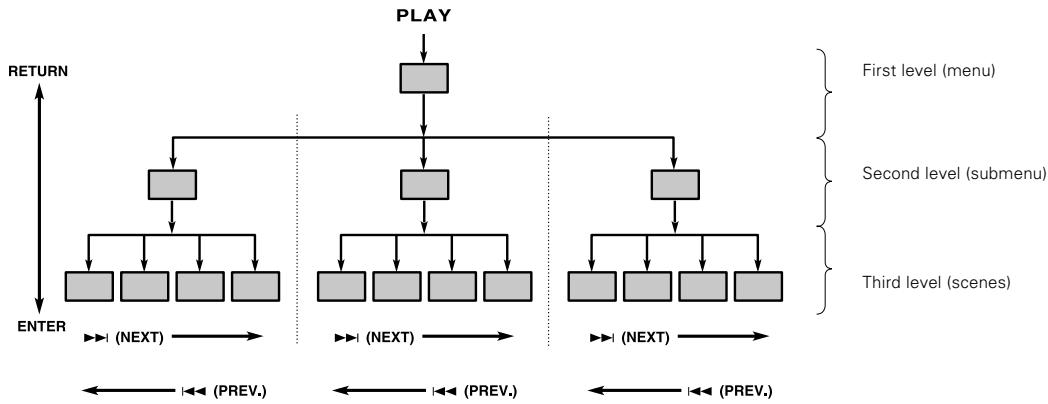
Advancing
When an item is selected on the menu screen with the ENTER (Select) key or the numeric keys, advance is made to the next lower menu level. When the advance destination is the "scene" to be played, the contents will be played.
- When several menus (scenes) can be selected in each level, screen switching is possible with the keys (NEXT) and (PREV.).
Returning
Each time the RETURN key is pressed, return is made to the next higher menu.
DVD menu language code list
| Language | Code |
| Abkhazian | 6566 |
| Afar | 6565 |
| Afrikaans | 6570 |
| Albanian | 8381 |
| Ameharic | 6577 |
| Arabic | 6582 |
| Armenian | 7289 |
| Assamese | 6583 |
| Aymara | 6588 |
| Azerbaijani | 6590 |
| Bashkir | 6665 |
| Basque | 6985 |
| Bengali; Bangla | 6678 |
| Bhutani | 6890 |
| Bihari | 6672 |
| Breton | 6682 |
| Bulgarian | 6671 |
| Burmese | 7789 |
| Byelorussian | 6669 |
| Cambodian | 7577 |
| Catalan | 6765 |
| Chinese | 9072 |
| Corsican | 6779 |
| Croatian | 7282 |
| Czech | 6783 |
| Danish | 6865 |
| Dutch | 7876 |
| English | 6978 |
| Esperanto | 6979 |
| Estonian | 6984 |
| Faroese | 7079 |
| Language | Code |
| Fiji | 7074 |
| Finnish | 7073 |
| French | 7082 |
| Frisian | 7089 |
| Galician | 7176 |
| Georgian | 7565 |
| German | 6869 |
| Greek | 6976 |
| Greenlandic | 7576 |
| Guarani | 7178 |
| Gujarati | 7185 |
| Hausa | 7265 |
| Hebrew | 7387 |
| Hindi | 7273 |
| Hungarian | 7285 |
| Icelandic | 7383 |
| Indonesian | 7378 |
| Interlingua | 7365 |
| Irish | 7165 |
| Italian | 7384 |
| Japanese | 7465 |
| Javanese | 7487 |
| Kannada | 7578 |
| Kashmiri | 7583 |
| Kazakh | 7575 |
| Kirghiz | 7589 |
| Korean | 7579 |
| Kurdish | 7585 |
| Laothian | 7679 |
| Latin | 7665 |
| Latvian, Lettish | 7686 |
| Language | Code |
| Lingala | 7678 |
| Lithuanian | 7684 |
| Macedonian | 7775 |
| Malagasy | 7771 |
| Malay | 7783 |
| Malayalam | 7776 |
| Maltese | 7784 |
| Maori | 7773 |
| Marathi | 7782 |
| Moldavian | 7779 |
| Mongolian | 7778 |
| Nauru | 7865 |
| Nepali | 7869 |
| Norwegian | 7879 |
| Oriya | 7982 |
| Panjabi | 8065 |
| Pashto, Pushto | 8083 |
| Persian | 7065 |
| Polish | 8076 |
| Portuguese | 8084 |
| Quechua | 8185 |
| Rhaeto-Romance | 8277 |
| Rumanian | 8279 |
| Russian | 8285 |
| Samoan | 8377 |
| Sanskrit | 8365 |
| Scots Gaelic | 7168 |
| Serbian | 8382 |
| Serbo-Croatian | 8372 |
| Shona | 8378 |
| Sindhi | 8368 |
| Language | Code |
| Singhalese | 8373 |
| Slovak | 8375 |
| Slovenian | 8376 |
| Somali | 8379 |
| Spanish | 6983 |
| Sudanese | 8385 |
| Swahili | 8387 |
| Swedish | 8386 |
| Tagalog | 8476 |
| Tajik | 8471 |
| Tamil | 8465 |
| Tatar | 8484 |
| Telugu | 8469 |
| Thai | 8472 |
| Tibetan | 6679 |
| Tigrinya | 8473 |
| Tonga | 8479 |
| Turkish | 8482 |
| Turkmen | 8475 |
| Twi | 8487 |
| Ukrainian | 8575 |
| Urdu | 8582 |
| Uzbek | 8590 |
| Vietnamese | 8673 |
| Volapük | 8679 |
| Welsh | 6789 |
| Wolof | 8779 |
| Xhosa | 8872 |
| Yiddish | 7473 |
| Yoruba | 8979 |
| Zulu | 9085 |
Country Code list
| Country | Code |
| Afghanistan | AF |
| Argentina | AR |
| Australia | AU |
| Austria | AT |
| Belgium | BE |
| Bhutan | BT |
| Bolivia | BO |
| Brazil | BR |
| Cambodia | KH |
| Canada | CA |
| Chile | CL |
| China | CN |
| Colombia | CO |
| Congo | CG |
| Costa Rica | CR |
| Croatia | HR |
| Czech Republic | CZ |
| Denmark | DK |
| Ecuador | EC |
| Egypt | EG |
| El Salvador | SV |
| Country | Code |
| Ethiopia | ET |
| Fiji | FJ |
| Finland | FI |
| France | FR |
| Germany | DE |
| Great Britain | GB |
| Greece | GR |
| Greenland | GL |
| Islands | HM |
| Hong Kong | HK |
| Hungary | HU |
| India | IN |
| Indonesia | ID |
| Israel | IL |
| Italy | IT |
| Jamaica | JM |
| Japan | JP |
| Kenya | KE |
| Kuwait | KW |
| Libya | LY |
| Luxembourg | LU |
| Country | Code |
| Malaysia | MY |
| Maldives | MV |
| Mexico | MX |
| Monaco | MC |
| Mongolia | MN |
| Morocco | MA |
| Nepal | NP |
| Netherlands | NL |
| Netherlands Antilles | AN |
| New Zealand | NZ |
| Nigeria | NG |
| Norway | NO |
| Oman | OM |
| Pakistan | PK |
| Panama | PA |
| Paraguay | PY |
| Philippines | PH |
| Poland | PL |
| Portugal | PT |
| Romania | RO |
| Russian Federation | RU |
| Country | Code |
| Saudi Arabia | SA |
| Senegal | SN |
| Singapore | SG |
| Slovak Republic | SK |
| Slovenia | SI |
| South Africa | ZA |
| South Korea | KR |
| Spain | ES |
| Sri Lanka | LK |
| Sweden | SE |
| Switzerland | CH |
| Taiwan | TW |
| Thailand | TH |
| Turkey | TR |
| Uganda | UG |
| Ukraine | UA |
| United States | US |
| Uruguay | UY |
| Uzbekistan | UZ |
| Vietnam | VN |
| Zimbabwe | ZW |
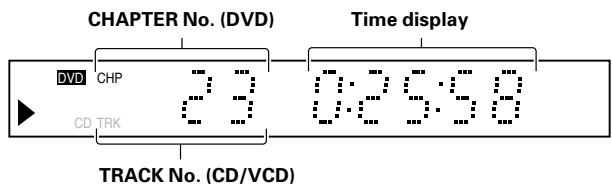
DVD VCD On screen display
The on-screen Banner Display contains many playback features. To see the Banner Display, press ON SCREEN key on the remote while a disc is playing. Use the Cursor ( / / /) keys on the remote to move through the different features in the Banner Display. Each feature is illustrated with an icon.
Example:
On-Screen Display during playing DVD

Title Number
Example:
On-Screen Display during playing VCD

Track Number (or PBC mode)

Chapter Number

Time search

Time search

Audio Channel

Audio language and Digital Audio Output mode

Sound

Subtitle language

Angle

Sound
CD DVD VCD Last Scene Memory
This player memorizes last scene from the last disc that is viewed. The last scene remains in memory even if you remove the disc from the player or switch off the player. If you load a disc that has the scene memorized, the scene is automatically recalled.
If you don't want to use the Last Scene Memory, press the STOP key during stop.

This player does not memorize the scene of a disc if you switch off the player before commencing to play the disc.
Basic play
Preparation

- Set the POWER key to the On position.

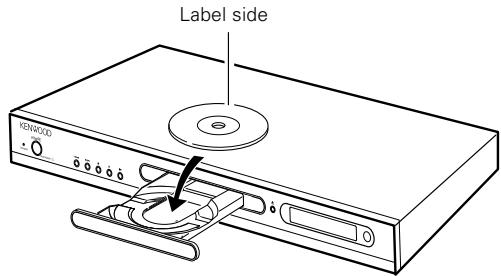
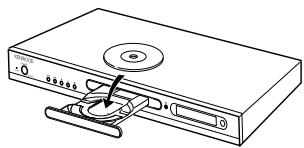
1 Load a disc.
MAIN UNIT
Open the tray.
Place a disc.

2 Start playback.
MAIN UNIT
REMOTE


- When the key is pressed while a tray is open, the tray closes automatically, and then playback begins.

When a Disc Menu appears on the screen
In case of interactive DVDs, a Disc Menu appears on the screen. Then press ENTER to select specific menu you want to play by using Cursor keys.
Each press pauses and plays the disc alternately.
When a menu screen is recorded on the DVD disc, the menu screen will be displayed when the TOP MENU key or MENU key is pressed. At the menu screen, the menu can be selected by pressing the Cursor keys.
To stop playback
MAIN UNIT
REMOTE


To pause playback
MAIN UNIT

REMOTE

- During DVD playback, step operation is performed each time this key is pressed. ( 21)
Disc playback features

- You won't hear the sound (audio) on the DVD and VCD when you're using the Skip, Search, Step or Slow motion features.
- Playback features are not available during the opening credits of a movie.
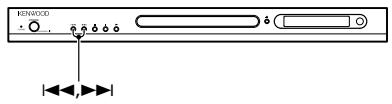
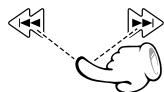
CD DVD Skipping chapters or tracks
MAIN UNIT
REMOTE
To skip backward
To skip forward
- The chapter (or track) in the direction of the key pressed is skipped, and the selected chapter (or track) will be played from the beginning.
- When the key is pressed once during playback, the chapter (or track) being played will be played from the beginning.
- When the key is pressed within 3 seconds after the start of chapter (or track) playback, playback starts from the start of the preceding chapter (or track).

The Chapter feature won't work if the disc isn't formatted with separate chapters.
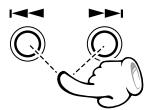
CD DVB VCD Searching
During playback, press or key for more than 2 seconds.
MAIN UNIT
REMOTE
Press and hold 口 or key repeatedly.
MAIN UNIT
REMOTE
To search backward (FR)
▶▶: To search forward (FF)
Each press and hold switches the searching speed.
(At the time of DVD playback)
FF 2X (▶key) or FR 2X (▶key)
② FF 4X (▶key) or FR 4X (I<key)
③ FF 16 X (▶key) or FR 16 X (I▶key)
L ④ FF100X( key) or FR 100X (Ikey)
(At the time of CD/VCD playback)
FF 2X (▶key) or FR 2X (▶key)
② FF 4X (▶key) or FR 4X (I▶key)
L ③ FF 8X (▶key) or FR 8X (1▶key)
- Press the key at any time to resume normal playback.
STEP (freeze frame and frame advance)
REMOTE

- During playback, press the PAUSE keys.
Each time you press the keys, the picture advances one frame. - Press the key to resume normal playback.
OVD VCD Slow motion playback
REMOTE
- During playback, press the SLOW keys.
Each press switches the motion speed.
(At the time of DVD playback)
① SF 1/16 (■ key) or SR 1/16 (▲ key)
② SF 1/8 (■ key) or SR 1/8 (▲ key)
③ SF 1/4 (■ key) or SR 1/4 (▲ key)
L ④ SF 1/2 (■key) or SR 1/2 (▲key)
(At the time of VCD playback)
(Slow Reverse is not possible)
① SF 1/16 (■ key)
② SF 1/8 (■key)
③ SF 1/4 (■ key)
L ④ SF 1/2 (I▶ key)
- Press the key to resume normal playback.
CD DVD Playback from desired title, chapter or track.
Because DVD VIDEOS discs use digital technology, a title can be divided into individual chapters (similar to tracks on a CD).
(At the time of DVD playback)
REMOTE
Press ON SCREEN key.
ON SCREEN

Press the Cursor up/down ( /) keys on the remote to select the title or chapter icon.
1/3Title icon
Chapter icon
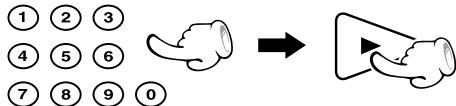
Press the numeric keys, then pless the (play) key.
(Example) To select track No. 23: ② ③
- The display is switched off when no operation is performed for about 10 seconds.
(At the time of CD/VCD playback)
REMOTE
Press the numeric keys, then pless the (play) key.
(Example) To select track No. 23: ② ③


P.B.C. on mode of VCD, the Selecting a Track function may not work.

The Chapter feature won't work if the disc isn't formatted with separate chapters.
DVD Select Audio Language
If the disc was created with different language tracks, you can use the AUDIO key on the remote to temporarily change the DVD player's Audio setting.
During playback, press the AUDIO key on the remote.

Audio language icon
The language is switched each time the AUDIO key is pressed.
- The display is switched off when no operation is performed for about 3 seconds.

- The language feature only works if the disc was created with multiple audio tracks.
- When you chose an audio language by the AUDIO key, you only override the audio language setting in the DVD Player's main menu (in the Language Preferences menu within Setup menu) temporarily.
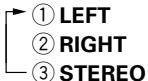
VCD Select the Audio channel
You can choose to play back only the right or the left channel of audio recorded on the disc, or you can select stereo playback.
During VCD playback, press the AUDIO key on the remote.


Audio cannel icon
Each press the key switches the mode.
DVD Select Subtitle Language
You can change the Subtitle language while you're watching a disc (but only if the disc was created with subtitles).
During playback, press the SUBTITLE key on the remote.

SUBTITLE

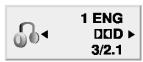
Subtitle language icon
1ENG
The language is switched each time the SUB-TITLE key is pressed.
- The display is switched off when no operation is performed for about 3 seconds.

- The subtitle feature only works if the disc was created with multiple subtitle tracks.
- The subtitle menu of the disc appears in some discs.
DVD VCD Using Marker
The marker feature lets you mark a point on the disc that you can go to quickly. You can store up to 9 marker points
Create the Marker
When you reach the scene you want to mark, press MARKER key.


- The marker icon appears on the TV screen briefly.
- Repeat to enter up to 9 marker points.
To recall or clear a marked scene
During playback, press the SEARCH key on the remote.


- The marker search menu appears on the screen.
Press the Cursor right/left (▲/▶) keys on the remote to select a marker number that you want to recall or cler.
Press the ENTER key to playback from the marked scene or press the CLEAR key to clear the selected number.

To recall

To clear

- If all 9 marker points are in use, you can still mark new scenes, but the previous marker points will be erased.
- Depending on the disc, the marker function may not work.
P.B.C. on mode of VCD, the marker function does not work.
Clearing all marker points
- The marker points are cleared each time a disc is removed from the player or when the power is turned off.
DVD Select Camera angle
Some disc contains multiple angles, particularly the scene or sequence. If the disc only has one angle, this feature won't work.
During playback, press the ANGLE key on the remote.

ANGLE

Angle icon
2 Select the Camera angle with press the ANGLE key.

ANGLE
- The display is switched off when no operation is performed for about 3 seconds.

Random play
The tracks of the disc are played in random order.
During playback, press the RANDOM key on the ramote.
The Random Play display appears on the TV screen.

RANDOM
Each time you press RANDOM key on the remote, random play would be on and off.
- By pressing key during random playback, the unit selects another track and resumes random playback.
To cancel random play
Press the stop (■) key to stop playback.
Press the RANDOM key to cancel random playback.
To repeat random play (repeat play-24)
During random playback, press the REPEAT key on the remote.

REPEAT
Each press the key switches the mode.
1 "TRACK"
② "ALL"
③ Goesoff(repeatoff)

- After all tracks of a disc have been played in random order, playback will stop.
- When playing a DVD, the Random mode does not work.
P.B.C. on mode of VCD, the RANDOM mode does not work.
16
DVD CD VCD Repeat play
Desired title, chapter, track or disc can be played back repeatedly.
At the time of DVD playback.
- "Chapter": Repeat the chapter that is playing.
"Title":Repeat the title that is playing.
At the time of CD/VCD playback.
"Track": Repeat the track that is playing.
- "All": Repeat the disc that is playing.
During playback, press the REPEAT key on the remote.


Each press the key switches the REPEAT mode At the time of DVD playback.

At the time of CD/VCD playback.

- To cancel repeat playback, press the REPEAT key and select "Off".

If you press SKIP (▶▶) once during Repeat Track playback, the repeat playback cancels.
"MP3/WMA Repeat play" 30

P.B.C. on mode of VCD, the Repeat play function does not work.
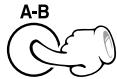
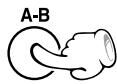
DVD CD VCD A-B Repeat play
The A-B repeat function lets you mark a segment to repeat between the beginning "A" and the end "B" of the segment you want to replay.
Press the A-B key on the remote when you want to choose a scene (sound) as the beginning point.

- "A" display appears.
Press the A-B key again to choose a scene (sound) as the end point.

- "A-B" display appears and the repeat sequence begins.
- To cancel A-B Repeat playback, press the A-B key.
DVD VCD Zoom function
Use zoom to enlarge the video image.
During playback, press the ZOOM key on the remote.

The square frame appears briefly in the right bottom of the picture.
Each press the key switches the mode.
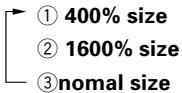
Press the Cursor ( / / / ) keys on the remote tomove through the zoomed picture (400% or 1600%).

- To resume nomal playback, press ZOOM or CLEAR key repeatedly.

Zoom may not work on some DVDs.
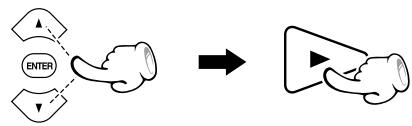
CD Using the TV screen to start CD playback
Once you insert an audio CD a menu appears on the TV screen.
Press the Cursor up/down ( /) keys on the remote to select a track then press PLAY () or ENTER and playback starts.
DVD 3D Surround for DVD or VCD
To produce a 3D surround effect that simulates multi-channel audio from two stereo speakers.
During playback, press the ON SCREEN key on the remote.

ON SCREEN
Press Cursor up/down ( /) keys on the remote to select the sound option.

Sound icon
3D SUR
The sound option will be highlighted.
Press Cursor left/right (▲/▶) keys on the remote to select "3D SUR".

3D SUR
- To turn off the 3D Surround effect, select "Normal".
CD Surround for CD
To produce a 3D surround effect that simulates multi-channel audio from two stereo speakers.
During playback, press the AUDIO key on the remote.


Sound icon
3D SUR
- "3D SUR" appears on the menu screen.
- To turn off the 3D Surround effect, press AUDIO key repeatedly until "3D SUR" disappears from the menu screen.
DVD Time Search
To start playing at any chosen time on the disc.
During playback, press the ON SCREEN key on the remote.

ON SCREEN
The time search box shows the elapsed playing time.
Press Cursor up/down ( /) keys on the remote to select the time clock icon.

Time clock icon
- :--: appears.
Input the required start time in hours, minutes and seconds from left to right.

- If you enter the wrong numbers, press CLEAR to remove the numbers you entered. Then input the correct numbers.
Press ENTER to confirm.

- Playback starts from the selected time.
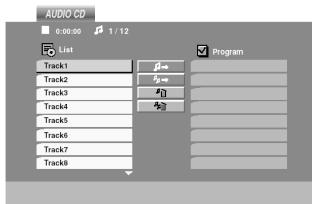
You can listen to the desired tracks of the current CD or VCD in any desired order.
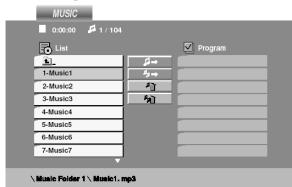
Program Edit
Insert a disc and close the tray.
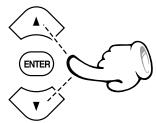
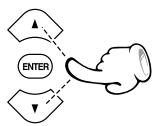
2 Select specific track by Press Cursor up/down ( /) keys.
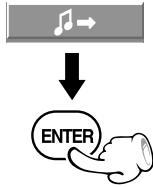
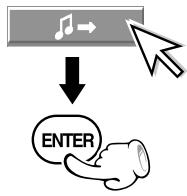
Press P.MODE key to register selected value onto Program list.
Or select "J " (add) icon on the screen to register selected value onto Program list, then press the ENTER key.

or
You can add all tracks in the disc. Select "p " (add all) icon then press ENTER key.
You can select maximum 99 values by repeating step -
Select the track you want to start playing on the Program list.
Press PLAY key or ENTER key to start.


or
Playback begins in the order in which you programmed tracks. Playback stops after all of the tracks on the Program list have played once.
Program edit screen appears.
Example of CD playback
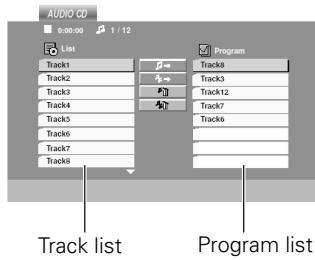
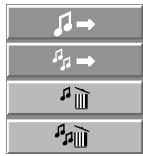
:Addicon
: Add all icon
:Deleteicon
:Deleteallicon
- MP3/WMA program playback
- The unit stops when the STOP (■) key is pressed. To restart program play, press the PLAY key.

P.B.C. on mode of VCD, the Program play function does not work. 16
To repeat program play
During program playback, press the REPEAT key on the remote.

Each press the key switches the mode.
① "TRACK":repeats the current track. ② "ALL":repeats all the tracks on programmed list. ③ Goes off (repeat off)

If you press SKIP (▶▶) once during Repeat Track playback, the repeat playback cancels.
Delete a track from Program list
Press the Cursor ( / / / ) keys to select the track that you wish to delete from the Program list.
Press CLEAR key. Or select "P" (Delete) icon then press ENTER key to place the selected track on the Program list.
Delete the complete Program list
Select "” (Delete all) icon, then press ENTER key.
The complete program for the disc is deleted.
- The programs are also cleared when the disc is removed.

P.B.C. on mode of VCD, the Program play function does not work.
Guidance of MP3/WMA/JPEG
MP3/WMA/JPEG media that can be played back with this equipment
Usable media : CD-ROM, CD-R, CD-RW
Useable formats : ISO9660 level 1 (excluding expanded formats)
Files that can be played back : MP3 files, WMA files and JPEG files
Creating media for playing back on this equipment
Compressing MP3/WMA
Please set up the transfer bit rate setting for the compression software when compressing MP3/WMA files as follow.
MP3 Files : 128kbps recommended (32kbps-320kbps)
WMA Files : 128kbps recommended (40kbps-192kbps)
- This unit is compatible with 32kHz,44.1kHz (recommended) and 48kHz sampling frequencies.
- This unit is compatible with ID3-TAG Ver. 1.
- DIGITAL output of MP3/WMA data is done not as MP3/WMA data, but as PCM data.
Naming folders and files
Single-byte characters between A and Z, single-byte numerais between 0 and 9, and the single-byte underscore(_) can be displayed. Ensure that the "mp3" (MP3 files), "wma" (WMA files) or "jpg" (JPEG files) extension log is attached to all file names
- Never add the "mp3" (or "wma") extension log to any files other than MP3 (or WMA) files. If the "mp3" (or "wma") extension log is added to any files other than MP3 (or WMA) files, the equipment will assume that they can be played back, and this will produce loud noises in the speakers, resulting in damage of adverse effects.
- Never add the "jpg" extension log to any files other than JPEG files. If the "jpg" extension log is added to any files other than JPEG, the unit will not operate normally.
Confirming media and files
Check to ascertain that MP3/WMA files can be played back correctly on the personal computer in use prior to saving them onto the media. Check to ensure that the saved file can be played back normally.
- It is not possible to confirm that files can be played back correctly while they are being saved onto the media.
When saving files onto media
Ensure that the session is closed or finalized when data has been written on media. There are cases where media on which the session has not be closed or finalized will not be played back correctly with this equipment.
- There are cases where the folder names and file names will not be displayed correctly depending on the software used to save them.
- Do not store files or folders other than MP3, WMA or JPEG on media to be played back with this equipment.
- It is recommended that ten or less sessions are stored when recording MP3/WMA files onto a media.
- In case of a multisession disc, some time may be required until playback begins.
- There are cases where playback is not possible when MP3/WMA/JPEG files (CD-ROM) and music CD infomation (CD-DA) are saved on the same media.
- The total number of files on the disc should be less than 999.
Example for a hierarchical structure
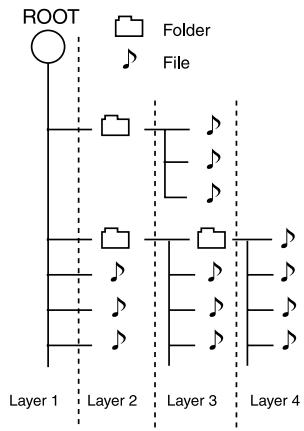

Folder names and file names are displayed up to 8 characters. When folder names and file names are recorded with more than 8 characters, the names will be displayed in abbreviated form.
Playing back MP3/WMA/JPEG files
- It is not possible to play back folders and files that exceed the maximum limitations of the media.
- A certain amount of time is required for the player to confirm the media on which MP3/WMA/JPEG files have been recorded before playback will commence.
Playback
Insert a disc and close the tray.
- On a disc with MP3/WMA and JPEG files you can switch MP3/WMA and JPEG. Press TOP MENU key and MUSIC or PHOTO word on top of the menu is highlighted.
Press Cursor up/down ( /) keys on the remote to select desired file, then press the PLAY key or the ENTER key to start playback.
Press and hold Cursor up/down ( / ) keys to go to the next / previous page.
- When JPEG files are displayed, the display is switched automatically from one file to the next. (Slide Show 30)
To stop playback press the (stop) key.
Searching (only for MP3/WMA files) 20
During playback, press the or key for more than 2 seconds.
MAIN UNIT
REMOTE
Press and hold the or key repeatedly.
Skipping files- 20
During playback, press the or key.
MAINUNIT
REMOTE
:To skip backward
▶▶: To skip forward
DISC menu appears
Example of MP3 menu
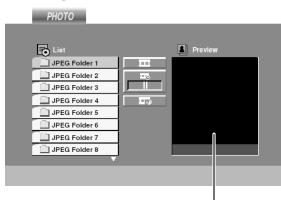
Example of JPEG menu
Preview window
- After all files of a folder have been played, playback will stop.
- If you are in a file list on the MP3/WMA menu and want to return to the folder list, use Cursor up/down (▲/▼) keys on the remote to highlight , and press ENTER key.

Reads and displays information of track from the ID3 tag on the TV screen.
Each press switches the searching speed.
FF 2X (▶key) or FR 2X (i<key)
② FF 4X (▶▶1 key) or FR 4X (I▶key)
③ FF 8X (▶key) or FR 8X (I▶key)
- Press the key at any time to resume normal playback.
To pause playback (Still picture)
Press the II key during playback (MP3/WMA), or press the II key during slide show (JPEG).
MAIN UNIT
REMOTE


To return to the playback or slide show, press the (play) key or press the II (pause) key.
Repeatplay(onlyforMP3/WMA files)→24
Desired file can be played back repeatedly.
- "Track": Repeat the file that is playing.
- "All": Repeat the folder that is playing.
During playback, press the REPEAT key on the remote.

Each press the key switches the REPEAT mode

- To cancel repeat playback, press the REPEAT key and select "Off".

If you press SKIP (▶▶) once during Repeat Track (file) playback, the repeat playback cancels.
Zoom function (only for JPEG files) - 24
Use zoom to enlarge the photo image.
During playback, press the ZOOM key on the remote.
Each press the key switches the mode.

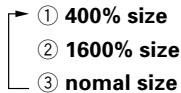
The square frame appears briefly in the right bottom of the picture.
Press the Cursor ( / / / ) keys on the remote tomove through the zoomed picture (400% or 1600%).
- To resume nomal playback, press ZOOM or CLEAR key repeatedly.
To rotate picture (only for JPEG files)
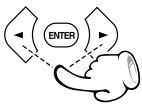
Press the Cursor left/right (▲/▶) keys on the remote to rotate the picture clockwise or
counter clockwise.
To hide the menu bar (only for JPEG files)
Press the RETURN (O) key on the remote to hide the menu bar.
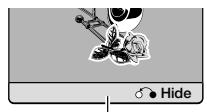
Menu bar

Switching between display and no display is done each time the RETURN key is pressed.
Slide show (only for JPEG files)
The Slide show function can be used to switch photo images automatically from one file to the next. There are four Slide speed options.
Insert a disc and close the tray.
Press Cursor ( / / / ) keys on the remote to highlight the speed icon (
Go to step ④ if the slide speed is not to be changed.

Press Cursor left/right (▲/▶) keys on the remote to select the option you want to use then press ENTER key.

4 Press Cursor up/down ( /) keys on the remote to select the icon and then press the ENTER key.

- Playback starts.
To listen to music watching picture (only for JPEG files)
You can display files while listening to MP3 music files recorded on the same disc.
Insert the disc containing the two types of file in the player.
Press the Cursor up/down ( /) keys on the remote to select a photo file.
Press Cursor right () key on the remote to select the icon then press ENTER key.

- Playback starts. The playback will continue until (STOP) key is pressed.
MP3/WMA program playback ( 26 27)
You can listen to the desired files of the current MP3/WMA disc in any desired order.
Program Edit
Insert a disc and close the tray.

- Program edit screen appears.
2 Select specific file by Press Cursor up/down (▲/▼) keys.
Press P.MODE key to register selected value onto Program list.
Or select " " (add) icon on the screen to register selected value onto Program list, then press the ENTER key.

or
You can add all files in the disc. Select "p " (add all) icon then press ENTER key.
You can select maximum 999 values by repeating step ±b - ±b
Select the track you want to start playing on the Program list
Press PLAY key or ENTER key to start.

or

Playback begins in the order in which you programmed files and "PROG." appears on the display window. Playback stops after all of the files on the Program list have played once.
- The unit stops when the STOP (■) key is pressed. To restart program play, press the PLAY key.
To repeat program play
During program playback, press the REPEAT key on the remote.

REPEAT
Each press the key switches the mode.
① "Track": repeats the current track.
② "All": repeats all the tracks on programmed list.
③ "Off"

If you press SKIP (▶▶) once during Repeat Track playback, the repeat playback cancels.
Delete a track from Program list
Press the Cursor ( / / / ) keys to select the file that you wish to delete from the Program list.
Press CLEAR key. Or select "p" (Delete) icon then press ENTER key to place the selected track on the Program list.
Delete the complete Program list
Select "p" (Delete all) icon, then press ENTER key.
The complete program for the disc is deleted.
- The programs are also cleared when the disc is removed.
What appears to be a malfunction may not always be serious. If your unit should not perform as expected, consult the table below to see if the problem can be corrected before seeking help from your dealer or service representative.
Operation to reset
The microprocessor may fall into malfunction (impossibility to operate erroneous display, etc.) when the power cord is unplugged while power is ON or due to an external factor.
In this case, switch off the power, wait for several seconds, and then switch the power on again.
DVD player unit
| Symptom | Cause | Remedy |
| Playback does not start when the▶key is pressed. | There is no disc in the player.There are no signals recorded on the side of the disc being played. | Load a disc and press the▶key.Turn the disc over and properly place it on the disc tray. |
| Playback starts but no image/sound is seen heard. | The TV is not turned on.The connection cords are not properly connected. | Turn on the TV.Properly reconnect the connection cords.→9→10 |
| The picture is disrupted when the image is fast forwarded or fast reversed. | The picture is slightly disrupted during fast forward and fast reverse operations. | This is not a malfunction. |
| No sound is heard. | The audio output cords are not properly connected.The volume control of the TV or amplifier is not adjusted properly.The player is in a special playback mode. | Properly connect the audio cords.→9→10Set the sound volume to an appropriate level.Press the▶(play) key to resume normal playback mode. |
| No picture is displayed. | Setting to progressive mode has been done for a TV not compatible with progressive mode. | Return to interlaced mode is made when the■(stop) key is pressed for at least 5 seconds. |
| The picture does not look good or the picture/sound quality is poor. | A nearby device is generating noise.The disc is dirty.The disc is damaged.There is condensation on the optical lens. | Separate this unit as far as possible from the device you think is generating the noise.Refer to the "Disc handling precautions" section and wipe dirt from the disc.→8Use a new disc.Refer to the "Caution on condensation" section and evaporate the condensation.→8 |
| It takes a while for the disc to start playing. | Time is required for the unit to detect the disc type and size and for the rotation of the motor to stabilize. This is not a malfunction. | Approximately 10 to 20 seconds are required for a disc to start playing, although the time differs depending on the disc. |
| The tray opens automatically. | The disc is not placed horizontally. | Properly place the disc on the tray. |
| The top and bottom of the screen cannot be seen, or the screen becomes black-and-white. | The video format of the disc being played does not match that of the connected TV monitor. | Refer to the "Video formats" section, and use a disc with the appropriate video format for your TV or a TV with the appropriate video format for the disc.→7 |
| The subtitle is not displayed. | The DVD disc being played does not contain the recording of subtitles.The subtitle mode is set to off. | The subtitle cannot be displayed when the DVD disc being played does not contain the recording of subtitles.Press the SUBTITLE key to switch on the subtitle mode.→22 |
| The voice (or subtitle) language cannot be changed. | The DVD disc being played does not contain the recording of more than one audio (or subtitle) language. | The voice (or subtitle) language cannot be changed when the DVD disc being played does not contain the recording of more than one voice (or subtitle) language. |
| The viewing angle cannot be changed. | The DVD disc being played does not contain the recording of more than one angle.You are attempting to switch the angle in a DVD section where more than one angle is not recorded. | The viewing angle cannot be changed when the DVD disc being played does not contain the recording of more than one angle.More than one viewing angle may be recorded only in limited sections in a disc. |
DVF-3080/DVF-8100 (EN/K,P,E,X,Y)
DVD player unit
| Symptom | Cause | Remedy |
| Playback will not start even after a title is se- lected. | ·A viewing restriction (PARENTAL) has been set for the disc. | ·Check the viewing restriction level (PA-RENTAL) setting. |
| The parental level cannot be changed. | ·You have forgotten the password. | ·Set the initial setup to the factory setup with the following procedure. ①Press the SETUP key on the remote to display the Setup menu. ②Input the 6-digit number "210499" and the security code is cleared. ③Enter a new code.→15 |
| The voice or subtitle language selected in the initial setting is not played. | ·The DVD disc being played does not contain the recording of the selected voice or subtitle language. ·The initial playback language is specified by the DVD disc. ·The DVD specifications provide for selection at the menu screen. | ·Use a DVD disc containing the recording of the selected voice or subtitle language. ·Press SUBTITLE or the AUDIO key on the remote and select the language.→22 ·Select at the menu screen of the disc. |
| Menu screen messages are not shown in the desired language. | ·The menu language function (MENU) is not set to desired language. | ·Select disc menu language.→14 |
| A VCD cannot be played using menus. | ·The VCD disc being played is not compatible with P.B.C. | ·Menu playback is available only with VCD discs recorded with P.B.C. |
Remote control unit
| Symptom | Cause | Remedy |
| Remote control operation is not possible. | ·Batteries are exhausted. ·The remote control is too far away from the system, the controlling angle is deviated or there is an obstacle in between. | ·Replace with new batteries. ·Operate the unit inside the remote control-lable range. |
Inhibition icon
| Symptom | Cause | Remedy |
| The inhibition icon is displayed and remote control is not possible. | ●Playback is restricted intentionally by the software producer. | ●The operation is inhibited. Please try another operation. |
This product incorporates copyright protection technology that is protected by U.S. patents and other intellectual property rights. Use of this copyright protection technology must be authorized by Macrovision, and is intended for home and other limited viewing uses only unless otherwise authorized by Macrovision. Reverse engineering or disassembly is prohibited.
CONSUMERS SHOULD NOTE THAT NOT ALL HIGH DEFINITION TELEVISION SETS ARE FULLY COMPATIBLE WITH THIS PRODUCT AND MAY CAUSE ARTIFACTS TO BE DISPLAYED IN THE PICTURE. IN CASE OF 525 OR 625 PROGRESSIVE SCAN PICTURE PROBLEMS, IT IS RECOMMENDED THAT THE USERS SWITCH THE CONNECTION TO THE "STANDARD DEFINITION" OUTPUT. IF THERE ARE QUESTIONS REGARDING OUR TV SET COMPATIBILITY WITH THIS MODEL 525P AND 625P DVD PLAYER, PLEASE CONTACT OUR CUSTOMER SERVICE CENTER.
Manufactured under license from Dolby Laboratories. "Dolby" and the double-D symbol are trademarks of Dolby Laboratories.
"DTS" and "DTS Digital Out" are registered trademarks of Digital Theater Systems, Inc.

DVF-3080/DVF-8100 (EN/K,P,E,X,Y)
[Type] System DVD video player Signal read system Semiconductor laser
[D/A Conversion Section] D/A conversion 24 Bit Oversampling...8 fs (Sampling frequency; 44.1, 48 kHz) 4 fs (Sampling frequency; 96 kHz)
[Audio section] Frequency response Sampling frequency; 44.1 kHz .8 Hz 20 kHz Sampling frequency; 48 kHz .8 Hz 22 kHz Sampling frequency; 96 kHz .8 Hz 44 kHz Signal to noise ratio .More than 100 dB Dynamic range .More than 92 dB Total harmonic distortion ....Less than 0.007% (1 kHz) Channel separation.... More than 90 dB (1 kHz) Wow and flutter .... Below measurable limit Analog output level/impedance .2 V / 550Ω Digital output level/impedance COAXIAL .0.5 Vp-p / 75 OPTICAL (Only DVF-8100 for Europe)
[Video Section] Video output format.. NTSC/PAL Video compression DVD . MPEG-2 Composite video output level 1 Vp-p (75 Ω load, sync. negative) S-video output level (Except for Europe) (Y-signal) 1 Vp-p (75 Ω load, sync. negative) (C-signal) NTSC 0.286 Vp-p (75 Ω) PAL 0.300 Vp-p (75 Ω) Component Video output level (Y-signal) 1 Vp-p (75 Ω) (Cb-signal) 0.7 Vp-p (75 Ω) (Cr-signal) 0.7 Vp-p (75 Ω) RGB output level (SCART) (For Europe) .. 0.7 Vp-p (75 Ω) Horizontal resolution. More than 500 lines Video signal to noise ratio. More than 70 dB
[General] Power consumption . 12 W Dimensions W:440 mm (17-5/16") H:44 mm (1-3/4") D:249 mm (9-13/16") Weight (net) (DVF-3080) 2.2 kg (4.9 lb) (DVF-8100) 2.3 kg (5.1 lb)

KENWOOD follows a policy of continuous advancements in development. For this reason specifications may be changed without notice.
- Sufficient performance may not be exhibited at extremely cold locations (Where water freezes).
KENWOOD
For your records
Record the serial number, found on the back of the unit, in the spaces designated on the warranty card, and in the space provided below. Refer to the model and serial numbers whenever you call upon your dealer for information or service on this product.
- KENWOOD
- DVF-8100
- DVF-3080
- INSTRUCTION MANUAL
- Before applying power
- Safety precautions
- WARNING: TO PREVENT FIRE OR ELECTRIC SHOCK, DO NOT EXPOSE THIS APPLIANCE TO RAIN OR MOISTURE.
- Unpacking
- Accessories
- Screen saver
- For the U.S.A.
- CAUTION:
- FCC WARNING
- NOTE:
- For Canada
- Special features
- Contents
- Preparations
- Operations
- Knowledge
- Types of playable discs
- Unplayable discs
- Icons on the DVD VIDEO discs
- Region codes in the world
- Region codes of the DVD VIDEO discs that can be played with this player
- Restrictions due to difference between discs
- Checking the Video Format
- When the video formats are different :
- To select TV Type
- Maintenance
- Maintenance of the unit
- In regard to contact cleaner
- Reference
- Disc handling precautions
- Handling
- Cleaning
- Storage
- Never play a cracked or warped disc
- Disc accessories
- Note related to transportation and movement
- Before transporting or moving this unit, carry out the following operations.
- Caution on condensation
- Malfunction of microcomputer
- DTS disclaimer clause
- Connecting to a TV with Component input terminals
- Connecting to an Audio component
- Amplifier equipped with 2-channel analog stereo or Dolby Pro Logic II / Pro Logic:
- Amplifier equipped with 2-channel digital stereo (PCM) or a multi-channel decoder (Dolby Digital™, MPEG 2, or DTS):
- STANDBY MODE
- ENTER key
- Loading batteries
- Operation
- Preparation for Set Up
- Setup menu
- Initial Settings
- To display and exit the Menu:
- To go to the next level:
- To go back to the previous level:
- General Operation
- Press SETUP key.
- Use the Cursor up/down ( /) keys on the remote to select the desired option, then press the Cursor right () key to move to the second level.
- Use the Cursor up/down ( /) keys on the remote to select the second desired option, then press the Cursor right () key to move to the third level.
- Use the Cursor up/down ( /) keys on the remote to select the desired setting, then press ENTER key to confirm your selection. Some items require additional steps.
- Press SETUP key or PLAY key to exit the Setup menu.
- LANGUAGE
- Menu Language
- Disc Audio/subtitle/Menu
- DVD DISPLAY
- TV Aspect DVD
- Display Mode DVD
- Progressive Scan
- TV Output Select (only for Europe)
- DVD AUDIO
- Dolby Digital/ DTS/ MPEG
- Sample Freq. (Frequency) DVD
- Dynamic Range Control (DRC) DvD
- Vocal
- LOCK(Parental Control)
- Rating DVD
- Unlock
- Password (Security Code)
- If you forget Security Code
- Country Code DvD
- OTHERS
- PBC VCD
- B.L.E. (Black Level Expansion)
- Hierarchical structure of VCD menus (P.B.C. function)
- Advancing
- Returning
- DVD VCD On screen display
- Example:
- On-Screen Display during playing DVD
- On-Screen Display during playing VCD
- CD DVD VCD Last Scene Memory
- Basic play
- Preparation
- Load a disc.
- Start playback.
- When a Disc Menu appears on the screen
- To stop playback
- To pause playback
- Disc playback features
- CD DVD Skipping chapters or tracks
- CD DVB VCD Searching
- (At the time of DVD playback)
- (At the time of CD/VCD playback)
- STEP (freeze frame and frame advance)
- OVD VCD Slow motion playback
- (At the time of VCD playback)
- CD DVD Playback from desired title, chapter or track.
- DVD Select Audio Language
- The language is switched each time the AUDIO key is pressed.
- VCD Select the Audio channel
- DVD Select Subtitle Language
- The language is switched each time the SUB-TITLE key is pressed.
- DVD VCD Using Marker
- Create the Marker
- To recall or clear a marked scene
- Clearing all marker points
- DVD Select Camera angle
- Random play
- To cancel random play
- To repeat random play (repeat play-24)
- DVD CD VCD Repeat play
- During playback, press the REPEAT key on the remote.
- Each press the key switches the REPEAT mode At the time of DVD playback.
- At the time of CD/VCD playback.
- "MP3/WMA Repeat play" 30
- DVD CD VCD A-B Repeat play
- Press the A-B key on the remote when you want to choose a scene (sound) as the beginning point.
- Press the A-B key again to choose a scene (sound) as the end point.
- DVD VCD Zoom function
- During playback, press the ZOOM key on the remote.
- Each press the key switches the mode.
- Press the Cursor ( / / / ) keys on the remote tomove through the zoomed picture (400% or 1600%).
- CD Using the TV screen to start CD playback
- Press the Cursor up/down ( /) keys on the remote to select a track then press PLAY () or ENTER and playback starts.
- DVD 3D Surround for DVD or VCD
- CD Surround for CD
- DVD Time Search
- Program Edit
- To repeat program play
- Delete a track from Program list
- Delete the complete Program list
- Guidance of MP3/WMA/JPEG
- MP3/WMA/JPEG media that can be played back with this equipment
- Creating media for playing back on this equipment
- Compressing MP3/WMA
- Naming folders and files
- Confirming media and files
- When saving files onto media
- Example for a hierarchical structure
- Playing back MP3/WMA/JPEG files
- Playback
- Insert a disc and close the tray.
- Press Cursor up/down ( /) keys on the remote to select desired file, then press the PLAY key or the ENTER key to start playback.
- Searching (only for MP3/WMA files) 20
- During playback, press the or key for more than 2 seconds.
- Press and hold the or key repeatedly.
- Skipping files- 20
- During playback, press the or key.
- DISC menu appears
- To pause playback (Still picture)
- Repeatplay(onlyforMP3/WMA files)→24
- Zoom function (only for JPEG files) - 24
- To rotate picture (only for JPEG files)
- To hide the menu bar (only for JPEG files)
- Slide show (only for JPEG files)
- To listen to music watching picture (only for JPEG files)
- MP3/WMA program playback (→ 26 → 27)
- Operation to reset
- For your records
Marque : KENWOOD
Modèle : DVF-8100
Catégorie : Lecteur dvd