
810 CAR PHONE - Téléphone de voiture NOKIA - Notice d'utilisation et mode d'emploi gratuit
Retrouvez gratuitement la notice de l'appareil 810 CAR PHONE NOKIA au format PDF.


| Type de produit | Téléphone de voiture mains-libres |
| Marque | Nokia |
| Modèle | 810 Car Phone |
| Technologie réseau | (E)GSM 900 et GSM 1800 |
| Alimentation | 12 VDC (10.8 - 16.0 V), négatif à la masse |
| Consommation électrique | 1,5 A (mode veille 1 mA) |
| Puissance d'émission | 2 W (EGSM 900) / 1 W (DCS 1800) |
| Connectivité | Bluetooth sans fil, port RS232 |
| Fonctions principales | Appel mains-libres, composition vocale, commandes vocales, répondeur vocal, messagerie texte, répertoire jusqu'à 1000 contacts par profil, deux profils utilisateur, minuterie d'extinction |
| Contenu de la boîte | Unité radio TFE-4R, écran XDW-1R, combiné HSU-4, haut-parleur SP-2, microphone MP-2, câble système PCU-4, câble adaptateur RS232 AD-3 |
| Entretien et nettoyage | Nettoyer avec un chiffon doux et sec, éviter l'humidité et les températures extrêmes |
| Sécurité | Installation par un professionnel qualifié uniquement ; distance minimale de 20 cm entre l'antenne et toute personne |
| Réparabilité | Confier à un service agréé ; ne pas ouvrir soi-même |
| Homologation | Conforme aux directives 1999/5/CE et 2004/104/CE |
FOIRE AUX QUESTIONS - 810 CAR PHONE NOKIA
Questions des utilisateurs sur 810 CAR PHONE NOKIA
0 question sur cet appareil. Repondez a celles que vous connaissez ou posez la votre.
Poser une nouvelle question sur cet appareil
Téléchargez la notice de votre Téléphone de voiture au format PDF gratuitement ! Retrouvez votre notice 810 CAR PHONE - NOKIA et reprennez votre appareil électronique en main. Sur cette page sont publiés tous les documents nécessaires à l'utilisation de votre appareil 810 CAR PHONE de la marque NOKIA.
MODE D'EMPLOI 810 CAR PHONE NOKIA
Nokia 810 car phone
User Guide
Installation Guide
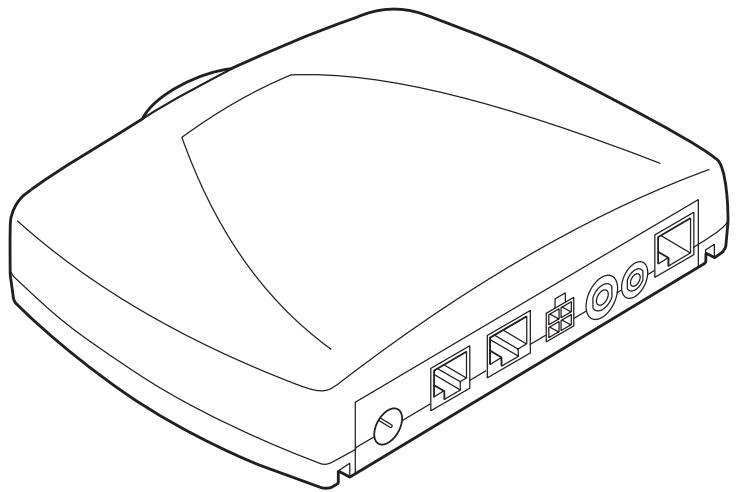
natural_image
Line drawing of a rectangular electronic device with ports and connectors (no text or symbols)9356656
Issue 4
DECLARATION OF CONFORMITY
Hereby, NOKIA CORPORATION, declares that this TFE-4R product is in compliance with the essential requirements and other relevant provisions of Directive 1999/5/EC. The product is in conformity with the limits defined in Directive 2004/104/EC (amending Directive 72/245/EEC), Annex I, paragraph 6.5, 6.6, 6.8 and 6.9. A copy of the Declaration of Conformity can be found at: http://www.nokia.com/phones/declaration_of_conformity/
C€0434
© 2005-2006 Nokia. All rights reserved.
Reproduction, transfer, distribution or storage of part or all of the contents of this document in any form without the prior written permission of Nokia is prohibited.
Nokia, Nokia Connecting People, and Navi™ wheel are trademarks or registered trademarks of Nokia Corporation. Other products and company names mentioned herein may be trademarks or tradenames of their respective owners.
Bluetooth is a registered trademark of Bluetooth SIG, Inc.
Nokia operates a policy of continuous development. Nokia reserves the right to make changes and improvements to any of the products described in this document without prior notice.
Under no circumstances shall Nokia be responsible for any loss of data or income or any special, incidental, consequential or indirect damages howsoever caused.
The contents of this document are provided "as is". Except as required by applicable law, no warranties of any kind, either express or implied, including, but not limited to, the implied warranties of merchantability and fitness for a particular purpose, are made in relation to the accuracy, reliability or contents of this document. Nokia reserves the right to revise this document or withdraw it at any time without prior notice.
The availability of particular products and services may vary by region. Please check with the Nokia dealer nearest to you.
Export Controls
This device may contain commodities, technology or software subject to export laws and regulations from the US and other countries.
Diversion contrary to law is prohibited.
9356656/Issue 4
Table of content
For your safety ....5
General information ....7
Overview of the car phone and equipment ... 7
Before putting your phone into operation ... 11
Stickers in the sales package ..... 11
Access codes required for the SIM card ..... 11
Your car phone 12
Display 12
Display indicators 12
Basic components of the handset ..... 14
Getting started 16
Installing the SIM card 16
Switching on/off and off mode ..... 17
Call functions .....18
Voice dialling 18
Calling a contact (name search) ..... 18
Redialling 19
Making a call using the keypad 19
Using the Navi™ wheel to make a call ..... 19
List of favourites 19
Call waiting 20
Options during a call 21
Using the menu 23
Accessing a menu function ..... 23
List of menu functions ..... 23
Menu functions 26
Messages 26
Call register 30
Contacts 31
Tones 33
Settings 34
Voice 43
Recorder 46
Bluetooth wireless technology ..... 47
User data 50
Data communication 53
Bluetooth wireless technology ....53
Sending and receiving a business card ..... 53
GPRS (General Packet Radio Service) ..... 53
HSCSD (High Speed Circuit Switched Data) . 54
Reference information .... 54
Installation 56
Your Nokia 810 car phone 56
Safety first 57
Mounting 57
Audio settings 60
Function test 60
Included in the sales package ..... 60
Care and maintenance 61
Important safety information ....62
Technical data 64
Glossary 65
For your safety
Read these simple guidelines. Breaking the rules may be dangerous or illegal. Further detailed information is given in this user's guide.

OFF MODE
If wireless phone use is prohibited or when it may cause interference or danger, switch your car phone over to off mode. To do so, with ignition on, press and hold ▶.

ROAD SAFETY COMES FIRST
Remember that the safety of operating a motor vehicle in traffic requires the full attention of all motorists. Only use your car phone if traffic conditions permit safe use and check if local laws/regulations restrict the use of mobile phones while driving.

INTERFERENCE
All wireless phones may get interference, which could affect performance.

OFF MODE WHEN REFUELLING
Switch your car phone over to off mode at a refuelling point. Don't use near fuel or chemicals.

OFF MODE NEAR BLASTING
Switch your car phone over to off mode where blasting is in progress. Observe restrictions, and follow any regulations or rules.

QUALIFIED INSTALLATION AND SERVICE
Only a qualified professional may install or repair phone equipment.
CONNECTING TO OTHER DEVICES

When connecting to any other device read the relevant user's guide for detailed safety instructions. Do not connect incompatible products.

EMERGENCY CALLS
Ensure the phone is switched on and in service.
▶Press and hold 📋 until Make an emergency call? is shown on the display. Confirm by pressing ⬇.
▶ Confirm the security inquiry Yes by pressing 📋 or cancel by selecting No with ⚠️ and pressing ⏻. Give your location. Do not end the call until told to do so.

CALLING
Ensure that the car's ignition is on. Select the desired phone number or enter the phone number, including the area code, then press ♂. To end a call, press ↗. To answer a call, press ♂.

ANTENNA
In order to comply with RF exposure requirements for mobile transmitting devices, a minimum distance of 20 cm must be maintained between the antenna and all persons.

FUSE REPLACEMENT
Replace a blown fuse with a fuse with of the same type and size. Never use a fuse with a higher rating!
Network Services
The wireless phone described in this guide is approved for use in the (E)GSM 900 and GSM 1800 networks.
A number of features included in this guide are called Network Services. These are special services that you arrange through your wireless service provider. Before you can take advantage of any of these Network Services, you must subscribe to them through your service provider and obtain instructions for their use from your service provider.

Note
Some networks may not support all language-dependent characters and/or services.
About accessories

Warning!
Use only accessories approved by the phone manufacturer for use with this particular phone model. The use of any other types may invalidate any approval or warranty applying to the phone and may be dangerous.
For availability of approved accessories, please check with your dealer.
1. General information
Overview of the car phone and equipment
Your car phone is made up of several components, which are described below:
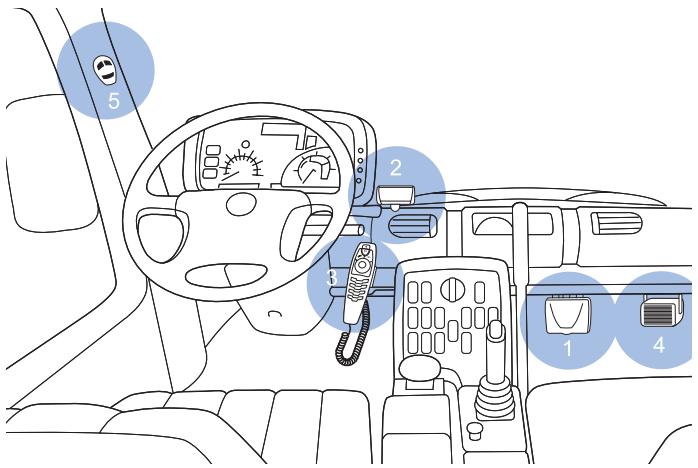
Car phone equipment
1. Radio unit TFE-4R
The radio unit is a (E)GSM 900/1800 car telephone with Bluetooth wireless technology that allows you to connect a compatible external GSM antenna and compatible external devices wireless by Bluetooth technology or using an RS232 adapter cable.
2. Display XDW-1R
The separate display comes with generously sized, easy-to-read fonts, convenient user-customisable display positioning and automatic backlighting that is configurable for day- or nighttime use.
3. Handset HSU-4
The handset comprises a set of function elements (keys and Navi™ wheel), alphanumeric keypad, microphone, and earpiece.
The handset is specially designed so that accessing key telephone functions is made simpler for the user, allowing intuitive operation.
4. Loudspeaker SP-2
A separate loudspeaker is provided for top-quality audio transmission of the acoustic signals from your car phone and voice transmission when calls are made. Should you wish to use the loudspeakers belonging to your car radio instead, please ask the service technician who is to install your car phone for professional assistance as the car phone may not be compatible with your system.
5. Microphone MP-2
The handsfree microphone supplied in the sales package has been tailormade for the vehicular environment. State-of-the-art technologies geared for effective echo and noise suppression in automotive systems enable quality results even in poor conditions. Selecting a suitable mounting location may also enhance the performance of the device. See "Installation" on page 56.
- System cables PCU-4
A set of cables is included for connection to the power supply and the ignition system and to mute the radio.
- GSM antenna (not included in the sales package)
Connecting the radio unit to a compatible external GSM antenna will allow optimum wireless performance of the car phone.
- RS232 cable AD-3
An RS232 adapter cable provides a convenient way to connect your car phone to the serial port of a compatible laptop computer.
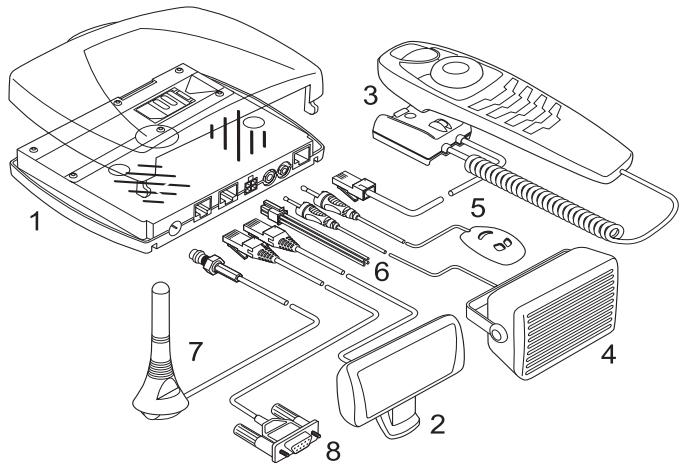
Car phone equipment and cable connections
Special features
For enhanced safety and operating comfort of wireless communication in the vehicular environment, this car phone is equipped with a variety of special features tailored for automotive applications. A number of these extras are sketched below:
Voice dialling
You can make a phone call by saying a voice tag you assigned to a contact. You can assign voice tags to up to 12 contacts. To make a voice call from the
standby display, just press the ☐ key on the handset and speak the desired voice tag.

Note
To be able to voice dial a contact, you must record a voice tag for the number stored in the car phone. For further information, see "Voice dialling" on page 18 and "Voice" on page 43.
Voice commands
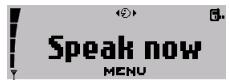
You have a selection of phone functions which can be activated by saying a voice command. As many as three voice tags for the voice commands can be added.
You can activate the voice command in the same way as making a call by using a voice tag. From the standby display, press the ☐ key on the handset and speak the voice command for the desired function.

Note
To be able to use a voice command to activate a desired function, you must record a voice tag for this function in the car phone. For further information, see "Voice commands" on page 44.
Voice recorder
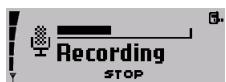
This feature acts as a dictaphone, allowing you to record personal voice memos. You can record up to 10 voice memos that last a total oft three
minutes. To start recording from the standby display, press and hold the ☐ key on the handset. To play a recorded speech memo select the option Play in the record menu.
Copying contact entries from your mobile phone
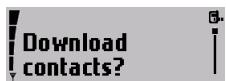
If you have a compatible mobile phone that supports Bluetooth technology, you can copy contact entries from the mobile phone to the car phone.
To download the contacts from your compatible mobile phone, you can use a personal voice command (for example, "Copy contacts") or select Download contacts? in the User data menu. For further information, see "User data" on page 50.

Note
To be able to use this feature, you must pair the mobile phone and the car phone using Bluetooth wireless technology. For further information, see "Bluetooth wireless technology" on page 47.
Multi-user capability
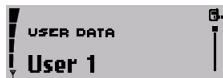
This feature lets you store personal entries or phone settings under two different user data profiles. For example, you can save contact entries, voice tags for voice dialling, and voice commands or ringing tones for two users and access them from the car phone using the same SIM card. Just activate your personal user profile to access your data.
Switchover to wireless headset

This feature supports use of compatible headsets with Bluetooth technology. You can switch calls over from handsfree mode where the car phone microphone and loudspeaker system is used to a wireless headset that is comfortable and easy to use. Press the ▶ key on the car phone handset to switch incoming or ongoing calls over to your wireless headset.

Note
To be able to use this feature, you must pair the wireless headset and the car phone using Bluetooth wireless technology. For further information, see "Bluetooth wireless technology" on page 47.
Quick access to the contacts

To call a contact quickly:
In the standby display, scroll right to the first letter of the contact name, and press 📄.
▶ Scroll to the name, and press Ⓞ to dial the number.

Note
To save contacts, see "Download contacts" on page 51.

Note
You can assign up to five phone numbers to a name in your contacts. For further information, see "Contacts" on page 31.
Mobile data communication using Bluetooth wireless technology or an RS232 cable
Your car phone comes with a convenient feature allowing you to connect compatible external devices such as a laptop computer or compatible vehicle on-board systems to the car phone either wireless through Bluetooth wireless technology or using an RS232 cable.
This means that you can now utilise GSM data services such as GPRS or HSCSD for mobile fax transmissions, Internet access or vehicle fleet services. For further information, see "Data transfer over the RS232 interface" on page 55.
SIM card
To operate your car phone, you must insert a SIM card in the radio unit. For further information, see "Installing the SIM card" on page 16.
Comfortable volume regulation with Navi™ wheel

Regulate the volume of the ringing tone notifying you of an incoming call simply by scrolling with 📁 as needed.
You can also adjust the loudspeaker volume during an ongoing call with 🏠️.
Before putting your phone into operation
Before you use your car phone, note the following:
- The car phone is automatically switched on with the car ignition.
- When you switch off your car ignition, the car phone is not switched off automatically; it remains in service for the period of time that is set using the power down timer. For further information, see "Power down timer" on page 38

Note
Check your car phone equipment regularly to ensure that it is correctly mounted and is working properly.
A valid SIM card is required for operation of your car phone. For further information, see "Installing the SIM card" on page 16.
Stickers in the sales package
The stickers supplied with your car phone are important for service and related purposes.
▶ Attach sticker B to your warranty card.
Access codes required for the SIM card
• PIN code (4-8 digits):
The PIN (Personal Identification Number) protects your SIM card against unauthorised use. The PIN code is usually supplied with the SIM card.
Some service providers may allow you to switch off the prompt, requesting you to enter the PIN at power on.
• PIN2 code (4-8 digits):
The PIN2 code may be supplied with the SIM card and is required to access some functions.
- PUK and PUK2 codes (8 digits):
The PUK (Personal Unblocking Key) code is required to change a blocked PIN code. The PUK2 code is required to change a blocked PIN2 code.

Note
If these codes have not been supplied with your SIM card, please contact your service provider.
2. Your car phone
Display
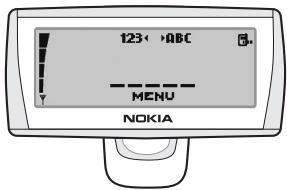
When the car phone is ready for use and no characters have as yet been entered, the standby display as depicted in the figure is shown. In addition the logo of the network operator is shown.
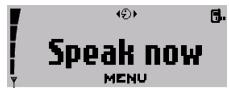
If you wish to activate a function using a voice tag, you will first have to call the voice display. To do so from the standby display, press
To adjust the display brightness to optimise performance, see "Display backlighting" on page 37.
Display indicators
The indicators described below may be shown on the display.
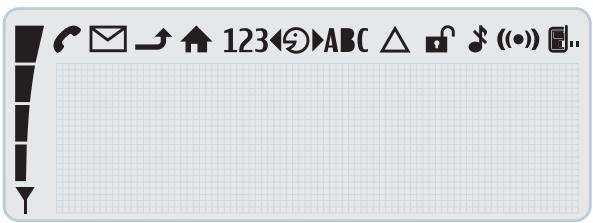
Call indicators
 Indicates an active voice call.  Indicates that a voice call has been disconnected.  Voice calls have been switched over to the headset.  Data communication is active.  Fax communication is active.  A GPRS connection has been established.  The call is on hold.General indicators
 Indicates a manual network search.  Indicates unread text messages. If this indicator is flashing, the memory is full.  Indicates a business card is being forwarded.  This setting is active.  Headset volume can be adjusted.  Ringing tone volume can be adjusted.  Loudspeaker volume can be adjusted.  Daytime display is active.  Nighttime display is active.Indicators for recorder functions
 Recorder function is on. The tape is being played back.Indicators for Bluetooth functions
 Device with Bluetooth technology has been paired with the car phone.  Bluetooth wireless technology is activated.Notification indicators
 Indicates that an item has been erased.  Indicates that your entry is incorrect or not permissible.  O.K. (confirms a setting or selection made).  Indicates additional information.  Indicates a warning or a caution.  Your text message is being sent (does not indicate that the message has been received).Basic components of the handset
 The handset consists of the function selectors, the alphanumeric keypad, the microphone, and the earpiece.Function selectors
The function selectors include four keys and a Navi wheel. Depending on the setting selected, you can choose from the following options: Press and hold
\- the emergency call function is active. Press
- to accept an incoming call. - to display the list of the last 10 phone numbers you have called or attempted to call. - to start dialling a number. Press and hold
- to delete text, numbers or other entries. - to return to the standby display. Press
- to end a call. - to delete a character or number entered. - to return to the previous menu item or display. Navi wheel
Turn the Navi wheel to adjust the volume of the ringing tone of an incoming call or the loudspeaker volume during an ongoing call. You can also use the Navi wheel to scroll within a menu.  In the standby display, turn the Navi wheel to the left to enter a phone number. If you are in the voice display, turning the Navi wheel to the left scrolls through the voice commands.  In the standby display, turn the Navi wheel to the right to search for a contact entry. If you are in the voice display, turning the Navi wheel to the right scrolls through the voice tags you assigned for voice dialling a number. Press the Navi wheel
to access a function in a particular context: - to start the menu and select an item. - to select an item from a list. - to start options and select an item. This key activates the following functions from the standby display: ▶ Press to switch off loudspeaker. An incoming call is indicated by a flashing display. ▶ Press and hold to put the car phone in off mode. Press again to return to the standby display. ▶ Press to switch incoming or ongoing calls from your car phone over to a compatible, paired headset and back as desired.  This key activates the following voice functions from the standby display: ▶ Press to activate voice dialling and voice commands. ▶ Press and hold to activate recording (also during ongoing calls).Alphanumeric keypad
Use these keys to enter numbers 0–9, letters, and other characters. Several characters have been assigned to each key. To enter a character, repeatedly press the related key until you have reached the desired character. Entering numbers and characters: ▶ To enter a number, press and hold the number key for approximately one second. ▶ To enter special characters, repeatedly press 1_ . ▶ To enter a blank space, press 0. ▶ To switch between upper- and lower-case characters, press 📄. ▶ Use the Navi wheel 📁 to move the cursor in the entered text. For example, if you wish to enter the letter "C", press three times. When the flashing cursor appears to the right of the letter entered, you can select the next character to be entered. Repeat these steps until you have completed your entry. Note
The procedure set out above applies only for entering text. Caution!
When you have finished using the handset, make sure that it is placed securely in the cradle. A loose handset may cause bodily injury if you have to brake sharply or should have an accident.3. Getting started
Installing the SIM card
Caution!
Keep all miniature SIM cards out of the reach of small children. Note
The SIM card and its contacts can easily be damaged by scratches or bending, so be careful when handling, inserting or removing the card ▶ Switch off the car's ignition before inserting the SIM card. ▶ Gently press the catch on the radio unit casing (1) to open and lift the cover (2).  ▶ Slide the SIM card holder (3) as shown to unlock it. ▶ Open the SIM card holder by lifting it upwards on one side as depicted in figure (4). ▶ Carefully insert the SIM card into the holder (5). Make sure that the SIM card is inserted properly and that the golden contact area on the card is facing you. ▶ Push the SIM card holder down into its original position and lock it into place by sliding it in the direction indicated by the arrow. Close the cover of the radio unit and check to make sure it catches. natural_image
Technical diagram showing a device casing with an inset close-up of its internal structure (no text or symbols)Switching on/off and off mode
Caution!
If wireless phone use is prohibited or when it may cause interference or danger, switch your car phone over to off mode. The car phone is then deactivated, even if the car ignition is on.Switching on the phone
To switch on your car phone, simply turn the ignition key. Your car phone is connected to the ignition system, so that turning the ignition on automatically switches your car phone on. If the message SIM rejected is shown on the display although checking the SIM card has shown that the SIM is properly inserted, please contact your network operator or service provider for assistance. If you are requested to enter your PIN code, enter the PIN code (displayed as \*\*\*\*). Press 🔒 to confirm the PIN. For further information, see "Change PIN code" on page 40. After you have entered the correct PIN, the car phone automatically activates the user data profile that was in use the last time the phone was switched on. If no entries have been made in the car phone memory for this particular user profile, the car phone asks you if you want to copy the contact entries from the SIM card memory to the car phone memory for this user profile. Note
The car phone entries represent those in the internal car phone memory and not those on the SIM card in use.Switching off the phone
When you switch off your car ignition, the car phone is not switched off automatically; it remains in service for the period of time that you set using the power down timer. Then the phone automatically switches off. Note
The factory setting for the power down timer is five minutes.Off mode
 To change over to off mode when your car's ignition is switched on: ▶ Press and hold ↗. ▶ Then press and hold ▶. When your car phone is in off mode, the display as depicted in the figure above is shown. ▶ To put your car phone back into service, press ↓. ▶ Follow the instructions shown on the display.4. Call functions
Voice dialling
 You can make a phone call simply by saying a voice tag that has been added to a number in the contacts. Name tags may be added to up to 12 of the numbers stored in the contacts. Any spoken word (or words) such as the name of a person can be used as a voice tag to voice dial a call. Before using voice dialling, note that: - Voice tags are not language dependent. They are dependent on the speaker's voice. - Voice tags are sensitive to background noise. Record them and make calls in a quiet environment. - You must say the name exactly as you said it when you recorded it. - Very short names are not accepted. Use long names and avoid similar names for different numbers. Note
Using voice tags may be difficult in a noisy environment or during an emergency, so you should not rely solely upon voice dialling in all circumstances. Note
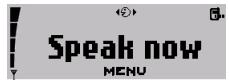
To assign a voice tag to a contact, see "Voice tags" on page 43. ▶ To voice dial a number, press ☐ to access the voice display. The message Speak now will appear on the display. ▶ Say the voice tag belonging to the desired number loudly and clearly. Your car phone plays the recorded voice tag and automatically dials the number assigned to it.Calling a contact (name search)
 In the standby display, scroll right to the desired letter of the alphabet, and press 🏠️ to open the list of names beginning with this letter. ▶ Scroll to the desired name, and press ⚙ to dial the number. Note
You can add up to five phone numbers to an entry in your contacts. The first number saved under a name is automatically set as the default number and is indicated with ☐ (General). Other number types are ☐ (Mobile), ☐ (Home), ☐ (Office), and ☐ (Fax).  To call any one of the other numbers stored for a name: ▶ Press ⏻, and scroll to the desired symbol or phone number. ▶ Press 📋 to dial the number.Redialling
To redial a number you have recently dialled, you can view a list of up to 10 numbers that you have last called or attempted to call. ▶ In the standby display, press 📋, ▶ Scroll to the desired number or name. ▶ Press 📋 to dial the number.Making a call using the keypad
You can also make a call by entering a phone number. In the standby display, to enter the desired phone number, press the number keys 0. to 9. ▶ If you entered the number incorrectly, press ↗ to delete it. ▶ To call the number shown on the display, press 🔔.Using the Navi wheel to make a call
You can use the Navi wheel to enter a phone number and make a call. In the standby display, scroll left to the first digit in the phone number, and press 🔒. ▶ Repeat this step for the other digits of the desired number until the complete phone number is shown on the display. ▶ Press 🔔 to call the number.List of favourites
You can add up to 12 contacts to this list. The list of favourites allows you to quickly access numbers you frequently call. To view the list from the standby display, ▶ Press ☐. ▶ Scroll to the desired entry, and press 📄. ▶ Follow the instructions shown on the display. ▶ Press 📋 to dial the number.Call waiting
 If Call waiting (network service) is activated, you are notified of any incoming call while you have another call in progress. This feature allows you to accept this call. To use the call waiting function in your car phone, you must first activate it: ▶ With the display in standby, press ⬇. ▶ Scroll to Settings, and press ▶ Scroll to Call settings, and press 🏠️. ▶ Scroll to Call waiting, and press ▶ Scroll to the desired setting, and press 🤨. Select from the following options: - Activate This option activates the call waiting service. - Cancel This option deactivates the call waiting service. - Check status This option lets you know whether this service is currently active for your car phone. ▶ Press ⬆ to accept an incoming call while you are engaged in an active call. The first call is placed on hold. ▶ Press 🔍 to end a currently active call and return to the call on hold. ▶ Press ⬆ to switch between the active call and the call on hold. The other call is placed on hold. ▶ Press ↗ to end a currently active call. For further information, see "Call waiting (network service)" on page 36.Options during a call
The following options are available to you during an active call: - Mute - Send DTMF - Contacts To access these options: ▶ Press ↓ during a call to view the list of options. ▶ Scroll to the desired option, and press ▶ Follow the instructions shown on the display.Mute call
 To mute a call in progress, select Mute, which switches off the microphone. Muted is displayed. ▶ Press 🏠 during an active call. ▶ Scroll to Muted, and press ↓ to mute the call. ▶ Press ⬇ to unmute the microphone.Send DTMF tones
DTMF tone strings can be used to send passwords or to access your answering machine or to control an automatic voice dialogue system. ▶ During a call, press ▶ Scroll to Send DTMF, and press ▶ Scroll right to access the contacts in order to select a string of numbers that have been predefined and saved. ▶ Scroll left to enter a string of numbers. ▶ Press ↓ to select the desired entry. ▶ If you have accessed the contact entries, scroll to the defined string, and press 📋. or To enter the desired string of numbers, use the keypad. For further information, see "Basic components of the handset" on page 14. When a number is selected, it is immediately sent as a DTMF tone. ▶ Press ↗ to exit this option and return to the call display. The call in progress remains active. Note
You can save DTMF strings as contacts. For further information on adding entries to the contacts, see "Add a name" on page 31.Contacts
During a call, you may wish to view contact entries to check a number or to give the caller a particular number. To view contacts: ▶ During a call, press ▶ Scroll right to the desired letter of the alphabet, and press to open the list of names beginning with this letter. ▶ Scroll to the desired name, and press 🔒 to view the number. ▶ Press ↗ to exit the contacts. The call in progress remains active.Adjust the loudspeaker volume
▶ During a call, adjust the loudspeaker volume with 📂.Accepting or refusing an incoming call
You can either accept or refuse any incoming call: ▶ Press 📋 to accept an incoming call and, when finished, press 🔍 to end it. ▶ Press ↗ to refuse an incoming call. If the function Divert if busy is activated (network service) and your incoming calls are directed to another number such as your voice mailbox number, any call you refuse is also diverted to this number. For more information, see "Call divert (network service)" on page 35.Recorder
The tape recorder feature allows you to record pieces of speech, sounds, or an active phone call. Warning!
Obey all local laws governing recording of calls. Do not use this feature illegally. ▶ Press and hold ☐ to begin recording during a phone call. ▶ Press ↓ to stop recording. For further information, see "Recorder" on page 46. ▶ Press ↓ during an active call. ▶ Scroll to the desired option, and press ↓. ▶ Follow the instructions shown on the display.5. Using the menu
The Nokia 810 car phone offers you an extensive range of functions, which are grouped in menus.Accessing a menu function
To access the menu from the standby display, press the Navi wheel ⏻. You can then navigate the menu using the following keys:  Turn the Navi wheel to the left to scroll down through a list of functions.  Turn the Navi wheel to the right to scroll up through a list of functions.  Press the Navi wheel to select a desired option.  Press this key to delete an entry made. Or press this key to return to the previous menu level (see the list of menu functions). Press and hold this key to clear the display.List of menu functions
Messages
■ Create message Send Clear text ■ Use template ■ Save as template Inbox Call Reply Forward ■ Save as template Delete Sent messages Open Details Delete ■ Message settings ■ Message centre number ■ Reply via same centre ■ View templates Send DeleteCall register
Missed calls ■ Received calls ■ Dialled numbersContacts
Search ■ Add contact Edit contact Delete ■ Add number ■ Memory status ■ Speed dialsTones
■ Ringing volume ■ Ringing tone ■ Warning tonesSettings
■ Time settings - Call settings ■ My number sending ■ Set by network On Off Call divert ■ Divert all voice calls ■ Divert if busy ■ Divert if not answered ■ Divert if out of reach ■ Divert if not available \- Cancel all diverts ■ Automatic answer ■ Automatic answer off ■ Automatic answer on Call waiting ■ Call waiting activated ■ Call waiting deactivated - Check status ■ Speed dialling ■ Speed dialling on ■ Speed dialling off ■ Phone settings Language ■ Backlight settings Cell info display ■ Cell info display on ■ Cell info display off ■ Network selection ■ Automatic ■ Manual ■ Power down timer ■ Voice mailbox ■ Listen to voice messages ■ Voice mailbox number ■ GPRS modem ■ Security settings ■ PIN code request ■ Change PIN code ■ Closed user group Default On Off ■ Fixed dialling Off ■ Number list On ■ Equaliser settings ■ Loudspeaker ■ Radio loudsp. ■ Restore factory settingsVoice
■ Voice tags ■ New voice tag ■ List of voice tags Play ■ Change Delete ■ Voice commands ■ New voice command ■ List of voice commands Play Change DeleteRecorder
Record Play DeleteBluetooth
■ Search for Bluetooth devs. ■ View active devices ■ View paired devices ■ Create connection ■ Delete pairing ■ Request authorisation ■ Edit Bluetooth name Bluetooth nameUser data
■ Download contacts ■ Change user User 1 User 2 ■ Phone memory ■ SIM and phone mem. ■ SIM memory ■ Phone memory6. Menu functions
Messages
 You can receive and read text messages on your car phone and write, send, and save text messages. Before you can send text messages, you must define necessary Message settings. Note
Remember that traffic safety comes first. Don't hold the handset while driving and only use the features offered by your car phone when traffic conditions permit this. Note
When sending messages by means of the SMS network service, your car phone may display the words Message sent. This is only an indication that the message has been sent to the message centre number programmed into your car phone. This does not mean that the message has been received at the intended destination.Create message
▶ With the display in standby, press 📄. ▶ Scroll to Messages, and press ▶ Scroll to Create message, and press 📄. ▶ Use the alphanumeric keypad on the car handset to write your text message. For further information, see "Alphanumeric keypad" on page 15. ▶ When you have finished writing your message, press Select from the following options:Send
To send text messages: ▶ Scroll to Send, and press ▶ Select the phone number of the recipient from the contacts, or enter the desired number. ▶ To send the message, press Clear text
To delete entered text, scroll to Delete, and press ↓.Use template
You can reply to a text message using a template. To view the list of templates: ▶ With the display in standby, press 🏠. ▶ Scroll to Messages, and press ▶ Scroll to View templates, and press ⬇ to view the list. ▶ Scroll through the list of templates, and press 🔒 to select the desired template. ▶ Press ↓ to confirm the selection.Save as template
This convenient option lets you save a received text message as a template. To use the template, select Reply with template to view the list and send the message. ▶ Scroll to Save as template, and press\_Inbox
 When you have received a text message, the indicator and the number of new messages are shown on the display along with the notification New msgs. received Text messages sent to your car phone are shown in the order in which they are received. Unread text messages are indicated by ☐, with read text messages indicated by the ☑ symbol. A flashing SMS indicator 📋 means that the message memory is full. To be able to send or receive a new message, you must delete some of the old ones. If you have received more than one text message: ▶ With the display in standby, press ⬇. ▶ Scroll to Messages and press ▶ Scroll to Inbox and press ⏻ to view the list of messages. ▶ Scroll to the desired message and press ⏻ to read it. ▶ Scroll to either browse through the message or display the message itself, the sender or sender's phone number, and the date and time the message was received. Your car phone comes with a number of options for handling the message selected: ▶ Press ▶ Scroll to the desired option and press ↻.Call
Select this option to make a call to the sender's phone number.Reply
Select this option to write a reply to a text message you received.Forward
Select this option to forward a text message to another number.Save as template
This convenient option lets you save a received text message as a template. To use the template when writing your own text message, select Reply with template.Delete
Select this option to delete a text message.Sent messages
You can open a sent message, view its details, or delete it. ▶ With the display in standby, press ▶ Select Messages, and press ▶ Scroll to Sent messages, and press 📄. ▶ Scroll to the desired message, and press 🏠. ▶ Press ⬇ to confirm the selection. ▶ Scroll to the desired option, and press ⬇. Open
This option opens the selected text message.Details
Select this option to view the name and phone number of the recipient and the time and date the text message was sent.Delete
This option deletes a text message.Message settings
To be able to send text messages, you must define settings on your car phone.Message centre number
You receive this number from your service provider. Note
This option saves the phone number of the message center, which you need to send text messages.Reply using same message center (network service)
Replies to text messages are typically handled by the SMS center to which the sender subscribes. Reply via same centre allows the recipient of your message to send you a reply using your message center. To make these settings: ▶ With the display in standby, press ⏻. ▶ Scroll to Message settings, and press ⬇. ▶ Scroll to the desired option, and press ⬇. ▶ Follow the instructions on the display.View templates
Your car phone has five standard templates for text messages. In addition to these, you can save five templates based on received text messages. ▶ With the display in standby, press ⏻. ▶ Scroll to Messages, and press ▶ Scroll to View templates, and press ⬇ to view the list. ▶ Scroll through the list of templates, and press 🔒 to select the desired template. ▶ Press ↓ to confirm selection of the template. ▶ Scroll to the desired option, and press ⬇. ▶ Follow the instructions shown on the display.Send
The template selected is sent.Delete
To delete templates you saved, scroll to Delete, and press to delete the template:  Note
While you can delete the templates you saved from received text messages, you cannot delete the five standard templates stored in the car phone memory.Call register
 The car phone registers the phone numbers of missed, received, and dialled calls, as well as the time and date of your calls. Note
The car phone registers missed and received calls only if the network supports these functions and if the car phone is switched on and within the network service area. Note
In these lists you can view up to 10 of the last calls made to your car phone or up to 10 of the last dialled numbers. The most current item is shown at the top of the list. Three options are available for each of the items in the call register: Call, Time of call, or Delete. ▶ Select an entry in the desired list, and press 🤨. ▶ Scroll to the desired option, and press ⬇. ▶ Follow the instructions on the display. ▶ Press 🔍 to return to the previous menu, or press and hold to return to the standby display.  Missed calls
To view a list of up to 10 of the latest registered calls: ▶ With the display in standby, press 🏠️. ▶ Scroll to Call register, and press ▶ Scroll to Missed calls, and press ⬇ to view the list. ▶ Scroll through the list. ▶ Press and hold ↗ to return to the standby display.Received calls
To view a list of up to 10 registered numbers of the latest calls you have received: ▶ With the display in standby, press 📄. ▶ Scroll to Call register, and press ⬇. ▶ Scroll to Received calls, and press ⬆ to view the list. ▶ Scroll through the list.Dialled numbers
You can use a shortcut to view the list of up to 10 of the last dialled numbers with the display in standby: press and hold Ⓞ. Alternatively, to view the list of dialled numbers: ▶ With the display in standby, press 📄. ▶ Scroll to Call regist., and press 🏠️. ▶ Scroll to Dialled numbers, and press ⬇ to view the list. ▶ Scroll through the list.Contacts
 All of the entries you create in the contacts are saved in the internal car phone memory. You can also copy entries from a SIM card or a compatible mobile phone that supports Bluetooth wireless technology to your car phone. For further information, see "Download contacts" on page 51. For each user profile, you can store up to 1000 names in the car phone memory with up to five numbers for each name. Note
If the number of contact entries you try to copy from the memory of a compatible mobile phone using Bluetooth wireless technology exceeds the available space in the car phone memory, not all of the entries are copied. When you select a name from the contact entries (for example, to make a call), the general number is used by default unless you select another number.Search for names and numbers
You can access the list of names and phone numbers quickly from the standby display: ▶ Scroll right to the first letter of the desired name, and press 🏠️. ▶ You can now view all the names stored in your contacts list that start with the letter selected. They are listed in alphabetical order. ▶ Scroll to the desired name in the list. ▶ To make a call to this person, press 📋. ▶ To cancel dialling or to end the call, press ↗. ▶ To return to the standby display, press ↗. For further information, see "Calling a contact (name search)" on page 18.Add a name
Names and phone numbers are stored in the contacts. To add a name and the related number to your contacts. ▶ With the display in standby, press 🏠️. ▶ Scroll to Contacts, and press ▶ Scroll right to Add contact, and press ↻. ▶ Enter the name with the alphanumeric keys, and press to save it. ▶ Enter the corresponding number, and press 🤒 to save it. ▶ To erase a character incorrectly selected, press ↗.Edit names and phone numbers
You can edit names and phone numbers in the contacts: ▶ With the display in standby, press ⬇. ▶ Scroll to Contacts, and press ▶ Scroll to Edit contact, and press ▶ Scroll to the first letter of the desired name, and press to view the list of entries starting with this letter. ▶ Scroll to the desired contact, and press ⬇. ▶ You can now edit the entry. Scroll to the letter or number to be changed, and make the desired changes. ▶ To save any changes made, press 📄.Delete contact entries
You can delete one or more names and the related numbers from the contacts. ▶ With the display in standby, press ⬇. ▶ Scroll to Contacts, and press ⬇ to open the contacts. ▶ Scroll to Delete, and press ▶ Scroll to the desired option, and press ⬇. ▶ Follow the instructions shown on the display.Add a phone number
You can add up to four additional phone numbers to an entry in the contacts. The first number saved under a name is automatically set as the default number and is indicated with ☐ (General). Other number types are (Home), ☐ (Office), and ☐ (Fax) (Mobile), ▶ With the display in standby, press 📄. ▶ Scroll to Contacts, and press ⬇ to open the contacts. ▶ Scroll to Add number, and press ▶ Scroll to the desired name in the contacts, and press ▶ Scroll to the symbol you wish to assign to the number you are adding, and press 🔒. ▶ Enter the number, and press ⬇ to save it.Query the memory status
This option allows you to view the free storage space in the car phone memory. ▶ With the display in standby, press 📄. ▶ Scroll to Contacts, and press ▶ Scroll to Memory status, and press 🏠. ▶ You can now view the memory status on the display.Speed dialling
The speed dialling option is a convenient shortcut function that lets you dial a phone number assigned to a number key quickly and easily. To activate (On) or deactivate (Off) the speed dialling option, select Settings > Call settings > Speed dialling.Assign a phone number to a speed dialling key
You can assign any phone number in your contacts to a speed dialling key ( 2_ext to 9_ext ). Note that the key is reserved for speed dialling your voice mailbox. The following options are available for each of the dialling keys: View number, Change, or Delete. ▶ With the display in standby, press 🏠. ▶ Scroll to Contacts, and press ▶ Scroll to Speed dialling, and press ⏻ to view the list of speed dialling keys and the phone numbers assigned to them. ▶ Scroll to the desired entry in the contacts, and press 📄. The options View number, Change, and Delete are displayed. ▶ Scroll to the desired option, and press ⏻. ▶ Follow the instructions shown on the display.Speed dial a number
▶ Press and hold the speed dialling key assigned to the number until the call is started. Note
For the setting options, please see "Speed dialling" on page 33.Tones
 You can choose the desired ringing tone for incoming calls, change the volume, and switch warning tones on or off as desired. Note
Use the Navi wheel 📂 to regulate the volume of the ringing tone when the car phone is ringing to notify you of an incoming call or to change the loudspeaker volume during a call in progress. ▶ With the display in standby, press 📄. ▶ Scroll to Tones, and press ▶ Scroll to the desired option, and press 📄. ▶ Follow the instructions on the display.Ringing volume
This option sets the loudspeaker volume for an incoming call. ▶ To regulate the volume of the ringing tone when you receive an incoming call or to change the loudspeaker volume during a call in progress, use the Navi wheel 📁.Ringing tone
This option offers you a range of ringing tones to choose from. Select the one you would like to have notify you of an incoming call.Warning tones
This option lets you activate or deactivate special notification tones.Settings
Set the time and date
▶ With the display in standby, press ▶ Scroll to Settings, and press ▶ Scroll to Time settings, and press ⬇. ▶ Scroll to Set the time, and press ▶ Scroll to set the hour. Press ⬇ to take over the setting and continue with the minutes. ▶ Repeat the above step to set the minutes. ▶ Repeat the above procedure to access the options Time format, Set the date, and Date format to make the desired settings. Call settings
▶ With the display in standby, press ▶ Scroll to Settings, and press ↓. ▶ Scroll to Call settings, and press My number sending (network service)
\- Set by network This activates the setting you have agreed with your network operator. \- On This option activates your caller ID: the person you call can view your car phone number. \- Off If you do not wish your number to be sent to the called party, use this option to deactivate your caller ID. ▶ Scroll to the desired option, and press Call divert (network service)
With Call divert, you can direct your incoming calls to another number (for example, to your voice mailbox number). For details, contact your service provider. Your car phone offers you a wide variety of options to choose from: • Divert all voice calls This option diverts all incoming voice calls. \- Divert if busy This option diverts voice calls when your number is busy or when you refuse an incoming call. • Divert if not answered This option diverts all voice calls you fail to answer. • Divert if out of reach This option diverts voice calls when you are out of reach of the network. • Divert if not available This option diverts all voice calls you receive when you are not available. \- Cancel all diverts This option cancels any active divert options. To make call divert settings: ▶ With the display in standby, press  ▶ Scroll to Settings, and press ▶ Scroll to Call settings, and press ▶ Scroll to Call divert, and press ▶ Scroll to the desired call divert feature, and press ⏻. You can select any of four options for each of the divert features offered: \- Activate This option lets you select the number you wish to direct diverted voice calls to your Voice mailbox or any other number. \- Cancel This option deactivates a call divert feature. \- Check status This option allows you to check the status of a call divert feature. \- Delay This option sets the time period after which an incoming voice call is to be diverted if not answered. This is only available if you have activated Divert if not answered. Note
The original factory setting for the delay time is five seconds. Active call diverts are shown by an indicator on the display. For further information, see "Display indicators" on page 12.Automatic answer
This feature allows you to automatically answer incoming calls after the first ring whenever your car phone is on and off mode is not active. You can switch this feature on or off as desired. Caution!
If you activate this feature, you should make sure that the ringing tone is set sufficiently loud to make you aware of an incoming call. Otherwise, you may run the risk of a caller listening in on conversations carried on in the car. To activate the automatic answer feature: ▶ With the display in standby, press 🏠️. ▶ Scroll to Settings, and press ▶ Scroll to Call settings, and press 🏠️. ▶ Scroll to Automatic answer, and press ↻. ▶ Scroll to On or Off, and press ⏻ to select the desired setting.Call waiting (network service)
If the Call waiting feature is activated, you are notified of any incoming call while you have another call in progress. This feature allows you to accept this call. To activate call waiting: ▶ With the display in standby, press ⏻. ▶ Scroll to Settings, and press ▶ Scroll to Call settings, and press ▶ Scroll to Call waiting, and press ⬇. ▶ Scroll to the desired setting, and press ⏻. Select from the following options: - Activate This option activates the call waiting service. - Cancel This option deactivates the call waiting service. - Check status This option lets you know whether this service is currently active for your car phone. ▶ Press 📋 to accept an incoming call while you are engaged in an active call. The first call is placed on hold. ▶ Press ↗ to end a currently active call and to return to the call on hold.Speed dialling
The speed dialling option is a convenient shortcut function that lets you dial a phone number assigned to a number key quickly and easily. To activate or deactivate speed dialling, select Settings > Call settings > Speed dialling > On or Off. For further information, see "Speed dialling" on page 33.Phone settings
You can define various basic settings for your car phone.Language
This option lets you select the language for display texts. To set the display text language: ▶ With the display in standby, press ⬇. ▶ Scroll to Settings, and press ▶ Scroll to Phone settings, and press ▶ Scroll to Language, and press ▶ Scroll to the desired language, and press 🤨. If you select Automatic, the car phone selects the language according to the information stored on the SIM card.Display backlighting
You can adjust the brightness of the display backlighting for better viewing comfort. To adjust the backlighting: ▶ With the display in standby, press ⬇. ▶ Scroll to Settings, and press ▶ Scroll to Phone settings, and press 📄. ▶ Scroll to Backlight settings, and press 📄. ▶ Scroll to the desired backlighting setting, and press ⏻.Cell info display
When this function is activated, information about the radio cell you are using is displayed. However, you can only use this network service if the car phone is booked into a cellular network based on microcellular network (MCN) technology. To select this function: ▶ With the display in standby, press ⏻. ▶ Scroll to Settings, and press ▶ Scroll to Phone settings, and press ▶ Scroll to Cell info display, and press ▶ Scroll to Cell info display on or Cell info display off, and press ⬇ to select the desired setting. ▶ Follow the instructions shown on the display.Network selection
You can select the cellular network in which you use the car phone manually or automatically. \- Automatic Your car phone automatically selects a suitable available cellular network. \- Manual You can view a list of available cellular networks and select any network that has a roaming agreement with your home network operator. The car phone stays in manual mode until the automatic mode is selected or another SIM card is inserted into the phone. To select the desired cellular network: ▶ With the display in standby, press ⬇. ▶ Scroll to Settings, and press ▶ Scroll to Phone settings, and press 🏠️. ▶ Scroll to Network selection, and press 📄. ▶ Scroll to the desired setting, and press ⬇. ▶ Follow the instructions shown on the display.Power down timer
Your car phone comes with a power down delay that keeps your phone in service for the period of time set, even when the car ignition is switched off. After you switch off the ignition, the car phone remains in operation for the time set in Power down timer. If you are in a call when the ignition is switched off, the power down timer does not begin the countdown until the active call ends. Note
The original factory setting for the power down timer is zero minutes. The power down delay is limited to a maximum delay time of 24 hours. Note
Your car phone is powered by the car battery. When setting the power down timer, take care not to drain your car battery. To set the power down timer: ▶ With the display in standby, press 📄. ▶ Scroll to Settings, and press ↓. ▶ Scroll to Phone settings, and press ▶ Scroll to Power down timer, and press ⬇. ▶ Scroll to set the time as desired. ▶ Press ⬇ to activate the timer. A message on the display notifies you that the power down timer is set.Voice mailbox
Your service provider may offer you a voice mailbox service, which you have to install before you can receive voice messages. To access this mailbox, you may need to save the number to your car phone. Your service provider will give you further information on this service and let you know the number of your voice mailbox.Voice mailbox number
To enter your voice mailbox number: ▶ With the display in standby, press ⬇. ▶ Scroll to Settings, and press ▶ Scroll to Voice mailbox, and press ↻. ▶ Scroll to Voice mailbox number, and press 🏠. ▶ Use the Navi wheel number editor to enter the number. ▶ If you select an incorrect number, press ↗ to delete it. ▶ To save the number, press OK in the Navi wheel number editor, or press 🔔. Note
Press and hold 🔒 to dial your voice mailbox direct.Listen to voice messages
To listen to voice messages: ▶ With the display in standby, press 📄. ▶ Scroll to Settings, and press ▶ Scroll to Voice mailbox, and press ▶ Scroll to Listen to voice messages, and press ↓.GPRS modem settings (network service)
You can use your car phone as a modem to enable GPRS connectivity. Note, however, that you need a GPRS access point to do so. Contact your network operator or service provider for information. To use GPRS: - You must subscribe to the GPRS service of your network operator or service provider. - For the relevant information on the availability of GPRS and the necessary settings, contact your network operator or service provider. - You must save the settings required to use GPRS applications to your car phone. To set up a GPRS access point: ▶ With the display in standby, press ⬇. ▶ Scroll to Settings, and press ▶ Scroll to GPRS modem, and press ▶ To set up a new GPRS access point or to change an existing one, press 📋 again. ▶ Press 🕒 to open the option Edit access point?, and enter the alphanumeric characters of the GPRS access point using the Navi wheel text editor. ▶ To save the name of the access point, press OK in the Navi wheel text editor or press 🔔. ▶ If you have made a mistake in selecting a character, press 📋 to delete it. Press and hold this key if you wish to erase the complete entry. For further information and to download modem driver software for your computer or laptop computer, visit the Nokia Web site at www.nokia.com\support.GPRS charges
You may be charged for GPRS data transmission or for an application that uses GPRS. For details of charges, contact your network operator or service provider.Security settings
Caution!
For some security settings (for example, when calls are restricted to closed user groups or fixed dialling numbers), calls still may be possible to the official emergency number programmed into your device.PIN code request
Use this option to set the car phone to ask for the PIN code of the car SIM card installed in the radio unit whenever the phone is switched on. Remember that some providers do not allow the PIN code request function to be deactivated.Change PIN code
This option lets you change the PIN code of the car SIM card installed in the radio unit of your car phone. Remember that these codes may only include the numbers 0 to 9. For further information, see "Access codes required for the SIM card" on page 11.Closed user group
This is a network service that specifies the group of people you can call or who can call you. For further information, contact your network operator or service provider. You can choose from three options for this service: - Default The settings made by your service provider are active. - On The closed user group service is active. - Off The closed user group service is deactivated.Fixed dialling numbers
You can restrict your outgoing calls to selected phone numbers, if this function is supported by your car SIM card. To save and edit the numbers on this list, you need the PIN2 code. Note
If you wish to use this feature when accessing the SIM card of a compatible mobile phone connected to your car phone using Bluetooth SIM access profile technology, you must define the corresponding settings in the compatible mobile phone. For further information, see the user guide applicable for the compatible mobile phone with Bluetooth technology that you are using. You can choose from three options for this feature when using the car SIM card installed in your car phone: - Off The fixed dialling numbers feature is deactivated. - Number list This option allows you to view the phone numbers that may be used for outgoing calls. - On The fixed dialling numbers feature is active. To set up fixed dialling numbers: ▶ With the display in standby, press ▶ Scroll to Settings, and press ▶ Scroll to Security settings, and press ▶ Scroll to Fixed dialling, and press ⬇. ▶ Scroll to the desired option, and press ▶ Follow the instructions on the display.    For further information, see "Access codes required for the SIM card" on page 11.Equaliser settings
Your car phone supports a variety of options for output over a loudspeaker: - Direct connection to the SP-2 loudspeaker supplied in the sales package. - Connection to compatible car radio loudspeakers using the audio line-in of your car radio. You must adjust the audio level suitably if this option is selected. - Connection to a compatible car radio loudspeaker over an additional relay that switches audio output over to the loudspeaker (not included in the sales package). Ask the service technician who installs your car phone for professional assistance. To make the desired setting: ▶ With the display in standby, press ⬇. ▶ Scroll to Settings, and press ▶ Scroll to Equaliser settings, and press ▶ Scroll to Loudspeaker or Radio loudsp., and press 🔒 to select the desired option.Restore factory settings
You can reset all of the menu settings to the original factory settings. ▶ With the display in standby, press 📄. ▶ Scroll to Settings, and press ▶ Scroll to Restore factory settings?, and press ↓. ▶ Follow the instructions on the display. Caution!
If you have erased a setting, you cannot undo this operation. The data is irretrievably lost.Voice
 Before recording voice tags or using voice dialling, you must be aware of some essential facts: - Voice tags are not language dependent. They are dependent on the speaker's voice. - Voice tags are sensitive to background noise. Record them and make calls in a quiet environment. - When recording a voice tag or making a call by saying a voice tag, make sure to speak clearly into the microphone. - Very short names are not accepted. Use long names and avoid similar names for different numbers. Note
You must say the name exactly as you said it when you recorded it. This may be difficult in, for example, a noisy environment or during an emergency, so you should not rely solely upon voice dialling in all circumstances.Voice tags
You can assign Voice tags to phone numbers and your car phone will automatically try to dial the number when it recognises the tag.New voice tag
This option lets you record a New voice tag, assign it to a phone number, and save it in the car phone memory. You can save up to 12 voice tags with the related numbers per user profile in your car phone. A voice tag can be any spoken word (or words) such as the name of a person. ▶ With the display in standby, press 📄. ▶ Scroll to Voice, and press ▶ Scroll to Voice tags, and press ▶ Scroll to New voice tag, and press ▶ Scroll to the desired name in the contacts, and press ↻. ▶ Scroll to the desired number you wish to record the voice tag for, and press 📄. ▶ Press 🏠 again and you are prompted to speak the voice tag you have selected for this entry. ▶ Follow the instructions on the display.Voice tag list
To check all of the voice tags saved in your car phone memory and to edit the list: ▶ With the display in standby, press ⬇. ▶ Scroll to Voice, and press ▶ Scroll to Voice tags, and press ▶ Scroll to List of voice tags, and press ⏻. ▶ Scroll to the desired option, and press ⬇. ▶ Scroll to the desired name in the contacts that you wish to edit, and press 🔒. ▶ Follow the instructions on the display. Select from the following options: - Play This option plays back the voice tag as recorded. \- Change You can replace any voice tag by a new one. Select this option, and say the new voice tag. \- Delete voice tag? This option erases a voice tag and makes room in the memory for a new voice tag.Voice dial a number
 To voice dial a number: ▶ Press ☐. Speak now is displayed. ▶ Say the voice tag belonging to the desired number loudly and clearly. Your car phone plays the voice tag and automatically dials the number assigned to it. ▶ To cancel voice dialling, press ↗. Note
If you are using a compatible headset with Bluetooth technology, press the key on the headset to activate it before speaking the voice tag.Voice commands
You have a selection of phone features that can be activated by saying a voice command. A voice tag may be assigned to as many as three of the commands on the list. You can activate the voice command in the same way as making a call using a name tag. Three options are available: \- Play This option lets you play selected recordings. The last made recording is played first. Press 📋 while listening to a recording to skip it and go to the next one. \- Download contacts You can use this feature to copy contact entries from a compatible mobile phone that supports Bluetooth wireless technology or from the SIM card installed in the compatible mobile phone to the car phone memory. If a wireless Bluetooth SIM access profile connection is established, the contact entries stored on the compatible mobile phone are automatically downloaded. \- Conn. to Bluetooth headset This option allows you to establish a wireless link to a compatible paired headset that supports Bluetooth technology. If there is no headset paired with the car phone, Search for audio enhancem. is displayed. For further information, see "Search for devices that support Bluetooth technology" on page 51.New voice commands
This option allows you to record a voice command (one or more words acting as a spoken command) and assign it to a function in the list of voice commands. ▶ With the display in standby, press 🏠. ▶ Scroll to Voice, and press ▶ Scroll to Voice commands, and press 📄. ▶ Scroll to New voice command, and press ▶ Scroll to the desired function for which you wish to record a voice command, and press 🔒. ▶ Press 🏠 again and you are prompted to speak the voice tag you have selected for this entry. ▶ Follow the instructions on the display. The voice command list includes the phone functions listed for voice commands. Each function on the list can be checked and edited using the options below: \- Play voice commands This option plays the voice command as recorded. \- Change You can record a new voice command for a selected entry, replacing the existing one. \- Delete voice command? This option erases a voice command and makes room in the memory for a new one. Before using voice commands, note that: - Voice commands are not language dependent. They are dependent on the speaker's voice. - Voice commands are sensitive to background noise. Record them and make calls in a quiet environment. - You must say the command exactly as you said it when you recorded it. - Very short commands are not accepted. Use long commands and avoid similar commands for different functions. You can use a shortcut to access the list of voice commands direct from the standby display: ▶ Press ☐, and scroll left. ▶ You can now view the list of Voice commands. ▶ Follow the instructions on the display.Execute a voice command
Note
When an application using the GPRS connection sends or receives data, you cannot execute a voice command. To do so, you must first end the application using the GPRS connection.  To execute a voice command: ▶ Press ☐. Speak now is displayed. ▶ Say the voice command loudly and clearly. Your car phone plays the voice command and automatically performs the function assigned to it.Recorder
 The tape recorder feature allows you to record pieces of speech, sounds, or an active phone call. This is especially useful if you need to note information during a call. For example, you can record a name or a number to be written down later. Warning!
Obey all local laws governing recording of calls. Do not use this feature illegally. You can make up to 10 recordings as long as you do not exceed an overall recording time of three minutes. Each recording is saved together with the running number and the length and time of the call. New recordings are automatically saved in the memory. When the memory is full, the message No memory to save rec. is displayed. To be able to make new tape recordings, you must erase some old ones. Note
You can easily play your recordings using a voice command. Say the voice command, and your car phone starts to play the last recording. Press 🔊 to skip to the next recording. Note
To use this shortcut, you must assign a voice command to this function in your car phone. For further information, see "Voice commands" on page 44.Record
This option allows pieces of speech to be recorded and automatically saves the recording. To make a recording: ▶ With the display in standby, press 📄. ▶ Scroll to Recorder, and press ▶ Scroll to Record, and press ▶ To stop the recording, press ↗. You can also use this feature during a call in progress. ▶ Press and hold ☐ to begin recording. ▶ To end the recording, press ↓. All tape recordings are stored and numbered. Two options are available for the recordings: Play and Delete.Play
You can play a selected recording. To view the list of recordings and select one to play: ▶ With the display in standby, press ⬇. ▶ Scroll to Recorder, and press ⏻ to view the list of recordings. ▶ Scroll to the desired recording in the list, and press 🏠. ▶ Scroll to Play, and press ⬇. The selected recording is played. ▶ Press ↗ to return to the list of recordings or to the previous menu item. ▶ To stop playing the recording, press ↗.Delete
You can use this option to erase a voice command in order to make room for new ones. ▶ With the display in standby, press ⬇. ▶ Scroll to Recorder, and press ▶ Scroll to the desired recording, and press 🤨. ▶ Scroll to Delete, and press ▶ Press 🏻 again to go to the next recording.Bluetooth wireless technology
 Bluetooth wireless technology is an international standard for wireless short-range communication, allowing you to establish a wireless connection between your car phone and a compatible device supporting Bluetooth wireless technology. Such devices may include, for example, mobile phone, a laptop computer, or a wireless headset. Since devices with Bluetooth technology communicate using radio waves, your phone and the other device do not need to be in direct line-of-sight. The two devices only need to be within a maximum of 10 metres of each other, although the connection can be subject to interference from obstructions such as the car body or from other electronic devices. Note
If you wish to use this function, make sure that both the car phone and the other device supporting Bluetooth technology are switched on. There may be restrictions on using such devices in some countries. Check with your local authorities.Activating and deactivating Bluetooth
The Bluetooth function is always activated in your car phone. However, in other devices with Bluetooth technology, for example, mobile phones, Bluetooth may have to be activated or deactivated in the device. Make sure that Bluetooth is active in all devices supporting Bluetooth wireless technology that you wish to use with your car phone. For further information, see the user's guide applicable for the device with Bluetooth technology that you are using.Search for audio enhancements
You can search for a wireless headset with Bluetooth technology. ▶ With the display in standby, press ⬇. ▶ Scroll to Bluetooth, and press ▶ Scroll to Search for audio enhancem., and press The car phone begins to search for enhancements supporting Bluetooth wireless technology. Devices that are found are shown on a list, with the device found last listed at the bottom. ▶ Scroll to browse the list. ▶ Press ↓ to begin pairing. Note
A wireless headset with Bluetooth technology can only be found by the car phone if there is no active Bluetooth wireless connection from the wireless headset to another compatible device supporting Bluetooth technology. Therefore, to switch over to a wireless headset with Bluetooth technology, you may need to break an existing Bluetooth wireless connection (for example, to a mobile phone).Pairing with devices with Bluetooth technology
To create a connection, you may need to exchange Bluetooth passcodes with the device you are connecting to for the first time. This operation is called pairing. The Bluetooth passcode is a 1- to 16-character-long numeric code. If you are asked to enter a passcode, you must enter the passcode supplied with the device. When establishing a wireless connection to devices such as a mobile phone using Bluetooth technology, you may be able to use a temporary passcode created by yourself. This passcode is used only once and you do not have to memorise it. Enter this passcode into the two devices sharing a Bluetooth connection. Then follow the instructions shown on the displays of the two devices. To start pairing, select a device on the list: ▶ Scroll to the desired device, and press ⬇.View active devices
To view the currently active devices with Bluetooth technology that share a connection with your car phone: ▶ With the display in standby, press 📄. ▶ Scroll to Bluetooth, and press ▶ Scroll to View active devices, and press ↓. ▶ Scroll to the desired device with Bluetooth technology, and press 🔒. ▶ Scroll to the desired option, and press ↓. ▶ Press ↗ to return to the previous menu. Press and hold ↗ to return to the standby display.View paired devices
You can view a list of Bluetooth wireless technology paired devices to create a connection to a paired device or to edit the list of paired devices. ▶ With the display in standby, press 📄. ▶ Scroll to Bluetooth, and press ▶ Scroll to the item View paired devices, and press ⬇ to open the list of paired devices. ▶ Scroll to the desired device, and press ⬇. ▶ Scroll to the desired option, and press 📄. ▶ Follow the instructions on the display. This function calls up a list of all paired devices with Bluetooth technology. The last pairing is listed at the top. Some of the options below may be available depending on the status of the device or the connection.Create connection
This option establishes a wireless connection to a paired device with Bluetooth technology.Delete pairing
This option removes a device from the list of paired devices with Bluetooth technology.Request authorisation
You can define whether the connection from the paired device is established automatically (No) or whether the car phone asks for authorization before pairing when the device to be paired comes within Bluetooth range of the car phone (Yes).Edit Bluetooth name
This option changes the name of the device with Bluetooth technology that is paired with your car phone. ▶ With the display in standby, press 🏠️. ▶ Scroll to Bluetooth, and press ▶ Scroll to View paired devices, and press ↓. ▶ Scroll to the name of the desired device, and press ⏻. ▶ Scroll to Edit Bluetooth name?, and press ↓. The devices that are paired with the car phone are displayed with their respective Bluetooth names. Scroll to the desired device, and press 📋. ▶ Scroll to the desired option Yes or No, and press 🤒 If you select Yes, the Bluetooth name currently in use is displayed. ▶ Use the Navi wheel text editor to make any desired changes. ▶ Press ↗ to delete a character. ▶ Press 🔔 to save an entry. ▶ Entry completed? is displayed. Scroll to Yes, and press to confirm.The car phone Bluetooth name
This option lets you change the Bluetooth name of your car phone, which is shown to others. Use the alphanumeric keypad to change the name. The factory setting is "Nokia 810". ▶ With the display in standby, press ⬇. ▶ Scroll to Bluetooth, and press ▶ Scroll to Bluetooth name, and press 🏠️. The name of the car phone appears on the display as Nokia 810. Press 🏠 to select the device. ▶ Edit Bluetooth name? is displayed. ▶ Scroll to Yes or No, and press ⬇ to select the desired option. ▶ If you select Yes, you can now use the text editor to change the name. ▶ Press ↗ to delete a character. ▶ When you have finished entering characters, press 📞. ▶ Entry completed? is displayed. Scroll to Yes, and press to save the name.User data
 The car phone can store and administrate data or settings under two different user data profiles. A user profile includes contact entries, name tags and voice commands, or car phone settings. Now two users sharing the car can access their personalized user data using the same SIM card simply by activating their personal user profile. Note
The indicator for the currently active user profile is shown in the status row of the display. If user profile 1 is active, 📄 is shown. If user profile 2 is active, 📋 is shown. One of the user profiles is active in the car phone at all times. When you use the car phone for the first time, user profile 1 is active.Download contacts
You can use this feature to copy contact entries from the car SIM card inserted in the car phone or from a compatible mobile phone supporting Bluetooth wireless technology to the car phone memory. Note
Many phones with the Symbian operating system require an additional application to be installed in order to download contacts. The software and installation help can be downloaded free of charge from the Nokia Web site: http://www.nokia.com/support. Note
You do not have direct access to the contact entries stored on a SIM card inserted in the car phone. To access these numbers, you must copy them to the car phone memory. Follow the instructions shown on the display. ▶ With the display in standby, press 🏠. ▶ Scroll to User data, and press ▶ Scroll to Download contacts, and press 🏠️.  Paired devices with Bluetooth technology
▶ Scroll to the compatible mobile phone with Bluetooth technology (the name is displayed in the list of paired devices) whose contacts you wish to download using the wireless Bluetooth connection to the car phone memory. ▶ Press ⬇ to begin copying the entries. Note
You can deactivate the option Request authorisation in the compatible mobile phone so that connections between the devices using Bluetooth wireless technology can conveniently be made automatically without separate acceptance or authorization. To do so, scroll to the menu item View paired devices, select Request authorisation, and set it to Off. For further information, see the user guide applicable for the compatible mobile phone with Bluetooth technology that you are using.SIM card
▶ Press 🏠️ to copy the contacts from the SIM card inserted in the radio unit to the car phone memory.Search for devices that support Bluetooth technology
▶ Scroll to Search for Bluetooth devs., and press 📄 if you wish to carry out the download from a device that is not paired with the car phone.Change user
You can save two user profiles in your car phone. The currently active profile is displayed at all times using two indicators: User 1 User 2 ▶ With the display in standby, press ⬇. ▶ Scroll to User data, and press ▶ Scroll to Change to user 1 or Change to user 2, and press to select the desired option. ▶ The user profile selected is activated. You may be prompted to enter the PIN code of the SIM card.Phone memory
You can copy contact data from any compatible mobile phone that supports Bluetooth wireless technology to your car phone. Select from the following options: • SIM and phone mem. This default setting lets you copy the contact data from the mobile phone SIM card and memory to the car phone memory. - SIM memory This option lets you download only the contact data from your mobile phone SIM card to the car phone memory. - Phone memory This option copies the entries stored in the phone memory of your mobile phone to the car phone memory.7. Data communication
Bluetooth wireless technology
Bluetooth wireless technology enables wireless connections between compatible electronic devices at a maximum range of 10 metres. Use the car phone as a modem for fax and data communication or to connect wirelessly to compatible enhancements with Bluetooth technology. Note
In some countries, there may be restrictions on using devices with Bluetooth wireless technology. Check with your dealer and the local authorities.Sending and receiving a business card
You can send or receive a person's contact information as a business card either using Bluetooth wireless technology or in the form of a text message.Receiving a business card
Make sure that your car phone is ready to receive data by means of Bluetooth wireless technology. The user of the other compatible phone can now send their business card and phone number using the desired medium. When you have received a business card using Bluetooth technology or as a text message, press the Navi wheel 🤒 and select Save to store the business card in the car phone memory. If you do not want to save the business card, select Discard.Sending a business card
You can forward a received business card to a compatible mobile phone using Bluetooth wireless technology if the phone supports it or to any handheld device that supports the vCard standard using the short message service. Select Forward for the received business card, or if you should also wish to save the business card for your personal use, select Save and forward. To send a business card using Bluetooth wireless technology, select via Bluetooth. To send a business card as a text message, select Via text message.GPRS (General Packet Radio Service)
GPRS is a technology that allows mobile phones to be used for sending and receiving data over the mobile network (network service). GPRS as such is a data bearer that enables wireless access to data networks such as the Internet. The applications that may use GPRS are WAP, SMS messaging, and the GPRS dial-up. Before you can use GPRS technology, you must subscribe to the GPRS service. For details on the availability of and subscription to the GPRS service, contact your network operator or service provider. For further information, see "GPRS modem settings (network service)" on page 39.HSCSD (High Speed Circuit Switched Data)
The car phone enables you to use GSM high-speed data services (network service). You can use high-speed functionality when your car phone is connected to a compatible computer by means of an RS232 cable or Bluetooth wireless technology and when the modem drivers supporting high-speed data software are installed on the computer and selected as an active modem. For information on the availability of and subscription to high-speed data services, please contact your network operator or service provider.Reference information
Cellular transmission
Your car phone employs the data transmission capabilities of the GSM network to send faxes, text messages, and e-mail, as well as to establish connections with remote computers (network services).GSM data capabilities of your car phone
We recommend that you move the car to a location where the strongest possible cellular signal can be obtained. A stronger signal allows more efficient data transmission. Cellular data communications are subject to a number of factors that may cause interference:Noise
Radio interference from electronic equipment and devices or from surrounding traffic may impact the transmission quality.Handovers
As the car phone user moves from one network cell to another, the signal strength of the channel drops and the cellular telephone exchange may hand the user over to a different cell and frequency where the signal is stronger. A cell handover may also occur when the user is stationary due to varying cellular traffic loads. Such handovers may cause delays.Dead spots and dropouts
Dead spots are areas where radio signals cannot be received. Dropouts occur when the car phone user passes through an area where the radio signal is blocked or reduced by geographic or man-made obstructions such as hills or high buildings.Low signal strength
Due to either distance from a base station or obstacles between your car phone and the base station, the radio signal strength from a cell site may not be strong or stable enough to provide a reliable cellular connection for trouble-free reception or transmission. Therefore, to ensure the best possible communication, remember to take the following points into consideration when using your car phone: Data and fax transmission will work best when the car is stationary. Attempting cellular communication while in a moving vehicle is not recommended. Fax transmission is more easily impaired than data or text message transmission. Check the signal strength on your car phone display. If the cellular signals are not strong enough to support a voice call, data connection should not be attempted until you can find a location with better reception.Data transfer over the RS232 interface
Connect your compatible laptop computer to the car phone system with the adapter cable (D-SUB9 to 10-pin western) supplied with the phone. Should you wish to transfer data between your car phone and a compatible laptop, plug the 10-pin western connector into the port provided in the radio unit. The D-SUB9 connector plugs into the laptop. A compatible mobile fax device can also be connected. For further information, see "Overview of the car phone and equipment" on page 7. To use your modem, you must select the data transmission speed Standard 19200 bps on the laptop. For more information, see the Nokia Web site: http://www.nokia.com.8. Installation
Your Nokia 810 car phone
The Nokia 810 car phone is designed for installation in motor vehicles. The sales package contains a convenient handsfree device that allows you to make calls without holding a phone to your ear, a separate handset for ease of use, and an easy-to-read display.  Car phone equipment. Note
The Nokia 810 car phone may only be installed by a qualified service technician using the approved original Nokia parts supplied in the sales package. Please note that non-observance of this requirement will result in loss of warranty. End users should remember that the car phone comprises complex technical equipment that requires professional installation using special tools and expert know-how. Note
Note that the instructions contained in this installation guide are general guidelines which apply for the installation of the car phone in an automobile. However, due to the wide variety of car types and models available on the market, this guide cannot consider the individual technical requirements relevant for any particular vehicle. Contact the vehicle manufacturer for further detailed information about the vehicle in question. For important safety information and/or instructions on the operation, care and maintenance of your car phone, see "Important safety information" on page 62 and "Care and maintenance" on page 61.Safety first
Note
Please read the basic safety guidelines set out below before beginning any installation work. - Make sure that the car ignition is off and disconnect the car battery before beginning with the installation work and ensure that it cannot be reconnected inadvertently. - Do not smoke when working on the car. Make sure that there is no source of fire or flame nearby. - Take care not to cause damage to electrical cables, fuel or brake lines or safety equipment during installation work. - Make sure not to impact the steering or braking systems or other key systems essential for proper operation of the car when installing car phone equipment. Check to make sure that deployment of the airbag is not blocked or impaired in any way. - RF signals may affect improperly installed or inadequately shielded electronic systems in motor vehicles (for example, electronic fuel injection systems, electronic anti-skid braking systems, electronic speed control systems, airbag systems). Should you note a fault or change in the operation of such a system, contact your car dealer. - Only use the car phone at an operating voltage of 12 V with the minus pole earthed. Failure to observe this requirement may result in damage to the car's electronics system. - Do not operate your car phone off the car battery for a longer period of time, that is, with the engine switched off, as this may cause your battery to run dry. - In order to comply with RF exposure requirements for mobile transmitting devices, a minimum separation distance of 20 cm must be maintained between the antenna and all persons.Mounting
 Car phone equipment and cable connectionsRadio unit TFE-4R (Pos.1)
It is recommended to mount the radio unit TFE-4R at a less visible position in the car interior. However, ensure that the unit is installed to permit easy access to the SIM card so that it can be changed if necessary and make sure that the cables for the microphone and loudspeaker will reach the places you intend to mount these components. Note
When installing the radio unit, make sure to mount the bracket in such a way that the unit slides into place towards the front of the car or is mounted sideways. Otherwise the unit may break loose if you have an accident and cause injury or damage.   Installing the radio unit in the carDisplay XDW-1R (Pos.2)
The mount for the display unit is to be fixed to the dashboard or to any other location in the cockpit area where the display is clearly visible for the user but does not impair control or operation of the vehicle. If you have any questions about installing your car phone, please ask your service technician, who will be glad to provide you with information on the most suitable mount for the display unit in your vehicle. Some mounting systems do not require boreholes. Remember that all equipment must be mounted so that it does not interfere with the operation of the vehicle.Handset HSU-4 (Pos.3)
The handset comes with a mount that is to be fixed in a suitable location where it is easily accessible for the user. However, take particular care to ensure that the handset will not interfere with the driver's operation of the vehicle. Make sure that the cable will reach to the radio unit for connection. The best location to mount the handset is horizontally on the console between the driver's and front passenger's seats.Loudspeaker SP-2 (Pos.4)
To ensure good acoustic quality, mount the loudspeaker so that it is pointed in the user's direction. It is recommended that you mount the loudspeaker a minimum distance of one metre away from the microphone to avoid feedback.Microphone MP-2 (Pos.5)
Note
Use only the MP-2 microphone that comes with your car phone. Use of any other microphone such as any device which may already be installed in the car may affect the operation of the phone, for example, due to noise. Mount the handsfree microphone approx. 30 cm from the user's head, and position it so that it points towards the user's mouth. Experience has shown that the best locations are near the rearview mirror or to the left of the sun visor. Check to make sure the microphone does not impair control or operation of the vehicle. We recommend that you keep the microphone a minimum distance of one metre away from the car phone loudspeaker to avoid feedback. Take care to mount the microphone so that it is not exposed to air streams from the vents. Do not lay the microphone cable in the heating, ventilation or AC system. Use the double-sided adhesive tape supplied to fix the microphone as this will prevent noise from the car body being transmitted into the interior. When you accept an incoming call or when an outgoing call is connected, the system will automatically mute your car radio and the call will be switched over to the car phone loudspeaker.System cable PCU-4 (Pos.6)
The system cable connects the car phone to the car's electronics system. See the wiring diagram for exact instructions. Note
When laying the cables, take care to position them so that they are located as far as possible from the electronics systems installed in your car in order to avoid electromagnetic interference. Ensure that cables are placed so that they will not be subjected to mechanical wear and tear (for example, not laid under car seats or over sharp edges).GSM antenna (Pos.7)
(not included in the sales package)
Your car phone is designed to be connected to an external GSM antenna. However, if your car is equipped with a compatible radio/GSM antenna with a frequency separating filter, this may be used instead. If your car does not come with a GSM antenna, please contact your dealer for information on the best location for mounting and for the relevant installation guidelines.RS232 adapter cable AD-3 (Pos. 8)
An RS232 adapter cable provides a convenient way to connect your car phone to the serial port of a compatible laptop computer. For further information, see the section on "Access codes required for the SIM card" on page 11.Audio settings
Your car phone supports a variety of options for output over a loudspeaker: - Direct connection to the SP-2 loudspeaker supplied in the sales package. - Connection to a compatible car radio loudspeaker over an additional relay that switches audio output over to the loudspeaker (not included in the sales package). - Connection to the compatible car radio loudspeakers over the line-in input of your car radio. If you select this option, you must adjust the audio level accordingly. To make audio settings, select the Start-up tour or Settings menu: ▶ Scroll to Equaliser settings and press ↓. ▶ Scroll to the desired option and press ⏻.Function test
After your car phone has been installed, it needs to be checked to ensure that it is working properly. When testing the operation of the equipment, also check that it has been mounted so that it in no way impairs the driver during operation of the vehicle. Note
To make a wireless connection between your car phone and a compatible accessory with Bluetooth technology, ensure that the devices are within the range necessary for Bluetooth transmission. Remember that external devices need to be supplied with sufficient power for this feature (check the battery pack).Included in the sales package
- Radio unit TFE-4R - Display XDW-1R - Handset HSU-4 - Loudspeaker SP-2 - Microphone MP-2 • System cable PCU-4 • RS232 adapter cable AD-39. Care and maintenance
Your car phone is a product of superior design and craftsmanship and should be treated with care. The suggestions below will help you to fulfil any warranty obligations and to enjoy this product for many years. - Keep the car phone and all its parts and accessories out of the reach of small children. - Keep the car phone dry. Precipitation, humidity, and all types of liquids or moisture can contain minerals that will corrode electronic circuits. - Do not use or store the car phone in dusty, dirty areas. Its moving parts can be damaged. - Do not store the car phone in hot areas. High temperatures can shorten the life of electronic devices, damage batteries, and warp or melt certain plastics. - Do not store the car phone in cold areas. When it warms up (to its normal temperature), moisture can form inside, which may damage electronic circuit boards. - Do not attempt to open the car phone. Non-expert handling may damage it. - Do not drop, knock or shake the car phone. Rough handling can break internal circuit boards. - Do not use harsh chemicals, cleaning solvents or strong detergents to clean the car phone. - Do not paint the car phone. Paint can clog the moving parts and prevent proper operation. \- Use only an approved antenna. Unauthorised antennas, modifications or attachments could damage the car phone and may violate regulations governing radio devices. All of the above suggestions apply equally to your car phone or any accessory. If any of them is not working properly, take it to your nearest qualified service facility. The personnel there will assist you and, if necessary, arrange for service.10. Important safety information
Traffic safety
Do not use a handset while driving a vehicle. Always secure the phone in its holder; do not place the phone on the passenger seat or where it can break loose in a collision or a sudden stop. Remember: road safety always comes first!Operating environment
Remember to follow any special regulations in force in any area and always switch off your phone whenever it is forbidden to use it, or when it may cause interference or danger.Electronic devices
Most modern electronic equipment is shielded from radio frequency (RF) signals. However, certain electronic equipment may not be shielded against the RF signals from your car phone.Pacemakers
Pacemaker manufacturers recommend that a minimum separation distance of 20 cm be maintained between the vehicle antenna and a pacemaker to avoid potential interference with the pacemaker. These recommendations are consistent with the independent research by and recommendations of Wireless Technology Research. If you have any reason to suspect that interference is taking place, switch your car phone over to off mode immediately.Potentially explosive atmospheres
Switch your car phone over to off mode, see "Off mode" on page 17, when in any area with a potentially explosive atmosphere and obey all signs and instructions. Sparks in such areas could cause an explosion or fire resulting in bodily injury or even death. Users are advised not to use the car phone when at a refuelling point. Remember to observe the restrictions on the use of radio equipment in fuel depots (fuel storage and distribution areas), chemical plants or where blasting operations are in progress. Areas with a potentially explosive atmosphere are often, but not always, clearly marked. They include below deck on boats, chemical transfer or storage facilities, vehicles using liquified petroleum gas (such as propane or butane), areas where the air contains chemicals or particles such as grain, dust or metal powders, and any other area where you would normally be advised to turn off your vehicle engine.Vehicles
Only qualified personnel should service the car phone or install the car phone in a vehicle. Faulty installation or service may be dangerous and may invalidate any warranty which may apply to the unit. Check regularly that all wireless phone equipment in your vehicle is mounted and operating properly. Do not store or carry flammable liquids, gases or explosive materials in the same compartment as the phone, its parts or accessories. For vehicles equipped with an air bag, remember that an air bag inflates with great force. Do not place objects, including both installed or portable wireless equipment in the area over the air bag or in the air bag deployment area. If in-vehicle wireless equipment is improperly installed and the air bag inflates, serious injury could result. Failure to observe these instructions may lead to suspension or denial of telephone services to the offender, or legal action or both.Emergency calls
Emergency calls may not be possible on all wireless phone networks or when certain network services and/or phone features are in use. Check with local service providers. Caution!
This car phone, like any wireless phone, operates using radio signals, wireless and landline networks as well as user-programmed functions. Because of this, connections in all conditions cannot be guaranteed. Therefore, you should never rely solely upon any wireless phone for essential communications (for example, medical emergencies).To make an emergency call
 If the car phone or car ignition is not on, switch it on. Check for adequate signal strength. Some networks may require that a valid SIM card is properly inserted in the car phone. ▶ Press and hold 📋 until Make an emergency call? is shown on the display. Confirm by pressing 🔒. ▶ Confirm the security inquiry Yes by pressing ↓ or cancel by selecting No with ↑ and pressing ↓. When making an emergency call, remember to give all the necessary information as accurately as possible. Remember that your car phone may be the only means of communication at the scene of an accident – do not cut off the call until given permission to do so.11. Technical data
Battery voltage
12.6 VDC (10.8 - 16.0 V) Negative potential to ground (GND).Current carrying capacity
1.5 A (off mode 1 mA)Transmitting power
EGSM 900: 3.2 mW - 2 W DCS 1800: 1.0 mW - 1 W System cable PCU-4 System cable wiring
1. Red, BATTERY, +12V 2. Black, GND, ground 3. Yellow, MUTE, radio mute When call is set up, switch over from +12V to 0V. 4. Blue, ACC / IGN, ignition 5. 2A fuse 6. 1A fuse12. Glossary
DTMF tones
DTMF (Dual Tone Multi-Frequency) tones are the tones you hear when you press the number keys on the phone keypad. DTMF tones allow you to communicate with voice mailboxes, computerised telephony systems, etc.GPRS
GPRS (General Packet Radio Service) enables wireless data transmission. For wireless access to data networks, you will need a GPRS access point from your network operator or service provider. For further information, see "GPRS (General Packet Radio Service)" on page 53.GSM
GSM, the Global System for Mobile Communication, is the technical standard for mobile radio networks.HSCSD
HSCSD (High Speed Circuit Switched Data) makes data connections faster for attractive GSM data services. For further information, see "HSCSD (High Speed Circuit Switched Data)" on page 54.IMEI
The IMEI is the serial number of your device and is supplied with the car phone.PIN code
The PIN (Personal Identification Number) is a 4- to 8-digit code that protects your SIM card from unauthorised use. The PIN code is supplied with the SIM card. For further information, see "Access codes required for the SIM card" on page 11.PUK code
The PUK (Personal Unblocking Key) is an 8-digit code that is required to change a disabled PIN code. The PUK code is supplied with the SIM card. If you lose the code or it has not been provided with the SIM card, contact your network operator.SIM card
The SIM (Subscriber Identity Module) card contains all the information the cellular network needs to identify the network user. The SIM card also contains security-related data.SMS
The network service SMS (Short Message Service) allows you to send short text messages (of up to 160 characters) to mobile phones and to receive short text messages from other mobile users if this service is enabled.SMSC number
You need the SMSC (Short Message Service Centre) number to send text messages.- Nokia 810 car phone
- User Guide
- Installation Guide
- DECLARATION OF CONFORMITY
- C€0434
- Export Controls
- Table of content
- Installation 56
- Care and maintenance 61
- Important safety information ....62
- Technical data 64
- Glossary 65
- For your safety
- OFF MODE
- ROAD SAFETY COMES FIRST
- INTERFERENCE
- OFF MODE WHEN REFUELLING
- OFF MODE NEAR BLASTING
- QUALIFIED INSTALLATION AND SERVICE
- CONNECTING TO OTHER DEVICES
- EMERGENCY CALLS
- CALLING
- ANTENNA
- FUSE REPLACEMENT
- Network Services
- Note
- About accessories
- Warning!
- General information
- Overview of the car phone and equipment
- Radio unit TFE-4R
- Display XDW-1R
- Handset HSU-4
- Loudspeaker SP-2
- Microphone MP-2
- Special features
- Voice dialling
- Voice commands
- Voice recorder
- Copying contact entries from your mobile phone
- Multi-user capability
- Switchover to wireless headset
- Quick access to the contacts
- Mobile data communication using Bluetooth wireless technology or an RS232 cable
- SIM card
- Comfortable volume regulation with Navi™ wheel
- Before putting your phone into operation
- Stickers in the sales package
- Access codes required for the SIM card
- Your car phone
- Display
- Display indicators
- Call indicators
- General indicators
- Indicators for recorder functions
- Indicators for Bluetooth functions
- Notification indicators
- Basic components of the handset
- Function selectors
- Press and hold
- Press
- Navi wheel
- Press the Navi wheel
- Alphanumeric keypad
- Caution!
- Getting started
- Installing the SIM card
- Switching on/off and off mode
- Switching on the phone
- Switching off the phone
- Call functions
- Calling a contact (name search)
- Redialling
- Making a call using the keypad
- Using the Navi wheel to make a call
- List of favourites
- Call waiting
- Options during a call
- Mute call
- Send DTMF tones
- Contacts
- Adjust the loudspeaker volume
- Accepting or refusing an incoming call
- Recorder
- Using the menu
- Accessing a menu function
- List of menu functions
- Messages
- Call register
- Tones
- Settings
- Voice
- Bluetooth
- User data
- Menu functions
- Create message
- Send
- Clear text
- Use template
- Save as template
- Inbox
- Call
- Reply
- Forward
- Delete
- Sent messages
- Open
- Details
- Message settings
- Message centre number
- Reply using same message center (network service)
- View templates
- Missed calls
- Received calls
- Dialled numbers
- Search for names and numbers
- Add a name
- Edit names and phone numbers
- Delete contact entries
- Add a phone number
- Query the memory status
- Speed dialling
- Assign a phone number to a speed dialling key
- Speed dial a number
- Ringing volume
- Ringing tone
- Warning tones
- Set the time and date
- Call settings
- My number sending (network service)
- Call divert (network service)
- Automatic answer
- Call waiting (network service)
- Phone settings
- Language
- Display backlighting
- Cell info display
- Network selection
- Power down timer
- Voice mailbox
- Voice mailbox number
- Listen to voice messages
- GPRS modem settings (network service)
- GPRS charges
- Security settings
- PIN code request
- Change PIN code
- Closed user group
- Fixed dialling numbers
- Equaliser settings
- Restore factory settings
- Voice tags
- New voice tag
- Voice tag list
- Voice dial a number
- New voice commands
- Execute a voice command
- Record
- Play
- Bluetooth wireless technology
- Activating and deactivating Bluetooth
- Search for audio enhancements
- Pairing with devices with Bluetooth technology
- View active devices
- View paired devices
- Create connection
- Delete pairing
- Request authorisation
- Edit Bluetooth name
- The car phone Bluetooth name
- Download contacts
- Paired devices with Bluetooth technology
- Search for devices that support Bluetooth technology
- Change user
- Phone memory
- Data communication
- Sending and receiving a business card
- Receiving a business card
- Sending a business card
- GPRS (General Packet Radio Service)
- HSCSD (High Speed Circuit Switched Data)
- Reference information
- Cellular transmission
- GSM data capabilities of your car phone
- Noise
- Handovers
- Dead spots and dropouts
- Low signal strength
- Data transfer over the RS232 interface
- Installation
- Your Nokia 810 car phone
- Safety first
- Mounting
- Radio unit TFE-4R (Pos.1)
- Display XDW-1R (Pos.2)
- Handset HSU-4 (Pos.3)
- Loudspeaker SP-2 (Pos.4)
- Microphone MP-2 (Pos.5)
- System cable PCU-4 (Pos.6)
- GSM antenna (Pos.7)
- (not included in the sales package)
- RS232 adapter cable AD-3 (Pos. 8)
- Audio settings
- Function test
- Included in the sales package
- Care and maintenance
- Important safety information
- Traffic safety
- Operating environment
- Electronic devices
- Pacemakers
- Potentially explosive atmospheres
- Vehicles
- To make an emergency call
- Technical data
- Battery voltage
- Current carrying capacity
- Transmitting power
- System cable wiring
- Glossary
- DTMF tones
- GPRS
- GSM
- HSCSD
- IMEI
- PIN code
- PUK code
- SMS
- SMSC number
Marque : NOKIA
Modèle : 810 CAR PHONE
Catégorie : Téléphone de voiture