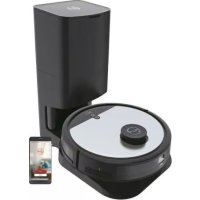
HG450HP 011 - Aspirateur robot HOOVER - Notice d'utilisation et mode d'emploi gratuit
Retrouvez gratuitement la notice de l'appareil HG450HP 011 HOOVER au format PDF.

Choisissez votre langue et indiquez votre email : nous vous enverrons une version traduite specifiquement.
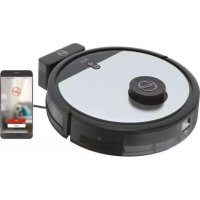
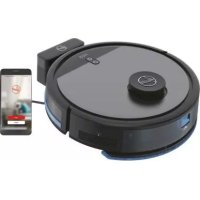
| Type de produit | Aspirateur robot |
| Marque | Hoover |
| Modèle | HG450HP 011 |
| Dimensions (diamètre × hauteur) | 33 cm × 8 cm |
| Poids | 3,2 kg |
| Type de batterie | Li-ion 14,8 V / 2600 mAh |
| Autonomie | Jusqu'à 120 min |
| Temps de charge | Environ 3 h |
| Capacité du réservoir à poussière | 600 ml |
| Puissance d'aspiration | 1800 Pa |
| Système de navigation | Caméra et radar |
| Capteurs | Anti-chute, pare-choc, capteur de saleté |
| Programmation | Application mobile Hoover Wizard |
| Connectivité | Wi-Fi 2,4 GHz |
| Assistants vocaux | Compatibles Alexa et Google Assistant |
| Modes de nettoyage | Automatique, localisé, bords, spirale |
| Retour automatique à la base | Oui |
| Suivi de cartographie | Multi-étages, jusqu'à 5 cartes |
| Zone interdite virtuelle | Oui |
| Filtre | HEPA lavable |
| Brosse principale | Brosse en caoutchouc résistante aux enchevêtrements |
| Niveau sonore | Environ 65 dB |
| Alimentation | Adaptateur secteur (entrée : 100-240 V, 50/60 Hz) |
| Contenu de la boîte | Robot, base de charge, adaptateur, brosses latérales, filtre de rechange, manuel d'utilisation |
FOIRE AUX QUESTIONS - HG450HP 011 HOOVER
Comment connecter mon aspirateur robot Hoover HG450HP à l'application ?
Téléchargez l'application Hoover Wizard depuis l'App Store ou Google Play. Créez un compte, puis suivez les instructions pour ajouter un appareil. Assurez-vous que le Wi-Fi est activé sur votre smartphone et que le robot est en mode appairage (bouton Wi-Fi sur le robot).
Que faire si le robot ne se connecte pas au Wi-Fi ?
Vérifiez que votre réseau Wi-Fi est en 2,4 GHz (le robot ne prend pas en charge le 5 GHz). Redémarrez le robot et le routeur. Assurez-vous que le robot est à proximité de la box. Si le problème persiste, réinitialisez le module Wi-Fi en maintenant le bouton de réinitialisation pendant 5 secondes.
Comment programmer un nettoyage automatique ?
Dans l'application Hoover Wizard, allez dans l'onglet 'Programmation'. Choisissez les jours et heures souhaités, sélectionnez le mode de nettoyage (ex. automatique ou localisé), puis validez. Le robot démarrera automatiquement à l'heure choisie.
Le robot ne se recharge pas sur sa base. Que faire ?
Vérifiez que la base de charge est branchée et que les contacts du robot et de la base sont propres. Assurez-vous que le robot est bien positionné sur la base (les voyants doivent indiquer la charge). Si le problème persiste, testez un autre adaptateur secteur.
Comment nettoyer les capteurs du robot ?
Utilisez un chiffon doux et sec pour essuyer délicatement les capteurs optiques (sur la face avant et en dessous). Ne pas utiliser de liquides ou d'objets abrasifs. Nettoyez également les contacts de charge avec un chiffon sec.
À quelle fréquence dois-je remplacer les brosses latérales ?
Les brosses latérales s'usent avec le temps. Remplacez-les tous les 3 à 6 mois selon l'utilisation. Vous pouvez commander des brosses de rechange sur le site Hoover ou chez les revendeurs agréés.
Que signifie une lumière rouge clignotante sur le robot ?
Une lumière rouge clignotante indique généralement une anomalie : blocage des roues, réservoir plein, capteur obstrué. Consultez l'application ou le manuel pour identifier le code d'erreur précis. Redémarrez le robot après avoir résolu le problème.
Puis-je utiliser le robot sur moquette ou tapis ?
Oui, le robot est conçu pour les sols durs et les moquettes à poils courts (jusqu'à 2 cm). En mode automatique, il détecte la surface et adapte sa puissance d'aspiration. Pour les tapis épais, utilisez le mode 'Tapis' dans l'application.
Comment créer une zone interdite ?
L'application Hoover Wizard permet de définir des zones interdites virtuelles sur la carte de votre maison. Après avoir effectué une cartographie, appuyez longuement sur la zone souhaitée et sélectionnez 'Zone interdite'. Vous pouvez également placer des barrières physiques (accessoire vendu séparément).
Où trouver des pièces détachées pour le HG450HP ?
Les pièces détachées (brosses, filtres, roues, etc.) sont disponibles sur le site officiel Hoover (section pièces détachées) ou chez les revendeurs partenaires. Utilisez le modèle HG450HP 011 pour trouver les références exactes.
Questions des utilisateurs sur HG450HP 011 HOOVER
0 question sur cet appareil. Repondez a celles que vous connaissez ou posez la votre.
Poser une nouvelle question sur cet appareil
Aucune question pour l'instant. Soyez le premier à en poser une.
Téléchargez la notice de votre Aspirateur robot au format PDF gratuitement ! Retrouvez votre notice HG450HP 011 - HOOVER et reprennez votre appareil électronique en main. Sur cette page sont publiés tous les documents nécessaires à l'utilisation de votre appareil HG450HP 011 de la marque HOOVER.
MODE D'EMPLOI HG450HP 011 HOOVER
flowchart
graph TD
    A["Camera"] --> B["Robot Arm"]
    B --> C["Battery"]
    C --> D["Sensor Module"]
    D --> E["Monitor"]
    E --> F["Display Module"]
    F --> G["Control Panel"]
    style A fill:#f9f,stroke:#333
    style B fill:#ccf,stroke:#333
    style C fill:#cfc,stroke:#333
    style D fill:#fcc,stroke:#333
    style E fill:#cff,stroke:#333
    style F fill:#ffc,stroke:#333
    style G fill:#fcc,stroke:#333
flowchart
graph TD
    A["Warning"] --> B["Warning Device"]
    B --> C{Warning Condition}
    C -->|Yes| D["Warning Device 1"]
    C -->|No| E["Warning Device 2"]
    C -->|Yes| F["Warning Device 3"]
    C -->|No| G["Warning Device 4"]
    D --> H["Warning Device 5"]
    E --> I["Warning Device 6"]
    F --> J["Warning Device 7"]
    G --> K["Warning Device 8"]
    H --> L["Warning Device 9"]
    I --> M["Warning Device 10"]
    J --> N["Warning Device 11"]
    K --> O["Warning Device 12"]
    L --> P["Warning Device 13"]
    M --> Q["Warning Device 14"]
    N --> R["Warning Device 15"]
    O --> S["Warning Device 16"]
    P --> T["Warning Device 17"]
    Q --> U["Warning Device 18"]
    R --> V["Warning Device 19"]
    S --> W["Warning Device 20"]
    T --> X["Warning Device 21"]
    U --> Y["Warning Device 22"]
    V --> Z["Warning Device 23"]
    W --> AA["Warning Device 24"]
    X --> AB["Warning Device 25"]
    Y --> AC["Warning Device 26"]
    Z --> AD["Warning Device 27"]
    AA --> AE["Warning Device 28"]
    AB --> AF["Warning Device 29"]
    AC --> AG["Warning Device 30"]
    AD --> AH["Warning Device 31"]
    AE --> AI["Warning Device 32"]
    AF --> AJ["Warning Device 33"]
    AG --> AK["Warning Device 34"]
    AH --> AL["Warning Device 35"]
    AI --> AM["Warning Device 36"]
    AJ --> AN["Warning Device 37"]
    AK --> AO["Warning Device 38"]
    AL --> AP["Warning Device 39"]
    AM --> AQ["Warning Device 40"]
    AN --> AR["Warning Device 41"]
    AO --> AS["Warning Device 42"]
    AP --> AT["Warning Device 43"]
    AQ --> AU["Warning Device 44"]
    AR --> AV["Warning Device 45"]
    AS --> AW["Warning Device 46"]
    AT --> AX["Warning Device 47"]
    AU --> AY["Warning Device 48"]
    AV --> AZ["Warning Device 49"]
    AW --> BA["Warning Device 50"]

text_image
GB User Manual PR Guide de l'utilisateur DE Bedemungspontierung IT Manual de u'uso GI Gebäußerbandeiding PT Manual de Instruções ES Guide del usuario DR Bringerprojektion MO Brusavirjöring IN INSTRUMENTANIAL FI Kdyttöblyse DO Mynos, Aconos. RU Pyrenaktiva rina hinoaateone PL Instruktica Oblugi C2 Návise k obolize D4 Neovella Z Jia Opeldo TR Rullanim Kilavuzu GB Please read the "Instruments for Safe Use and Fittings" booklet before using your product. PR: wixelles live le paragarde - Instructions De Solutéure D'Utilisation E Di Rezondement - avoid d'option ou export. DE: Bitter sores se im Dembrauch des Gärts aufnahme der Beizernungsanlagen vor sierchemen Dienstige. IT: Länger con attouzione è di bilanziario (Institutie in Un Suisse Enerji) Etragi Applessovi Devi Prosseri e Partite di allucose 6 prodotti. ML: Leveni, Instruções Veral Engela Grada Abdalierten? Use a het product. In portre meenet. PT: Per fener lette a manual "Instruments Para Utilisation E Initiazione Segmente" ante de cencer a suje i prodotti. EI: Per fener lette i "Instruções Par Lis Uo Seguro Pera" ante de celleri produktiv. DE: Lettene ergelijedings "Instruktive For Solken Ring og Singing", van de lage produktiv produkt. NO: Verwijzig tot elektringen "Instruktive Per Solken Ring og Singing" for du broker produkt. DE: We viriglio "Instruktiven der silver aneriding" net na anderer denne produkt. IT: Talaize enes toxtimen kluttif "Innovatenen Tremladen Klafde i Asienkem Objekt" slijeweg. GE: Thessuola Beddeni mo rovrimo "Obyaat apoplasse Spasne Res Epipapmasa" en Schikloskaya, papiarantomschinen opplur. MI: Bopt, spiescaammaski spijeklansoplasen oppluero o te-gepansje fo Bracorocenoe Hirtakowskowe i Pristvo. PT: Potit uijzen produktiva, inciso porazenda sig i instrucire Biopaplasen# Hyushwore i Aksoniew. CZ: Prednictiv prisveke o clakade preleche adadabige pekung y incidio "naviel # Biopaplasen Realisi i Lippenhi". PT: Potit uijzen produktiva, in die fremde is in situat de Solken Nordisk Physikmä. TR: Liefer i die katerer beveler, die katerer beveler, die katerer beveler, die katerer beveler, die katerer beveler, die katerer beveler, die katerer beveler, die katerer beveler, die katerer beveler, die katerer beveler, die katerer beveler, die katerer beveler, die katerer beveler, die kateren beveler, die kateren beveler, die kateren beveler, die kateren beveler, die kateren beveler, die kateren beveler, die kateren beveler, die kateren beveler, die kateren beveler, die kateren beveler, die kateren beveler, die kateren beveler, die kateren beveler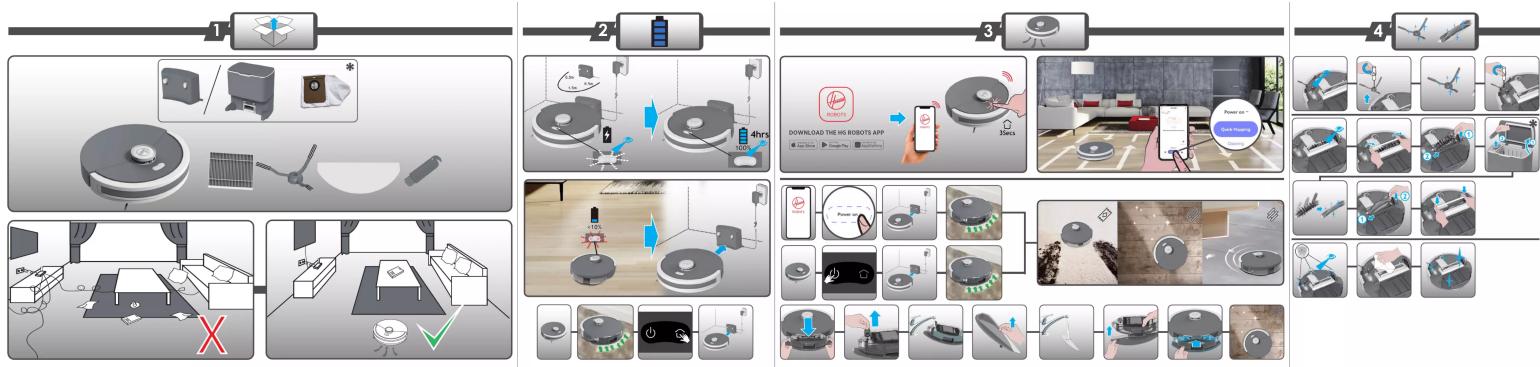
flowchart
graph TD
    A["1: Device Setup"] --> B["2: Robot Tracking"]
    B --> C["3: App Download & Control"]
    C --> D["4: Smart Home Control & Inspection"]

    subgraph User-Actuator
        E["Device 1: Radar & Camera Interface"]
        F["Device 2: Sensor & Display Interface"]
        G["Device 3: Smartphone & Phone Interface"]
    end

    subgraph Automated System
        H["User Interface: Radar & Camera Interface"]
        I["User Interface: Sensor & Display Interface"]
        J["User Interface: Smartphone & Phone Interface"]
    end

    subgraph Control System
        K["User Interface: Radar & Camera Interface"]
        L["User Interface: Sensor & Display Interface"]
        M["User Interface: Smartphone & Phone Interface"]
    end

    subgraph Testing System
        N["User Interface: Radar & Camera Interface"]
        O["User Interface: Sensor & Display Interface"]
        P["User Interface: Smartphone & Phone Interface"]
    end

    subgraph Output System
        Q["User Interface: Radar & Camera Interface"]
        R["User Interface: Sensor & Display Interface"]
        S["User Interface: Smartphone & Phone Interface"]
    end

    subgraph Monitoring System
        T["User Interface: Radar & Camera Interface"]
        U["User Interface: Sensor & Display Interface"]
        V["User Interface: Smartphone & Phone Interface"]
    end

    subgraph Feedback System
        W["User Interface: Radar & Camera Interface"]
        X["User Interface: Sensor & Display Interface"]
        Y["User Interface: Smartphone & Phone Interface"]
    end

    subgraph Output System
        Z["User Interface: Radar & Camera Interface"]
        AA["User Interface: Sensor & Display Interface"]
        AB["User Interface: Smartphone & Phone Interface"]
    end

    subgraph Monitoring System
        AC["User Interface: Radar & Camera Interface"]
        AD["User Interface: Sensor & Display Interface"]
        AE["User Interface: Smartphone & Phone Interface"]
    end

    subgraph Testing System
        AF["User Interface: Radar & Camera Interface"]
        AG["User Interface: Sensor & Display Interface"]
        AH["User Interface: Smartphone & Phone Interface"]
    end

    subgraph Feedback System
        AI["User Interface: Radar & Camera Interface"]
        AJ["User Interface: Sensor & Display Interface"]
        AK["User Interface: Smartphone & Phone Interface"]
    end

    subgraph Monitoring System
        AL["User Interface: Radar & Camera Interface"]
        AM["User Interface: Sensor & Display Interface"]
        AN["User Interface: Smartphone & Phone Interface"]
    end

    subgraph Output System
        AO["User Interface: Radar & Camera Interface"]
        AP["User Interface: Sensor & Display Interface"]
        AQ["User Interface: Smartphone & Phone Interface"]
    end

    subgraph Monitoring System
        AR["User Interface: Radar & Camera Interface"]
        AS["User Interface: Sensor & Display Interface"]
        AT["User Interface: Smartphone & Phone Interface"]
    end

    subgraph Testing System
        AU["User Interface: Radar & Camera Interface"]
        AV["User Interface: Sensor & Display Interface"]
        AW["User Interface: Smartphone & Phone Interface"]
    end

    subgraph Feedback System
        AX["User Interface: Radar & Camera Interface"]
        AY["User Interface: Sensor & Display Interface"]
        AZ["User Interface: Smartphone & Phone Interface"]
    end

    subgraph Monitoring System
        BA["User Interface: Radar & Camera Interface"]
        BB["User Interface: Sensor & Display Interface"]
        BC["User Interface: Smartphone & Phone Interface"]
    end

    subgraph Output System
        BD["User Interface: Radar & Camera Interface"]
        BE["User Interface: Sensor & Display Interface"]
        BF["User Interface: Smartphone & Phone Interface"]
    end

    subgraph Monitoring System
        BG["User Interface: Radar & Camera Interface"]
        BH["User Interface: Sensor & Display Interface"]
        BI["User Interface: Smartphone & Phone Interface"]
    end

    subgraph Testing System
        BJ["User Interface: Radar & Camera Interface"]
        BK["User Interface: Sensor & Display Interface"]
        BL["User Interface: Smartphone & Phone Interface"]
    end

    subgraph Feedback System
        BM["User Interface: Radar & Camera Interface"]
        BN["User Interface: Sensor & Display Interface"]
        BO["User Interface: Smartphone & Phone Interface"]
    end

    subgraph Monitoring System
        BP["User Interface: Radar & Camera Interface"]
        BQ["User Interface: Sensor & Display Interface"]
        BR["User Interface: Smartphone & Phone Interface"]
    end

    subgraph Output System
        BS["User Interface: Radar & Camera Interface"]
        BT["User Interface: Sensor & Display Interface"]
        BU["User Interface: Smartphone & Phone Interface"]
    end

    subgraph Monitoring System
        BV["User Interface: Radar & Camera Interface"]
        BW["User Interface: Sensor & Display Interface"]
        BX["User Interface: Smartphone & Phone Interface"]
    end

    subgraph Testing System
        BY["User Interface: Radar & Camera Interface"]
        BZ["User Interface: Sensor & Display Interface"]
        BWB["User Interface: Smartphone & Phone Interface"]
    end

    subgraph Feedback System
        BZL["User Interface: Radar & Camera Interface"]
        BWL["User Interface: Sensor & Display Interface"]
        BXL["User Interface: Smartphone & Phone Interface"]
    end

    subgraph Monitoring System
        BYL["User Interface: Radar & Camera Interface"]
        BWLX["User Interface: Sensor & Display Interface"]
        BXLX["User Interface: Smartphone & Phone Interface"]
    end

    subgraph Output System
        BYLX["User Interface: Radar & Camera Interface"]
        BWLYX["User Interface: Sensor & Display Interface"]
        BXLYX["User Interface: Smartphone & Phone Interface"]
    end

    subgraph Monitoring System
        BYLXL[Xiaomi 100% Inverter / Smart Home Controller / Smart Home Control / Smart Home Control / Smart Home Control / Smart Home Control / Smart Home Control / Smart Home Control / Smart Home Control / Smart Home Control / Smart Home Control / Smart Home Control / Smart Home Control / Smart Home Control / Smart Home Control / Smart Home Control / Smart Home Control / Smart Home Control / Smart Home Control / Smart Home Control / Smart Home Control / Smart Home Control / Smart Home Control / Smart Home Control / Smart Home Control / Smart Home Control / Smart Home Control / Smart Home Condition / Smart Home Condition / Smart Home Condition / Smart Home Condition / Smart Home Condition / Smart Home Condition / Smart Home Condition / Smart Home Condition / Smart Home Condition / Smart Home Condition / Smart Home Condition / Smart Home Condition / Smart Home Condition / Smart Home Condition / Smart Home Condition / Smart Home Condition / Smart Home Condition / Smart Home Condition / Smart Home Condition / Smart Home Condition / Smart Home Condition / Smart Home Condition / Smart Home Condition / Smart Home Condition / Smart Home Condition / Smart Home Conditions / Smart Home Conditions / Smart Home Conditions / Smart Home Conditions / Smart Home Conditions / Smart Home Conditions / Smart Home Conditions / Smart Home Conditions / Smart Home Conditions / Smart Home Conditions / Smart Home Conditions / Smart Home Conditions / Smart Home Conditions / Smart Home Conditions / Smart Home Conditions / Smart Home Conditions / Smart Home Conditions / Smart Home Conditions / Smart Home Conditions / Smart Home Conditions / Smart Home Conditions / Smart Home Conditions / Smart Home Conditions / Smart Home Conditions / Smart Home Conditions / Smart Home Condition / Smart Home Condition / Smart Home Condition / Smart Home Condition / Smart Home Condition / Smart Home Condition / Smart Home Condition / Smart Home Condition / Smart Home Condition / Smart Home Condition / Smart Home Condition / Smart Home Condition / Smart Home Condition / Smart Home Condition / Smart Home Condition / Smart Home Condition / Smart Home Condition / Smart Home Condition / Smart Home Condition / Smart Home Condition / Smart Home Condition / Smart Home Condition / Smart Home Condition / Smart Home Condition / Smart Home Environment/SmartHomeEnvironment/SmartHomeEnvironment/SmartHomeEnvironment/SmartHomeEnvironment/SmartHomeEnvironment/SmartHomeEnvironment/SmartHomeEnvironment/SmartHomeEnvironment/SmartHomeEnvironment/SmartHomeEnvironment/SmartHomeEnvironment/SmartHomeEnvironment/SmartHomeEnvironment/SmartHomeEnvironment/SmartHomeEnvironment/SmartHomeEnvironment/SmartHomeEnvironment/SmartHomeEnvironment/SmartHomeEnvironment/SmartHomeEnvironment/SmartHomeEnvironment/SmartHomeEnvironment/SmartHomeEnvironment/SmartHomeEnvironment/SmartHomeEnvironment/SmartHomeGovernment/SmartHomeGovernment/SmartHomeGovernment/SmartHomeGovernment/SmartHomeGovernment/SmartHomeGovernment/SmartHomeGovernment/SmartHomeGovernment/SmartHomeGovernment/SmartHomeGovernment/SmartHomeGovernment/SmartHomeGovernment/SmartHomeGovernment/SmartHomeGovernment/SmartHomeGovernment/SmartHomeGovernment/SmartHomeGovernment/SmartHomeGovernment/SmartHomeGovernment/SmartHomeGovernment/SmartHomeGovernment/SmartHomeGovernment/SmartHomeGovernment/SmartHomeGovernment/SmartHomeGovernment/SmartHome Government/SmartHome Government/SmartHome Government/SmartHome Government/SmartHome Government/SmartHome Government/SmartHome Government/SmartHome Government/SmartHome Government/SmartHome Government/SmartHome Government/SmartHome Government/SmartHome Government/SmartHome Government/SmartHome Government/SmartHome Government/SmartHome Government/SmartHome Government/SmartHome Government/SmartHome Government/SmartHome Government/SmartHome Government/SmartHome Government/SmartHome Government/SmartHome Government/SmartHomeGovernment/SmartHome Government/SmartHome Government/SmartHome Government/SmartHome Government/SmartHome Government/SmartHome Government/SmartHome Government/SmartHome Government/SmartHome Government/SmartHome Government/SmartHome Government/SmartHome Government/SmartHome Government/SmartHome Government/SmartHome Government/SmartHome Government/SmartHome Government/SmartHome Government/SmartHome Government/SmartHome Government/SmartHome Government/SmartHome Government/SmartHome Government/SmartHomeGovernment/SmartHomeGovernment/SmartHomeGovernment/SmartHomeGovernment/SmartHomeGovernment/SmartHomeGovernment/SmartHomeGovernment/SmartHomeGovernment/SmartHomeGovernment/SmartHomeGovernment/SmartHomeGovernment/SmartHomeGovernment/SmartHomeGovernment/SmartHomeGovernment/SmartHomeGovernment/SmartHomeGovernment/SmartHomeGovernment/SmartHomeGovernment/SmartHomeGovernment/SmartHomeGovernment/SmartHomeGovernment/SmartHomeGovernment/SmartHomeGovernment/SmartHomeGovernment/SmartHomeCurrentControl/
    end