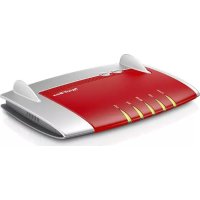
Fritz!Box 3370 - Routeur AVM - Notice d'utilisation et mode d'emploi gratuit
Retrouvez gratuitement la notice de l'appareil Fritz!Box 3370 AVM au format PDF.


| Caractéristiques | Détails |
|---|---|
| Type de routeur | Routeur ADSL/VDSL |
| Normes Wi-Fi | IEEE 802.11n, 802.11g, 802.11b |
| Vitesse Wi-Fi | Jusqu'à 450 Mbps |
| Ports Ethernet | 4 ports Gigabit Ethernet |
| Ports USB | 1 port USB 2.0 |
| Fonctionnalités de sécurité | WPA2, WPA, WEP, filtrage d'adresses MAC |
| Gestion à distance | Interface web, application Fritz!App WLAN |
| Configuration | Installation facile via assistant de configuration |
| Maintenance | Mises à jour du firmware via l'interface web |
| Dimensions | 220 x 160 x 40 mm |
| Poids | 500 g |
FOIRE AUX QUESTIONS - Fritz!Box 3370 AVM
Questions des utilisateurs sur Fritz!Box 3370 AVM
0 question sur cet appareil. Repondez a celles que vous connaissez ou posez la votre.
Poser une nouvelle question sur cet appareil
Téléchargez la notice de votre Routeur au format PDF gratuitement ! Retrouvez votre notice Fritz!Box 3370 - AVM et reprennez votre appareil électronique en main. Sur cette page sont publiés tous les documents nécessaires à l'utilisation de votre appareil Fritz!Box 3370 de la marque AVM.
MODE D'EMPLOI Fritz!Box 3370 AVM
FRITZ!
FRITZ!Box 3370
Installation and Operation
text_image
Modulation and Operation POWER WLAN POWER LAN WLAN DSL IntoTable of Contents
Symbols and Highlighting 6
1 The FRITZ!Box 3370....7
2 Ports, Interfaces, Buttons and LEDs. 8
2.1 Ports and Interfaces 8
2.2 Buttons....9
2.3 LEDs....10
3 Before You Connect the FRITZ!Box ..... 11
3.1 Contents of the FRITZ!Box Package ..... 11
3.2 Requirements for Operation 11
3.3 Security and Handling 12
4 Connecting the FRITZ!Box 15
4.1 Connecting to Electrical Power ..... 15
4.2 Connecting to the Internet 15
5 Connecting the Computer to the FRITZ!Box ..... 17
5.1 Connecting Computers to the LAN Port ..... 17
5.2 Connecting Computers Wirelessly over WLAN 19
6 The FRITZ!Box User Interface 26
6.1 Opening the User Interface 26
6.2 Overview: Everything at a Glance 27
6.3 Standard View and Advanced View.....28
6.4 Protecting the User Interface with a Password ..... 28
6.5 Saving the FRITZ!Box Settings 30
7 Configuring an Internet Connection in the FRITZ!Box . . . 31
7.1 Configuring an Internet Connection for DSL 31
7.2 Changing the Annex Setting of the FRITZ!Box 32
7.3 Configuring the Internet Connection for the Mobile Communications Network....33
7.4 Surfing the Net 34
8 Firmware Update: Updating the FRITZ!OS ..... 35
8.1 Searching for and Transferring FRITZ!OS Update with the Wizard...35
8.2 Automatic Search for Updates and Updating FRITZ!OS ..... 36
9 MyFRITZ!: Global Access to the FRITZ!Box ..... 38
10 FRITZ!Box as an Internet Router .... 41
10.1 Child Protection: Restricting Internet Access ..... 41
10.2 Port Forwarding: Making Computers Accessible from the Internet .. 42
10.3 Dynamic DNS: Name Instead of IP Address 45
10.4 Remote Access over HTTPS 45
10.5 Prioritization: Right of Way for Internet Access....46
10.6 VPN: Remote Access to the Home Network.....48
10.7 DNS Server: Freely Selectable .... 50
10.8 DNSSEC: Security for DNS Queries .... 50
10.9 IPv6: The New Internet Protocol....51
10.10 Mobile Network: Replace Faulty DSL 53
11 FRITZ!Box as a WLAN Base Station....55
11.1 Connecting WLAN Devices Securely with the FRITZ!Box.....55
11.2 Connecting WLAN Devices with the FRITZ!Box Guest Access.....57
11.3 Switching the WLAN Radio Network On and Off by Schedule ..... 58
11.4 Enlarging the WLAN Radio Network....58
11.5 WLAN—Getting Technical 60
12 The FRITZ!Box Home Network....68
13 Network Devices in the FRITZ!Box Home Network.....70
13.1 Network Settings in the FRITZ!Box....70
13.2 Obtaining an IP Address Automatically....78
14 USB Devices in the FRITZ!Box Home Network ..... 81
14.1 Power Supply for USB Devices....81
14.2 USB Devices on the FRITZ!Box 81
14.3 Using USB Devices Safely 82
14.4 Configuring Password Protection and Access Rights ..... 82
14.5 Accessing USB Memory 83
14.6 Sharing a USB Printer....84
15 Saving Energy with FRITZ!Box. 90
15.1 Saving Energy with the WLAN Radio Network ..... 90
15.2 Enabling Energy-saving Mode for USB Hard Drives ..... 90
15.3 Saving Energy at the LAN Ports 91
16 Help in Case of Errors 92
16.1 Cannot Establish a DSL Connection ..... 92
16.2 The User Interface Does Not Open....93
16.3 Cannot Establish a WLAN Connection ..... 98
17 Taking FRITZ!Box out of Operation ..... 103
17.1 Restoring Factory Settings .... 103
17.2 Uninstalling Software....104
18 Technical Specifications .... 106
18.1 Ports and Interfaces .... 106
18.2 Router Functions....106
18.3 User Interface and Display....106
18.4 Physical Specifications 107
18.5 Cable 107
19 Customer Service 108
19.1 Documentation on the FRITZ!Box.....108
19.2 Information in the Internet.... 108
19.3 Feedback on FRITZ!Box....109
19.4 Support from the Support Team .... 110
19.5 Manufacturer's Warranty 111
20 AVM Products for the FRITZ!Box ..... 112
Legal Notice....117
Legal Notice ....117
Declaration of CE Conformity 118
Disposal Information 119
Drilling Template 120
Glossary 122
Index 141
Symbols and Highlighting
Symbols and emphasized text are used to mark certain information in this manual.
Symbols

This symbol marks useful hints and tips.

This symbol indicates important instructions that must be observed to avoid malfunctions.
Highlighting
| Marker Example | |
| Quotation marks designate elements in the user interface, path entries, and names of folders and files | “Home Network”“C:\Pictures”“Info” |
| Pointed brackets mark wild cards | number |
| Blue, underlined text designates addresses to be entered in the browser | fritz.box |
| Blue text designates links and references within this manual | see page 117 |
| Bold type emphasizes important words Do not click ... | |
1 The FRITZ!Box 3370
Welcome! We are glad you decided on a FRITZ!Box. The FRITZ!Box 3370 is the hub of your home network, connecting your computers and network devices with the Internet. You can operate the FRITZ!Box on a DSL or VDSL line as an Internet router.
The FRITZ!Box has ports for computers and USB devices and supports wireless LAN technology. This means you can use the FRITZ!Box as a wireless LAN base station for wireless devices like notebooks, tablets or smartphones.
The FRITZ!Box integrates connected computers and network devices into your private home network. The devices can exchange data with each other and enjoy shared access to USB hard drives, USB printers and other USB devices. The FRITZ!Box transmits music, video and image files to suitable playback devices in the home network.
The FRITZ!Box offers you a full range of functions and settings so that you can set up a home network tailored to your needs.
In the settings of your FRITZ!Box you can access a user interface that is easy to operate in any web browser. Wizards guide you step by step through the setup of the most important FRITZ!Box functions, and comprehensive online Help is available on every page of the user interface.
2 Ports, Interfaces, Buttons and LEDs
This chapter describes the ports, interfaces, buttons and LEDs of the FRITZ!Box.
2.1 Ports and Interfaces
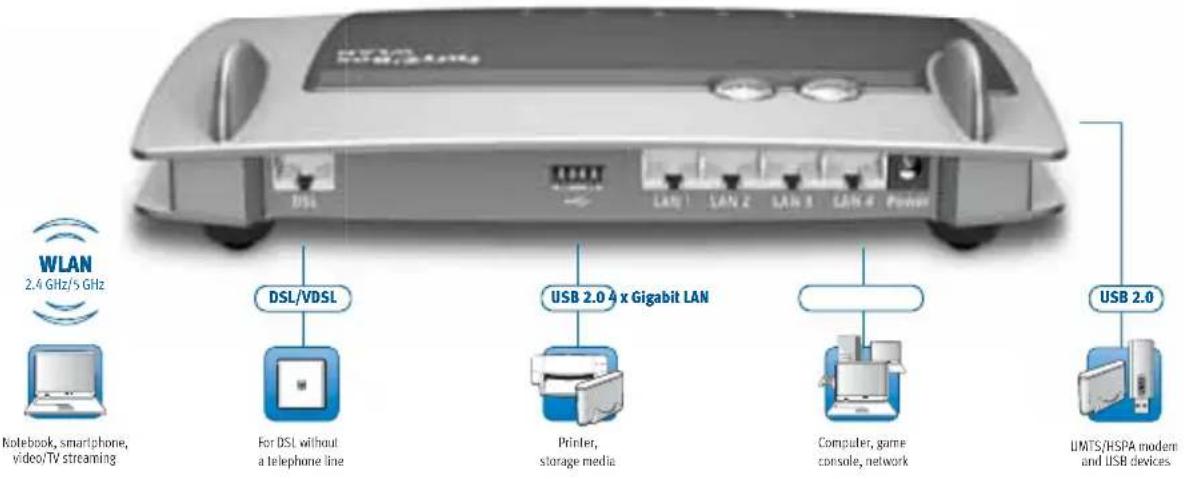
text_image
WLAN 2.4 GHz/5 GHz DSL/VDSL DSL For DSL without a telephone line USB 2.0 4 x Gigabit LAN Printer, storage media Computer, game console, network USB 2.0 UMTS/HSPA modem and USB devicesPossibilities for connecting the FRITZ!Box
• DSL
Socket for connecting to ADSL2+ and VDSL
• LAN1 - LAN4
4 gigabit Ethernet ports (10/100/1000 Base-T) for connecting computers and other network devices like game consoles and network hubs
USB

2 USB 2.0 ports for connecting USB devices like printers or storage media
- WLAN base station
Integrated WLAN base station for connecting to WLAN devices that use the radio standard IEEE 802.11a, IEEE 802.11b, IEEE 802.11g or IEEE 802.11n (in the 2.4-or 5-GHz frequency band)
2.2 Buttons
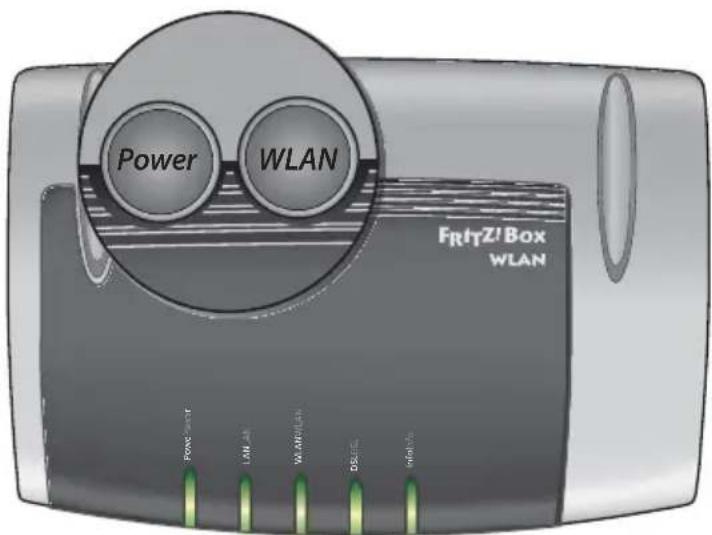
The FRITZ!Box has two buttons on the upper side of the housing.
text_image
Power WLAN FRHTZ!Box WLAN POWER LAW WLAN OSI NOSIFRITZ!Box buttons
WLAN Button
With the WLAN button you can turn the WLAN function on and off and connect wireless devices with the FRITZ!Box by WPS. WPS is an easy way to establish secure wireless connections (see page 20).
Power Button
Use the Power button to switch the FRITZ!Box on and off.
2.3 LEDs
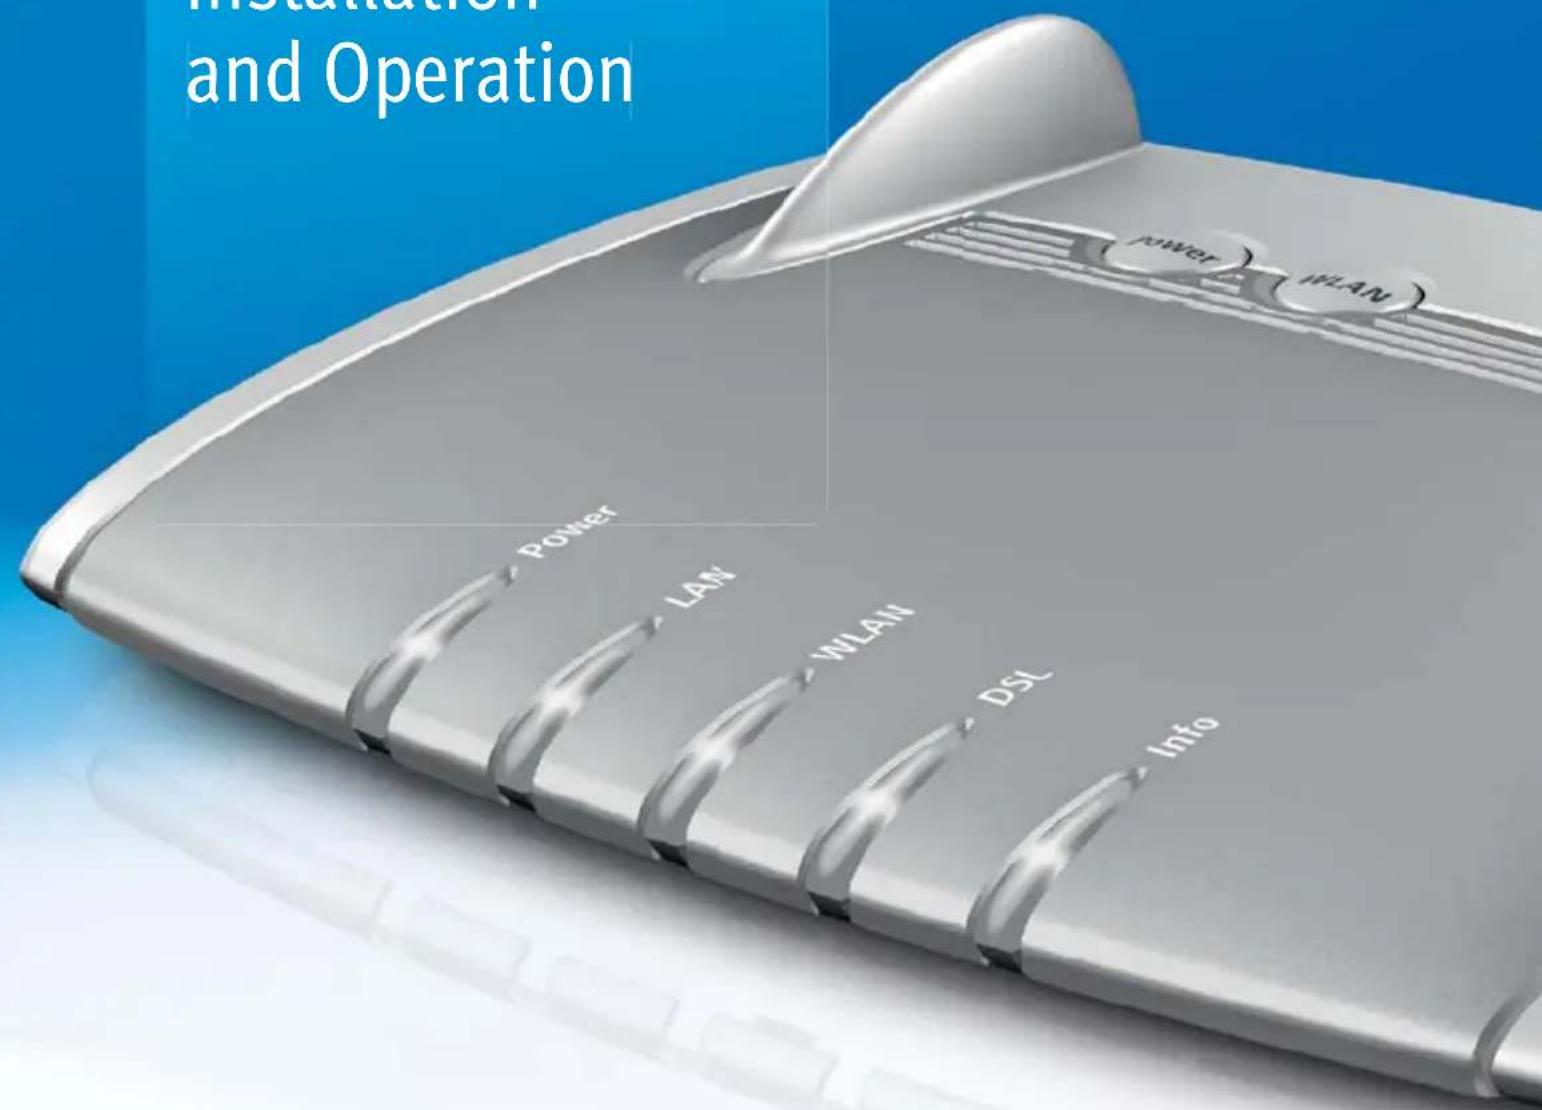
Five LEDs are built into the top of the FRITZ!Box 3370, which flash or light up to display various connection statuses and events.
| LED Condition | on Meaning | |
| Power on | ·Device has electrical power and the DSL line is ready for operation | |
| flashing | ·Device has electrical power and the connection to DSL is being established or has been interrupted | |
| LAN on Network connection is active to at least one connected device (network adapter or hub/switch) | ||
| WLAN on WLAN function is enabled | ||
| DSL on Internet connection is active | ||
| Info flashing | ·Updating FRITZ!OS, the firmware of your FRITZ!Box·Online meter reached the defined value, or another event defined in the user interface under “System / “Info” Display” is signaled | |
| flashing red Error: Open the FRITZ!Box user interface and follow the instructions on the “Overview” page | ||
3 Before You Connect the FRITZ!Box
- Check the contents of your FRITZ!Box package. See the section Contents of the FRITZ!Box Package on page 11 for more information.
- Make sure that the requirements for connecting and operating the FRITZ!Box have been met. See the section Requirements for Operation on page 11 for more information.
- Please see the security and handling instructions in the section Security and Handling on page 12.
3.1 Contents of the FRITZ!Box Package
• FRITZ!Box 3370
• one power supply unit
- one network cable
- one DSL cable
• printed product information
3.2 Requirements for Operation
In order to operate the FRITZ!Box, you must have the following:
-
a web browser that supports Java script (for instance, Internet Explorer version 8.0 or higher, or Firefox version 7 or higher)
• a connection to the Internet -
a DSL line, standard ITU G.992.1 Annex A or B (ADSL), ITU G.992.3 Annex A or B (ADSL2), ITU G.992.5 Annex A or B (ADSL2+), ITU G.992.3/5 Annex J, ITU G.992.3/5 Annex M, ITU G.994.1 (G.hs)
- or a VDSL2 line, standard ITU G.993.2 Annex A or B (VDSL2)
– or a USB modem for mobile Internet access (UMTS/HSPA)
• for connecting computers via WLAN:
computer with WLAN support (compliant with IEEE 802.11n, IEEE 802.11g, IEEE 802.11a or IEEE 802.11b). Computers that do not have integrated WLAN can be equipped with WLAN support by installing a WLAN device like a FRITZ!WLAN USB Stick N, for instance.
• for connecting computers using network cable:
computer with a network port (network adapter standard Ethernet 10/100/1000 Base-T)
3.3 Security and Handling
Before installing and using the FRITZ!Box, please read the following security and handling instructions.
Safety Instructions

When connecting the FRITZ!Box 3370, be sure to observe the following security instructions in order to protect yourself and the FRITZ!Box from harm.
- Avoid overloading power outlets, extension cables and socket strips. Overloaded power supply components present a fire and electrocution risk.
- Avoid using sockets strips and extension cords if at all possible.
- Do not connect multiple extension cords or socket strips to each other.
- Before mounting the FRITZ!Box on the wall, make sure that there are no electrical lines, gas or water pipes located where you need to drill the holes.
If necessary, check the site with a pipe detector or consult with qualified experts.
- Make sure that the ventilation slits on the FRITZ!Box housing are always unobstructed. The ventilation slits provide for air cooling.
- The FRITZ!Box should not be placed on a carpet or on upholstered furniture.
- Do not cover the FRITZ!Box.
- Do not place the FRITZ!Box on excessively heat-sensitive surfaces, as the base of the device can heat up during normal operation.
- Do not install the FRITZ!Box during an electrical storm.
- During a storm, disconnect the FRITZ!Box from the power supply and from the DSL or VDSL line.
- Never let liquids get inside the FRITZ!Box. Otherwise, electric shocks or short circuits may result.
- Do not open the FRITZ!Box housing. The device contains hazardous components and should only be opened by authorized repair technicians.
- The FRITZ!Box is intended for indoor use only.
Handling the FRITZ!Box
- You can either place FRITZ!Box on a horizontal surface or mount it on a wall. For a drilling template to mount the FRITZ!Box on a wall, see page 120.
- Place or hang the FRITZ!Box in a dry location that is free of dust and protected from direct sunlight.
- For ideal operating conditions, mount the FRITZ!Box on a wall with the cables connected on the bottom.
- When connecting the FRITZ!Box to your computer using a network cable, keep in mind that the cable can be no longer than 100 m.
- If you would like to establish wireless connections between the FRITZ!Box and the computer, position the FRITZ!Box at a central location.
- Make sure to keep sufficient distance from potential sources of interference like microwave devices or electric devices with large metal housings.
4 Connecting the FRITZ!Box
- Connect the FRITZ!Box to the power supply.
- Connect the FRITZ!Box to your Internet connection.
This chapter tells you how.

Before you connect the FRITZ!Box, note the additional instructions in the section Security and Handling on page 12.
4.1 Connecting to Electrical Power
natural_image
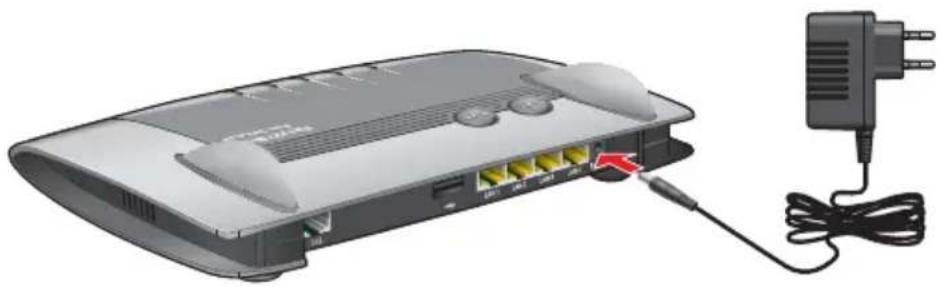
Rear view of a wireless router with attached power supply cable (no visible text or symbols)Connecting to the power supply
- Pick up the power supply unit included in the FRITZ!Box package.

Use only this power supply unit for connecting to electrical power.
- Connect the power supply unit to the socket on the FRITZ!Box labeled "Power".
- Plug the other end into an AC power outlet.
The "Power" LED begins flashing after a few seconds to indicate that the FRITZ!Box is ready for operation.
4.2 Connecting to the Internet
The FRITZ!Box can be connected using various types of Internet connections:
- DSL/VDSL line
- Internet via mobile communications network using a UMTS/HSPA modem
Connecting to the DSL Line
natural_image
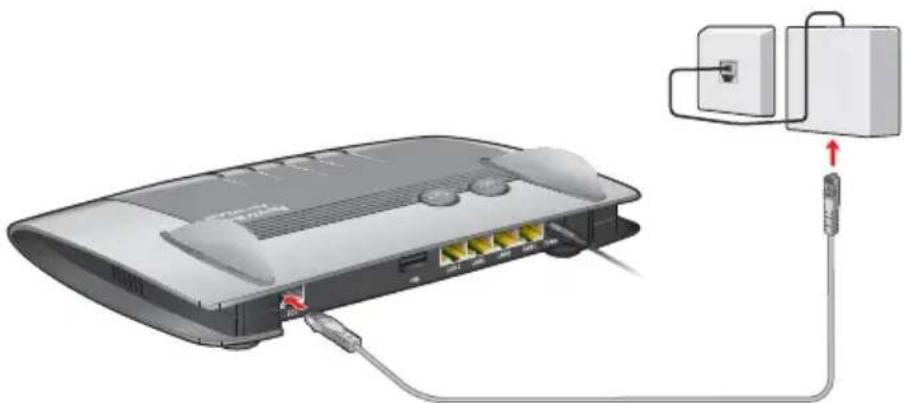
Diagram of a wireless router connected to a power outlet via cable, showing ports and wiring (no text or labels)Connecting to a telephone socket
- Pick up the DSL cable (gray) included in the package. The cable has an RJ45 connector on both ends.
- Insert one end of the cable into the socket on the FRITZ!Box labeled "DSL".
- Connect the other end to the socket on the DSL splitter labeled "DSL" or similar.
The “Power” LED lights up after a short time to signalize that the FRITZ!Box is ready for Internet connections over DSL.
Connecting to the Internet via the Mobile Communications Network
If no other kind of Internet connection is available, you can use your FRITZ!Box to connect to the Internet via the mobile communications network. A USB modem for mobile Internet access (UMTS/HSPA) is required for this.

The FRITZ!Box supports UMTS/HSPA modems from various manufacturers.
- Insert the USB modem into the USB port on the FRITZ!Box.
- Set up the Internet connection via the mobile communications network (see page 33).
5 Connecting the Computer to the FRITZ!Box
You can connect a computer with the FRITZ!Box either using a network cable or wirelessly over WLAN.

A computer can be connected with the FRITZ!Box using only one of these methods. It is not possible to connect using the network cable and WLAN.
5.1 Connecting Computers to the LAN Port
natural_image
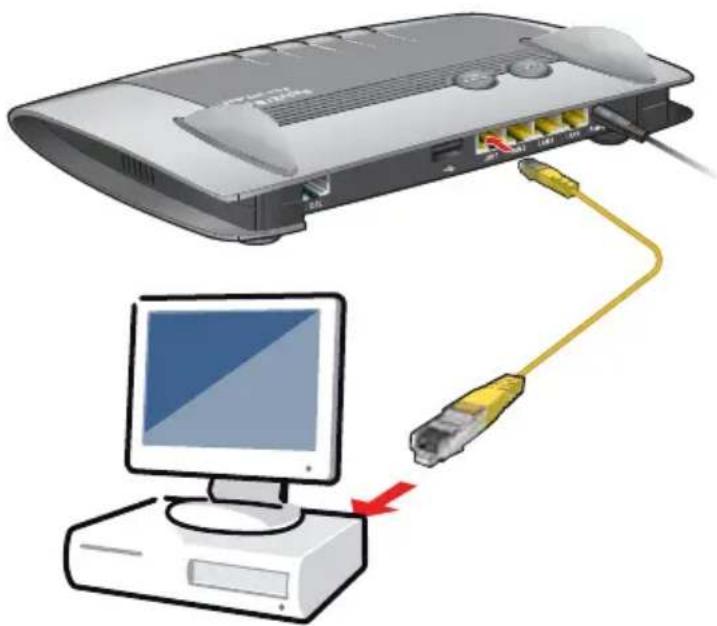
Illustration of a router connected to a computer via a USB cable, showing internal components and connection (no text or symbols)Connecting a computer to the FRITZ!Box using a network cable
- Set aside the network cable from the FRITZ!Box package.
- If you work with a Linux operating system: Configure the network adapter of the computer with the setting "DHCP".
- Connect one end of the network cable to the network port (network adapter) of the computer.
- Connect the other end to the "LAN 1", "LAN 2", "LAN 3" or "LAN 4" socket on the FRITZ!Box.
Now the FRITZ!Box and the computer are connected to each other.
Connecting More Computers to the LAN Ports
Additional cables are required to connect further computers. In purchasing a LAN cable, note the instructions in the section Network Cable on page 107.
One computer can be connected to each network port of the FRITZ!Box.
Connecting a Network Hub or Switch
You can also connect a network hub or switch to the LAN ports on the FRITZ!Box.
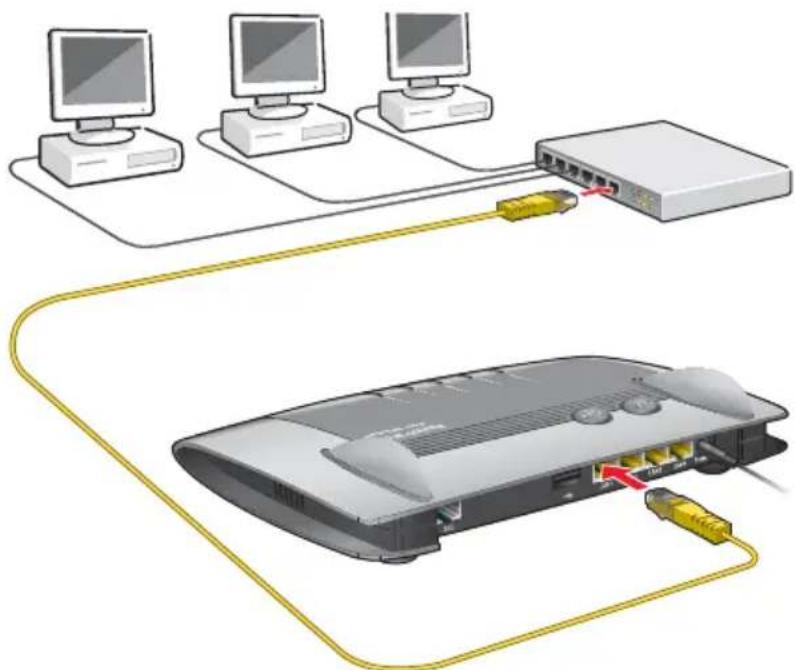
natural_image
Illustration of a router connected to three computer monitors, showing internal connections via yellow cables (no text or symbols)Connecting the FRITZ!Box to a network hub
- Set aside the network cable from the FRITZ!Box package.
- Connect one end of the LAN cable to the uplink port (see glossary) of the network hub or network switch.
- Connect the other end of the cable to one of the LAN ports on the FRITZ!Box.
The FRITZ!Box and the network hub are now connected with each other.
5.2 Connecting Computers Wirelessly over WLAN
Using WLAN radio technology you can connect multiple computers with the FRITZ!Box wirelessly.
Please note the following before establishing a wireless connection between the computer and the FRITZ!Box:
- WLAN device
A computer to be connected to the FRITZ!Box via WLAN must be equipped with a WLAN device for it to support WLAN. A WLAN device can be an external WLAN adapter—like a USB stick, for example—or a device integrated in the computer. Many modern computers and notebooks come with a WLAN device integrated.
- WLAN security settings
In the FRITZ!Box, WLAN security settings are enabled upon delivery. Before a computer can establish a wireless connection to the FRITZ!Box, the WLAN security settings of the FRITZ!Box must be transferred to the WLAN device.
For this procedure the FRITZ!Box supports the two automatic methods AVM Stick & Surf and WPS (Wi-Fi Protected Setup). The security settings can also be transferred manually.

For more information on WLAN, see the section FRITZ!Box as a WLAN Base Station from page 55.
Establishing a WLAN Connection with AVM Stick & Surf
If you use a FRITZ!WLAN USB Stick from AVM as the WLAN device, you can use AVM Stick & Surf to establish a secure WLAN connection quickly and conveniently.
- Switch on your computer.
-
Insert your FRITZ!WLAN USB Stick into one of the USB ports on the FRITZ!Box.
The WLAN security settings are transmitted to the FRITZ!WLAN USB Stick. The “Info” LED on the FRITZ!Box begins flashing quickly.
As soon as the “Info” LED stops flashing, transmission of the settings has been concluded. -
Remove the FRITZ!WLAN USB Stick.
- Now insert the FRITZ!WLAN USB Stick into the USB port of the computer.
The security settings will be adopted and the WLAN connection between the FRITZ!Box and the FRITZ!WLAN USB Stick will be established. As soon as the WLAN connection has been established the computer is connected to the FRITZ!Box.

See the AVM FRITZ!WLAN USB Stick manual for details.
Establishing a WLAN Connection Using WPS
The FRITZ!Box supports WPS (Wi-Fi Protected Setup). WLAN devices that also support WPS can be connected with your FRITZ!Box securely using this method. All of the necessary WLAN security settings are transferred in the process. There are two kinds of WPS: the push-button method and the PIN method.
WPS with the Push-button Method
The push-button method (WPS PBC) can be used if your WLAN device is equipped with a WPS button, or if WPS can be enabled via the control software of the WLAN device.
- Press the "WLAN" button on the FRITZ!Box until the "WLAN" LED begins flashing.
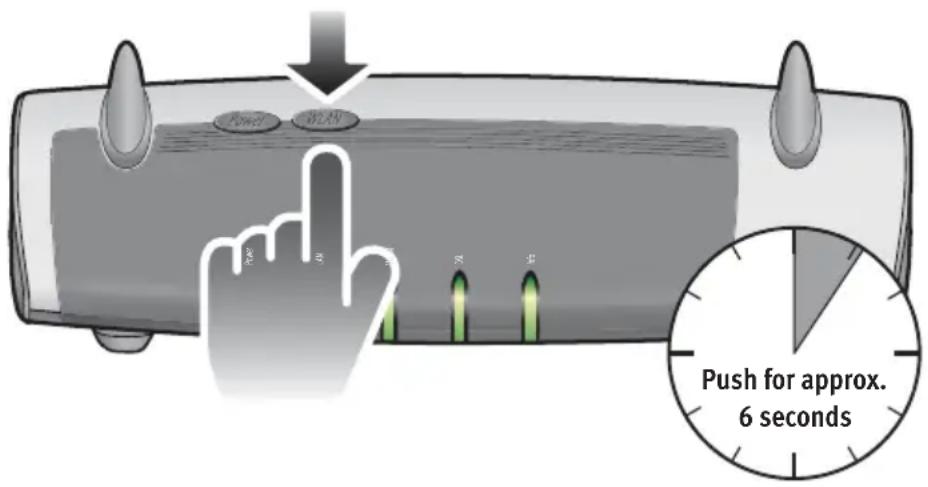
text_image
Push for approx. 6 seconds- When the "WLAN" flashes, start WPS on the WLAN device. You have 2 minutes for this task.
How to start WPS depends on the WLAN device. Either press a button on the WLAN device, or start WPS in the control software of the WLAN device.
The connection between the FRITZ!Box and the computer is established automatically. The computer is now connected with the FRITZ!Box.
WPS with the PIN Method
If your WLAN device supports WPS, but does not have a button to start the push method nor any possibility to enable it in its control software, use the PIN method to establish the WLAN connection.
You can choose between two methods:
• the FRITZ!Box specifies the PIN
• the WLAN device specifies the PIN.
The FRITZ!Box Specifies the PIN
- Open the FRITZ!Box user interface.
- Select the "WLAN / Security" menu.
- Go to the "WPS Quick Connection" page.
- Enable the setting "WPS enabled".
- Select the option "PIN method (WPS-PIN), the FRITZ!Box specifies the PIN".
-
The PIN will be displayed. Enter this PIN in the control software of the WLAN device.
-
Click "Start WPS".
The “WLAN” LED on the FRITZ!Box flashes slowly, indicating that the WPS procedure has begun. Now a secure WLAN connection is being established between the FRITZ!Box and the WLAN device.
The WLAN Device Specifies the PIN
- Open the FRITZ!Box user interface.
- Select the "WLAN / Security" menu.
- Go to the "WPS Quick Connection" page.
- Enable the setting "WPS enabled".
- Select the option "PIN method (WPS-PIN), the WLAN device specifies the PIN".
- Now start the control software of the WLAN device. The program outputs a PIN for establishing a connection.
- Enter this PIN in the FRITZ!Box user interface.
- Click "Start WPS".
The “WLAN” LED on the FRITZ!Box flashes slowly, indicating that the WPS procedure has begun. Now a secure WLAN connection is being established between the FRITZ!Box and the WLAN device.
Transferring the WLAN Security Settings Manually
The WLAN security settings for WLAN devices can also be transferred manually. Manual transfer is unavoidable if a WLAN device does not support any methods for transferring the security settings automatically.
For manual transfer the WLAN security settings have to be entered in the WLAN software.
WLAN devices are generally delivered with their own WLAN software, which is installed in the computer along with the WLAN device. By now many operating systems have WLAN software included. Integrated WLAN devices sometimes use the operating system's WLAN software.
Installing a WLAN Device
If you need to use a separate WLAN device because you do not have one integrated, then install the WLAN device in the computer along with the corresponding WLAN software. Please take note of the instructions in the documentation of the device.
Transferring WLAN Security Settings
The values for WLAN security preconfigured in the FRITZ!Box have to be transferred to the WLAN device.

The values preset in the FRITZ!Box are printed on the sticker attached to the bottom of the housing. If you would like to establish a WLAN connection using these values, then your WLAN device must support the preset encryption method. If this is not the case, first change the settings in the FRITZ!Box. To do this, connect your computer and the FRITZ!Box using a network cable.
-
Start the WLAN software.
-
The following table presents the values that are possible for the connection between the FRITZ!Box and the WLAN device. Enter in the WLAN software the values set in the FRITZ!Box. If you changed the preconfigured values in the FRITZ!Box, then enter these changed values in the WLAN software.
| SSID (name of the FRITZ!Box WLAN 3370WLAN radio network) |
| Encryption method WPA2 (AES-CCMP) |
| Encryption WPA2-PSK (AES) |
| WLAN key The key is printed on the sticker attached to the bottom of the housing. |
| Network mode Infrastructure |
- Confirm your entries using the relevant button in the user interface (for instance, "OK" or "Connect").
Now your WLAN device and the FRITZ!Box are connected with each other wirelessly.
If the WLAN Device Does Not Support WPA
If your WLAN device does not support WPA encryption, you must convert the encryption set in the FRITZ!Box to WEP. For this you must change the WLAN settings in the FRITZ!Box.
- Connect the FRITZ!Box and the computer using the network cable (yellow) (see the section Connecting Computers to the LAN Port on page 17).
- Open the FRITZ!Box user interface (see the section Opening the User Interface on page 26).
- Select the "WLAN / Security" menu.
- Open the “Encryption” page, then select WEP encryption and enter a network key.
- Click the "Apply" button.
A window is displayed with the WLAN security settings. - Make a note of the settings or print out the page.
- Close the user interface and clear the connection between the FRITZ!Box and the computer. Remove the network cable (yellow).
- Configure your WLAN device with the security settings entered in the FRITZ!Box.
The WLAN connection between your WLAN device and the FRITZ!Box will be established.

We strongly recommend using a WLAN device that supports WPA or WPA2 (for instance, a FRITZ!WLAN USB Stick from AVM). WEP is out of date and data encrypted with WEP can be deciphered within minutes.
6 The FRITZ!Box User Interface
The FRITZ!Box has a user interface you can open in a web browser on your computer.
In the user interface you can set up the FRITZ!Box, enable or disable functions and receive information on the FRITZ!Box and on your connections.
6.1 Opening the User Interface
The FRITZ!Box user interface can be opened on every computer connected with the FRITZ!Box.
- Start a web browser on your computer.
- Enter fritz.box in the address line of the browser.
The FRITZ!Box user interface opens.
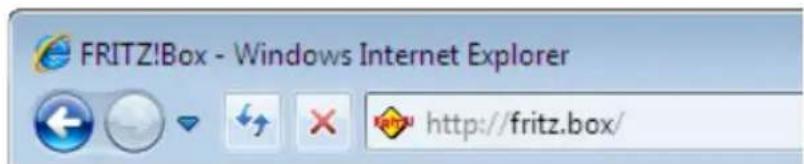
text_image
FRITZ!Box - Windows Internet Explorer http://fritz.box/Entering the address fritz.box in the browser

If the user interface does not open, see the instructions on resolving errors in the section from page 93.
The Wizard: Opening the User Interface for the First Time
When you open the user interface for the first time, a wizard starts to assist you in configuring the FRITZ!Box.
If you cancel the wizard, you can configure your FRITZ!Box without this wizard. You can change the settings configured with this wizard at any time.
For comprehensive information on configuring the many diverse functions of your FRITZ!Box, see the following chapters in this manual.
6.2 Overview: Everything at a Glance
All important information about the FRITZ!Box is displayed directly on the "Overview" page of the FRITZ!Box user interface.
By clicking the linked entries you can jump from this page to the corresponding menus and configure settings there.
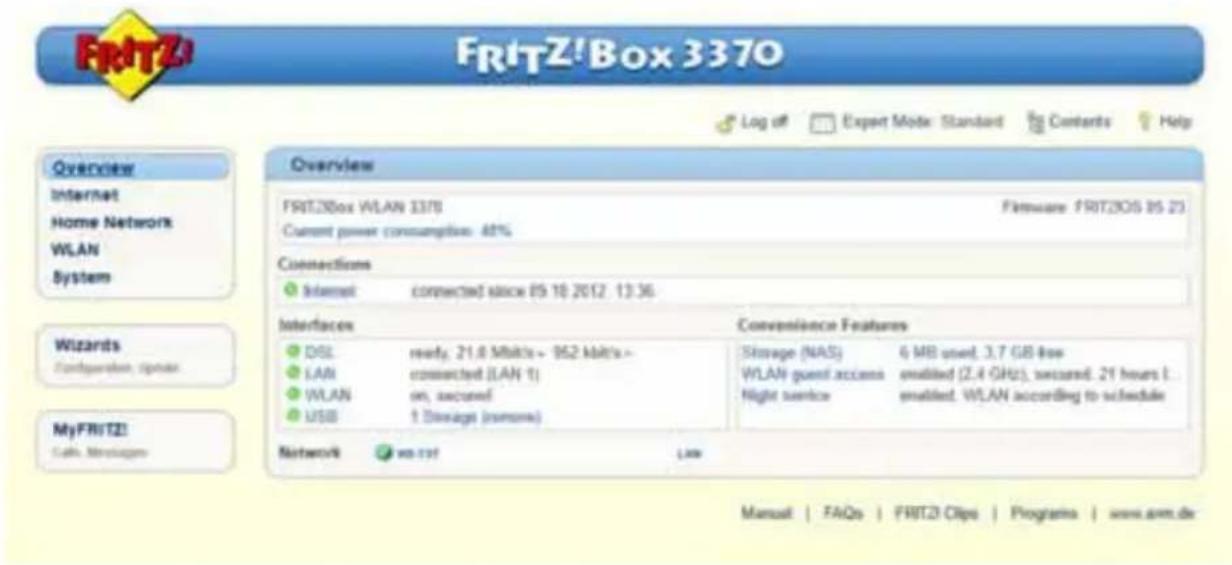
text_image
FritZ! Box 3370 Overview FRITZ!Box WLAN 3370 Current power consumption: 48% Connections Internet connected since 09 10 2012. 13:36. Interfaces DSL ready, 21.8 Mbit/s > 952 Mbit/s > LAN connected (LAN 1) WLAN on, second USB 1 Storage (seconds) Convenience Features Storage (NAS) 4 MB used, 3.7 GB low WLAN guest access enabled (2.4 GHz), second, 21 hours t... Night service enabled: WLAN according to schedule Network#: w-137 Line Manual | FAQs | FRTZ! Clips | Programs | www.arm.deThe FRITZ!Box "Overview" page
In the upper area of the window the FRITZ!Box is displayed with its complete product name, the currently installed version of FRITZ!OS, and its current energy consumption.
Depending on your settings, the following additional information is displayed here:
- If you assigned an individual name for your FRITZ!Box (see page 68), this name will be displayed here.
- If you use the automatic search for updates (page 36) and a new FRITZ!OS version is available on the AVM Update Server for your FRITZ!Box, you will be notified.
The middle section of the window presents information about connections, ports and configured convenience functions like MyFRITZ!, call diversion, guest access, remote access, port forwarding and push service.
In the lower area of the window, the information is rounded out by the last telephone calls conducted, the list of connected devices like computers, network storage and telephones, and the last telephone book entries to be edited.
6.3 Standard View and Advanced View
The FRITZ!Box user interface has two views: the standard view and the advanced view.
In the standard view all of the settings required for everyday operation of the FRITZ!Box are at your disposal. Some pages and areas of the FRITZ!Box user interface are not displayed.

Upon delivery, the FRITZ!Box interface is set to display the standard view.
In the advanced view additional settings options appear under various menus and commands. The expanded menu items contain network and DSL settings for advanced users and are not required for normal FRITZ!Box operation.

Enabling this option is recommended only if you have advanced network expertise. When this setting is selected, settings can be configured which have the result that the FRITZ!Box user interface can no longer be opened.
Fast Switching between the Views
The “View” icon in the link list of the FRITZ!Box allows you to switch immediately between the standard view and the advanced view.
6.4 Protecting the User Interface with a Password
You can protect the user interface of the FRITZ!Box with a password. The password will be requested every time the user interface is opened. This protects the settings of your FRITZ!Box from unauthorized access.

For reasons of security, we recommend setting up and using password protection for the user interface.
Setting Up Password Protection
As long as no password protection has been set up, every time you open the user interface you will be prompted to enter a password. If you disabled this message, here is how to set password protection:
- Open the FRITZ!Box user interface (see page 26).
- Go to the "System / FRITZ!Box Password" menu.
- Enter a password and save the password by clicking "Apply".
Password protection is now enabled.

Be sure to remember the password! If you forget the password, the factory settings will have to be restored to your FRITZ!Box. All of the settings you configured will be discarded. This is why we recommend saving the settings of your FRITZ!Box in a backup file (see page 30).
Forgot Password—What to Do?
If you have forgotten your password for the user interface, for reasons of security, you have to restore the factory settings to your FRITZ!Box:
- Open the FRITZ!Box user interface (see page 26).
- In the “Welcome to FRITZ!Box” window, click “reset” below the password prompt and follow the instructions on the screen.
The FRITZ!Box is reset to the factory settings and then re-started. Afterward you can once again access the FRITZ!Box user interface. - After restarting, reconfigure the FRITZ!Box over the user interface or load your saved settings to the FRITZ!Box (see page 30).
This concludes the reset of the FRITZ!Box.
Logging Off the User Interface
When password protection is enabled, you can log off the user interface at any time. To do so, click in the list of links.
If you do not click on the user interface for a period of longer than ten minutes, you will be logged off automatically. The only pages excepted from this are those which are constantly updated, like the “Overview” page. No automatic logout will take place on these pages.
6.5 Saving the FRITZ!Box Settings
All of the settings you configure in your FRITZ!Box can be saved in a backup file on your computer. With this backup file you can restore your settings to the FRITZ!Box at any time or load your settings to another FRITZ!Box.
Saving and Restoring Settings
To save and restore your FRITZ!Box settings, use the “System / Save Settings” menu in the user interface. Here you can
- save your FRITZ!Box settings on the “Save” tab.
- restore all of your saved settings to the same FRITZ!Box on the “Restore” tab.
- load all of your saved settings to another FRITZ!Box of the same model on the “Restore” tab.
- load your saved settings to another FRITZ!Box model on the “Apply” tab. In this case you can select which settings are to be applied to the FRITZ!Box.

To load your saved settings to another FRITZ!Box of the same model, or to apply the settings of another FRITZ!Box model to your FRITZ!Box, the backup file must always be password-protected.
Instructions for saving, restoring and applying FRITZ!Box settings are presented in the user interface's Online Help.
7 Configuring an Internet Connection in the FRITZ!Box
Once you have connected the FRITZ!Box to your Internet connection, you must configure the Internet connection in the FRITZ!Box user interface so that the FRITZ!Box can establish the connection to your Internet service provider and connect to the Internet.
The sequence and number of steps required to configure your Internet connection depend on the kind of connection, the desired operating mode, and the Internet service provider.
7.1 Configuring an Internet Connection for DSL
If you have a DSL line, you received Internet account information from your DSL or Internet service provider. The Internet account information is required to configure the Internet connection.

Your Internet service provider also supplied information about the configuration of your Internet connection. Always perform the Internet connection setup as described by your provider.
Configuring an Internet Connection Automatically
If your Internet service provider arranges for the service of automatically configuring your Internet connection, the automatic configuration will be performed right after the FRITZ!Box is connected. No additional settings for the Internet connection have to be configured in the FRITZ!Box. To start automatic configuration, some providers require that you enter a start code.
Configuring the Internet Connection Using the Wizard
The wizard takes you step by step through the setup.
- Open the FRITZ!Box user interface (see page 26).
- Select the "Wizards" entry in the menu.
- Click the "Check Internet Connection" Wizard and follow the instructions.
When the Wizard is finished, your Internet connection has been configured.
Configuring the Internet Connection Without the Wizard
You can also set up the Internet connection without the Wizard.
- Open the FRITZ!Box user interface (see page 26).
- Select the “Internet / Account Information” menu and enter your account information.
Also take advantage of the Help available in the FRITZ!Box user interface.
7.2 Changing the Annex Setting of the FRITZ!Box
The FRITZ!Box cannot establish a connection to the DSL network. This is signaled by the continued flashing of the "Power" LED.
Cause
The kind of DSL (Annex A, B, J or M) set in the FRITZ!Box is not the same as the annex used on your DSL line.
Help
- Contact your Internet service provider to find out which annex is used on your DSL line.
- Connect a computer with the FRITZ!Box either wirelessly via WLAN or using a network cable.
- Open the FRITZ!Box user interface.
- Open the “Internet / DSL Information” and select the “Line Settings” page.
- In the “Annex Settings” area, make sure that the annex working on your DSL line is set. Save your settings by clicking “Apply”.
After the annex setting has been changed, the FRITZ!Box restarts automatically. The connection to the DSL network has been established as soon as the “Power” LED stops flashing and remains lit up.
7.3 Configuring the Internet Connection for the Mobile Communications Network
With a USB modem you can also establish the Internet connection with your FRITZ!Box 3370 via the mobile communications network. A USB modem for mobile Internet access (UMTS/HSPA) and a SIM card from a mobile communications provider are required for this. The FRITZ!Box supports UMTS/HSPA modems from various manufacturers.
- Insert the USB modem in the USB port on the FRITZ!Box.
- Open the FRITZ!Box user interface (see page 26).
In the “Internet” menu, the sub-menu “Mobile Telephone Network” is displayed.

The “Mobile Telephone Network” menu is not available until the UMTS/HSPA modem has been connected to the USB port of the FRITZ!Box.
-
Select the setting "Mobile connection enabled".
-
Configure the settings for your Internet connection over the mobile communications network. For more information, see the Online Help of the FRITZ!Box.
When the mobile communications function is used, the FRITZ!Box user interface presents information about network availability, connection status and throughput.
After this function has been set up, the “Internet / Mobile Telephone Network” menu is always available, even when the USB modem has been disconnected.

Due to technical limitations on the part of the mobile communications network providers, some limitations may arise for Internet telephone calls and for applications requiring an incoming connection. The same is true for using port forwarding, sharing USB storage memory, remote access via HTTPS, dynamic DNS and VPN. Contact your network provider for details on any restrictions that may apply.
7.4 Surfing the Net
- Start a web browser on your computer.
- Enter in the address field the URL of the web page you would like to visit, for instance www.avm.de/en.
The requested Internet page is opened and displayed.
8 Firmware Update: Updating the FRITZ!OS
AVM provides free updates of the firmware for your FRITZ!Box. The firmware—called FRITZ!OS—is the software stored in the FRITZ!Box that controls all of the FRITZ!Box functions.
FRITZ!OS updates contain further developments of existing FRITZ!Box functions and often also introduce new functions for your FRITZ!Box.
A FRITZ!OS update is necessary if you would like to take advantage of further developments and new functions.
8.1 Searching for and Transferring FRITZ!OS Update with the Wizard
- Open the FRITZ!Box user interface (see page 26).
- Click “Wizards” in the menu and start the “Update Firmware” Wizard.
The Wizard checks whether a FRITZ!OS update is available for your FRITZ!Box.
If the Wizard finds an update, it displays the version number of the new FRITZ!OS. Click the link under the FRITZ!OS version to view information about further developments and new functions contained in the FRITZ!OS update. Read this information before starting the update.
- To transfer FRITZ!OS update to the FRITZ!Box, click "Start Firmware Update Now".
The FRITZ!OS update begins and the “Info” LED on the FRITZ!Box starts flashing.

Do not interrupt the power supply to the FRITZ!Box during the FRITZ!OS update!
The FRITZ!OS update is complete when the “Info” LED stops flashing.
8.2 Automatic Search for Updates and Updating FRITZ!OS
With the AVM service “Search for updates automatically” you will always be informed about the latest FRITZ!OS updates for your FRITZ!Box. When a new firmware for your FRITZ!Box is found on the AVM website, you will be notified on the “Overview” page.

New updates are not installed automatically.
Updating FRITZ!OS
- Open the "Overview" page.
When an FRITZ!OS update for your FRITZ!Box is found, you will be notified with the message “The latest firmware is not installed: Update?”.
-
Click the "Update?" link to install the update.
-
In the next window, click "Start Firmware Update Now".
The FRITZ!OS update begins and the “Info” LED on the FRITZ!Box starts flashing.

Do not interrupt the power supply to the FRITZ!Box during the FRITZ!OS update!
The FRITZ!OS update is complete when the “Info” LED stops flashing.
Disabling the Service
The service “Search for updates automatically” is set by default upon delivery of the FRITZ!Box, but you can disable it if desired.
-
Open the FRITZ!Box user interface (see page 26).
-
Select the "Contents" link in the header.
The contents page, or sitemap, of the FRITZ!Box user interface is opened.
- Scroll down to the end of this page and click the “AVM Services” link.
The “AVM Services” page is opened.
- Disable the setting "FRITZ!Box searches for updates periodically" and save your setting with "Apply".
The AVM service “Search for updates automatically” is now disabled.
9 MyFRITZ!: Global Access to the FRITZ!Box
MyFRITZ! is an web service by AVM with which you can access your FRITZ!Box from anywhere in the world over the Internet.
- FRITZ!NAS: When you use MyFRITZ!, FRITZ!NAS is available everywhere. You can access photographs, music and documents located on the storage media connected to the FRITZ!Box.
- Answering machine: With MyFRITZ! you can listen to the messages on the answering machine of the FRITZ!Box from anywhere in the world.
- Call list: With MyFRITZ! you can view the call list in the FRITZ!Box from anywhere in the world.
The MyFRITZ! Principle
- Set up a MyFRITZ! account.
- Register your FRITZ!Box with your MyFRITZ! account.
- From wherever you are, you can access your FRITZ!Box from the www.myfritz.net page.
The MyFRITZ! Account
You need a MyFRITZ! account if you would like to use the MyFRITZ! service. Register your FRITZ!Box with your MyFRITZ! account. Every time the public IP address is changed, the FRITZ!Box now will transmit the changed IP address to the MyFRITZ! account. This ensures that the current, public IP address of the FRITZ!Box is always known. When you log in to MyFRITZ!, you will be forwarded to the FRITZ!Box using the IP address.
Setting Up a MyFRITZ! Account and Registering the FRITZ!Box
- Make sure that the Internet connection is active and that you can access your e-mail.
- You can set up the MyFRITZ! account in the FRITZ!Box user interface in the “Internet / MyFRITZ!” menu.
- Enter the following user data:
- For the MyFRITZ! account, enter your e-mail address and assign a MyFRITZ! password.
- For access to the FRITZ!Box over the Internet, enter a FRITZ!Box Internet password. This password is requested by the FRITZ!Box whenever you want to access the FRITZ!Box via MyFRITZ!.
- You receive an e-mail from MyFRITZ! containing a registration link. If possible, open the e-mail on the computer on which you began to set up the account. Click the registration link.
- You are forwarded to the MyFRITZ! website, where you are prompted to read the terms of use and activate the account.
- Once the account has been activated successfully, you will be redirected to the FRITZ!Box user interface. Now the FRITZ!Box is registered with your MyFRITZ! account.
Using MyFRITZ!
As soon as you have created a MyFRITZ! account and registered your FRITZ!Box with the account, you can begin using the MyFRITZ! service.
- Open the www.myfritz.net website.
- Log in with your e-mail address and your MyFRITZ! password.
- Click the "To My FRITZ!Box" button.
- Enter the Internet password for your FRITZ!Box.
- You will be directed to the MyFRITZ! page of your FRITZ!Box.
- You have access to the storage media enabled for sharing, to the call list, and to the voice messages on the answering machine.
- Click the “FRITZ!Box” button to open the user interface of your FRITZ!Box.
MyFRITZ! in the Home Network
You can also use MyFRITZ! in the FRITZ!Box home network.
- Enter "myfritz.box" in the address field of your browser.
- Enter the Internet password for your FRITZ!Box.
You will be directed to the MyFRITZ! page of your FRITZ!Box. In this case you do not have to log in to MyFRITZ!.
Multiple FRITZ!Boxes
You can register multiple FRITZ!Boxes at one MyFRITZ! account.
- Every FRITZ!Box is registered with the MyFRITZ! account over your user interface. From the “Internet / MyFRITZ!” menu, select the setting “Register the FRITZ!Box at an existing MyFRITZ! account”.
- When you log in to MyFRITZ!, all registered devices will be displayed.
Security with MyFRITZ!
For the following MyFRITZ! activities the https security protocol is used:
- setting up a MyFRITZ! account with myfritz.net
- registration of the FRITZ!Box with the MyFRITZ! account
- accessing the MyFRITZ! page of your FRITZ!Box over myfritz.net
- accessing the user interface of the FRITZ!Box
The FRITZ!Box generates its own https certificate. Because this certificate does not come from a certification authority preset in common browsers, you have to confirm that the connection should be established nevertheless. Firefox and Internet Explorer will remember your confirmation and refrain from showing any further warnings.
http is used for the daily update of the IP address on myfritz.net. The password is never transmitted as clear text.
10 FRITZ!Box as an Internet Router
The FRITZ!Box connects computers in your home network with the Internet. This chapter explains the possibilities offered by using the FRITZ!Box as an Internet router and how to take advantage of them.
10.1 Child Protection: Restricting Internet Access
The child protection feature allows you to define access rules to the Internet for individual computers or Windows users. These access rules may include restrictions of Internet access time, filter lists and a list with blocked network applications.
- Restrict Internet access time: Using the time restriction you can restrict the amount of time the user can surf the web. You can define on which days of the week, at what times of day, and for how long a computer or Windows user is allowed to use the Internet connection.
- Block or permit web sites: you can use filter lists to define which Internet pages are allowed to be accessed and to which access is blocked. For instance, you can block all Internet pages the government has defined as offensive or harmful to minors.
You can create both filter lists, the whitelist and the blacklist. A whitelist contains all Internet pages to which access is allowed. A blacklist contains all Internet pages to which access is blocked.
- Block network applications: You can list network applications for which Internet access should be blocked. For instance, you can block Internet access for file-sharing software.
Child protection can be enabled for each computer individually, regardless of the computer's operating system.
You can also enable child protection individually for all Windows users in all Windows operating systems (Windows 7, Windows Vista and Windows XP). This option is useful if a computer is used by multiple users.
The child protection feature is available only if you have set up the Internet connection in the FRITZ!Box and established an Internet connection. Child protection is not available if you have configured the FRITZ!Box as an IP client. In this case, use the corresponding functions of the router whose Internet connection is being shared.
Setting Up Child Protection in the FRITZ!Box
- Open the FRITZ!Box user interface (see page 26).
- Select the "Internet / Filters" menu.
- Set up child protection. See the Online Help available in the FRITZ!Box user interface for more information.
10.2 Port Forwarding: Making Computers Accessible from the Internet
With default settings in the FRITZ!Box, programs on your computer and LAN cannot be accessed from the Internet. For applications like online games and file sharing software or server services like HTTP, FTP, VPN, terminal and remote access servers you have to make your computer accessible for other Internet users.
Port Forwarding
Using port forwarding, you allow incoming connections from the Internet. By releasing certain ports for incoming connections, you grant controlled access to your computers in your network to other Internet users. Ports serve to assign incoming data packets to the various applications when all applications can be accessed at one IP address only.
The following port forwarding methods are possible in the FRITZ!Box:
| PING IPv4: | The FRITZ!Box responds to ping inquiries from the Internet addressed to the IPv4 address of the FRITZ!Box. |
| IPv6:The FRITZ!Box responds to ping inquiries from the Internet addressed to the IPv6 address of the FRITZ!Box. Additionally, you can set up PING6 port forwarding rules for each computer in the home network since each computer has its own globally valid IPv6 address. | |
| TCP | IPv4: |
| UDP | Within IPv4 networks you can open the FRITZ!Box firewall for the protocols TCP and UDP when entering the port range. One port can be opened for exactly one computer. |
| IPv6:Within IPv6 networks you can open the FRITZ!Box firewall for the protocols TCP and UDP when entering the port range. One port can be opened for each computer in the network. | |
| ESP | IPv4: |
| GRE | Within IPv4 networks you can open the firewall for the two protocols ESP and GRE which do not use ports. |
| Exposed Host (Open firewall completely) | IPv4:Within IPv4 networks you can open the firewall for one computer completely. This computer is then no longer protected by the FRITZ!Box firewall. If individual ports are already open for other computers, then data packets for these ports are not forwarded to the exposed host but to the other computer instead. |
| IPv6:Within IPv6 networks you can open the firewall for each computer completely. These computers are then no longer protected by the FRITZ!Box firewall. |
Setting Up Port Forwarding in the FRITZ!Box
- IPv4: Port forwarding for IPv4 is set up in the “Internet / Permit Access” menu, on the “Port Forwarding” page.
- IPv6: Enable the advanced view. Port forwarding for IPv6 is also set up in the “Internet / Permit Access” menu, on the “IPv6” page.
Determining the IPv4 Address for Accessing the FRITZ!Box
If you have enabled ports for forwarding in the FRITZ!Box, other Internet users can access your computers at the IP address assigned to your FRITZ!Box by the Internet service provider. This is a public IPv4 address.
Here is how to determine the public IPv4 address of the FRITZ!Box:
- Open any Internet page in order to establish an Internet connection.
- Open the FRITZ!Box user interface and enable the advanced view in the user interface.
- The FRITZ!Box's public IPv4 address is displayed on the "Overview" page in the "Connections" area.

Every time the Internet connection is interrupted the Internet service provider re-assigns the IP address. The IP address may change in the process. Therefore it is a good idea to use MyFRITZ! or dynamic DNS so that the IP address can always be reached under the same name. For more information about MyFRITZ!, see the section MyFRITZ!: Global Access to the FRITZ!Box on page 38. For more information about dynamic DNS, see the section Dynamic DNS: Name Instead of IP Address on page 45.
10.3 Dynamic DNS: Name Instead of IP Address
Dynamic DNS is an Internet service that makes it possible for the FRITZ!Box to remain accessible from the Internet at all times under a fixed name, even though the public IP address changes.
Dynamic DNS can be used as an alternative to MyFRITZ!. Both services can be used in parallel.
You must register with a dynamic DNS provider to use this service. When you register, you agree on the fixed name (domain name) at which your FRITZ!Box should be accessible from the Internet. You also define a user name and password.
Every time the IP address changes, the FRITZ!Box transmits the new IP address to the dynamic DNS provider in the form of an update request. Then the domain name is assigned to the current IP address by the dynamic DNS provider.
Setting Up Dynamic DNS in the FRITZ!Box
- Open the FRITZ!Box user interface (see page 26).
- Enable the advanced view.
- Select the "Internet / Permit Access" menu.
- Select the “Dynamic DNS” page and set up dynamic DNS. Consult the Online Help available in the FRITZ!Box user interface for more information.
10.4 Remote Access over HTTPS
With this function it is possible to access the user interface of the FRITZ!Box from another location. This allows you to configure settings in the FRITZ!Box or perform a FRITZ!OS update using a computer that is not in your own network (LAN or WLAN).
Setting Up Remote Access over HTTPS in the FRITZ!Box
- Open the FRITZ!Box user interface (see page 26).
- Enable the advanced view.
-
Select the "Internet / Permit Access" menu.
-
Select the “Remote Access” page and set up dynamic DNS. For more information, see the Online Help.
10.5 Prioritization: Right of Way for Internet Access
Prioritization is a function you can use to specify that network applications and network devices be treated with higher or lower priority when they access the Internet connection. For example, you may wish to ensure that applications like IPTV and video on demand are always treated with higher priority than other applications. You can also specify that file-sharing applications like eMule and BitTorrent always have to wait behind online games.
Categories for Prioritization
There are three categories for prioritization: “Real-time applications”, “Prioritized applications” and “Background applications”. The categories are explained below.
Network applications and network devices are assigned to the categories using rules.
Real-time Applications
This category is suitable for applications with high demands on transmission speed and reaction times (for example, IPTV or video on demand).
- Network applications of this category always have priority over other applications accessing the Internet at the same time.
- When the Internet connection is working at full capacity, the network packets of the applications of this category will always be sent first. In this case data from network applications assigned to other categories, like “Prioritized applications”, will be transmitted later.
- If multiple network applications are assigned to this category, then they must share the available capacity.
- Whenever Internet telephony is included in this category, this application always has the highest priority, even over other real-time applications.
Prioritized Applications
This category is suitable for applications that require a fast reaction time (for example, company access, terminal applications, games).
- For network applications prioritized in this category, 90% of the FRITZ!Box's upload bandwidth is available, as long as no application from the “Real-time applications” category requires bandwidth. The remaining 10% of the upload bandwidth is available for applications that are prioritized in lower categories or not prioritized at all.
- If multiple network applications are assigned to the “Prioritized applications” category, then they must share the available capacity.
Background Applications
This category is suitable for applications that do not require any high transmission speed and which are not time-critical (for example, peer-to-peer services or automatic updates).
- Network applications assigned to this category are always treated with the lowest priority when the Internet connection is working at full capacity. So whenever an application from a different category or a non-prioritized application requires the entire bandwidth, all background applications must wait until bandwidth capacity becomes available again.
- If no other network applications are active, then the background applications receive the entire bandwidth.
Prioritization Method in the FRITZ!Box
The following algorithm is used in the FRITZ!Box to send data packets according to their prioritization:
- Change in the order in which packets are sent to the Internet (upstream direction)
The order of the packets the FRITZ!Box receives from the Internet (downstream direction) cannot be changed.
- Discard low-priority packets in order to ensure the transmission of higher-priority packets. This algorithm is used whenever more packets are supposed to be sent to the Internet than the upstream transmission rate of the Internet connection allows.
- As long as no packets are being sent from higher-priority applications, the full transmission rate of the Internet connection is available for low-priority packets.
Setting Up Prioritization in the FRITZ!Box
- Enable the advanced view.
- Prioritization is set up in the “Internet / Filters / Prioritization” menu.
10.6 VPN: Remote Access to the Home Network
Via VPN (see glossary) a secure remote access to the network of the FRITZ!Box can be established. The VPN solution for the FRITZ!Box features the following:
- The VPN solution for the FRITZ!Box is based on the IPSec standard.
- Computer-LAN coupling and LAN-LAN coupling: VPN connections can be set up for individual remote computers or even for remote networks.
- A maximum of eight simultaneous active VPN connections is supported.
- The configuration files for the VPN connections are created using a separate program. The program is provided free of charge and can be downloaded from the AVM web site.
- A free VPN client for individual computers can also be downloaded from the AVM web site.
The AVM web site offers a Service Portal which presents comprehensive information on VPN in general and in connection with the FRITZ!Box. Visit this portal to obtain more detailed information.
www.avm.de/en/vpn
Setting Up VPN in the FRITZ!Box
- Open the FRITZ!Box user interface.
- Enable the advanced view.
- Select the "Internet / Permit Access" menu.
- Select the "VPN" page.
See the Online Help of the FRITZ!Box to set up VPN.
Supplementary Software for VPN
All of the information required for a VPN is saved in a configuration file. The terminals involved in any VPN must receive this file.
Individual computers that are networked over a VPN require a VPN client.
- “Configure FRITZ!Box VPN Connection” Wizard
AVM provides the “Configure FRITZ!Box VPN” software for creating configuration files. This program is a Wizard that takes you step by step through the VPN configuration. All of the necessary VPN settings, like the encryption method and access rules, are set automatically. The resulting configuration files must be imported to the respective terminals of the VPN tunnel. At the terminal with the FRITZ!Box the configuration file is then imported to the FRITZ!Box. The VPN parameters in these files can be adjusted manually to connect to products by other manufacturers.
- The “FRITZ!VPN” VPN Client
AVM offers the “FRITZ!VPN” software as a VPN client.
Both the Wizard and the client can be downloaded free of charge from the VPN Service Portal on the AVM web site:
www.avm.de/en/vpn
10.7 DNS Server: Freely Selectable
DNS servers are preset in the FRITZ!Box for IPv4 and IPv6.
These are the DNS servers assigned by the Internet service provider.
For both IPv4 and IPv6, the preset DNS server can be replaced by a free DNS server. Free DNS servers include, for instance, OpenDNS and Google DNS.
Here is how to change the DNS server entry:
- Open the FRITZ!Box user interface.
- Enable the advanced view.
- In the “Internet / Account Information” menu, select the “DNS Server” page.
- Change the settings for the DNS servers.

The “DNSv6” page is displayed only if you enabled IPv6 support for the FRITZ!Box on the “IPv6” page.
10.8 DNSSEC: Security for DNS Queries
DNSSEC is short for Domain Name System Security Extensions. As the name says, this is an extension of DNS, the domain name system.
DNSSEC ensures that both the DNS server and the information returned by the DNS server are authentic, or genuine.
Security with DNSSEC
When a home user surfs the web, she or he sends queries to the Internet by entering URLs in the address line of the browser. A URL is the name of a web site that is easy to remember, such as www.avm.de/en. Every query is sent to the DNS server first. The DNS server resolves the URL into the corresponding IP address. There is one unambiguous IP address for every URL.
The home user relies on the authenticity of the IP address returned by the DNS server. Authentic means that the response is the IP address of the desired web site, and not a faked IP address that leads to a fake web site. DNSSEC can ensure that the returned addresses are authentic.
Support with the FRITZ!Box
The FRITZ!Box supports DNSSEC queries over UDP.
The FRITZ!Box has a DNS proxy. The computers in the home network use the FRITZ!Box as a DNS server. The FRITZ!Box forwards DNSSEC queries from the home network to the Internet. The FRITZ!Box forwards DNSSEC responses from the Internet to the home network. The DNSSEC information must be validated on the computer in the home network. For this DNSSEC must be supported in the operating system.
10.9 IPv6: The New Internet Protocol
IPv6 stands for Internet protocol version 6 and is the successor to IPv4.
The FRITZ!Box supports the new IPv6 web protocol and can establish IPv6 connections:
- IPv6 support can be switched on in the FRITZ!Box user interface.
- For simultaneous use of IPv6 and IPv4, the FRITZ!Box supports dual-stack and dual-stack lite. This means that the FRITZ!Box can communicate with both IPv4 and IPv6 domains in the Internet.
- The FRITZ!Box supports native IPv6 and IPv6 with a tunnel protocol. Native IPv6 means that your Internet service provider supports IPv6 directly on your line.
IPv6-capable Services in the Home Network
• FRITZ!NAS access via SMB or FTP/FTPS
- access to the user interface with http or https over IPv6
- The DNS resolver of the FRITZ!Box supports queries for IPv6 addresses (AAAA records) and can query the upstream DNS resolver of the Internet service pInternet service providerrovider over IPv6.
- The globally valid prefix is distributed via router advertisement.
- For guest access to the WLAN, the home network and WLAN guests are separated by IPv6 subnetworks.
• UPnP, UPnP AV media server
• automatic provisioning (TR-064)
IPv6-capable Services in the Internet
• FRITZ!NAS access via FTPS
• completely closed firewall to protect against unwanted data from the Internet (Stateful Inspection Firewall)
• automatic provisioning (TR-069)
• time synchronization over NTP (Network Time Protocol)
- remote access via https
• dynamic DNS via dyndns.org and namemaster.de
Setting Up IPv6 in the FRITZ!Box
- Open the FRITZ!Box user interface.
- Enable the advanced view.
- Then select the "Internet / Account Information" menu.
- Select the “IPv6” page and set up IPv6 in the FRITZ!Box. Consult the Online Help of the FRITZ!Box user interface for more information.
Setting Up IPv6 on the Computer
You can establish connections in the IPv6 range of the Internet only if IPv6 is installed and enabled on the computers in your home network.
- IPv6 is already installed and enabled in the Windows 7 and Windows Vista operating systems.
- IPv6 is not installed and enabled in standard Windows XP. You must install and enable IPv6 in order to use it. The IPv6 installation requires Service Pack 2 for Windows XP.
- IPv6 has been available in the Mac OS X operating systems since Mac OS 10.
10.10 Mobile Network: Replace Faulty DSL
Internet access over the mobile telephone network can be set up so that the mobile telephone connection is established automatically whenever the DSL connection fails. This guarantees Internet access even when the DSL connection is missing. A USB modem for mobile Internet access (UMTS/HSPA) and a SIM card from a mobile communications provider are required for this. The FRITZ!Box supports UMTS/HSPA modems from various manufacturers.
Here is how to set up the mobile telephone connection as a substitute upon DSL failure:
- Insert the USB modem in the USB port on the FRITZ!Box.
- Open the FRITZ!Box user interface (see page 26).
In the “Internet” menu, the sub-menu “Mobile Telephone Network” is displayed.

The “Mobile Telephone Network” menu is not available until the UMTS/HSPA modem has been connected to the USB port of the FRITZ!Box.
-
Select the setting "Automatically enable the mobile connection when the DSL connection is disrupted".
-
Configure the settings for your Internet connection over the mobile communications network. For more information, see the Online Help of the FRITZ!Box.
Access to the Internet is now guaranteed, even when the DSL connection fails.
As soon as the DSL connection is stable and available for at least 30 minutes, the connection will be switched back to the DSL connection.
11 FRITZ!Box as a WLAN Base Station
The FRITZ!Box is a WLAN base station for WLAN devices like notebooks, tablets or smartphones. The FRITZ!Box can establish WLAN connections compliant with the fast WLAN N standard in two different frequency bands at the same time. The FRITZ!Box is preconfigured with an encryption method from today's safest method WPA2. This encryption method is supported by most of the latest WLAN devices. The FRITZ!Box supports wireless LAN convenience functions like guest access, night service and WPS Quick Connection.
11.1 Connecting WLAN Devices Securely with the FRITZ!Box
In a WLAN radio network security is of the utmost importance. This is why WLAN connections between the FRITZ!Box and your wireless devices are encrypted. For encryption the FRITZ!Box and your wireless devices must use the same encryption method. The FRITZ!Box is preconfigured with an encryption method that combines today's safest methods WPA and WPA2. These encryption methods are supported by most of the latest wireless devices.
If you would like to use wireless devices that do not support WPA2 or WPA, you can switch encryption in the FRITZ!Box to the older, less secure WEP method. You can also establish non-encrypted wireless LAN connections. However, if at all possible we recommend always establishing WPA2 wireless LAN connections.
WLAN devices can be connected with the FRITZ!Box automatically or manually. A particularly simple and secure automatic method is WPS, with which a WLAN connection can be established at the touch of a button. For manual WLAN connections with the FRITZ!Box use the WLAN software of your WLAN device or the WLAN program on your computer.
Connecting WLAN Devices Automatically (WPS)
WLAN devices that support the fast connection method WPS can be connected with the FRITZ!Box automatically.
-
Start the WPS function of your WLAN device. Consult the documentation of the WLAN device to find out how to start WPS.
-
Press the WLAN button on the FRITZ!Box until the "WLAN" LED begins flashing. You have 2 minutes for this task.
- Your WLAN device and the FRITZ!Box now establish a secure WLAN connection automatically. The FRITZ!Box "WLAN" LED stops flashing and remains on.
With this, the WLAN connection is established. Your WLAN device is integrated into your home network and can use the Internet connection of the FRITZ!Box.
Connecting WLAN Devices Manually
You can connect WLAN devices with the FRITZ!Box manually. WLAN devices like notebooks, tablets and smartphones use the WLAN software of their own operating system for this connection. A WLAN adapter at the USB port of your computer can use the WLAN software of your computer or a WLAN program of your own. No matter what program is used to establish the WLAN connection, the principle is the same: the WLAN software searches for a WLAN radio network in the vicinity and, after authorization with a WLAN key, enables the WLAN connection between the FRITZ!Box and your WLAN device.
- Make sure that the WLAN function of the FRITZ!Box is enabled and the "WLAN" LED is on. If "WLAN" is not on, press the "WLAN" button briefly.
- Start the WLAN software of your WLAN device. Consult the documentation of your WLAN device for instructions.
- Search for the WLAN radio network of your FRITZ!Box. Upon delivery this network is called "FRITZ!Box WLAN 3370".
- Enter the WLAN key of the FRITZ!Box.
With this, the WLAN connection is established. Your WLAN device is integrated into your home network and can use the Internet connection of the FRITZ!Box.
11.2 Connecting WLAN Devices with the FRITZ!Box Guest Access
With the FRITZ!Box you can provide your guests with an Internet connection of their own. At this guest access they can surf the web with their own smartphones or tablets, but cannot access the contents of your home network.
You can set up a guest access if you have connected the FRITZ!Box directly to your DSL line. If the FRITZ!Box is connected in another way, for instance to a cable modem, you cannot set up guest access.
- Open the FRITZ!Box user interface.
- Make sure that the wireless radio network (WLAN) is enabled in the “WLAN / Radio Network” menu.
- Select the “WLAN / Guest Access” menu and enable guest access.
- Assign a name for the guest wireless network (SSID) and enter a WLAN key at least 20 characters long under “Security”.
This concludes the setup of your guest access. Now guests can register their WLAN devices with the FRITZ!Box.
-
Your guest starts the WLAN software of his WLAN device, searches for your guest wireless network and enters the WLAN key you specified for authorization.
-
The WLAN connection will be established.
Your guest's WLAN device can use the Internet connection of the FRITZ!Box, but has no access to your home network. For more information, see the Online Help.
11.3 Switching the WLAN Radio Network On and Off by Schedule
You can switch the WLAN radio network of the FRITZ!Box automatically according to a schedule. This function is called “night service” and reduces the power consumption of the FRITZ!Box by completely turning off the WLAN module. The FRITZ!Box Night Service also affects any other FRITZ! products connected in the network (FRITZ!WLAN Repeater, for instance) by switching the WLAN transmission of these devices on and off as well.
- Open the FRITZ!Box user interface.
- Open the "System / Night Service" menu.
- Enable the schedule for the WLAN radio network.
With the options “Switch WLAN off daily” and “Switch WLAN off according to schedule” you define the intervals of the schedule. You can also select the option “The radio network cannot be switched off until no more WLAN devices are active”.
For more information on these settings, see the Online Help.
Switching WLAN On and Off Manually
You can switch the wireless radio network of the FRITZ!Box on and off at any time, even when the device is hibernating.
- Press the WLAN button on the FRITZ!Box briefly
11.4 Enlarging the WLAN Radio Network
The range of a WLAN radio network is not specified. It depends on
- the WLAN devices you are using for your WLAN connections
• interference in the vicinity of your WLAN radio network - the structural conditions where you operate the WLAN radio network
- the number of WLAN devices in the vicinity of your FRITZ!Box that work in the same frequency range
You can extend the range of your WLAN radio network with a WLAN repeater.
Or you can set up a second WLAN router, for instance a second FRITZ!Box as a WDS repeater.
Expanding a WLAN Radio Network with a WLAN Repeater
You can expanding your WLAN radio network with a WLAN Repeater. In combination with the FRITZ!Box the AVM FRITZ!WLAN Repeater are especially suitable. All models of the FRITZ!WLAN Repeater series can be integrated into your WLAN radio network and your home network by WPS Quick Connection. Find out more in the Internet at:
www.avm.de/en/Produkte/FRITZ_WLAN/FRITZ_WLAN_Repeater_N_G
Expanding a WLAN Radio Network with a WDS Repeater
You can expand the WLAN radio network of your FRITZ!Box with what is called a WDS repeater. A WDS repeater can be a FRITZ!Box or any WLAN router you already have that can be configured as a WDS repeater to expand your WLAN radio network.
See the documentation of your device to find out whether your existing WLAN router supports the WDS function and how to configure it as a WDS repeater. Your FRITZ!Box or another FRITZ!Box model can be configured as a WDS repeater by working through the following steps:
- Open the FRITZ!Box user interface.
- Select "View: Advanced".
- Select the "WLAN / WDS" menu and follow the instructions displayed on the screen.
See the Online Help of the FRITZ!Box for more information.

The wireless LAN connection between your FRITZ!Box and a FRITZ!Box in WDS operation can be encrypted by WPA2. The wireless LAN connection between your FRITZ!Box and another wireless LAN router is only possible with less secure WEP encryption.
11.5 WLAN—Getting Technical
A wireless LAN radio network is based on standards defined by the Institute of Electrical and Electronic Engineers (IEEE). These standards describe, for instance, the transmission speeds, encryption methods and frequencies used in a wireless LAN network.
WLAN Standards
The Institute of Electrical and Electronic Engineers (IEEE) defined the WLAN standards IEEE 802.11a, IEEE 802.11b, IEEE 802.11g, IEEE 802.11n and IEEE 802.11i for WLAN radio networks.
Standards for the Throughput Rate
The throughputs listed differentiate between gross and net transmission rates. The net speed describes the transmission rate of the user data.
The FRITZ!Box supports your choice of the standards IEEE 802.11a, IEEE 802.11b, IEEE 802.11g and IEEE 802.11n. WLAN devices based on one or more of the standards listed can be used for WLAN connections with the FRITZ!Box.
| Standard Frequency Band Gross Data Throughput up to | Net Data Throughput up to |
| 802.11b 2.4 GHz 11 Mbit/s 5 Mbit/s | |
| 802.11g 2.4 GHz 54 Mbit/s 25 Mbit/s | |
| 802.11a 5 GHz 54 Mbit/s 25 Mbit/s | |
| 802.11n 2.4 / 5 GHz 450 Mbit/s | 200 Mbit/s |
The standards are intended for different frequency bands.
IEEE 802.11a
Because this standard works exclusively in the seldom used 5-GHz range, it offers the opportunity to transmit data relatively free of interference from external influences. WLAN devices that support 802.11a are much less common than devices that work in accordance with the 802.11b/g standard.
IEEE 802.11b
With a maximum throughput rate of 11 Mbit/s, this is the oldest WLAN standard. Older WLAN devices of the first generation can communicate with the FRITZ!Box using 802.11b. However, if the WLAN device supports newer standards such as 802.11g, the latest standard should be used.
IEEE 802.11g
This is currently the most common WLAN standard. It communicates with a maximum of 54 Mbit/s gross in the 2.4-GHz frequency range (ISM) and guarantees broad compatibility with many WLAN devices.
However, due to heavy use of the 2.4-GHz range, interference is more common than in the less-used 5-GHz range.
IEEE 802.11n
This standard allows for high throughput rates and ranges. The FRITZ!Box supports 802.11n in the 2.4-GHz frequency band, or, if desired, also in the 5-GHz frequency band. Modulation processes and antenna techniques like MIMO (Multiple Input, Multiple Output) use whichever frequency band is available more effectively than the older standards.

The use of the 802.11n standard—and thus the availability of higher throughput rates—is possible only if the WLAN connection is secured using the WPA2 security mechanism (AES-CCMP).
Thanks to compatibility with the 802.11g standard, you can also continue to use older WLAN devices.
Setting the Right Standard in the FRITZ!Box
The throughput rate that can be achieved in your WLAN radio network depends on the WLAN standards used by the integrated WLAN devices. These WLAN standards must also be set in the FRITZ!Box. Proceed as follows to check which WLAN standards are set and change them if needed:
- Open the FRITZ!Box user interface.
- Enable the advanced view.
- Open the “WLAN / Radio Channel” menu and select “Adjust radio channel settings” to make the desired changes.

Note the following for the configuration of this setting:
- In order to communicate with each other, the FRITZ!Box and all WLAN devices must work in the same frequency band.
- The standard you configure in the FRITZ!Box must be compatible with the standards of all WLAN devices used in the WLAN.
Make a note of which standards the WLAN devices in your network are compatible with and then adjust the FRITZ!Box settings according to the following information:
- Your radio network integrates only WLAN devices that are compatible with one or both of the following standards:
802.11n
802.11g
Set the following mode in the FRITZ!Box:
Mode: 802.11n+g
The 2.4-GHz frequency band will be used.
- Your radio network integrates only WLAN devices that are compatible with one or both of the following standards:
802.11b
802.11g
Set the following mode in the FRITZ!Box:
Mode: 802.11b+g
The 2.4-GHz frequency band will be used.
- Your radio network integrates only WLAN devices that are compatible with one or several of the following standards:
802.11n
802.11g
802.11b
Set the following mode in the FRITZ!Box:
Mode: 802.11n+g+b
The 2.4-GHz frequency band will be used.
- Your radio network integrates only WLAN devices that are compatible with one or both of the following standards:
802.11n
802.11a
Set the following mode in the FRITZ!Box:
Mode: 802.11n+a
The 5-GHz frequency band will be used.
The Standard for Security
IEEE 802.11i
The WPA2 security mechanism is defined in the IEEE 802.11i standard. WPA2 is an extension of the familiar security mechanism WPA (Wi-Fi Protected Access).
The main feature of the extension of WPA to WPA2 is the AES-CCMP encryption process.
| Mechanism Encryption | |
| WPA TKIP (Temporary Key Integrity Protocol) | |
| WPA2 TKIP | AES-CCMPbased on the extremely secure AES (Advanced Encryption Standard) procedure. CCMP (Counter Mode with CBC-MAC Protocol) defines how the AES procedure is applied to WLAN packets. |
FRITZ!Box supports the AES encryption procedure as part of the WPA2 mechanism, and the TKIP encryption procedure as part of the WPA mechanism. This means that the FRITZ!Box can be used in combination with any WLAN devices that also support WPA2 with AES or WPA with TKIP.
Frequency Ranges
WLAN uses the frequency ranges at 2.4 GHz and 5 GHz as its transmission range.
With the FRITZ!Box you can establish WLAN connections in either the 2.4-GHz or the 5-GHz frequency range.
2.4-GHz Frequency Band
In the 2.4-GHz frequency band WLAN works in the same range as Bluetooth, microwave devices and various other devices like radio-controlled toys, garage-door openers and video bridges. This means that interference may occur within WLANs operated in the vicinity of such devices. Generally this has adverse effects on the transmission rate, including aborted connections.
In the 2.4-GHz frequency range the European regulation authorities have designated 13 channels for WLAN.
A channel can have a bandwidth of 20 MHz (throughput of up to 216 Mbit/s) or 40 MHz (throughput of up to 450 Mbit/s).
Channels located directly next to each other in the 2.4-GHz band may overlap and result in mutual interference. For instance, if several WLANs are operated close to each other in the 2.4-GHz frequency range with a bandwidth of 20 MHz, a distance of at least five channels should be left empty between each two channels used. This means that if channel 1 is selected for one WLAN, the channels 6 through 13 can be selected for a second WLAN. This maintains the minimum distance between channels.
Should interference in a WLAN persist, the first step should be to select a different channel.
WLAN Autochannel
With the WLAN autochannel function, the FRITZ!Box automatically searches for the channel subject to the least interference. This process takes into consideration interference from radio networks in the vicinity (WLAN base stations) and potential sources of interference (for instance video bridges, baby monitors, microwave ovens). Should problems with interference persist despite this function, try to identify the source of interference and switch it off manually.
Additional tips on interference in the WLAN radio network are presented in the section Ruling Out Interference from Other Wireless Networks from page 101.
5-GHz Frequency Band
The FRITZ!Box can operate in the 5-GHz frequency band as an alternative. This frequency range is used much less often than the most common 2.4-GHz frequency range.
In the 5-GHz frequency band the FRITZ!Box supports automatic channel switching by DFS (Dynamic Frequency Selection). DFS ensures that the channels from 52 to 140 are kept free for higher-priority users, like weather radar systems. If you are operating your FRITZ!Box in one of these channels, it
monitors the selected channel periodically for higher-priority users, and, if necessary, switches to a different channel. Note that the FRITZ!Box waits up to ten minutes, as legally required, before occupying a free channel. During this period you cannot register any WLAN devices. The WLAN connection is then established automatically. For more information, see the section Avoiding WLAN Channels with DFS on page 101.
A prerequisite for use of the 5-GHz frequency band is that WLAN devices used in the network support this frequency range in accordance with the IEEE 802.11a or IEEE 8002.11n standard.
2.4 GHz or 5 GHz
The FRITZ!Box works in the wireless network either in the 2.4-GHz range or in the 5-GHz range, but not parallel in both frequency ranges at the same time.
Bandwidth
In both frequency ranges you can select between channel bandwidths of 20 MHz or 40 MHz (exception: channel 140 in the 5-GHz frequency band). The FRITZ!Box initially attempts to select a channel with 40 MHz bandwidth. If this is not possible due to interference or channels already being used by other WLANs in the vicinity, the FRITZ!Box automatically switches temporarily to a bandwidth of 20 MHz. Greater bandwidth provides for higher data throughput:
| Bandwidth (MHz) Maximum Data Throughput (Mbit/s) | |
| 20 216 | |
| 40 450 | |
Increasing bandwidths also increases the probability of interference by wireless networks in the vicinity. Large bandwidths reduce the frequency range available to other wireless networks in the vicinity.
Allocation of the WLAN Channels in the 2.4-GHz Range
| Channel Frequency (GHz) Channel Frequency (GHz) | ||||
| 1 | 2 | . | 4 | 1 2 |
| 2 | 2 | . | 4 | 1 7 |
| 3 2.422 10 | 2.457 | |||
| 4 2.427 11 | 2.462 | |||
| 5 2.432 12 | 2.467 | |||
| 6 2.437 13 | 2.472 | |||
| 7 | 2 | . | 4 | 4 2 |
Allocation of the WLAN Channels in the 5-GHz Range
| Channel | Frequency (GHz) | Channel | Frequency (GHz) |
| 36 | 5.18 | 108 | 5.54 |
| 40 | 5.20 | 112 | 5.56 |
| 44 | 5.22 | 116 | 5.58 |
| 48 | 5.24 | 120 | 5.60 |
| 52 | 5.26 | 124 | 5.62 |
| 56 | 5.28 | 128 | 5.64 |
| 60 | 5.30 | 132 | 5.66 |
| 64 | 5.32 | 136 | 5.68 |
| 100 | 5.50 | 140 | 5.70 (20 MHz band-width only) |
| 104 | 5.52 |
12 The FRITZ!Box Home Network
The FRITZ!Box connects your network devices, USB devices and storage devices in what we call a FRITZ!Box home network. In the home network the FRITZ!Box makes data like images, music and videos available to all connected users and allows them to share a printer.
Network Devices
• Network devices include, for instance, computers, game consoles and smartphones that are connected with the FRITZ!Box via a network cable connection or via WLAN.
- All network devices can access each other's folders released for sharing.
- The USB devices connected to the FRITZ!Box can be accessed by all network devices at the same time, and available memory can be shared.
If you would like to learn more about the possibilities of network devices in your FRITZ!Box home network, continue reading in the chapter Network Devices in the FRITZ!Box Home Network from page 70.
USB Devices
USB devices include, for instance, printers, multi-function devices, and flash memory on the USB ports of the FRITZ!Box.
Connected USB devices can be used jointly and simultaneously by all network devices of your FRITZ!Box home network.
For more information about how to best configure USB devices in your home network and how to use them securely, see the chapter USB Devices in the FRITZ!Box Home Network from page 81.
Storage (NAS)
The memory of the FRITZ!Box includes storage media like flash memory or hard drives connected to the USB ports of the FRITZ!Box.
What is more, the FRITZ!Box is equipped with integrated internal memory and can manage online storage configured on the server of your telecommunications provider.
For more information about how to access the memory in your FRITZ!Box home network safely and conveniently, see the chapter Accessing USB Memory from page 83.
FRITZ!Box Name
You can assign an individual name for your FRITZ!Box in the FRITZ!Box user interface. The name is set up under “Home Network / FRITZ!Box Name” and appears in the following areas of your home network display:
• name of the WLAN radio network (SSID)
• name of the guest radio network (SSID)
• name of the working group released for home network sharing
• name of the media server
• name of the DECT base station
- push service sender name
13 Network Devices in the FRITZ!Box Home Network
All network devices connected with the FRITZ!Box comprise a network. Network devices include, for instance, computers, game consoles and smartphones. The devices can be connected with the FRITZ!Box by cable or wirelessly. This chapter describes the network settings in the FRITZ!Box and how you can change them. You will also learn how you can change the IP settings for the computer in the most common operating systems.
13.1 Network Settings in the FRITZ!Box
The FRITZ!Box is delivered with preconfigured network settings. According to these settings, all network devices connected with the FRITZ!Box are located in a single network.
The network settings can be changed and adapted to your conditions and needs. But you should do so only if you are well versed in networking technology.

The Glossary (page 122) explains concepts and terminology having to do with IP networks.
Network Overview
The FRITZ!Box user interface shows an overview with all of the devices and users connected with the FRITZ!Box.
The network overview “Devices and Users” is found in the menu “Home Network / Network”.
- For each user and each network device, you find an entry in the network overview. The columns have the following meanings:
- If you use FRITZ!Powerline devices in your network, then the FRITZ!Powerline devices are entered in the network overview along with the network devices connected to the FRITZ!Powerline devices.
- The network overview is divided into the areas “Active Connections”, “Guest Network” and “Idle Connections”.
For each user and each network device, you find an entry in the network overview. The columns have the following meanings:
| Icon A green LED | before the device name indicates that a device is actively connected with the FRITZ!Box, but not using the Internet connection at this time. A green-blue globe indicates that the device is currently using the Internet connection. |
| Name This column | n displays the name under which the user or the network device is known to the FRITZ!Box. The names of network devices can be changed by clicking the button to edit the entry. |
| IP Address For n | network devices, also displayed is the IP address with which the device is integrated into the FRITZ!Box network. |
| Connection The WLAN icon is displayed for wireless connec-tions. | |
| Properties This c | column indicates whether port forwarding or child protection is enabled for the respective user or network device. |
 | Button for editing the entryThe button opens the entry in editing mode. This view displays information about the network de-vice, for instance on child protection or port for-warding settings. The name of the device in the FRITZ!Box can be changed here. |
 | Button for deleting the entryUsers or network devices that do not have an ac-tive connection to the FRITZ!Box can be deleted from the network overview by clicking this button. |
Accessing Network Devices by Mouse Click
Network devices that can be reached over the http protocol can be accessed within the home network by the click of a mouse. Clicking the device name opens the user interface of the http application.
Always Assigning the Same IP Address
The editing mode for network devices includes the setting "Always assign this network device the same IP address".
When this setting is enabled for a network device, the DHCP server of the FRITZ!Box will always assign the same IP address to this device each time the connection is established.
Starting the Computer—Wake on LAN
The Wake on LAN function of computers can be enabled in the editing mode for network devices. The computers must support wake on LAN and be connected with the FRITZ!Box with a network cable. The wake on LAN function is also available when the devices are connected via FRITZ!Powerline devices.
Wake on LAN is a function that allows a computer in the local network to be started when it is accessed from the Internet. For instance, you can access a computer using remote maintenance software, without wasting electricity by keeping the computer switched on permanently. The computer must be in standby operation.
The FRITZ!Box supports Wake on LAN both for IPv4 and for IPv6 connections.
- The “Start Computer” Button
You can start the computer each time it is accessed over the Internet by clicking the “Start Computer” button.
- Starting Automatically
To do this, enable the setting “Start this computer automatically as soon as it is accessed from the Internet”. When the computer is accessed from the Internet, it is started automatically.
IPv4 Settings in the FRITZ!Box
The IPv4 settings of the FRITZ!Box are preset upon delivery with the following values:
| Factory Settings | |
| IPv4 address 192.168.178.1 | |
| Subnet mask 255.255.255.0 | |
| DHCP server enabled | |
The IP address and the corresponding subnet mask yield the following values:
| Network address of the subnet 192.1 | 68.178.0 |
| Entire IPv4 address range for the computers | 192.168.178.2 - 192168178254 |
The following IPv4 addresses cannot be assigned because they are reserved for certain purposes:
| This IP address is used by the FRITZ!Box itself | 192.168.178.1 |
| This IP address is the broadcast address used to send messages into the network | 192168178255 |
IP Address in Case of Emergency
The FRITZ!Box has a fixed IP address that cannot be changed. The FRITZ!Box always can be reached at this IP address.
| Fixed IP address 169.254.1.1 |
For instructions about how to handle fixed IP addresses, see the section Opening the User Interface Using the Fixed IP Address from page 97.
IPv4 Address in the FRITZ!Box
Upon delivery the FRITZ!Box is assigned the following IPv4 address:
192.168.178.1
If you would like to change the IPv4 address, please read through the following sections.
When Does It Make Sense to Change the IPv4 Address?
You should change the IPv4 address of the FRITZ!Box if the following apply to your network:
- You have an existing local IPv4 network, one subnet with several computers.
- Fixed IPv4 addresses are registered in the network settings of the computer, and you do not want to or are not permitted to change these addresses.
- You want to connect the FRITZ!Box to the local IPv4 network in order to make the FRITZ!Box features available to all of the computers in the IPv4 network.
Reserved IP Addresses
The entire IP network 192.168.180.0 in the FRITZ!Box is reserved for internal purposes.
IPv4 addresses from this network may not be assigned to the FRITZ!Box.
DHCP Server for IPv4
The FRITZ!Box is equipped with its own DHCP server for the IPv4 network. The DHCP server is enabled by default in the factory settings. The following range of IP addresses is reserved for the DHCP server in the factory settings:
192.168.178.20 - 192.168.178.200
This IP address can be changed as needed.
Every time the operating system on a computer connected with FRITZ!Box is started, the DHCP server assigns it an IPv4 address from the IP address range of the DHCP server.

Only one DHCP server may be active within any network.
Assigning the IP addresses via the DHCP server ensures that all of the computers connected with the FRITZ!Box are located in the same IP network.

The computers can receive their IPv4 addresses from the DHCP server only if the setting “Obtain an IPv4 address automatically” is enabled in the their IP settings. For more information, see the section Obtaining an IP Address Automatically from page 78.
Fixed IPv4 Addresses When the DHCP Server Is Enabled
If you would like to configure fixed IPv4 addresses on individual computers connected with the FRITZ!Box despite the enabled DHCP server, please note the following:
- The IPv4 addresses must be from the IPv4 network of the FRITZ!Box.
- The IPv4 addresses may not come from the address range of the DHCP server.
• Each IPv4 address can be assigned only once.
Disabling the DHCP Server
You can disable the DHCP server.
To make sure that all computers remain in the same IP network when the DHCP server is disabled, you must enter the IPv4 addresses manually in the computers' network settings. First disable the option “Obtain an IP address automatically” and then enter the IP address manually in the appropriate field.
In the case of the preset IPv4 address of the FRITZ!Box, the following IPv4 addresses are available for assignment to the computers:
192.168.178.2 - 192.168.178.254

Here too: each IPv4 address can be assigned only once.
Changing Network Settings
- Enable the advanced view in the user interface.
- Select the "Home Network / Network" menu.
- Select the "Network Settings" page.
- Click the "IPv4 Addresses" or "IPv6 Addresses" button, depending on the address range you would like to change.

Please note that changes to the network settings in the FRITZ!Box may make it necessary to adjust the network settings of your computers so that you can continue to access the FRITZ!Box user interface.
IPv6 Settings in the FRITZ!Box
The following settings options for IPv6 are found in the advanced view in the “Home Network / Network” menu on the “Network Settings” page.
Additional IPv6 Routers in the Home Network
• IPv6 prefixes from other IPv6 routers
You can allow the network devices connected to the FRITZ!Box to receive IPv6 prefixes announced by other IPv6 routers in the local network.
- Also announce DNSv6 server via router advertisement
With this setting you specify that the FRITZ!Box announces the local DNSv6 server in the local network via router advertisement. Alternatively, the network devices can identify the local DNSv6 server via DHCPv6.
IPv6 Settings
Click the “IPv6 Addresses” button to configure settings for the IPv6 addresses in the local network.
Unique Local Adresses
The communication within the local network takes place via the Unique Local Addresses (ULA). If no IPv6 Internet connection is established, the network devices do not have a ULA and communication between them is restricted. For this case you can set the FRITZ!Box such that the network devices receive the ULA from the FRITZ!Box.
DHCPv6 Servers in the Home Network
The FRITZ!Box is equipped with its own DHCPv6 server. The DHCPv6 server of the FRITZ!Box is switched on by default.
The DHCPv6 server assigns the network devices their IPv6 settings. These settings are used instead of the data in the router advertisement messages. The DNS server, IPv6 prefixes or IPv6 addresses can all be assigned by DHCPv6. Define which IPv6 settings should be assigned by the DHCPv6 server.
UPnP Settings
The Universal Plug-and-Play (UPnP) service included in your FRITZ!Box provides status information about the FRITZ!Box to all connected computers. Programs with UPnP support on these computers can receive this information and use them to display the status of the FRITZ!Box (e.g., connection status, data transmission). UPnP service thus allows you to monitor your FRITZ!Box from a connected computer.
Here is how to change the UPnP settings:
- Open the FRITZ!Box user interface (see page 26).
- Enable the advanced view.
- Configure the UPnP settings in the “Home Network / Network” menu on the “Programs” page.
Guest Access over the LAN 4
The network port “LAN 4” can be configured as a guest access. Guests can then connect their laptops to the guest access with a network cable to access the Internet. The guest device does not have access to the home network.
Set up the guest access as follows:
- Open the FRITZ!Box user interface.
- In the "Home Network / Network" menu, select the "Network Settings" page.
- Enable the guest access.
13.2 Obtaining an IP Address Automatically
The FRITZ!Box has its own DHCP server, which assigns IP addresses to the connected computers. The connected computers must be configured such that they can receive their IP addresses automatically. The steps for checking and adjusting this option differ among the operating systems. See the relevant section for your operating system.

If FRITZ!Box is operated in a network, no other DHCP server may be activated in this network.
Obtaining an IP Address Automatically in Windows
- Open the network connections:
Windows XP: Select "Start / Run", enter "ncpa.cpl" and then click "OK".
Windows 7 and Windows Vista: Click "Start", enter "ncpa.cpl" in the search line of the start menu, and press "Enter".
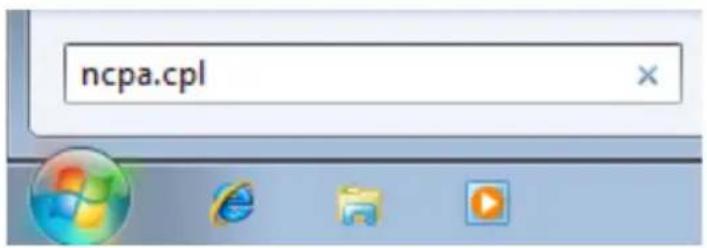
text_image
ncpa.cplEntering "ncpa.cpl" in Windows 7
-
Click the network connection between the computer and the FRITZ!Box with the right mouse button and select "Properties".
-
Windows XP: Under "This connection uses the following items", select "Internet Protocol (TCP/IP)".
Windows 7 and Windows Vista: Under “This connection uses the following items”, select “Internet Protocol Version 4 (TCP/IPv4)”.
-
Click the "Properties" button.
-
On the “General” tab, enable the options “Obtain an IP address automatically” and “Obtain DNS server address automatically”.
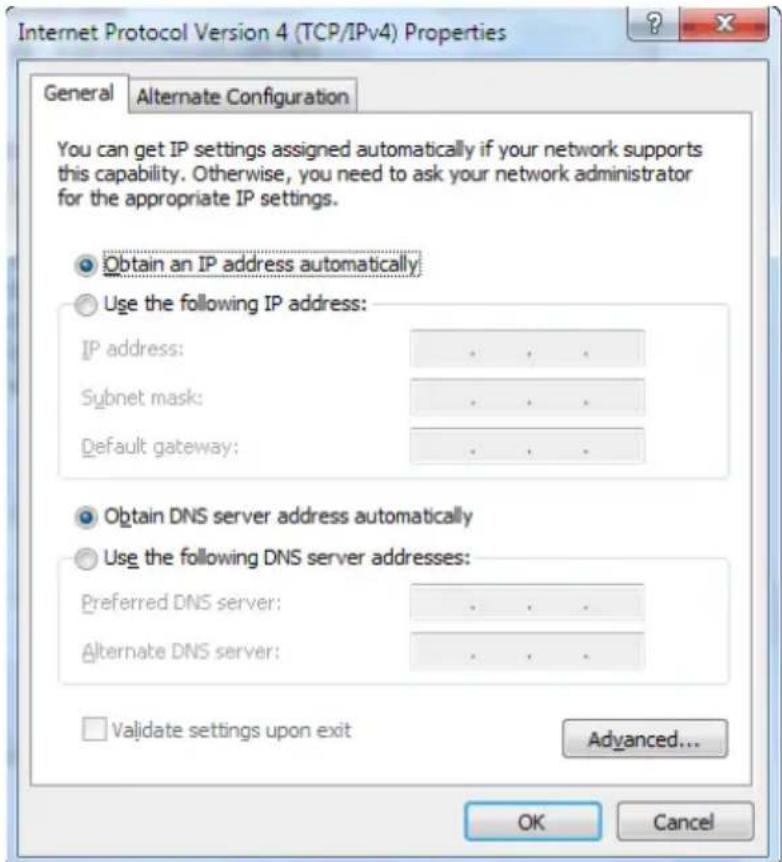
text_image
Internet Protocol Version 4 (TCP/IPv4) Properties General Alternate Configuration You can get IP settings assigned automatically if your network supports this capability. Otherwise, you need to ask your network administrator for the appropriate IP settings. Obtain an IP address automatically Use the following IP address: IP address: . Subnet mask: . Default gateway: . Obtain DNS server address automatically Use the following DNS server addresses: Preferred DNS server: . Alternate DNS server: . Validate settings upon exit Advanced... OK Cancel-
Click "OK" to save the settings.
-
Only in Windows 7 and Windows Vista: Enable the options "Obtain an IPv6 address automatically" and "Obtain DNS server address automatically" for the Internet Protocol Version 6 (TCP/IPv6) as well.
The computer now receives an IP address from the FRITZ!Box.
Obtaining an IP Address Automatically in Mac OS X
- Select the "System Preferences..." in the Apple menu.
- In the "System Preferences" window, click the "Network" icon.
- In the “Network” window, select the “Built-in Ethernet” entry from the list. Click the “Advanced...” button.
-
Click the “Advanced...” button. The “TCP/IP” settings page opens. Select the “Using DHCP” option from the “Configure IPv4:” drop-down list.
-
Click "OK".
The computer now receives an IP address from the FRITZ!Box.
Obtaining an IP Address Automatically in Linux
For comprehensive information and tips on the topic of network settings in Linux, see, for example:
www.tldp.org/HOWTO/NET3-4-HOWTO-5.html
14 USB Devices in the FRITZ!Box Home Network
The FRITZ!Box has two USB ports to which you can connect various USB devices. All network devices in the FRITZ!Box home network can use these USB devices jointly and simultaneously.
This chapter describes how to share a printer in the network, which USB devices can be used in your FRITZ!Box home network, and how to use these devices safely.
14.1 Power Supply for USB Devices
You can connect USB devices with the following properties to the FRITZ!Box:
- Some USB devices require more than one USB port for operation, for instance, hard drives with a USB Y cable. Connect this type of USB devices to the FRITZ!Box using a USB hub with its own power supply.
- The total current consumption of connected USB devices without their own power supply may not exceed 500 mA. Check the rating plates of the connected USB devices.
USB devices that exceed the total current consumption of 500 mA can be connected to the FRITZ!Box using a USB hub with its own power supply.
14.2 USB Devices on the FRITZ!Box
These USB devices can be connected to the FRITZ!Box:
- You can connect up to four USB storage media like hard disks, USB flash drives or card readers.
- USB storage media must use the file systems EXT2, FAT, FAT32 or NTFS. On storage media with the FAT and FAT32 file systems you can use files up to a size of 4 GB. In the EXT2 and NTFS file systems there is no limit to the size of files that can be used.
- You can connect one standard USB printer or one all-in-one device with scanner and fax function. The complete range of functions available in a all-in-one printers
device is guaranteed only with the USB remote connection of the FRITZ!Box (see also: Sharing a USB Printer on page 84).
- You can connect a USB hub to the FRITZ!Box and use up to four USB devices at this hub.
You can use USB hubs with or without a separate power supply. We recommend deploying a USB hub with its own power supply if the USB devices to be connected exceed a total current consumption of 500 mA (see also: Power Supply for USB Devices on page 81).
- You can connect a USB stick from the FRITZ!WLAN USB Stick series by AVM to conveniently establish secure WLAN connections using AVM Stick & Surf (see: Establishing a WLAN Connection with AVM Stick & Surf on page 20).
14.3 Using USB Devices Safely
Follow the instructions below about how to use USB devices on your FRITZ!Box.
- The FRITZ!Box can not defend the USB memory from external influences. This means that voltage spikes or drops, like those that occur during electrical storms, may lead to data losses on connected USB storage media. We recommend making regular backups of the USB memory contents to avoid any losses.
- Whenever you want to remove USB devices from the FRITZ!Box, go to the “Home Network / USB Devices” area in the FRITZ!Box user interface to remove them safely and avoid any loss of data.
14.4 Configuring Password Protection and Access Rights
To protect the data on your USB memory from unauthorized access, you can set up a password and access rights. Both the password protection and the access rights are valid on all memory available in the FRITZ!Box home network. You can not assign special passwords or access rights for individual storage media.
- Start a web browser.
- Enter "fritz.box" in the address line.
- Go to the “Home Network / Storage (NAS)” and select the “Security” tab.
- Configure the access rights and password protection.

Note that you cannot set up password protection and access rights if the USB remote connection is active.
14.5 Accessing USB Memory
The participants in the home network have various possibilities for accessing the various storage media of the FRITZ!Box.
- Home network members can access the contents of connected USB memory and all other memory of the FRITZ!Box especially conveniently with FRITZ!NAS. For this FRITZ!NAS offers a graphic interface and allows data exchange by drag & drop.
- Participants in the home network can use FTP software like FireFTP to exchange files among the FRITZ!Box storage media and workplaces.
Alternatively, you can enter ftp://fritz.box in the address line of your Internet browser to access the storage media of the FRITZ!Box.
If you would like to use FTP software, see the documentation of the software as well as the instructions in the Online Help of the FRITZ!Box user interface.
- For access to media data like music, images and videos available on the memory or on storage media of the FRITZ!Box you can enable the FRITZ!Box media server.
Suitable playback devices like TV sets, web radios, smartphones and the Windows Media Player can then call up the data for streaming from the media server.
Playback devices to be used in connection with the media server must support the UPnP AV standard. The term “DLNA” is often used to designate this support.
Enable the “media server” function in the FRITZ!Box user interface under “Home Network / Storage (NAS) / Options Enabled”.
14.6 Sharing a USB Printer
You can connect a USB printer to the USB port of the FRITZ!Box to make it available to all participants in your home network. You can either release the printer for sharing as a network printer or use the FRITZ!Box USB remote connection software to connect it with a computer. Which option is preferable depends on how you intend to use the printer.
Using a USB Printer as a Network Printer
Configure the USB printer as a network printer on the FRITZ!Box if
- the participants in the home network are to be able to use the printer jointly and simultaneously.
- the printer is to be used by computers that use an operating system other than Windows (e.g. Mac OS X or Linux).
For information about how to configure a USB printer as a network printer, see the section Setting Up a USB Printer as a Network Printer on page 85.
Using a USB Printer with FRITZ!Box USB Remote Connection
Configure the USB printer on the FRITZ!Box with the FRITZ!Box USB remote connection if
- the USB printer is an all-in-one device (fax/printer/scanner) and the entire range of functions is to be used.
- the USB printer is equipped with convenience features like ink level display and you would like to use these.
- the USB printer uses bidirectional data exchange. In other words: Not only does the computer send data to the printer, the printer also sends status messages to the computer. This communication in both directions is typical of the “Windows printers” or “GDI printers” that work only with special Windows device drivers.
For information about how to configure a USB printer with the USB remote connection, continue reading from the section Configuring a USB Printer with FRITZ!Box USB Remote Connection on page 88.
Setting Up a USB Printer as a Network Printer
Work through the following steps to connect a USB printer to the FRITZ!Box and configure it for use as a network printer.
Preparing Configuration
- Open the FRITZ!Box user interface.
- Enable the advanced view.
- Select the "Home Network / USB Devices / USB Remote Connection" menu.
- Make sure that the option “printers (including all-in-one printers)” is disabled.
- Click "Apply".
- Connect the USB printer to the FRITZ!Box.
This concludes the preparations. Continue reading in the section for your operating system.
Setting Up a USB Printer in Windows 7, Vista and XP
-
Click "Start / Control Panel" and select the printer category of your operating system:
-
“Devices and Printers” (Windows 7)
- “Printers” (Windows Vista
-
“Printers and Faxes” (Windows XP)
-
Click the printer icon with the right mouse button and select "Properties" or "Printer properties".

If the printer is not displayed, you must first install the printer drivers for this device. Consult the documentation of your printer for instructions.
- Switch to the "Ports" tab.
- Click "Add".
- Double-click the “Standard TCP/IP Port” entry and click “New Port”, then “Next”.
- Enter "fritz.box" in the "Printer Name or IP Address" field.

If the FRITZ!Box is configured as a WDS repeater or as an IP client, enter here the IP address at which the FRITZ!Box can be reached within the network.
- Enter any name you wish in the "Port Name" field and click "Next".
- Select the "Custom" option and click "Settings...".
- Enable the "Raw" option.
- Enter "9100" in the "Port Number" field and click "OK".
- Click "Next" and confirm with "Finish" and "Close".
- In the “[Printer name] properties” window, switch to the “Ports” tab.
- Disable the "Enable bidirectional support" option and click "Apply".
The USB printer has been configured and can be used as a network printer.
Setting Up a USB Printer in Mac OS 10.5
- In the dock, click "System preferences".
- Click "Print & Fax".
- Click the “+” sign.
-
In the "Add Printer" window, click "IP".
-
In the "Protocol:" drop-down list, select the entry "HP Jetdirect - Socket".
- Enter "fritz.box" in the "Address:" input field.

If the FRITZ!Box is configured as a WDS repeater or as an IP client, enter here the IP address at which the FRITZ!Box can be reached within the network.
- In the "Print Using:" drop-down list, select the printer that is connected to the USB port of your FRITZ!Box.

If the printer is not displayed, you must first install the printer drivers for this device. Consult the documentation of your printer for instructions.
- Click "Add".
The USB printer has been configured and can be used as a network printer.
Setting Up a USB Printer in Other Operating Systems

The names of entries or menus in other operating systems not described above may be slightly different than the terms we use here.
- As the port type, select "Raw TCP".
- Enter "9100" as the port.
- As the printer name, enter "fritz.box".

If the FRITZ!Box is configured as a WDS repeater or as an IP client, enter here the IP address at which the FRITZ!Box can be reached within the network.
Configuring a USB Printer with FRITZ!Box USB Remote Connection
If you are using an all-in-one device or would like to use the convenience features of a USB printer connected to the FRITZ!Box, we recommend installing the FRITZ!Box USB remote connection software. The FRITZ!Box USB remote connection program can be installed on computers with Windows 7, Vista or XP (32- and 64-bit).
Installing FRITZ!Box USB Remote Connection
Install the program for FRITZ!Box USB remote connection on all of the computers with which you want to use the connected USB device.
- Connect the USB printer to the USB port of the FRITZ!Box.
- Open the FRITZ!Box user interface.
- Enable the advanced view.
- Select the “Home Network / USB Devices / USB Remote Connection” menu.
- Click the "USB remote connection software" link.
- In the window "USB Remote Connection" click "Download".
- Download the file "fritzbox-usb-fernanschluss.exe".
- Double-click the file and follow the instructions on your screen.
The FRITZ!Box USB remote connection software is now installed on your computer. Repeat the steps in these instructions for all further Windows users who wish to use the USB remote connection on this computer.
Enabling the FRITZ!Box USB Remote Connection
- Open the FRITZ!Box user interface.
- Enable the advanced view.
-
Select the “Home Network / USB Devices / USB Remote Connection” menu.
-
Enable the USB remote connection for printers and select the option "printers (including all-in-one printers)".
For an all-in-one printer with a memory function, also enable the “USB storage media” option.
For an all-in-one printer with a scanner function, also enable the “others (e.g. scanner)” option. -
Click "Apply".
The FRITZ!Box USB remote connection is enabled.
Using a USB Printer with FRITZ!Box USB Remote Connection
- Open the FRITZ!Box USB remote connection by clicking the icon in the Windows task bar.
- Enter in the "My FRITZ!Box" area the FRITZ!Box password.
- Click "Refresh".
- Click the USB printer in the "Devices" area.
The USB printer is being connected to the computer.

Do not conduct any firmware updates for USB devices that are connected with the computer via the FRITZ!Box USB remote connection.
15 Saving Energy with FRITZ!Box
The FRITZ!Box combines a variety of devices in one device: VDSL and ADSL modem, WLAN router and media server. This means that you generally use much less power with the FRITZ!Box than you would with several separate devices.
What is more, the FRITZ!Box saves energy by reducing processing power on standby and lowering the power consumption of idle functions. The FRITZ!Box also offers various settings for energy-saving operation.

The current energy consumption of the total FRITZ!Box system is displayed on the “Overview” page. From there, click with the mouse to view the Energy Monitor, which displays details on the energy consumption.
15.1 Saving Energy with the WLAN Radio Network
You can reduce the power consumption of the WLAN radio network by
- setting up night service for the WLAN radio network (see page 58).
- turning off the WLAN radio network with the “WLAN” button whenever no more WLAN devices are registered on the FRITZ!Box.
- adjusting the setting “Maximum transmitter power” to the percentage level actually needed. This setting is configured in the “WLAN / Radio Channel” menu in the FRITZ!Box user interface.
15.2 Enabling Energy-saving Mode for USB Hard Drives
In the FRITZ!Box you can enable an energy-saving function for USB hard drives connected to the FRITZ!Box.
When the energy-saving function is enabled, connected USB hard drives will be switched off when they are idle—as long as the hard drives support the energy-saving function.
Enable the energy-saving function in the “Home Network / USB Devices” menu in the FRITZ!Box user interface. You can also test here, whether your USB hard disk supports the energy-saving function.
15.3 Saving Energy at the LAN Ports
For the individual LAN ports of your FRITZ!Box you can configure various operation modes. The power consumption of some modes is higher than others. Select the operation mode that is best suited to your needs in order to minimize the power consumption of the LAN ports.
The LAN ports can be configured in the FRITZ!Box user interface. In the “System / Energy Monitor” menu, the following operating modes are available on the “Settings” page:
| Operating Mode Functionality and Power Consumption | |
| Always Enabled The | LAN port is always enabled.Highest power consumption. |
| Enable Automatically – Power Mode | As needed, the FRITZ!Box establishes LAN connections with a data throughput rate of 1 G bit / s.Lower power consumption than for the “Always Enabled” setting. |
| Enable Automatically – Green Mode | Default setting of the FRITZ!Box. As needed, the FRITZ!Box establishes LAN connections with a data throughput rate of 100 Mbit/s.Lower power consumption than for the “Detect Automatically - Power Mode” setting. |
| Disabled The LAN port | is disabled and consumes no power.The first LAN port cannot be disabled. |
16 Help in Case of Errors
This chapter provides assistance if you are not able to open the user interface of your FRITZ!Box or are having problems with the DSL or WLAN connection.
16.1 Cannot Establish a DSL Connection
The FRITZ!Box automatically establishes a connection to the DSL network as soon as it is connected with the DSL line. If the DSL connection is not established, check which kind (annex) of DSL is set in your FRITZ!Box and attempt to resolve the error.
Changing the Annex Setting of the FRITZ!Box
The FRITZ!Box cannot establish a connection to the DSL network. This is signaled by the continued flashing of the “Power” LED.
Cause
The kind of DSL (Annex A, B, J or M) set in the FRITZ!Box is not the same as the annex used on your DSL line.
Help
- Contact your Internet service provider to find out which annex is used on your DSL line.
- Connect a computer with the FRITZ!Box either wirelessly via WLAN or using a network cable.
- Open the FRITZ!Box user interface and enable the advanced view in the user interface.
- Open the “Internet / DSL Information / Line Settings” menu.
- In the “Annex Settings” area, make sure that the annex working on your DSL line is set. Save your settings by clicking “Apply”.
After the annex setting has been changed, the FRITZ!Box restarts automatically. The connection to the DSL network has been established as soon as the “Power” LED stops flashing and remains lit up.
16.2 The User Interface Does Not Open
If an error message is returned when you open the FRITZ!Box user interface, this can have various causes. Check the causes listed below and attempt to resolve the error.
Restarting the FRITZ!Box
The user interface cannot be opened or does not react.
Cause
Inconsistencies within the FRITZ!Box.
Help
- Restart the FRITZ!Box.
Remove the power cable from the socket. - Wait about five seconds before reconnecting to the power supply.
- To make sure that the FRITZ!Box has finished restarting, wait until the “Power” LED lights up and stops flashing and, if you have switched on WLAN, the “WLAN” LED remains lit up as well. This ensures that the FRITZ!Box restart has been completed.
- Try again to open the FRITZ!Box user interface by entering fritz.box in the address field.
Checking the Cable Connections
The FRITZ!Box user interface is not displayed in your web browser.
Cause
The cable connections are not secure.
Help
Make sure that all cables are plugged in securely.
Checking the Name Resolution
The user interface of the FRITZ!Box cannot be opened by entering fritz.box.
Cause
The name resolution of the FRITZ!Box does not work.
Help
- In the web browser, enter the following IP address in place of fritz.box:
192.168.178.1 - If the user interface opens in response to this address, set the network adapters of your computer to “Obtain the IP address automatically” (see page 78).
Checking the IP Address
The user interface of the FRITZ!Box cannot be opened by a fritz.box nor by entering 192.168.178.1.
Cause
Incorrect IP address on the connected computer.
Help
Set the computer's network adapter to DHCP so that the network address can obtain its IP address from the DHCP server of the FRITZ!Box. See the section Obtaining an IP Address Automatically from page 78 for instructions.
If you still cannot open the user interface by entering fritz.box or by 192.168.178.1, use the fixed IP address of the FRITZ!Box as described on page 97.
Disabling Dial-up Connections
The user interface is not opened; a window for a dial-up connection appears instead.
Cause
The browser must use the network connection between the computer and FRITZ!Box when the user interface is opened. For this the automatic establishment of a Dial-Up Networking connection must be disabled.
Help
You can disable the automatic attempt to establish a Dial-up Networking connection. The following example explains how to check the settings of Internet Explorer 8:
- Select the “Connections” settings page under “Tools / Internet Options”.
- In the “Dial-up and Virtual Private Network settings” section, enable the option “Never dial a connection”.
- As a final step, click "OK".
Disabling Online Operation
The user interface does not appear in the window of your web browser.
Cause
The web browser is set for offline operation.
Help
Configure the web browser for online operation. Using the example of Internet Explorer 8:
-
Open the "File" menu.
-
If a checkmark is displayed in front of "Work Offline", click this line.
The checkmark will be removed and Internet Explorer will switch to online operation.
Checking the Proxy Settings
The user interface does not appear in the window of your web browser.
Cause
The proxy settings of the web browser prevent the user interface from being opened.
Help
Enter the DNS name and the IP address of the FRITZ!Box as an exception in the proxy settings of the web browser, as described here for the example of the Internet Explorer 8.
- Select the “Connections” settings page under “Tools / Internet Options”.
- Click the "LAN settings" button in the "Local Area Network (LAN) settings" area.
-
In the “Proxy server” area of the next window, check the “Use a proxy server for your LAN” option and then click “Advanced”.
-
Enter as "Exceptions": fritz.box; 192.168.178.1; 169.254.1.1 and click "OK".
Checking the Security Software
The user interface cannot be displayed in the web browser.
Cause
Security software is blocking access to the user interface.
Help
Security software like firewalls can prevent access to the user interface of the FRITZ!Box. Configure exceptions for the FRITZ!Box in all of the enabled security software.

If you would like to exit security software to test access to the FRITZ!Box, remove the DSL cable first. After testing, first start the security software before reinserting the DSL cable and connecting to the Internet!
Opening the User Interface Using the Fixed IP Address
The FRITZ!Box has a fixed IP address that cannot be changed. The FRITZ!Box always can be reached at this IP address.
Fixed IP address 169.254.1.1
Proceed as follows to open the FRITZ!Box user interface using this IP address:
- Connect a computer to the FRITZ!Box with a network cable (see page 17).
- Make sure that the computer obtains its IP address automatically (see page 78).
-
Start your Internet browser and enter the FRITZ!Box's fixed IP address: 169.254.1.1
The FRITZ!Box user interface opens. -
Check the IP settings of the FRITZ!Box and correct them if necessary.
16.3 Cannot Establish a WLAN Connection
If you are not able to establish a WLAN connection between your computer and the FRITZ!Box, then please undertake the following measures to seek the source of the error and resolve it.
Enabling the WLAN Device
The WLAN device cannot find a wireless network.
Cause
The WLAN device is not ready for operation.
Help
Make sure that the WLAN device is ready for operation. Some of the WLAN devices installed in notebooks must be activated by flipping a switch on the notebook.

For questions on the WLAN device of your computer, please contact the manufacturer.
Enabling WLAN
The WLAN device cannot find the radio network of the FRITZ!Box.
Cause
WLAN is switched off in the FRITZ!Box. The WLAN LED on the FRITZ!Box is off.
Help
Press the WLAN button on the FRITZ!Box. The WLAN LED begins flashing. As soon as the WLAN LED stops flashing and stays lit, the WLAN function of the FRITZ!Box is enabled.
Announcing the Name of the Radio Network
The WLAN device cannot find the wireless network of the FRITZ!Box.
Cause
The name of the wireless network of the FRITZ!Box is concealed.
Help
- Connect a computer to the FRITZ!Box with a network cable (see page 17).
- Open the FRITZ!Box user interface (see page 26).
- Select "WLAN / Radio Network".
- Enable the option "Name of the radio network visible".
- Click the "Apply" button.
- Remove the network cable and try again to establish a connection via WLAN.
Checking the Security Settings for WLAN
Make sure that the WLAN security settings of the FRITZ!Box agree with the security settings of the WLAN adapter.
The WLAN security settings of the FRITZ!Box are found in the user interface:
- Connect a computer to the FRITZ!Box with a network cable (see page 17).
- Open the FRITZ!Box user interface (see page 26).
- Select "WLAN / Security".
- Click the "Apply" button.
A window is displayed with the WLAN security settings. You can print out these settings by clicking the “Print Page” button.
Testing a Non-Encrypted WLAN Connection
Test whether a non-encrypted WLAN connection between the FRITZ!Box and the WLAN adapter is possible.
- Connect a computer to the FRITZ!Box with a network cable (see page 17).
- Open the FRITZ!Box user interface (see page 26).
- Select "WLAN / Security".
- Enable the "non-encrypted" option.
- Click the "Apply" button.
- Remove the network cable and try again to establish a connection.

Disable WLAN encryption only for testing. Enable WLAN encryption right away after completing the tests.
If you cannot establish a non-encrypted WLAN connection, make sure that the WLAN adapter in your computer is installed correctly. If the error cannot be remedied, contact the manufacturer of the WLAN adapter.
Installing the Current Service Pack for Windows XP
The WLAN connection to the FRITZ!Box cannot be established using the Microsoft WLAN Service (WZC: Windows Zero Configuration) in Windows XP with Service Pack 2.
Cause
The required Microsoft patch for WPA2 (IEEE 802.11i) may not be not installed.
Help
Install Service Pack 3 (SP3) for Windows XP, available as a free download from Microsoft. Then Microsoft WLAN Service will support WPA2, so that a WLAN connection can be established to the FRITZ!Box.
Avoiding WLAN Channels with DFS
The FRITZ!Box loses the WLAN connection in the 5-GHz frequency band for no apparent reason.
Cause
A forced channel change is taking place. In the 5-GHz frequency band the WLAN base station is programmed to change the channel whenever a radar source transmits on the same channel (Dynamic Frequency Selection, DFS).
Help
You can prevent forced channel changes by selecting in the FRITZ!Box a channel for the 5-GHz frequency band that does not use DFS (channels 36, 40, 44, 48).
Ruling Out Interference from Other Wireless Networks
If there are other devices in the immediate vicinity of your FRITZ!Box that use the same frequency band, mutual interference and interrupted connections can occur. Devices that can cause disruptions include other WLAN base stations, baby monitors, game consoles, garage door openers, Bluetooth devices, or wireless AV bridges, which also use the 2.4-GHz frequency band.
If such devices are located in the vicinity of the FRITZ!Box, test a different radio channel for the FRITZ!Box or switch the radio channel setting to “Autochannel”. Then the FRITZ!Box will automatically set the best WLAN channel for transmission.
For applications that rely on a high throughput rate (“streaming”), you should use the 5-GHz frequency band. This frequency band provides more channels and is subject to significantly less external interference.
- Connect a computer to the FRITZ!Box with a network cable (see page 17).
- Open the FRITZ!Box user interface (see page 26).
-
Select "WLAN / Radio Channel".
-
Set a different radio channel or automatic radio channel selection.
- Click the "Apply" button.
- Remove the network cable and check whether interference continues to occur.
17 Taking FRITZ!Box out of Operation
In this chapter you receive tips and recommendations for taking the FRITZ!Box out of operation.

Please also follow our instructions for the correct disposal of waste equipment on page 119.
17.1 Restoring Factory Settings
When the factory settings are restored to the FRITZ!Box, all of the settings in the FRITZ!Box are restored to their condition upon delivery. This is strongly recommended if you are planning to pass the FRITZ!Box on to another user.
Resetting the FRITZ!Box has the following effects:
- All settings you made in the FRITZ!Box will be deleted.
- The internal memory of the FRITZ!Box will be deleted. Received faxes and messages on the answering machine will also be deleted.
- The factory settings' WLAN key will be activated again.
- The IP configuration of the factory settings will be restored.
Saving FRITZ!Box Settings
Before loading the factory settings, save all of the settings you made in your FRITZ!Box to a backup file. With this backup file you can restore your settings to the FRITZ!Box at any time or load them to another FRITZ!Box.
Instructions for saving, restoring and applying the FRITZ!Box settings are presented in the Online Help of the user interface.
Saving Data from Internal Memory
Before loading the factory settings, save your data from the internal memory of the FRITZ!Box.
Instructions for saving the data from the internal memory of the FRITZ!Box are presented in the Online Help of the user interface.
Loading Factory Settings
- In the FRITZ!Box user interface, select the "System / Reset" menu.
- Select the "Factory Settings" tab.
- Click the "Load Factory Settings" button.
The FRITZ!Box is reset to its factory settings.
17.2 Uninstalling Software
Additional software for the FRITZ!Box is available on the web pages of AVM at www.avm.de/en/download.
If you have installed supplementary programs on one or more computers, uninstall the software using the control panel of your Windows operating system.
Uninstalling Software in Windows 7
- Open "Start / Control Panel / Programs".
- Under “Programs and Features”, click “Uninstall a program”.
- Select in the list the AVM software to be uninstalled.
- Click the "Uninstall/Change" button.
The software will be removed.
Uninstalling Software in Windows Vista
- Open “Start / Settings / Control Panel / Programs and Functions”.
- Select in the list the AVM software to be uninstalled.
- Click the "Uninstall/Change" button and confirm with "Continue".
The software will be removed.
Uninstalling Software in Windows XP
- Open “start / Control Panel / Add or Remove Programs”. Make sure that the “Change or Remove Programs” button is selected in the column at left.
- Select the AVM software to be uninstalled from the list of "Currently installed programs".
- Click the "Change/Remove" button.
The software will be removed.
18 Technical Specifications
Facts worth knowing: Here you will find comprehensive technical data on your FRITZ!Box 3370.
18.1 Ports and Interfaces
• VDSL modem in accordance with ITU standard G.993.2 Annex B
- Four LAN ports via RJ45 sockets (standard Ethernet, 10/100/1000 Base-T)
- Two USB host controllers (USB version 2.0)
- WLAN base station with support for wireless networks
- IEEE 802.11a - 54 Mbit/s
- IEEE 802.11b - 11 Mbit/s
- IEEE 802.11g - 54 Mbit/s
- IEEE 802.11n - 450 Mbit/s
18.2 Router Functions
- Router
- DHCP Server
- Firewall with IP masquerading/NAT
- IPv4 and IPv6
• Child protection and filter lists - Port forwarding
• Dynamic DNS
• VPN
18.3 User Interface and Display
- Configuration and status messages via a web browser on a connected computer
- Five LEDs indicate the condition of the device
18.4 Physical Specifications
• Dimensions (W x D x H): ca. 226 x 160 x 47 mm
• Supply voltage: 230 V / 50 Hz
• Maximum power consumption: 19 W
• FRITZ!OS can be updated
- Conforms to CE standards
- Ambient conditions
- operating temperature: 0^ - +40^
- storage temperature: -20 °C - +70 °C
– relative humidity (operation): 10% – 90%
– relative humidity (idle): 5% – 95%
18.5 Cable
Network Cable
The network cable (yellow) of the FRITZ!Box 3370 is a standard category 5 (Cat 5) Ethernet cable. Please use a standard STP-type (Shielded Twisted Pair) Ethernet cable of category 5 (Cat 5) to replace or extend the Ethernet cable. To extend the cable you will need a shielded RJ45 double coupling (Cat 5) with a 1:1 pin assignment. You can use both straight cables and crosslink cables. All components are available from specialized vendors.
When components of a category smaller than Cat 5 are used, reduced transmission rates may result.
AVM recommends using a network cable no more than 100 meters long.
19 Customer Service
Be it product documentation, frequently asked questions, tips or support: this chapter presents information on all important service topics.
19.1 Documentation on the FRITZ!Box
To take advantage of all commands and features of your FRITZ!Box, consult the following documentation:
Help
In the FRITZ!Box user interface you can open the comprehensive Online Help by clicking the “Help” icon and the “Help” buttons.
Manual
The PDF file of the manual can be opened and downloaded from the Internet at the following address:
www.avm.de/en/service/manuals
Choose the “FRITZ!Box” product group and then your “FRITZ!Box 3370”. The PDF is opened.

The current Adobe Acrobat Reader for reading PDF documents can be downloaded from the Internet free of charge at www.adobe.com.
19.2 Information in the Internet
On its web site AVM presents comprehensive information on your AVM product.
Videos on the FRITZ!Box
Videos on many of the FRITZ!Box functions are available, showing animated demonstrations of how to set up the individual functions.
The videos can be viewed at the following address:
www.avm.de/en/service/FRITZ_Clips
19.3 Feedback on FRITZ!Box
In various places in the user interface, the FRITZ!Box offers you the opportunity to send your concrete feedback to AVM. Your feedback helps us to continually improve the FRITZ!Box.

When you submit your feedback, only the technical data and no personal data are transmitted to AVM. These data are used for the exclusive purpose of product improvement. A corresponding message appears in the Event Log, stating that the error report was sent to AVM.
Automatically Sending Error Reports to AVM
In the case of serious errors, this service generates a report on the problem that occurred and automatically sends this error report to AVM. The error report helps improve the stability of the FRITZ!OS.
Settings options for automatically sending error reports are located in on the “Contents / AVM Services” page of the FRITZ!Box user interface.
Evaluating the DSL Connection
On the “Internet / DSL Information / Feedback” page you can evaluate your DSL connection. This makes it possible to optimize your DSL performance with upcoming firmware updates.
Evaluating the WLAN Connection
On the “WLAN / Radio Network / Known WLAN Devices / Feedback” page you can evaluate your satisfaction with the WLAN connection between the FRITZ!Box and the wireless device. This information helps AVM optimize the WLAN properties of the FRITZ!Box.
19.4 Support from the Support Team
Should problems with your FRITZ!Box arise, we recommend taking the following steps:
-
If you have questions about starting operation of your FRITZ!Box, please consult the following chapters again:
-
Before You Connect the FRITZ!Box from page 11
- Connecting the FRITZ!Box from page 15
-
Connecting the Computer to the FRITZ!Box from page 17
-
If you have any problems, seek first aid by consulting the chapter Help in Case of Errors from page 92.
This chapter also presents tips on problems with establishing connections.
- Read our tips from the AVM Knowledge Base in the “Service” area.
http://service.avm.de/support/en/skb
This site contains answers to questions our customers have frequently asked our Support team.

Please take advantage of the information sources described above before contacting AVM support.
Support by E-mail
You can send us an English-language e-mail request at any time using the “Service” area of our web site. The “Service” area can be reached at:
www.avm.de/en/service
- Select the product group and your product for which you need support from the "Support" area.
You will receive a selection of FAQs.
-
If you need more help, click the "Contact support" button to open the e-mail support form.
-
Fill out the form and send it to AVM by clicking the "Submit support request".
Our Support team will respond by e-mail as quickly as possible.
19.5 Manufacturer's Warranty
We offer a manufacturer's warranty of 5 years on the hardware of this original product. The warranty period begins with the purchase date from the first end user. Compliance with the warranty period can be proven by submission of the original invoice or comparable documents. This warranty does not restrict your warranty rights based on the contract of sale or other statutory rights.
Within the warranty period, we will remove defects to the product which are demonstrably due to faults in materials or manufacturing. Our warranty does not cover defects which occur due to incorrect installation, improper use, non-observance of instructions in the user manual, normal wear and tear or defects in the environment of the system (third-party hardware or software). We may, at our discretion, repair or replace the defective product. Claims other than the right to the removal of defects which is mentioned in these terms of warranty are not constituted.
We guarantee that the software conforms with general specifications, not, however, that the software meets your individual requirements. Delivery costs will not be reimbursed. Products which have been replaced revert to our ownership.
Claims recognized under warranty entail neither an extension or recommencement of the warranty period. If we reject a warranty claim, this claim lapses no later than six months after being rejected by us.
This warranty shall be governed by German substantive law, to the exclusion of the United Nations Convention on Contracts for the International Sale of Goods (CISG).
20 AVM Products for the FRITZ!Box
Here we introduce additional devices by AVM that are designed to be used in combination with your FRITZ!Box 3370.
FRITZ!Powerline 500E
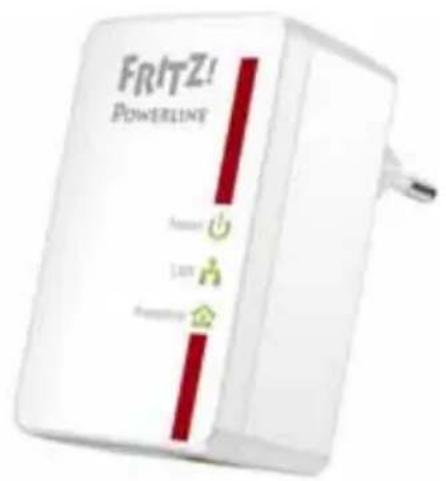
text_image
FRITZ! POWERLINE Smart Light PowerlineLAN
Powerline
With FRITZ!Powerline 500E your electrical outlet is transformed into a secure network line. Just connect your devices over the power line—without installing any cables:
• Networks FRITZ!Powerline 500E, computer, printer, TV, stereo, game console, media player and other network devices
• Especially suitable for broadband-intensive use like streaming, surfing, gaming, Internet TV, video on demand and VoIP
- Throughput of up to 500 Mbit/s over a range of up to 500 meter over your own power mains
- Low operating power consumption, under 1 W on standby
• Encrypted securely upon delivery with 128-bit AES
- Immediately operational at every outlet
- Immediately ready for operation without any new software
• Available in a practical set with two adapters; additional adapters can be networked easily and securely at the touch of a button
For more information, see www.avm.de/en/Produkte/FRITZPowerline/FRITZPowerline_500E.
FRITZ!WLAN USB Stick N
natural_image
Close-up of a red and white FRTZ Wireless device with visible internal components (no text or symbols on body)Up to 300 Mbit/s
Dual band
WPA2 (802.11i)
Stick & Surf
FRITZ!WLAN USB Stick N connects your computer easily and safely with your FRITZ!Box WLAN and other compatible WLAN routers:
- USB stick for WLAN N with up to 300 Mbit/s
- WLAN support for either 2.4-GHz or 5-GHz connections (dual band)
• Supports the conventional standards 802.11n/g/b/a
• WPA2 encryption for maximum WLAN security (802.11i) - Stick & Surf: secure wireless network without configuration
• Supports WPS for easy, fast configuration of secure WLAN connections
For more information, see www.avm.de/en/Produkte/FRITZ_WLAN/FRITZ_WLAN_USB_Stick_N.
FRITZ!WLAN USB Stick
natural_image
Red and white USB device labeled 'FRITZ! WLAN' (no additional text or symbols visible)Up to 150 Mbit/s
WPA2 (802.11i)
Stick & Surf
FRITZ!WLAN USB Stick connects your computer easily and safely with any WLAN router:
- USB stick for WLAN N with up to 150 Mbit/s
• Supports the WLAN standards 802.11n/b/g
• WLAN support for 2.4-GHz connections
• WPA2 encryption for maximum WLAN security (802.11i) - Stick & Surf: secure wireless network without configuration
• Supports WPS for easy, fast configuration of secure WLAN connections
For more information, see www.avm.de/en/Produkte/FRITZ_WLAN/FRITZ_WLAN_USB_Stick.
FRITZ!WLAN Repeater 300E
natural_image
Front view of a white and red FRTZ1 wireless router with visible I/O ports and a circular logo (no readable text beyond branding)Up to 300 Mbit/s
WPS
Gigabit LAN
With the FRITZ!WLAN Repeater 300E the range of the wireless network can be conveniently extended:
- Compatible with all conventional WLAN routers (802.11n/g/b/a radio standards)
- WLAN support for either 2.4-GHz or 5-GHz connections (dual band)
- Simple configuration at the click of a button via WPS, using a Wizard or manually
- Integrated gigabit LAN interface provides for simple integration of network devices into the home network or the Internet
For more information, see www.avm.de/en/Produkte/FRITZ_WLAN/FRITZ_WLAN_Repeater_300E.
FRITZ!WLAN Repeater N/G
natural_image
Black electronic device labeled 'FRITZ! WEAN REPEATER' with red LED grid and power outlet (no readable text beyond branding)Up to 300 Mbit/s
WPS
Media function
With the FRITZ!WLAN Repeater N/G the range of the wireless network can be extended quickly and easily:
- Compatible with all conventional WLAN routers (802.11n/g/b/a radio standards)
- WLAN support for either 2.4-GHz or 5-GHz connections (dual band)
- Simple configuration at the click of a button via WPS, using a Wizard or manually
• Media function: integrated audio output and miniature FM transmitter for transferring music or web radio to stereo/radio
For more information, see www.avm.de/en/Produkte/FRITZ_WLAN/FRITZ_WLAN_Repeater_N_G.
Legal Notice
Legal Notice
This documentation and the software it describes are protected by copyright. AVM grants the non-exclusive right to use the software, which is supplied exclusively in object code format. The licensee may create only one copy of the software, which may be used exclusively for backup use.
AVM reserves all rights that are not expressly granted to the licensee. Without previous approval in writing, and except for in cases permitted by law, it is particularly prohibited to
- copy, propagate or in any other manner make this documentation or this software publicly accessible, or
- process, disassemble, reverse engineer, translate, decompile or in any other manner open the software and subsequently copy, propagate or make the software publicly accessible in any other manner.
The licensing conditions are presented in the FRITZ!Box 3370 user interface under the “Legal Notice” heading.
This documentation and software have been produced with all due care and checked for correctness in accordance with the best available technology. AVM GmbH disclaims all liability and warranties, whether express or implied, relating to the AVM product's quality, performance or suitability for any given purpose which deviates from the performance specifications contained in the product description. The licensee bears all risk in regard to hazards and impairments of quality which may arise in connection with the use of this product.
AVM will not be liable for damages arising directly or indirectly from the use of the manual or the software, nor for incidental or consequential damages, except in case of intent or gross negligence. AVM expressly disclaims all liability for the loss of or damage to hardware or software or data as a result of direct or indirect errors or destruction and for any costs (including connection charges) related to the documentation and the software and due to incorrect installations not performed by AVM itself.
The information in this documentation and the software are subject to change without notice for the purpose of technical improvement.
© AVM GmbH 2012. All rights reserved. Documentation release 09/2012
AVM Audiovisuelles Marketing
und Computersysteme GmbH
Alt-Moabit 95
D 10559 Berlin
Germany
AVM Computersysteme
Vertriebs GmbH
Alt-Moabit 95
D 10559 Berlin
Germany
AVM in the Internet:
www.avm.de/en
Marks: Marks like AVM, FRITZ! and FRITZ!Box (product names and logos) are protected marks owned by AVM GmbH. Microsoft, Windows and the Windows logo are trademarks owned by Microsoft Corporation in the USA and/or other countries. Apple, App Store, iPhone, iPod and iPad are marks owned by Apple Inc. in the USA and/or other countries. IOS is a mark owned by Cisco Technology Inc. in den USA and/or other countries. Google and Android are marks owned by Google Inc. in the USA and/or other countries. All other marks (like product names, logos, commercial names) are owned by their respective holders.
Declaration of CE Conformity
The manufacturer AVM GmbH
Alt-Moabit 95
D 10559 Berlin
Germany
herewith declares that the product
FRITZ!Box 3370
ADSL/VDSL WLAN router
complies with the following directives:
1999/5/EC R&TTE Directive: Radio Equipment and Telecommunications Terminal Equipment
2009/125/EC EU directive: ecodesign requirements for energy-related products
The following norms were consulted to assess conformity:
- EN 60950-1:2006 + A11:2009 + A1:2010 - EN 300 328 V1.7.1
- EN 55024:2010 - EN 301 893 V1.6.1
- EN 301 489-1 V1.8.1 - EN 50371:2002
- EN 301 489-17 V2.1.1


The CE symbol confirms that this product conforms with the above mentioned norms and regulations.
$$ P. \mathcal {F} _ {a x l} $$
Berlin, 2012-10-01 Peter Faxel, Technical Director
Indication of Countries
The WLAN radio technology of this device is designed for use in all countries of the European Union and in Switzerland, Norway and Iceland. In France only indoor operation is permitted.
Disposal Information
In accordance with European regulations and the Waste Electrical and Electronic Equipment Directive (WEEE), the FRITZ!Box 3370, as well as all devices and electronic components contained in the package, may not be disposed with household waste.
In accordance with European regulations and the Waste Electrical and Electronic Equipment Directive (WEEE), the FRITZ!Box 3370, as well as all devices and electronic components contained in the package, may not be disposed with household waste.
Please bring FRITZ!Box 3370 to a collection point in your local community for the disposal of electric and electronic appliances after use.
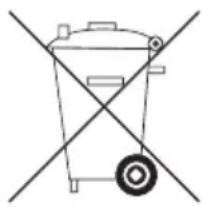
natural_image
Simple line drawing of a trash bin with two crossed lines indicating no text or symbols (no text or symbols present)
Symbol for the separate collection of electric and electronic devices

Note the symbol for the separate collection of electric and electronic devices. FRITZ!Box 3370 and the electronic parts included with delivery must be disposed of separately from household waste.
Drilling Template
See the next page for a drilling template. Use the drilling template as a guide to mark the holes needed to mount the FRITZ!Box on a wall.

Be sure to print out the page with the drilling template in its original size, or 100%. Do not enlarge it, adjust its size, reformat or rescale it in your printer settings.

natural_image
Pure mechanical part diagram showing two U-shaped slots aligned vertically with dashed centerlines (no text or symbols)Glossary
ADSL
short for Asymmetric Digital Subscriber Line
ADSL (G.992.1/G.992.2) was developed on the basis of DSL technology in order to satisfy the increasing demand for higher throughput rates during uploading and downloading.
Designates a fast kind of data transmission that works with standard copper cables and transports signals in both directions at different speeds (upstream at 640 Kbit/s and downstream at up to 9 Mbit/s).
ADSL2
short for Asymmetric Digital Subscriber Line 2
ADSL2 (G.992.3) is a further development of the ADSL standard.
ADSL2 offers range much greater than did the first ADSL generation, and is significantly more robust than ADSL, as it can simply disable single carrier frequencies when they produce interference. This feature allows ADSL2 to prevent synchronization losses.
With a throughput rate of up to 12 Mbit/s downstream, ADSL2 offers considerably greater bandwidth than ADSL.
ADSL2 is completely downward compatible, meaning that terminal devices compliant with ADSL can also be operated on ADSL2 lines, although they cannot exploit the advantages of ADSL2.
In practice ADSL2 has become less important since the ADSL2+ standard has made higher throughput rates possible.
ADSL2+
short for Asymmetric Digital Subscriber Line 2 with extended bandwidth
ADSL2+ (G.992.5) is a further development of the ADSL standard.
ADSL2+ offers a doubled frequency range used for downstream transmission, and thus double the maximum bandwidth achievable for downstream to 24 Mbit/s.
ADSL2+ is completely downward compatible, meaning that terminal devices compliant with ADSL and ADSL2 can also be operated on ADSL2+ lines, although they cannot exploit the advantages of ADSL2+.
DDNS
short for Dynamic Domain Name System
DDNS is a service which allows a computer always to be reached under the same domain name despite constantly changing public IP addresses. This means the home network can always be reached from the Internet, regardless of the user's location. Even private users have an economical way of placing their own Internet offers on their computer at home.
Every time the Internet connection is established, the Internet service provider assigns a new public IP address.
Each time the IP address changes, the current IP address is transmitted to a special DDNS server. Except for the few seconds between the cancellation of the old IP address and the notification of the new IP address, the computer can always be reached at the selected domain name.
default gateway
Gateway (see glossary)
DHCP
short for Dynamic Host Configuration Protocol
DHCP is a protocol for dynamically negotiating the operating parameters of the TCP/IP protocol (see glossary). The computers in a local IP network (DHCP clients) access the DHCP server as part of their operating systems' start procedure.
The central administration of the TCP/IP operation parameters makes it possible to avoid address conflicts caused by IP addresses (see glossary) accidentally assigned more than once.
DHCP is used in IPv4 networks (see glossary).
DHCP server
The DHCP server assigns each client an IP address that it has not yet been assigned at the present time. The DHCP server also informs the client of the IP addresses of the DNS server to be used and of the default gateway. In assigning the IP addresses the DHCP server selects from a prescribed range of IP addresses.
DHCP is used in IPv4 networks (see glossary).
DNS
short for Domain Name System
Domain Name Service takes care of determining the IP address for a given domain name. This Domain Name Service runs on every computer. It accepts the domain name entered by a user and inquires about the corresponding IP address at a DNS server known to the service. If a DNS server cannot answer the inquiry itself, it can inquire about the IP address (DNS resolution) at other DNS servers.
If the Domain Name Service receives negative information from the DNS server (domain name not known), it can send inquiries to other DNS servers it knows or return a corresponding error message to the user. If it receives the desired IP address instead, the application can use the IP address to retrieve the destination desired by the user.
This hierarchical system of DNS servers is known as the Domain Name System. The addresses of the DNS servers at which the Domain Name Service is to inquire by default generally are handed over to the computer by the Internet service provider automatically whenever a connection to the Internet is established.
download
Download designates the transfer of files from the Internet to a computer.
DSL modem
A DSL modem connects a computer to the Internet via the DSL line. In contrast to the analog modem, a connection via the DSL modem does not mean that the telephone line is busy.
DSL router
A DSL router generally combines three different devices: a DSL modem (see glossary), a router, and a LAN switch.
A DSL router serves, first, to connect multiple computers or other network devices together to form a local network (LAN) so that the devices can exchange data with each other.
Second, a DSL router provides a central Internet connection that can be used by all devices in the home network at the same time. The DSL router's job is to control the data traffic between the local network and the Internet. If the DSL router is equipped with a firewall (see glossary), it protects the devices in the home network against attacks from the Internet.
DSL splitter
A DSL splitter is a device that separates telephone and DSL signals.
You need a DSL splitter if you have a fixed line (see glossary) and a DSL line. The splitter separates the telephone and DSL signals, which use the same cable to access your house or apartment. The splitter conducts telephone signals to your analog telephones or to the NT (see glossary). DSL signals are sent on to the DSL modem or DSL router.
dynamic IP address
A dynamic IP address is an IP address valid only for the duration of one Internet or network session.
Every computer participating in the Internet must have a uniquely assigned public IP address. Since only a limited number of such IP addresses is available, they must be used sparingly. That is why most of the Internet participants who dial in to the Internet receive a dynamic IP address. They are called dynamic because every participant receives a new public address that has not been assigned yet each time she or he connects to the Internet.
By contrast, dynamic addresses are usually used in local IP networks because they are easy to handle, and because using them avoids incorrect IP address entries or unintentional double assignments.
file system
A file system saves and manages files on a data medium (for instance, a hard drive or flash drive). The way the files are stored varies from one file system to the next.
The different operating systems offer different file systems. In Windows 7, Windows Vista and Windows XP the file systems FAT32 and NTFS are used most frequently. The file system of a data storage medium can be changed, for instance from FAT32 to NTFS.
fixed IP address
Fixed IP addresses are IP addresses (see glossary) which are permanently assigned to a computer or another device like a network printer.
Assigning fixed IP addresses makes sense in cases where a computer is always supposed to be accessible at a certain address (for instance, a web server or an e-mail server).
fixed line
A fixed line is a telephone line in the classic, landline telephone network. There are two kinds of fixed lines: analog lines and ISDN lines.
If you have a fixed line and a DSL line, the signals for both lines use the same cable to access your house or apartment. For this reason your telephony and Internet service provider supplies you with a DSL splitter (see glossary) that separates the telephone signals and DSL signals from each other.
firewall
A firewall protects a computer or local network against attacks from the Internet.
Most firewalls work with packet filters, which merely check the IP addresses and port numbers of incoming and outgoing data packets and filter the packets according to prescribed rules.
Within IPv4 networks, some firewalls also integrate additional concepts like IP masquerading and NAT to decouple data traffic by distinguishing strictly between the internal and external network.
Especially effective firewalls go even further, analyzing and evaluating the contents of the packets and filtering them according to prescribed rules. Such techniques may also include a Stateful Packet Inspection Firewall, for instance.
firmware
The firmware is the software of an electronic device, which is stored in the device and controls its functions.
FTP
short for File Transfer Protocol
The File Transfer Protocol allows files to be exchanged between two computers in the Internet. A computer on which the files are made available for downloading is called an “FTP server”. A special program is required for downloading files, known as an “FTP client”. Some web browsers contain FTP clients, but they are also available as independent software.
gateway
Gateway is a general term designating an interface between two networks. Such a network interface can be realized using a router or a bridge, for instance.
If a computer wants to transfer data packets to a computer in another network, it must first transmit the packet to the gateway. To do this, the computer must know the address of the gateway.
If all packets that cannot be delivered in a local network always are to be transmitted to their given recipients via the same gateway, for this purpose the address of the gateway must be saved as the default gateway in the network settings of the computer.
If a router is used for the shared Internet access in a local network, the IP address of the router must be entered as the default gateway in the TCP/IP settings of each computer that wishes to use the Internet connection.
HSPA
short for High Speed Packet Access
HSPA is a third-generation mobile radio standard further developed from the UMTS mobile radio standard. HSPA provides for throughput rates in the mobile radio network that are comparable with DSL (3.6 to 13.98 Mbit/s).
hub
A hub is a device that is used to connect network devices to each other, for instance through an Ethernet. Network devices are connected to each other in a star network, with each network device connected to the hub. There are no direct connections between the network devices.
A hub can either send or receive data. Received data are sent to all connected devices. All connected devices share the data throughput.
Internet telephony
VoIP (see glossary)
IP
short for Internet Protocol
The IP Internet Protocol is the most important basic protocol for the control of data exchange in local networks and in the Internet. The Internet protocol works without a connection; in other words, data packets are transmitted from the sender to the recipient without previous consultation. The addresses of the recipient and the sender in the data packets are given as IP addresses.
IPv4
short for Internet Protocol version 4
IPv4 is currently the conventional Internet protocol.
IPv4 addresses are 32 bits long, such that IPv4 offers an address space of 2^32 IP addresses, or just over four billion. The latest estimates suggest that the last IPv4 addresses will be assigned by the beginning of 2012.
The successor protocol to IPv4 is IPv6.
IPv6
short for Internet Protocol version 6
IPv6 is the successor protocol to IPv4.
IPv6 addresses are 128 bits long. This means that IPv6 makes approximately 340 undecillion ( 3.4 × 10^36 ) IPv6 addresses available. Each private user can be allotted over 18 quintillion public IPv6 addresses from her or his Internet service provider.
The dearth of addresses in IPv4 is only one of the reasons for introducing IPv6. IPv6 also offers additional advantageous characteristics in the framework of communication within IP networks.
IP address
In IP-based networks, for instance in the Internet and local networks, all connected devices are addressed via their IP addresses. So that data packets are sure to be delivered to the right address, each IP address may be assigned only once within the local IP network.
IPv6 addresses are structured differently from IPv4 addresses. IP addresses can be written in decimal, octal or hexadecimal format.
IP masquerading
IP masquerading is a technique used within IPv4 networks. With IP masquerading a computer or LAN can be protected from unauthorized connection requests from the Internet. Masquerading works by converting the IP addresses used in a network to one public IP address. From the outside it appears as if all requests are sent from a single computer.
IP network
A network in which data exchange takes place on the basis of the Internet Protocol (IP) is called an IP network.
NAS functionality
NAS is short for Network Attached Storage
NAS designates one or more devices that are integrated into a network to provide storage space.
In connection with the FRITZ!Box, NAS functionality means that various services for connected USB storage media are available in the FRITZ!Box so that it easier for you to use your data and make them available in the local network. It is easy to exchange documents in the local network via the storage medium on the FRITZ!Box. The media server makes music, images and videos in the network available to compatible playback devices. Files can also be released for sharing in the Internet, and local memory expanded by adding online storage.
NAT
short for Network Address Translation
NAT is a technique used within IPv4 networks. NAT is used in routers to replace the address information in data packets with new address information. A typical application for NAT is routers that connect local networks with the Internet. In local networks, every network device has a private IP address, while generally there is only one public IP address available for the Internet. To grant the network devices access to the Internet, the router replaces the private IP address of the sender with its own public IP address in all outgoing data packets. The router saves all necessary information in a table so that incoming data packets can then be assigned to the correct network device.
NTBA
short for Network Termination for ISDN Basic Rate Access
The NT is the network termination device on the ISDN basic rate terminal. The ISDN terminal devices are connected to the NT, for instance the ISDN telephone system (PBX) or ISDN telephones.
public IP address
A public IP address is an IP address (see glossary) valid in the Internet. Every computer or router participating in the Internet must have a uniquely assigned public IP address. This address is usually negotiated dynamically with the Internet service provider when a connection to the Internet is dialed. The Internet service provider assigns the negotiated IP address to the computer or router for the duration of an Internet session.
port
So that a single network connection on a computer can be used by multiple applications to exchange data with remote sites at the same time, a computer administers what are known as ports for the IP-based protocols TCP and UDP. Ports substantiate the point of access for the data packets
delivered via the IP Internet protocol. While the IP address determines the destination computer quite generally, the port addresses the communication interface provided by an application for a certain communication procedure.
The Internet protocol allots 16 bits for the specification of the port number. Thus a total of 65,535 different port numbers can be specified. Ports up to port number 1,024 are reserved for special system applications and typical Internet applications. These include, for instance, the port numbers 21 for FTP (File Transfer Protocol), 25 for SMTP (Simple Mail Transfer Protocol), 53 for DNS (Domain Name Service) and 80 for HTTP (Hypertext Transfer Protocol).
Ports are primarily of interest to users for their role in protecting an Internet connection from external attacks. Most firewalls offer the possibility of preventing data traffic on certain ports. This means that certain port numbers can be blocked to prevent data from being delivered to system services. This is also a way of preventing any Trojans (malicious applications opening backdoors on computers) that may have infected your computer from receiving data on ports it created as means of accessing your computer for potentially damaging activities. A firewall blocks most of the atypical port numbers not required for normal operation of an application and offers specialized users the opportunity to forward specified ports.
port forwarding
With port forwarding it is possible to specify ports that will allow all incoming or outgoing data packets to pass through a router or firewall.
If a computer from the local network offers server services, for instance, the settings of a router using NAT (see glossary) or IP masquerading (see glossary) must enable or forward the port used by the server service for access to incoming data packets and thus keep it open permanently. The private IP address of the given computer must be saved as the destination address for all of the packets arriving at the port.
Typical server applications that require port forwarding are FTP and web servers. To allow access to a computer via remote management software like Symantec pcAnywhere or Microsoft's Remote Desktop, or even use of a file-sharing program like eDonkey, the required ports must be released for port forwarding. Port forwarding settings for the most important application cases are quite simple as long as the settings of the router or the firewall already contain rules with a corresponding preconfiguration.
private IP address
Private IP addresses are used for computers and other network devices within local IPv4 networks.
Since many local IP networks are not connected to the Internet except via single computers or routers (gateway), certain address ranges are excluded from the publicly available IP addresses so that they are available for assignment in local IP networks. An IP address may be assigned only once within the local network. A private IP address may exist in any number of other local networks.
remote configuration
TR-069 (see glossary)
splitter
DSL splitter (see glossary)
Stick & Surf
Stick & Surf is a technique developed by AVM for the fast, simple, error-free and secure configuration of radio networks. This technique allows for the straightforward transmission of all important parameters of a radio network from the WLAN base station to any computer that is to be added to the radio network.
In this process the radio parameters used, including the WLAN channel, SSID and WLAN standard used, as well as security parameters like the encryption method and network
key, are transferred almost fully automatically from the WLAN base station to the computer with the WLAN client that is to be connected.
subnetwork
A local IP network can consist of one subnetwork or be divided into multiple subnetworks. The division into subnetworks is performed when the local IP network is configured. The subnetworks of a local IP network are also IP networks (see glossary).
subnet mask
The subnet mask indicates which part of an IP address (see glossary) is the network address and which the address of the computer. The network address defines what is called the subnet.
switch
A switch is a device that connects multiple network devices with each other, for instance through an Ethernet.
In contrast to a hub, a switch can establish direct connections between the connected devices. This makes it possible to send data packets directly to specific recipients.
The entire data throughput is at the disposal of every connected device.
TCP/IP
short for Transmission Control Protocol / Internet Protocol
TCP/IP is the “language” of the Internet. TCP/IP is used to refer to a suite of protocols used for data communication over the Internet. TCP and IP are the network and transport protocols underlying most Internet services, including file transfer (FTP) and e-mail communication (SMTP). TCP/IP is available for practically all computer systems. TCP/IP thus offers the advantage of trouble-free communication between otherwise incompatible networks and systems.
TR-069
TR-069 is a technical directive that simplifies the automatic configuration of Internet access devices like the FRITZ!Box.
TR-069 describes the remote configuration of Internet access devices. In remote configuration the access and account data are automatically transmitted to the FRITZ!Box by the Internet service provider. These may include the account data for the Internet connection, Internet telephone numbers and login data for Internet telephony, or both.
The Internet service provider saves the data to be transmitted on what is called an Auto Configuration Server (ACS). When the FRITZ!Box is connected with the broadband line (for instance, DSL), the data can be transferred automatically from the ACS to the FRITZ!Box. This relieves the user of the task of manually setting up the Internet and/or Internet telephone numbers in the FRITZ!Box.
Encryption and ID verification ensure that the automatic configuration of the FRITZ!Box can not be intercepted or performed by unauthorized parties.
Automatic configuration of the FRITZ!Box is possible only if the Internet service plnternet service providerrovider supports remote configuration with TR-069. Which data are transferred to the FRITZ!Box and how remote configuration is started depends on the provider. For some providers, for instance, the user must enter a start code in the FRITZ!Box user interface.
UMTS
short for Universal Mobile Telecommunications System
UMTS is a third-generation (3G) mobile radio standard with throughput rates of 384 Kbit/s to 7.2 Mbit/s.
The high throughput rates make it possible to support multi-media services. With special cards or USB sticks the Internet connection can also be provided for laptops or computers via UMTS.
update
A more recent version of software or firmware is called an update. Updates are often free of charge, resolve minor programming errors, and sometimes also offer new functions.
uplink port
The uplink port on a hub or switch is designed for connecting another hub or switch, or a router. In contrast to the uplink port, there is also a user port for connecting terminal devices. The send and receive directions are transposed on the uplink port. On some devices the port can change between normal and uplink mode by means of a switch.
upload
This term designates the procedure of transmitting files from one's own computer to another computer in the Internet.
UPnP
short for Universal Plug and Play (UPnP)
UPnP is an extension of the Microsoft Plug & Play standard that allows devices to network globally and to exchange services—without a central server or computer.
UPnP allows devices from all kinds of manufacturers (stereo systems, routers, printers, house controls) to be controlled via an IP-based network (see glossary), with or without central control through a gateway. It is based on a number of standardized network protocols and data formats. Expressed simplistically, devices can communicate with each other automatically using UPnP to exchange information.
Today the UPnP forum specifies the UPnP standard and certifies devices that are compliant with this standard.
UPnP AV
short for Universal Plug and Play Audio/Video
UPnP AV is a UPnP specification for the interaction between the media server, playback devices and devices controlling the streaming (transmitting a data stream) of audio, image and video data within networks. Media servers are devices that make audio, image and video data available upon request. Playback devices render the audio, image and video data (television, stereo system, streaming clients). Control devices are remote controls (smartphone, remote control).
USB
short for Universal Serial Bus
The Universal Serial Bus is an interface for transferring data between a computer and connected devices. It was introduced in 1996. Today nearly all computers have multiple USB ports. USB is used, for instance, to connect many keyboards, mice, printers and external hard drives to the computer.
By now many other devices also have a USB port. For instance, many DVD and Blue-ray players can play back images, videos and music directly from a USB storage medium (hard drive, flash drive).
The Universal Serial Bus supports hot plugging. This means that USB devices can be connected without turning the computer off. The Universal Serial Bus also offers a 5-Volt power supply. This makes it possible to load devices at the USB port and operate USB devices that do not have a power supply of their own.
The Universal Serial Bus was introduced with the USB 1.0 specification in 1996. In 1998 came the reworked USB 1.1 specification, followed in 2000 by USB 2.0. With 480 Mbit/s, USB 2.0 provides for considerably higher throughput rates than USB 1.0/1.1 (12 Mbit/s).
VDSL
short for Very High Speed Digital Subscriber Line
In Germany, the DSL technology VDSL is increasingly becoming available in the VDSL2 (G993.2) version. VDSL2 is a further development of the ADSL2+ standard, to which it is fully
downward compatible. The standard provides for throughput rates of up to 100 Mbit/s for uploading and downloading, but requires a distribution network with a more closely meshed infrastructure—a demand that is hardly economical outside of major urban areas.
VPN
short for Virtual Private Network
VPN serves to integrate devices from a neighboring network into your own network, without the networks having to be compatible with each other.
A VPN is generally an independent company network distributed over several locations, which uses the infrastructure of a public communications network to link its partial networks or to link individual computers to the rest of the network. A VPN uses tunneling technologies and typically builds on the infrastructure of the Internet.
Using a Virtual Private Network it is possible to use all network applications of the company network even from distant locations. This means it is possible to use the advantages of the network even over large geographical distances.
VPN facilitates optimum information flow without delay throughout the entire company, even to offices in other locations. E-mail servers, file sharing and other central applications of the company network can thus be made available via VPN even to distant branch offices, subsidiaries and home offices. With VPN, field representatives of a company can also be granted secure access to the company network.
VoIP
short for for Voice over IP, also known as Internet telephony
Calls from the Internet are possible to and from the fixed-line network and mobile communications networks. Various Internet service providers and telephony carriers provide SIP-fixed-line gateways for this purpose. The gateways are used to produce voice connections between the Internet and conventional telephone networks.
In principle, VoIP calls can be made over any Internet connection. However, for convenient use with existing terminal devices, and for conversations with the fixed-line and mobile communications networks, it is important that the Internet service provider support what is known as the SIP standard. SIP is the current standard defined for VoIP by the IETF (Internet Engineering Task Force).
WLAN
short for Wireless Local Area Network
The term WLAN designates the industry standard for wireless local networks passed by the Institute of Electrical and Electronics Engineers (IEEE) in 1997 under the title IEEE 802.11.
By means of WLAN technology, individual computers or network devices like printers or DSL access points can be linked wirelessly to an existing cable-connected local network (LAN), or LANs can be converted completely to a wireless structure. A further useful purpose for WLAN technology is to link segments of existing cable-connected networks.
Although WLAN was actually developed only for short-range connections, by cascading WLAN base stations or implementing transmission networks with high-power point-to-point radio transmission, even network segments located further away from each other can be linked or network participants in relatively remote locations can be economically and easily integrated into an existing network.
WLAN base stations often also serve as access points to the Internet in private or public institutions. Many airports, hotels and cafes, for instance, make WLAN hotspots available to their customers, either free or subject to a charge. Ultimately this has maneuvered WLAN into serious competition with mobile UMTS technology.
The application possibilities for wireless network communication also overlap with Bluetooth technology. For mobile devices with limited energy capacity Bluetooth is the more useful solution, however, as Bluetooth uses considerably less
power than wireless LAN. What is more, Bluetooth technology is more flexible and thus can offer a greater bandwidth of potential applications.
Index
A
access rights user interface .... 28
access rules....41
accessories....112
advanced view 28
ambient conditions....107
analog extension 8
autochannel ....65 see WLAN autochannel
automatic error report ..... 109
AVM Stick & Surf 20
B
blocking Internet pages ..... 41
button power....9 WLAN....9
C
cable network cable....107
CE conformity declaration ..... 118
child protection....41
connecting....16 computers....17
FRITZ!WLAN USB Stick 20
multiple computers .... 18
to electrical power ..... 15
to LAN 17
to LAN port 17
to network hub/switch ..... 18
to WLAN....19
USB devices 81
connecting computer 17
connecting to DSL....16
connecting to electrical power ..... 15
copyright....117
customer service....108
D
declaration of CE conformity ..... 118
DHCP server integrated....74
disposal....119
DNS server....50
DNSSEC 50
documentation....108
drilling template 120
dynamic DNS....45
E
emergency IP address 73
ending operation 103
energy consumption....107
energy savings 90
evaluating DSL connection.....109
WLAN connection 109
exposed host 42
F
factory settings DHCP server ....74 IPv4 address ....74 loading with FRITZ!Box....103
feedback....109
filter 41
firmware updating....36
firmware update automatic search .... 36 searching and transmitting .... 35
firmware-update 35
FRITZ!OS 35
FRITZ!OS update....35
FRITZ!WLAN USB Stick 20
G
guest access WLAN 57
guest access LAN 4....77
H
help customer service .... 108
manual 108
support team 110
user interface 108
videos 108
hibernation 58
home network....70 see network
HSPA 16,33 see mobile communications
HTTPS....45
hub network....18 USB....81
|
imprint....117
information about FRITZ!Box ..... 27
information in the Internet videos....108
instructions handling ....13 security....12, 13
internal memory....103
Internet access regulating times .... 41
Internet connection configuration wizard....31
configuring 31
configuring manually .... 31
over DSL 31
via mobile communications network ..... 16, 33
Internet filter 41
Internet protocol version 6 ..... 51 see IPv6
Internet router 41
IP address changing....76
emergency 73
in Linux 80
in Mac OS X. 80
in Windows 78
obtaining automatically ..... 78
IPv4 address factory settings....74
IPv4 settings 73
IPv6 51
L
LAN connection....17
LAN guest access 77
LEDs 10
legal notice 117
M
manufacturer's warranty ..... 111
media server 83
mobile communications network . 16, 33
mobile network 53
MyFRITZ! 38
N
network....70
changing settings....76
connection 17
factory settings....73
IPv4 settings 73
network hub/switch 18
network overview 70
network settings. 70
prioritization 46
UPnP settings 77
network cable 107
network devices 70
remote maintenance of computer . 72
wake on LAN 72
new firmware....35
night service 58
notice legal....117
0
operation requirements ..... 11
overview information on FRITZ!Box ..... 27
P
package contents 11
password protection forgot password ....29 setup ....29 user interface ....28
physical specifications ..... 107
PIN method....21 see WPS
port forwarding 42
port forwarding IPv6 42
ports 8
ports and interfaces 106
power button 9
power consumption 107
R
recovery electrical equipment ..... 119 electronic equipment ..... 119
recycling 119
remote access .... 45, 48 see VPN
requirements for operation ..... 11
S
saving data 103
saving energy 90
schedule 58
security operating instructions ..... 12 user interface ..... 28 WLAN ..... 55
setting saving ....103
settings IP address....78 network....73 restoring....30 saving....30
software firmware .... 35
standard view 28
starting operation requirements for operation ..... 11
streaming 83
support ....108 by e-mail ....110 information in the Internet....108
switch .... 18 see network
symbols in the manual....6
T
technical specifications ..... 106
U
UMTS Internet connection ..... 16, 33
UMTS substitute connection ..... 53
update 35
UPnP settings....77
USB accessing memory....83 devices....81 ports....8 storage media....81
user interface opening......26 password protection......28 restoring settings......30 saving settings......30
V
videos 108
views advanced view .... 28 standard view .... 28
VPN 48 client 49 configuration wizard 49 remote access 48 supplementary software 49
W
wake on LAN 72
warranty....111
Wi-Fi Protected Setup (WPS) ..... 20
WLAN 19
base station 8
frequency ranges 64
guest access 57
manually 56
range 58
security 55
standards 60
switching on and off. 9
Wireless Local Area Network ..... 55
WPS 20,55
WLAN autochannel 65
WLAN button 9
WLAN connection
FRITZ!WLAN USB Stick 20
with Stick & Surf....20
with WPS 20
WLAN devices 19
connecting by WPS 20
WLAN frequency ranges 64
WLAN on/off 58
WLAN radio network
expanding....59, 59
WLAN security settings
manual transfer 23
WPS 20
PIN method 21
push-button configuration
(WPS-PBC) 21