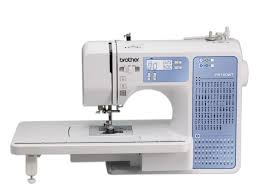
FS100WT - Machine à coudre BROTHER - Notice d'utilisation et mode d'emploi gratuit
Retrouvez gratuitement la notice de l'appareil FS100WT BROTHER au format PDF.


| Intitulé | Description |
|---|---|
| Type de produit | Machine à coudre électronique |
| Caractéristiques techniques principales | 100 points de couture, 8 boutonnières automatiques, 55 alphabets intégrés |
| Alimentation électrique | Adaptateur secteur 230V |
| Dimensions approximatives | 38 cm x 15 cm x 30 cm |
| Poids | 6,5 kg |
| Compatibilités | Compatible avec différents types de tissus, y compris le denim et la soie |
| Fonctions principales | Couture, broderie, quilting, surjet |
| Entretien et nettoyage | Nettoyage régulier de la machine, lubrification des pièces mobiles |
| Pièces détachées et réparabilité | Disponibilité de pièces détachées via le service après-vente Brother |
| Sécurité | Arrêt automatique, protection contre les surcharges électriques |
| Informations générales utiles | Garantie de 3 ans, manuel d'utilisation inclus, support technique disponible |
FOIRE AUX QUESTIONS - FS100WT BROTHER
Questions des utilisateurs sur FS100WT BROTHER
0 question sur cet appareil. Repondez a celles que vous connaissez ou posez la votre.
Poser une nouvelle question sur cet appareil
Téléchargez la notice de votre Machine à coudre au format PDF gratuitement ! Retrouvez votre notice FS100WT - BROTHER et reprennez votre appareil électronique en main. Sur cette page sont publiés tous les documents nécessaires à l'utilisation de votre appareil FS100WT de la marque BROTHER.
MODE D'EMPLOI FS100WT BROTHER
Operation Manual
Sewing Machine
Product Code: 888-E30/E31/E37/E38/V61/V63/V65/V67
1 KNOWING YOUR SEWING MACHINE
2 SEWING BASICS
3 UTILITY STITCHES
4 APPENDIX
IMPORTANT SAFETY INSTRUCTIONS
Please read these safety instructions before attempting to use the machine.
DANGER
- To reduce the risk of electric shock:
1 Always unplug the machine from the electrical outlet immediately after using, when cleaning, when making any user servicing adjustments mentioned in this manual, or if you are leaving the machine unattended.
WARNING
- To reduce the risk of burns, fire, electric shock, or injury to persons.
2 Always unplug the machine from the electrical outlet when making any adjustments mentioned in the instruction manual:
- To unplug the machine, switch the machine to the symbol "O" position to turn it off, then grasp the plug and pull it out of the electrical outlet. Do not pull on the cord.
- Plug the machine directly into the electrical outlet. Do not use an extension cord.
- Always unplug your machine if the power is cut.
3 Electrical Hazards:
- This machine should be connected to an AC power source within the range indicated on the rating label. Do not connect it to a DC power source or inverter. If you are not sure what kind of power source you have, contact a qualified electrician.
- This machine is approved for use in the country of purchase only.
4 Never operate this machine if it has a damaged cord or plug, if it is not working properly, if it has been dropped or damaged, or water is spilled on the unit. Return the machine to the nearest authorized dealer or service center for examination, repair, electrical or mechanical adjustment.
- While the machine is stored or in use if you notice anything unusual, such as an odor, heat, discoloration or deformation, stop using the machine and immediately unplug the power cord.
- When transporting the machine, be sure to carry it by its handle. Lifting the machine by any other part may damage the machine or result in the machine falling, which could cause injuries.
- When lifting the machine, be careful not to make any sudden or careless movements, otherwise you may injure your back or knees.
5 Always keep your work area clear:
- Never operate the machine with any air openings blocked. Keep ventilation openings of the machine and foot control free from the build up of lint, dust, and loose cloth.
- Do not store objects on the foot controller.
- Do not use extension cords. Plug the machine directly into the electrical outlet.
- Never drop or insert any object into any opening.
- Do not operate where aerosol (spray) products are being used or where oxygen is being administered.
- Do not use the machine near a heat source, such as a stove or iron; otherwise, the machine, power cord or garment being sewn may ignite, resulting in fire or an electric shock.
- Do not place this machine on an unstable surface, such as an unsteady or slanted table, otherwise the machine may fall, resulting in injuries.
6 Special care is required when sewing:
Always pay close attention to the needle. Do not use bent or damaged needles.
- Keep fingers away from all moving parts. Special care is required around the machine needle.
- Switch the machine to the symbol "O" position to turn it off when making any adjustments in the needle area.
- Do not use a damaged or incorrect needle plate, as it could cause the needle to break.
- Do not push or pull the fabric when sewing, and follow careful instruction when freehand stitching so that you do not deflect the needle and cause it to break.
7 This machine is not a toy:
- Your close attention is necessary when the machine is used by or near children.
- The plastic bag that this machine was supplied in should be kept out of the reach of children or disposed of. Never allow children to play with the bag due to the danger of suffocation.
- Do not use outdoors.
8 For a longer service life:
- When storing this machine, avoid direct sunlight and high humidity locations. Do not use or store the machine near a space heater, iron, halogen lamp, or other hot objects.
- Use only neutral soaps or detergents to clean the case. Benzene, thinner, and scouring powders can damage the case and machine, and should never be used.
- Always consult the operation manual when replacing or installing any assemblies, the presser feet, needle, or other parts to assure correct installation.
9 For repair or adjustment:
- If the Light unit (light-emitting diode) is damaged, it must be replaced by authorized dealer.
- In the event a malfunction occurs or adjustment is required, first follow the troubleshooting table in the back of the operation manual to inspect and adjust the machine yourself. If the problem persists, please consult your local authorized Brother dealer.
Use this machine only for its intended use as described in this manual.
Use accessories recommended by the manufacturer as contained in this manual.
The contents of this manual and specifications of this product are subject to change without notice.
For additional product information, visit our web site at www.brother.com
SAVE THESE INSTRUCTIONS
This machine is intended for household use.
FOR USERS IN COUNTRIES EXCEPT CENELEC COUNTRIES
This appliance is not intended for use by persons (including children) with reduced physical, sensory or mental capabilities, or lack of experience and knowledge, unless they have been given supervision or instruction concerning use of the appliance by a person responsible for their safety. Children should be supervised to ensure that they do not play with the appliance.
FOR USERS IN CENELEC COUNTRIES
This appliance can be used by children aged from 8 years and above and persons with reduced physical, sensory or mental capabilities or lack of experience and knowledge if they have been given supervision or instruction concerning use of the appliance in a safe way and understand the hazards involved. Children shall not play with the appliance.
Cleaning and user maintenance shall not be made by children without supervision.
FOR USERS IN THE UK, EIRE, MALTA AND CYPRUS ONLY
IMPORTANT
- In the event of replacing the plug fuse, use a fuse approved by ASTA to BS 1362, i.e.
carrying the mark, rating as marked on plug.
Always replace the fuse cover. Never use plugs with the fuse cover omitted.
- If the available electrical outlet is not suitable for the plug supplied with this equipment, you should contact your authorized dealer to obtain the correct lead.
CONTENTS
IMPORTANT SAFETY INSTRUCTIONS 1
CONTENTS 3
1. KNOWING YOUR SEWING MACHINE ....... 4
ACCESSIONS 4
Included accessories 4
Optional accessories 4
Accessory compartment 5
NAMES OF MACHINE PARTS AND THEIR
FUNCTIONS 5
The main parts 5
Needle and presser foot section 6
Operation buttons 6
Operation panel 6
Spool pin 7
USING YOUR SEWING MACHINE 7
Power supply precautions 7
Power supply 8
Foot controller 8
Sewing speed controller (for models equipped with the start/stop button) 9
Changing the needle stop position 9
Changing the initial needle position 9
Cancelling the operation beep (for models equipped with the operation beep) .... 9
THREADING THE MACHINE 10
Winding the bobbin 10
Lower threading 13
Upper threading 15
Drawing up the lower thread 18
REPLACING THE NEEDLE 18
Needle precautions 18
Needle types and their uses 19
Checking the needle 19
Replacing the needle 20
Sewing with the twin needle 21
REPLACING THE PRESSER FOOT 22
Replacing the presser foot 22
Removing the presser foot holder 23
2. SEwING BASICS 24
SEwING 24
General sewing procedure 24
Selecting a stitch 24
Adjusting the stitch length and width 24
Starting to sew 25
Thread tension 26
USEFUL SEWING TIPS 27
Trial sewing 27
Changing the sewing direction 27
Sewing curves 27
Sewing thick fabrics 27
Sewing hook-and-loop fastener 28
Sewing thin fabrics 28
Sewing stretch fabrics 28
Stitching cylindrical pieces 28
3. UTILITY STITCHES 29
OVERCASTING STITCHES 29
Using zigzag foot 29
Using overcasting foot 29
BASIC STITCHING 30
Basicstitching 30
BLIND HEM STITCHING 30
BUTTONHOLESEWING 32
Button sewing 35
ZIPPER INSERTION 36
SEWING STRETCH FABRICS AND ELASTIC
TAPE 37
Stretch stitching 38
Elastic attaching 38
APLIQUE, PATCHWORK AND QUILT
STITCHING 38
Appliqués 39
Patchwork (crazy quilt) stitching 39
Piecing 39
Quilting 39
Free-motion quilting 40
REINFORCEMENT STITCHING 41
Triple stretch stitching 41
Bar tack stitching 41
DECORATIVE STITCHING 42
Fagoting 43
Scallopstitching 44
Smocking 44
Shell tuck stitching 45
Joining 45
Heirloom stitching 45
SEWING CHARACTERS (For models equipped
with character stitches) 46
Selecting characters 46
Checking characters 48
Deleting characters 48
Sewing the character stitches 48
ADJUSTING STITCHES (For models equipped
with character stitches) 49
4. APPENDIX 50
STITCH SETTINGS 50
Utility stitches 50
Character stitches (for models equipped with
character stitches) 56
MAINTENANCE 57
Restrictions on oiling 57
Precautions on storing the machine 57
Cleaning the machine surface 57
Cleaning the race 57
TROUBLESHOOTING 58
Frequent troubleshooting topics 58
Upper thread tightened up 59
Tangled thread on wrong side of fabric 59
Incorrect thread tension 59
Fabric is caught in the machine and cannot be
removed 60
List of symptoms 63
ERROR MESSAGES 68
Operation beep (for models equipped with the
operationbeep) 68
INDEX 69

KNOWING YOUR SEWING MACHINE
ACCESSORIES
Included accessories
After opening the box, check that the following accessories are included. If any item is missing or damaged, contact your dealer.

Note
(For U.S.A. only)
- Foot controller: Model T
- This foot controller can be used on the machine with product code 888-E30/E31/E37/E38/V61/V63/V65/V67. The product code is mentioned on the machine rating plate.
The screw of the presser foot holder is available through your authorized dealer. (Part code: 132730-122) - The included accessories vary depending on the machine model.
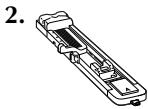
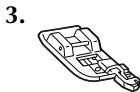
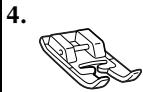
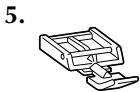
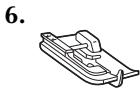
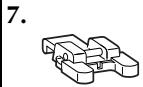
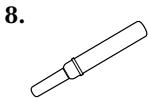
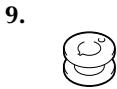
| No. | Part Name | Part Code | |
| Americas | Others | ||
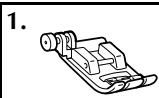
| 1 | Zigzag foot "J" (on machine) | XC3021-031 | |
| 2 | Buttonhole foot "A" | XC2691-033 | |
| 3 | Overcasting foot "G" | XC3098-031 | |
| 4 | Monogramming foot "N" | XD0810-031 | |
| 5 | Zipper foot "I" | X59370-021 | |
| 6 | Blind stitch foot "R" | XE2650-001 | |
| 7 | Button fitting foot "M" | XE2137-001 | |
| 8 | Seam ripper | XF4967-001 | |
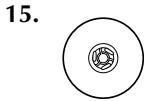
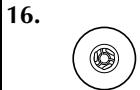
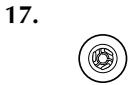
| 9 | Bobbin (4) (One is on machine.) | SA156 | SFB: XA5539-151 |
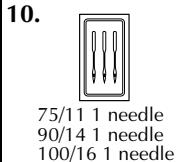
| 10 | Needle set | XC8834-021 | |
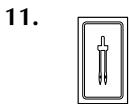
| 11 | Twin needle | 131096-121 | |
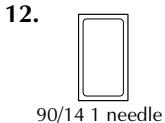
| 12 | Ball point needle (gold colored) | XD0360-021 | |
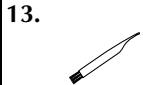
| 13 | Cleaning brush | X59476-051 | |
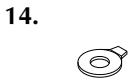
| 14 | Disc-shaped screwdriver | XC1074-051 | |
| 15 | Spool cap (large) | 130012-024 | |
| 16 | Spool cap (medium) (on machine) | XE1372-001 | |
| 17 | Spool cap (small) | 130013-124 | |
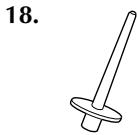
| 18 | Extra spool pin | XE2241-001 | |
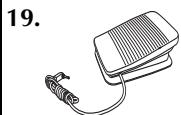
| 19 | Foot controller | XD0501-121 (EU area) XC8816-071 (Other areas) | |

Memo
- About zigzag foot "J"; Press the black button on the left side of the foot when it is difficult for thick seams to be fed, for example, at the beginning of sewing thick fabrics. (page 27)
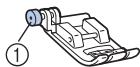
① Black button
Optional accessories
The following are available as optional accessories to be purchased separately. Depending on the model you purchased, the following accessory may be included with your machine.
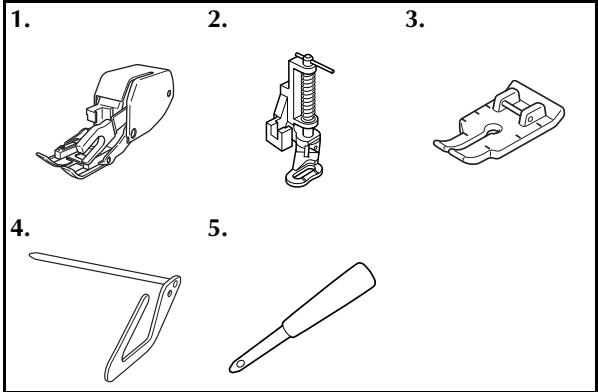
| No. | Part Name | Part Code | |
| Americas | Others | ||
| 1 | Walking Foot | SA140 | F033N: XG6623-001 |
| 2 | Quilting Foot | SA129 | F005N: XC1948-052 |
| 3 | 1/4-Inch Quilting Foot | SA125 | F001N: XC1944-052 |
| 4 | Quilting guide | SA132 | F016N: XC2215-052 |
| 5 | Eyelet punch | XZ5051-001 | |
Accessory compartment
The accessories are stored in a compartment inside the flat bed attachment. Slide the flat bed attachment to the left to open it.
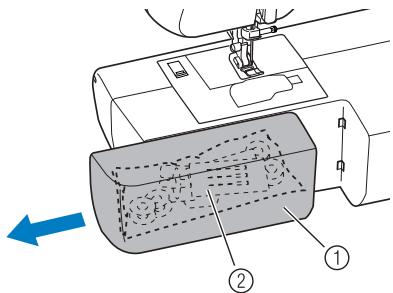
① Flat bed attachment
② Storage compartment

Note
- Put the accessories in the bag, and then store the bag inside the compartment. If the accessories are not in a bag, they may fall out, and be lost or damaged.
NAMES OF MACHINE PARTS AND THEIR FUNCTIONS
The illustrations in this operation manual may differ from the actual machine.
The main parts
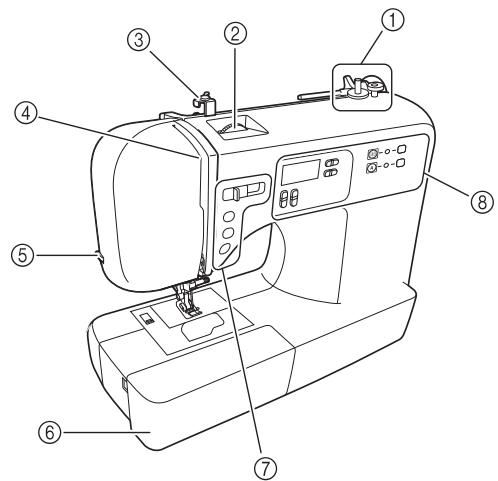
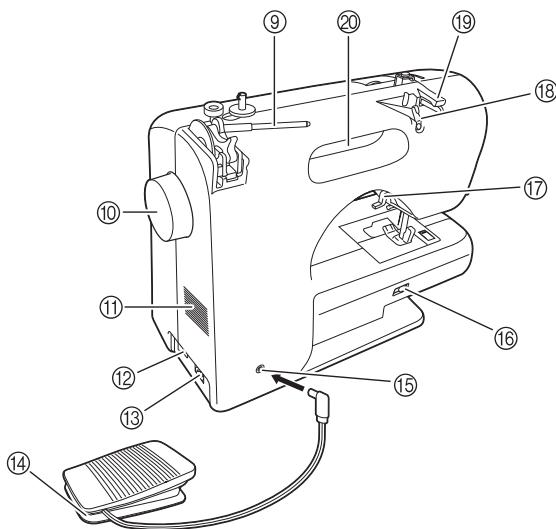
① Bobbinwinder(page10)
② Upper tension-control dial (page 26)
③ Bobbin-winding thread guide and pretension disc (page 10)
④ Thread take-up lever (page 16)
⑤ Thread cutter (page 26)
⑥ Flat bed attachment with accessory compartment (page 5 and 28)
⑦ Operation buttons (page 6)
⑧ Operation panel (page 6)
⑨ Spool pin (page 7, 10 and 15)
10 Handwheel
This is used to manually raise and lower the needle.
⑪ Air vent
This vent allows the air surrounding the motor to circulate. Do not cover the air vent while the sewing machine is being used.
② Main power and sewing light switch (page 8)
⑬ Jack/socket connector (page 8)
⑭ Foot controller (page 8)
15 Foot controller jack/socket (page 8)
Feed dog position lever (page 35 and 41)
⑦ Presser foot lever (page 15)
18 Thread guide (page 11 and 16)
19 Thread guide cover (page 11 and 16)
念 Handle
Carry the sewing machine by its handle when transporting the machine.
Needle and presser foot section
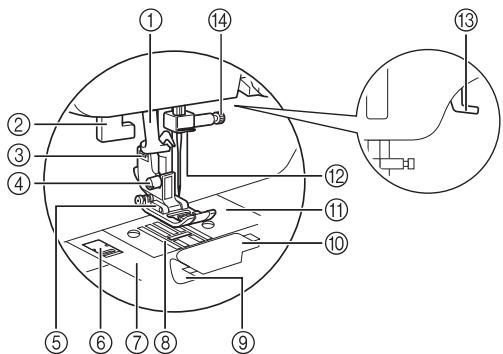
① Needle threads (for models equipped with the needle threader) (page 17)
② Buttonhole lever (page 34 and 42)
③ Presser foot holder
The presser foot is installed onto the presser foot holder.
(4) Presser foot holder screw
Use the presser foot holder screw to hold the presser foot holder in place.
⑤ Presser foot
The presser foot applies pressure consistently on the fabric as the sewing takes place. Attach the appropriate presser foot for the selected stitching.
⑥ Needle plate cover release
Use when removing the needle plate cover.
⑦ Needle plate cover
⑧ Feed dogs
The feed dogs feed the fabric in the sewing direction.
(9) Quick-set bobbin (for models equipped with the quick-set bobbin)
You can start sewing without pulling up the bobbin thread.
Bobbin cover
⑪ Needle plate
The needle plate is marked with guides for sewing straight seams.
念 Needle bar thread guide (page 16)
③ Presser foot lever
Raise and lower the presser foot.
14 Needle clamp screw
Operation buttons
The operation buttons differ depending on the sewing machine model.
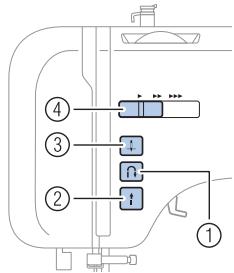
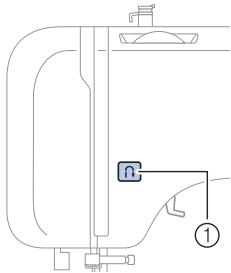
① Reverse/reinforcement stitch button
Press the reverse/reinforcement stitch button to sew reverse stitches. Reverse stitches are sewn by keeping the button pressed down to sew in the opposite direction. For details, refer to "Sewing reinforcement stitches" (page 26).
- Buttons provided on some models
② Start/stop button
Press the start/stop button to start or stop sewing. The machine sews at a slow speed at the beginning of sewing while the button is depressed. When sewing is stopped, the needle is lowered in the fabric. For details, refer to "Starting to sew" (page 25).
③ Needle position button
Press this button to raise or lower the needle.
④ Sewing speed controller
Slide this controller to adjust the sewing speed.
Operation panel
The operation panel allows you to select a stitch and specify how the stitch will be sewn. The operation panel differs depending on the sewing machine model.
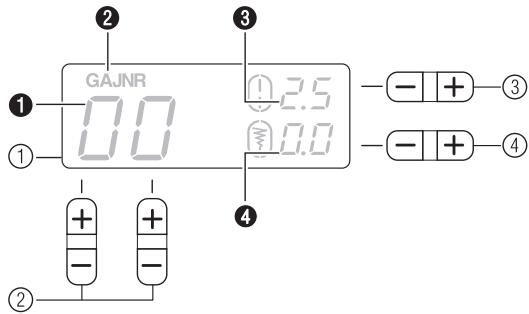
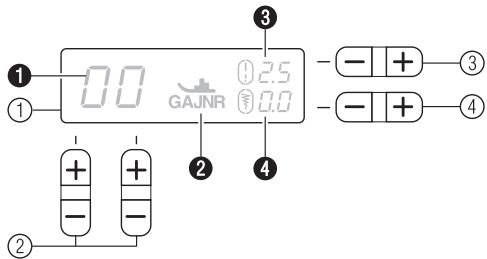
① LCD (liquid crystal display)
The number of the selected stitch (1), the presser foot type to be used (2), the stitch length (mm) (3), and the stitch width (mm) (4) are displayed here.
② ① ②
Select the number for the stitch that you wish to use.
③ Stitch length adjustment key
Press the - side to reduce the stitch length; press the +^ side to increase the stitch length.
④ Stitch width adjustment key
Press the - side to reduce the stitch width; press the + - side to increase the stitch width.
Keys and indicators provided on some models
⑤ Utility stitch key (page 24)
⑥ Utility stitch indicator
This indicator lights up when the utility stitch key is pressed.
⑦ Character stitch key (page 46)
Press this key to sew character stitches.
⑧ Character stitch indicator
This indicator lights up when the character stitch key is pressed.
Spool pin
As shown, press down on the spool pin lever with your finger to raise the spool pin.
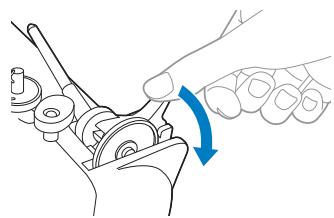
CAUTION
- Do not grab the bar to raise the spool pin, otherwise, the spool pin may bend or break.
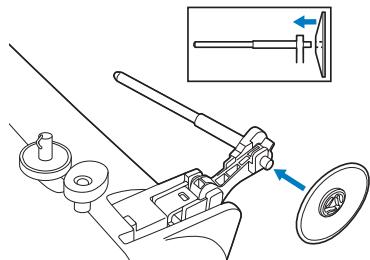
Storing the spool cap
The included spool cap (large, medium, small) can be stored by attaching it to the spool pin as shown in the illustration.
Storing the spool pin
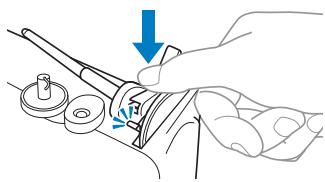
When placing the cover on the sewing machine or if the spool pin will not be used, return the spool pin to its storage position.
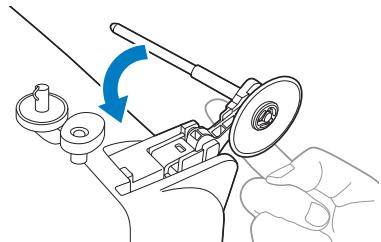
Press until it clicks.
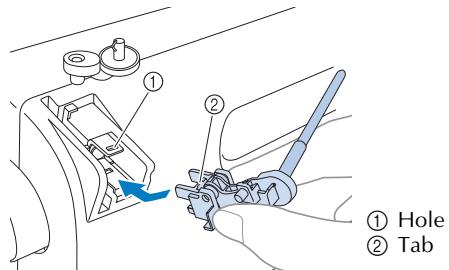
■ Installing the spool pin
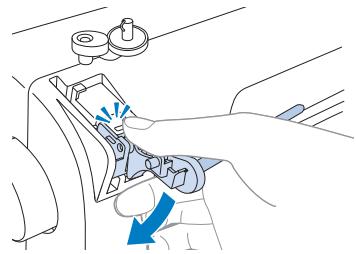
Insert the tab on the spool pin into the hole.
Push the spool pin down until it locks into place.
USING YOUR SEWING MACHINE
Power supply precautions
Be sure to observe the following precautions concerning the power supply.
WARNING
-
Use only regular household electricity for the power source. Using other power sources may result in fire, electric shock, or damage to the machine.
-
Make sure that the plugs on the power cord are firmly inserted into the electrical outlet and the power supply jack on the machine. Otherwise, a fire or electric shock may result.
-
Do not insert the plug on the power cord into an electrical outlet that is in poor condition.
-
Turn off the main power and remove the plug in the following circumstances:
-
When you are away from the machine
After using the machine - When the power fails during use
- When the machine does not operate correctly due to a bad connection or a disconnection
During electrical storms
CAUTION
- Use only the power cord included with this machine.
- Do not use extension cords or multi-plug adapters with many other appliances plugged in to them. Fire or electric shock may result.
- Do not touch the plug with wet hands. Electric shock may result.
- When unplugging the machine, always turn off the main power first. Always grasp the plug to remove it from the outlet. Pulling on the cord may damage the cord, or lead to fire or electric shock.
- Do not allow the power cord to be cut, damaged, modified, forcefully bent, pulled, twisted, or bundled. Do not place heavy objects on the cord. Do not subject the cord to heat. These things may damage the cord and cause fire or electric shock. If the cord or plug is damaged, take the machine to your authorized dealer for repairs before continuing use.
- Unplug the power cord if the machine is not to be used for a long period of time. Otherwise a fire may result.
Power supply
Insert the plug into a wall outlet.
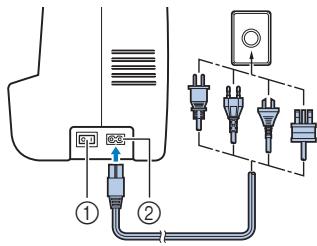
① Main power switch
② Jack/socket connector
Set the main power switch to "1".
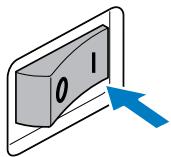
The sewing lamp comes on when the machine is turned on.
To turn off the machine, set the main power switch to "O".
The sewing lamp goes off when the machine is turned off.
Note
- If a power outage occurs while the sewing machine is being operated, turn off the sewing machine and unplug the power supply cord. When restarting the sewing machine, follow the necessary procedure to correctly operate the machine.
(For U.S.A. only)
- This appliance has a polarized plug (one blade wider than the other). To reduce the risk of electric shock, this plug is intended to fit in a polarized outlet only one way. If the plug does not fit fully in the outlet, reverse the plug.
If it still does not fit, contact a qualified electrician to install the proper outlet. Do not modify the plug in any way.
Foot controller
Insert the foot controller plug into its jack/socket.
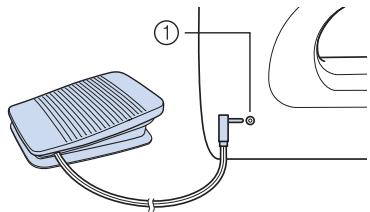
① Foot controller jack/socket
CAUTION
- When connecting the foot controller, be sure to turn off the sewing machine in order to prevent the machine from accidentally being started.
Depress the foot controller to start sewing, and adjust the sewing speed by changing the pressing force.
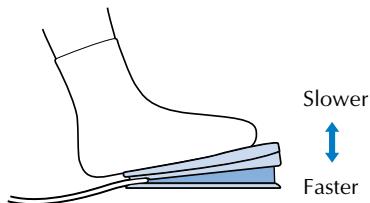
You should make sure that nothing is placed on the foot controller when the machine is not in use.
CAUTION
- Do not allow pieces of cloth and dust to build up on the foot controller. Doing so could cause a fire or an electric shock.

Note
- When the foot controller is plugged in, the start/stop button cannot be used to start sewing (only for models equipped with the start/stop button).
Sewing speed controller (for models equipped with the start/stop button)
Slide the sewing speed controller to select the desired sewing speed.
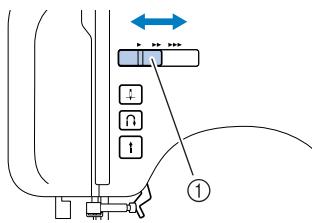
① Sewing speed controller
- The speed set using the sewing speed controller is the foot controller's maximum sewing speed.
Changing the needle stop position
Normally, the sewing machine is set to leave the needle in the fabric when sewing is stopped. Instead, the machine can be set to leave the needle raised when sewing is stopped.
Turn off the sewing machine.
Hold down the “-” side of + - (1) and turn on the sewing machine.
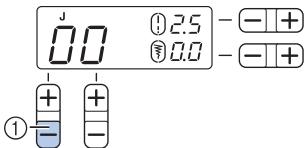
After turning on the sewing machine, release the "_" side of + (1).
The needle stop position changes to the raised position.

Memo
- Perform the same operation to change the needle stop position to the lowered position.
Changing the initial needle position
Normally, the straight stitch (left needle position) is automatically selected when the sewing machine is turned on. The initial needle position can be changed to the straight stitch (center needle position).
Turn off the sewing machine.
Hold down the "+" side of + (2) and turn on the sewing machine.
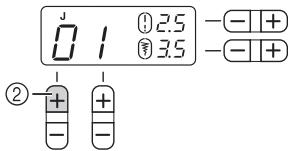
After turning on the sewing machine, release the " ^+ " side of + ②
The initial needle position changes to the center needle position.

Memo
The specified initial needle position is maintained even after the machine is turned off.
- Perform the same operation to change the initial needle position to the left needle position.
Cancelling the operation beep (for models equipped with the operation beep)
When the sewing machine is purchased, it is set to beep each time a key is pressed. This setting can be changed so that the machine does not beep.
Turn off the sewing machine.
Hold down the “-” side of - (3) and turn on the sewing machine.
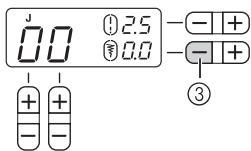
After turning on the sewing machine, release the "-" side of - (3).
The machine is now set so that it will not beep.
Memo No. 10
- Perform the same operation to change the setting so that machine beeps.
THREADING THE MACHINE
Winding the bobbin
This section describes how to wind the thread onto the bobbin.
- For details on the fast bobbin winding, see page 12.
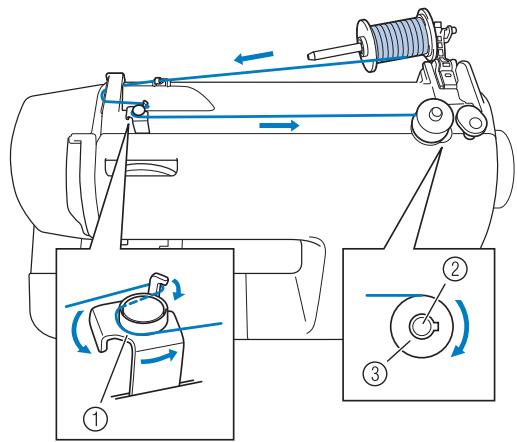
① Bobbin-winding thread guide
② Bobbinwindershaft
③ Bobbin
CAUTION
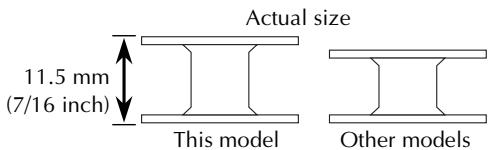
- Only use bobbins (part code: SA156, SFB: XA5539-151) that have been designed for this sewing machine. Using other bobbins may cause damage to the machine.
- We designed the bobbin that comes with this machine. If you use bobbins from other models, the machine will not work properly. Only use the bobbin that comes with this machine or bobbins of the same type (part code: SA156, SFB:XA5539-151).
Press down on the spool pin lever to swing up the spool pin. Then remove the spool cap.
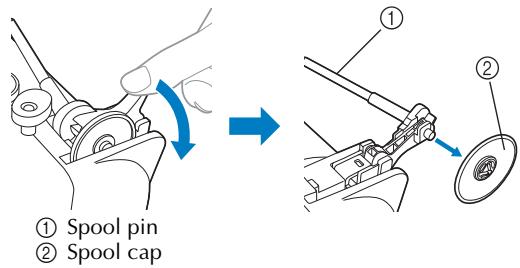
CAUTION
- Do not grab the bar to raise the spool pin, otherwise, the spool pin may bend or break.
- Be sure to raise the spool pin when winding the bobbin. The thread may become tangled if the bobbin winder is used without raising the spool pin.
Fully insert the spool of thread for the bobbin, and then slide the spool cap onto the spool pin.
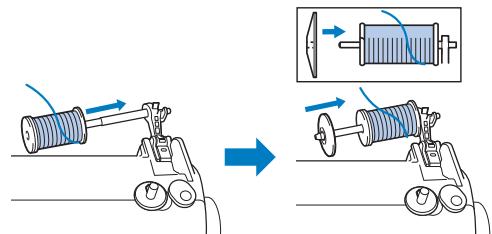
- The thread should be unwound from the bottom to the front.
CAUTION
- If the spool or the spool cap is not positioned correctly, the thread may become tangled around the spool pin or the machine may be damaged.
- Three spool cap sizes are available, allowing you to choose a spool cap that best fits the size of spool being used. If the spool cap is too small for the spool being used, the thread may catch on the slit in the spool or the machine may be damaged.
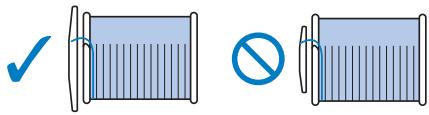

Memo
- When sewing with fine, cross-wound thread, use the small spool cap, and leave a small space between the cap and the spool.
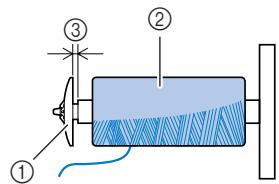
① Spool cap (small)
② Spool
(cross-wound thread)
③ Space

Pass the thread as illustrated below.
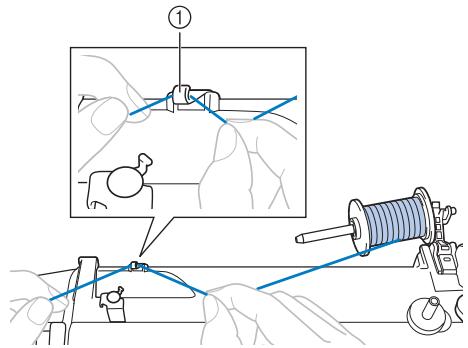
① Thread guide
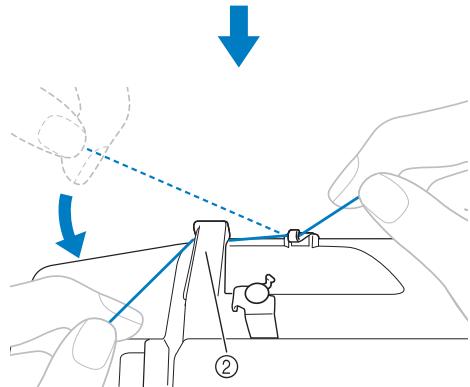
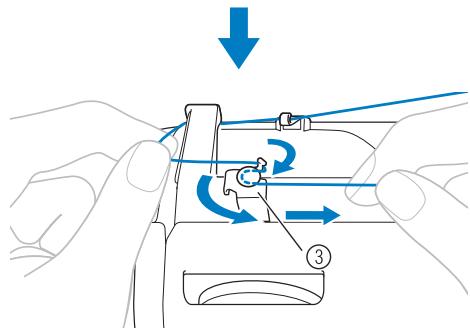
② Thread guide cover
③ Bobbin-winding thread guide
Make sure that the thread passes under the pretension disk.
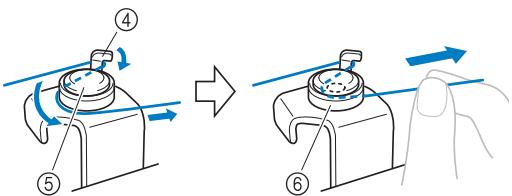
④ Hook
(5) Pretension disk
⑥ Pull it in as far as possible.

Note
- Make sure that the thread is pulled as far as possible into the pretension disk, otherwise the bobbin may not be wound cleanly.

Put the bobbin onto the bobbin winder shaft and slide the bobbin winder shaft to the right. Turn the bobbin clockwise, by hand, until the spring on the shaft slides into the notch in the bobbin.
- Make sure to pull out 7 to 10cm (3 to 4 inches) of thread from the hole on the bobbin.
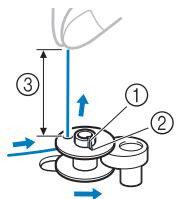
① Spring on the shaft
② Notch
③ 7-10 cm (3 to 4 inches)
CAUTION
Pull the thread taut and hold the end of the thread straight up. If the thread is too short, not pulled taut or held at an angle, injuries may occur when the thread is wound around the bobbin.

Turn on the sewing machine.

While holding the end of the thread, gently press the foot controller or press (start/stop button) (for models equipped with the start/stop button) to wind the thread around the bobbin a few times. Then stop the machine and trim the excess thread.

Note
- If the sewing machine is to be operated using the foot controller, connect the foot controller before turning on the machine.
- When the foot controller is plugged in, the start/stop button cannot be used to start sewing (only for models equipped with the start/stop button).
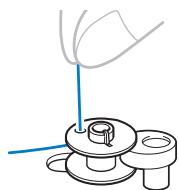
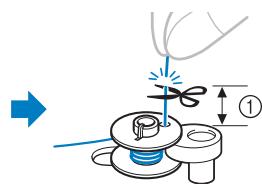
① 1cm(3/8inch)
CAUTION
- Make sure you follow the instructions carefully. If you do not cut the thread completely, and the bobbin is wound, when the thread runs low it may tangle around the bobbin and cause the needle to break.
Slide the sewing speed controller to the right (to set the speed to fast). (For models equipped with the sewing speed controller.)
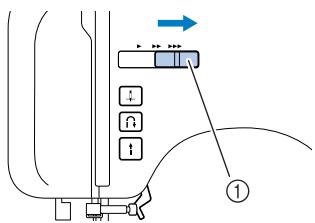
① Sewing speed controller
Press the foot controller or press (start/stop button) (for models equipped with the start/stop button) to start.
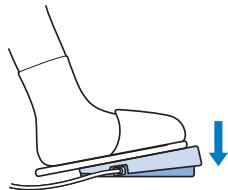
When the bobbin seems full and begins spinning slowly, take your foot off the foot controller or press (start/stop button) (for models equipped with the start/stop button).
Cut the thread, slide the bobbin winder shaft to the left and remove the bobbin.
Slide the sewing speed controller back to its original position (for models equipped with the sewing speed controller).

Memo
- When the sewing machine is started or the handwheel is turned after winding the thread around the bobbin, the machine will make a clicking sound; this is not a malfunction.
- The needle bar does not move when you slide the bobbin winding shaft to the right.
CAUTION
- Not winding the bobbin properly may cause the thread tension to loosen, and may break the needle.
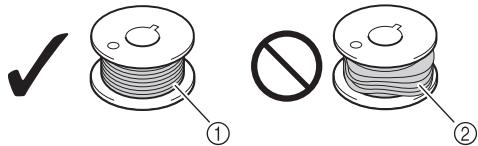
① Wound evenly
② Wound poorly
For models equipped with the fast bobbin winding system
Place the bobbin on the bobbin winder shaft so that the spring on the shaft fits into the notch in the bobbin. Then slide the shaft to the right.
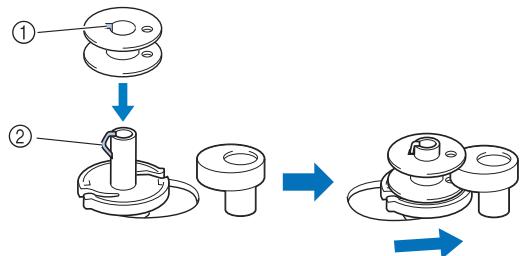
① Notch
② Spring
2 Follow steps 1 through 3 of the procedure in "Winding the bobbin" to pass the thread around the pretension disk (page 10).
3 Wind the free end of the thread clockwise around the bobbin five or six times.
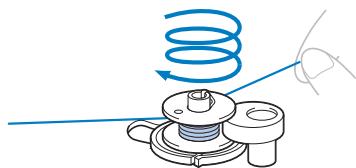
Pull the thread to the right and pass it through the slit in the bobbin winder seat.
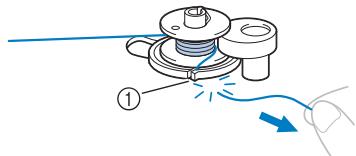
① Slit (with built-in cutter)
The thread is cut to a suitable length.
CAUTION
- Be sure to cut the thread as described. If the bobbin is wound without cutting the thread using the cutter built into the slit in the bobbin winder seat, the thread may become tangled in the bobbin or the needle may bend or break when the bobbin thread starts to run out.
Slide the sewing speed controller to the right (to set the speed to fast) (for models equipped with the sewing speed controller).
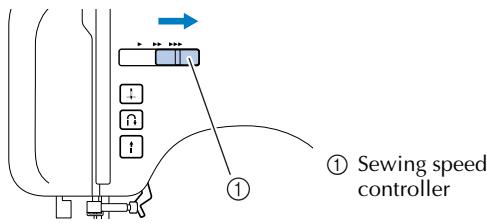
Turn on the sewing machine.
Press the foot controller or press (start/stop button) (for models equipped with the start/stop button) to start.

Note
- If the sewing machine is to be operated using the foot controller, connect the foot controller before turning on the machine.
- When the foot controller is plugged in, the start/stop button cannot be used to start sewing (only for models equipped with the start/stop button).
When the bobbin begins spinning slowly, take your foot off the foot controller or press (start/stop button) (for models equipped with the start/stop button).
Cut the thread, slide the bobbin winder shaft to the left, and then remove the bobbin from the shaft.

10 Slide the sewing speed controller back to its original position (for models equipped with the sewing speed controller).

Memo
- When the sewing machine is started or the handwheel is turned after winding the thread around the bobbin, the machine will make a clicking sound; this is not a malfunction.
The needle bar does not move when you slide the bobbin winding shaft to the right.
Lower threading
Install the bobbin wound with thread.
- For more details on quick-set bobbin, see page 14.
CAUTION
- Winding the bobbin improperly may cause the thread tension to loosen, breaking the needle and resulting in injury.
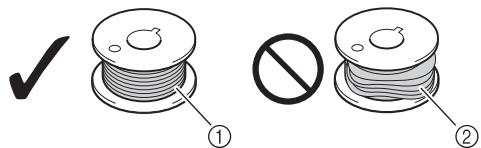
① Wound evenly
② Wound poorly
- Make sure you turn the power off while threading the machine. If you accidentally step on the foot controller and the machine starts to sew, you could be injured.

Memo
- The direction for feeding the bobbin thread is indicated by marks on the needle plate cover. Be sure to thread the machine as indicated.
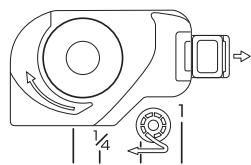
1 Raise the needle to its highest position by turning the handwheel toward you (counterclockwise) or press + (needle position button) (for models equipped with the needle position button), and raise the pressor foot lever.
Turn off the sewing machine.
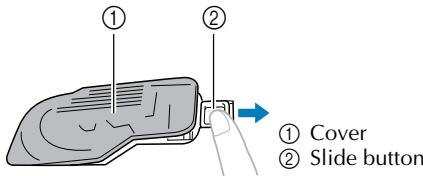
Slide the button and open the cover.
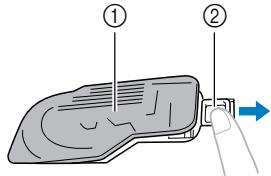
① Cover
② Slide button
Put the bobbin in so the thread comes out in the direction shown by the arrow.
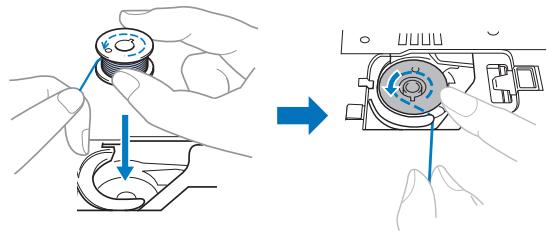
CAUTION
- Make sure you set the bobbin so the thread unrolls in the right direction. If the thread unrolls in the wrong direction, it may cause the thread tension to be incorrect or break the needle.

Hold the end of the thread, push the bobbin down with your finger, and then pass the thread through the slit, as shown.
- If the thread is not correctly inserted, it may cause incorrect thread tension (page 26).
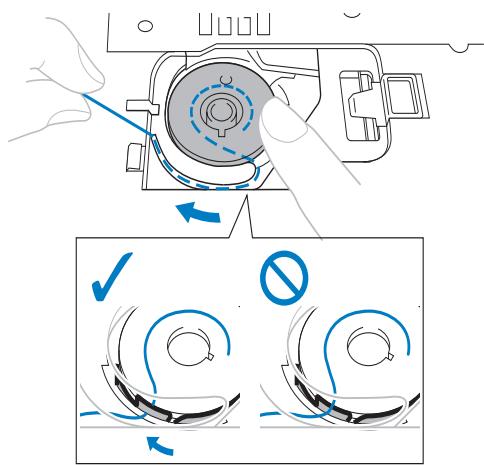

Replace the bobbin cover.
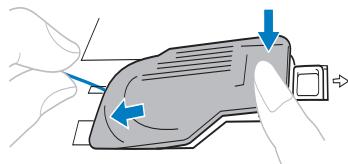
- Replace the cover so that the end of the thread comes out from the left side of the cover (as shown by the line in the diagram).
For models equipped with the quick-set bobbin

Memo
The direction for feeding the bobbin thread is indicated by marks on the needle plate cover. Be sure to thread the machine as indicated.
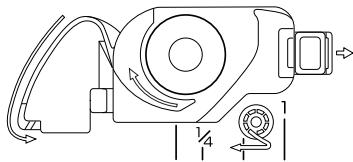

Raise the needle to its highest position by turning the handwheel toward you (counterclockwise) or press + (needle position button) (for models equipped with the needle position button), and raise the pressor foot lever.

Turn off the sewing machine.

Slide the button and open the cover.

Put the bobbin in so the thread comes out in the direction shown by the arrow.
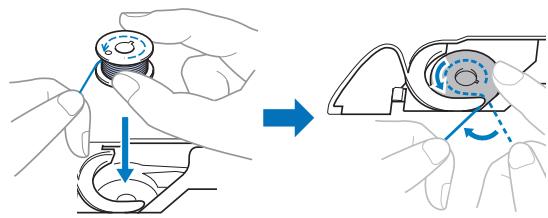
CAUTION
- Make sure you set the bobbin so the thread unrolls in the right direction. If the thread unrolls in the wrong direction, it may cause the thread tension to be incorrect or break the needle.

While lightly holding down the bobbin, guide the thread through the slit (1 and 2).
- At this time, check that the bobbin easily rotates counterclockwise.
Then, pull the thread toward you to cut it with the cutter (6).
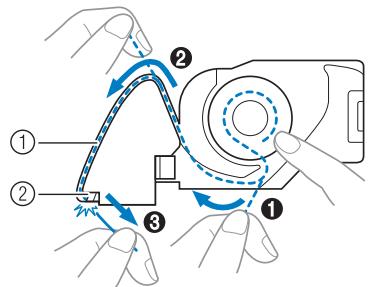
① Slit
② Cutter

Note
- If the thread is not correctly inserted through the tension-adjusting spring of the bobbin case, it may cause incorrect thread tension (page 26).
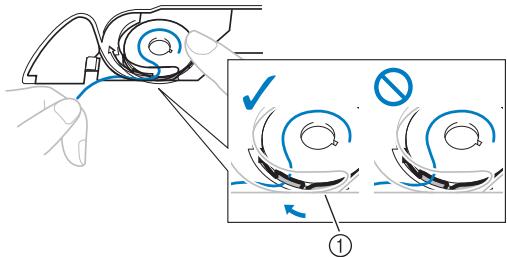
① Tension-adjusting spring

Replace the bobbin cover.

Memo
- You can begin sewing immediately without drawing up the bobbin thread. If you want to draw up the bobbin thread before you start to sew, follow to the procedure in "Drawing up the lower thread" (page 18).
Upper threading
Set the upper thread and thread the needle.
- For details on the needle threads, see page 17.
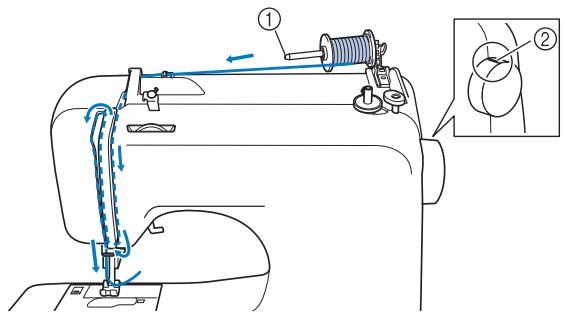
① Spool pin
② Mark on the handwheel
CAUTION
- When threading the upper thread, carefully follow the instructions. If the upper threading is not correct, the thread may become tangled or the needle may bend or break.
- Never use a thread weight of 20 or lower.
- Use the needle and the thread in the correct combination. For details on the correct combination of needles and threads, refer to "Needle types and their uses" (page 19).

Turn on the sewing machine.

Raise the presser foot using the presser foot lever.
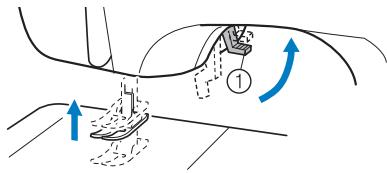
① Presser foot lever
CAUTION
- If the presser foot is not raised, the sewing machine cannot be threaded correctly.

Raise the needle by turning the handwheel toward you (counterclockwise) so that the mark on the wheel points up, or press + (needle position button) (for models equipped with the needle position button) once or twice to raise the needle.
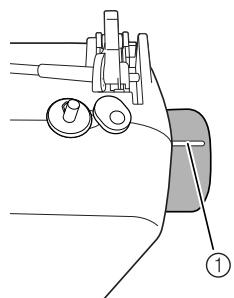
① Mark
or
② Needle position button
- If the needle is not correctly raised, the sewing machine can not be threaded. Be sure to turn the handwheel so that the mark on the wheel points up before threading the sewing machine.

Press down on the spool pin lever to swing up the spool pin. Then remove the spool cap.
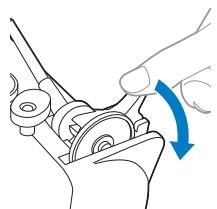
① Spool pin
② Spool cap

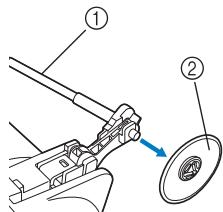
CAUTION
- Do not grab the bar to raise the spool pin, otherwise, the spool pin may bend or break.
- Be sure to raise the spool pin before use. If the spool of thread is in the wrong place, or is set incorrectly, the thread may tangle on the spool pin and cause the needle to break.

Fully insert the spool for the upper thread onto the spool pin.
Slide the spool cap onto the spool pin.
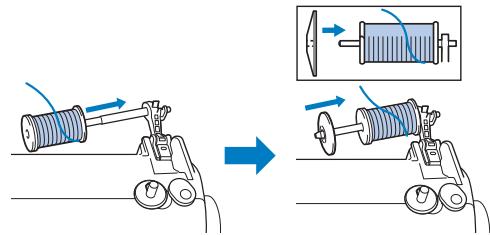
- The thread should be unwound from the bottom to the front.
CAUTION
- If the spool or the spool cap is not positioned correctly, the thread may become tangled around the spool pin or the needle may break.
- Three spool cap sizes are available, allowing you to choose a spool cap that best fits the size of spool being used. If the spool cap is too small for the spool being used, the thread may catch on the slit in the spool or the needle may break.
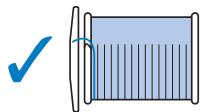

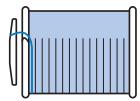

Memo
- When sewing with fine, cross-wound thread, use the small spool cap, and leave a small space between the cap and the spool.
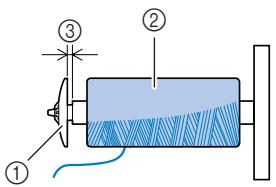
① Spool cap (small)
② Spool (cross-wound thread)
③ Space

Pass the thread as illustrated below.
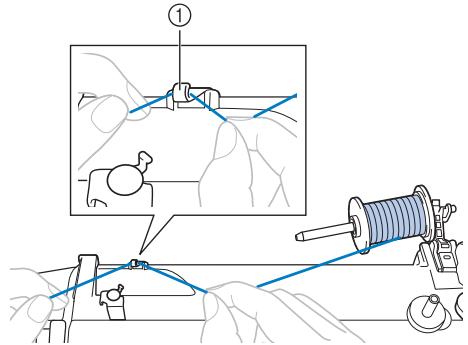
① Thread guide
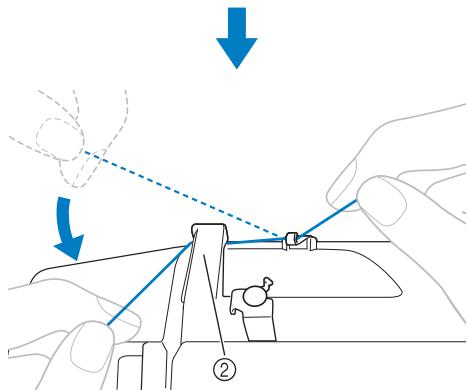
② Thread guide cover

Feed the upper thread as illustrated below.
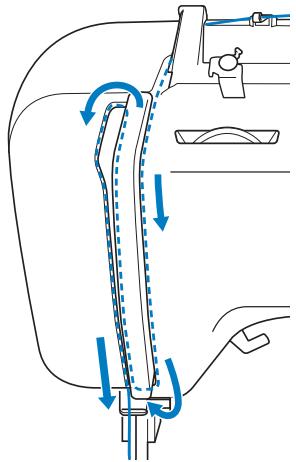

Make sure to guide the thread through the thread take-up lever from right to left.
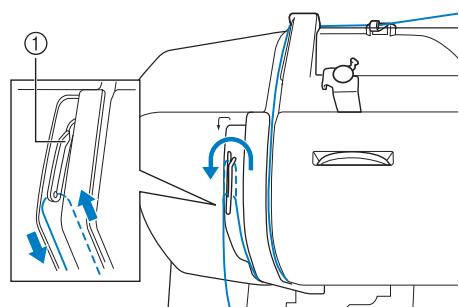
① Thread take-up lever

Memo
- If the needle is not raised, the thread take-up lever cannot be threaded. Be sure to press the needle position button to raise the needle before threading the thread take-up lever.

Put the thread behind the needle bar thread guide.
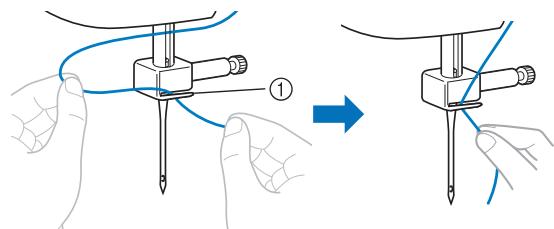
① Needle bar thread guide

Turn off the sewing machine.
CAUTION
- Make sure you turn the power off while threading the machine without using the needle threader (for models equipped with the needle threader). If you accidentally step on the foot controller and the machine starts to sew, you could be injured.

Thread the needle from front to back and pull out about 5cm (2 inches) of thread.
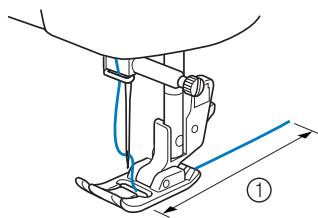
① 5cm(2inches)

Note
- If the thread take-up lever is lowered, the upper thread cannot be wrapped around the thread take-up lever. Make sure you raise the presser foot lever and the thread take-up lever before you feed the upper thread.
- If you incorrectly feed the thread you may cause sewing problems.
Using the needle threads (for models equipped with the needle threads)
CAUTION
- The needle threads can be used with a 75/11 through 100/16 home sewing machine needle. However, the needle threads cannot be used with a 65/9 home sewing machine needle. When using special thread such as transparent nylon thread or metallic thread, the needle threads cannot be used.
- Thread with a thickness of 130/120 or thicker cannot be used with the needle threads.
- The needle threads cannot be used with the wing needle or the twin needle.
- If the needle threads cannot be used, refer to "Upper threading" (page 15).

Follow steps 1 through 10 of the procedure in "Upper threading".

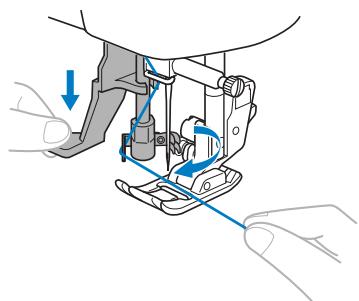
Lower the presser foot lever.

While lowering the needle threads lever, hook the thread onto the guide.
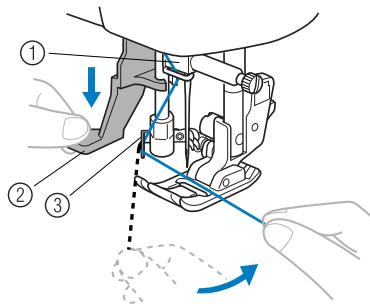
① Needle holder
② Needle threads lever
③ Guide

Fully lower the needle threads lever.
The hook passes through the eye of the needle, and catch the thread.
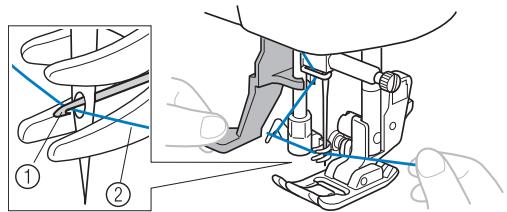
① Hook
② Thread

Release the needle threads lever. Then pull the loop of the thread.
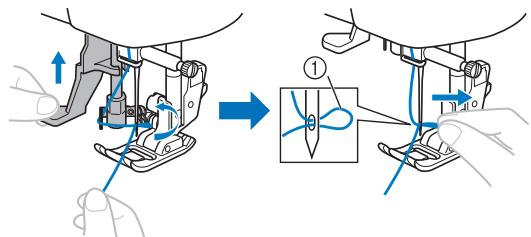
① Loop of thread
CAUTION
- Be careful not to pull on the thread with force or it may bend the needle.
- If the thread does not pass through the eye of the needle, start from step ③ again.

Raise the presser foot lever.
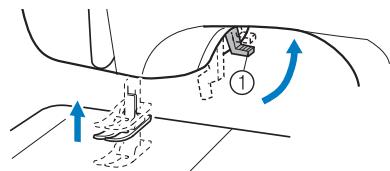
① Presser foot lever

Pass the end of the thread as illustrated below.
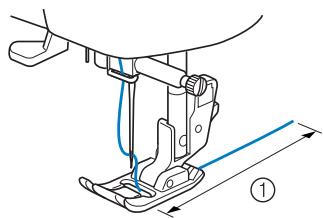
① 5cm(2inches)

Note
- If you incorrectly feed the thread you may cause sewing problems.
Drawing up the lower thread

Lightly hold the end of the upper thread.
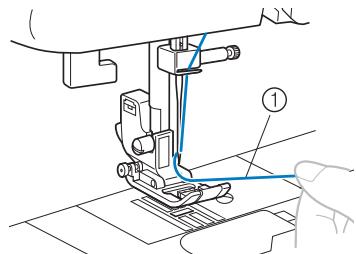
① Upper thread

While holding the end of the upper thread, raise the needle either by turning the handwheel toward you (counterclockwise) so that the mark on the wheel points up or by pressing + (needle position button) (for models equipped with the needle position button) once or twice.
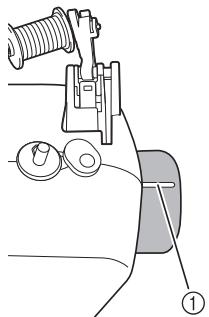
① Mark
or
② Needle position button

Pull on the upper thread to draw up the lower thread.
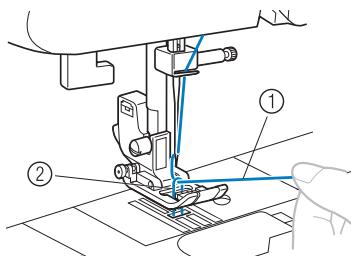
① Upper thread
(2) Lower thread

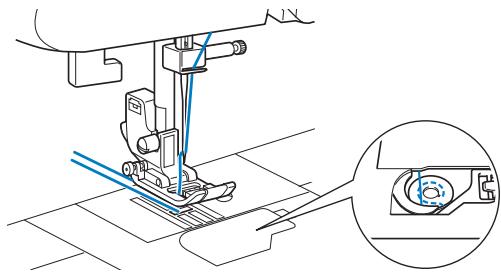
Pull out about 10cm (4 inches) of both threads and pull them toward the back of the machine under the presser foot.
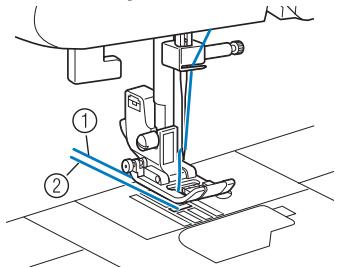
① Upper thread
② Lower thread

or models equipped with the quick-set Tobin
You can begin sewing immediately without drawing up the bobbin thread. When sewing gathers or darts, you can draw up the lower thread by hand so that some thread will be left over. Before you draw up the lower thread, put the bobbin back in.

Pass the thread along the slit in the direction of the arrow, and leave it there without cutting it.
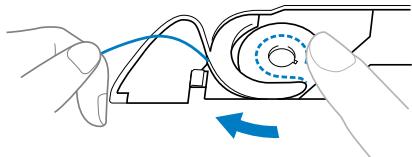
- The bobbin cover should still be removed.

Draw up the lower thread as described in steps 1 to 4.

Replace the bobbin cover.
REPLACING THE NEEDLE
This section provides information on sewing machine needles.
Needle precautions
Be sure to observe the following precautions concerning the handling of the needle. Failure to observe these precautions is extremely dangerous.
CAUTION
- Only use home sewing machine needles. Use of any other needle may bend the needle or damage the machine.
- Never use bent needles. Bent needles can easily break, possibly resulting in injury.
Needle types and their uses
The sewing machine needle that should be used depends on the fabric and thread thickness.
| Fabric Type/Application | Thread | Size of Needle | ||
| Type | Size | |||
| Medium weight fabrics | Broadcloth | Cotton thread | 60-90 | 75/11-90/14 |
| Taffeta | Synthetic thread | |||
| Flannel, Gabardine | Silk thread | 50 | ||
| Thin fabrics | Lawn | Cotton thread | 60-90 | 65/9-75/11 |
| Georgette | Synthetic thread | |||
| Challis, Satin | Silk thread | 50 | ||
| Thick fabrics | Denim | Cotton thread | 30 | 100/16 |
| 50 | 90/14-100/16 | |||
| Corduroy | Synthetic thread | 50-60 | ||
| Tweed | Silk thread | |||
| Stretch fabrics | Jersey | Thread for knits | 50-60 | Ball point needle 75/11-90/14 (gold colored) |
| Tricot | ||||
| Easily frayed fabrics | Cotton thread | 50-90 | 65/9-90/14 | |
| Synthetic thread | ||||
| Silk thread | 50 | |||
| For top-stitching | Synthetic thread | 30 | 100/16 | |
| Silk thread | 50-60 | 75/11-90/14 | ||

Note
- Never use a thread of weight 20 or lower. It may cause malfunctions.

Memo
- The smaller the thread number, the thicker the thread; and the larger the needle number, the thicker the needle.
Ball point needle
Use the ball point needle when sewing on stretch fabrics or fabrics where skipped stitches easily occur.
Use the ball point needle for best results when sewing patterns using monogramming foot "N".
Transparent nylon thread
Use a 90/14 to 100/16 needle, regardless of the fabric or thread.
CAUTION
- The appropriate fabric, thread and needle combinations are shown in the table on the this page. If the combination of the fabric, thread and needle is not correct, particularly when sewing thick fabrics (such as denim) with thin needles (such as 65/9 to 75/11), the needle may bend or break. In addition, the stitching may be uneven or puckered or there may be skipped stitches.
Checking the needle
Sewing with a bent needle is extremely dangerous since the needle may break while the machine is being operated.
Before using the needle, place the flat side of the needle on a flat surface and check that the distance between the needle and the flat surface is even.
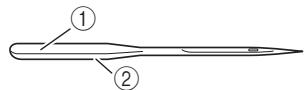
① Flat side
② Needle type marking
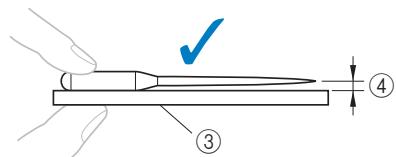
③ Flat surface
(4) Even
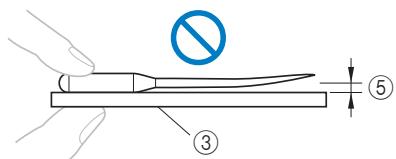
(5) Not even
Replacing the needle
1 Raise the needle by turning the handwheel toward you (counterclockwise) so that the mark on the wheel points up. (With models equipped with + (needle position button), raise the needle by pressing + once or twice.)
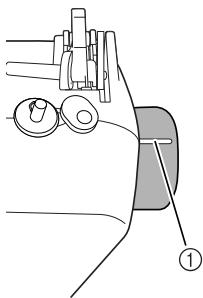
① Mark
or
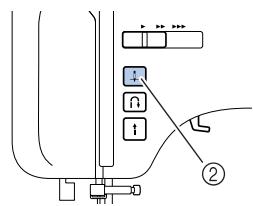
② Needle position button
Turn off the sewing machine.
CAUTION
- Before replacing the needle, be sure to turn off the sewing machine, otherwise injuries may occur if the foot controller or the start/stop button is accidentally pressed and the machine starts sewing.
3 Lower the presser foot lever.
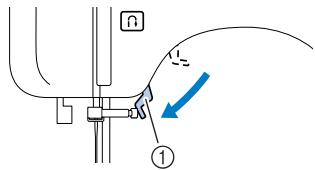
① Presser foot lever
CAUTION
- Before replacing the needle, place fabric or paper under the presser foot to prevent the needle from falling into the hole in the needle plate.
4 Remove the needle by turning the needle clamp screw counterclockwise.
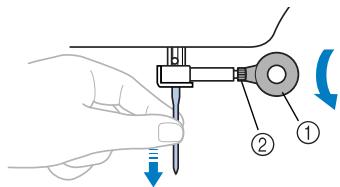
① Disc-shaped screwdriver
② Needle clamp screw
Note
-
If the needle clamp screw is loosened too much, the needle clamp (which holds the needle) may fall off. Therefore, do not loosen the needle clamp screw too much.
-
Do not apply strong force when loosening or tightening the needle clamp screw, otherwise certain parts of the sewing machine may be damaged.
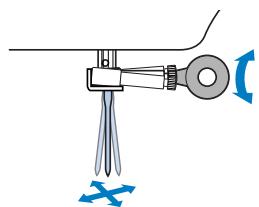
With the flat side of the needle toward the rear of the machine, insert the needle until it touches the needle stopper.
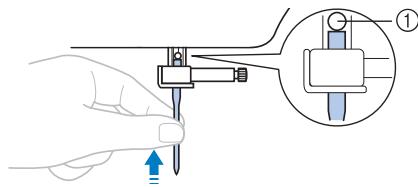
① Needle stopper
6 Tighten the needle clamp screw by turning it clockwise.
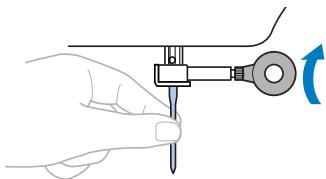
Install the twin needle in the same way.
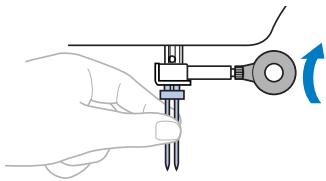
CAUTION
- Be sure to insert the needle until it touches the needle stopper and securely tighten the needle clamp screw with the disc-shaped screwdriver, otherwise the needle may break or damage may result.
Sewing with the twin needle
You can sew with this needle and two top threads. You can use the same color or two different colors of thread for making decorative stitches.
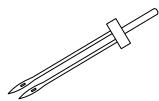
① Twin needle
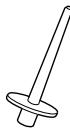
② Extra spool pin
CAUTION
Use only twin needles that have been made for this machine (part code: 131096-121). Other needles could break, and damage the machine.
- Do not sew with bent needles. The needle could break and injure you.
- You can not use the needle threader to thread the twin needle. Instead, thread the twin needle by hand, from front to back. Using the needle threader may damage the machine.
- When using the twin needle, be sure to select an appropriate stitch, otherwise the needle may break or the machine may be damaged.
- Select a stitch width of 5.0 ~mm (3/16 inch) or less, otherwise the needle may break or the machine may be damaged.
Install the twin needle.
- For details on installing a needle, refer to "Replacing the needle" (page 20).
Thread the upper thread for the left needle.
- For details, refer to steps 1 through 5 of "Upper threading" (page 15).
3 Manually thread the left needle with the upper thread.
Pass the thread through the eye of the needle from the front to the back.
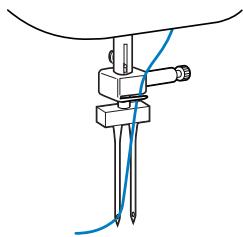
4 Insert the extra spool pin onto the end of the bobbin winder shaft.
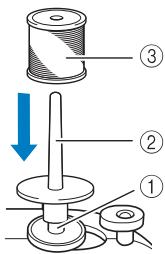
① Bobbinwindershaft
② Extra spool pin
③ Thread spool
Install the thread spool and thread the upper thread.
Memo No. 10
- When setting the thread spool, set it so that the thread winds off from the front of the spool.
Thread the upper thread for the right needle in the same way as the left needle.
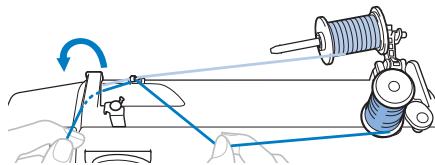
Without passing the thread through the needle bar thread guide, manually thread the right needle.
Pass the thread through the eye of the needle from the front to the back.
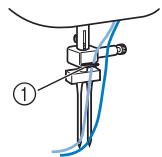
① Needle bar thread guide
8 Attach zigzag foot "J". (Refer to page 22.)
Note
Models equipped with a needle threadser
- You cannot use the needle threader to thread the twin needle. Instead, thread the twin needle by hand, from front to back. Using the needle threader may damage the machine.
CAUTION
- When using the twin needle, be sure to attach zigzag foot "J", otherwise the needle may break or the machine may be damaged.
Turn on the sewing machine.
Select a stitch.
- For details on selecting a stitch, refer to "Selecting a stitch" (page 24).
- For details on the stitches that can be sewn with the twin needle, refer to "STITCH SETTINGS" (page 50).
CAUTION
After adjusting the stitch width, slowly turn the handwheel toward you (counterclockwise) and check that the needle does not touch the presser foot. If the needle hits the presser foot, the needle may bend or break.
Start sewing.
For details on starting to sew, refer to "Starting to sew" (page 25).
Two lines of stitching are sewn parallel to each other.
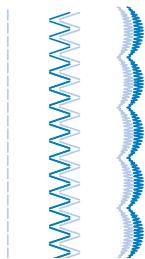

Note
- When using the twin needle, the stitches may become bunched together, depending on the types of thread and fabric that are used. If this occurs, increase the stitch length. For details on adjusting the stitch length, refer to "Adjusting the stitch length and width" (page 24).
CAUTION
- When changing the sewing direction, be sure to raise the needle from the fabric, and then raise the presser foot lever and turn the fabric. Otherwise the needle may break or the machine may be damaged.
- Do not try turning the fabric with the twin needle left down in the fabric, otherwise the needle may break or the machine may be damaged.
REPLACING THE PRESSER FOOT
CAUTION
Always turn off the power before you change the presser foot. If you leave the power on and step on the controller, the machine will start and you may be injured.
Always use the correct presser foot for the stitch pattern you have chosen. If you use the wrong presser foot, the needle may strike the presser foot and bend or break, and may cause injury.
- Only use presser feet that have been designed to be used with this machine. Using other any presser feet may cause an accident or injury.
Replacing the presser foot
Replace the presser foot as described below.

Raise the needle by turning the handwheel toward you (counterclockwise) so that the mark on the wheel points up. (With models equipped with + (needle position button), raise the needle by pressing + once or twice.)
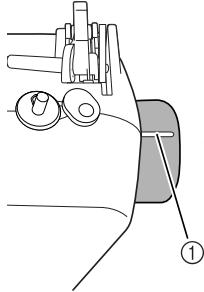
① Mark
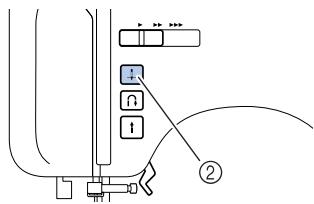
② Needle position button
If the sewing machine has been turned on, turn it off.
CAUTION
- Before replacing the presser foot, be sure to turn off the sewing machine, otherwise injuries may occur if the foot controller or the start/stop button is accidentally pressed and the machine starts sewing.

Raise the presser foot lever.
Press the black button to release the presser foot.
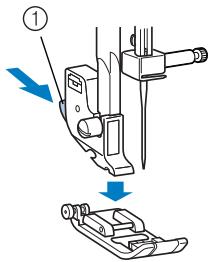
① Black button
Place a different presser foot below the presser foot holder so that the presser foot pin is aligned with the shank in the holder.
Position the presser foot so the letter indicating the presser foot type (J, A, etc.) is positioned to be read.
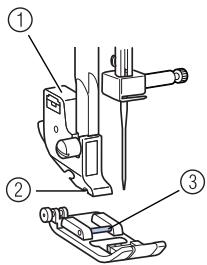
① Presser foot holder
(2) Shank
③ Pin

Note
- The presser foot to be used with each stitch appears in the LCD. To select a stitch, refer to "Selecting a stitch" (page 24).
Slowly lower the presser foot lever so that the presser foot pin snaps into the shank.
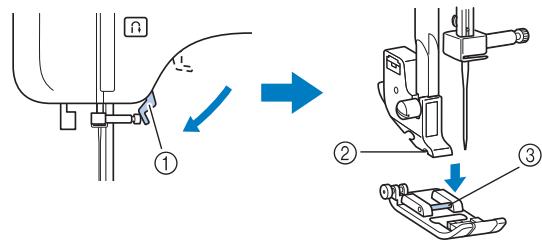
① Presser foot lever
② Shank
③ Pin
The presser foot is attached.
7 Raise the presser foot lever to check that the presser foot is securely attached.
Removing the presser foot holder
Remove the presser foot holder when cleaning the sewing machine or when installing a presser foot that does not use the presser foot holder, such as the quilting foot. Use the disc-shaped screwdriver to remove the presser foot holder.
1 Remove the presser foot. (Refer to page 22.)
Loosen the presser foot holder screw.
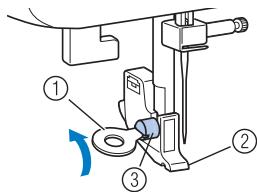
① Disc-shaped screwdriver
② Presser foot holder
③ Presser foot holder screw
■ Attaching the presser foot holder
Align the presser foot holder with the lower-left side of the presser bar.
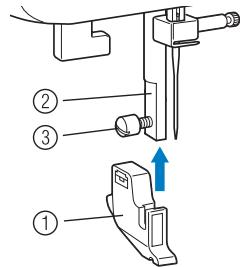
① Presser foot holder
② Presser bar
③ Presser foot holder screw
Holding the presser foot holder in place, tighten the screw.

- If the presser foot holder is not correctly installed, the thread tension will be incorrect.
CAUTION
- Be sure to securely tighten the presser foot holder screw, otherwise the presser foot holder may fall off and the needle may strike it, causing the needle to bend or break.
2 SEWING BASICS
SEWING
Basic sewing operations are described below. Before operating the sewing machine, read the following precautions.
CAUTION
- While the machine is in operation, pay special attention to the needle location. In addition, keep your hands away from all moving parts such as the needle and handwheel, otherwise injuries may occur.
- Do not pull or push the fabric too hard while sewing, otherwise injuries may occur or the needle may break.
- Never use bent needles. Bent needles can easily break, possibly resulting in injuries.
- Make sure that the needle does not strike basting pins, otherwise the needle may break or bend.
General sewing procedure
Follow the basic procedures below to sew.
1 Turn on the machine.
Turn on the sewing machine. For details on turning on the machine, refer to "Power supply" (page 8).

2 Select the stitch.
Select the stitch appropriate for the area to be sewn. For details on selecting a stitch, refer to "Selecting a stitch" (page 24).

3 Attach the presser foot.
Attach the presser foot appropriate for the stitch. For details on replacing the presser foot, refer to "Replacing the presser foot" (page 22).

4 Start sewing.
Position the fabric, and then start sewing. When sewing is finished, cut the threads.
For details on starting to sew, refer to "Starting to sew" (page 25).
Selecting a stitch
Using the stitch selection keys, select the desired stitch. When the sewing machine is turned on, the straight stitch ( left needle position) is selected.
Turn on the sewing machine.
(For models equipped with the character stitch key) Confirm that the utility stitch indicator is lit. If it is not lit, press the utility stitch key.
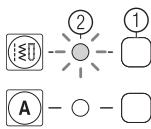
① Utility stitch key
② Utility stitch indicator
3 Press + + (stitch selection keys). The number of the selected stitch is displayed.
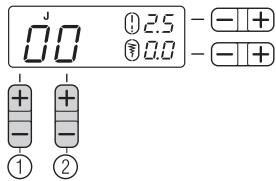
① Designate the tens digit.
② Designate the ones digit.
The stitch is selected.
4 Attach the presser foot indicated in the LCD.
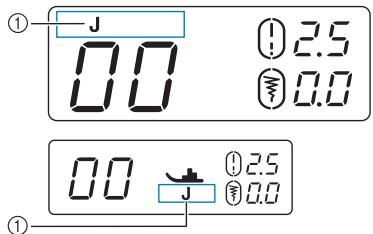
① Presser foot type
- For details, refer to "Replacing the presser foot" (page 22).
Adjusting the stitch length and width
[Example] Selecting stitch
Press the stitch selection keys to select stitch 04. With + on the right, select "4", and with + on the left, select "0".
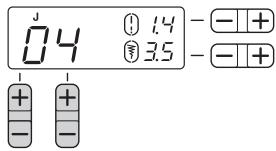
Press the "+" or "-" side of =1+ (stitch length adjustment key) to increase or reduce the stitch length.
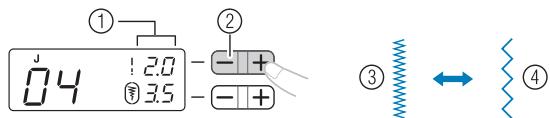
① Stitch length
② Stitch length adjustment key
③ Short
④ Long
Press the "+" or "-" side of -+ (stitch width adjustment key) to increase or reduce the stitch width.
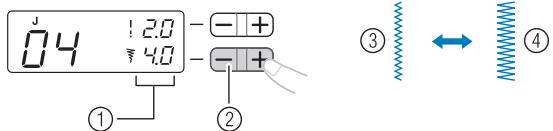
① Stitch width
② Stitch width adjustment key
③ Narrow
④ Wide

Note
- When the stitch length or stitch width is changed from the standard setting, around or disappears from the LCD.
CAUTION
After adjusting the stitch width, slowly turn the handwheel toward you (counterclockwise) and check that the needle does not touch the presser foot. If the needle hits the presser foot, the needle may bend or break.
- If the stitches are bunched together, increase the stitch length. Continuing to sew with the stitches bunched together may result in the needle bending or breaking.
Starting to sew
1 Raise the needle by turning the handwheel toward you (counterclockwise) so that the mark on the wheel points up. (With models equipped with + (needle position button), raise the needle by pressing + once or twice.)
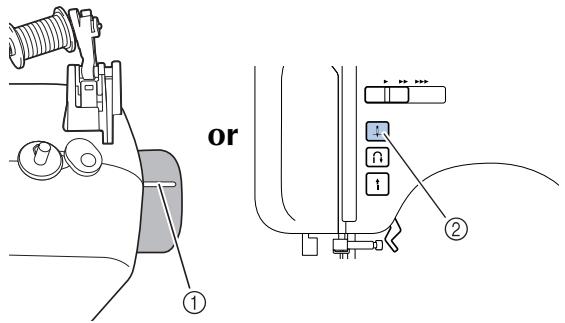
① Mark
② Needle position button
2 Raise the presser foot lever.
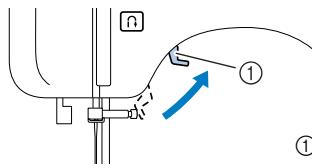
① Presser foot lever
Place the fabric under the presser foot, pass the thread under the presser foot, and then pull out about 5cm (2 inches) of thread toward the rear of the machine.
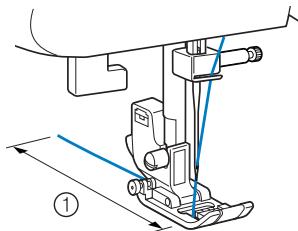
① 5cm (2 inches)
While holding the end of the thread and the fabric with your left hand, turn the handwheel toward you (counterclockwise) with your right hand to lower the needle to the starting point of the stitching.
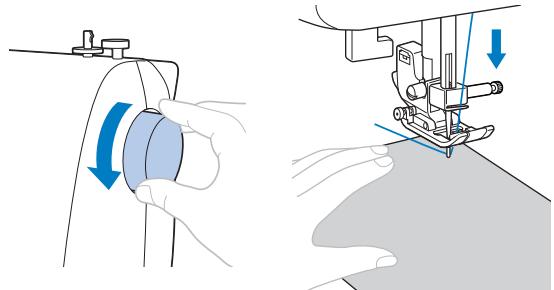
Lower the presser foot lever.
On models equipped with a sewing speed controller, slide the sewing speed controller to the left or right to adjust the sewing speed. Refer to "Sewing speed controller (for models equipped with the start/stop button)" (page 9).
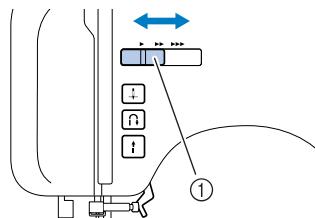
① Sewing speed controller
Slowly press down on the foot controller. (With models equipped with (start/stop button), if the foot controller is not connected, press once.)
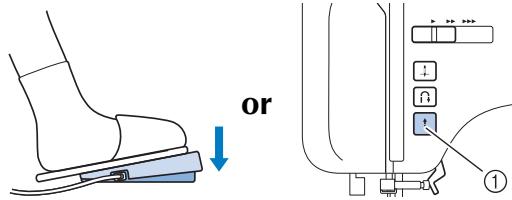
①Start/stop button
The machine starts sewing.
Take your foot off the foot controller, or press (start/stop button) once (if the machine was started by pressing (start/stop button)) (for models equipped with the start/stop button). The machine stops sewing.
9 Raise the needle by turning the handwheel toward you (counterclockwise) so that the mark on the wheel points up. (With models equipped with + (needle position button), raise the needle by pressing + once or twice.) This procedure is not necessary if the needle stop position has been set to the raised position (page 9).
10 Raise the presser foot lever.
Pull the fabric to the left side of the machine, and then cut the threads by using the thread cutter.
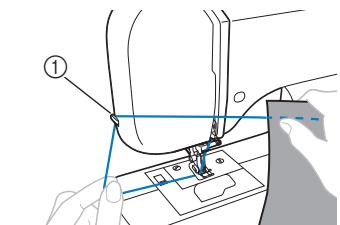
① Thread cutter

Memo
- When the foot controller is plugged in, start/stop button cannot be used to start sewing (for models equipped with the start/stop button).
- When sewing is stopped, the needle remains lowered (in the fabric). The machine can be set so that the needle will stay up when sewing is stopped. For details on setting the machine so that the needles stay up when sewing is stopped, refer to "Changing the needle stop position" (page 9).
Sewing reinforcement stitches
When sewing stitches other than straight or zigzag stitches that are secured with reverse stitching, pressing (reverse/reinforcement stitch button) sews reinforcement stitches, 3 to 5 stitches on top of each other.

①

(2)
① Reverse stitching
② Reinforcement stitching

Memo
- Whether reverse stitches or reinforcement stitches are sewn depends on the stitch that is selected. For details, refer to "STITCH SETTINGS" (page 50).
Thread tension
The thread tension will affect the quality of your stitches. You may need to adjust it when you change fabric or thread.

Memo
- We recommend that you do a test sample on scrap of a fabric before you start to sew.
Correct tension
Correct tension is important as too much or too little tension will weaken your seams or cause puckers on your fabric.
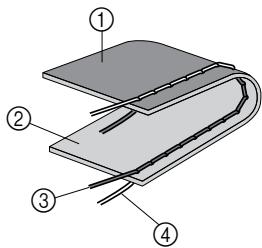
① Wrong side
② Surface
③ Upper thread
(4) Lower thread
Upper tension is too tight
Loops will appear on the surface of the fabric.

Note
- If the bobbin thread was incorrectly threaded, the upper thread may be too tight. In this case, refer to "Lower threading" (page 13) and rethread the bobbin thread.
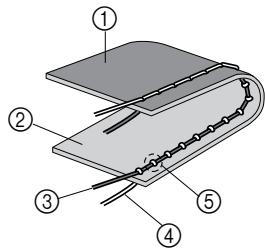
① Wrong side
② Surface
③ Upper thread
④ Lower thread
⑤ Loops appear on surface of fabric
Solution
Reduce the tension by turning the upper tension-control dial to a lower number.
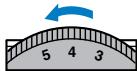

Memo
- When you finish sewing, remove the bobbin cover and then make sure that the thread is shown as below. If the thread is not shown as below, the thread is not inserted through the tension-adjusting spring of the bobbin case correctly. Reinsert the thread correctly. For details, refer to page 13, 14.
Upper tension is too loose
Loops appear on the wrong side of the fabric.

Note
- If the upper thread was incorrectly threaded, the upper thread may be too loose. In this case, refer to "Upper threading" (page 15) and rethread the upper thread.
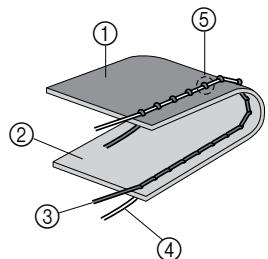
① Wrong side
② Surface
③ Upper thread
④ Lower thread
⑤ Loops appear on wrong side of fabric
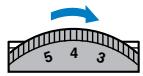
Solution
Increase the tension by turning the upper tension-control dial to a higher number.
USEFUL SEWING TIPS
Various ways to achieve better results for your sewing projects are described below. Refer to these tips when sewing your project.
Trial sewing
A trial piece of fabric should be sewn. Use a piece of fabric and thread that are the same as those used for your project, and check the thread tension and stitch length and width.
Changing the sewing direction

When the stitching reaches a corner, stop the sewing machine. Leave the needle lowered (in the fabric). If the needle was raised, lower the needle either by turning the handwheel toward you (counterclockwise) or by pressing (±) (needle position button) once (for models equipped with the needle position button).
CAUTION
- When using the twin needle, be sure to raise the needle before changing the sewing direction. If the fabric is turned while the needle is lowered, the needle may bend or break.

Raise the presser foot lever, and then turn the fabric.
Turn the fabric using the needle as a pivot.
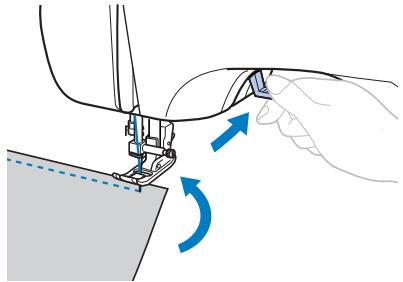

Lower the presser foot lever and continue sewing.
Sewing curves
Stop sewing, and then slightly change the sewing direction to sew around the curve.
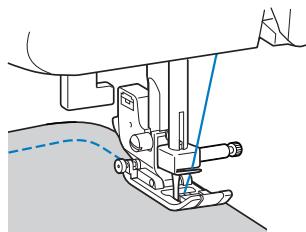
When sewing along a curve while using a zigzag stitch, select a shorter stitch length in order to obtain a finer stitch.
Sewing thick fabrics
If the fabric does not fit under the presser foot
If the fabric does not fit easily under the presser foot, raise the presser foot lever even higher to bring the presser foot to its highest position.
If thick seams are being sewn and the fabric does not feed at the beginning of stitching
The fabric may not feed when thick seams are being sewn and the presser foot is not level, as shown below. In this case, use the presser foot locking pin.
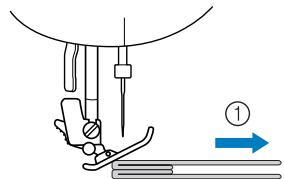
① Sewing direction

Raise the presser foot lever.

Align the beginning of stitching, and then position the fabric.

While holding zigzag foot "J" level, hold the presser foot locking pin (black button on the left side) pressed in, and lower the presser foot lever.
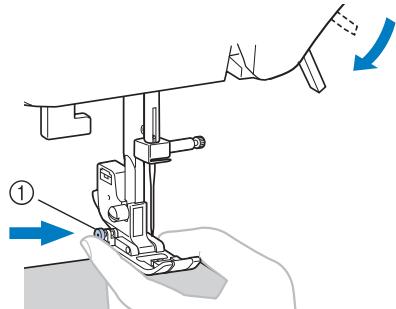
① Presser foot locking pin (black button)

Release the presser foot locking pin (black button).
The presser foot remains level, allowing the fabric to be fed.
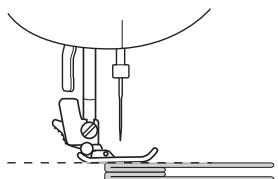
- After the seam is sewn, the presser foot will return to its original angle.
CAUTION
- If fabric more than 6mm (15/64 inch) thick is sewn or if the fabric is pushed with too much force, the needle may bend or break.
Sewing hook-and-loop fastener
CAUTION
- Use only the ungummed hook-and-loop fastener which is for sewing. If the glue is attached to the needle or the bobbin hook race, it may cause malfunction.
- If the hook-and-loop fastener is sewn with the thin needle (65/9-75/11), the needle may bend or break.

Note
- Before start sewing, baste together the fabric and the hook-and-loop fastener.
Make sure that the needle passes through the hook-and-loop fastener by turning the handwheel and lower the needle into the hook-and-loop fastener before sewing. And then, sew the edge of the hook-and-loop fastener at a slow speed.
If the needle does not pass through the hook-and-loop fastener, replace the needle with the needle for thick fabrics (page 19).
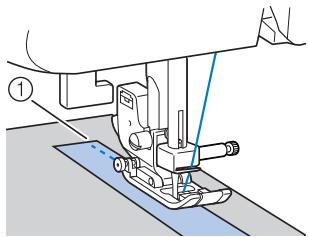
① Edge of the hook-and-loop fastener
Sewing thin fabrics
When sewing thin fabrics, the stitching may become misaligned or the fabric may not feed correctly. If this occurs, place thin paper or stabilizer material under the fabric and sew it together with the fabric. When you have finished sewing, tear off any excess paper.
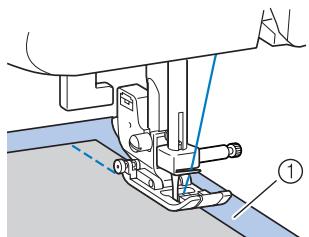
① Stabilizer material or paper
Sewing stretch fabrics
First, baste the pieces of fabric together, and then sew without stretching the fabric.
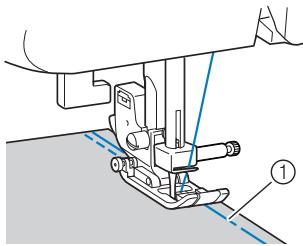
① Basting
Stitching cylindrical pieces
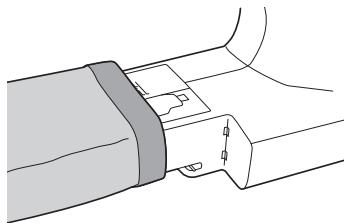
Removing the flat bed attachment makes it easier to sew cylindrical pieces such as cuffs and pant legs, or hard-to-reach areas.

Slide the flat bed attachment to the left to release it.
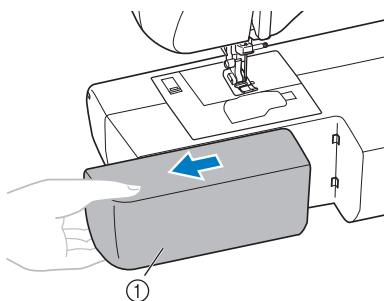
① Flat bed attachment
With the flat bed attachment removed, free-arm sewing is possible.
- When sewing cylindrical pieces, follow the next step.

Note
- When you are finished with free-arm sewing, install the flat bed attachment back in its original position.

Slide the part that you wish to sew onto the arm, and then sew from the top.
3 UTILITY STITCHES
OVERCASTING STITCHES
You can use the overcasting stitches to join together seams and finish them in one operation. They are also useful for sewing stretch materials.
| Stitch Name | Pattern | Presser Foot | Pattern No. | ||||||
| 100 stitches model | 80/90 stitches model | 60/70 stitches model | 50 stitches model | 40 stitches model | 30 stitches model | 20 stitches model | |||
| Zigzag stitch | VW | J | 04 | 04 | 04 | 04 | 04 | 04 | 04 |
| 3-point zig-zag stitch | VW | J | 05 | 05 | 05 | 05 | 05 | 05 | 05 |
| Overcasting stitch | WV | G | 06 | 06 | 06 | 06 | 06 | 06 | 06 |
| WV | G | 07 | 07 | 07 | 07 | 07 | 07 | 07 | |
| TJ | J | 08 | 08 | 08 | 08 | 08 | 08 | 08 | |
| TJ | J | 09 | 09 | - | - | - | - | - | |
CAUTION Be sure to turn off the main power before replacing the presser foot. Otherwise, injuries may occur if the foot controller or (start/stop button) is accidentally pressed and the machine starts sewing.
Using zigzag foot
1 Attach zigzag foot "J".
2 Select a stitch. For details
- For details, refer to "Selecting a stitch" (page 24).
Sew with the edge of the fabric.
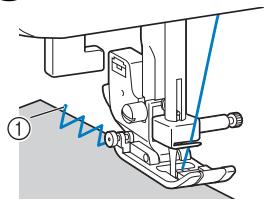
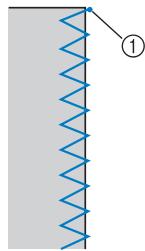
① Needle drop point
Using overcasting foot
1 Attach overcasting foot "G".
Select stitch or
- For details, refer to "Selecting a stitch" (page 24).
Position the fabric with the edge of the fabric against the guide of the presser foot, and then lower the presser foot lever.
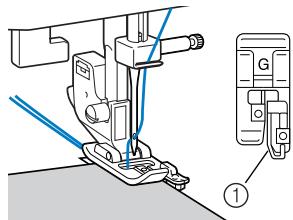
① Guide
4 Slowly turn the handwheel toward you (counterclockwise) and check that the needle does not touch the presser foot.
Sew with the edge of the fabric against the presser foot guide.
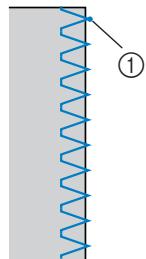
① Needle drop point
CAUTION
- After adjusting the stitch width, slowly turn the handwheel toward you (counterclockwise) and check that the needle does not touch the presser foot. If the needle hits the presser foot, the needle may bend or break.
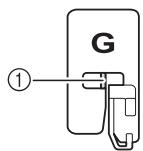
① Check that the needle does not touch the presser foot.
BASIC STITCHING
Straight stitches are used for sewing plain seams.
| Stitch Name | Pattern | Presser Foot | Pattern No. | |||||||
| 100 stitches model | 80/90 stitches model | 60/70 stitches model | 50 stitches model | 40 stitches model | 30 stitches model | 20 stitches model | ||||
| Straight | Left | =0 | J | 00 | 00 | 00 | 00 | 00 | 00 | 00 |
| Center | =0 | J | 01 | 01 | 01 | 01 | 01 | 01 | 01 | |
| Triple stretch stitch | =0 | J | 02 | 02 | 02 | 02 | 02 | 02 | 02 | |
CAUTION
- Be sure to turn off the main power before replacing the presser foot. Otherwise, injuries may occur if the foot controller or (start/stop button) is accidentally pressed and the machine starts sewing.
Basic stitching
Baste or pin together the fabric pieces.
2 Attach zigzag foot "J".
3 Select a stitch.
- For details, refer to "Selecting a stitch" (page 24).
Lower the needle into the fabric at the beginning of the stitching.
5 Start sewing.
- For details, refer to "Starting to sew" (page 25).
- For details on sewing reverse/reinforcement stitches, refer to "Sewing reinforcement stitches" (page 26).
6 When sewing is finished, cut the thread.
- For details, refer to "Starting to sew" (page 25).
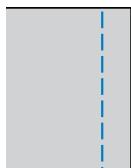
Changing the needle position
With the straight stitch (left needle position) and the triple stretch stitch, the needle position can be adjusted. Pressing the "+" side of the stitch width adjustment key moves the needle to the right; pressing the "-" side of the stitch width adjustment key moves the needle to the left.
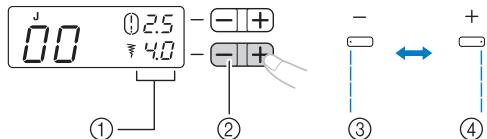
① Stitch width
② Stitch width adjustment key
③ Left needle position
④ Right needle position
BLIND HEM STITCHING
You can use the Blind Hem Stitch to finish the edge of a project, like the hem of a pair of trousers, without the stitch showing.
| Stitch Name | Pattern | Presser Foot | Pattern No. | ||||||
| 100 stitches model | 80/90 stitches model | 60/70 stitches model | 50 stitches model | 40 stitches model | 30 stitches model | 20 stitches model | |||
| Blind hem stitch | LwMl | R | 10 | 10 | 09 | 09 | 09 | 09 | 09 |
| LwMl | R | 11 | 11 | 10 | 10 | 10 | 10 | 10 | |
CAUTION
- Be sure to turn off the main power before replacing the presser foot. Otherwise, injuries may occur if the foot controller or 1 (start/stop button) is accidentally pressed and the machine starts sewing.

Memo
- When selecting stitch _i = 1^n or _i = 1^n . Stitch numbers "0", "-1", "-2" or "-3" may be displayed on the LCD by pressing "-" side of the stitch width adjustment key, then the needle drop point will be changed to the left. Stitch numbers "0", "1", "2" or "3" may be displayed on the LCD by pressing "+" side of the stitch width adjustment key, then the needle drop point will be changed to the right.
- When the size of cylindrical pieces is too small to slide onto the arm or the length is too short, the fabric will not feed and desired results may not be achieved.
1 Reverse the skirt or pants.
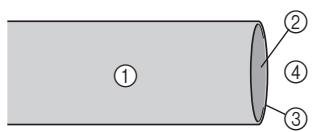
① Wrong side of fabric
② Right side of fabric
③ Edge of fabric
④ Bottom side
2 Fold the fabric along the desired edge of the hem, and press.
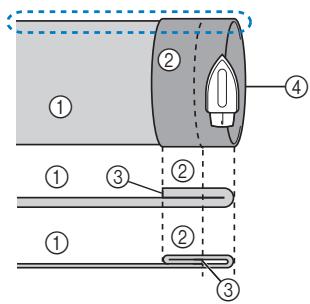
① Wrong side of fabric
(2) Right side of fabric
③ Edge of fabric
④ Desired edge of hem
Use a chalk to mark on the fabric about 5 ~mm (3/16 inch) from the edge of the fabric, and then baste it.
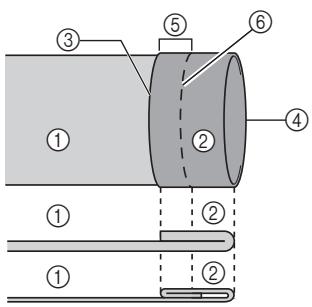
① Wrong side of fabric
② Right side of fabric
③ Edge of fabric
(4) Desired edge of hem
⑤ 5mm(3/16inch)
⑥ Basting
Fold back the fabric inside along theasting.
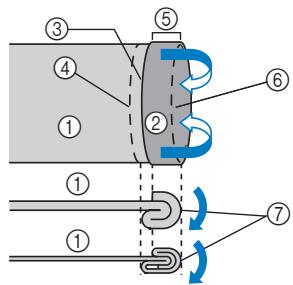
① Wrong side of fabric
② Right side of fabric
③ Edge of fabric
④ Desired edge of hem
⑤ 5mm(3/16inch)
⑥ Basting
⑦ Basting point
5 Unfold the edge of fabric, and position the fabric with the wrong side facing up.
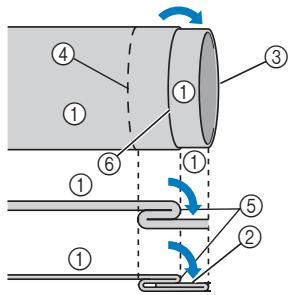
① Wrong side of fabric
② Right side of fabric
③ Edge of fabric
(4) Desired edge of hem
⑤ Basting point
⑥ Basting
6 Attach blind hem foot "R".
Select a stitch.
Remove the flat bed attachment and make free-arm sewing possible.
- For details on free-arm sewing, refer to "Stitching cylindrical pieces" (page 28).
9 Slide the part that you wish to sew onto the arm, make sure that the fabric feeds correctly, and then start sewing.
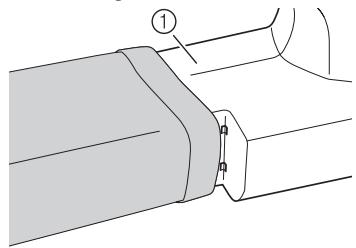
① Arm
Position the fabric with the edge of the folded hem against the guide of the presser foot, and then lower the presser foot lever.
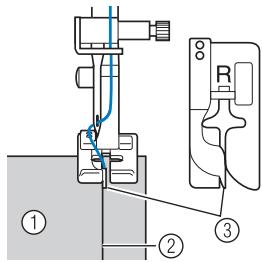
① Wrong side of fabric
② Fold of hem
③ Guide
Adjust the stitch width until the needle slightly catches the fold of the hem.
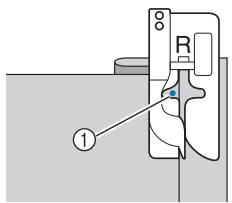
① Needle drop point
When you change the needle drop point, raise the needle, and then change the stitch width.
Stitch width

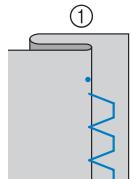
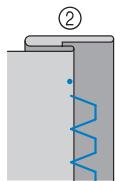
① Thick fabric
② Normal fabric
If the needle catches too much of the hem fold
If the needle catches too much of the hem fold, adjust the stitch width so that the needle slightly catches the fold by pressing the "+" side of the stitch width adjustment key.
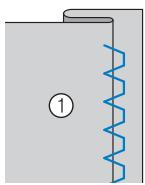

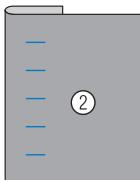
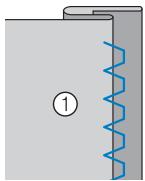

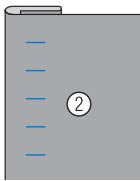
① Wrong side of fabric
② Right side of fabric
If the needle does not catch the hem fold
If the needle does not catch the hem fold, adjust the stitch width so that the needle slightly catches the fold by pressing the " - " side of the stitch width adjustment key.
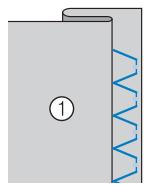

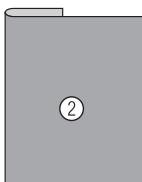
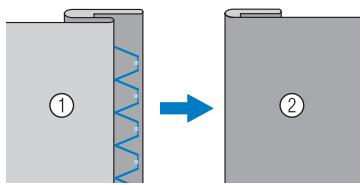
① Wrong side of fabric
② Right side of fabric
- For details on changing the stitch width, refer to "Selecting a stitch" (page 24).
Sew with the fold of the hem against the presser foot guide.
13 Remove the basting stitching and turn the fabric right side up.
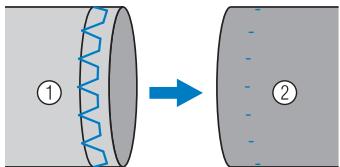
① Wrong side of fabric
② Right side of fabric
BUTTONHOLE SEWING
Buttonholes can be sewn and buttons can be sewn on.
| Stitch Name | Pattern | Presser Foot | Pattern No. | ||||||
| 100 stitches model | 80/90 stitches model | 60/70 stitches model | 50 stitches model | 40 stitches model | 30 stitches model | 20 stitches model | |||
| Buttonhole stitch | A | 34 | 34 | 29 | 29 | 25 | 21 | 16 | |
| A | 35 | 35 | 30 | 30 | 26 | 22 | 17 | ||
| A | 36 | 36 | 31 | 31 | 27 | - | - | ||
| A | 37 | 37 | 32 | 32 | 28 | - | - | ||
| A | 38 | 38 | - | - | - | - | - | ||
| A | 39 | 39 | 33 | 33 | 29 | 23 | 18 | ||
| A | 40 | 40 | 34 | - | - | - | - | ||
| A | 41 | 41 | 35 | - | - | - | - | ||
| Zigzag stitch (for quilting) | J | 46 | 46 | 40 | - | - | - | - | |
CAUTION
- Be sure to turn off the main power before replacing the presser foot. Otherwise, injuries may occur if the foot controller or (start/stop button) is accidentally pressed and the machine starts sewing.
The maximum buttonhole length is about 28mm (1-1/ 8 inches) (diameter + thickness of the button).
Buttonholes are sewn from the front of the presser foot to the back, as shown below.
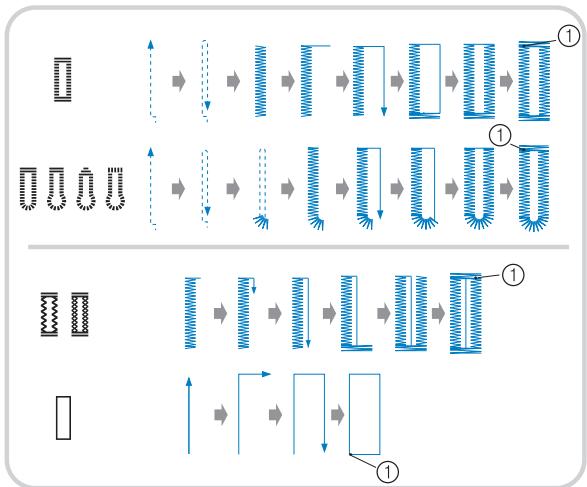
① Reinforcement stitching
Part names of the buttonhole foot "A"
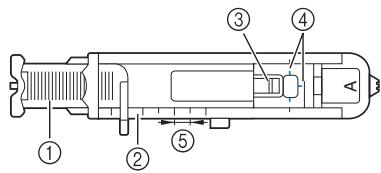
① Button guide plate
② Presser foot scale
(3) Pin
④ Marks on buttonhole foot
⑤ 5mm (3/16 inch)
Use chalk to mark the position and length of the buttonhole on the fabric.
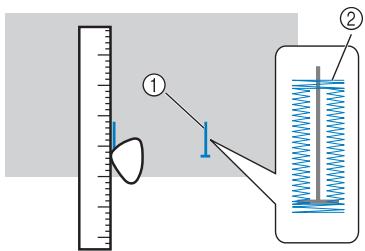
① Marks on fabric
② Buttonhole sewing
Pull out the button guide plate of buttonhole foot “A”, and then insert the button that will be put through the buttonhole.
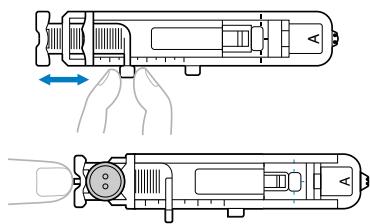
The size of the buttonhole is set.
If the button does not fit in the button guide plate
Add together the diameter and thickness of the button, and then set the button guide plate to the calculated length. (The distance between the markings on the presser foot scale is 5mm (3/16 inch).)
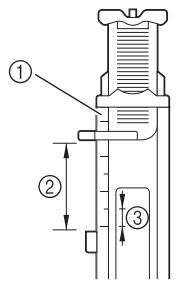
① Presser foot scale
② Length of buttonhole
(Diameter + thickness of button)
③ 5mm (3/16 inch)
Example: For a button with a diameter of 15mm (9/ 16 inch) and a thickness of 10mm (3/8 inch), the button guide plate should be set to 25mm (1 inch) on the scale.
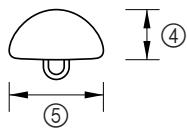
④ 10mm (3/8 inch)
⑤ 15 mm (9/16 inch)
3 Attach buttonhole foot "A".
4 Select a stitch.
Pass the upper thread down through the hole in the presser foot.
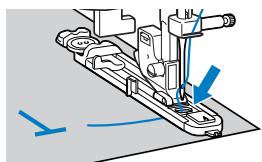
Position the fabric with the front end of the buttonhole mark aligned with the red marks on the sides of the buttonhole foot, and then lower the presser foot lever.
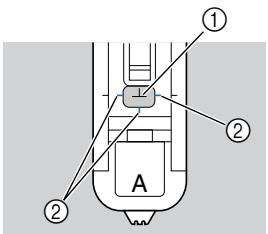
① Mark on fabric
② Red marks on buttonhole foot
- When lowering the presser foot, do not push in the front of the presser foot, otherwise the buttonhole will not be sewn with the correct size.
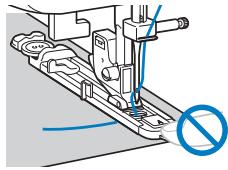
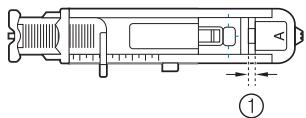
① Do not reduce the gap.
Pull down the buttonhole lever as far as possible.
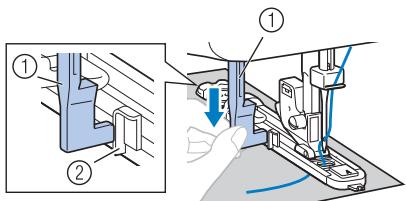
① Buttonhole lever
② Bracket
The buttonhole lever is positioned behind the bracket on the buttonhole foot.
Gently hold the end of the upper thread in your left hand, and then start sewing.
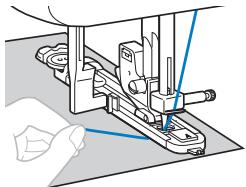

Note
- If thick seams are being sewn and the fabric does not feed, sew with the coarser (longer) stitch.
Once sewing is completed, the machine automatically sews reinforcement stitches, then stops.
9 Raise the needle and the presser foot lever, remove the fabric, and cut the thread.
10 Raise the buttonhole lever to its original position.
Insert a pin at the end of the buttonhole stitching to prevent the stitching from being cut, and then use a seam ripper to cut towards the pin and open the buttonhole.
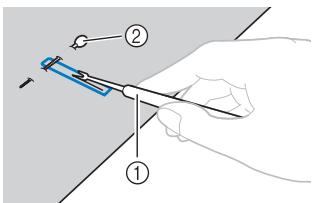
① Seam ripper
② Pin
For keyhole buttonholes, use a commercial eyelet punch to make a hole in the rounded end of the buttonhole, and then use the seam ripper to cut open the buttonhole.
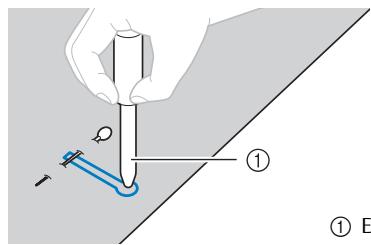
① Eyelet punch
- When using the eyelet punch, place thick paper or some other protective sheet under the fabric before punching the hole in the fabric.
CAUTION
- When opening the buttonhole with the seam ripper, do not place your hands in the cutting path, otherwise injuries may result if the seam ripper slips. Do not use the seam ripper in any other way than how it is intended.

Memo
- Before sewing buttonholes, check the stitch length and width by sewing a trial buttonhole on a scrap piece of fabric.
Sewing buttonholes on stretch fabrics
When sewing buttonholes on stretch fabrics, use a gimp thread.
Hook the gimp thread onto the part of buttonhole foot "A" shown in the illustration so that it fits into the grooves, and then loosely tie it.
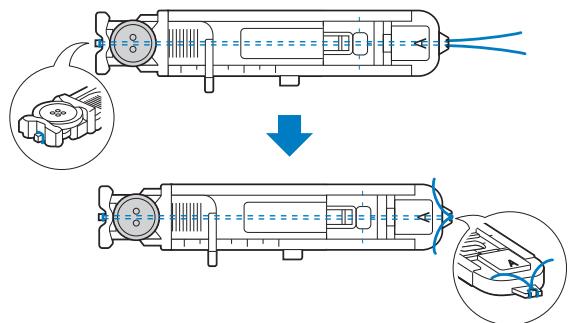
2 Attach buttonhole foot "A".
3 Select a stitch or
Adjust the stitch width to the thickness of the gimp thread.
Lower the presser foot lever and the buttonhole lever, and then start sewing.
When sewing is finished, gently pull the gimp thread to remove any slack.
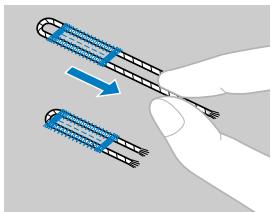
Use a handsewing needle to pull the gimp thread to the wrong side of the fabric, and then tie it.
With a seam ripper, cut the middle part of the gimp thread remaining at the top end of the buttonhole.
Trim off any excess of the gimp thread.
Button sewing
Buttons can be sewn on with the sewing machine. Buttons with 2 or with 4 holes can be attached.
Measure the distance between the holes.
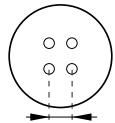
2 Raise the presser foot lever, and then slide the feed dog position lever to .
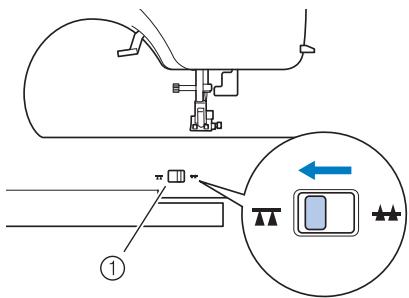
① Feed dog position lever
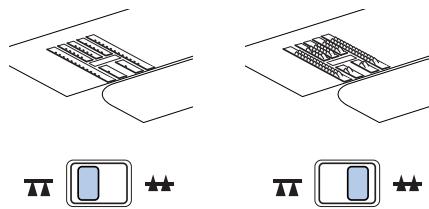
The feed dogs are lowered.
3 Attach presser foot "M".
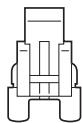
Place a button between the presser foot and the fabric.
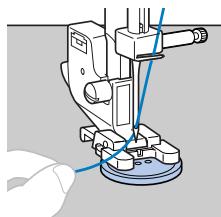
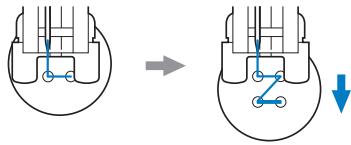
- When attaching four-hole buttons, first sew the two holes closest to you. Then, slide the button so that the needle goes into the two holes, and then sew them in the same way.
5 Select a stitch _ . (With models not provided with stitch _ , select stitch _ .)
Adjust the stitch width so that it is the same as the distance between the holes in the button.
7 Set the stitch length to the shortest setting by pressing the stitch length adjustment key.
Turn the handwheel toward you (counterclockwise) to check that the needle correctly goes into the two holes of the button. Adjust the stitch width to the distance between the button holes.
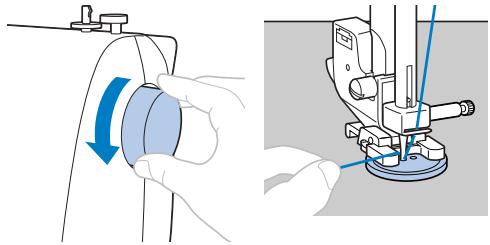
CAUTION
- When sewing, be sure that the needle does not touch the button, otherwise the needle may bend or break.
9 Start sewing.
- After sewing for about 10 seconds at low speed, press (reverse/reinforcement stitch button) to sew reinforcement stitches.
Pull the upper thread at the end of the stitching to the wrong side of the fabric, and then tie it with the bobbin thread.
Use scissors to cut the upper thread and the bobbin thread at the beginning of the stitching.
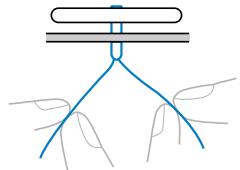
When you are finished attaching the button, slide the feed dog position lever to and turn the handwheel to raise the dogs.
- Normally, the feed dog position lever is positioned at .
ZIPPER INSERTION
You can use the zipper foot to sew different types of zippers, and can easily position it to the right or left side of the needle.
| Stitch Name | Pattern | Presser Foot | Pattern No. | ||||||
| 100 stitches model | 80/90 stitches model | 60/70 stitches model | 50 stitches model | 40 stitches model | 30 stitches model | 20 stitches model | |||
| Straight stitch (center) | = | 1 | 01 | 01 | 01 | 01 | 01 | 01 | 01 |
CAUTION
- Be sure to turn off the main power before replacing the presser foot. Otherwise, injuries may occur if the foot controller or 1 (start/stop button) is accidentally pressed and the machine starts sewing.
1 Attach zigzag foot "J".
Place the two pieces of fabric with their right sides facing each other.
Sew basic stitches to the end of the zipper opening, and then sew reverse stitches at the end of the stitching.
- Use basting stitching to sew the zipper opening (where the zipper will be inserted).
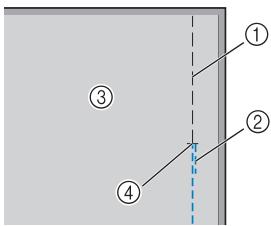
① Basting stitching
(2) Reverse stitches
③ Wrong side of fabric
④ End of zipper opening
Refer to "Basic stitching" on page 30.
4 Open the seam allowance, press it from the wrong side of the fabric with an iron, align the center of the zipper with the stitching, and then baste the zipper in place.
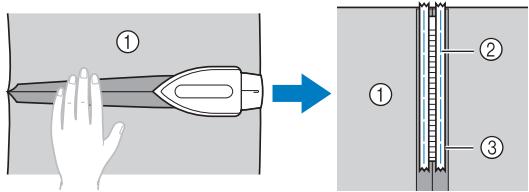
① Wrong side of fabric
② Basting stitching
③ Zipper
5 Attach the presser foot holder to the right side of the pin on zipper foot "I".
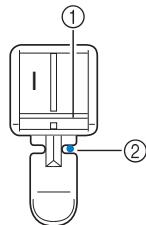
① Pin on the right side
② Needle drop point
Select stitch
CAUTION
- Turn the handwheel by hand to make sure the needle does not hit the presser foot before you start sewing. If you choose a different stitch, the needle will hit the presser foot and break the needle. You may also be injured.
With the right side of the fabric facing up, continue sewing with the zipper on the right side of the presser foot.
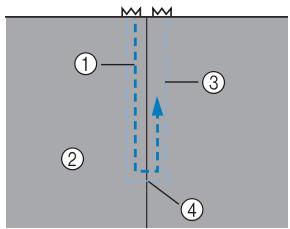
① Stitching
② Right side of fabric
Basting stitching
④ End of zipper opening
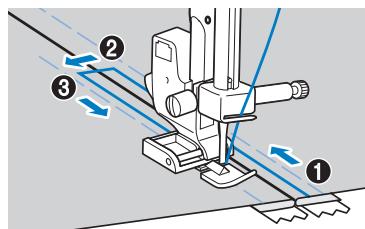
Sew the stitching in order, from 1 to 3.
CAUTION
- Make sure the needle does not hit the zipper during sewing. If the needle hits the zipper, the needle may break and you may be injured.

Memo
- If the presser foot contacts the zipper slider, leave the needle lowered (in the fabric) and raise the presser foot. After moving the slider so it will not contact the presser foot, lower the presser foot and continue sewing.
- To sew with the zipper on the left side of the presser foot, attach the presser foot holder to the left side of the pin on zipper foot "I" in step ⑤.
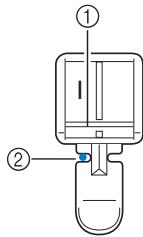
① Left side of the pin
② Needle drop point
When you have finished sewing, remove the basting stitching.
SEWING STRETCH FABRICS AND ELASTIC TAPE
Stretch fabrics can be sewn and elastic tape can be attached.
| Stitch Name | Pattern | Presser Foot | Pattern No. | ||||||
| 100 stitches model | 80/90 stitches model | 60/70 stitches model | 50 stitches model | 40 stitches model | 30 stitches model | 20 stitches model | |||
| Stretch stitch | J | 03 | 03 | 03 | 03 | 03 | 03 | 03 | |
| 3-point zigzag stitch | J | 05 | 05 | 05 | 05 | 05 | 05 | 05 | |
| Elastic-attaching stitch | J | 21 | 21 | - | - | - | - | - | |
CAUTION
- Be sure to turn off the main power before replacing the presser foot. Otherwise, injuries may occur if the foot controller or 1 (start/stop button) is accidentally pressed and the machine starts sewing.
Observe the corresponding precautions when performing each of the following stitching operations.
Stretch stitching
1 Attach zigzag foot "J".
Select stitch
Sew the fabric without stretching it.
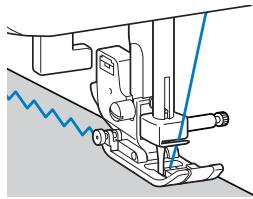
Elastic attaching
When elastic tape is attached to the cuff or waist of a piece of clothing, the finished dimensions will be that of the stretched elastic tape. Therefore, it is necessary that a suitable length of the elastic tape be used.
Pin the elastic tape to the wrong side of the fabric.
Pin the elastic tape to the fabric at a few points to make sure that the tape is uniformly positioned on the fabric.
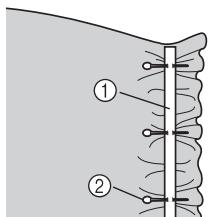
① Elastic tape
② Pin
2 Attach zigzag foot "J".
3 Select a stitch.
Sew the elastic tape to the fabric while stretching the tape so that it is the same length as the fabric.
While pulling the fabric behind the presser foot with your left hand, pull the fabric at the pin nearest the front of the presser foot with your right hand.
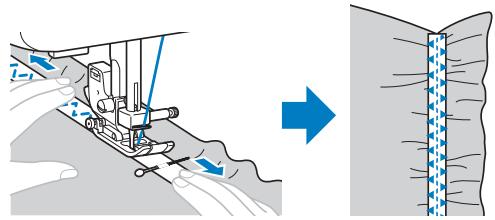
CAUTION
- When sewing, be sure that the needle does not touch any pins, otherwise the needle may bend or break.
APPLIQUE, PATCHWORK AND QILT STITCHING
The stitches that can be used for sewing appliqués, patchwork and quilts are described below.
| Stitch Name | Pattern | Presser Foot | Pattern No. | ||||||
| 100 stitches model | 80/90 stitches model | 60/70 stitches model | 50 stitches model | 40 stitches model | 30 stitches model | 20 stitches model | |||
| Zigzag stitch | V/V | J | 04 | 04 | 04 | 04 | 04 | 04 | 04 |
| Zigzag stitch (for quilting) | V/V | J | 46 | 46 | 40 | - | - | - | - |
| Appliqué stitch | J | 12 | 12 | 11 | 11 | 11 | 11 | 11 | |
| Appliquédestitch (for quilting) | J | 47 | 47 | 41 | - | - | - | - | |
| J | 48 | 48 | 42 | - | - | - | - | ||
| Piecing straight stitch | J | 43 | 43 | 37 | - | - | - | - | |
| J | 44 | 44 | 38 | - | - | - | - | ||
| Joining stitch | V/V | J | 15 | 15 | 14 | 14 | 14 | 14 | - |
| J | 16 | 16 | 15 | 15 | 15 | 15 | 14 | ||
| V/V | J | 17 | 17 | 16 | 16 | 16 | 16 | - | |
| Hand-look quilting | Q/Q | J | 45 | 45 | 39 | 35 | 31 | - | - |
| Quilting stippling | Q/Q | J | 49 | 49 | 43 | - | - | - | - |
CAUTION
- Be sure to turn off the main power before replacing the presser foot. Otherwise, injuries may occur if the foot controller or 1 (start/stop button) is accidentally pressed and the machine starts sewing.
Appliqués
You can create an appliqué by cutting a different piece of fabric into a shape and using it as a decoration.
Baste the cut design to the fabric.
CAUTION
- If glue is used to hold the cut design in place on the fabric, do not apply glue to areas that will be sewn with the machine. If glue is attached to the needle or race, the machine may be damaged.
2 Attach zigzag foot "J".
3 Select stitch
4 Sew along the edge of the fabric with the needle dropping off the edge at the right.
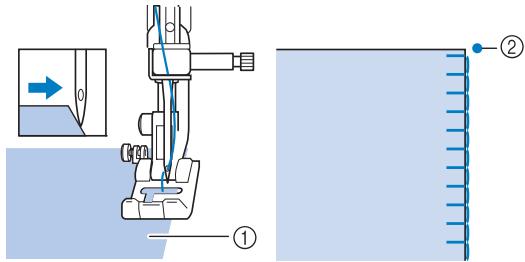
① Appliqué fabric
② Needle drop point
Remove the basting, if necessary.
Memo No. 10
- Make reinforcing straight stitches at the beginning and the end of stitching.
CAUTION
- Be careful that the needle does not hit a pin during sewing, as the needle can break. You may also be injured.
Patchwork (crazy quilt) stitching
1 Fold the edge of the top piece of fabric and place it over the lower piece.
Sew the two pieces of fabric together so the pattern spans both pieces.
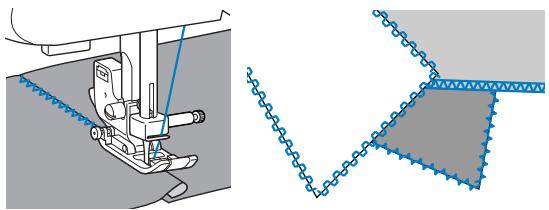
Piecing
Sewing together two pieces of fabric is called "piecing". The fabric pieces should be cut with a 6.5mm (1/4 inch) seam allowance.
Sew a piecing straight stitch 6.5mm (1/4 inch) from either the right side or the left side of the presser foot.
Baste or pin along the seam allowance of the fabric that you wish to piece together.
2 Attach zigzag foot "J".
Select stitch or P.
4 Sew with the side of the presser foot aligned with the edge of the fabric.
■ For a seam allowance on the right side Align the right side of the presser foot with the edge of the fabric, and sew using stitch
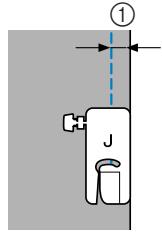
① 6.5mm (1/4 inch)
For a seam allowance on the left side Align the left side of the presser foot with the edge of the fabric, and sew using stitch
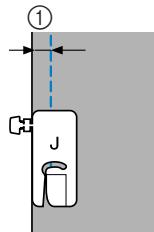
① 6.5mm (1/4 inch)

Memo
- To change the width of the seam allowance (the needle position), adjust the stitch width. For details, refer to "Changing the needle position" (page 30).
Quilting
Sandwiching batting between the top and bottom layers of fabric is called "quilting". Quilts can easily be sewn using the optional walking foot and the optional quilting guide.

Note
- Only use the walking foot with straight or zigzag stitches. Do not use other patterns. Reverse stitches cannot be sewn with the walking foot.
Baste the fabric to be quilted.
2 Remove the presser foot and the presser foot holder.
- For details, refer to "Removing the presser foot holder" (page 23).
3 Hook the connecting fork of the walking foot onto the needle clamp screw, lower the presser foot lever, and then use the presser foot holder screw to attach the walking foot to the presser bar.
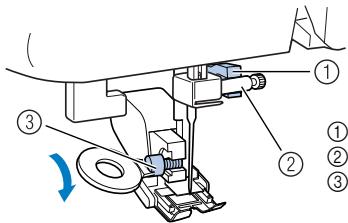
① Connecting fork
② Needle clamp screw
③ Presser foot holder screw
CAUTION
- Use the disc-shaped screwdriver to tighten the screw securely. If the screw is loose, the needle may strike the presser foot and cause injury.
- Be sure to turn the handwheel toward the front of the machine to check that the needle does not strike the presser foot. If the needle strikes the presser foot, injury may result.
4 Select stitch or 5 Q.
Place one hand on each side of the presser foot, and then evenly guide the fabric while sewing.
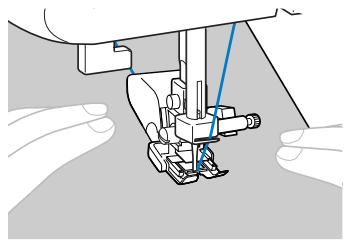

Note
- When sewing with the walking foot, sew at a speed between slow and medium.
Using the optional quilting guide
Use the quilting guide to sew parallel stitches that are equally spaced.
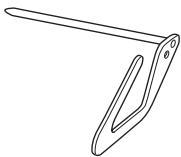
Insert the stem of the quilting guide into the hole at the rear of the walking foot or presser foot holder.
Walking foot
Presser foot holder
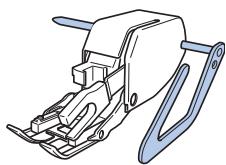
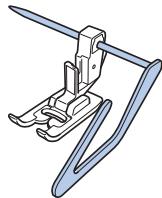
Adjust the stem of the quilting guide so that the guide aligns with the seam that has already been sewn.
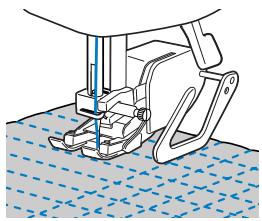
Free-motion quilting
With free-motion quilting, the feed dogs can be lowered (using the feed dog position lever) so that the fabric can be moved freely in any direction.
The optional quilting foot is needed for free-motion quilting.
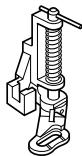
1 Remove the presser foot and the presser foot holder.
- For details, refer to "Removing the presser foot holder" (page 23).
Align the quilting foot with the lower-left side of the presser bar.
The pin on the quilting foot should be positioned over the needle clamp screw.
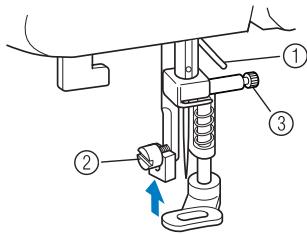
① Pin on quilting foot
② Presser foot holder screw
③ Needle clamp screw
Hold the quilting foot in place with your right hand, and then tighten the presser foot holder screw using the disc-shaped screwdriver in your left hand.
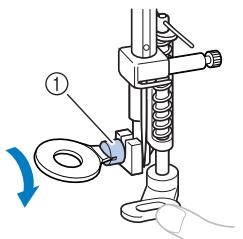
① Presser foot holder screw
CAUTION
- Be sure to securely tighten the screws with the disc-shaped screwdriver, otherwise the needle may touch the presser foot, causing it to bend or break.

Slide the feed dog position lever to ±b
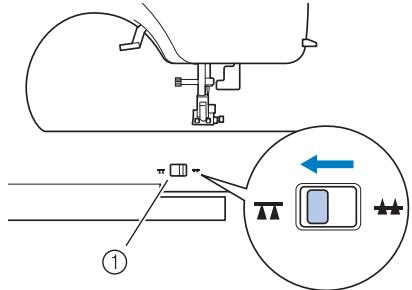
① Feed dog position lever
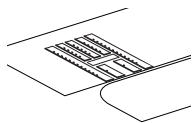
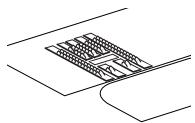

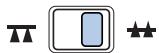
The feed dogs are lowered.

Turn on the sewing machine, and then select a stitch.

Use both hands to hold the fabric taut, then move the fabric to follow the pattern.
Reinforcement stitches are sewn at the beginning and end of sewing.
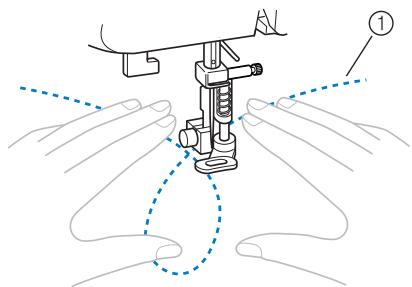
① Pattern

After sewing is finished, slide the feed dog position lever to and turn the handwheel to raise the dogs.
- Normally, the feed dog position lever is positioned at .
REINFORCEMENT STITCHING
Reinforce points that will be subject to strain, such as sleeve holes, inseams and pocket corners.
| Stitch Name | Pattern | Presser Foot | Pattern No. | ||||||
| 100 stitches model | 80/90 stitches model | 60/70 stitches model | 50 stitches model | 40 stitches model | 30 stitches model | 20 stitches model | |||
| Triple stretch stitch | J | 02 | 02 | 02 | 02 | 02 | 02 | 02 | 02 |
| Bar tack stitch | A | 42 | 42 | 36 | 34 | 30 | 24 | 19 | |
CAUTION
- Be sure to turn off the main power before replacing the presser foot. Otherwise, injuries may occur if the foot controller or 1 (start/stop button) is accidentally pressed and the machine starts sewing.
Triple stretch stitching
Use triple stretch stitching to reinforce sleeve holes and inseams.

Attach zigzag foot "J".

Select stitch

Start sewing.
- For details, refer to "Starting to sew" (page 25).
Bar tack stitching
Bar tacks are used to reinforce points subject to strain, such as pocket corners and openings.
As an example, the procedure for sewing bar tacks at pocket corners is described below.
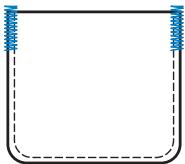
Determine the desired length of the bar tack. Set the button guide plate on buttonhole foot "A" to the desired length. (The distance between the markings on the presser foot scale is 5 ~mm (3/16 inch).)
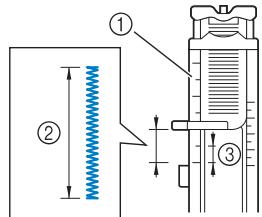
① Presser foot scale
② Length of bar tack
③ 5mm (3/16 inch)
- A bar tack with a maximum length of about 28 mm (1-1/8 inches) can be sewn.
2 Attach buttonhole foot "A".
3 Select stitch
Position the fabric so that the opening of the pocket faces toward you, and then lower the presser foot lever so that the needle drops 2 mm (1/16 inch) in front of the pocket opening.
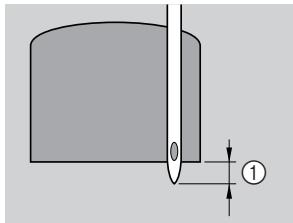
① 2mm (1/16 inch)
Pass the upper thread down through the hole in the presser foot.
- When lowering the presser foot, do not push in the front of the presser foot, otherwise the bar tack will not be sewn with the correct size.
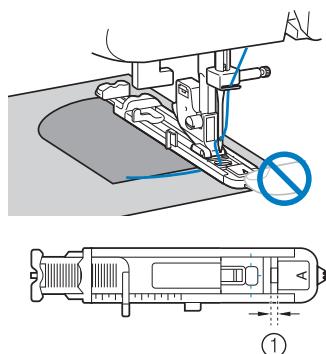
① Do not reduce the gap.
Pull down the buttonhole lever as far as possible.
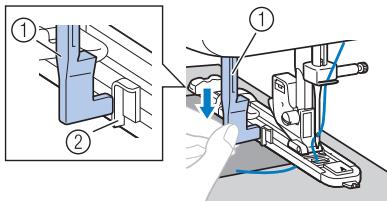
① Buttonhole lever
② Bracket
The buttonhole lever is positioned behind the bracket on the buttonhole foot.
Gently hold the end of the upper thread in your left hand, and then start sewing.
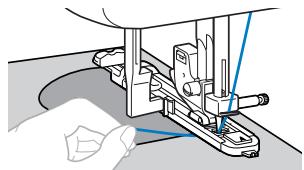
Once sewing is completed, the machine automatically sews reinforcement stitches, then stops.
7 Raise the needle and the presser foot lever, remove the fabric, and cut the thread.
8 Raise the buttonhole lever to its original position.

Memo
- If the fabric does not feed, for example, because it is too thick, increase the stitch length. For details, refer to "Selecting a stitch" (page 24).
DECORATIVE STITCHING
Various decorative stitches can be sewn with this sewing machine.
| Stitch Name | Pattern | Preser Foot | Pattern No. | ||||||
| 100 stitches model | 80/90 stitches model | 60/70 stitches model | 50 stitches model | 40 stitches model | 30 stitches model | 20 stitches model | |||
| Fagoting stitch | ^ | J | 19 | 19 | 17 | 17 | 17 | 17 | 15 |
| XXX | J | 20 | 20 | 18 | 18 | 18 | 18 | - | |
| Stitch Name | Pattern | Presser Fool | Pattern No. | ||||||
| 100 stitches model | 80/90 stitches model | 60/70 stitches model | 50 stitches model | 40 stitches model | 30 stitches model | 20 stitches model | |||
| Joining stitch | J | 15 | 15 | 14 | 14 | 14 | 14 | - | |
| J | 16 | 16 | 15 | 15 | 15 | 15 | 14 | ||
| J | 17 | 17 | 16 | 16 | 16 | 16 | - | ||
| Shell tuck stitch | J | 13 | 13 | 12 | 12 | 12 | 12 | 12 | |
| Smocking stitch | J | 18 | 18 | - | - | - | - | - | |
| Satin scallop stitch | N | 14 | 14 | 13 | 13 | 13 | 13 | 13 | |
| Decorative stitch | J | 22 | 22 | 19 | 19 | 19 | - | - | |
| J | 23 | 23 | 20 | 20 | 20 | - | - | ||
| J | 24 | 24 | 21 | 21 | - | - | - | ||
| N | 25 | 25 | 22 | 22 | 21 | - | - | ||
| N | 26 | 26 | 23 | 23 | 22 | 19 | - | ||
| N | 27 | 27 | 24 | 24 | 23 | 20 | - | ||
| N | 28 | 28 | 25 | 25 | - | - | - | ||
| N | 29 | 29 | 26 | 26 | 24 | - | - | ||
| N | 30 | 30 | 27 | 27 | - | - | - | ||
| Decorative stitch | N | 31 | 31 | 28 | 28 | - | - | - | |
| N | 32 | 32 | - | - | - | - | - | ||
| N | 33 | 33 | - | - | - | - | - | ||
CAUTION
- Be sure to turn off the main power before replacing the presser foot. Otherwise, injuries may occur if the foot controller or + (start/stop button) is accidentally pressed and the machine starts sewing.
Fagoting
Stitching across an open seam is called "fagoting". It is used on blouses and children's clothing. This stitch is more decorative when thicker thread is used.
Use an iron to fold the two pieces of fabric along their seams.
Baste the two pieces of fabric, separated by about 4.0 ~mm (3/16 inch), onto thin paper or a sheet of water-soluble stabilizer.
- If you draw a line down the middle of the thin paper or water-soluble stabilizer, sewing is easier.
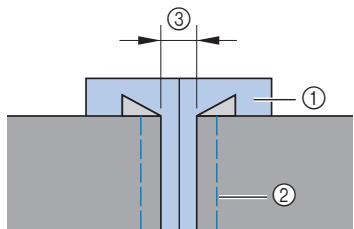
① Thin paper or water soluble stabilizer
(2) Basting stitching
③ 4mm(3/16inch)
3 Attach zigzag foot "J".
Select stitch or Xx.
Set the stitch width to 7.0mm (1/4 inch).
- For details, refer to "Selecting a stitch" (page 24).
6 Sew with the center of the presser foot aligned along the center of the two pieces of fabric.
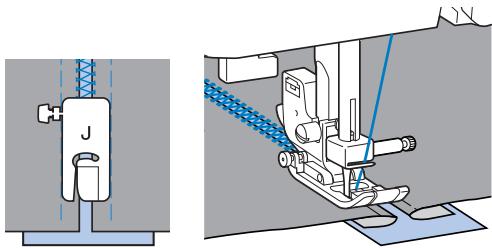
After sewing is finished, remove the paper.
Scallop stitching
The wave-shaped repeating pattern that looks like shells is called "scalloping". It is used on the collars of blouses and to decorate the edges of handkerchiefs.
Attach monogramming foot "N".
Select stitch
3 Stitch along the edge of the fabric, making sure not to sew directly on the edge of the fabric.
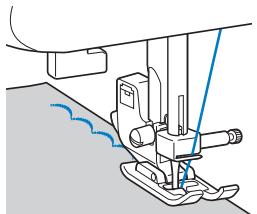
- For better results, apply spray starch onto the fabric and press with a hot iron before it is sewn.
4 Trim along the stitches.
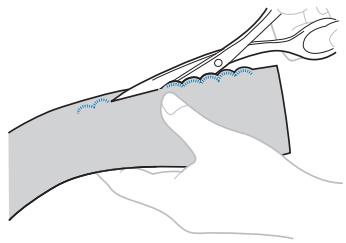
- Be careful not to cut the stitches.
Smocking
The decorative stitch created by stitching or embroidering over gathers is called "smocking". It is used to decorate the front of blouses or cuffs.
The smocking stitch adds texture and elasticity to fabric.
1 Attach zigzag foot "J".
2 Select the straight stitch, and then adjust the stitch length to 4.0mm (3/16 inch) and loosen the thread tension.
- For details, refer to "Selecting a stitch" (page 24) and "Thread tension" (page 26).
Sew parallel stitching at intervals of 10mm (3/8 inch).
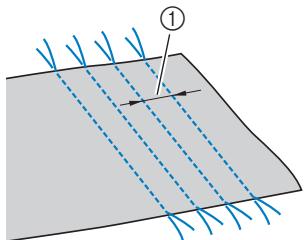
① 10mm (3/8 inch)
- Do not sew reverse/reinforcement stitches or cut the thread.
Pull the bobbin threads to create gathers. Smooth the gathers by ironing them.
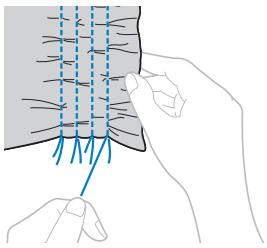
Select stitch or X
6 Stitch between the straight stitches.
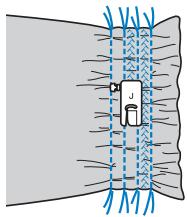
Pull out the threads for the straight stitches.
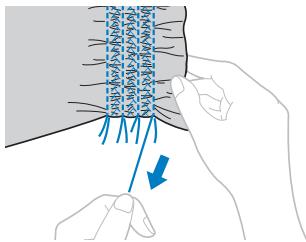
Shell tuck stitching
The gathers that look like shells are called "shell tucks". They are used to decorate trims, the front of blouses or cuffs made of thin fabrics.
Fold the fabric along the bias.
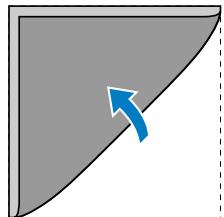
2 Attach zigzag foot "J".
3 Select stitch, and then increase the thread tension.
- For details, refer to "Selecting a stitch" (page 24).
Sew while making sure that the needle drops slightly off the edge of the fabric.
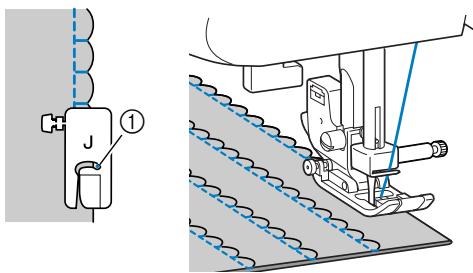
① Needle drop point
5 Unfold the fabric, and then iron the tucks down to one side.
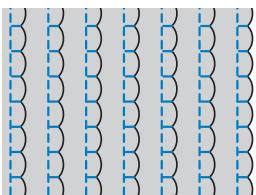
Joining
Decorative bridging stitches can be sewn over the seam allowance of joined fabrics. This is used when making a crazy quilt.
1 Attach zigzag foot "J".
Sew together the right sides of the two pieces of fabric, and then open up the seam allowances.
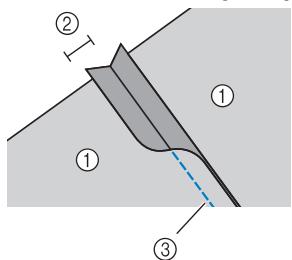
① Wrong side of fabric
② 6.5mm (1/4 inch) seam allowance
③ Straight stitch
3 Select stitch ≥slant or
Turn the fabric over so that the right side faces up, and then sew over the seam with the center of the presser foot aligned with the seam.
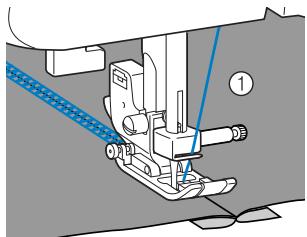
① Right side of fabric
Heirloom stitching
When sewing with the wing needle, the needle holes are enlarged, creating a lace-like decorative stitch. This is used to decorate hems and tablecloths on thin or medium weight fabrics in addition to plain weave fabrics.
CAUTION
- The needle threader cannot be used with the wing needle, otherwise the sewing machine may be damaged. Manually pass the thread through the eye of the needle from the front to the back. For details, refer to "Upper threading" (page 15).
Insert the wing needle.
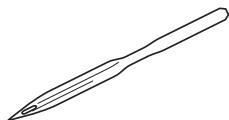
- Use a 130/705H 100/16 wing needle.
- For details on inserting a needle, refer to "Replacing the needle" (page 20).
2 Attach monogramming foot "N".
Select stitch E, F, F, F, F, F, or or
CAUTION
- Select a stitch width of 6.0mm (15/64 inch) or less, otherwise the needle may bend or break.
- After adjusting the stitch width, slowly turn the handwheel toward you (counterclockwise) and check that the needle does not touch the presser foot. If the needle hits the presser foot, the needle may bend or break.

Start sewing.
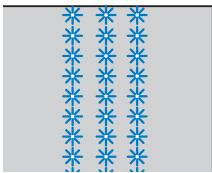
SEWING CHARACTERS (For models equipped with character stitches)
55 characters can be sewn by following the procedure below.
Selecting characters
Selecting a character
[Example] Selecting stitch "C" (No. 03).

Turn on the sewing machine.

Press the character stitch key and confirm that the character stitch indicator lights up.
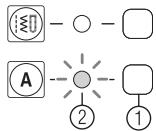
① Character stitch key
② Character stitch indicator

Memo
- When you select a character, check that there are no characters in memory.
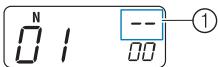
① This indicator shows that no character is stored.
If there are any characters in memory, delete them.
For details, refer to "Deleting characters" (page 48).

Press + (stitch selection keys) to select pattern No. 03.
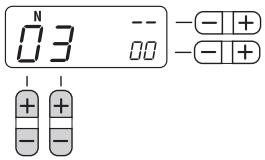
- For details, refer to step 3 of "Selecting a stitch" (page 24).

Press the "+" side of + + (stitch width adjustment key) to enter the selected character.
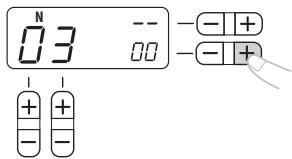
The following display is shown on the LCD.
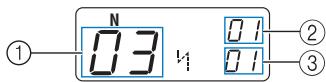
① Selected pattern No.
② The position of the selected pattern No.
③ The total number of entered characters

Attach the presser foot indicated on the LCD.
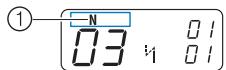
① The presser foot to use
- For details, refer to "Replacing the presser foot" (page 22).

If you would like to only sew this single character, start sewing.
If you would like to sew a sequence of characters, go to step ① on "Combining characters" (page 46).
- For details on sewing characters, refer to "Sewing the character stitches" (page 48).
Combining characters
You can easily sew names, messages, etc. by combining the character stitches. Up to 35 characters can be combined.
[Example] Selecting stitches "COME" (No. 03) + (No. 15) + (No. 13) + (No. 05)

Follow steps 1 through 5 in "Selecting a character" (page 46) to select the first character "C" (No. 03).

Press ++ (stitch selection keys) to select the next character, "O" (No. 15).
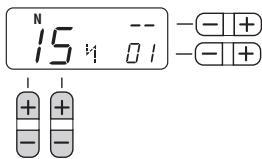
Press the "+" side of + + (stitch width adjustment key) to enter the selected character.
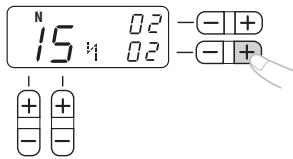
Repeat steps 2 and 3 to add "M" (No.13) and "E" (No.05).
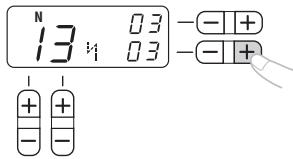

Memo
To enter a space, select "_" (No. 30).
When you have finished combining characters, check the entered characters and their order.
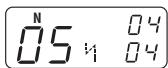
- For details on checking characters, refer to "Checking characters" (page 48).

Memo
- A new character can only be added next to the last character. You cannot insert a new character between characters or before the first character of the sequence.

After checking the entered characters, start sewing.
- For details on sewing characters, refer to "Sewing the character stitches" (page 48).

Memo
- The combination of characters will be stored in memory even if you turn off the machine.
Adding new characters after sewing
After sewing a combination of characters, you can add characters to the combination using the following method.

Memo
- When you have finished sewing, the pattern No. of the first character in the current combination is shown on the LCD.
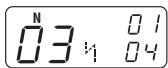
Press the utility stitch key.
① Utility stitch key

Press the character stitch key.
① Character stitch key

Add new characters by following the procedure described in "Combining characters" (page 46).
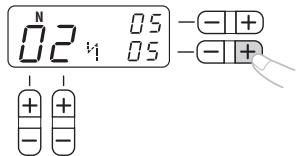
New characters are added next to the last character of the combination.
Making a new combination of characters after sewing

Memo
- When you have finished sewing, the pattern No. of the first character in the current combination is shown on the LCD.
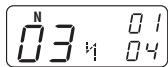
1 Select the first character of the new combination.
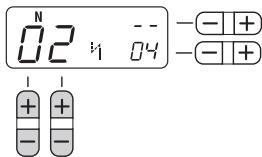
Press the "+" side of - + (stitch width adjustment key).
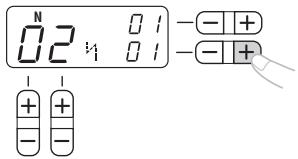
The old combination of characters is cleared from memory, and the pattern No. shown in the LCD is entered as the first character of a new combination.

Add characters by following the procedure described in "Combining characters" (page 46).
Checking characters
You can check the characters in a combination with following method.
Press the "+" or "-" side of + + (stitch length adjustment key) repeatedly.
This will display the characters that have been entered one by one on the LCD.
You can check the pattern No. and position of each character.
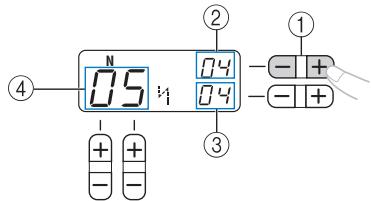
① Stitch length adjustment key
② The position of the selected pattern No.
(3) The total number of characters in the combination
④ Selected pattern No.
Deleting characters
You can delete characters from the combination.
Press " - " side of =+ (stitch width adjustment key) to delete the last character in the combination.
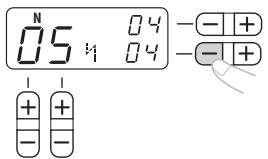
The last character will be deleted.
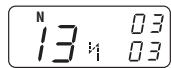

Memo
- Repeat step ① to delete more characters.
- You can only delete the last character in a combination.
Sewing the character stitches
All character stitches are sewn with monogramming foot "N".
Select a character stitch.
- For details, refer to "Selecting characters" (page 46)

Attach monogramming foot "N".
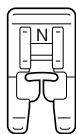
- For details, refer to "Replacing the presser foot" (page 22).

Start sewing.
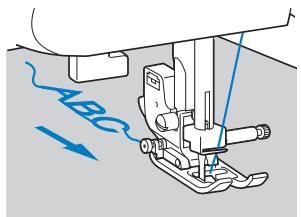
The stitch is sewn in the direction indicated by the arrow.

Memo
- When sewing characters, the machine automatically sews reinforcement stitches for each character.
- While sewing, the LCD shows the pattern No. currently being sewn.
When you have finished sewing, use scissors to trim off any excess threads at the beginning of the stitching and between the characters.

ADJUSTING STITCHES (For models equipped with character stitches)
Your stitch pattern may sometimes turn out poorly, depending on the type or thickness of fabric, the stabilizer material used, sewing speed, etc. If your sewing does not turn out well, sew trial stitches using the same conditions as the real sewing, and adjust the stitch pattern as shown below.

Memo
The character stitches "034" (No. 31 + No. 34 + No. 35) are used for making adjustments.

Attach monogramming foot "N".
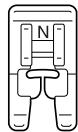
- For details, refer to "Replacing the presser foot" (page 22).

Combine the character stitches "034" (No. 31 + No. 34 + No. 35).
- For details, refer to "Combining characters" (page 46).
When you have finished creating the combination, the following is displayed on the LCD.
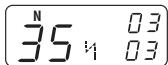

Sew the combination of characters and check how it turns out.
- For details, refer to "Sewing the character stitches" (page 48).

A


B

C
A: Correctly sewn (with proper spaces between characters)
B: Bunched or shapeless (There is no space between characters.)
C: Overstretched (The stitch "0" has a gap.)
If the pattern you sewed does not look like A, use the following steps to adjust the stitches.

Select No. 59 (for making adjustments).
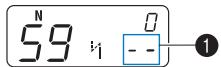
The LCD goes into the stitch adjustment mode. The total number of combined characters (1) changes to "--".

Adjust the character stitches by pressing (stitch length adjustment key).
Each press of "+" or "-" side of =++ (stitch length adjustment key) widens or narrows the stitches.
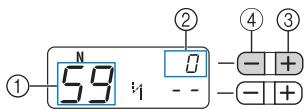
① No. for making adjustments
② The stitch adjustment level
③ Widens the stitches
(4) Narrows the stitches
□ If the pattern is bunched (B)
Press the "+" side of =+ (stitch length adjustment key) to widen the stitch.
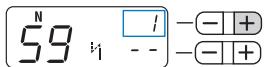
□ If the pattern is overstretched (The stitch "0" has a gap.) (C)
Press the " - " side of - + (stitch length adjustment key) to narrow the stitch.
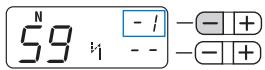

Memo
- The stitch adjustment level can be set between -9 and 9.
- The setting is saved in memory even if you turn off the machine.

Sew the characters "034" again.

Memo
- You can sew when you are in the stitch adjustment mode.
If the stitch pattern still comes out poorly, adjust the stitch again. Adjust the stitch until the stitch pattern comes out correctly.

After you have finished adjusting the pattern, press the utility stitch key once, and then press the character stitch key.

The display returns to the normal character stitching mode.

APPENDIX
STITCH SETTINGS
Applications, stitch lengths and widths and whether the twin needle can be used are listed for utility stitches in the following table.
CAUTION
- When using the twin needle, select a stitch width of 5.0 ~mm (3/16 inch) or less, otherwise the needle may break or the machine may be damaged.
- When using the twin needle, be sure to attach zigzag foot "J", otherwise the needle may break or the machine may be damaged.
Utility stitches
| Pattern | Presser Foot | Pattern No. | Stitch Name/Application | Stitch Width [mm (inch.)] | Stitch Length [mm (inch.)] | Twin Needle | Walking Foot | Reverse (Rev./Reinforcement (Rc.) Stitching | ||||||||
| 100 stitches model | 90 stitches model | 80 stitches model | 70 stitches model | 60 stitches model | 50 stitches model | 40 stitches model | 30 stitches model | 20 stitches model | Auto Manual | Auto Manual | ||||||
| J | 00 | 00 | 00 | 00 | 00 | 00 | 00 | 00 | 00 | Straight stitch (Left) | 0.0 (0) | 2.5 (3/32) | ** Yes (J) | * Yes | Rev. | |
| Basic stitching, sewing gathers or pintucks, etc. | 0.0-7.0 (0-1/4) | 0.2-5.0 (1/64-3/16) | ||||||||||||||
| J | 01 | 01 | 01 | 01 | 01 | 01 | 01 | 01 | 01 | Straight stitch (Center) | 3.5 (1/8) | 2.5 (3/32) | ** Yes (J) | * Yes | Rev. | |
| Attaching zippers, basic stitching, and sewing gath-ers or pintucks, etc. | 0.0-7.0 (0-1/4) | 0.2-5.0 (1/64-3/16) | ||||||||||||||
| J | 02 | 02 | 02 | 02 | 02 | 02 | 02 | 02 | 02 | Triple stretch stitch | 0.0 (0) | 2.5 (3/32) | ** Yes (J) | No | Rfc. | |
| Attaching sleeves, sewing inseams, sewing stretch fabrics and decorative stitching | 0.0-7.0 (0-1/4) | 1.5-4.0 (1/16-3/16) | ||||||||||||||
| J | 03 | 03 | 03 | 03 | 03 | 03 | 03 | 03 | 03 | Stretch stitch | 1.0 (1/16) | 2.5 (3/32) | Yes (J) | No | Rfc. | |
| Sewing stretch fabrics and decorative stitching | 1.0-3.0 (1/16-1/8) | 1.0-4.0 (1/16-3/16) | ||||||||||||||
| J | 04 | 04 | 04 | 04 | 04 | 04 | 04 | 04 | 04 | Zigzag stitch | 3.5 (1/8) | 1.4 (1/16) | ** Yes (J) | * Yes | Rev. | |
| Overcasting and attaching appliqués | 0.0-7.0 (0-1/4) | 0.0-4.0 (0-3/16) | ||||||||||||||
| J | 05 | 05 | 05 | 05 | 05 | 05 | 05 | 05 | 05 | 3-point zigzag stitch | 5.0 (3/16) | 1.0 (1/16) | ** Yes (J) | No | Rfc. | |
| Overcasting on medium weight or stretch fabrics, attaching elastic, darning, etc. | 1.5-7.0 (1/16-1/4) | 0.2-4.0 (1/64-3/16) | ||||||||||||||
| G | 06 | 06 | 06 | 06 | 06 | 06 | 06 | 06 | 06 | Overcasting stitch | 3.5 (1/8) | 2.0 (1/16) | No | No | Rfc. | |
| Overcasting on thin or medium weight fabrics | 2.5-5.0 (3/32-3/16) | 1.0-4.0 (1/16-3/16) | ||||||||||||||
| G | 07 | 07 | 07 | 07 | 07 | 07 | 07 | 07 | 07 | Overcasting stitch | 5.0 (3/16) | 2.5 (3/32) | No | No | Rfc. | |
| Overcasting on thick fabrics | 2.5-5.0 (3/32-3/16) | 1.0-4.0 (1/16-3/16) | ||||||||||||||
| J | 08 | 08 | 08 | 08 | 08 | 08 | 08 | 08 | 08 | Overcasting stitch | 5.0 (3/16) | 2.5 (3/32) | ** Yes (J) | No | Rfc. | |
| Overcasting on stretch fabrics | 0.0-7.0 (0-1/4) | 0.5-4.0 (1/32-3/16) | ||||||||||||||
| J | 09 | 09 | 09 | - | - | - | - | - | - | Overcasting stitch | 5.0 (3/16) | 2.5 (3/32) | ** Yes (J) | No | Rfc. | |
| Overcasting on thick or stretch fabrics | 0.0-7.0 (0-1/4) | 0.5-4.0 (1/32-3/16) | ||||||||||||||
Do not use reverse stitching.
*Select a stitch width of 5.0mm (3/16 inch) or less.
| Pattern | Presser Foot | Pattern No. | Stitch Name/Application | Stitch Width [mm (inch.)] | Stitch Length [mm (inch.)] | Twin Needle | Walking Foot | Reverse (Rev.) Reinforcement (Re) Stitching | ||||||||
| 100 stitches model | 90 stitches model | 80 stitches model | 70 stitches model | 60 stitches model | 50 stitches model | 40 stitches model | 30 stitches model | 20 stitches model | Auto Manual | Auto Manual | ||||||
| LAAJ | R | 10 | 10 | 10 | 09 | 09 | 09 | 09 | 09 | 09 | Blind hem stitch Blind hem stitching on medium weight fabrics | 0 (0) -3←→3 | 2.0 (1/16) 1.0-3.5 (1/16-1/8) | No | No | Rfc. |
| WMM | R | 11 | 11 | 11 | 10 | 10 | 10 | 10 | 10 | 10 | Blind hem stitch Blind hem stitching on stretch fabrics | 0 (0) -3←→3 | 2.0 (1/16) 1.0-3.5 (1/16-1/8) | No | No | Rfc. |
| LAM | J | 12 | 12 | 12 | 11 | 11 | 11 | 11 | 11 | 11 | Applique stitch Appliqué stitching | 3.5 (1/8) 2.5-7.0 (3/32-1/4) | 2.5 (3/32) 1.6-4.0 (1/16-3/16) | ** Yes (J) | No | Rfc. |
| TTT | J | 13 | 13 | 13 | 12 | 12 | 12 | 12 | 12 | 12 | Shell tuck stitch Shell tuck stitching | 4.0 (3/16) 0.0-7.0 (0-1/4) | 2.5 (3/32) 0.2-4.0 (1/64-3/16) | ** Yes (J) | No | Rfc. |
| NAP | N | 14 | 14 | 14 | 13 | 13 | 13 | 13 | 13 | 13 | Satin scallop stitch Scallop stitching | 5.0 (3/16) 2.5-7.0 (3/32-1/4) | 0.5 (1/32) 0.1-1.0 (1/64-1/16) | ** Yes (J) | No | Rfc. |
| VJ | J | 15 | 15 | 15 | 14 | 14 | 14 | 14 | 14 | - | Joining stitch Patchwork stitching and decorative stitching | 4.0 (3/16) 0.0-7.0 (0-1/4) | 1.2 (1/16) 0.2-4.0 (1/64-3/16) | ** Yes (J) | No | Rfc. |
| Z | J | 16 | 16 | 16 | 15 | 15 | 15 | 15 | 15 | 14 | Joining stitch Patchwork stitching, decorative stitching and sewing overcasting on both pieces of fabrics, such as with tri-cot | 5.0 (3/16) 2.5-7.0 (3/32-1/4) | 2.5 (3/32) 1.0-4.0 (1/16-3/16) | ** Yes (J) | No | Rfc. |
| VV | J | 17 | 17 | 17 | 16 | 16 | 16 | 16 | 16 | - | Joining stitch Patchwork stitching and decorative stitching | 5.0 (3/16) 0.0-7.0 (0-1/4) | 1.2 (1/16) 0.2-4.0 (1/64-3/16) | ** Yes (J) | No | Rfc. |
| XXX | J | 18 | 18 | 18 | - | - | - | - | - | - | Smocking stitch Smocking stitching and decorative stitching | 5.0 (3/16) 0.0-7.0 (0-1/4) | 1.6 (1/16) 1.0-4.0 (1/16-3/16) | ** Yes (J) | No | Rfc. |
| XXX | J | 19 | 19 | 19 | 17 | 17 | 17 | 17 | 17 | 15 | Fagoting stitch Fagoting, smocking and decorative stitching | 5.0 (3/16) 0.0-7.0 (0-1/4) | 2.5 (3/32) 1.0-4.0 (1/16-3/16) | ** Yes (J) | No | Rfc. |
| XXXX | J | 20 | 20 | 20 | 18 | 18 | 18 | 18 | 18 | - | Fagoting stitch Fagoting, smocking and decorative stitching | 5.0 (3/16) 2.5-7.0 (3/32-1/4) | 2.5 (3/32) 1.0-4.0 (1/16-3/16) | ** Yes (J) | No | Rfc. |
| VVV | J | 21 | 21 | 21 | - | - | - | - | - | - | Elastic-attaching stitch Attaching elastic to stretch fabrics | 4.0 (3/16) 0.0-7.0 (0-1/4) | 1.0 (1/16) 0.2-4.0 (1/64-3/16) | ** Yes (J) | No | Rfc. |
| III | J | 22 | 22 | 22 | 19 | 19 | 19 | 19 | - | - | Decorative stitch Decorative stitching | 4.0 (3/16) 0.0-7.0 (0-1/4) | 3.0 (1/8) 2.0-4.0 (1/16-3/16) | No | No | Rfc. |
| XXX | J | 23 | 23 | 23 | 20 | 20 | 20 | 20 | - | - | Decorative stitch Decorative stitching | 4.0 (3/16) 0.0-7.0 (0-1/4) | 2.5 (3/32) 1.0-4.0 (1/16-3/16) | ** Yes (J) | No | Rfc. |
| XXX | J | 24 | 24 | 24 | 21 | 21 | 21 | - | - | - | Decorative stitch Decorative stitching | 5.5 (7/32) 0.0-7.0 (0-1/4) | 1.6 (1/16) 1.0-4.0 (1/16-3/16) | ** Yes (J) | No | Rfc. |
| √ | N | 25 | 25 | 25 | 22 | 22 | 22 | 21 | - | - | Decorative stitch Decorative stitching and elastic-attaching | 5.0 (3/16) 1.5-7.0 (1/64-1/4) | 1.0 (1/16) 0.2-4.0 (1/64-3/16) | ** Yes (J) | No | Rfc. |
| mm | N | 26 | 26 | 26 | 23 | 23 | 23 | 22 | 19 | - | Decorative stitch Lace sewing, decorative hemming, heirloom stitching, etc. | 3.5 (1/8) 1.5-7.0 (1/16-1/4) | 2.5 (3/32) 1.6-4.0 (1/16-3/16) | No | No | Rfc. |
| xxx | N | 27 | 27 | 27 | 24 | 24 | 24 | 23 | 20 | - | Decorative stitch Decorative hemming, heirloom stitching, etc. | 6.0 (15/64) 1.5-7.0 (1/16-1/4) | 3.0 (1/8) 1.5-4.0 (1/16-3/16) | No | No | Rfc. |
**Select a stitch width of 5.0mm (3/16 inch) or less.
| Pattern | Presser Fool | Pattern No. | Stitch Name/Application | Stitch Width [mm (inch.)] | Stitch Length [mm (inch.)] | Twin Needle | Walking Tool | Reverse (Rev)/Reinforcement (RfC) Stitching | ||||||||
| 100 stitches model | 90 stitches model | 80 stitches model | 70 stitches model | 60 stitches model | 50 stitches model | 40 stitches model | 30 stitches model | 20 stitches model | Auto Manual | Auto Manual | ||||||
| XXX | N | 28 | 28 | 28 | 25 | 25 | 25 | - | - | - | Decorative stitch Decorative hemming on thin, medium weight and plain weave fabrics, heirloom stitching, etc. | 5.0 (3/16)1.5-7.0(1/16-1/4) | 3.5 (1/8)1.5-4.0(1/16-3/16) | No | No | Rfc. |
| XXXX | N | 29 | 29 | 29 | 26 | 26 | 26 | 24 | - | - | Decorative stitchDecorative hemming on thin, medium weight and plain weave fabrics, heirloom stitching, etc. | 5.0 (3/16)1.5-7.0(1/16-1/4) | 4.0 (3/16)1.5-4.0(1/16-3/16) | No | No | Rfc. |
| XXX | N | 30 | 30 | 30 | 27 | 27 | 27 | - | - | - | Decorative stitchDecorative hemming on thin, medium weight and plain weave fabrics, heirloom stitching, etc. | 5.0 (3/16)1.5-7.0(1/16-1/4) | 2.5 (3/32)1.5-4.0(1/16-3/16) | No | No | Rfc. |
| + + + | N | 31 | 31 | 31 | 28 | 28 | 28 | - | - | - | Decorative stitchDecorative hemming on thin, medium weight and plain weave fabrics, heirloom stitching, etc. | 5.0 (3/16)1.5-7.0(1/16-1/4) | 2.0 (1/16)1.5-4.0(1/16-3/16) | No | No | Rfc. |
| XXX | N | 32 | 32 | 32 | - | - | - | - | - | - | Decorative stitchDecorative hemming on thin, medium weight and plain weave fabrics, heirloom stitching, etc. | 6.0 (15/64)1.5-7.0(1/16-1/4) | 1.6 (1/16)1.0-4.0(1/16-3/16) | No | No | Rfc. |
| XXX | N | 33 | 33 | 33 | - | - | - | - | - | - | Decorative stitchDecorative hemming on thin and medium weight fabrics | 5.0 (3/16)1.5-7.0(1/16-1/4) | 1.6 (1/16)1.0-4.0(1/16-3/16) | No | No | Rfc. |
| XXX | A | 34 | 34 | 34 | 29 | 29 | 29 | 25 | 21 | 16 | Buttonhole stitchHorizontal buttonholes on thin and medium weight fabrics | 5.0 (3/16)3.0-5.0(1/8-3/16) | 0.5 (1/32)0.2-1.0(1/64-1/16) | No | No | *** Auto Rfc. |
| XXX | A | 35 | 35 | 35 | 30 | 30 | 30 | 26 | 22 | 17 | Buttonhole stitchSecured buttonholes for fabrics that have backings | 5.0 (3/16)3.0-5.0(1/8-3/16) | 0.5 (1/32)0.2-1.0(1/64-1/16) | No | No | *** Auto Rfc. |
| XXX | A | 36 | 36 | 36 | 31 | 31 | 31 | 27 | - | - | Buttonhole stitchButtonholes for stretch or knit fabrics | 6.0 (15/64)3.0-6.0(1/8-15/64) | 1.0 (1/16)0.5-2.0(1/32-1/16) | No | No | *** Auto Rfc. |
| XXX | A | 37 | 37 | 37 | 32 | 32 | 32 | 28 | - | - | Buttonhole stitchButtonholes for stretch fabrics | 6.0 (15/64)3.0-6.0(1/8-15/64) | 1.5 (1/16)1.0-3.0(1/16-1/8) | No | No | *** Auto Rfc. |
| XXX | A | 38 | 38 | 38 | - | - | - | - | - | - | Buttonhole stitchBound buttonholes | 5.0 (3/16)0.0-6.0(0-15/64) | 2.0 (1/16)0.2-4.0(1/64-3/16) | No | No | *** Auto Rfc. |
| XXX | A | 39 | 39 | 39 | 33 | 33 | 33 | 29 | 23 | 18 | Buttonhole stitchKeyhole buttonholes for thick or furry fabrics | 7.0 (1/4)3.0-7.0(1/8-1/4) | 0.5 (1/32)0.3-1.0(1/64-1/16) | No | No | *** Auto Rfc. |
| XXX | A | 40 | 40 | 40 | 34 | 34 | - | - | - | - | Buttonhole stitchKeyhole buttonholes for medium weight and thick fabrics | 7.0 (1/4)3.0-7.0(1/8-1/4) | 0.5 (1/32)0.3-1.0(1/64-1/16) | No | No | *** Auto Rfc. |
| XXX | A | 41 | 41 | 41 | 35 | 35 | - | - | - | - | Buttonhole stitchKeyhole buttonholes for thick or furry fabrics | 7.0 (1/4)3.0-7.0(1/8-1/4) | 0.5 (1/32)0.3-1.0(1/64-1/16) | No | No | *** Auto Rfc. |
| XXX | A | 42 | 42 | 42 | 36 | 36 | 34 | 30 | 24 | 19 | Bar tack stitchReinforcing openings and areas where the seam easily comes loose | 2.0 (1/16)1.0-3.0(1/16-1/8) | 0.4 (1/64)0.3-1.0(1/64-1/16) | No | No | *** Auto Rfc. |
| IP | J | 43 | 43 | 43 | 37 | 37 | - | - | - | - | Piecing straight stitchPiecing straight stitching (with a seam allowance of 6.5mm from the right edge of the pressor foot) | 5.5 (7/32)0.0-7.0(0-1/4) | 2.0 (1/16)0.2-5.0(1/64-3/16) | No | Yes | Rfc. |
| IP | J | 44 | 44 | 44 | 38 | 38 | - | - | - | - | Piecing straight stitchPiecing straight stitching (with a seam allowance of 6.5mm from the left edge of the pressor foot) | 1.5 (1/16)0.0-7.0(0-1/4) | 2.0 (1/16)0.2-5.0(1/64-3/16) | No | Yes | Rfc. |
***Auto Rfc.:Automatic Reinforcement
| Pattern | Presser Foot | Pattern No. | Stitch Name/Application | Stitch Width [mm (inch.)] | Stitch Length [mm (inch.)] | Twin Needle | Walking Foot | Reverse Rev./Reinforcement (Rf.) Sticking | ||||||||
| 100 stitches model | 90 stitches model | 80 stitches model | 70 stitches model | 60 stitches model | 50 stitches model | 40 stitches model | 30 stitches model | 20 stitches model | Auto Manual | Auto Manual | ||||||
| F=0 | J | 45 | 45 | 45 | 39 | 39 | 35 | 31 | - | - | Hand-look quilting Straight stitch quilling that looks hand-sewn | 0.0 (0) 0.0-7.0 (0-1/4) | 2.5 (3/32) 1.0-4.0 (1/16-3/16) | No | No | Rfc. |
| W=. | J | 46 | 46 | 46 | 40 | 40 | - | - | - | - | Zigzag stitch (for quilting) Appliqué quilting, freemotion quilting, satin stitching, button sewing | 3.5 (1/8) 0.0-7.0 (0-1/4) | 1.4 (1/16) 0.0-4.0 (0-3/16) | No | Yes | Rfc. |
| L=... | J | 47 | 47 | 47 | 41 | 41 | - | - | - | - | Appliqué stitch (for quilting) Attaching appliqués and binding | 1.5 (1/16) 0.5-3.5 (1/32-1/8) | 1.8 (1/16) 1.0-4.0 (1/16-3/16) | No | No | Rfc. |
| C=TT | J | 48 | 48 | 48 | 42 | 42 | - | - | - | - | Appliqué stitch (for quilting) Attaching appliqués and binding | 1.5 (1/16) 0.5-3.5 (1/32-1/8) | 1.8 (1/16) 1.0-4.0 (1/16-3/16) | No | No | Rfc. |
| S=2 | J | 49 | 49 | 49 | 43 | 43 | - | - | - | - | Quilting stippling Quilting background stitching (stippling) | 7.0 (1/4) 1.0-7.0 (1/16-1/4) | 1.6 (1/16) 1.0-4.0 (1/16-3/16) | No | No | Rfc. |
| A | N | 50 | 50 | 50 | - | - | - | - | - | - | Decorative stitch For decoration, etc. | 3.0 (1/8) 0.0-7.0 (0-1/4) | 1.0 (1/16) 0.2-4.0 (1/64-3/16) | No | No | Rfc. |
| XXX | N | 51 | - | - | - | - | - | - | - | - | Decorative stitch For decoration, etc. | 5.0 (3/16) 0.0-7.0 (0-1/4) | 2.0 (1/16) 0.2-4.0 (1/64-3/16) | No | No | Rfc. |
| Z | N | 52 | - | - | - | - | - | - | - | - | Decorative stitch For decoration, etc. | 4.0 (3/16) 0.0-7.0 (0-1/4) | 1.6 (1/16) 0.2-4.0 (1/64-3/16) | No | No | Rfc. |
| AABB | N | 53 | 51 | - | - | - | - | - | - | - | Decorative stitch For decoration, etc. | 5.0 (3/16) 0.0-7.0 (0-1/4) | 2.5 (3/32) 0.2-4.0 (1/64-3/16) | No | No | Rfc. |
| MAY | N | 54 | 52 | 51 | - | - | - | - | - | - | Decorative stitch For decoration, etc. | 7.0 (1/4) 0.0-7.0 (0-1/4) | 2.5 (3/32) 0.2-4.0 (1/64-3/16) | No | No | Rfc. |
| XXX | N | 55 | 53 | 52 | 44 | 44 | 36 | 32 | 25 | - | Decorative stitch For decoration, etc. | 7.0 (1/4) 0.0-7.0 (0-1/4) | 2.5 (3/32) 0.2-4.0 (1/64-3/16) | No | No | Rfc. |
| WWW | N | 56 | 54 | - | - | - | - | - | - | - | Decorative stitch For decoration, etc. | 7.0 (1/4) 0.0-7.0 (0-1/4) | 1.4 (1/16) 0.2-4.0 (1/64-3/16) | No | No | Rfc. |
| X | N | 57 | 55 | - | - | - | - | - | - | - | Decorative stitch For decoration, etc. | 7.0 (1/4) 0.0-7.0 (0-1/4) | 2.5 (3/32) 0.2-4.0 (1/64-3/16) | No | No | Rfc. |
| XX | N | 58 | - | - | - | - | - | - | - | - | Decorative stitch For decoration, etc. | 7.0 (1/4) 0.0-7.0 (0-1/4) | 1.6 (1/16) 0.2-4.0 (1/64-3/16) | No | No | Rfc. |
| O | N | 59 | 56 | 53 | 45 | 45 | 37 | 33 | - | - | Decorative stitch For decoration, etc. | 7.0 (1/4) 0.0-7.0 (0-1/4) | 2.0 (1/16) 0.2-4.0 (1/64-3/16) | No | No | Rfc. |
| G | N | 60 | 57 | 54 | 46 | 46 | 38 | - | - | - | Decorative stitch For decoration, etc. | 7.0 (1/4) 0.0-7.0 (0-1/4) | 2.5 (3/32) 0.2-4.0 (1/64-3/16) | No | No | Rfc. |
| B | N | 61 | - | - | - | - | - | - | - | - | Decorative stitch For decoration, etc. | 7.0 (1/4) 0.0-7.0 (0-1/4) | 2.5 (3/32) 0.2-4.0 (1/64-3/16) | No | No | Rfc. |
| B | N | 62 | 58 | - | - | - | - | - | - | - | Decorative stitch For decoration, etc. | 7.0 (1/4) 0.0-7.0 (0-1/4) | 2.0 (1/16) 0.2-4.0 (1/64-3/16) | No | No | Rfc. |

| Pattern | Presser Foot | Pattern No. | Stitch Name/Application | Stitch Width [mm (inch.)] | Stitch Length [mm (inch.)] | Twin Needle | Walking Foot | Reverse (Rev)/Reinforcement (Rf.) Sticking | ||||||||
| 100 stitches model | 90 stitches model | 80 stitches model | 70 stitches model | 60 stitches model | 50 stitches model | 40 stitches model | 30 stitches model | 20 stitches model | Auto Manual | Auto Manual | ||||||
| 新貌 | N | 63 | 59 | 55 | 47 | - | - | - | - | - | Decorative stitch For decoration, etc. | 7.0 (1/4) 0.0-7.0 (0-1/4) | 2.5 (3/32) 0.2-4.0 (1/64-3/16) | No | No | Rfc. |
| N | 64 | 60 | - | - | - | - | - | - | - | Decorative stitch For decoration, etc. | 7.0 (1/4) 0.0-7.0 (0-1/4) | 1.6 (1/16) 0.2-4.0 (1/64-3/16) | No | No | Rfc. | |
| N | 65 | 61 | 56 | 48 | 47 | 39 | - | - | - | Decorative stitch For decoration, etc. | 7.0 (1/4) 0.0-7.0 (0-1/4) | 2.0 (1/16) 0.2-4.0 (1/64-3/16) | No | No | Rfc. | |
| N | 66 | 62 | 57 | 49 | 48 | 40 | - | - | - | Decorative stitch For decoration, etc. | 7.0 (1/4) 0.0-7.0 (0-1/4) | 2.0 (1/16) 0.2-4.0 (1/64-3/16) | No | No | Rfc. | |
| N | 67 | 63 | 58 | 50 | - | - | - | - | - | Decorative stitch For decoration, etc. | 7.0 (1/4) 0.0-7.0 (0-1/4) | 1.6 (1/16) 0.2-4.0 (1/64-3/16) | No | No | Rfc. | |
| N | 68 | 64 | 59 | 51 | 49 | 41 | 34 | 26 | - | Decorative stitch For decoration, etc. | 7.0 (1/4) 0.0-7.0 (0-1/4) | 2.5 (3/32) 0.2-4.0 (1/64-3/16) | No | No | Rfc. | |
| N | 69 | 65 | 60 | 52 | - | - | - | - | - | Decorative stitch For decoration, etc. | 7.0 (1/4) 0.0-7.0 (0-1/4) | 2.0 (1/16) 0.2-4.0 (1/64-3/16) | No | No | Rfc. | |
| N | 70 | 66 | 61 | 53 | - | - | - | - | - | Decorative stitch For decoration, etc. | 5.0 (3/16) 0.0-7.0 (0-1/4) | 2.0 (1/16) 0.2-4.0 (1/64-3/16) | No | No | Rfc. | |
| N | 71 | - | - | - | - | - | - | - | - | Decorative stitch For decoration, etc. | 7.0 (1/4) 0.0-7.0 (0-1/4) | 1.6 (1/16) 0.2-4.0 (1/64-3/16) | No | No | Rfc. | |
| N | 72 | 67 | 62 | - | - | - | - | - | - | Decorative stitch For decoration, etc. | 7.0 (1/4) 0.0-7.0 (0-1/4) | 2.0 (1/16) 0.2-4.0 (1/64-3/16) | No | No | Rfc. | |
| N | 73 | 68 | - | - | - | - | - | - | - | Decorative stitch For decoration, etc. | 7.0 (1/4) 0.0-7.0 (0-1/4) | 2.0 (1/16) 0.2-4.0 (1/64-3/16) | No | No | Rfc. | |
| N | 74 | 69 | 63 | 54 | - | - | - | - | - | Decorative stitch For decoration, etc. | 7.0 (1/4) 0.0-7.0 (0-1/4) | 2.5 (3/32) 0.2-4.0 (1/64-3/16) | No | No | Rfc. | |
| N | 75 | 70 | 64 | 55 | 50 | - | - | - | - | Decorative stitch For decoration, etc. | 7.0 (1/4) 0.0-7.0 (0-1/4) | 1.6 (1/16) 0.2-4.0 (1/64-3/16) | No | No | Rfc. | |
| N | 76 | 71 | 65 | 56 | 51 | - | - | - | - | Decorative stitch For decoration, etc. | 7.0 (1/4) 0.0-7.0 (0-1/4) | 1.4 (1/16) 0.2-4.0 (1/64-3/16) | No | No | Rfc. | |
| N | 77 | 72 | 66 | - | - | - | - | - | - | Satin stitches For decoration, etc. | 7.0 (1/4) 0.0-7.0 (0-1/4) | 0.4 (1/64) 0.1-1.0 (1/64-1/16) | ** (J) | No | Rfc. | |
| N | 78 | 73 | 67 | 58 | - | - | - | - | - | Satin stitches For decoration, etc. | 7.0 (1/4) 0.0-7.0 (0-1/4) | 0.4 (1/64) 0.1-1.0 (1/64-1/16) | ** (J) | No | Rfc. | |
| N | 79 | 74 | - | - | - | - | - | - | - | Satin stitches For decoration, etc. | 7.0 (1/4) 0.0-7.0 (0-1/4) | 0.4 (1/64) 0.1-1.0 (1/64-1/16) | ** (J) | No | Rfc. | |
**Select a stitch width of 5.0mm (3/16 inch) or less.
| Pattern | Presser Foot | Pattern No. | Stitch Name/Application | Stitch Width [mm (inch.)] | Stitch Length [mm (inch.)] | Twin Needle | Walking Foot | Reverse (Rev./Reminon) [Rfc.] Statching | ||||||||
| 100 stitches model | 90 stitches model | 80 stitches model | 70 stitches model | 60 stitches model | 50 stitches model | 40 stitches model | 30 stitches model | 20 stitches model | Auto Manual | Auto Manual | ||||||
| unum | N | 80 | 75 | 68 | 59 | 53 | 43 | 35 | - | - | Satin stitches For decoration, etc. | 7.0 (1/4) | 0.4 (1/64) | ** Yes (J) | No | Rfc. |
| 0.0-7.0 (0-1/4) | 0.1-1.0 (1/64-1/16) | |||||||||||||||
| unum | N | 81 | - | - | - | - | - | - | - | - | Satin stitches For decoration, etc. | 7.0 (1/4) | 0.4 (1/64) | ** Yes (J) | No | Rfc. |
| 0.0-7.0 (0-1/4) | 0.1-1.0 (1/64-1/16) | |||||||||||||||
| unumu | N | 82 | 76 | 69 | 60 | 54 | 44 | 36 | 27 | - | Satin stitches For decoration, etc. | 7.0 (1/4) | 0.4 (1/64) | ** Yes (J) | No | Rfc. |
| 0.0-7.0 (0-1/4) | 0.1-1.0 (1/64-1/16) | |||||||||||||||
| unumu | M | 83 | 77 | 70 | 61 | 55 | 45 | - | - | - | Satin stitches For decoration, etc. | 7.0 (1/4) | 0.4 (1/64) | ** Yes (J) | No | Rfc. |
| 0.0-7.0 (0-1/4) | 0.1-1.0 (1/64-1/16) | |||||||||||||||
| Unumu | N | 84 | 78 | 71 | 62 | 56 | 46 | 37 | 28 | - | Satin stitches For decoration, etc. | 7.0 (1/4) | 0.4 (1/64) | ** Yes (J) | No | Rfc. |
| 0.0-7.0 (0-1/4) | 0.1-1.0 (1/64-1/16) | |||||||||||||||
| unumu | n | 85 | 79 | 72 | 63 | - | - | - | - | - | Satin stitches For decoration, etc. | 7.0 (1/4) | 0.4 (1/64) | ** Yes (J) | No | Rfc. |
| 0.0-7.0 (0-1/4) | 0.1-1.0 (1/64-1/16) | |||||||||||||||
| unumu | N | 86 | 80 | 73 | 64 | - | - | - | - | - | Satin stitches For decoration, etc. | 7.0 (1/4) | 0.4 (1/64) | ** Yes (J) | No | Rfc. |
| 0.0-7.0 (0-1/4) | 0.1-1.0 (1/64-1/16) | Rfc. | ||||||||||||||
| unumu | N | 87 | 81 | 74 | 57 | 52 | 42 | - | - | - | Satin stitches For decoration, etc. | 7.0 (1/4) | 0.4 (1/64) | ** Yes (J) | No | Rfc. |
| 0.0-7.0 (0-1/4) | 0.1-1.0 (1/64-1/16) | |||||||||||||||
| tugup | N | 88 | 82 | - | - | - | - | - | - | - | Satin stitches For decoration, etc. | 7.0 (1/4) | 0.4 (1/64) | ** Yes (J) | No | Rfc. |
| 0.0-7.0 (0-1/4) | 0.1-1.0 (1/64-1/15) | |||||||||||||||
| unumu | N | 89 | - | - | - | - | - | - | - | - | Satin stitches For decoration, etc. | 7.0 (1/4) | 0.4 (1/64) | ** Yes (J) | No | Rfc. |
| 0.0-7.0 (0-1/4) | 0.1-1.0 (1/64-116) | |||||||||||||||
| unumu | N | 90 | - | - | - | - | - | - | - | - | Satin stitches For decoration, etc. | 7.0 (1/4) | 0.4 (1/64) | ** Yes (J) | No | Rfc. |
| 0.0-7.0 (0-1/4) | 0.1-1.0 (1/64-1 /16) | |||||||||||||||
| unumu | N | 91 | - | - | - | - | - | - | - | - | Satin stitches For decoration, etc. | 7.0 (1/4) | 0.4 (1/64) | ** Yes (J) | No | Rfc. |
| 0.0-7.0 (0-1/4) | 0.1-1.0 (1/64- 1/16) | |||||||||||||||
| unumu | N | 92 | - | - | - | - | - | - | - | - | Satin stitches For decoration, etc. | 7.0 (1/4) | 0.4 (1/64) | ** Yes (J) | No | Rfc. |
| 0.0-7.0 (0-1/4) | 0.1-1.0 (1/64-1 16) | |||||||||||||||
**Select a stitch width of 5.0mm (3/16 inch) or less.
| Pattern | Presser Foot | Pattern No. | Stitch Name/Application | Stitch Width [mm (inch.)] | Stitch Length [mm (inch.)] | Twin Needle | Walking Foot | Reverse (Rev.) Reinforcement (Rfc.) Stitching | ||||||||
| 100 stitches model | 90 stitches model | 80 stitches model | 70 stitches model | 60 stitches model | 50 stitches model | 40 stitches model | 30 stitches model | 20 stitches model | Auto Manual | Auto Manual | ||||||
| XXX | N | 93 | 83 | - | - | - | - | - | - | - | Cross-stitches For decoration, etc. | 6.0 (15/64) | 1.4 (1/16) | No | No | Rfc. |
| 0.0-7.0 (0-1/4) | 0.2-4.0 (1/64-3/16) | |||||||||||||||
| XXX | N | 94 | 84 | 75 | 65 | - | - | - | - | - | Cross-stitches For decoration, etc. | 7.0 (1/4) | 1.6 (1/16) | No | No | Rfc. |
| 0.0-7.0 (0-1/4) | 0.2-4.0 (1/64-3/16) | |||||||||||||||
| XXX | N | 95 | 85 | 76 | 67 | 57 | 47 | 38 | 29 | - | Cross-stitches For decoration, etc. | 6.0 (15/64) | 2.5 (3/32) | No | No | Rfc. |
| 0.0-7.0 (0-1/4) | 0.2-4.0 (1/64-3/16) | |||||||||||||||
| XXX | N | 96 | 86 | - | - | - | - | - | - | - | Cross-stitches For decoration, etc. | 6.0 (15/64) | 1.4 (1/16) | No | No | Rfc. |
| 0.0-7.0 (0-1/4) | 0.2-4.0 (1/64-3/16), | |||||||||||||||
| XXX | N | 97 | 87 | 77 | 66 | - | - | - | - | - | Cross-stitches For decoration, etc. | 6.0 (15/64) | 1.4 (1/16) | No | No | Rfc. |
| 0.0-7.0 (0-1/4) | 0.2-4.0 (1/64-3/16) | |||||||||||||||
Character stitches (for models equipped with character stitches)
| Stitch Type | Presser Font | Pattern No. | Twin Needle | Stitch width/ Stitch Length | |||||||||
| Character stitches | N | 01A | 02B | 03C | 04D | 05E | 06F | 07G | 08H | 09I | 10J | No | - |
| 11K | 12L | 13M | 14N | 15O | 16P | 17Q | 18R | 19S | 20T | ||||
| 21U | 22V | 23W | 24X | 25Y | 26Z | 27& | 28? | 29! | 30— | ||||
| 31O | 321 | 332 | 343 | 354 | 365 | 376 | 387 | 398 | 409 | ||||
| 41, | 42, | 43. | 44( | 45) | 46— | 47A | 48A | 49AE | 50N | ||||
| 51O | 52O | 53C | 54U | 55B | |||||||||
MAINTENANCE
Simple sewing machine maintenance operations are described below.
Restrictions on oiling
In order to prevent damaging this machine, it must not be oiled by the user.
This machine was manufactured with the necessary amount of oil applied to ensure correct operation, making periodic oiling unnecessary.
If problems occur, such as difficulty turning the handwheel or an unusual noise, immediately stop using the machine, and contact your authorized dealer or the nearest authorized service center.
Precautions on storing the machine
Do not store the machine in any of the locations described below, otherwise damage to the machine may result, for example, rust caused by condensation.
- Exposed to extremely high temperatures
- Exposed to extremely low temperatures
- Exposed to extreme temperature changes
- Exposed to high humidity or steam
Near a flame, heater or air conditioner - Outdoors or exposed to direct sunlight
- Exposed to extremely dusty or oily environments

Note
- In order to extend the life of this machine, periodically turn it on and use it.
Storing this machine for an extended period of time without using it may reduce its efficiency.
Cleaning the machine surface
If the surface of the machine is dirty, lightly soak a cloth in neutral detergent, squeeze it out firmly, and then wipe the surface of the machine. After cleaning it once with a wet cloth, wipe it again with a dry cloth.
CAUTION
- Unplug the power supply cord before cleaning the machine, otherwise injuries or an electric shock may occur.
Cleaning the race
Sewing performance will suffer if dust collects in the race therefore, it should be cleaned periodically.

Switch the machine off and unplug it.
CAUTION
- Make sure you unplug the machine before you clean it. Otherwise, you may get an electric shock or be injured.

Raise the needle and the presser foot.

Loosen the presser-foot screw and the needle clamp screw to remove the presser-foot holder and the needle.
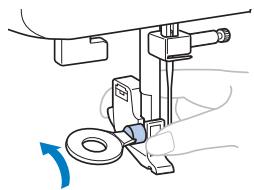
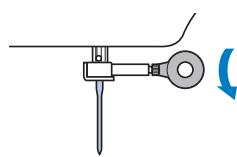

Slide the needle plate cover release toward you to remove the needle plate cover.
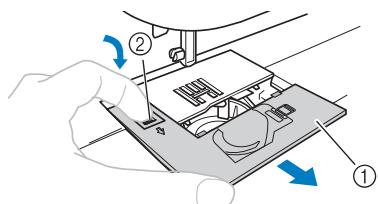
① Needle plate cover
② Needle plate cover release

Remove the bobbin case.
Grasp the bobbin case, and then pull it out.
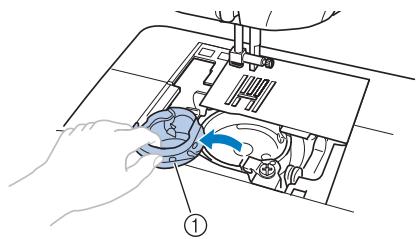
① Bobbin case

Use the cleaning brush or a vacuum cleaner to remove any dust from the race and its surrounding area.
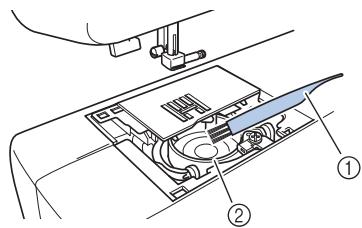
① Cleaning brush
② Race

Note
- Do not put oil on the race.

Insert the bobbin case so that the mark on the bobbin case aligns with the mark on the machine.
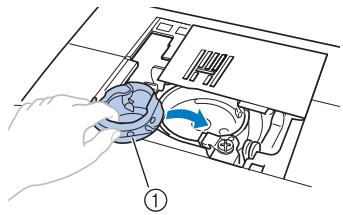
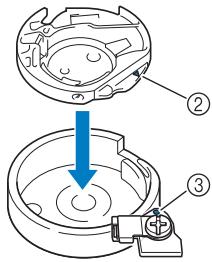
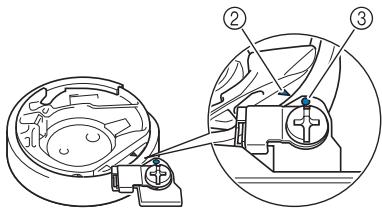
① Bobbin case
(2) mark
③ ●mark
- Align the and marks.
- Make sure that the indicated points are aligned before installing the bobbin case.
CAUTION
- Never use a bobbin case that is scratched, otherwise the upper thread may become tangled, the needle may break or sewing performance may suffer. For a new bobbin case (part code: XE7560-001), contact your nearest authorized service center.
Make sure that you fit the bobbin case properly, otherwise the needle may break.
As shown, insert the tab on the needle plate cover into the hole in the needle plate, and then correctly position of the needle plate cover.
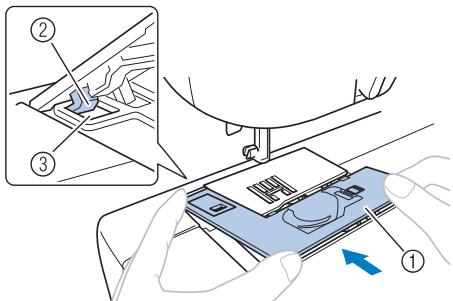
① Needle plate cover
② Tab
③ Hole
- Check that the needle plate cover is flush with the top surface of the machine.
From the front, slide the needle plate cover back into position.
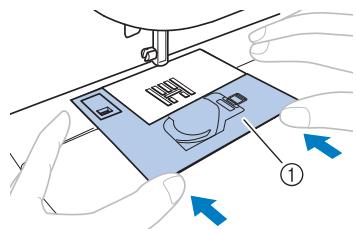
① Needle plate cover
CAUTION
- If the needle plate cover is not flush with the surface of the machine as shown below, remove the needle plate cover (step 4), and then install it again (steps 5 and 6). Sewing while the needle plate cover is not flush with the surface of the machine may cause the needle plate cover to come off of the machine, resulting in injuries if your fingers touch the race.
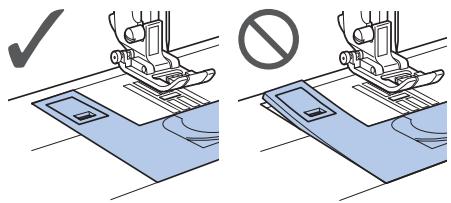
TROUBLESHOOTING
If the machine stops operating correctly, check the following possible problems before requesting service. You can solve most problems by yourself. If you need additional help, the Brother Solutions Center offers the latest FAQs and troubleshooting tips. Visit us at " http:// support.brother.com/". If the problem persists, contact your dealer or the nearest authorized service center.
Frequent troubleshooting topics
Detailed causes and remedies for common troubleshooting topics are described below. Be sure to refer to this before contacting us.
| ■ Upper thread tightened up | page 59 |
| ■ Tangled thread on wrong side of fabric | page 59 |
| ■ Incorrect thread tension | page 59 |
| ■ Fabric is caught in the machine and cannot be removed | page 60 |
Upper thread tightened up
Symptom
- The upper thread appears as a single continuous line.
- The lower thread is visible from the upper side of the fabric. (Refer to the illustration below.)
- The upper thread has tightened up, and comes out when pulled.
- The upper thread has tightened up, and wrinkles appear in the fabric.
- The upper thread tension is tight, and the results do not change even after the thread tension is adjusted.
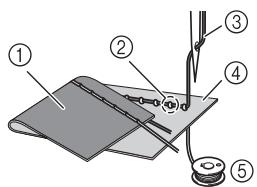
① Lower side of fabric
② Lower thread visible from upper side of fabric
③ Upper thread
(4) Upper side of fabric
⑤ Lower thread
Cause
Incorrect lower threading
If the lower thread is incorrectly threaded, instead of the appropriate tension being applied to the lower thread, it is pulled through the fabric when the upper thread is pulled up. For this reason, the thread is visible from the upper side of the fabric.
■ Remedy/check details
Correctly install the lower thread.
Refer to "Lower threading" (page 13-15).
Tangled thread on wrong side of fabric
Symptom
- The thread becomes tangled on the lower side of the fabric.
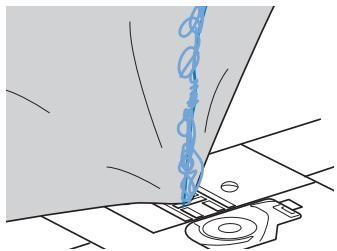
-
After starting sewing, a rattling noise is made and sewing cannot continue.
-
Looking under the fabric, there is tangled thread in the bobbin case.
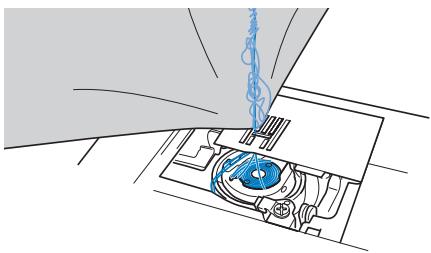
Cause
Incorrect upper threading
If the upper thread is incorrectly threaded, the upper thread passed through the fabric cannot be firmly pulled up and the upper thread becomes tangled in the bobbin case, causing a rattling noise.
■ Remedy/check details
Remove the tangled thread, and then correct the upper threading.

Remove the tangled thread. If it cannot be removed, cut the thread with scissors.
- For details, refer to "Cleaning the race" on page 57.

Remove the upper thread from the machine.

Correct the upper threading by following the instructions in "Upper threading" (page 15-17).
- If the bobbin was removed from the bobbin case, refer to "Lower threading" (page 13) and "Remedy/check details" in the section "Upper thread tightened up" (page 59) to correctly install the bobbin.
Incorrect thread tension
Symptoms
Symptom 1: The lower thread is visible from the upper side of the fabric.
Symptom 2: The upper thread appears as a straight line on the upper side of the fabric.
Symptom 3: The upper thread is visible from the lower side of the fabric.
Symptom 4: The lower thread appears as a straight line on the lower side of the fabric.
Symptom 5: The stitching on the lower side of the fabric is loose or has slack.
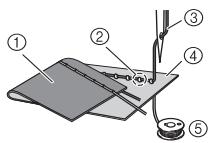
□ Symptom 1
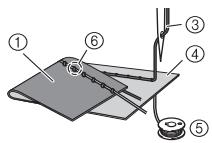
□ Symptom 3
① Lower side of fabric
② Lower thread visible from upper side of fabric
③ Upper thread
(4) Upper side of fabric
⑤ Lower thread
⑥ Upper thread visible from lower side of fabric
Cause/remedy/check details
Cause 1
The machine is not correctly threaded.
Return the upper tension-control dial to "4", and then refer to "Upper thread tightened up" (page 59) to correct the threading.
Return the upper tension-control dial to "4", and then refer to "Tangled thread on wrong side of fabric" (page 59) to correct the upper threading.
Cause 2
A needle and thread appropriate for the fabric are not being used.
Refer to "Needle types and their uses" (page 19) to check that a needle and thread appropriate for the fabric are being used.
Cause 3
An appropriate setting on the upper tension-control dial is not selected.
Turn the upper tension-control dial to select an appropriate thread tension.
- Adjust the thread tension while test sewing on a piece of scrap fabric that is the same as that used in your project.

Note
-
If the upper threading and lower threading are incorrect, the thread tension cannot be adjusted correctly, even by turning the upper tension-control dial. Check the upper threading and lower threading first, and then adjust the thread tension.
-
When the lower thread is visible from the upper side of the fabric, turn the dial counterclockwise.
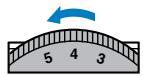
- When the upper thread is visible from the lower side of the fabric, turn the dial clockwise.
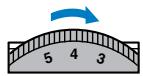
Fabric is caught in the machine and cannot be removed
If the fabric is caught in the sewing machine and cannot be removed, the thread may have become tangled under the needle plate. Follow the procedure described below to remove the fabric from the machine. If the operation could not be completed according to the procedure, instead of attempting to complete it forcefully, contact your nearest authorized service center.
■ Removing the fabric from the machine

Immediately stop the sewing machine.

Turn off the sewing machine.

Remove the needle.
If the needle is lowered into the fabric, turn the handwheel away from you (clockwise) to raise the needle out of the fabric, and then remove the needle.
Refer to "Replacing the needle" (page 20).

Remove the presser foot and presser foot holder.
Refer to "Replacing the presser foot" (page 22) and "Removing the presser foot holder" (page 23).

Lift up the fabric and cut the threads below it. If the fabric can be removed, remove it.

Remove the needle plate cover.
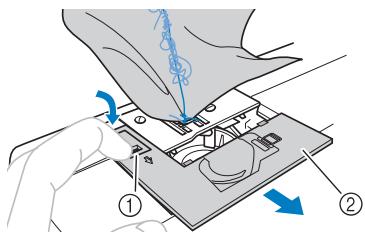
① Needle plate cover release
② Needle plate cover (front part)

Cut out the tangled threads, and then remove the bobbin.
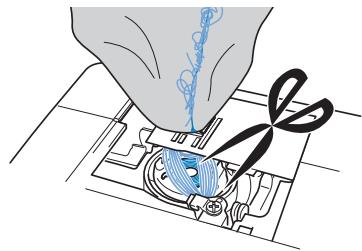

Remove the bobbin case.
If threads remain in the bobbin case, remove them.
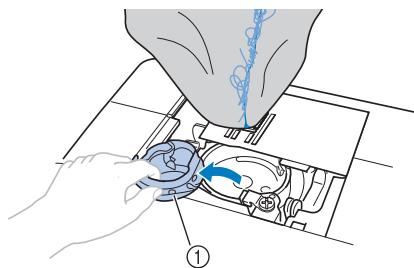
① Bobbin case

Use the cleaning brush or a vacuum cleaner to remove any dust from the race and its surrounding area.
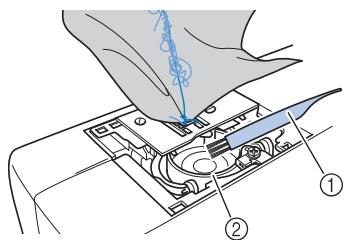
① Cleaning brush
② Race
| If the fabric could be removed | Continue with step 16. |
| If the fabric could not be removed | Continue with step 19. |

Use the enclosed disc-shaped screwdriver to loosen the two screws on the needle plate.
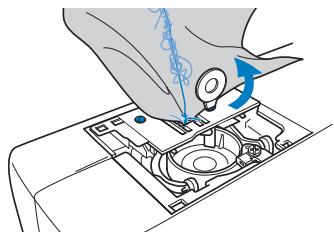

Note
- Be careful not to drop the removed screws in the machine.

Slightly lift up the needle plate, cut any tangled threads, and then remove the needle plate.
Remove the fabric and threads from the needle plate.
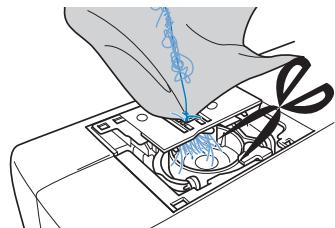
If the fabric cannot be removed, even after completing these steps, contact your nearest authorized service center.

Remove any threads in the race and around the feed dogs.

Turn the handwheel to raise the feed dogs.

Align the two screw holes in the needle plate with the two holes at the needle plate mounting base, and then fit the needle plate onto the machine.

Lightly finger-tighten the screw on the right side of the needle plate. Then, use the disc-shaped screwdriver to firmly tighten the screw on the left side. Finally, firmly tighten the screw on the right side.
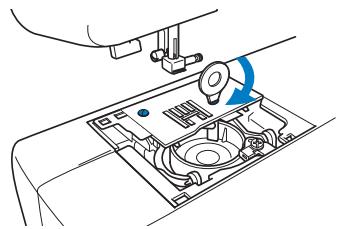
Turn the handwheel to check that the feed dogs move smoothly and do not contact the edges of the slots in the needle plate.
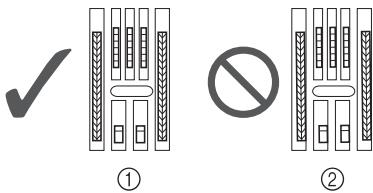
① Correct position of feed dogs

② Incorrect position of feed dogs
Note
- Be careful not to drop the removed screws in the machine.
16 Insert the bobbin case by following step 7 in "Cleaning the race" (page 58).
17 Attach the needle plate cover according to steps ⑧ and ⑨ in "Cleaning the race" (page 58).
18 Check the condition of the needle, and then install it.
- Refer to "Checking the needle" (page 19) and "Replacing the needle" (page 20).
CAUTION
- Never use bent needles. Bent needles can easily break, possibly resulting in injuries.

Note
- After completing this procedure, continue with the following procedure in "Checking machine operations" to check that the machine is operating correctly.

Memo
- Since the needle may have been damaged when the fabric was caught in the machine, we recommend replacing it with a new one.
Checking machine operations
If the needle plate has been removed, check machine operations to confirm that installation has been completed correctly.
Turn on the machine.
Select (middle needle position stitch).

- Do not yet install the presser foot and thread.
Slowly turn the handwheel toward you (counterclockwise), and look from all sides to check that the needle falls at the center of the hole in the needle plate.
If the needle contacts the needle plate, remove the needle plate, and then install it again, starting with step 13 in "Removing the fabric from the machine" (page 61).
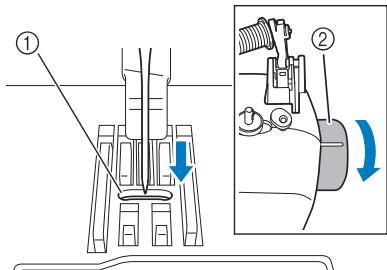
① Hole in the needle plate
② Handwheel
4 Select zigzag stitch . At this time, increase the stitch length and width to their maximum settings.
Refer to "Adjusting the stitch length and width" (page 24).
Slowly turn the handwheel toward you (counterclockwise) and check that the needle bar and feed dogs operate correctly.
If the needle or feed dogs contact the needle plate, the machine may be malfunctioning; therefore, contact your nearest authorized service center.
Turn off the machine, and then install the bobbin and presser foot.
Refer to "Lower threading" (page 13) and "Replacing the presser foot" (page 22).
Correctly thread the machine.
Refer to "Upper threading" (page 15).

- The thread may have become tangled as a result of incorrect upper threading. Make sure that the machine is correctly threaded.
Perform trial sewing with normal fabric.

- Incorrect sewing may be the result of incorrect upper threading or sewing thin fabrics. If there are poor results from the trial sewing, check the upper threading or the type of fabric being used.
List of symptoms
Before sewing
| Symptom | Possible cause | How to put it right | Reference |
| The needle threader can not be used. (For models equipped with the needle threader lever.) | You have not moved the needle holder to its highest position. | Raise the needle either by turning the handwheel toward you (counterclockwise) so that the mark on the wheel points up or by pressing (needle position button) once or twice. | page 15 |
| The needle is incorrectly installed. | Correctly install the needle. | page 20 | |
| The sewing light does not come on. | The sewing lamp is damaged. | Contact your retailer or the nearest authorized service center. | - |
| The machine is not turned on. | Turn on the machine. | page 8 | |
| Bobbin thread does not wind neatly on the bob-bin. | The thread is not passed through the bobbin-winding thread guide correctly. | Correctly pass the thread through the bobbin-winding thread guide. | page 11 |
| Bobbin spins slowly. (for models equipped with the sewing speed controller.) | Move the sewing speed controller to the right (so that the speed will be fast). | page 12 | |
| The thread that was pulled out was not wound onto the bobbin correctly. (For models equipped with the fast bobbin winding system.) | Wind the thread that was pulled off round the bobbin five or six times clockwise. | page 12 | |
| The thread does not pass through the eye of the needle. (For mod-els equipped with the needle threader lever.) | You have not moved the needle holder to its highest position. | Raise the needle either by turning the handwheel toward you (counterclockwise) so that the mark on the wheel points up or by pressing (needle position button) once or twice. | page 15 |
| The needle is incorrectly installed. | Correctly install the needle. | page 20 | |
| The needle threader lever does not lower to the correct position. (For models equipped with the needle threader lever.) | The needle has not been raised to the correct position. | Press the needle position button. | page 15 |
| While winding the bobbin, the bobbin thread was wound below the bobbin winder seat. | You have not wound the bobbin thread properly. | After removing the thread wound below the bobbin winder seat, wind the bobbin correctly. | page 10 |
While sewing
| Symptom | Possible cause | How to put it right | Reference |
| The sewing machine does not work. | The machine is not plugged in. | Plug the machine in. | page 8 |
| The main power switch is turned off. | Turn on the main power switch. | page 8 | |
| The bobbin winder shaft is pushed to the right. | Move the bobbin winder shaft to the left. | page 12, 13 | |
| You have not used the foot controller properly. | Use the foot controller properly. | page 8 | |
| The foot controller or the start/stop button was not pressed (for models equipped with the start/stop button). | Press the foot controller or the start/stop button. | page 25 | |
| The presser foot lever is raised. | Lower the presser foot lever. | page 25 | |
| The start/stop button was pressed, even though the foot controller is connected. (for models equipped with the start/stop button) | Do not use the start/stop button when the foot controller is connected. To use the start/stop button, disconnect the foot controller. | page 25 | |
| Fabric being sewn with the machine cannot be removed. | Thread is tangled below the needle plate. | Lift up the fabric and cut the threads below it, and clean the race. | page 60 |
| The needle breaks. | The spool or spool cap is incorrectly installed. | Correctly install the spool or spool cap. | page 15 |
| The upper thread was not threaded correctly. | Correct the upper threading. | page 15 | |
| The needle is incorrectly installed. | Correctly install the needle. | page 20 | |
| The needle clamp screw is loose. | Use the disc-shaped screwdriver to firmly tighten the screw. | page 20 | |
| The needle is bent or blunt. | Replace the needle. | page 20 | |
| You have not used the right combination of fabric, thread and needle. | Choose a thread and needle that are appropriate for the type of fabric. | page 19 | |
| The presser foot you are using is not appropriate for the type of stitch that you want to sew. | Attach the presser foot that is correct for the type of stitch that you want to sew. | page 50 | |
| The upper thread tension is too tight. | Loosen the upper thread tension. | page 26 | |
| You are pulling the fabric too much. | Lightly guide the fabric. | - | |
| The area around the hole in the needle plate is scratched. There is a notch (①) on the left side of the opening in the needle plate. This is not a scratch. | Replace the needle plate. Contact your retailer or the nearest authorized service center. | - | |
| The area around the hole in the presser foot is scratched. | Replace the presser foot. Contact your retailer or the nearest authorized service center. | - | |
| The bobbin case is scratched. | Replace the bobbin case. Contact your retailer or the nearest authorized service center. | - | |
| You have not used a bobbin that has been designed for this machine. | Incorrect bobbins will not work properly. Only use a bobbin that has been designed for this machine. | page 10 | |
| The upper thread breaks. | The upper thread was not threaded correctly (for example, the spool is not installed correctly, the spool cap is too big for the spool being used, or the thread has come out of the needle bar thread guide.) | Correct the upper threading. Use the spool cap that best fits the size of the spool being used. | page 15 |
| There are knots or tangles in the thread. | Remove any knots or tangles. | - | |
| The needle is not appropriate for the thread you are using. | Choose a needle that is appropriate for the type of stitch. | page 19 | |
| The upper thread tension is too tight. | Loosen the upper thread tension. | page 26 | |
| The thread is tangled, for example, in the race. | Remove the tangle thread. If the thread is tangled in the race, clean the race. | page 57, 59 | |
| The needle is bent or blunt. | Replace the needle. | page 20 | |
| The needle is incorrectly installed. | Correctly install the needle. | page 20 | |
| The area around the hole in the needle plate is scratched. There is a notch (1) on the left side of the opening in the needle plate. This is not a scratch. | Replace the needle plate. Contact your retailer or the nearest authorised service center. | - | |
| The area around the hole in the presser foot is scratched. | Replace the presser foot. Contact your retailer or the nearest authorised service center. | - | |
| The bobbin case is scratched, or has a burr on it. | Replace the bobbin case. Contact your retailer or the nearest authorised service center. | - | |
| You have not used a bobbin that has been designed for this machine. | Incorrect bobbins will not work properly. Only use a bobbin that has been designed for this machine. | page 10 | |
| The lower thread is tangled or breaks. | You have not wound the bobbin thread properly. | Wind the bobbin thread properly. | page 10 |
| The bobbin is scratched or does not turn smoothly. | Replace the bobbin. | - | |
| The thread is tangled. | Remove the tangled thread and clean the race. | page 57, 59 | |
| You have not used a bobbin that has been designed for this machine. | Incorrect bobbins will not work properly. Only use a bobbin that has been designed for this machine. | page 10 | |
| Bobbin is set incorrectly. | Reset the bobbin thread correctly. | page 13, 14 | |
| The fabric is wrinkled. | You have not threaded the upper thread properly or fitted the bobbin properly. | Thread the upper thread and wind the bobbin thread properly. | page 13, 14, 15 |
| The spool or spool cap is incorrectly installed. | Correctly install the spool or spool cap. | page 15 | |
| You have not used the right combination of fabric, thread and needle. | Choose a thread and needle that are appropriate for the type of fabric. | page 19 | |
| The needle is bent or blunt. | Replace the needle. | page 20 | |
| If thin fabrics are being sewn, the stitch is too long or the fabric is not being fed correctly. | Sew with the stabilizer material under the fabric. | page 28 | |
| The fabric is wrinkled. | If thin fabrics are being sewn, the stitch is too coarse. | Shorten the stitch length, or sew with stabilizer material under the fabric. | page 24, 28 |
| The presser foot you are using is not appropriate for the type of stitch that you want to sew. | Attach the presser foot that is correct for the type of stitch that you want to sew. | page 50 | |
| The thread tension is incorrect. | Adjust the tension of the upper thread. | page 26, 59 | |
| Stitches are skipped. | You have not threaded the upper thread properly. | Correct the upper threading. | page 15 |
| You have not used the right combination of fabric, thread and needle. | Choose a thread and needle that are appropriate for the type of fabric. | page 19 | |
| The needle is bent or blunt. | Replace the needle. | page 20 | |
| The needle is incorrectly installed. | Correctly install the needle. | ||
| Dust has accumulated under the needle plate or in the race. | Remove the needle plate cover and clean the plate and the race. | page 57 | |
| There is a high-pitched noise while sewing. | Dust has built up in the feed dogs or in the race. | Remove the needle plate cover and clean the plate and the race. | page 57 |
| You have not threaded the upper thread properly. | Correct the upper threading. | page 15 | |
| The bobbin case is scratched. | Replace the bobbin case.Contact your retailer or the nearest authorized service center. | - | |
| You have not used bobbin that has been designed for this machine. | Incorrect bobbins will not work properly. Only use a bobbin that has been designed for this machine. | page 10 | |
| The fabric does not feed. | The feed dogs are lowered. | Slide the feed dog position lever to. | page 35, 41 |
| The stitch is too fine. | Lengthen the stitch length. | page 25 | |
| You have not used the right combination of fabric, thread and needle. | Choose a thread and needle that are appropriate for the type of fabric. | page 19 | |
| The thread is tangled, for example, in the race. | Remove the tangle thread. If the thread is tangled in the race, clean the race. | page 57, 59 | |
| The presser foot you are using is not appropriate for the type of stitch that you want to sew. | Attach the presser foot that is correct for the type of stitch that you want to sew. | page 50 | |
| The needle is bent or blunt. | Replace the needle. | page 20 | |
| Zigzag foot "J" is slanted on a thick seam at the beginning of stitching. | Use the presser foot locking pin (black button on the left side) on zigzag foot "J" to keep the presser foot level while sewing. | page 27 | |
| The fabric feeds in the opposite direction. | The feed mechanism is damaged. | Contact your retailer or the nearest authorized service center. | - |
After sewing
| Symptom | Possible cause | How to put it right | Reference |
| The upper thread has tightened up. | The bobbin thread is incorrectly installed. | Correctly install the bobbin thread. | page 13, 59 |
| The thread tension is incorrect. | You have not threaded the upper thread properly. | Correct the upper threading. | page 15 |
| You have not wound the bobbin thread properly. | Wind the bobbin thread properly. | page 10 | |
| The bobbin thread is incorrectly installed. | Correctly install the bobbin thread. | page 13 | |
| You have not threaded the right combination of thread and needle for the fabric you are using. | Choose a thread and needle that are appropriate for the type of fabric. | page 19 | |
| You have not attached the presser-foot holder properly. | Attach the presser-foot holder properly. | page 23 | |
| The thread tension is incorrect. | Adjust the tension of the upper thread. | page 26, 59 | |
| You have not used a bobbin that has been designed for this machine. | Incorrect bobbins will not work properly. Only use a bobbin that has been designed for this machine. | page 10 | |
| Bobbin is set incorrectly. | Reset the bobbin thread correctly. | page 13, 14 | |
| The thread is tangled on the wrong side of the fabric. | You have not threaded the upper thread properly. | Correct the upper threading. | page 15, 59 |
| The stitch is not sewn correctly. | The presser foot you are using is not appropriate for the type of stitch that you want to sew. | Attach the presser foot that is correct for the type of stitch that you want to sew. | page 50 |
| The thread tension is incorrect. | Adjust the tension of the upper thread. | page 26, 59 | |
| The thread is tangled, for example, in the race. | Remove the tangle thread. If the thread is tangled in the race, clean the race. | page 57, 59 | |
| The stitch adjustment level is incorrect. | Adjust the stitch. | page 49 |
ERROR MESSAGES
If an operation is performed incorrectly before the sewing machine is set up, an error message appears on the operation panel. Follow the instructions indicated in the table.
If you press the stitch selection key or do the operation correctly while the error message is displayed, the message disappears.
| Error Message | Probable Cause | Solution |
| E1 | The foot controller was pressed (or the start/stop button was pressed if the foot controller is not connected) and the reverse/reinforcement stitch button was pressed while the pressor foot is raised. | Lower the pressor foot lever before continuing the operation. |
| E2 | A stitch other than the buttonhole or bar tack stitch was selected and the foot controller was pressed (or the start/stop button was pressed if the foot controller is not connected) while the buttonhole lever is lowered. | Raise the buttonhole lever before continuing the operation. |
| E3 | The buttonhole or bar tack stitch was selected and the foot controller was pressed (or the start/stop button was pressed if the foot controller is not connected) while the buttonhole lever is raised. | Lower the buttonhole lever before continuing the operation. |
| E4 | The reverse/reinforcement stitch button or needle position button was pressed while the bobbin winder shaft is moved to the right. | Move the bobbin winder shaft to the left before continuing the operation. |
| E5 | The start/stop button was pressed while the foot controller was connected. | Disconnect the foot controller, and then press the start/stop button. Otherwise, operate the machine by using the foot controller. |
| E6 | The motor locked up because the thread is tangled. | Clean the race to remove the tangled thread (p.59). After cleaning the race, insert the bobbin case properly. If the needle is bent or broken, replace the needle. Then, thread the upper thread properly, and continue the operation. |

Note
- If error message "F1" through "F9" appears in the LCD while the sewing machine is being used, the machine may be malfunctioning. Contact your nearest authorized service center.
Operation beep (for models equipped with the operation beep)
Each time a key is pressed you will hear one beep. If a non-functioning key is pressed or an incorrect operation is performed you will hear two or four beeps (only for models equipped with the operation beep).
If a key is pressed (correct operation)
One beep sounds.
If an incorrect operation is performed or a non-functioning key is pressed
Two or four beeps sound.
If the machine locks up, for example, because the thread is tangled
The sewing machine beeps for four seconds and the machine automatically stops. Be sure to check for the cause of the error, and correct it before continuing to sew.
INDEX
Numerics
3-point zigzag stitch 29
B
bar tack. 41
bobbin cover. 6, 13, 14
bobbinwinder. 5,10,12,63,64,68
button sewing. 35
buttonhole foot. 42
buttonhole lever.. 6,34,42
C
character stitch indicator 6, 46
character stitch key 6, 46
checking characters. 48
combining characters 46
crazy quilt stitching 39
D
deleting characters 48
E
error messages. 68
extra spool pin 21
eyelet punch 34
F
fagoting 43
fast bobbin winding. 12
feed dog position lever. 5, 35, 41
feed dogs. 6, 35, 40
flat bed attachment. 5, 28
foot controller 4,8,25
free-motion quilting 40
H
handwheel 5, 25
heirloomstitching 45
hook-and-loop fastener 28
J
joining. 45
joining stitch 38, 43
M
main parts 5
main power switch. 8
monogramming. 44, 45
N
needle bar thread guide. 6, 16
needle clamp screw 6
needle plate 6
needle plate cover. 6, 57
needle position. 30
needle position button. 6
needle threader 6, 17
0
openings 41
operationbeep. 9,68
operation buttons 6
operation panel 6
optional accessories 4
P
patchwork stitching 39
piecing 39
pocket corners. 41
presser foot. 6
presser foot holder. 6, 23
presser foot lever 6, 15
Q
quick-setbobbin 6,14,18
quilting 39
quilting foot. 40
quilting guide 39, 40
R
race. 57
reinforcement stitching. 26
reverse/reinforcement stitch button. 6, 26
S
scallop stitching 44
seam ripper 34
sewing machine needles 18
sewing speed controller. 6, 9
sewing the character stitches 48
sleeve holes. 41
smocking. 44
spool cap 4, 7
spool pin. 7, 10, 15
start/stop button. 6, 25
stitch length. 25
stitch selection key 6, 46
stitch width 25
straight stitch 30
stretch fabrics 28
T
thick fabrics. 27
thin fabrics 28
thread cutter 26
thread tension 26
trial sewing. 27
triple stretch stitch 30
twin needle 20, 21
U
upper tension-control dial 5, 26, 59
upper threading. 15
utilitystitchindicator. 6,24
utility stitch key. 6, 24
W
walking foot 39
wing needle 45
Z
zigzag stitch 27, 29, 38
zipper foot. 36
Please visit us at http://support.brother.com/ where you can get product support and answers to frequently asked questions (FAQs).