MODE D'EMPLOI EASYKIT Connected LEGRAND
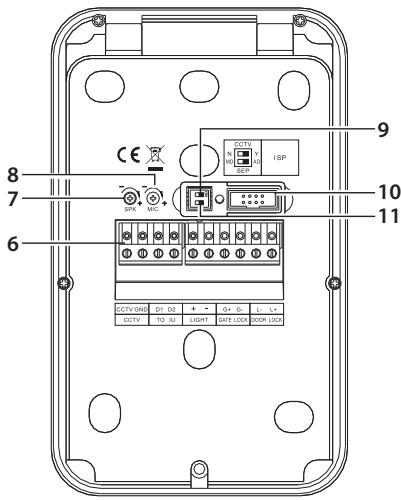
- Haut-parleur
- Camera
- Voyantéclairagechampde cadrage
- Boutons d'appoint
- Micro
-
Bornes de branchement amovibles
-
Caméra analogue CCTV
D1 - D2 Poste interne
Lumière (+/-) 12/24V AC/DC
- Serrure grille (G + / G -) : 12/24 V AC/DC, 1A
-
Serrure porte (L + / L -) : 18 V, 4 A à impulsions, 250mA maintien
-
Réglage haut-parleur
- Réglage micro
-
Commutateur configuration camera CCTV Commutateur 1 OFF = aucune camera CCTV supplémentaire (N) Commutateur 1 ON = ave camera CCTV supplémentaire (Y)
-
Non utilise
- Commutateur configuration poste externe
Commutateur 2 OFF = dispositif principal (MD)
Commutateur 2 ON = dispositif supplémentaire (AD)
- Utilisation du joystick
Pour naviguer dans le menu et seLECTIONner les différents réglages, il est nécessaire d'utiliser le joystick situé sur la partie latérale du dispositif.
Actionner le joystick vers le haut/bas pour selectionner la page voulue :
- Beweeg de joystick omhoog/omlaag om de pagina te selecterenuit:
- Move the joystick up/down to select the page among:
- Verwenden Sie den Joystick nach oben/unten, um folgende Seiten zu wahren:
- Accione el joystick hacía arriba/abajo para selectionar una páqina entre:
- Regular o joystick para cima/baixo para selectionar a páginé Entre:
- Przesun joystick w góre/w dól, aby wybrać zădana strone:
- A holster, a boot, and a pair of shoes.
- Posunte joystick smereh nahoru/dolu pro zvoleni stranky mezi:
Actionati joystickul in sus/jos pentru a selecta pagina din:
- Posúvaním ovládača nahor/nadol zvolte stránku:
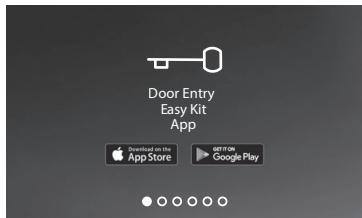
- Il est possible de télécharger l'appli Easy Kit Connected en se rendant sur les stores; la page s'efface après la première association avec l'appli:
- U kunt de app Door Entry CLASS100 ut de stores downloen. De pagingewijdrot zoda de或者其他 koppeling met de app is verricht:
- You can download the Easy Kit Connected App from the Stores.
he page disappears after the first association with the App:
- Sie können die Easy Kit Connected App in den Geschäften herunternde. Die Seite erlischnt nach der ersten Verknipfung mit der App:
- Puede descargarse la App Door Entry Easy Kit en los store, la pagina desaparare après de efectuar la primarya assocacion con la app:
- Podera descarregar a App Door Entry Easy Kit das lojas,
a páginá desaparece(before da primeira associação com a app:
- Możesz pobreć aplikacja Door Entry Easy Kit ze sklepow, strona zznika po pierwyszym połoczeni u z aplikacja.
- A store-bó letölthetó a Door Entry Easy Kit app, az oldal az app-pal történő also társítaskor tünik el.
- Mûzete stáhnout App Door Entry Easy Kit ze store, stránka zmízi po prvním prižazení k app.
- Puteti descàrca aplicatia Door Entry Easy Kit din magazinèle de aplicatiès, paging dispare dupa prima associé cu aplicatia.
- Zo store możete stiahnut' App Door Entry Easy Kit. Po pvrom spárovaní s aplíkációu stránka zmizne.
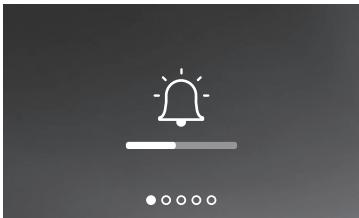
- Règle le volume dxe la sonnerie
- Het volume van de beltonen regelen
- Adjust the ringtone volume
Lautstärke Ruftöne einstellen
- Regular el volumen del tiempo
Regular o volume da campainha
Wyreguluj glosnosc dzwonka
- Ällitsa be a csengetési hangeröt
Reguljte hlasitost yvzvanéciho tónu
- Regliati volumul soneriei
- Regulácia hlasitosti zvonenia
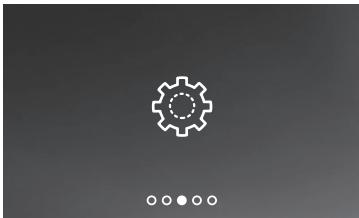
- Page des réglages Wi-Fi qui permet d'activer/désactiver/reinitialiser la connexion Wi-Fi, d'effectuer la première association avec l'appli et de réinitialiser le dispositif
- Pagina met wifi-installingen die u kunt gebruieren voor het activieren/deactivieren/resetten van de wifi, het verrachten van de eerste koppeling met de app en het setzen van het apparatus
- Wi-Fi settings page, where it is possible to enable/disable-reset the Wi-Fi, perform the first association to the app and reset the device
- Wi-Fi-Einstellungssite, auf der Sie Wi-Fi aktivieren/deaktivieren/zurücksetzen, die erstige Verbindung mit der App herstellen und das Gerät zurücksetzen können
-
Págrina de ajustes del Wi-Fi donde puedaactivar/desactivar/resetear el Wi-Fi, efectuar la primera asociación con la app, yresetear el dispositivo
-
Párga de configurações Wi-Fi onde poder ativar/desativar/zerar o Wi-Fi, efetuar a primarya associação com a app, e reinicializar o disposito
- Strona ustawien Wi-Fi, na której przyna wączyc/wyączyc/zresetowac Wi-Fi, wykonac pierwste病毒感染 z aplikacja i zresetowac urzędzenia
Wi-Fi beallitask oldal, ahol elvegezhe to a Wi-Fi aktivalasa/inaktivalasa/visszaallitasa, az app-pal torten o elsersitis, es az eszkov isszaallitasa
Stránka nastavení Wi-Fi, kde je moźne aktivovat/deaktivovat/setrivat Wi-Fi, provadět první priřazováni k app aresetovat zařizení
- Pagina de setári Wi-Fi unde putéti activa/dezactiva/reseta Wi-Fi, efectuati prima associre cu aplicàtica si resetatei dispositivul
Stránka nastavení Wi-Fi, kde mozte aktivovat/vypnút/ zresetovat Wi-Fi, vykonat' pré spárovanie aḥpláciou a zresetovat' zariadenie
Quitter le menu
- Menu afsluiten
- Exit the menu
- Menu beenden
Salir del menu
- Sair do menu
-Wyjdz menu
- Lepjen ki a menubol
- Opustete menu
- lesire din menui
Vystup z ponuky
- Réglage volume sonnerie
Volumeregeling beltoon
- Ringtone volume adjustment
Ruftonlautstärke einstellen
- Regulación del volumen del tiempo
-
RegULAÇÃO do volume da campainha
-
Regulacja głowosnosci dzwonka
Csengetesi hangero beallitasa
Regulace hlasitosti vyzvancicho tonu
-
Reglare volum sonerie
Regulácia hlasitosti zvonenia
-
Depuis la condition de stand-by appuyer sur le joystick pour activer l'écran et sélectionner la page correspondante
- Druk vanuit stand-by op de joystick om het display te activeren en de desbetreffende pagina te selecteren
- From stand-by press the joystick to activate the display and select the corresponding page
- Im Sandby, den Joystick drücken, um das Display zu aktivieren und die entsprechende Seite zu wahren
-
En stand-by, pulse el joystick para activar la pantalla y seleccionar la pagina relativa
-
A partir de stand-by carregar em joystick para ativar o ecran e selecionar a pagina relativa
- W trybie gotowosci nacijsnij joystick, aby wącncy wyświetlacz i wybrac odpowiednia strone.
- Stand-by helyzettbōnyomja meg a joystick a kijelze akivlāsādhoz e az adott old al kivālasātśdāho
- Ze stand-by stisknete joystick pro aktivaci displejea a zvolte pifrusnou stränku
- In modul stand-by, apasa fi joystickul pentru a activa ecranul si pentru a selecta pagina corespunzatoare
Ovladac v pohotowostnej polohe stlacte, aby sa aktivoval displeja a zvolte prislu snu stranku
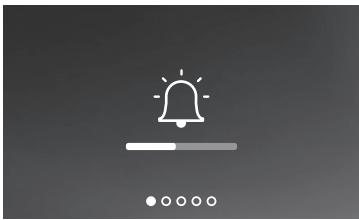

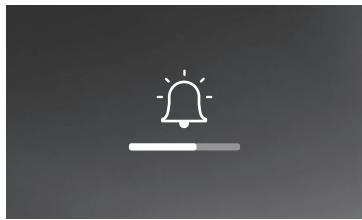
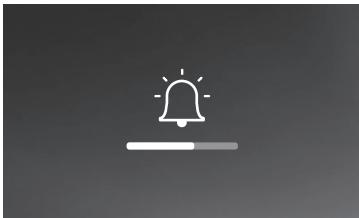
Appuyer sur le joystick pour regérez le volume. La sonnée est reproductive au volume régisé
- Regel het volume met een druk op de joystick.a De belloon worden t het ingestede geluidsvneuare afgepsweed
- Press the joystick to adjust the volume. The ringtone is played at the set volume level
- Den Joystick drücken, um die Lautstärke zu regeln.
Das Lautwerk wird auf die gewünschte Lautstärke eingestellt
- Pulse el joystick para regular el volumen. Se reproduce el timbre con el nivel ajustado de volumen
- Carregar no joystick para regular o volume.
E reproducido a campanha con o nível volume programado
- Nacsinij joystick, aby wegrulowac gliosnocs.
Dzwnoke jest odwartzany z ustawiony posizomien gliosnocs
- Nyomja meg a joysticket a hangerö befallitäðashoz.
Ekor megtzsárol a csengete á befallit't hangerö
- Stinkéne jogist pro regulaci hlasitosti.
- Prehrajse se vyvanečić tón s nestavenym stupné hlasitosti
- Apasati joystikul pentru a regla volumul. Se reproduce sanerie la nivele del volume sett
-Staclanovim oladauvaupravehlasitost. Zaznie vzonienie s nastavennoy urovniou hlasitosti
- Actionner le joystick vers le haut/bas pour selectionner le niveau (1 - 8) du volume.
- Beweeg de joystick omhoog/omlaag om hetiveau van het volume (1-8) te selecteren.
- Move the joystick up/down to select the volume level (1 - 8).
- Verwendten Sie den Joystick nach oben, um das Laufstörkenniveau einzustellen (1-8).
- Accione el joystick hacía abriba/abajo para selecciónar el nivel (1 - 8) del volumen.
- Regular o joystick para cima/baixo para selectionar o nivel(1 - 8) do volume.
- Przesun joystick w gore/w dof, aby wybrać poziom gośnosci (1 - 8).
- A joystick fel/le mozgatatasával valasszon hangeró (1-8) szintet..
- Posunte joystick směrem nahoru/dolů pro zvolení stipné (1-8) hlasitosti.
Actionati joystickul in sus/jos pentru a selecta nivelul (1-8) volumului.
Posuvanim ovladača nahor/nadol zvolte uroven (1-8) hlasitosti.

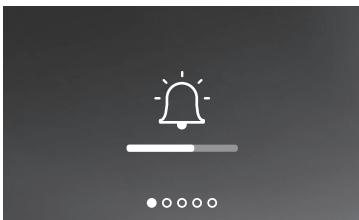
- Appuyer sur le joystick pour confirmer le réglage ou bien attendre le time-out
- Bevestig de instelling met een druk op de joystick of wacht de time-out af
- Press the joystick to confirm the setting or wait for the timeout
- Den Joystick drücken, um die Einstellung zu bestätigen oder das Timeout abwarten
- Pulse el joystick para confirmar el ajuste o esperar el timeout
- Carregar no joystick para confirmar a programação ou aguardar o timeout
Naciśnij joystick, aby potwierdzić ustawienie lub poźekaj na timeout
- Nyomja meg a joysticket a beallitás megerósítésévez vagy varjon az idótillepésig
- Stisknéte joystick pro potvrzení nastavení nebo počeje na timeout
- Apasati joystickul pentru a confirma setarea sau astepateti expirarea
- Stlacenim ovladaca potvrde nestavenie alebo pockajte na uplynutie casoheho limitu
Actionner le joystick vers le haut/bas pour sélectionner un autre réglage ou la première page pour quitter
- Beweeg de joystick omhoog/omlaag om een andere instelling te selecteren of de laatste pagina te selecteren en te konnen afsluiten
- Move the joystick up/down to select another setting or the last page to exit
- Verwenden Sie den Joystick nach oben/unten, um eine andere Einstellung zu halten oder die weitere Seite abzurufen, um den Vorgang zu beenden
- Accione el joystick hacía arriba/abajo para seleccióno和睦ajuste o la ultima頁ina para pagar
- Regular o joystick para cima/baixo para selecionar outra programacao ou a ultima pagina para sair
- Prszus jeystick w gorne/w doi, aby wybrac innate ustawmieie lub ostatni strone, aby wvjc
- A joystick fel/le mozgatasával valasszon;másik beallitstvag kilepéshez az utolsó oldalt
- Pasantje joystick smérém nahoru/dolü pro zvoleni dalího nastavení nebo posledni stránky op oustěni
Actionati joystickul in sus/jos pentru a selecta o alta setare sau ultima pagina pentru a iesi
- Posúvanim ovládača nahor/nadol zvolte iné nastavenie alebo posledné stránku, aby ste vystúpili z ponuky

Actionner le joystick vers le haut/bas pour selectionner la page voulue :
- Beweeg de joystick omhoog/omlaag om de pagina te selectoren uit:
- Move the joystick up/down to select the page among:
- Verwenden Sie den Joystick nach oben/unten, um folgende Seiten zu wahren:
- Accione el joystick hacía arriba/abajo para selecciónar una páginá Entre:
- Regular o joystick para cima/baixo para selecionar a网页 entre:
- Przesun joystick w gore/w dof, aby wybrac zadana strone:
- A joystick fel/le MOZgatasával valasszon az oldalak közül:
- Posunte joystick smērem nahoru/dolu pro zvolení stránky mezi:
Actionati joystickul in sus/jos pentru a selecta pagina din:
-
Posúvaním ovládača nahor/nadol zvolte stránku:
-
C t i r i i i i i i i i i i i i i i i i i i i i i i i i i i i i i i i i i i i i i i i i i i i i i i i i i i i t t t t t t t t t t t t t t t t t t t t t t t t t t t t t t t t t t t t t t t t t t t t t t t t t t t
- Op dezeagna kunut het wifi-network waarmeeth het apparataat verbonden is weergeven de verbinding eventueldeactiveren. Opmering: om het apparataat met het wifi-network de app te konnen verbinden, moet u eerst de koppelprocedure van Easy Kit Connected met de App Door Entry Easy Kit verrichten.
- In this page you can display the Wi-Fi network to which the device is connected and if necessary disable the connection. Note: to connect the device to the Wi-Fi network and to the app, you must first associate the Easy Kit Connected to the Easy Kit Connected app.
In thise Sierk n s d W- Fi-Net z m th Vorriactiien and the Veruizn. anerming: Ums Gerit with dm Wi-Fi-Netz und der App zu verbinden, ist zuersert die Züchdnasprozeder der Easy Kit Connected mit der App, Easy Kit Connected durchzuführen.
En a esta pagina可以使 visualizar la red Wi-Fi a la que el dispositivo está concastado y deshabitar la connexion si quiere. Nota: para conectar el dispositivo a la red Wi-Fi y a en app, primero要做 efectuar el procedimiento de asociacion del Del Easy Kit Connected con la App Door Entry Easy Kit.
- Nesta páginéposipvel visuaizararede Wi-Fià qual odispositivo estáconctado e sefor necessario desativaraconexão.
- La page montre le type de paramètre (A) et le niveau régle (B)
Actionner le joystick vers le haut/bas pour sélectionner le type de paramètre dont on souhaite modifier la valeur (voir tableau suivant)
Lire attentivement avant toute utilisation et installation de nos produits et conserver pour toute consultation en cas de besoin.

Interdiction de toucher les unités avec les mains mouillées.
Interdiction d'utiliser des produits de nettoyage liquides ou des aérosols.
Interdiction de boucher les ouvertes de ventilation.
Interdiction de modifier les dispositifs.
Interdiction des retirer les parties de protection des dispositifs.
Interdiction dinstaller les unités à proximite de liquides et poudres/poussières.
Interdiction dinstaller les unités à proximite de sources de chaleur.
Interdiction dinstaller les unités à proximite de gaz nocifs, de poudres metalliques ou autres matièressemblables.
Interdiction de fixer les unités sur des surfaces non appropriées.

Risque d'électrocution

Risque de chute des dispositifs en cas de rupture de la surface sur laquelle ils sont installés ou mauvaise installation.
Couper l'alimentation avant toute intervention sur l'installation.

Attention : les opérations d'installation, de configuration, de mise en service et d'entretien doivent être confiées à un personnel qualifié. S'assurer que l'installation murale est correctement effectué. Effectuer la pose des cables dans le respect des normes en vigueur. Brancher les cables d'alimentation dans le respect des indications fournies. Pour les événuelles extensions de l'installation, utiliser uniquement les articles indiqués dans les caractéristiques techniques.

o produits similares
Après d'être enregistré et s'était authenticate, il est nécessaire d'effectuer l'association avec le dispositif; ensuite, il est possible d'utiliser les fonctions suivantes:
Tampon d'installation Installer stamp