
POWER 3 - Robot culinaire MAGIMIX - Notice d'utilisation et mode d'emploi gratuit
Retrouvez gratuitement la notice de l'appareil POWER 3 MAGIMIX au format PDF.

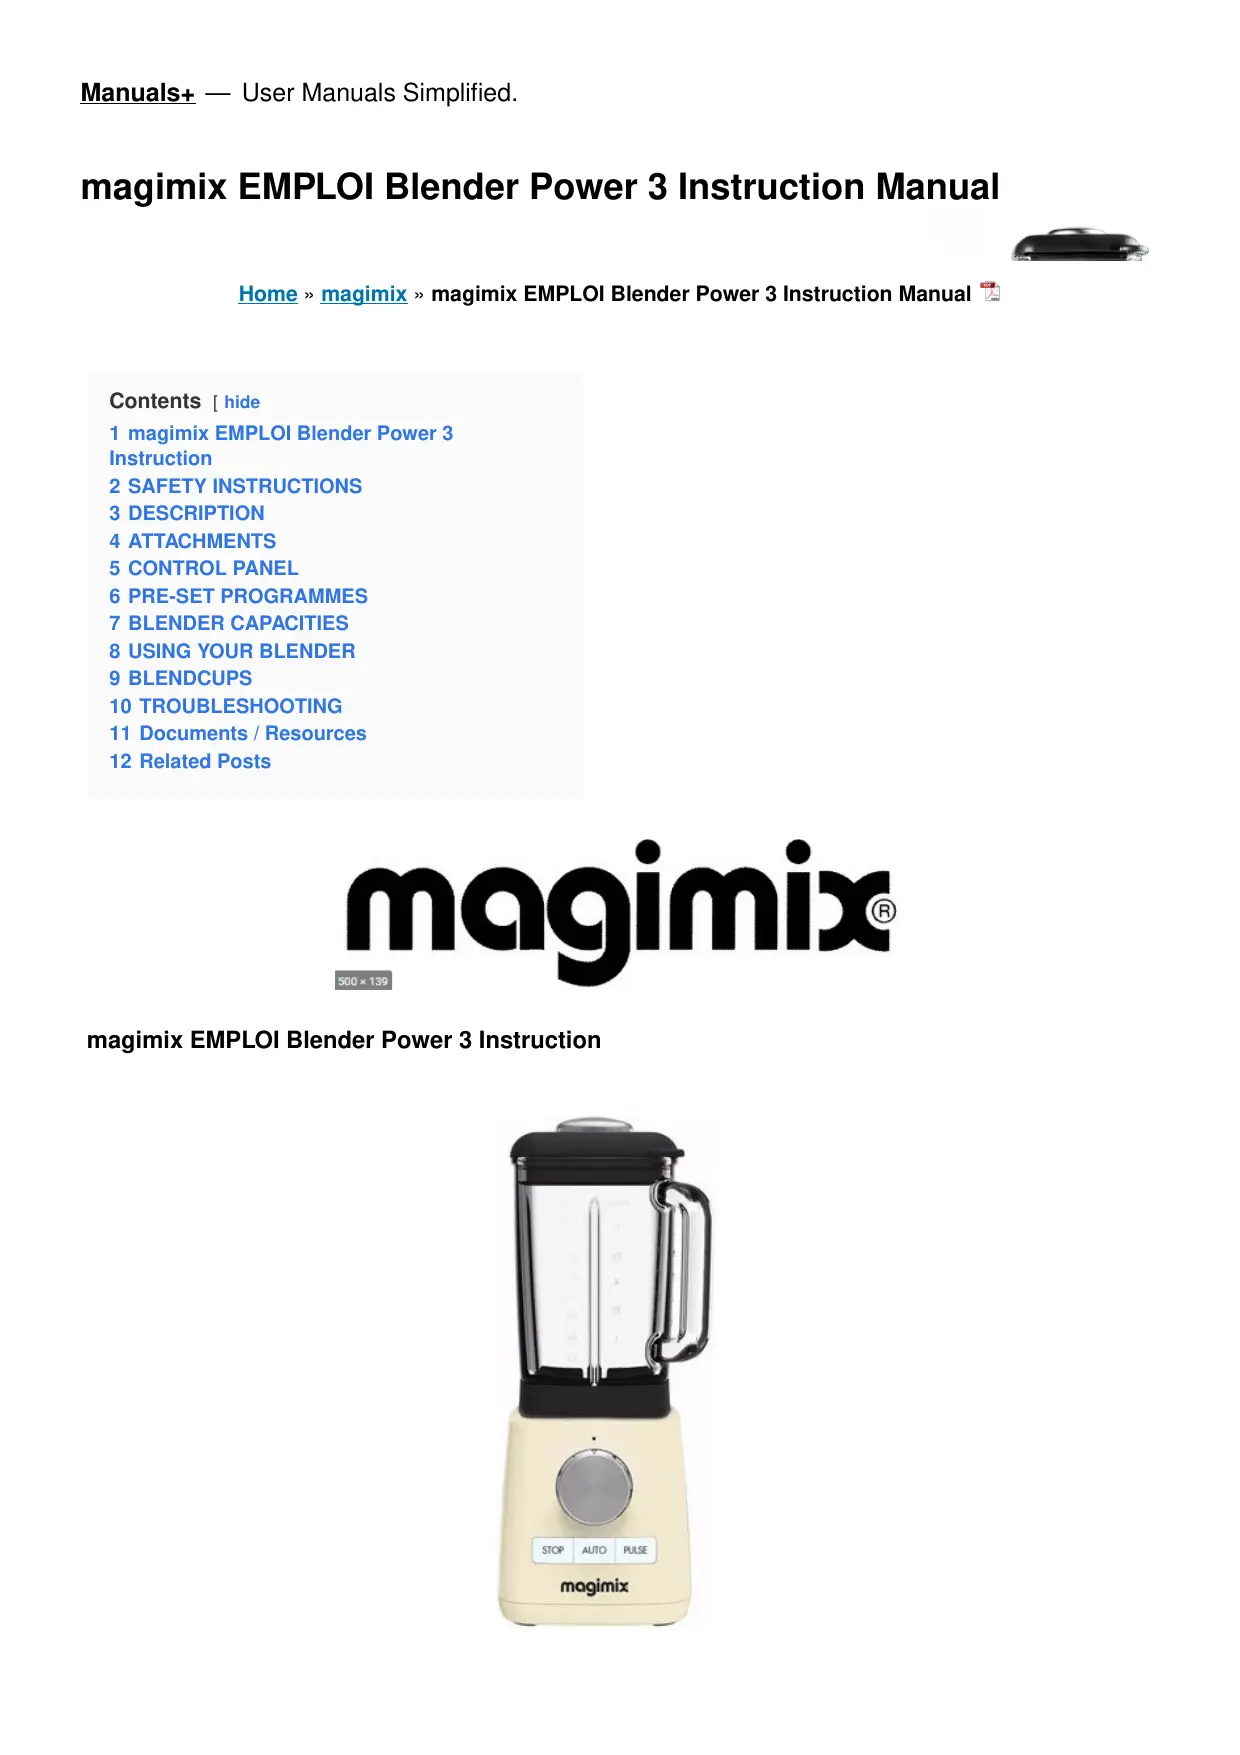

| Type de produit | Robot culinaire (blender polyvalent) |
| Capacité du bol principal | 1,8 L |
| Capacités des BlendCups | 400 ml et 700 ml |
| Accessoires inclus | Bol 1,8 L, 2 BlendCups, moulin avec lames, presse-agrumes, spatule |
| Programmes automatiques | 5 programmes : Nettoyage, Glace pilée, Smoothie, Soupes, Desserts |
| Commandes | Vitesses variables, mode Pulse, sélecteur de programme |
| Fonction de sécurité | Arrêt automatique en cas de surcharge, verrouillage du couvercle |
| Nettoyage | Programme de nettoyage automatique ; pièces lavables au lave-vaisselle (sauf bloc moteur) |
| Type de lames | Lames inoxydables amovibles |
| Alimentation | Tension adaptée au réseau (voir plaque signalétique) |
| Utilisation | Usage domestique uniquement |
| Garantie | Garantie constructeur (voir conditions) |
| Service après-vente | Pièces détachées disponibles auprès du SAV Magimix |
FOIRE AUX QUESTIONS - POWER 3 MAGIMIX
Questions des utilisateurs sur POWER 3 MAGIMIX
0 question sur cet appareil. Repondez a celles que vous connaissez ou posez la votre.
Poser une nouvelle question sur cet appareil
Téléchargez la notice de votre Robot culinaire au format PDF gratuitement ! Retrouvez votre notice POWER 3 - MAGIMIX et reprennez votre appareil électronique en main. Sur cette page sont publiés tous les documents nécessaires à l'utilisation de votre appareil POWER 3 de la marque MAGIMIX.
MODE D'EMPLOI POWER 3 MAGIMIX
magimix EMPLOI Blender Power 3 Instruction Manual

Home » magimix » magimix EMPLOI Blender Power 3 Instruction Manual

Contents [hide
1 magimix EMPLOI Blender Power 3 Instruction
2 SAFETY INSTRUCTIONS
3 DESCRIPTION
4 ATTACHMENTS
5 CONTROL PANEL
6 PRE-SET PROGRAMMES
7 BLENDER CAPACITIES
8 USING YOUR BLENDER
9 BLENDCUPS
10 TROUBLESHOOTING
11 Documents / Resources
12 Related Posts

magimix EMPLOI Blender Power 3 Instruction
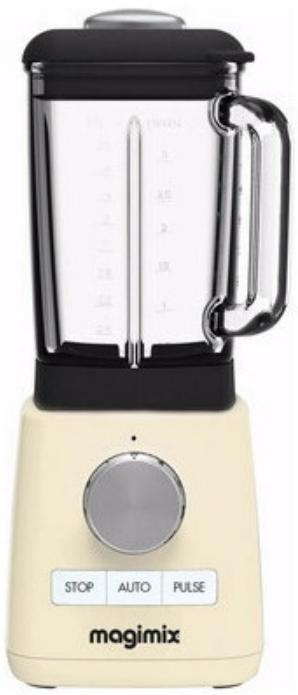
WARNING: the safety instructions are an integral part of the appliance For your own safety, please read them carefully before using it for the first time
- Never go above the Max18 L mark
- Never run the blender if the lid if not secured properly or if the lid seal and blades are not assembled correctly
- Never put your fingers or anything other than the spatula delivered with the product in the bowl while the blender is operating
- If the blades get stuck, always disconnect the blender before removing the ingredients
- Always disconnect the blender (i) if it is left without surveillance, (ii) before mounting, dismounting or cleaning, (iii) before changing the attachments and (iv) when you need to go near any moving
- All surfaces in contact with food must be cleaned with soapy water or washing-up liquid (see further details under CLEANING)
- Special precautions must be taken when handling sharpened blades, when emptying the bowl and during cleaning. There is a risk of injury if the blender is used incorrectly
- Never immerse the blender in water or other liquids in order to avoid the risk of electrocution
- Do not place the blender on or near a gas burner or hot plate nor in a hot oven
- This appliance is intended solely for use in the home
- Do not use the blender outside
- Children must not play with the blender The blender must not be used by children Keep the blender and its cord out of reach of children
- The blender can be used by persons whose, physical, sensory or mental capacities are reduced, or by persons who have no experience or knowledge of the appliance, provided they are properly supervised or have been instructed beforehand on using the blender safely and they understand the risks involved
- Use of the appliance in the following cases is not covered by the warranty: in staff kitchen areas in stores, offices and other working environments, in farms, by guests in hotels, motels, bed & breakfasts, guest houses and other residential environments
RISK OF BURNS
- NEVER process hot ingredients (solid or liquid) in the BlendCups or mill attachment, as blending hot foods in a lidded jug can lead to a build-up of pressure, forcing out scalding steam or liquids
- Processing hot foods in the 18l jug: blending hot ingredients at high speed can lead to a build-up of pressure, forcing out scalding steam or liquids Always take care when pouring in a hot liquid, as it may suddenly boil up and escape from the jug
- Never introduce hot ingredients (solid or liquid) if they are over 60^ in temperature Always make sure the lid is firmly fitted but the measuring cap is only loosely positioned, to allow any steam to escape Always use the SOUP program or start at a low speed and gradually increase it Never use the PULSE button
MAINS CONNECTION
- Your appliance must be connected to an earthed socket with the original power cord
-
Check that the voltage indicated on its identification plate corresponds to the voltage of your mains supply
-
Never allow the power cord to dangle over the edge of your worktop or counter, and make sure that it does not come into contact with hot surfaces
AFTER-SALES SERVICE
- If the power cord has been damaged, it must be replaced by the manufacturer, a Magimix-approved service agent or a similarly qualified person, in order to avoid all risks
- The use of parts that are not recommended or sold by Magimix may result in injury, fire or electric shock
KEEP THESE SAFETY INSTRUCTIONS FOR FUTURE REFERENCE
DESCRIPTION
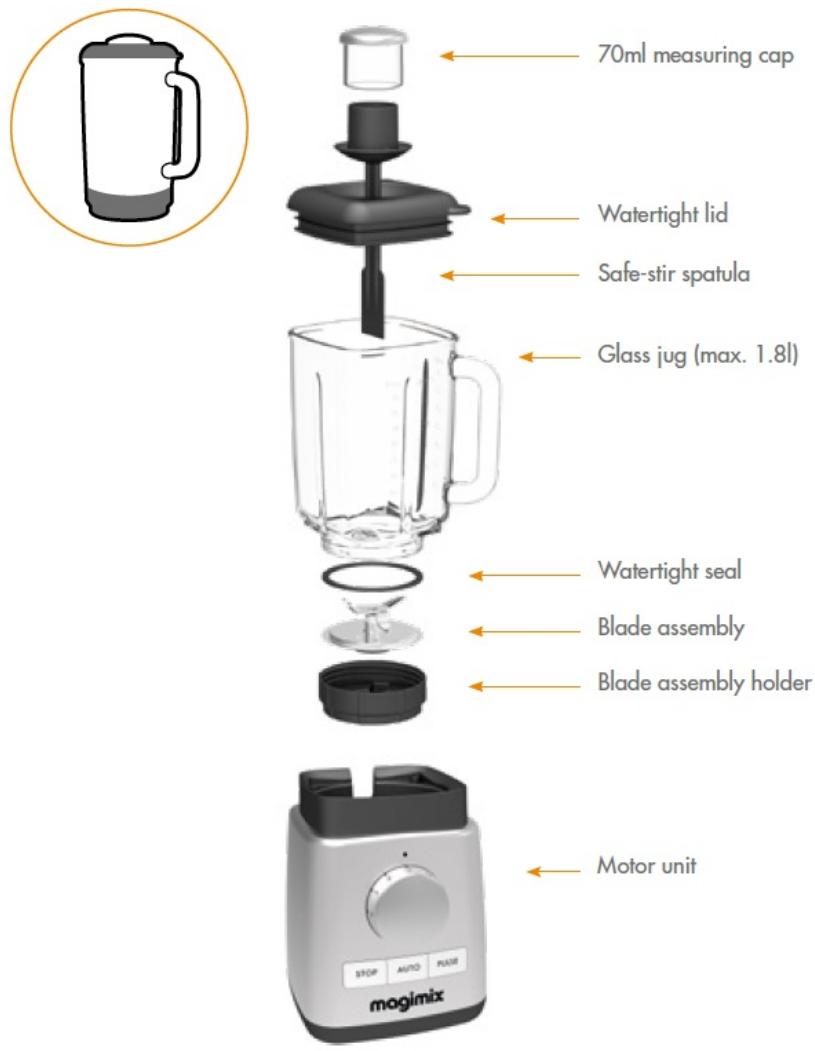
Carefully wash all the parts (except the motor unit) before using for the first time
ATTACHMENTS
Mill attachment
Glass mill attachment is ideal for grinding spices or Parmesan, and making small amounts of savory dips Mill supplied with a special blade assembly for processing dry ingredients See p28
BlendCups
Compact blend-and-go jugs (400 & 700 ml) for blending small amounts and/or carrying around homemade drinks
Citrus press
This attachment slots onto the blender lid, so that you can easily prepare citrus juices and add them directly to your preparations. See p 31
Blender Kit
A premium box containing:
2 BlendCups (400ml & 700ml), with 1 watertight lid and 1 easy grip handle 1 Mill attachment, with a blade assembly and shake and pour lid
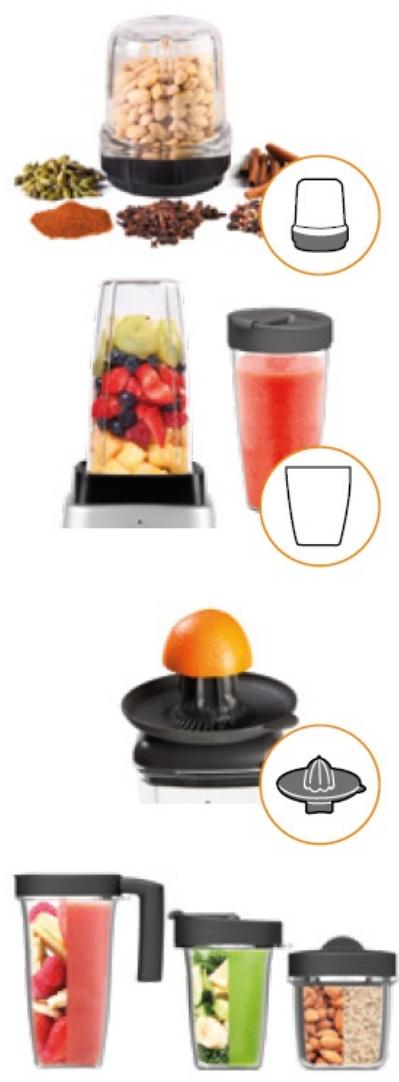
Depending on the model/attachments sold separately **Solely for cold preparations
CONTROL PANEL

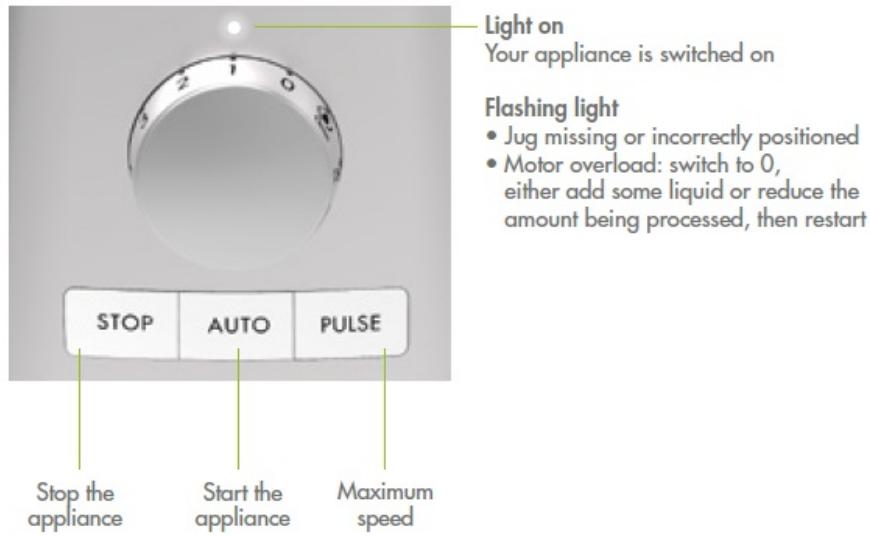
- Switching your appliance on: first select a speed or programme, then press AUTO
- Manual mode: always start at the slowest speed and gradually increase it
- Never run continuously for more than 60 seconds
PULSE: maximum speed for an even smoother texture / pulsing to give you complete control
PRE-SET PROGRAMMES
5 pre-set programmes of cycles and speeds to ensure the best result every time
As these programmes are for use with the 18l jug, please read the instructions on how to adapt them to the other jugs

Clean
Cleaning Automatic rinsing programme

Ice
Crushed glass
For crushing ice

Smoothie
Drinks
For blending milkshakes, smoothies and cocktails

Soups
Soups
For making pureed soups and cream soups (hot or cold)

Desserts
Frozen desserts
For making instant desserts (using frozen fruit) and mixing or pureeing dense and compact ingredients
1.8I jug
BlendCup
Mill attachment


The lengths of the cycles have been established on the basis of the maximum blender capacities (see p 24). You can stop the programme before the end of the cycle if you are processing smaller amounts or prefer a coarser texture
BLENDER CAPACITIES
To make best use of your appliance, please follow the recommendations below:
| 1.8l jug | BlendCup | Mill attachment | |
| Dried breadcrumbs | x | x | 3 breakfast rusk (30g) Sp 4, 14 s |
| Fruit compote | 500g chilled cooked fruit Sp 1, then Sp 3 + spatula | x | 200g chilled cooked fruit Sp 1 then Sp 3 |
| Frozen desserts | 300g frozen fruit (2cm cubes) Desserts + spatula | x | x |
| Ground spices | x | x | 100g Sp 4, 20 s |
| Coffee beans | x | x | 80 g Sp 4, 40 s |
| Crushed ice | 300g (approx. 15-20 ice cubes) Ice | x | x |
| Milkshakes | 1.6l Smoothies | 0.4l or 0.7l Smoothies | x |
| Walnuts, almonds | x | x | 100g Sp 3, 20 s |
| Onion | 200g Sp 1 30 s + spatula | x | 100g Sp 1, 30 s |
| Parmesan | x | x | 80g (2cm cubes) Sp 4, 50 s |
| Pancake batter | 1l Sp 3, 10 s + Sp 4, 20 s | x | x |
| Pureed vegetables | 200g chilled cooked vegetables Sp 1, 50 s | x | 200g chilled cooked vegetables Sp 1, 50 s |
| Smoothies | 1.8l Smoothies | 0.4l or 0.7l Smoothies | x |
| Hot soups | 1.6l Soups | A | A |
| king sugar | x | x | 200g caster sugar Sp4 + Pulse, 60 s |
| Raw meat | x | x | 200g (2cm cubes) Sp 4 10 s |
A blender is not designed to knead dough or mash potatoes Whatever the attachment or recipe concerned, the blender must not be used continuously for more than 60 seconds
USING YOUR BLENDER
1 Assemble the base

Place the seal on the rim of the blade assembly, making sure it is completely flat.
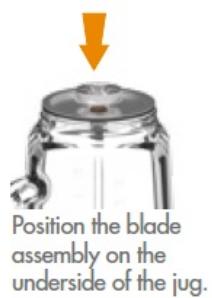
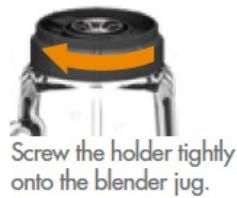
2 Assemble the jug

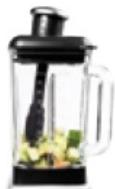
Place the upright jug on the motor unit.
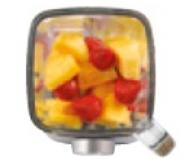
Add the ingredients (max. 1.8l).
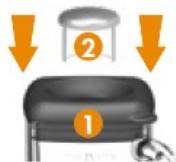
Push the lid down firmly into place. Loosely position the cap.
Select a speed or programme. Press AUTO.
If necessary, use the spatula to help with the mixing.
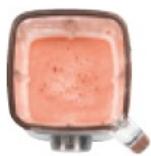
Wait until the blades have completely stopped moving before opening.
ADVICE
- Ice / frozen or sticky ingredients such as honey, banana and avocado
- Fresh fruit and vegetables except for banana and avocado
Leaves, herbs such as spinach and fresh herbs - Hard or dry ingredients such as cereals, nuts and carrots
- Liquids such as water, milk and fruit juice
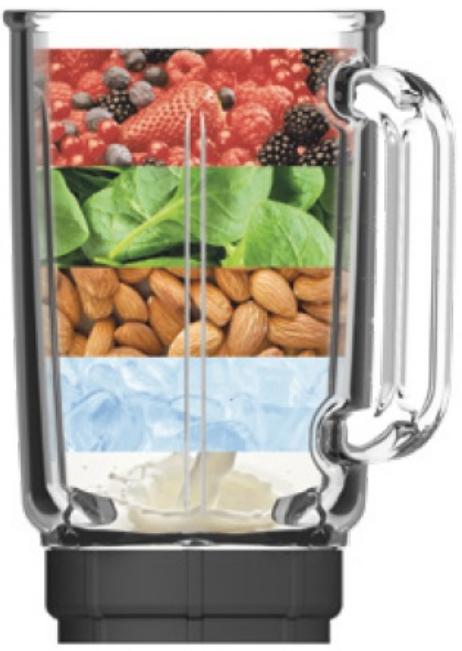
- Cut the food into chunks measuring approx 2cm
- Coarsely chop the herbs or leaves before adding them
- Always add the ingredients in the order specified in the recipe
- When processing thick mixtures, always start at a low speed, otherwise the food will stick to the sides and not come into contact with the blades. If necessary, add a little liquid and use the spatula
- To add ingredients, either remove the measuring cap or stop the machine and remove the lid
- Never run your blender if the jug is empty To process dry ingredients such as nuts and spices, we recommend using the mill attachment, which has a specially designed blade assembly.
Never fill above the MAX mark. Never add solid or liquid ingredients if they are above 60^ in temperature.
Tips
- Hot soups: wait for the ingredients to cool to 60^ C (tasting temperature) before blending. Make sure that the measuring cap is only loosely positioned on the lid, to allow any steam to escape. Either use the SOUP program or start at a low speed and gradually increase it. Never use the PULSE button
- Crushed ice: the ICE function reduces ice cubes to a very fine, snow-like pow-der If you want more coarsely crushed ice, put a small number of ice cubes (100/150g max) in the jug and use the PULSE button
- To fold ingredients into a mixture without chopping them (eg chocolate chips in a cake mixture), add them at the end and run your blender for a further 5-10 seconds at a slow speed (05)
- Using frozen fruit: when fruit come out of the freezer it sometimes forms a solid block Break this block into cubes measuring roughly 2cm before putting in the jug, to avoid damaging your blender
- To rescue a lumpy sauce, blend it for 15 s at Speed 3
Automatic overload failsafe
Your appliance is fitted with a safety system that cuts the motor if it is overloaded or has been running for too long. The indicator light then starts to flash
- Turn to the selector to 0 and unplug your appliance
- Wait for about 30 minutes before restarting your blender
- Reduce the amount of ingredients in the jug and/or add some liquid
MILL ATTACHMENT
1 Assemble the base
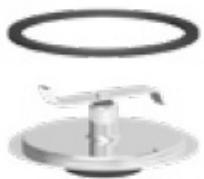
Place the seal on the rim of the blade assembly, making sure it is completely flat.
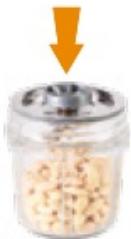
Put the ingredients in the mill attachment. Position the blade assembly on the mill attachment.
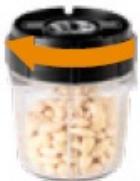
Screw the holder tightly onto the mill attachment.
2 Assemble the jug
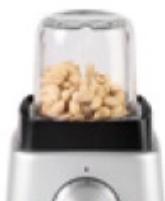
Place the upright mill attachment on the motor unit.
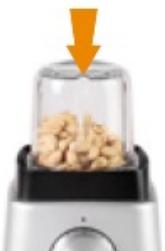
Press down with your hand to check that it is ready to run.
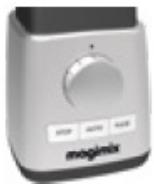
Select a speed and press AUTO
- Instant crumble: crush digestives or butter biscuits and divide between fruit salad / ice cream verrines
- Icing sugar: pour in 200g caster sugar Blend for 1 min at Speed 4 For an even finer consistency, blend for a further minute
- Cake icing: pour 200g icing sugar into the jug with 1 egg white Blend for 20 s at Speed 1 Never blend hot liquids. The blade assembly can be extremely hot after use.
BLENDCUPS
- Liquids
water, milk, fruit juice
- Frozen foodsor sticky
ingredients honey, banana, avocado
- Hard or dry ingredients
cereals, nuts, carrots
Leaves, herbs
spinach, fresh herbs
- Fresh fruit and vegetables
except for banana and avocado
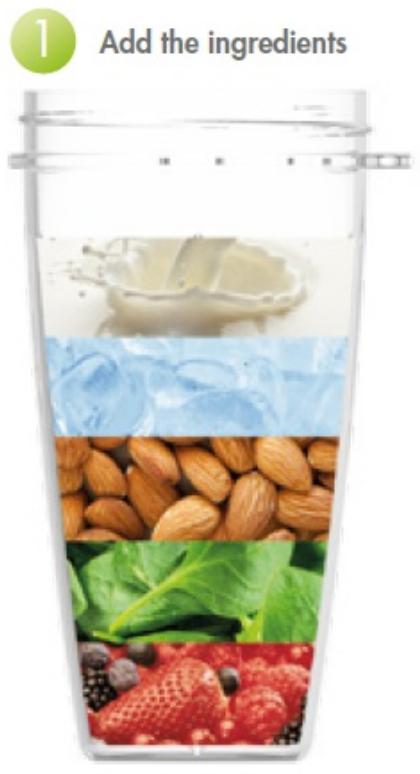
For the best possible result:
- Cut the ingredients into small chunks (approx2cm)
- Roughly chop leaves or herbs before adding to the jug, especially if they are large or thick
- Always add the ingredients in the right order
Always add a little liquid - Use ice cubes (max 4 cubes) rather than crushed ice
Never use hot liquids
Never fill above the MAX level
Never put the BlendCups in the microwave Do not use sparkling liquids in the BlendCups
2 Assemble the base

Position the seal on the rim of the blade assembly, making sure it is completely flat.
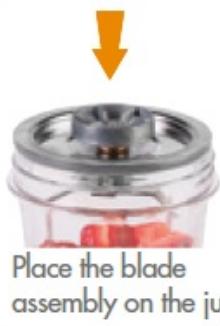
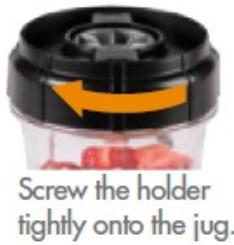
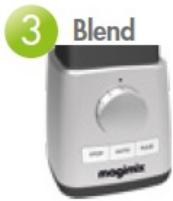
3 Blend
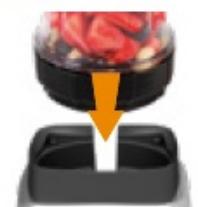
Place the BlendCup on the motor unit (locking pins at the back).
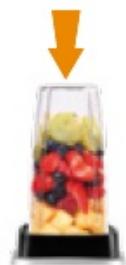
PRESS on the BlendCup to activate the blender.
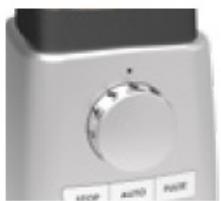
Select a speed or programme and press AUTO.
Drink immediately or take away.

Wait until the blades have completely stopped moving.
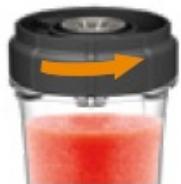
Remove the BlendCup.
Unscrew the holder.
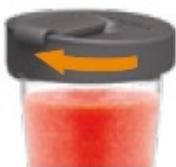
If necessary, screw on the lid.
Tips and advice
- Run at a low speed for the first few seconds, until all the ingredients are caught up in the blades, then gradually increase the speed
- Never run the blender continuously for more than 1 minute, otherwise the ingredients may heat up and pressure may build up inside the jug
- If blending is difficult, reduce either the speed or the amount being processed. If the preparation is thick, add some liquid (without going above the MAX mark)
- Dense or sticky (eg nut-based) preparations tend to stick to the sides If this happens, switch the blender off, wait until the blades have come to a complete standstill and shake the jug downwards to send the ingredients back towards the blades
- The base of the jug is shaped to fit the cupholder in your vehicle
CITRUS PRESS
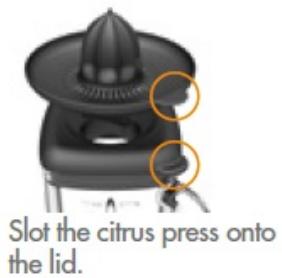
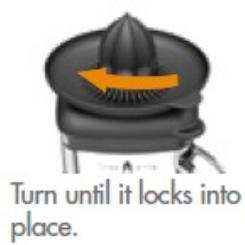

CLEANING
Automatic cleaning programme
As soon as you have finished using your appliance, fill the jug up halfway with warm water + a few drops of washing-up liquid Close the lid tightly, select the CLEAN program and press AUTO
Thorough cleaning
- Unplug the appliance and remove all the parts, not forgetting the seals
- All the parts are dishwasher safe (except motor unit): use the short cycle and place all the small parts on the upper rack
- For the best results, we nevertheless recommend washing the lid and the seals by hand
- Never leave the blade assembly to soak, and check that the blades move freely before reassembling
- Clean the base with a damp cloth
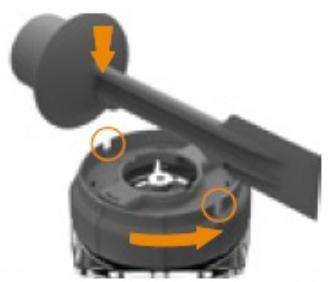
Unscrew the holder with the aid of the spatula.
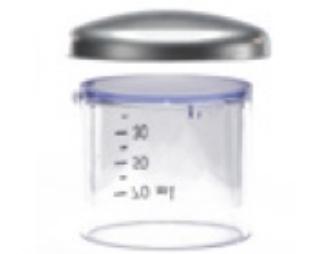
The top of the measuring cap can be removed.
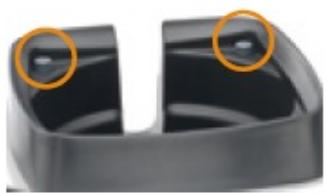
Check that the locking pins slide smoothly, and clean them if necessary.
Electrical and electronic goods at the end of their lifetime
It is against European law to treat electrical and electronic equipment (WEEE) as regular household waste Your appliance contains many materials that can be recovered or recycled It should be taken to a WEEE collection point For more details about collection points, please contact your local council or your household waste recycling centre You can also take your appliance to an electrical goods store
TROUBLESHOOTING
| Problem | Solution |
| The lid is stiff | As the lid is designed to be watertight, it can be a little hard to fit, especially if the appliance is new or has not been used for a long time ◆ Pour a little vegetable oil onto some kitchen paper and rub the seal |
| Flashing light | Jug or attachment incorrectly positioned Motor overload: switch your appliance off and wait for 30 minutes before sw itching it back on |
| Your appliance will not start | Check the plug/socket If the white indicator light is on, reposition the jug, then select a speed or pr ogramme and press AUTO |
| The ingredients are not properly mixed/blended | Add some liquid Always add the ingredients in the right order Glass jug: use the spatula Cut the ingredients into smaller pieces |
| Leaking base | Check that the blade assembly seal is correctly positioned Check that the support is screwed on properly to the base of the jug Glass jug: use the spatula |
| Desserts programme does not work | Frozen fruit: break into cubes measuring roughly 2cm before putting in the blender, to avoid damaging your appliance Do not exceed the blender capacity and add a little liquid Use the spatula |
| The motor smells | There may be a faint smell when you use your appliance for the first time or if the motor is overloaded◆ This poses absolutely no risk, and the smell will I go away after you have used your appliance a few times◆ Allow the motor to cool for 30 minutes before restarting it |
| Stained plastic parts | Some ingredients, such as curry and carrots, may give rise to some staining◆ Pour some vegetable oil onto kitchen paper and rub the parts before adding the ingredients |
The mixture tends to stick to the sides
Add some liquid
Use the spatula, start at a low speed and gradually increase it
Documents / Resources
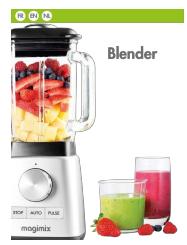
magimix EMPLOI Blender Power 3 [pdf] Instruction Manual EMPLOI, Blender Power 3
Related Posts


Manuals+, home privacy
Godox P2400 Power Pack Instruction Manual
P2400 Power Pack
Hunting Instruction Manual
Hunting Instruction Manual - Optimized PDF Hunting Instruction Manual - Original PDF
Digital Anemometer Instruction Manual
Digital Anemometer Instruction Manual - Download [optimized] Digital Anemometer Instruction Manual - Download
svenlars Montage Instruction Manual
svenlars Montage Instruction Manual www.svenlars.nl Questions? support@svenlars.nl
- magimix EMPLOI Blender Power 3 Instruction Manual
- Contents [hide
- RISK OF BURNS
- MAINS CONNECTION
- AFTER-SALES SERVICE
- KEEP THESE SAFETY INSTRUCTIONS FOR FUTURE REFERENCE
- DESCRIPTION
- ATTACHMENTS
- Mill attachment
- BlendCups
- Citrus press
- Blender Kit
- CONTROL PANEL
- PRE-SET PROGRAMMES
- BLENDER CAPACITIES
- Assemble the base
- Assemble the jug
- ADVICE
- Tips
- Automatic overload failsafe
- For the best possible result:
- Assemble the base
- Blend
- Drink immediately or take away.
- Tips and advice
- CLEANING
- Automatic cleaning programme
- Thorough cleaning
- TROUBLESHOOTING
- Documents / Resources
- Related Posts
- Godox P2400 Power Pack Instruction Manual
- Hunting Instruction Manual
- Digital Anemometer Instruction Manual
- svenlars Montage Instruction Manual
Marque : MAGIMIX
Modèle : POWER 3
Catégorie : Robot culinaire