
DOOR VIEW - Système de sécurité résidentielle RING - Notice d'utilisation et mode d'emploi gratuit
Retrouvez gratuitement la notice de l'appareil DOOR VIEW RING au format PDF.

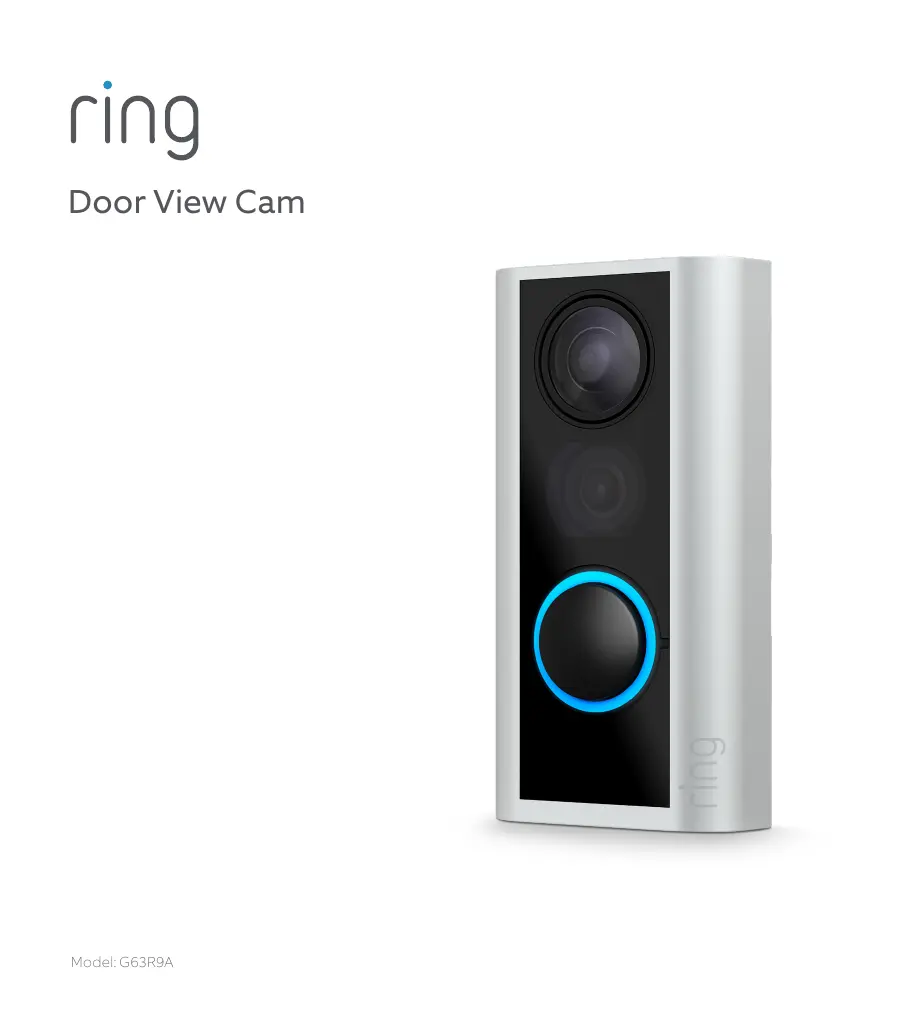

| Type de produit | Visiophone vidéo sans fil |
| Marque | Ring |
| Modèle | Door View Cam |
| Dimensions (intérieur) | Environ 5 x 5 x 2 cm |
| Alimentation | Batterie rechargeable (USB-C) |
| Poids | Environ 100 g |
| Connectivité | Wi-Fi 2,4 GHz |
| Fonctions principales | Caméra vidéo HD, détection de mouvement, audio bidirectionnel, vision nocturne, notification push |
| Application mobile | Ring App (iOS et Android) |
| Angle de vue | 160° diagonale |
| Résolution vidéo | 1920 x 1080 pixels |
| Vision nocturne | LED infrarouge |
| Entretien et nettoyage | Nettoyer l'objectif avec un chiffon doux et sec |
| Sécurité | Montage sécurisé via écrou de serrage, chiffre de protection inclus |
| Pièces détachées | Batterie, adaptateur, écrou de serrage, clé de montage |
| Réparabilité | Batterie remplaçable, assistance en ligne |
| Température d'utilisation | -20°C à 50°C |
| Garantie | 1 an (selon revendeur) |
| Informations générales | Fonctionne avec l'application Ring, installation facile sans fil |
FOIRE AUX QUESTIONS - DOOR VIEW RING
Questions des utilisateurs sur DOOR VIEW RING
0 question sur cet appareil. Repondez a celles que vous connaissez ou posez la votre.
Poser une nouvelle question sur cet appareil
Téléchargez la notice de votre Système de sécurité résidentielle au format PDF gratuitement ! Retrouvez votre notice DOOR VIEW - RING et reprennez votre appareil électronique en main. Sur cette page sont publiés tous les documents nécessaires à l'utilisation de votre appareil DOOR VIEW de la marque RING.
MODE D'EMPLOI DOOR VIEW RING
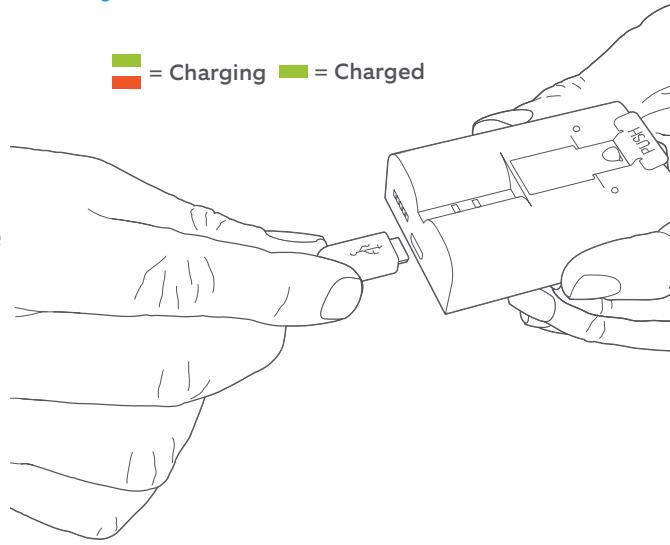
Charge the provided battery.
First, fully charge the battery. Find it in the Door View Kit tray, along with the adapter and tightening nut.
Plug it into a USB power source using the provided orange cable (located underneath your Door View Key).
The battery is fully charged when just one LED is lit.
Download the Ring app.
The Ring app walks you through setting up and managing your Door View Cam.
Download it on your iOS or Android device.
ring
Grab your Wi-Fi password.
You'll need it later to set up your Door View Cam. Write it down below so it's handy when you need it:
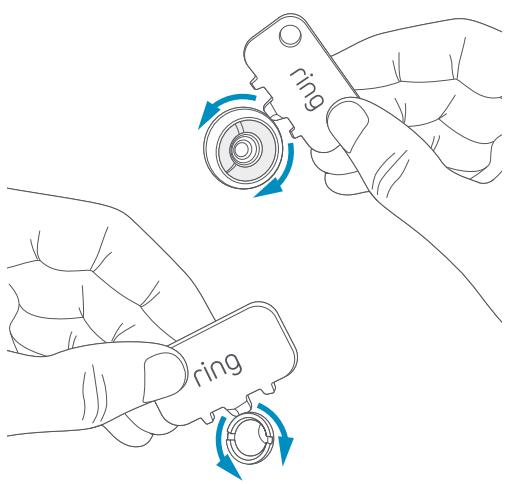
Clean up any paint.
If your peephole was painted over, you may have to remove the excess in order to unscrew it (if not, skip ahead).
Check for paint on or around your peephole, both indoors and outdoors.
Use the toothed edge of the Door View Key to carefully remove paint covering the edges or slots.
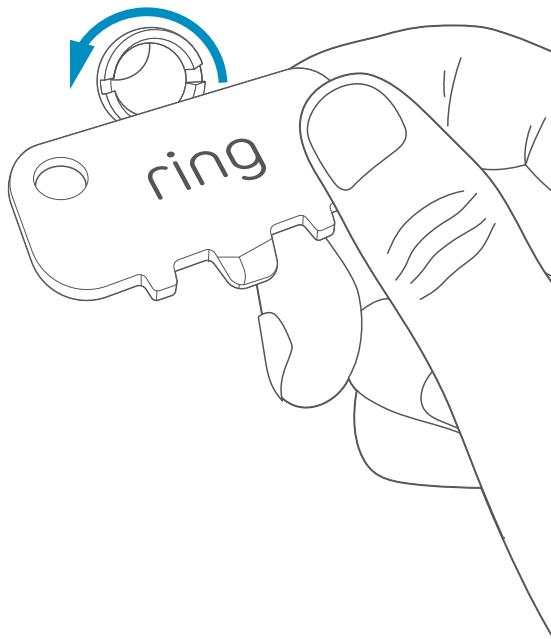
Remove the indoor half.
On the indoor side, place the flat edge of the Door View Key into the slots on your peephole and rotate counter-clockwise to unscrew it.
Once it's loose enough, you can use your fingers to finish unscrewing it and remove it completely.

You may have to secure the outdoor side of the peephole while unscrewing the indoor portion to keep it from spinning.
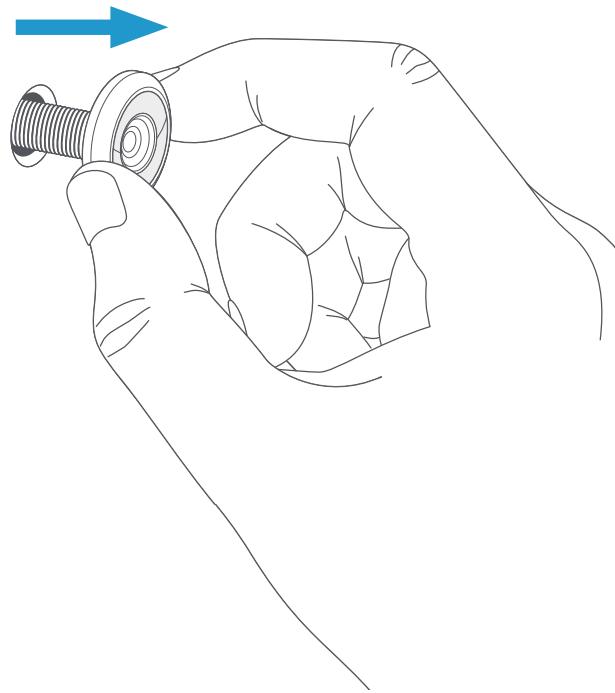
Remove the outdoor half.
With the indoor side removed, the outdoor portion should slide right out.
In the event that it doesn't, check again for paint or other obstructions around the lens.
If this isn't your forever home, consider storing the peephole in a safe place in case you have to re-install it one day.
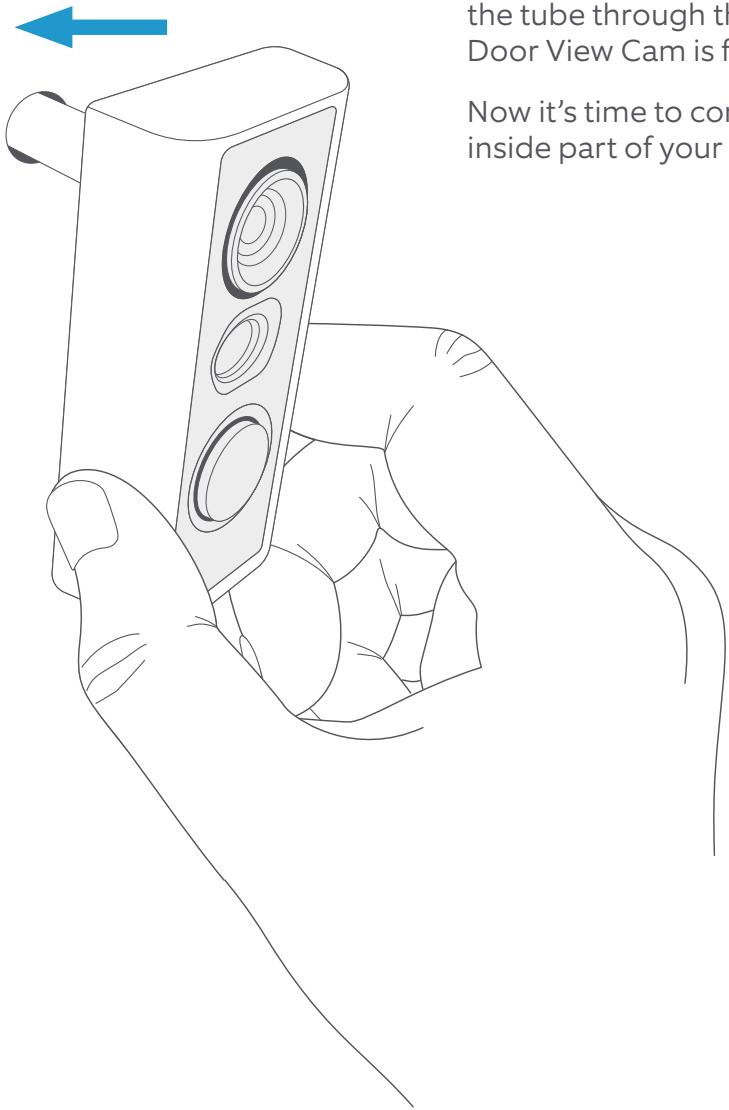
Place the outdoor assembly.
From the front side of your door, insert the tube through the hole until your Door View Cam is flush with the door.
Now it's time to continue setup on the inside part of your door.
You might need the included adapter.
It's used to support larger door view holes. Let's find out if it'll fit yours...
Remove the adapter from the Door View Kit tray. From the indoor side of your door, place the adapter over the tube and cable, then slide it towards the hole.
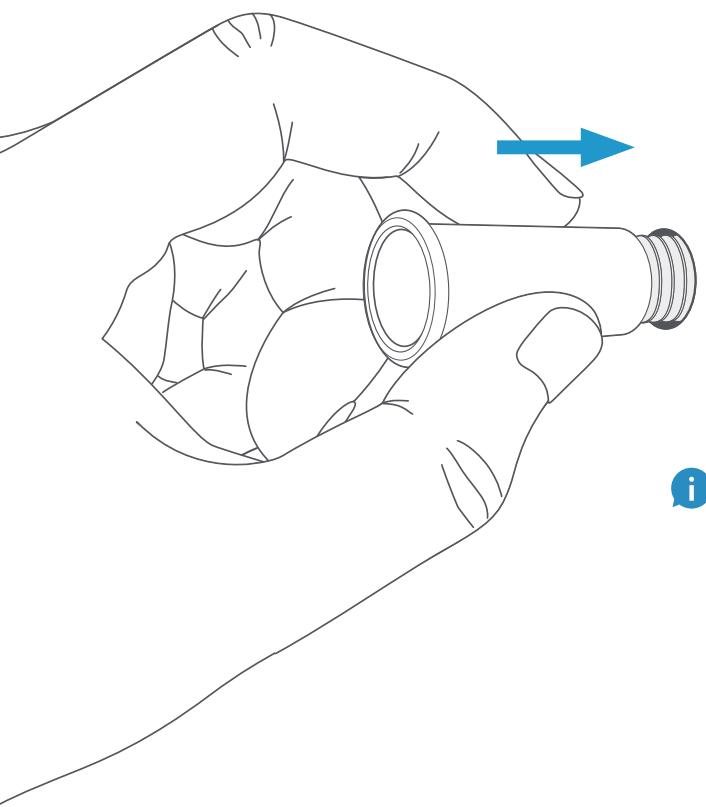
If it DOES NOT slide in easily, don't force it through. You won't need the adapter.
If it DOES slide in easily, insert the adapter until the rim is flush with your door.
You may have to hold the outdoor assembly in place while inserting the adapter to keep it from falling out; if you've got a wide door, grab a partner.
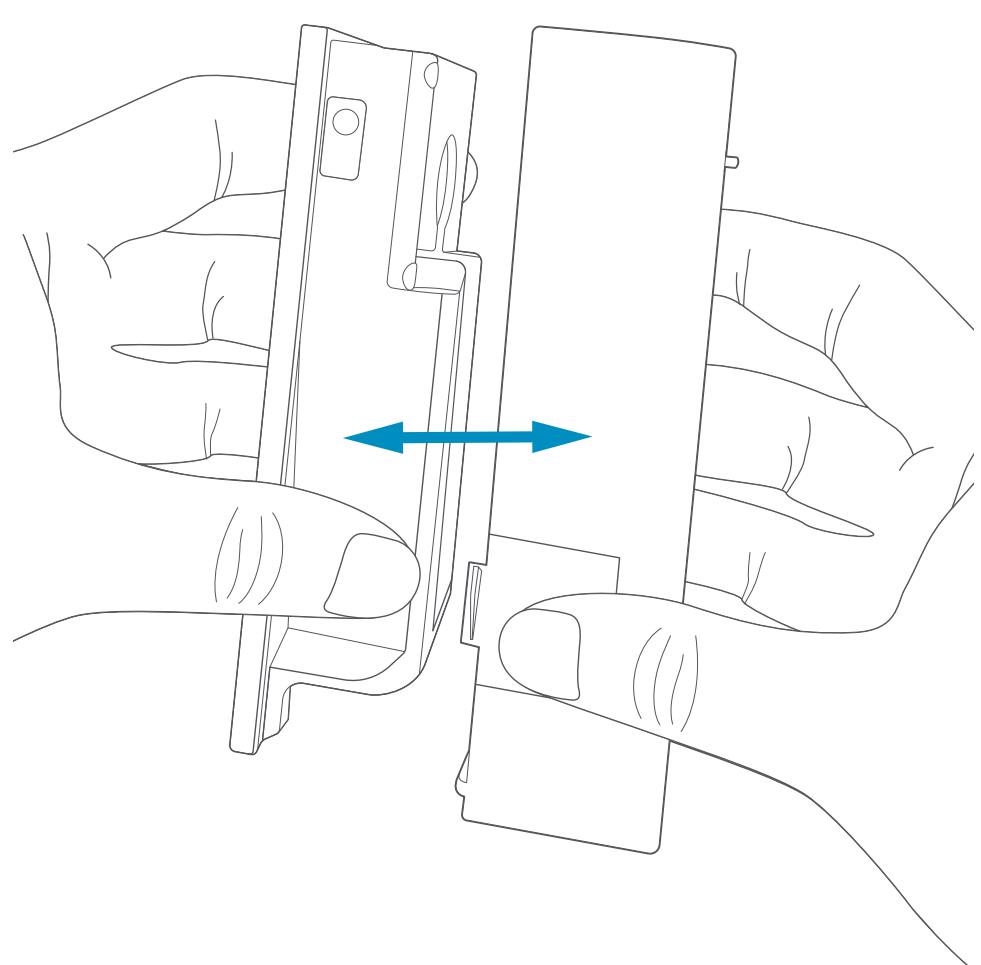
Remove the rear cover.
Grasp the thin edge of the indoor assembly body, and pinch the cover at the indentations.
Pull the body and cover apart. Set the cover aside for now.
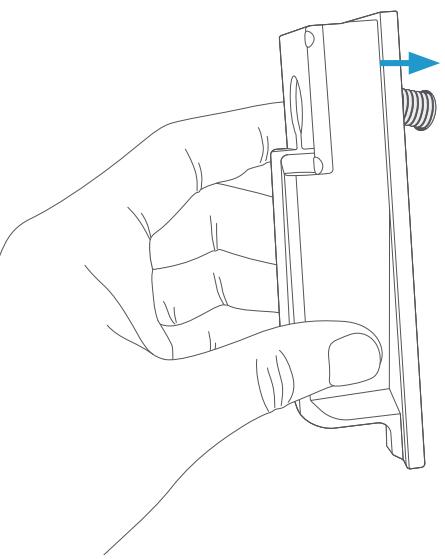
Place the indoor assembly.
Next, carefully slide the indoor assembly onto the tube until it's flush with your door, making sure the outdoor assembly isn't pushed out the other side.

Once again, you may have to hold the outdoor assembly in place to keep it from falling out while placing the indoor assembly.
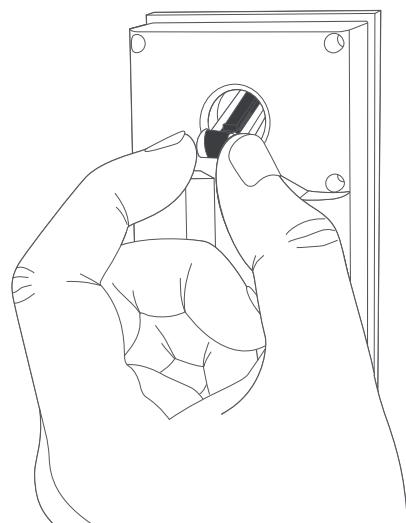
Pull out the connector cable.
We tucked it into the tube for safe travels, but now it's time to take it out.
First, remove and discard the protective orange cap. Next, grasp either side of the exposed gray connector, and delicately draw it out of the tube until there's no more slack left.
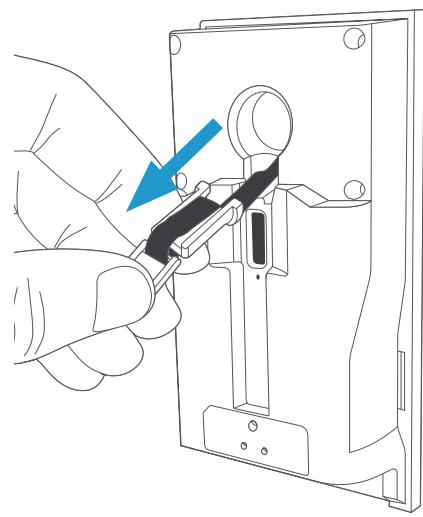
Join the indoor and outdoor assemblies.
While holding the cable out of the way, place the tightening nut from the Door View Kit tray onto the tube (DO NOT attempt to thread the cable through the nut).
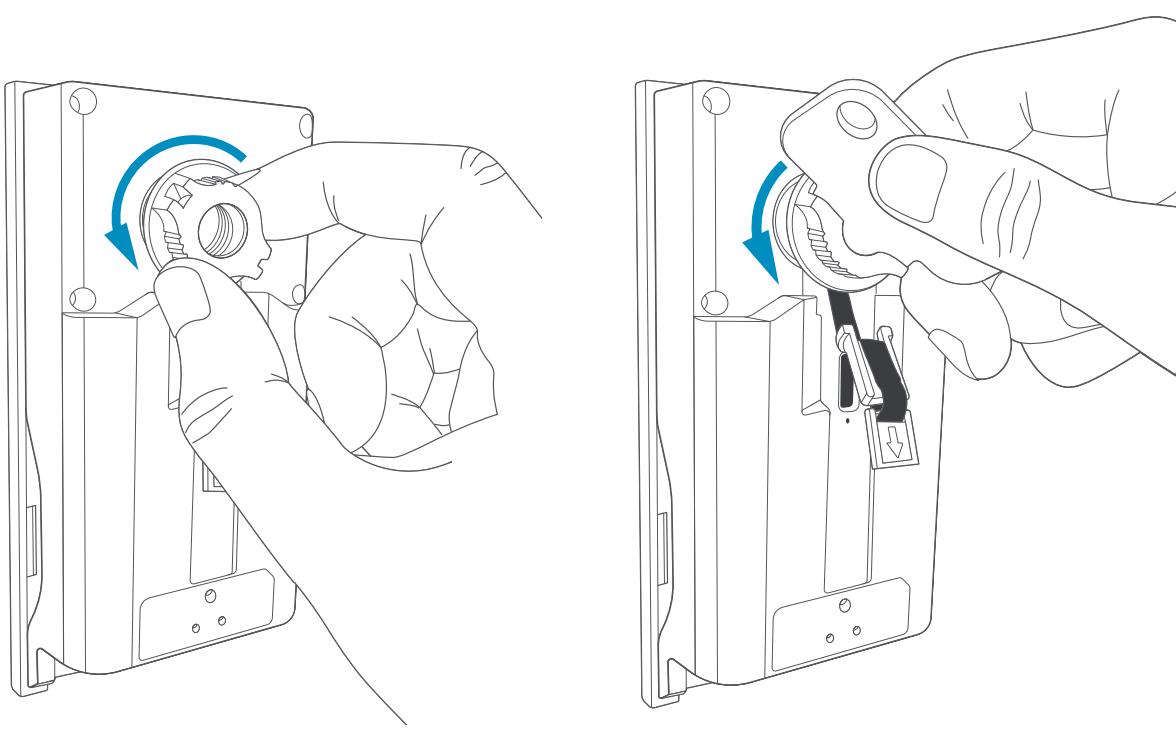
Using either your fingers or the Door View Key, twist clockwise and tighten firmly to make sure your Door View Cam doesn't rotate freely.
Once secure, check the outdoor assembly. It may shift slightly while tightening, so make sure it's level.
Plug in the connector.
Gently pull the cable taut, then firmly press the connector into the port on the indoor assembly, ensuring it is inserted.
Secure the cable.
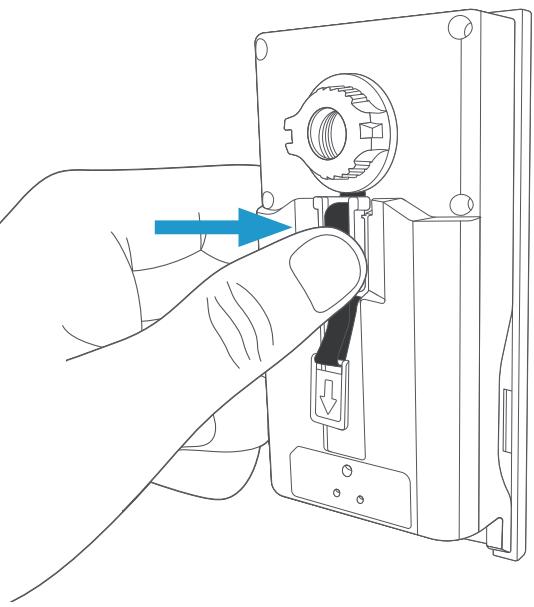
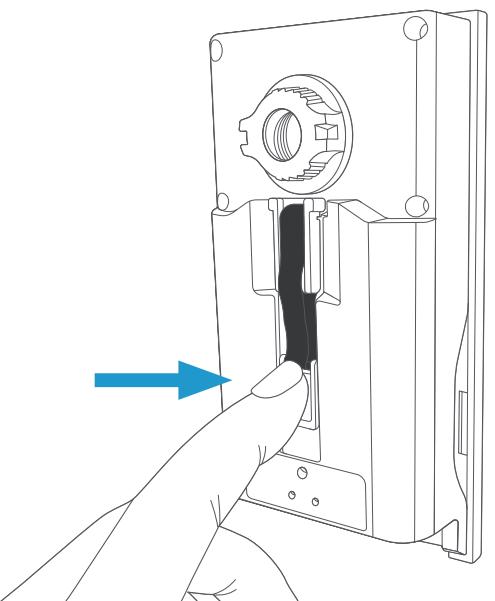
Press the tab with the arrow into the channel and secure the remaining slack in the cable.
Insert the battery.
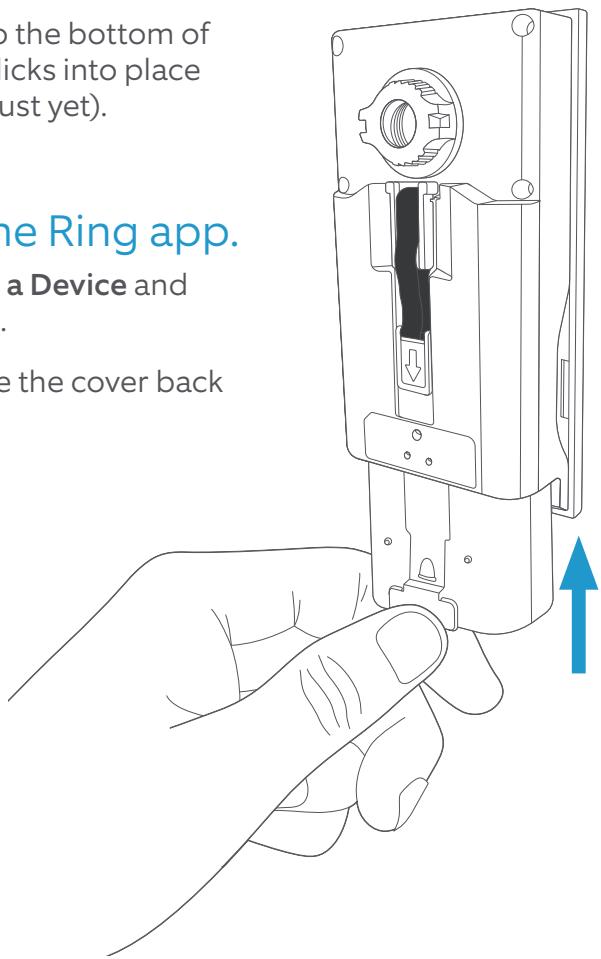
Slide the charged battery into the bottom of your Door View Cam until it clicks into place (don't put the cover back on just yet).
Complete setup in the Ring app.
In the Ring app, select Set Up a Device and follow the in-app instructions.
Once setup is complete, place the cover back on your Door View Cam.

ring.com/help

+800 87 00 97 81

+44 1727 263045
- Charge the provided battery.
- Download the Ring app.
- Grab your Wi-Fi password.
- Clean up any paint.
- Remove the indoor half.
- Remove the outdoor half.
- Place the outdoor assembly.
- You might need the included adapter.
- Remove the rear cover.
- Place the indoor assembly.
- Pull out the connector cable.
- Join the indoor and outdoor assemblies.
- Plug in the connector.
- Secure the cable.
- Insert the battery.
- Complete setup in the Ring app.
Marque : RING
Modèle : DOOR VIEW
Catégorie : Système de sécurité résidentielle