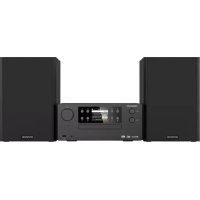
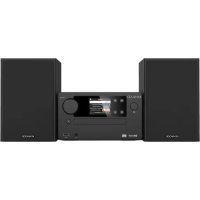
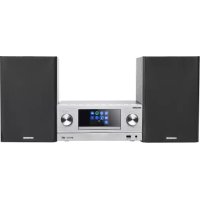
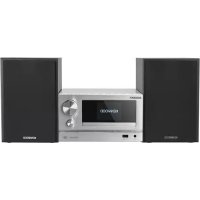
T74L - Système audio KENWOOD - Notice d'utilisation et mode d'emploi gratuit
Retrouvez gratuitement la notice de l'appareil T74L KENWOOD au format PDF.
| Type d'appareil | Chaîne hi-fi compacte |
| Fonction principale | Lecture audio MIDI |
| Format audio supporté | MIDI |
| Alimentation | Non précisé |
| Dimensions | Non précisées |
| Poids | Non précisé |
| Connectivité | Non précisée |
| Commandes | Non précisées |
| Affichage | Non précisé |
| Fonctions supplémentaires | Non précisées |
| Marque | Non précisée |
| Modèle | Non précisé |
| Manuel d'instruction | Inclus |
| Année de publication | Non précisée |
FOIRE AUX QUESTIONS - T74L KENWOOD
Questions des utilisateurs sur T74L KENWOOD
0 question sur cet appareil. Repondez a celles que vous connaissez ou posez la votre.
Poser une nouvelle question sur cet appareil
Téléchargez la notice de votre Système audio au format PDF gratuitement ! Retrouvez votre notice T74L - KENWOOD et reprennez votre appareil électronique en main. Sur cette page sont publiés tous les documents nécessaires à l'utilisation de votre appareil T74L de la marque KENWOOD.
MODE D'EMPLOI T74L KENWOOD
HE ZZ O OD
MIDI COMPACT AUDIO SYSTEM
MIDI M-74
INSTRUCTION MANUAL
KENWOOD CORPORATION
Your choice of this product indicates that you are a devotee to excellence in sound reproduction.
We appreciate your patronage and take pride in the long tradition of quality components that our company represents.
So that you can get the most out of your unit, we suggest that you take the time to read through this manual before you hook up and operate your system. This will acquaint you with operating features and system-connection considerations so that your listening pleasure will be enhanced right from the start. You will notice that in all aspects of planning, engineering, styling, operating convenience and adaptability we have sought to anticipate your needs and desires.
Keep this manual handy for future reference.
For your records
Record the serial number, found on the back of the unit, in the spaces designated on the warranty card, and in the space provided below. Refer to the model and serial numbers whenever you call upon your dealer for information or service on this product.
Model ____ Serial Number ____
Unpacking
Unpack the unit carefully and make sure that all accessories are put aside so they will not be lost.
Examine the unit for any possibility of shipping damage. If your unit is damaged or fails to operate, notify your dealer immediately. If your unit was shipped to you directly, notify the shipping company without delay. Only the consignee (the person or company receiving the unit) can file a claim against the carrier for shipping damage.
We recommend that you retain the original carton and packing materials for use should you transport or ship the unit in the future.
When your unit needs to be repaired, bring the entire set (Speakers included) to your dealer.
Dolby noise reduction manufactured under license from Dolby Laboratories Licensing Corporation. "DOLBY" and the double-D symbol ☐ are trademarks of Dolby Laboratories Licensing Corporation.
WARNING NOTICE:
IN MOST CASES IT IS AN INFRINGEMENT OF COPYRIGHT TO MAKE COPIES OF TAPES OR DISCS WITHOUT THE PERMISSION OF THE COPYRIGHT OWNERS. ANYONE WISHING TO COPY COMMERCIALLY AVAILABLE TAPES OR DISCS SHOULD CONTACT THE MECHANICAL COPYRIGHT PROTECTION SOCIETY LIMITED OR THE PERFORMING RIGHTS SOCIETY LIMITED.
Accessories
T-type (FM) feeder antenna 1
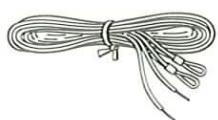
Antenna stand 1
Loop antenna 1
Antenna adaptor (75Ω/300Ω) 1
Remote control unit ..... 1
System control cord ..... 1
Battery "AAA" or "R03" 2
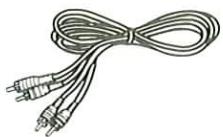
Audio cord 3
Contents
Caution: Read the pages marked ⚠ carefully to ensure safe operation.
Introduction 2
Before applying power.... 3
: safety precautions 3
: IMPORTANT SAFEGUARDS 4
Before operation.... 6
System connections 8
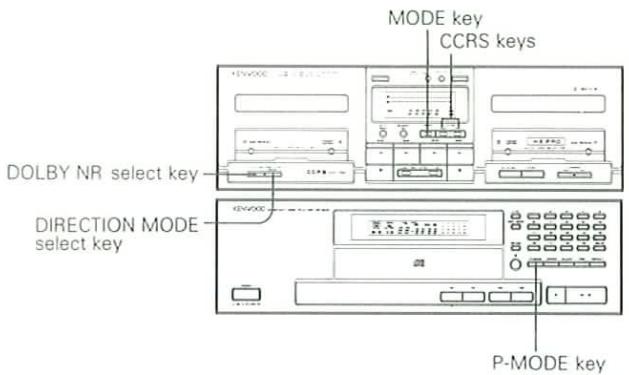
Controls and indicators 12
Operation of remote control unit.... 15
Listening to sound.... 16
Time adjustment 17
Operation of amplifier.... 18
Operation of tuner.... 20
Playback operation of cassette decks 24
DPSS operation 26
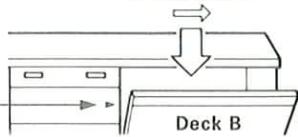
Recording operation on cassette deck (Deck B only) 28
Recording of CD playback (CCRS) 31
Tape dubbing.... 39
Timer operations.... 40
In case of difficulty.... 48
Specifications 51
For the U.S.A. and Canada
Important!
Units shipped to the U.S.A. and Canada are designed for operation on 120 volts AC only.
Safety precaution for a Polarized AC plug
However, some products may be supplied with a non-polarized plug.
CAUTION: TO PREVENT ELECTRIC SHOCK DO NOT USE THIS (POLARIZED) PLUG WITH AN EXTENSION CORD, RECEPTACLE OR OTHER OUTLET UNLESS THE BLADES CAN BE FULLY INSERTED TO PREVENT BLADE EXPOSURE.
For the United Kingdom
Important!
Units shipped to the U.K. are designed for operation on 240 volts AC only.
The mains plug must be removed from the wall socket prior to any internal examination.
The wires in this mains lead are coloured in accordance with the following code:
Blue Neutral Brown Live
The wires in this mains lead must be connected to the terminals in the plug as follows:
Wire colour Plug terminal marking Blue N or Black Brown L or Red
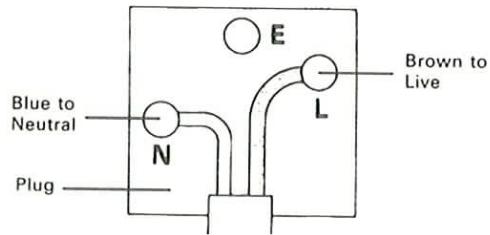
Notes:
- If a 13-amp plug is used, this must be fitted with a 5-amp fuse.
- If a 3-pin plug with earthing contact is used, no wire must be connected to the E terminal.
For Australia and Europe
Important!
Units shipped to Australia are designed for operation on 240 V AC only.
Units shipped to Europe are designed for operation on 220 V AC only.
For other countries
Important!
Units shipped to countries other than the above countries are equipped with an AC voltage selector switch on the rear panel. Refer to the following paragraph for the proper setting of this switch.
AC voltage selection
This unit operates on 110-120 or 220-240 volts AC. The AC voltage selector switch Type A or Type B on the rear panel is set to the voltage that prevails in the area to which the unit is shipped. Before connecting the power cord to your AC outlet, make sure that the setting position of this switch matches your line voltage. If not, it must be set to your voltage in accordance with the following direction.
Note:
Our warranty does not cover damage caused by excessive line voltage due to improper setting of the AC voltage selector switch.
AC voltage selector switch
Type A

Type B
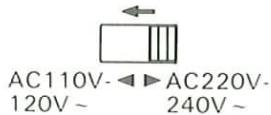
Move switch lever to match your line voltage with a small screwdriver or other pointed tool.
Safety precautions
WARNING: TO PREVENT FIRE OR SHOCK HAZARD, DO NOT EXPOSE THIS APPLIANCE TO RAIN OR MOISTURE.
 CAUTIONRISK OF ELECTRIC SHOCKDO NOT OPEN CAUTIONRISK OF ELECTRIC SHOCKDO NOT OPEN | CAUTION: TO REDUCE THE RISK OF ELECTRIC SHOCK, DO NOT REMOVE COVER (OR BACK). NO USER-SERVICEABLE PARTS INSIDE, REFER SER-VICING TO QUALIFIED SERVICE PERSONNEL. | |
 | THE LIGHTNING FLASH WITH ARROWHEAD SYMBOL, WITHIN AN EQUILATERAL TRIANGLE, IS INTENDED TO ALERT THE USER TO THE PRESENCE OF UNINSULATED “DANGEROUS VOL-TAGE” WITHIN THE PRODUCT’S ENCLOSURE THAT MAY BE OF SUFFICIENT MAGNITUDE TO CONSTITUTE A RISK OF ELECTRIC SHOCK TO PERSONS. | |
 | THE EXCLAMATION POINT WITHIN AN EQUILATERAL TRIANGLE IS INTENDED TO ALERT THE USER TO THE PRESENCE OF IMPORTANT OPERATING AND MAINTENANCE (SERVICING) IN-STRUCTIONS IN THE LITERATURE ACCOMPANYING THE APPLIANCE. | |
Please read all of the safety and operating instructions before operating this unit. For best results, follow all warnings placed on the unit and adhere to the operating and use instructions. These safety and operating instructions should be retained for future reference.
-
Power sources — The unit should be connected to a power supply only of the type described in the operating instructions or as marked on the appliance.
-
Power-cord protection — Power-supply cords should be routed so that they are not likely to be walked on or pinched by items placed upon or against them, pay particular attention to cords at plugs, convenience receptacles, and the point where they exit from the unit.
Never pull or stretch the cord.
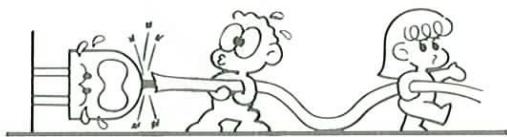
natural_image
Cartoon illustration of two children pulling a rope with a device, no text or symbols present-
Grounding or polarization — The precautions should be taken so that the grounding or polarization means of this unit is not defeated.
-
Ventilation — The unit should be situated so that its location or position does not interfere with its proper ventilation.
To maintain good ventilation, do not put records on a table-cloth on the unit. Place the unit at least 10 cm away from the walls.
Do not use the unit on a bed, sofa, rug or similar surface that may block the ventilation openings.
natural_image
Illustration of a person reading a book with hands reaching toward it (no text or symbols present)- Water and moisture — The unit should not be used near water — for example, near a bathtub, washbowl, kitchen sink, laundry tub, in a wet basement, or near a swimming pool, etc.

natural_image
Cartoon illustration of a KENWOOD appliance with two characters and a dog, no text or symbols present-
Temperature — The unit may not function properly if used at extremely low, or freezing temperatures. The ideal ambient temperature is above +5°C (41°F).
-
Heat — The unit should be situated away from heat sources such as radiators, heat registers, stoves, or other units (including amplifiers) that produce heat.
natural_image
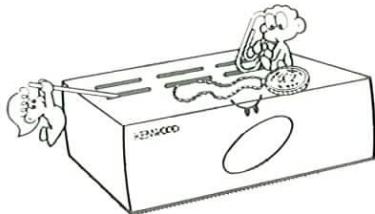
Illustration of a person reacting to a large wall with smoke and raindrops, no text or symbols present- Electric shock — Care should be taken so that objects do not fall and liquid is not spilled into the enclosure through openings. If a metal object, such as a hair pin or a needle, comes into contact with the inside of this unit, a dangerous electric shock may result. For families with children, never permit children to put anything, especially metal, inside this unit.
natural_image
Cartoon illustration of two characters interacting with a box containing items, no text or symbols present- Enclosure removal — Never remove the enclosure. If the internal parts are touched accidentally, a serious electric shock might occur.
- Magnetic fields — Keep the unit away from sources of magnetic fields such as TV sets, speaker systems, radios, motorized toys or magnetized objects.

natural_image
Illustration of a person interacting with computers and equipment (no text or symbols)- Cleaning — Do not use volatile solvents such as alcohol, paint thinner, gasoline, or benzine, etc. to clean the cabinet. Use a clean dry cloth.

- Carts and stands — An appliance and cart combination should be moved with care. Quick stops, excessive force, and uneven surfaces may cause the appliance and cart combination to overturn.

natural_image
Symbolic illustration of a person climbing a ladder inside a circle (no text or symbols)-
Nonuse periods — The power cord of the unit should be unplugged from the outlet when left unused for a long period of time.
-
Abnormal smell — If an abnormal smell or smoke is detected, immediately turn the power OFF and pull out the power cord. Contact your dealer or nearest service center.
POWER OFF!

- Damage requiring service — The unit should be serviced by qualified service personnel when:
A. The power-supply cord or the plug has been damaged; or
B. Objects have fallen, or liquid has been spilled into the unit; or
C. The unit has been exposed to rain; or
D. The unit does not appear to operate normally or exhibits a marked change in performance; or
E. The unit has been dropped, or the enclosure damaged.
-
Servicing — The user should not attempt to service the unit beyond that described in the operating instructions. All other servicing should be referred to qualified service personnel.
-
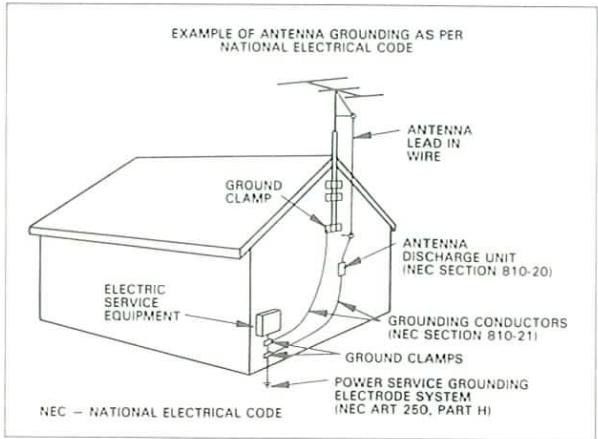
Outdoor antenna grounding — If an outside antenna is connected to the receiver, be sure the antenna system is grounded so as to provide some protection against voltage surges and built up static charges. Section 810 of the National Electrical Code, ANSI/ NFPA No. 70—1984, provides information with respect to proper grounding of the mast and supporting structure, grounding of the lead-in wire to an antenna discharge unit, size of grounding con-
ductors, location of antenna-discharge unit, connection to grounding electrodes, and requirements for the grounding electrode. See Figure.
-
Power lines — An outdoor antenna should be located away from power lines.
-
AC outlets — Do not connect other audio equipment with a power consumption larger than that specified to the AC outlet on the rear panel. Never connect other electrical units, such as an iron or toaster, to it to prevent fire or electric shock.
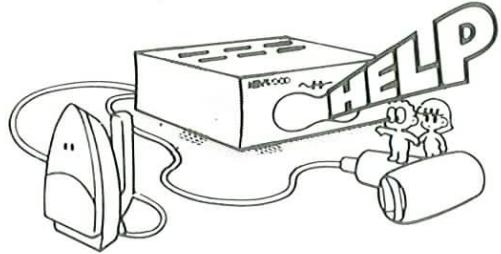
The maximum capacities indicated for the AC outlets on the rear panel of this unit are as follows.
SWITCHED outlets ; 200 W
Notes:
- Item 3 is not required except for grounded or polarized equipment.
- Item 17 and 18 are not required except for units provided with antenna terminals.
- Item 17 complies with UL in the U.S.A.
Notes on cassette tape
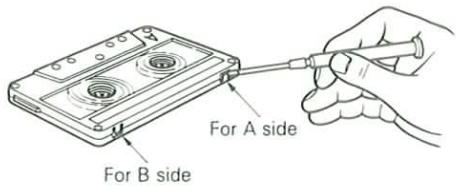
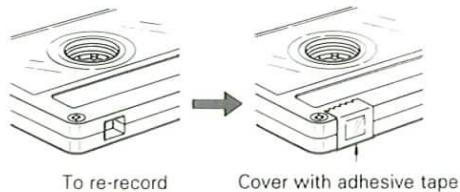
• Safety tab (accidental erasure prevention tab)
After an important recording has been finished, break the safety tab, to prevent the recorded contents from being erased or recorded on accidentally.
• To store cassette tapes
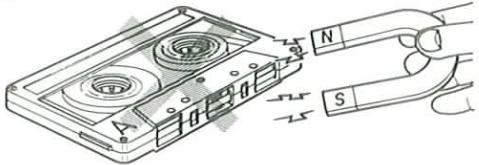
Do not store the tapes in a place which is subject to direct sunlight, or near equipment that generates heat. Keep the cassette tapes away from any magnetic field.
natural_image
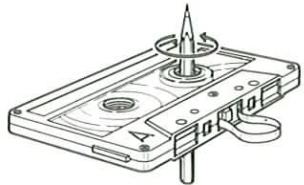
Illustration of a cassette tape being inserted into a magnetic field with labeled poles (N and S), no text or symbols present.- When there is slack in the tape
In such a case, insert a pencil into the reel hole and wind the reel hub to remove the slack.
natural_image
Technical line drawing of a cassette tape with a spool and handle (no text or symbols)Notes:
- 120-minute cassette tape
Since a 120-minute cassette tape is very thin, the tape could adhere to the pinch roller or be easily cut. It is recommended that these tapes not be used with this unit to prevent possible damage.
- Endless tapes
Do not use an endless tape, as this could damage the mechanism of the unit.
■ Cleaning the head section
Cleaning the heads and peripheral components
For maintaining the best condition of the deck and for longer service life, always keep the head (recording/playback/erase), capstan and pinch roller clean. To clean them, perform the following.
- Open the cassette holder.
- Using a cotton swab dipped in alcohol, clean the head (recording/playback/erase), capstan and pinch roller carefully.
Demagnetizing the head
When the recording/playback head is magnetized, the sound quality will be deteriorated. In such a case, demagnetize the head using a commercially available demagnetizer (head eraser).
Note:
There are precisely aligned parts around the heads, including the tape guides.
When cleaning, pay special attention so as not to apply shock to them.
■ Beware of condensation
When water vapor comes into contact with the surface of cold material, water drops are produced.
If condensation occurs, correct operation may not be possible, or the unit may not function correctly.
This is not a malfunction, however, and the unit should be dried. (To do this, turn the POWER switch ON and leave the unit as it is for several hours.)
Be especially careful in the following conditions.
- When the unit is brought from a cold place to a warm place, and there is a large temperature difference.
- When a heater starts operating.
- When the unit is brought from an air-conditioned place to a place of high temperature with high humidity.
- When there is a large difference between the internal temperature of the unit and the ambient temperature, or in conditions where condensation occurs easily.
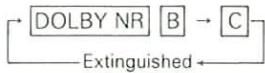
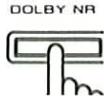
Dolby noise reduction system
The Dolby noise reduction system was developed to reduce the tape hiss noise generated during play back. The optimum effect of the Dolby NR system is obtained when the same type NR system is used for both recording and playback. If a different type NR system is used, playback is not performed correctly. Make sure that the same type noise reduction system is used for both recording and playback.
Dolby B NR:
The most popular noise reduction system used in home audio components. Usually, Dolby NR system corresponds to B NR.
Dolby C NR:
Dolby C NR offers improved noise reduction performance over that of the Dolby B NR. It features a superior noise reduction effect. Use Dolby C NR to record or playback with this unit.
It is recommended that tapes recorded with the Dolby NR system be marked "B" or "C", so that they can easily be distinguished.
Dolby noise reduction and HX Pro headroom extension manufactured under license from Dolby Laboratories Licensing Corporation. HX Pro originated by Bang & Olufsen. "DOLBY", the double-D symbol ☐ and "HX PRO" are trademarks of Dolby Laboratories Licensing Corporation.
STAND BY mode of POWER key
When the power cord of this system is plugged into an AC outlet, the STAND BY indicator lights up regardless of the ON/OFF setting of the POWER key. This indicates that a small amount of current is being supplied to the unit to back up the memory contents and support the timer function. This mode is referred to as the Stand By mode. While the STAND BY indicator is lit, the power of the system can be switched ON/OFF from the remote control unit.
Strömbrytarens POWER beredskapsläge
Indikatorn STAND BY tänds efter nätkabelns anslutning till ett vägguttag, oavsett strömbrytarens POWER till/frånslag. Detta anger att en liten mängd ström leds till komponenten som stöd för minnesinnehållet och också för att skydda de inställningar, som lagrats i minnet, för timerstyrda funktioner mot radering. Detta läge kallas för beredskapsläget. Strömbrytaren på fjärrkontrollen kan användas för att slå på och av strömmen så länge indikatorn STAND BY lyser.
Virtanäppäimen (POWER) valmiustila (STAND BY)
Kun laitteen verkkojohto on liitetty pistorasiaan, valmiustilan merkkivalo syttyy riippumatta virtanäppäimen (POWER) asennosta (ON/OFF). Merkkivalo osoittaa, että laitteessa on hieman virtaa muistin sisältöjen ja ajastintoiminnon ylläpitoa varten. Tätä tilaa kutsutaan valmiustilaksi. Kun valmiustilan merkkivalo (STAND BY) palaa, laitteen virta voidaan kytkeä ja katkaista kaukosäätimellä.
Afbrydertastens (POWER) STAND BY funktion
Når apparatets strømledning er tilsluttet en stikkontakt, lyser STAND BY indikatoren, uanset om der er tændt ved afbryderen på apparatet eller ej. Det angiver, at apparatet bliver forsynet med en ganske lille mængde strøm til opret-holdelse af hukommelsens indhold og til timeren. Denne funktion kaldes STAND BY. Når STAND BY indikatoren er tændt, kan strømmen til apparatet slås til og fra med fjernsty-ringsenheden.
PÅ/AV-knappens Stand-by funksjon
Når strømledningen til dette anlegget er satt i en vekselstrømskontakt, vil STAND-BY indikatorlampen lyse enten PÅ/AV-knappen er på- eller avslått. Dette betyr at en viss mengde strøm tilføres anlegget slik at innholdet i minnet samt timerfunksjonen ikke går tapt. Denne funksjonen kalles Stand-by. Når indikatorlampen for STAND-BY er tent, kan strømmen slås PÅ/AV fra fjernkontrollen.
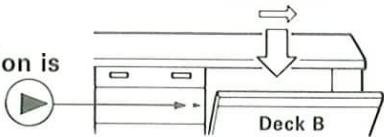
Make connections as shown below. When connecting the related system components, refer also to the instruction manuals of the related components.
When connecting the parallel cords, be sure to match the colors of the sockets.
Do not plug in the power lead until all connections are completed.
flowchart
graph TD
    A["Tuner"] --> B["T-74L"]
    B --> C["Amplifier"]
    C --> D["A-74"]
    D --> E["Cassette deck"]
    E --> F["X-74"]
    F --> G["CD player (DP-940 optional)"]
    G --> H["System control cord"]
    H --> I["For U.K. AC outlets"]
    I --> J["To wall AC outlet"]
    J --> K["System control cord"]
    K --> L["Flat cord"]
    L --> M["Blue"]
    M --> N["Speaker 2-18D"]
    M --> O["Measurement Selector"]
    M --> P["From 74L to 1-74"]
    M --> Q["Gray"]
    Q --> R["Switched Total 200 MHz"]
    R --> S["Audio cord"]
    S --> T["Audio cord"]
    T --> U["Line OUTPUT"]
    T --> V["BURTEX"]
    U --> W["Output"]
    V --> X["Output"]
Notes of system connections
Basic precautions
- Connect all cords firmly. If connections are loose there could be loss of sound or noise produced.
-
Do not connect up a power source which is larger than that indicated on the socket at the rear of the unit.
-
When stacking components, follow the indicated order in the connections diagram.
-
When plugging and unplugging connection cords after connections are complete, be sure to first remove the power cord from the AC outlet. Plugging/unplugging connection cords without removal of the power cord can cause malfunctions or damage to the unit.
Connection of the flat cords
(Amplifier/cassette deck/tuner connection cords and system control cords)
- When you plug in the connector Insert firmly in place until it clicks.
- When you unplug the connector Grip the socket section and pull straight back.

natural_image
Illustration of hands holding a mechanical component with directional arrows indicating movement (no text or symbols)- Make sure that the system control cords are connected correctly as in the figure.
ADAPTOR jacks on the amplifier rear panel
When an adaptor-type component such as a graphic equalizer is connected, unplug the shorting pins from the ADAPTOR jacks and connect the component to these jacks.
- When the ADAPTOR jacks are not used, be sure to plug the shorting pins into the jacks. Otherwise, the sound will not be produced.
- When the ADAPTOR jacks are used, retain the shorting pins and be careful not to lose them.
- Never plug a shorting pin into other jacks than ADAPTOR jacks. Otherwise, the unit may be damaged.
DAT, VIDEO input jack
You can connect components such as a DAT (Digital Audio Tape) deck and video deck and use them for playback or for recording other music sources.
Only audio signal lines can be connected to this unit. Video signal lines should be connected directly from the DAT or video deck to your TV.
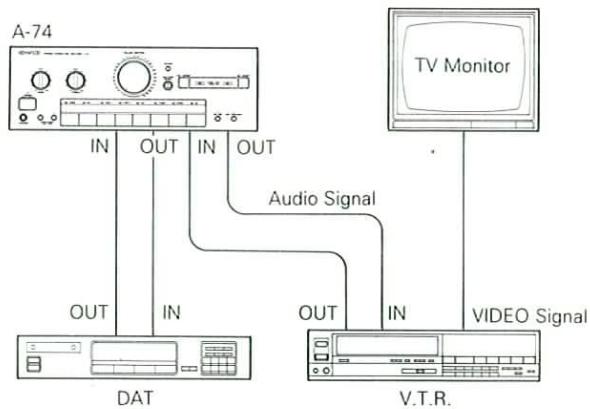
flowchart
graph TD
    A["A-74"] -->|IN| B["DAT"]
    A -->|OUT| C["V.T.R."]
    A -->|IN| D["Video Signal"]
    A -->|OUT| E["TV Monitor"]
    B -->|IN| F["Video Signal"]
    C -->|IN| G["Video Signal"]
    D -->|Audio Signal| H["TV Monitor"]
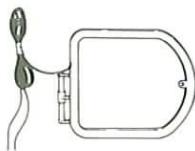
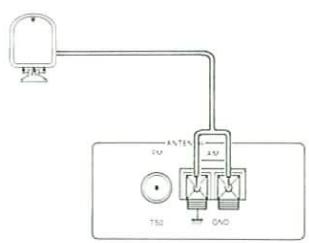
■ AM loop antenna connection
The supplied antenna is for indoor use. Place it as far as possible from the main system, TV set, speaker cords and power cord, and set it to a direction which provides the best reception.

■ AM outdoor antenna connection
If the reception is poor when the AM loop antenna is used, distribute a vinyl-coated wire of more than 6 meters outdoors, without disconnecting the loop antenna.
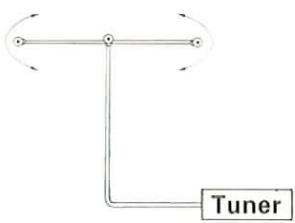
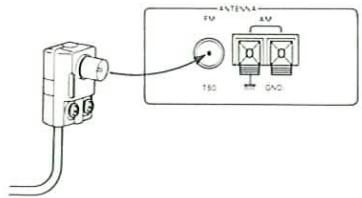
■ FM indoor antenna connection
Connect to the screw terminals.
flowchart
graph TD
    A["Input Node 1"] --> B["Tunnel"]
    C["Input Node 2"] --> B
    D["Input Node 3"] --> B
    B --> E["Tuner"]
Find the position that provides best reception. Fix two ends.
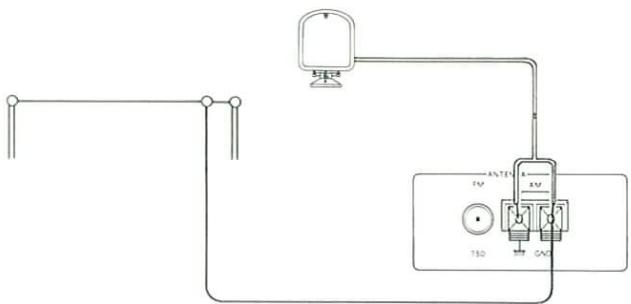
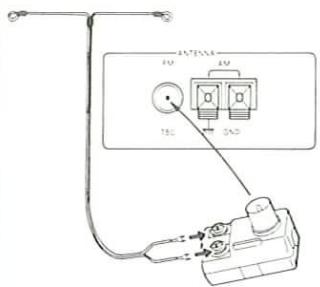
■ FM outdoor antenna connection
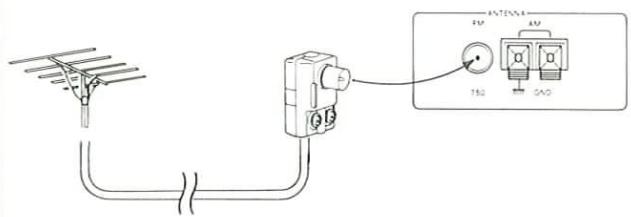
■ 75 Ω coaxial cable connection
① Arrange the coaxial cable as illustrated.
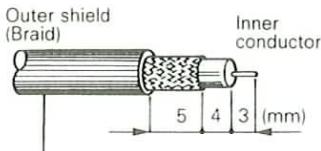
RG-6 (5C-2V) or RG-59 (3C-2V)
② Open the antenna adaptor. Press the claws in the direction of the arrows with the fingers to release the lock and pull out the cover.
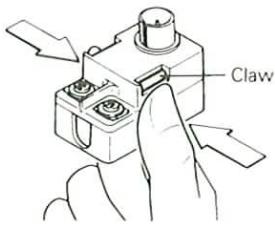
③ Cut off the red wire and remove it from the clip.
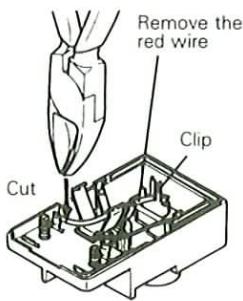
④ Insert into the slit on the chip. Fasten the bands A and B, using a pair of pliers.

⑤ Close the cover.
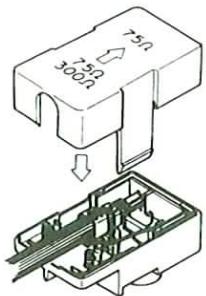
⑥ Connect the adaptor to the antenna terminal.
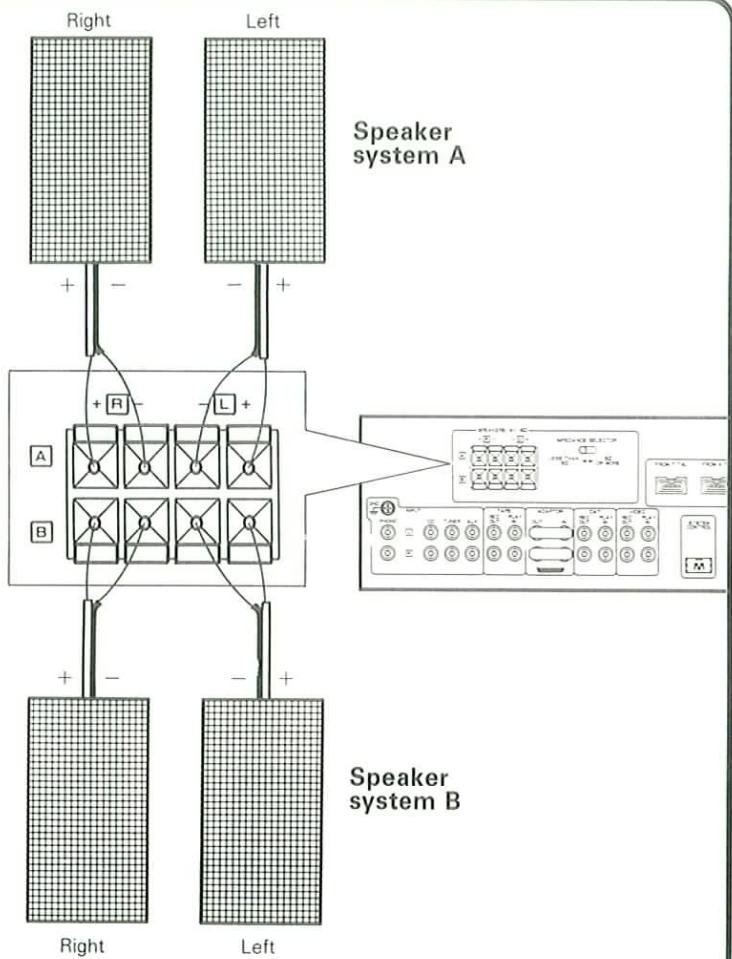
■ Connection of speakers
① Push the lever up.

② Insert the cord.
③ Lock the lever.

- Never short-circuit the + and — speaker cords.
- If the left and right speakers are connected inversely or if the speaker cords are connected with reversed polarity, the sound becomes unnatural with ambiguous acoustic image positioning. Be sure to connect the speakers and speaker cords correctly.
flowchart
graph TD
    subgraph_Speaker_system_A["Speaker system A"]
        A1["Left"] -->|+ -| A2["Right"]
        A2 -->|+ -| A3["Left"]
        A3 -->|+ -| A4["Speaker system B"]
        A4 -->|+ -| A5["Right"]
        A5 -->|+ -| A6["Left"]
    end
    subgraph_Speaker_system_B["Speaker system B"]
        B1["Left"] -->|+ -| B2["Right"]
        B2 -->|+ -| B3["Left"]
        B3 -->|+ -| B4["Speaker system B"]
    end
    A1 -->|+ R -| A2
    A2 -->|+ R -| A3
    A3 -->|+ R -| A4
    A4 -->|+ R -| B1
    A4 -->|+ R -| B2
    A4 -->|+ R -| B3
    A4 -->|+ R -| B4
    A4 -->|+ R -| B5
    A4 -->|+ R -| B6
    A4 -->|+ R -| B7
    A4 -->|+ R -| B8
    A4 -->|+ R -| B9
    A4 -->|+ R -| B10
    A4 -->|+ R -| B11
    A4 -->|+ R -| B12
    A4 -->|+ R -| B13
    A4 -->|+ R -| B14
    A4 -->|+ R -| B15
    A4 -->|+ R -| B16
    A4 -->|+ R -| B17
    A4 -->|+ R -| B18
    A4 -->|+ R -| B19
    A4 -->|+ R -| B20
    A4 -->|+ R -| B21
    A4 -->|+ R -| B22
    A4 -->|+ R -| B23
    A4 -->|+ R -| B24
    A4 -->|+ R -| B25
    A4 -->|+ R -| B26
    A4 -->|+ R -| B27
    A4 -->|+ R -| B28
    A4 -->|+ R -| B29
    A4 -->|+ R -| B30
    A4 -->|+ R -| B31
    A4 -->|+ R -| B32
    A4 -->|+ R -| B33
    A4 -->|+ R -| B34
    A4 -->|+ R -| B35
    A4 -->|+ R -| B36
    A4 -->|+ R -| B37
    A4 -->|+ R -| B38
    A4 -->|+ R -| B39
    A4 -->|+ R -| B40
    A4 -->|+ R -| B41
    A4 -->|+ R -| B42
    A4 -->|+ R -| B43
    A4 -->|+ R -| B44
    A4 -->|+ R -| B45
    A4 -->|+ R -| B46
    A4 -->|+ R -| B47
    A4 -->|+ R -| B48
    A4 -->|+ R -| B49
    A4 -->|+ R -| B50
    A4 -->|+ R -| B51
    A4 -->|+ R -| B52
    A4 -->|+ R -| B53
    A4 -->|+ R -| B54
    A4 -->|+ R -| B55
    A4 -->|+ R -| B56
    A4 -->|+ R -| B57
    A4 -->|+ R -| B58
    A4 -->|+ R -| B59
    A4 -->|+ R -| B60
    A4 -->|+ R -| B61
    A4 -->|+ R -| B62
    A4 -->|+ R -| B63
    A4 -->|+ R -| B64
    A4 -->|+ R -| B65
    A4 -->|+ R -| B66
    A4 -->|+ R -| B67
    A4 -->|+ R -| B68
    A4 -->|+ R -| B69
    A4 -->|+ R -| B70
    A4 -->|+ R - | B71
    A4 -->|+ R - | B72
    A4 -->|+ R - | B73
    A4 -->|+ R - | B74
    A4 -->|+ R - | B75
    A4 -->|+ R - | B76
    A4 -->|+ R - | B77
    A4 -->|+ R - | B78
    A4 -->|+ R - | B79
    A4 -->|+ R - | B80
    A4 -->|+ R - | B81
    A4 -->|+ R - | B82
    A4 -->|+ R - | B83
    A4 -->|+ R - | B84
    A4 -->|+ R - | B85
    A4 -->|+ R - | B86
    A4 -->|+ R - | B87
    A4 -->|+ R - | B88
    A4 -->|+ R - | B89
    A4 -->|+ R - | B90
Setting the SPEAKER IMPEDANCE SELECTOR
| Speaker impedance | Selector position |
| 4Ω, 6Ω | “LESS THAN 8Ω” |
| 8Ω, 16Ω | “8Ω OR MORE” |
According to the impedance of the speakers used, set the SPEAKER IMPEDANCE SELECTOR at rear as tables.
- During speaker system connection and operation of the SPEAKER IMPEDANCE SELECTOR, set the POWER key to OFF.
- When only one set of speakers is used, use the SPEAKERS A terminals.
- Even when only one of speaker systems A and B uses 4 Ω or 6 Ω speakers, be sure to set the SPEAKER IMPEDANCE SELECTOR to "LESS THAN 8Ω".
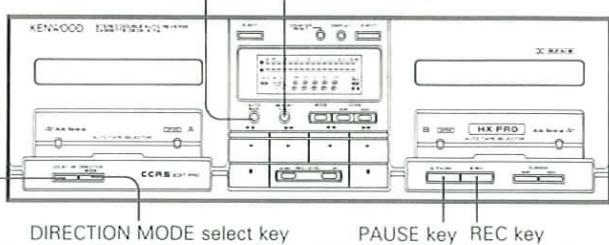
Tuner
Amplifier
Cassette deck
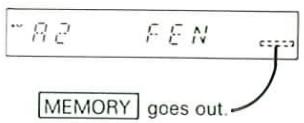
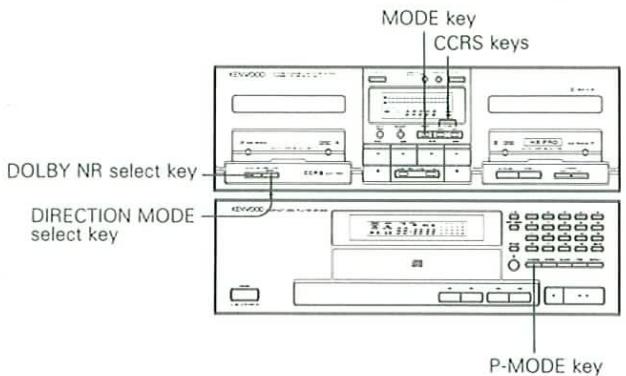
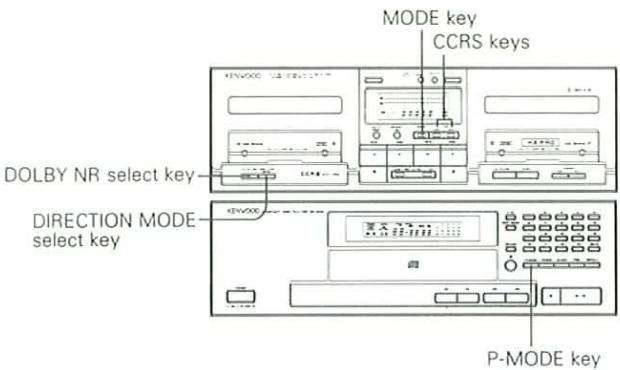
![Peak level indicator DOLBY NR indicator Deck A transport direction indicators Source COUNTER A B DUBS NOR [SP] HIGH CCRS AUTO BIB Transport mode indicators Deck B transport direction indicators Multi display area Recording source/Counter A, B/ MODE/Recording level Pause indicator Recording indicator AUTO BIAS key MEMORY CALL key Display area AUTO BIAS MEMORY CALL MODE CCRS NOR. HIGH MODE select key CCRS recording keys COUNTER RESET key DISPLAY select key Deck A EJECT key Deck B EJECT key KENWOOD STEREO DOUBLE AUTO REVERSE CASSETTE DECK X-74 EJECT COUNTER RESET DISPLAY EJECT AUTO BIAS ORDER CALL MODE 10000000000000000000000000000000000000000000000000000000000000000000000000000000000000000000000000 AUTO TAPE SELECTOR Auto Reverse CASS A DOLBY NR DIRECTION MODE CCRS EDT PRO DIRECTION MODE select key (Tape transport mode) Deck A operation keys DCAM REC LEVEL DCAM REJECT KEY DECK LEVEL key PAUSE key DUBBING keys B CASS HX PRO AUTO REVERSE 5" AUTO TAPE SELECTOR HAX PRO AUTO REVERSE 5" PAUSE REC DUBBING keys](/content/2026/01/220761/images/2222571d0480f8e7a57d224264c78d8e33cbc22cd291773003b4c4a702ba82ef.jpg)
Consult the instruction manuals for CD player (DP-940), graphic equalizer (GE-940, GE-540) or turntable (P-94, P-64) on how to use their operation keys. Other keys have the same function as those on the main system.
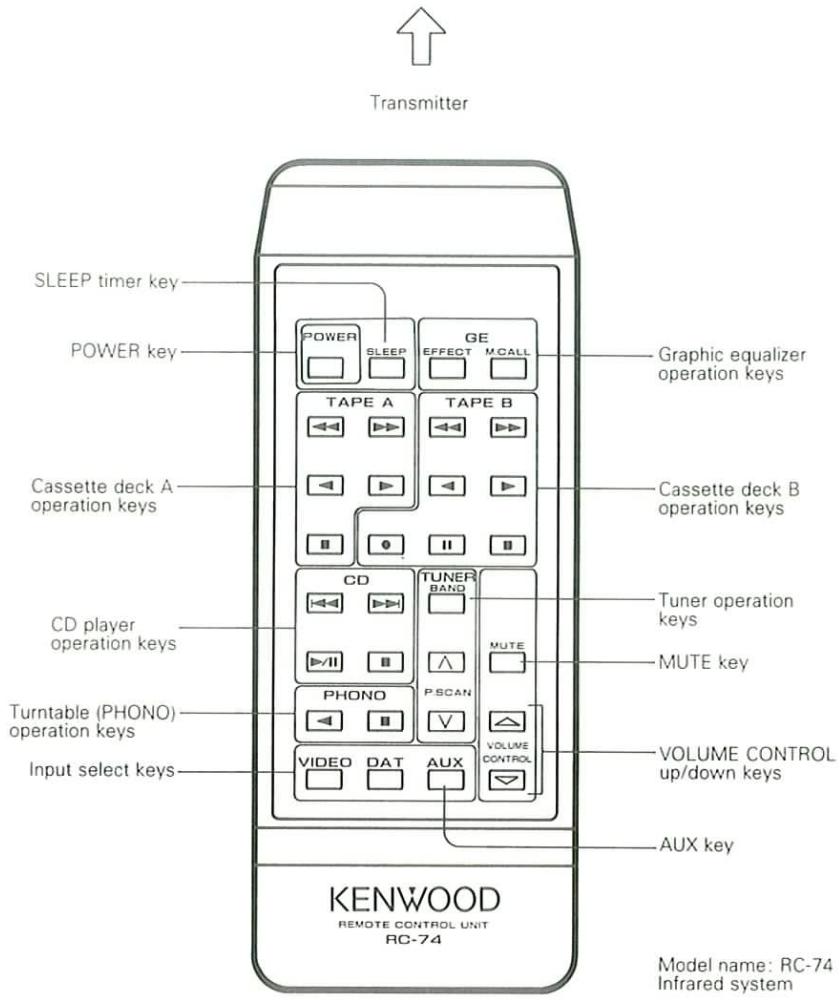
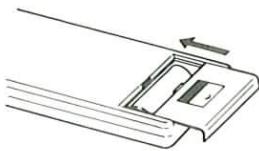
- Loading batteries
1 Remove the cover.
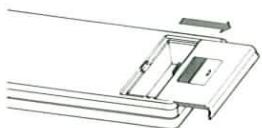
2 Insert batteries.
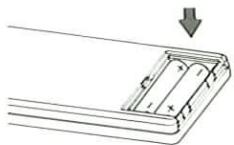
Insert two AAA-size (R03) batteries as indicated by the polarity marking.
3 Close the cover.
natural_image
Pure technical line drawing of a mechanical component with no text or symbolsOperation procedure
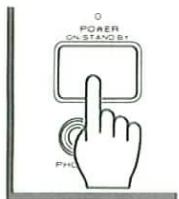
Plug the power cord of the system into an AC wall outlet, and press the POWER key on the remote control unit to turn the power on.
When the power is turned on, press the key of the source component to be operated.
- When two operation keys on the remote control unit are pressed successively, press each key securely reserving an interval of more than 1 second for each press
- Components connected via the system control cords, such as the CD player, can also be remote-controlled. In this case, please read the instruction manual supplied with your CD player.

Notes:
- The supplied batteries are intended for use in operation checks. Therefore, their lives may be shorter than ordinary batteries.
- When the remote-controllable distance gets shorter than before, replace both batteries with new ones.
- Malfunction may occur if direct sunlight or the light of a high-frequency lighting fluorescent lamp enters the remote control light sensor. In such a case, change the system installation position to prevent the malfunction.
For details, also refer to the instruction manuals provided with the connected components.
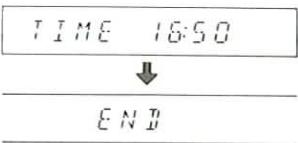
Blinks! For setting the clock, please read page 17.
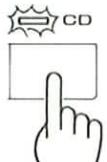
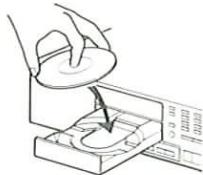
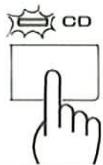
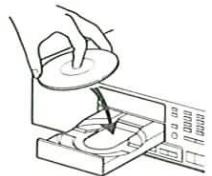
| To listen to a radio broadcast | To listen to a tape | To listen to a CD | |
| 1 | Select the tuner input. Press the BAND key 2. | Insert a tape in Deck A. | Place a CD on the tray. |
| 2 | Select a station. Press the TUNING/CHARACTER keys 1. | Play the tape. Press the play key 4. | Play the CD. Press the play/pause key 5. |
| 3 | Adjust the volume. | ||
The tuner is equipped with a time function. Be sure to set the correct date and time before using the Program Timer.
The time function is provided with a Calendar Check function which can determine the day of the week from the numbers you input for the year, month, and day. (See page 47.)

1 Press the ADJUST key.
2 Input the year using the numeric keys, and press the ENTER key.
For the year 1991: press 1, 9, 9, 1.


- If you make a mistake during entry, press the CLEAR key and then re-enter the correct number.
3 Input the month then the day, and press the ENTER key.
For March 7th: press 0, 3, 0, 7.
For December 30th: press 1, 2, 3, 0.


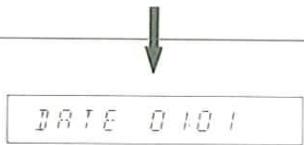
- If you make a mistake during entry, press the CLEAR key and then re-enter the correct number.
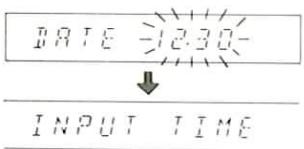
4 Set the time.
Use the 24-hour time format.
For 9:05 a.m.: press 0, 9, 0, 5.
For 4:50 p.m.: press 1, 6, 5, 0.


- If you make a mistake during entry, press the CLEAR key and then re-enter the correct number.
5 Press the ENTER key.
- You can set the time precisely by pressing the ENTER key simultaneously with the signal from a time cast.

The clock starts running.
Note:
If a power outage occurs or the power cord is unplugged from the AC outlet, the time display will blink after the power comes back on. If this occurs, re-enter the date and time.
Display contents and the DISPLAY key
Each time the DISPLAY key is pressed when a station is being received, the contents of the display change according to the following sequence: station frequency → station name → current time → month and day. If one of the tuner's tuning-related keys is pressed while the date or time is displayed, the display automatically changes to the frequency display, and then after a few seconds changes back to the original display. When the power is OFF, the DISPLAY key switches between the date and time displays.
Press the POWER key of the amplifier.
• The POWER key on the amplifier can switch on/off the powers of main system.
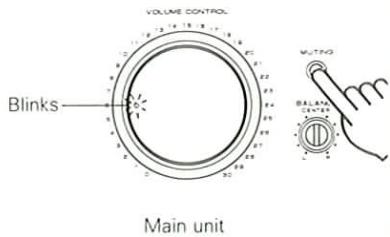
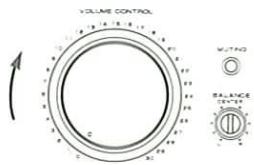
Volume adjustment
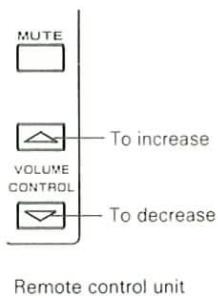
- When the volume is adjusted from the remote control unit, the point indicator on the VOLUME CONTROL knob blinks and rotates together with the control knob.
To mute sound temporarily
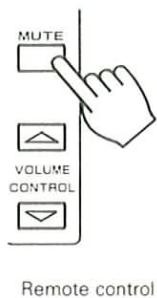
- Pressing the key again resumes the previous volume.
Automatic play operation function associated with input select keys of amplifier
The Automatic play operation allows to start playing the selected input source by simply pressing the input select key (TAPE A, TAPE B, TUNER, CD or PHONO). It also allows to select a correct input select key on the amplifier by simply starting playback on the desired input source component.
The same operation is also possible with the relative keys on the remote control unit.
The input source selected at the moment the power is switched ON is the last source (TUNER, CD, etc.) selected before switching the power OFF.
■ Adjusting the left and right volume balance
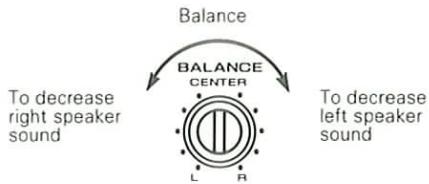
flowchart
graph TD
    A["Balance"] --> B["Balance CENTER"]
    B --> C["To decrease right speaker sound"]
    B --> D["To decrease left speaker sound"]
■ Adjusting the tone
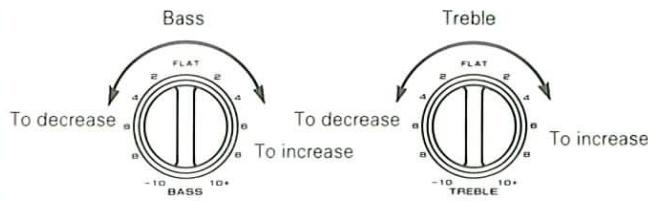
flowchart
graph TD
    A["Bass"] -->|To decrease 4/8 BASS 10+| B["FLAT"]
    B --> C["To decrease 4/8 BASS 10+"]
    D["Treble"] -->|To increase 4/8 TREBLE 10+| E["FLAT"]
    E --> F["To increase 4/8 TREBLE 10+"]
SPEAKERS A and B switches
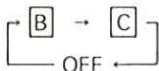
A, B OFF - This position silences all speakers to permit private use of headphones.
A ON - Activates speakers connected to the SPEAKERS A terminals on the rear panel.
B ON - Activates the speakers connected to the SPEAKERS B terminals on the rear panel.
A, B ON - Activates the speakers connected to the SPEAKERS A and B terminals simultaneously.
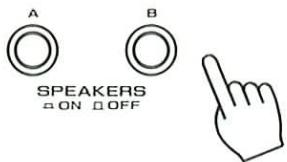
- When speakers are connected only to the SPEAKERS A terminals, the sound will not be heard if both the SPEAKERS A and B switches are depressed to the ON position.
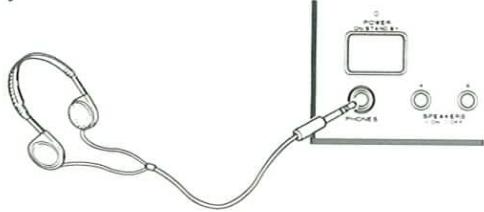
■ Listening through headphones
1 Insert the headphone plug into the headphones jack.
natural_image
Line drawing of a headset connected to a control panel with buttons (no text or symbols)- Set both SPEAKERS A and B switches to OFF.
2 Adjust the volume.
LINE STRAIGHT playback
This function bypasses the tone control circuitry during playback so that the sound quality of the input source is reproduced purely with minimum loss.
1 Press the key of the input source you wish to listen to.


2 Press the LINE STRAIGHT key.


3 Play the input source.
To cancel
Goes out —— o LINE STRAIGHT
Press the LINE STRAIGHT key again.

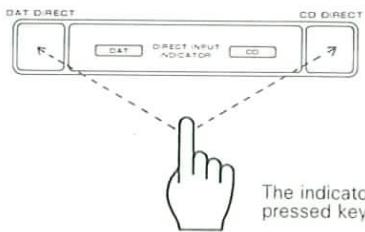
■ CD/DAT DIRECT playback
CD and DAT sources offer ideal playback conditions. Use the CD DIRECT and DAT DIRECT playback functions to play these sources so that their inherent sound quality is not lost.
1 Press the CD DIRECT or DAT DIRECT key.
flowchart
graph TD
    A["DAT DIRECT"] --> B["DATA"]
    A --> C["CD DIRECT"]
    B --> D["DIRECT INPUT INDICATOR"]
    C --> E["CD"]
    D -.-> F["The indicator pressed key"]
The indicator of the pressed key lights.
2 Start playback on the CD player or DAT deck.
- The CD DIRECT key or DAT DIRECT key has priority Regardless of the selected input select key.
To cancel the CD/DAT DIRECT function
During CD DIRECT playback press the CD DIRECT key again, and during DAT DIRECT playback press the DAT DIRECT key again. Or, press an input select key other than CD or DAT.
- The DAT or CD indicator goes out.
Notes:
- During CD/DAT DIRECT playback, the tone controls and components connected to the adapter jacks do not function.
- During recording, the CD/DAT DIRECT keys will not function even if pressed.
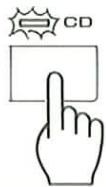
CD REC key
Refer to "Using the CD REC key" on page 38.
■ Tuning in and presetting (memorizing) stations
1 Set the display to the frequency display.
- Each time the DISPLAY key is pressed, the display contents change according to the following sequence: frequency → station name → current time → month and day.


Frequency display
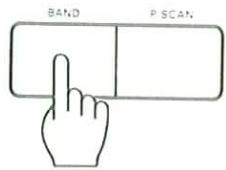
2 Select the broadcast band.
- When you press a tuning-related key, the display changes to the frequency display for a few seconds.

The broadcast band changes each time you press the BAND key.

3 Select the tuning mode.
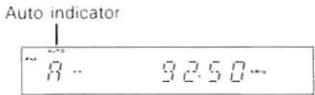
- Normally set the tuning mode to Auto (the AUTO indicator lights).

Press the key to select Auto (AUTO lights) or Manual (AUTO is extinguished).
4 Tune in the desired station.
- TUNED lights when a station is tuned in.
- Use manual tuning if the desired station has a weak signal and there is excessive noise.
| Auto tuning | Manual tuning |
| Press once.Tuning automatically stops when a station is received. | Press repeatedly or hold pressed until the desired station is received. |
5 Memorize the station.
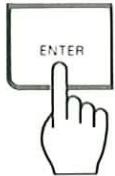
① Press the ENTER key.
- Irrespective of the broadcast band, up to 10 stations (numeric keys 1 - 10/0) can be stored in each group A, B, and C, for a maximum of 30 preset stations.
- Proceed the steps ② and ③ while the MEMORY indicator is lighted.
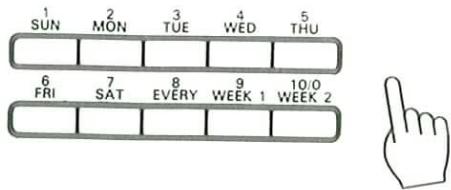
② Select the preset group (A, B, or C).
③ Press the desired numeric key.
- If you press a numeric key which already contains a preset station, the previously memorized station is replaced by the new station.

■ Receiving a preset station
1 Select the preset group.
One of A, B or C.

2 Press the preset key.
- The frequency of the station received will be displayed.
■ Listening to all preset stations in sequence: Preset Scan
Press the P.SCAN key.
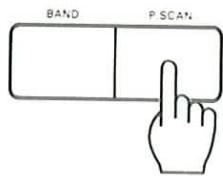
Remote control unit

P.SCAN

- Each time the P.SCAN key on the main unit is pressed, the next preset station is tuned in according to the following sequence: A1 → A2 · · · A10 → B1 · · · B10 → C1 · · · C10 → A1 · · ·
- When using the remote control unit, each press of the key tunes in the next preset station according to the sequence A1 A2 ··· A10 B1 ··· ; each press of the key tunes in the next preset station according to the sequence A10 A9 ··· A1 C10 ··· .
Last channel memory
When the tuner's band selector is switched or when the amplifier's input selector is switched from another source to TUNER, the last received station is recalled for each of FM, MW and LW, when the amp power is switched ON.
■ Direct tuning of radio station
If you know the frequency of the desired station, it can be received directly using the numeric keys.
1 Select the broadcast band.
• One of FM, MW and LW
2 Press the DIRECT key.
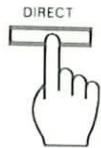
3 Enter the frequency of the desired station by pressing the numeric keys.

Example
| Desired station | Order of pressing numeric keys |
| FM 90 MHz | |
| FM 102.5 MHz | |
| MW 810 kHz | |
| MW 1240 kHz |
- If you commit a mistake in the input of numeric keys, press the CLEAR key, and re-start the input from the beginning.
■ Displaying station names
Up to four digits (characters, symbols, etc.) can be displayed for each station.
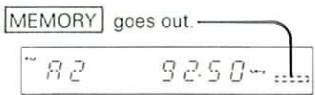
Example: Tuning in FM 92.50 MHz, entering the characters "CBE", and presetting the station in group A under the 3 key.
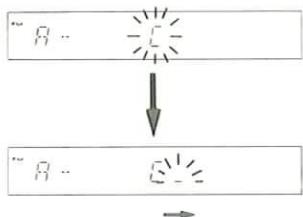
1 Tune in FM 92.50 MHz and set the tuner to character input mode.
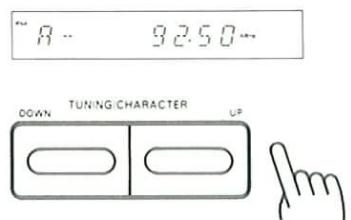

2 Enter the characters you wish to display.
① Select the desired character.

flowchart
graph TD
    A["启动"] --> B["执行步骤1"]
    B --> C["执行步骤2"]
    C --> D[""结束"]
The blinking cursor moves to the next position.
② Set the character.
③ Repeat steps ① and ② to enter the remaining necessary characters.
- To enter the letter "C", press the UP side three times.
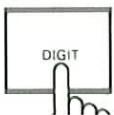
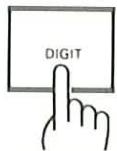
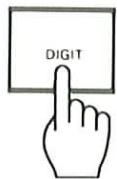
- To enter a space, just press the DIGIT key.
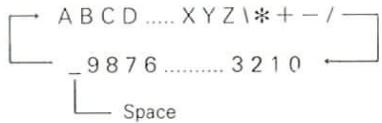
Available characters
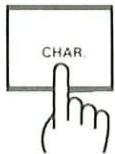
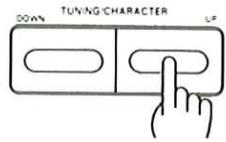
The available characters can be displayed by pressing the CHAR key and then pressing the TUNING/CHARACTER keys.
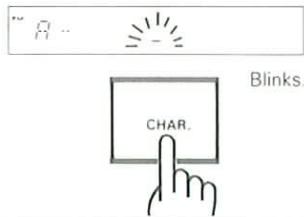
3 Finish entering characters.

If you make a mistake during entry, press the CLEAR key and re-enter the characters from the beginning
- Character entry automatically ends after four characters are entered.
- To finish after entering three characters or less, press the CHAR. key after setting the final character.
4 Memorize the station name in group A under the ③ key.
① Press the ENTER key.
② Select the preset group (A, B or C).
③ Press numeric key 3.


(Preset completion)
Press while MEMORY is lit.
■ Changing station names
Example: Changing the name of the station memorized under A 2 (AM 810 kHz) from "FHN8" to "FEN".
1 Tune in preset station A 2 and set the tuner to character input mode.

2 Move the blinking position to the next character.
Press once.
The blinking position moves to the next character.

3 Select "E" with the TUNING/CHARACTER keys.

- Move the blinking position to the last character.
Press twice.
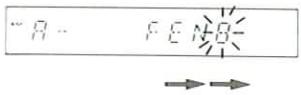
5 Select "space" with the TUNING/CHARACTER keys.


- Character entry automatically ends after the fourth character is input.
6 Memorize the new name under the 2 key.
① Press the ENTER key.

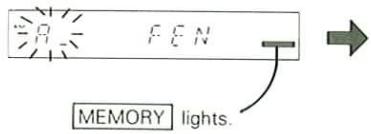
② Press the 2 key.
Press while MEMORY is lit.
(Name change completion)
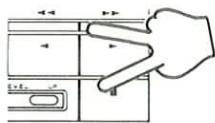
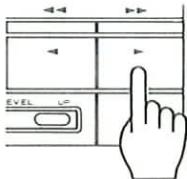
■ To playback a tape
1 Insert a tape.

- The tape shall be fully rewound to one of the reels before being inserted into the cassette holder.
- The type of tape, Normal, Chrome or Metal, is detected and set automatically.
2 Determine the playback conditions.
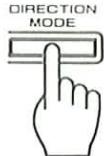
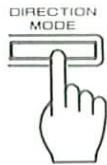
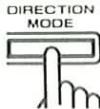
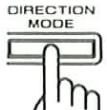
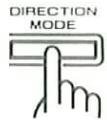
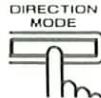
① Selection of DIRECTION mode.
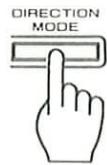
The display changes each time the key is pressed.
| Tape stops at the end of one side | |
| Tape stops after two sides have been played | |
| Tape playback continues until the ■ key is pressed. |
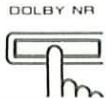
② Selection of DOLBY NR mode.
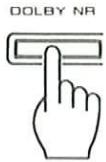
Select according to the tape to be played.
The display changes each time the key is pressed.
3 Start playback.
or
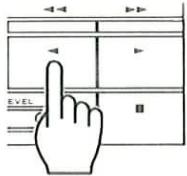
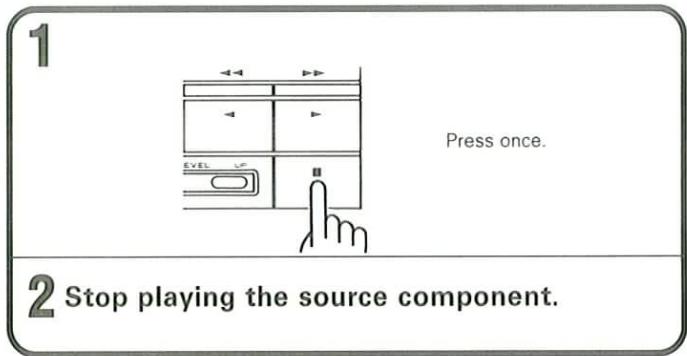
To stop playback
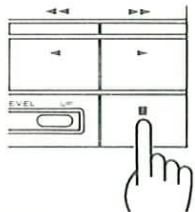
- When the DIRECTION MODE is set to or , the play-back stops automatically at the end of tape.
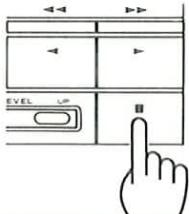
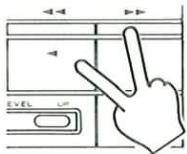
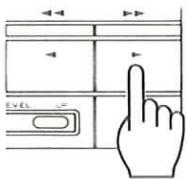
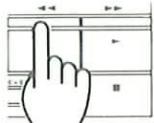
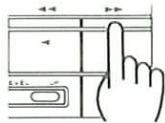
■ To wind the tape at high speed
1 Stop playback.
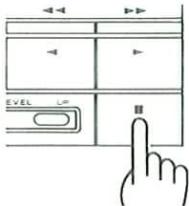
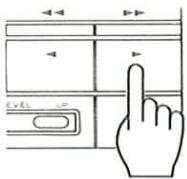
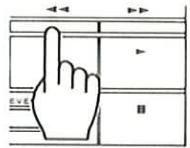
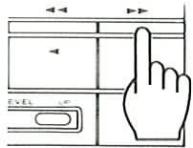
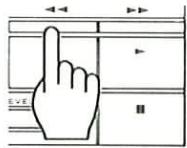
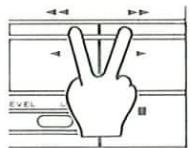
2 Press the ◀◀ key or ▶▶ key.
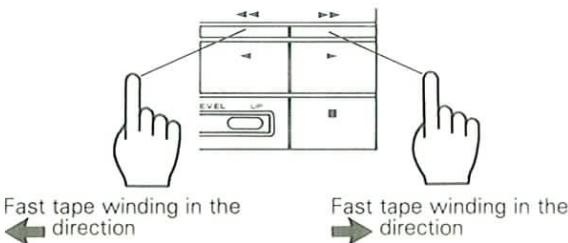
To stop fast tape winding
■ Zero-stop operation
This operation is not available from the remote control unit.
Fast tape winding in the direction
Fast tape winding in the direction
- Tape is forwarded until counter reading "0000", where it stops.
Relay playback
Tapes in the two decks (A and B) can be played alternately and repeatedly.
1 Insert tapes.
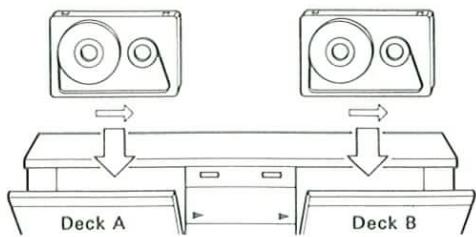
- Tapes are played in the directions indicated by their respective indicators on the display.
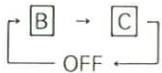
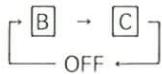
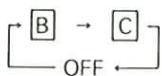
2 Set the DIRECTION MODE.
→: One-way relay playback One side of Deck A, B is played.
⊃: Two-way relay playback Both sides of Deck A, B are played.
- Relay playback cannot be performed if the DIRECTION MODE is set to " 🔍".
3 Start playback
- The playback starts with the deck the ▶ key of which is pressed.
To stop relay playback
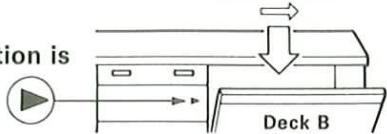
Tape transport direction indicators
The ◀ indicators show the direction of tape transport in its playback or recording. The direction selected when the tape was stopped the last time is maintained even after the power is turned off, and the same direction will be set next time the power is turned on. To change the tape transport direction, insert a tape and press the play key of the opposite direction.
![∞ -20 -15 -10 -6 -3 0 3 8 (dB) E R DOLBY NR B C DUEA NOR [SP] HIGH CCS AUTO SOURCE COUNTER A B AUTO BIAS](/content/2026/01/220761/images/66d4e86a0d3bc3e1208af3d21995445f32fc28ce867c3d5cc732a17a482284e8.jpg)
Deck A direction indicators
Deck B direction indicators
The DPSS stands for Direct Program Search System, which enables the following convenient operations (these operations are, however, not available on both decks simultaneously). The DPSS functions are based on the detection of non-recorded spaces of 4 seconds or more between tunes.
- Skip play
: By specifying a tune located several tunes beyond (or behind) the tune being played, skips tunes between the current tune and the desired tune and starts playback from the beginning of the selected tune. Up to 16 tunes can be skipped in Skip Search.
- Single-tune repeated playback
: One single tune is played back repeatedly up to 16 times.
- Rewind & Play
: Rewinds the tape to the beginning and starts playback from there.
- Dash & Play
: If a non-recorded space of more than 10 seconds is detected during playback, that space will be skipped by fast tape winding.
Skip play operation
The following four examples show the cases when tape runs in the direction of ▶. When tape runs in the direction of ◀, press the opposite key.
To play a tune located immediately after the tune being played
Press once during the playback.
To play the tune being played from the beginning
Press once during the playback.
To play a tune located 4 tunes beyond
Press 4 times during the playback.
To play the tune located 4 tunes behind
Press 5 times during the playback.
The DPSS will not function properly with the following types of tapes.
- Tapes containing spaces of 4 seconds or more, such as conversations and speeches.
- Tapes containing extremely low levels or non-recorded blanks in the middle of tunes, such as classical music.
- Tapes containing recording or large noise between tunes.
- Tapes containing spaces of less than 4 seconds between tunes.
- Tapes recorded with low recording level
- Tapes recorded using Cross-fade recording
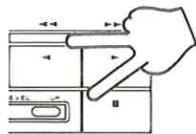
■ Rewind & Play operation
This operation cannot be carried out from the remote control unit.
Transport direction of the tape: ▶
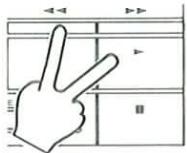
Press simultaneously.
Transport direction of the tape:
Press simultaneously
■ Single-tune repeated playback
1 Play the tune to be repeated.
2 Press the play key of the same direction as the current tape transport direction.
Transport direction of the tape: ▶
- Normal playback resumes after repeating the same tune for 16 times.
■ Dash & Play operation
The cassette deck automatically fast-forwards through blank unrecorded sections.
This operation cannot be carried out from the remote control unit.
1 Determine the playback conditions.
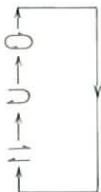
The display changes each time the key is pressed.
☐: Two sides are repeated 8 times.
⊃: Two sides are played only once.
二: One side is repeated 8 times.
- In case the DIRECTION MODE is set to "⊃" and tapes are inserted in both of the decks, when a deck finishes Dash & Play, the other deck starts Dash & Play on it.
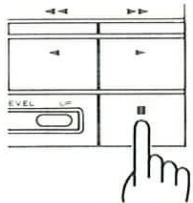
2 Press the ◀ and ▶ keys simultaneously.
To cancel the playback above in the middle
Press once.
Deck B incorporates the Dolby HX Pro headroom extension and auto bias functions to allow recording with excellent high-frequency characteristics.
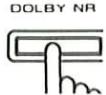
DOLBY NR select key
AUTO BIAS key MEMORY CALL key
Normal recording
1 Prepare the cassette deck for recording.
① Load a tape.
Blank tape
② Make sure the correct transport direction is set.

③ Select one-side or two-side recording.
○, ⊃: Two-side recording
二:One-side recording
④ Select the desired DOLBY NR setting.

2 Select the music source to be recorded.
Cannot be selected as a recording source.
- Select the display and verify the input source.
3 Set the cassette deck to auto bias mode.


- After approximately 45 seconds, the correct bias value is set and the auto bias operation stops.
- To cancel the auto bias operation in the middle, press the stop key.
- Recording is possible even if the auto bias setting operation is not carried out.
- Even if the auto bias value is canceled after being set, you can restore the setting to the previously set level by pressing the MEMORY CALL key.
4 Set the recording level.
① Play the music source.
② Set the cassette deck to record-standby mode.
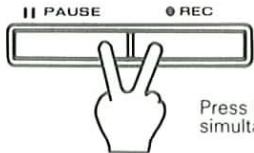
Press both keys simultaneously.
③ Adjust the recording level.
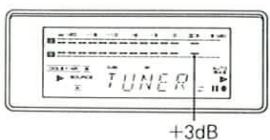
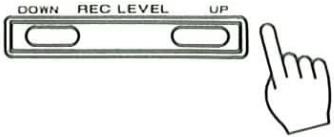
- Adjust the recording level so that the peak level meter indicators near the +3dB level light occasionally.
④ Stop playing the music source.
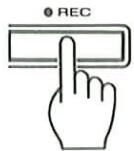
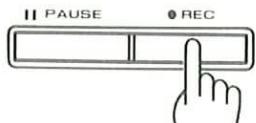
5 Start recording.
① Start playing the music source from the beginning.
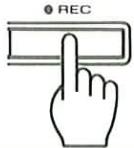
② Press the REC key.

Press once.

- Recording automatically stops at the end of the tape.
Auto bias adjustment function
Normal tapes and chrome tapes are available in wide ranges, from popular products to high-class products, and their characteristics vary largely. The cassette deck incorporates the auto bias adjustment function enabling optimum recording for both normal and chrome tapes. It is recommended to use the auto bias adjustment function when recording using a normal or chrome tape.
- During auto bias adjustment operation, operation keys are not effective except for the ▶, ◀ and ■ keys of deck A and the ■ key of deck B.
- If the remaining amount of tape is small, the auto bias adjustment may be canceled in the middle and tape may stop there.
- The setting of auto bias adjustment is canceled when the EJECT key is pressed.
■ To Pause recording temporarily
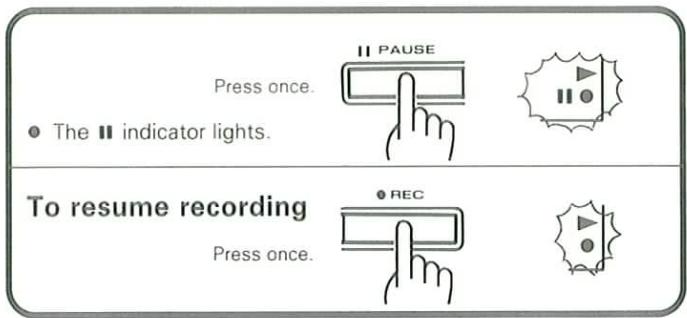
To stop recording
■ To re-start recording after mistake
A non-recorded space of 4 seconds or more should be reserved before the position where recording was started.
1 Rewind the tape.
During recording in
direction
During recording in
direction
- The recording is aborted, the tape is rewound to the position where the recording was started, and the deck enters the stop mode after leaving a non-recorded space of about 2 seconds from the end of the previous tune.
2 Restart recording.
① Press the REC key twice.
- A non-recorded space of 4 seconds is reserved on tape.
② Press the REC key once.
- Recording starts.
Tape counter display
The displayed contents change every time the DISPLAY key is pressed.
(1) During ordinary recording
flowchart
graph TD
    A["Source"] --> B["Input source display"]
    B --> C["Recording level display"]
    C --> D["Deck A counter display"]
    C --> E["Deck B counter display"]
    D --> F["Waveform 0.000"]
    E --> G["Waveform 1.000"]
    F --> H["Output: 0.000"]
    G --> I["Output: 1.000"]
    H --> J["Output: 2.000"]
    I --> K["Output: 3.000"]
    J --> L["Output: 4.000"]
    K --> M["Output: 5.000"]
    L --> N["Output: 6.000"]
    M --> O["Output: 7.000"]
    N --> P["Output: 8.000"]
    O --> Q["Output: 9.000"]
    P --> R["Output: 10.000"]
    Q --> S["Output: 11.000"]
    R --> T["Output: 12.000"]
    S --> U["Output: 13.000"]
    T --> V["Output: 14.000"]
    U --> W["Output: 15.000"]
    V --> X["Output: 16.000"]
    W --> Y["Output: 17.000"]
    X --> Z["Output: 18.000"]
    Y --> AA["Output: 19.000"]
    Z --> AB["Output: 20.000"]
When the REC LEVEL key is pressed, the recording level is displayed for about 5 seconds regardless of the DISPLAY key setting. Although the standard recording level has been set for each input source of the amplifier, the standard level can be varied by pressing the REC LEVEL key. The standard level is not displayed during CCRS recording.
(2) During CCRS recording
(3) When tape is not inserted
(4) Key message display
Each time the key of the cassette deck is pressed, the function of the key can be displayed.

■ To display the key message
① Press the DISPLAY key so that the program source is displayed.
② Press the COUNTER RESET key once.
- MESSAGES ON moves in the display
- Press the COUNTER RESET key to stop key message display
By connecting this unit to the other KENWOOD CD player and turntable equipped with SYSTEM CONTROL terminals, the following convenient operations will be available.
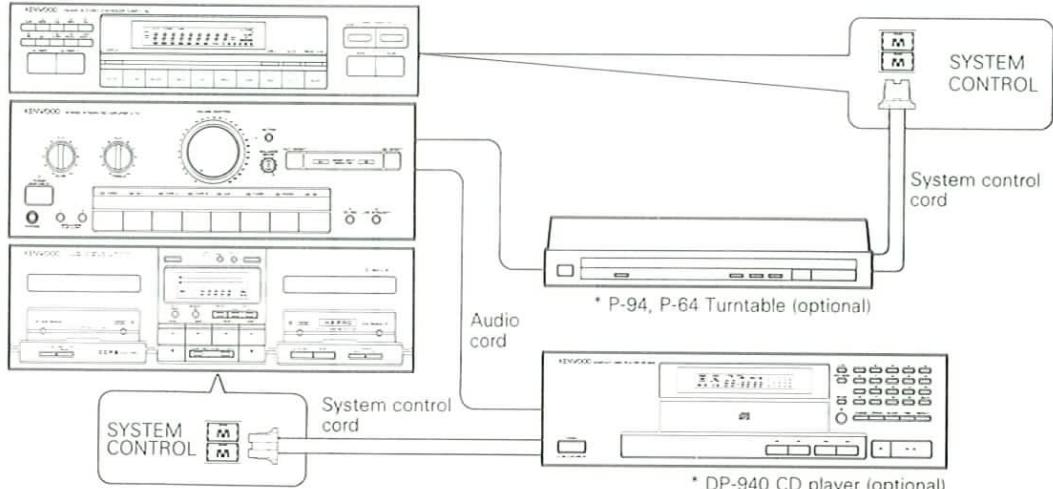
flowchart
graph TD
    A["SYSTEM CONTROL"] --> B["Audio cord"]
    C["SYSTEM CONTROL"] --> D["System control cord"]
    E["DP-940 CD player (optional)"] --> F["System control cord"]
    G["P-94, P-64 Turntable (optional)"] --> H["DC with audio cord"]
■ Synchro recording of CD playback
1 Make the preparations for recording.
Refer to page 28, steps 1-4
2 Enter the record-pause mode.

Press successively twice.
- The deck enters the record-pause mode after leaving a non-recorded space of about 4 seconds.
3 Start playing the CD.
- Tape recording starts at the same time. - When the CD player has completed playback, the cassette deck also stops recording and enters the stop mode.
To pause
Press the ▶/□ key of the CD player.
To resume recording
Press the ▶/□ key of the CD player.
To stop recording
Press the ☐ key of the CD player.
■ Synchro recording of analog disc play
This operation is not available from the remote control unit.
1 Make the preparations for recording.
Refer to page 28, steps 1-4.
2 Enter the record-pause mode.
Press successively twice.
- The deck enters the record-pause mode after leaving a non-recorded space of about 4 seconds.
3 Start playing the analog disc.
- Tape recording starts at the same time.
To pause (P-94 only)
Press the CUEING key of the turntable.
To resume recording (P-94 only)
Press the CUEING key of the turntable.
To stop recording
Press the PLAY/CUT key of the turntable.
Note:
When the ☐ key on the cassette deck is pressed, the cassette deck enters the stop mode, but the playback of CD does not stop.
\* IMPORTANT
This option may not be available in some areas. For details on options, consult your dealer.
The CCRS (Computer-controlled CD Recording System) makes the following convenient recordings possible by setting the optimum tape recording level and recording bias for the specific CD to be recorded and starting recording automatically. (Please also refer to the instruction manual of the CD player.)
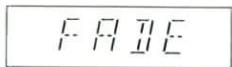
| Fade-out edit recording (FADE) ......Tracks are recorded in sequence starting with the first track on the CD. When the deck approaches the end of first side of the tape in the middle of a tune, the tune is faded out, the tape direction is reversed, and recording continues on the opposite side. |
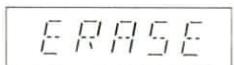
| Erase edit recording (ERASE)......If the end of the first side of the tape is reached in the middle of a tune, the incomplete tune is erased from the first side and recorded again from the beginning on the reverse side. |
| Cross-fade edit recording (CROSS)...Recording is carried out by fading out the end of each tune and fading in the beginning of the next tune so that there is no break between tunes. |
| Normal edit recording (EDIT)......By designating the length of the tape, the tracks on the CD are automatically edited to fit within the designated recording time to prevent tunes from being cut off at the end of the tape. Up to 20 tunes can be edited and recorded. |
| AI edit recording (AI EDIT) ......When recording a CD that is longer than the length of your tape, this function fades out each tune so that all of the tunes can be recorded on one tape. |
| Multi-disc edit recording ......Tunes from several CDs can be edited and recorded on a single tape. The fade-out and cross-fade edit recording functions can be used. |
| CCRS high-speed recording ......The CD is recorded at twice the normal speed. A graphic equalizer can also be used in double-speed mode. Dolby NR recording is not possible. |
CCRS recording is possible only when the KENWOOD DP-940 CD player is connected using a system control cord.
CCRS (Computer-controlled CD Recording System)
When the CCRS key is pressed, the following operations occur automatically and recording of CD starts after them.
- The CD is played and its peak level is sampled from the disc recording level.
- The optimum tape recording level for that disc is determined from the sampled peak level and the cassette deck is set accordingly.
- The cassette deck sets automatically the optimum bias for the tape used in recording.
- The recording preparations detailed above are completed in about 90 seconds, after which actual recording starts.
- When the recording is completed (when the CD player ends playback or when the tape has been recorded), both the cassette deck and CD player enter the stop mode.
- When a graphic equalizer (optional) is connected and used during CCRS recording, the equalizer should be set between steps 1 and 2 in each of the edit recording procedures.
- The set recording level and Auto Bias level are maintained while the CCRS and AUTO BIAS indicators are lit.
- The recording level is canceled when the CD player's ▲ key is pressed, the Auto Bias level is canceled when Deck B's EJECT key is pressed, and both levels are canceled when the power is turned off.
Display during CCRS operation
| Cassette deck display | CD player display | |
| During automatic recording level setting | 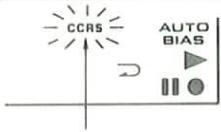 Quick blinking Quick blinking |  |
| During auto bias setting | 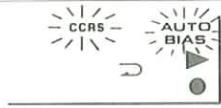 |  |
| During recording | 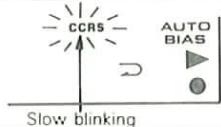 |  |
| End of recording | 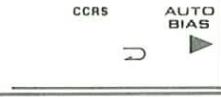 |  |
Fade-in/Fade-out
Fade-in refers to the gradual volume increase from a small level to the normal level used in beginning of music, and fade-out refers to the gradual volume decrease from the normal level to a small level used in ending of music.

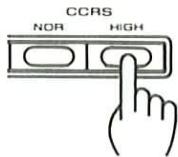
CCRS high-speed recording
In this mode, recording is carried out while the CD player and cassette deck run at twice their normal speeds. Recording time is cut to about half the normally required recording time. At this time, however, since the CD sound is played at twice the normal speed and pitch, you cannot enjoy the music while it is being recorded even if you monitor the sound from the speakers. When using the effect of the graphic equalizer during high-speed recording, be sure to select one of the preset equalizer patterns R1-R5. (GE-940, GE-540)
In double-speed recording, tunes are recorded onto the tape without DOLBY NR effect. So playback the tape without DOLBY NR effect.
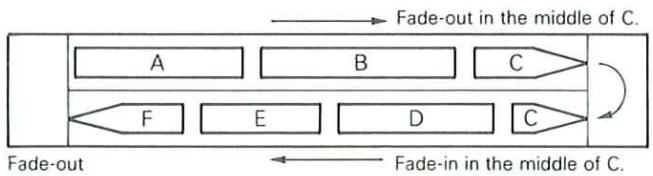
■ Fade-out edit recording (FADE)
The music is faded out and faded back in at the point where the tape reverses direction.
1 Prepare Deck B for recording.
① Load a tape.
Blank tape
② Make sure the transport direction is set correctly.
③ Select one-side or two-side recording.
⊃: Two-side recording
→: One-side recording
④ Select the desired DOLBY NR setting.
2 Set the input selector to CD.
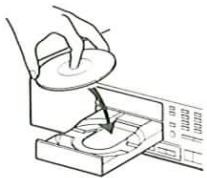
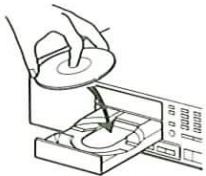
3 Load a disc into the CD player.
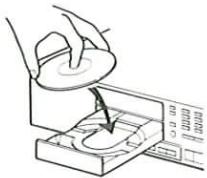
4 Select the CD playback mode.
TRACK mode: Tunes are recorded in the order of their track numbers. PGM mode: Tunes are recorded in the programmed order.
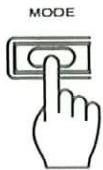
5 Set the cassette deck to FADE mode.
Press the MODE key.
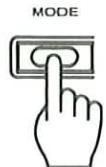

The display changes each time the MODE key is pressed.
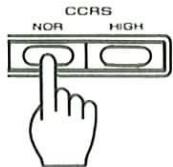
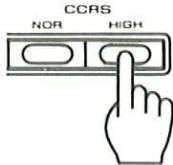
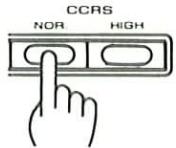
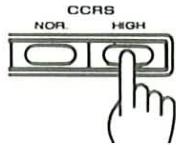
6 Press the CCRS key.
For normal-speed recording
For high-speed recording
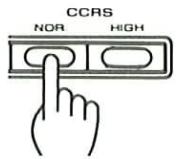
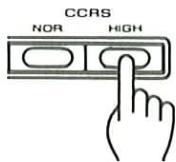
- HIGH or NOR. is displayed in the display.
Recording is carried out as shown below.
flowchart
graph TD
    A["A"] --> B["B"]
    B --> C["C"]
    C --> D["D"]
    D --> E["E"]
    E --> F["F"]
    F --> G["C"]
    G --> H["D"]
    H --> I["E"]
    I --> J["F"]
    style A fill:#f9f,stroke:#333
    style B fill:#f9f,stroke:#333
    style C fill:#ccf,stroke:#333
    style D fill:#cfc,stroke:#333
    style E fill:#cfc,stroke:#333
    style F fill:#fcc,stroke:#333
    style G fill:#fcc,stroke:#333
    style H fill:#fcc,stroke:#333
    style I fill:#fcc,stroke:#333
    note1["Fade-out in the middle of C."] --> A
    note2["Fade-in in the middle of C."] --> H
Notes:
- When the CCRS key is pressed during CD Playback, the playback is stopped and CCRS setting operation starts.
- Once the recording level has been set by the CCRS, it cannot be adjusted as long as the CCRS operation continues.
- The CCRS searches the peak level on a CD in a limited period of about 60 seconds. Therefore, it could happen that the optimum level cannot be adjusted, though it is a very rare case.
- If the length of a track on the CD is extremely long such as with a classical music, the CCRS cannot be used because the music cannot be fit in one side of tape. In such a case, the CD should be recorded referring to "Synchro recording of CD playback".
- When the DIRECTION MODE of the cassette deck is , the tape end processing occurs only on the A side of tape.
- When the remaining length of a tape is short, the erase recording may be carried out at the end of the tape.
- When the tune being recorded at the end of the tape is to be faded out, the ending part of the previous tune may also be faded out if the space between the tunes is short. In such a case, record it after pressing the SPACE key on the CD player.
■ Erase edit recording (ERASE)
At the point where the tape reverses direction, the tune which was cut off in middle on the first side is erased and re-recorded from the beginning on the reverse side.
1 Prepare Deck B for recording.
① Load a tape.
② Make sure the transport direction is set correctly.
③ Select one-side or two-side recording. DIRECTION

⊃: Two-side recording
→: One-side recording
④ Select the desired DOLBY NR setting.
2 Set the input selector to CD.
3 Load a disc into the CD player.
4. Select the CD playback mode.
TRACK mode: Tunes are recorded in the order of their track numbers. PGM mode: Tunes are recorded in the programmed order.
5 Set the cassette deck to ERASE mode.
Press the MODE key.

The display changes each time the MODE key is pressed.
6 Press the CCRS key.
For normal-speed recording
For high-speed recording
- HIGH or NOR. is displayed in the display.
Recording is carried out as shown below.
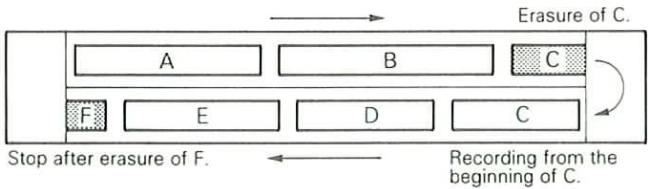
flowchart
graph TD
    A["Erasure of C."] --> B["A"]
    B --> C["B"]
    C --> D["C"]
    D --> E["E"]
    E --> F["D"]
    F --> G["C"]
    G --> H["F"]
    H --> I["Stop after erasure of F."]
    I --> J["Recording from the beginning of C."]
    style A fill:#f9f,stroke:#333
    style B fill:#f9f,stroke:#333
    style C fill:#f9f,stroke:#333
    style D fill:#f9f,stroke:#333
    style E fill:#f9f,stroke:#333
    style F fill:#f9f,stroke:#333
    style G fill:#f9f,stroke:#333
    style H fill:#f9f,stroke:#333
    style I fill:#f9f,stroke:#333
    style J fill:#f9f,stroke:#333
Notes:
- When the CCRS key is pressed during CD Playback, the playback is stopped and CCRS setting operation starts.
- Once the recording level has been set by the CCRS, it cannot be adjusted as long as the CCRS operation continues.
- The CCRS searches the peak level on a CD in a limited period of about 60 seconds. Therefore, it could happen that the optimum level cannot be adjusted, though it is a very rare case.
- If the length of a track on the CD is extremely long such as with a classical music, the CCRS cannot be used because the music cannot be fit in one side of tape. In such a case, the CD should be recorded referring to "Synchro recording of CD playback".
- When the DIRECTION MODE of the cassette deck is , the tape end processing occurs only on the A side of tape.
- When the tune being recorded at the end of the tape is to be erased, the ending part of the previous tune may also be erased if the space between the tunes is short. In such a case, record it after pressing the SPACE key on the CD player.
■ Cross-fade edit recording (CROSS)
Adjacent tunes are overlapped and connected by fading out the previous tune and fading in the next tune so that there are no blanks between tunes.
1 Prepare Deck B for recording.
① Load a tape.
② Make sure the transport direction is set correctly.
③ Select one-side or two-side recording. DIRECTION
⊃: Two-side recording
→: One-side recording
④ Select the desired DOLBY NR setting.
2 Set the input selector to CD.
3 Load a disc into the CD player.
4 Select the CD playback mode.
TRACK mode: Tunes are recorded in the order of their track numbers. PGM mode: Tunes are recorded in the programmed order.
5 Set the cassette deck to CROSS mode.
Press the MODE key.
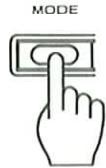
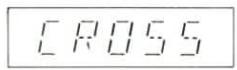

The display changes each time the MODE key is pressed.
6 Press the CCRS key.
For normal-speed recording
For high-speed recording
- HIGH or NOR. is displayed in the display.
Recording is carried out as shown below.
flowchart
graph TD
    A["Recording interrupted in the middle of C."] --> B["Stop in the middle of E."]
    B --> C["Recording from the beginning of C."]
    style A fill:#f9f,stroke:#333
    style B fill:#f9f,stroke:#333
    style C fill:#f9f,stroke:#333
    subgraph Middle_C
        A1["A"] --> A2["B"] --> A3["C"]
        A4["E"] --> A5["D"] --> A6["C"]
    end
    subgraph Middle_E
        B1["E"] --> B2["D"] --> B3["C"]
    end
- Fade-out processing is not carried out at the end of the tape.
Notes:
- When the CCRS key is pressed during CD Playback, the playback is stopped and CCRS setting operation starts.
- Once the recording level has been set by the CCRS, it cannot be adjusted as long as the CCRS operation continues.
- The CCRS searches the peak level on a CD in a limited period of about 60 seconds. Therefore, it could happen that the optimum level cannot be adjusted, though it is a very rare case.
- If the length of a track on the CD is extremely long such as with a classical music, the CCRS cannot be used because the music cannot be fit in one side of tape. In such a case the CD should be recorded referring to "Synchro recording of CD playback".
- If tunes that fade in and fade out at the beginning and end are recorded using the cross-fade recording function, spaces between recorded tunes may become very long.
- The cross-faded parts of some tunes may not be clear. In such a case, record with another edit recording.
■ Normal edit recording (EDIT)
By designating the length of the tape, the tracks on the CD are automatically edited to fit within the designated recording time to prevent tunes from being cut off at the end of the tape.
1 Prepare Deck B for recording.
① Load a tape.
② Make sure the transport direction is set correctly.
③ Select the size be recorded.

⊃: Select two-side recording.

④ Select the desired DOLBY NR setting.


2 Set the input selector to CD.
3 Load a disc into the CD player.
- When using the SPACE key function, press the SPACE key before step 4.
- When you wish to program tunes, carry out the programming before step 5.
4 Set the CD edit mode to EDIT.
EDIT MODE


The mode changes each time the key is pressed.
- After selecting EDIT mode, input the data for step 5 within 8 seconds. If more than 8 seconds elapse before the next step is carried out, select EDIT mode one more time.
- The playback mode is automatically set to PGM.
5 Input the recording length of the tape.
Input the length using the CD player's numeric keys.
For C-60 tapes: Press +10 six times and 20/0 once.
For C-46 tapes: Press +10 four times and 6 once.
- You can select 46, 54, 60, or 90 by pressing the TIME key. At this time, press the EDIT MODE key again.
- Tunes on the CD are automatically edited for sides A and B. When editing is completed, the blinking EDIT indicator stops blinking and lights steadily.
- If a number of tunes are programmed beforehand, those tunes are given priority during editing.
- If you press the EDIT MODE key after the EDIT indicator stops blinking, "SHUFFLE" will appear on the display and the tunes will be re-edited.
6 Select the desired mode of the cassette deck.
- When CROSS mode is selected, the CROSS-FADE recording is possible.
- If the input time is longer than the time of a tape, the tune at the end of the tape will be faded-out in the FADE mode and the tune at the end of the tape will be erased in the ERASE mode.
7 Press the CCRS key.
For normal-speed recording
For high-speed recording
- HIGH or NOR. is displayed in the display.
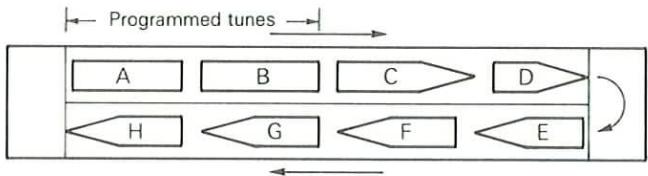
Recording is carried out as shown below.
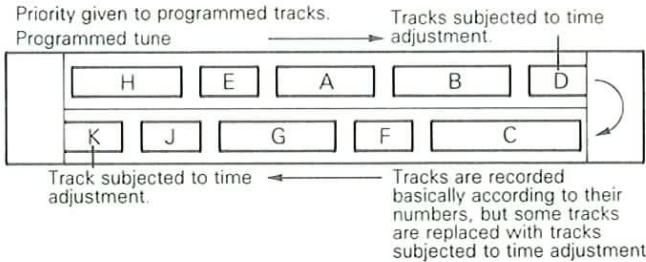
flowchart
graph TD
    A["Programmed tune"] --> B["Track subjected to time adjustment."]
    B --> C["Track subjected to time adjustment."]
    C --> D["Track subjected to time adjustment."]
    D --> E["Track subjected to time adjustment."]
    E --> F["Track subjected to time adjustment."]
    F --> G["Track subjected to time adjustment."]
    G --> H["Track subjected to time adjustment."]
    H --> I["Track subjected to time adjustment."]
    I --> J["Track subjected to time adjustment."]
    J --> K["Track subjected to time adjustment."]
    K --> L["Track subjected to time adjustment."]
    L --> M["Track subjected to time adjustment."]
    M --> N["Track subjected to time adjustment."]
    N --> O["Track subjected to time adjustment."]
    O --> P["Track subjected to time adjustment."]
    P --> Q["Track subjected to time adjustment."]
    Q --> R["Track subjected to time adjustment."]
    R --> S["Track subjected to time adjustment."]
    S --> T["Track subjected to time adjustment."]
    T --> U["Track subjected to time adjustment."]
    U --> V["Track subjected to time adjustment."]
    V --> W["Track subjected to time adjustment."]
    W --> X["Track subjected to time adjustment."]
    X --> Y["Track subjected to time adjustment."]
    Y --> Z["Track subjected to time adjustment."]
- Operation automatically stops when recording ends.
■ AI edit recording (AI EDIT)
When the length of the CD you wish to record is longer than the recording length of the tape, this function fades out (shortens) the last part of each tune so that all of the tunes fit on the tape. You can designate which tunes you do not want shortened.
1 Prepare Deck B for recording.
① Load a tape.
Blank tape
② Make sure the transport direction is set correctly.
③ Select the sides to be recorded. DIRECT
⊃: Select two-side recording.
④ Select the desired DOLBY NR setting.

2 Set the input selector to CD.
3 Load a disc into the CD player.
- When you wish to program tunes, carry out the programming before step 5.
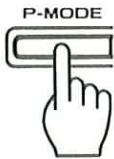
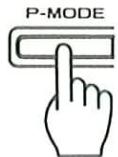
4 Select the tunes you do not want shortened.
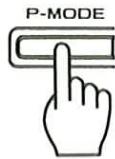
① Press the P-MODE key.
PGM lights.

② Enter the selected track numbers using the numeric keys.
- Input all of the selected track numbers in the desired order.
- For details, refer to "Programmed play" in DP-940 instruction manual.
5 Set the CD edit mode to AI EDIT.
EDIT MODE


The mode changes each time the key is pressed.
- After selecting AI EDIT mode, input the data for step 6 within 8 seconds. If more than 8 seconds elapse before the next step is carried out, select AI EDIT mode one more time.
- The playback mode is automatically set to PGM.
6 Input the recording length of the tape.
Input the length using the CD player's numeric keys.
For C-60 tapes: Press +10 six tir es and 20/0 once.
For C-46 tapes: Press +10 four tir es and 6 once.
- You can select 46, 54, 60, or 90 by pressing the TIME key. At this time, press the EDIT MODE key again.
- Tunes on the CD are automatically edited for sides A and B. When editing is completed, the blinking EDIT indicator stops blinking and lights steadily.
7 Press the CCRS key.
For normal recording
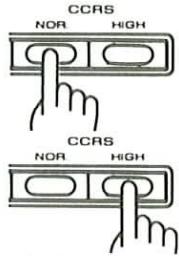
For high-speed recording
- HIGH or NOR. is displayed in the display.
Recording is carried out as shown below.
flowchart
graph LR
    A["A"] --> B["B"]
    B --> C["C"]
    C --> D["D"]
    D --> E["E"]
    E --> F["F"]
    F --> G["G"]
    G --> H["H"]
    H --> A
- Programmed tunes are given priority and are not shortened by the fade-out process. Other tunes are shortened by having their last parts faded out during recording.
- If there is enough room on the tape, all of the tunes are recorded all the way to the end without being shortened.
- Operation automatically stops when recording is completed.
Notes:
- When AI EDIT mode is selected, it is not necessary to select the mode of the cassette deck using the MODE key. The unit automatically enters fade-out mode regardless of the selected mode of the cassette deck.
- If the length of the tape is very short compared to the CD, automatic editing may not be carried out or programmed tunes may be shortened.
- The SPACE key and REPEAT key do not function.
- Programmed track numbers of 44 or greater cannot be edited.
■ Multiple-disc edit recording (MULTI EDIT)
Tunes from several CDs can be edited and recorded on a single tape, with up to 20 tunes edit-recorded from a single disc.
1 Prepare Deck B for recording.
① Load a tape.
② Make sure the transport direction is set correctly.
③ Select the sides to be recorded.
⊃: Select two-side recording.
④ Select the desired DOLBY NR setting.
2 Set the input selector to CD.
3 Load a disc into the CD player.
- When you wish to program tunes, carry out the programming before step 5.
4 Set the CD edit mode to MULTI EDIT.
EDIT MODE

The mode changes each time the key is pressed.
- After selecting MULTI EDIT mode, input the data for step 5 within 8 seconds. If more than 8 seconds elapse before the next step is carried out, select MULTI EDIT mode one more time.
- The playback mode is automatically set to PGM.
5 Input the recording length of the tape.
Input the length using the CD player's numeric keys.
For C-60 tapes: Press +10 six times and 20/0 once.
For C-46 tapes: Press +10 four times and 6 once.
- You can select 46, 54, 60, or 90 by pressing the TIME key. At this time, press the EDIT MODE key again.
- The EDIT indicator stops blinking and lights steadily, the unit enters program input standby mode, and the amount of recording time available on side A is shown on the display.
6 Select the desired mode of the cassette deck.
MODE

- When CROSS mode is selected, the CROSS-FADE recording is possible.
- If the input time is longer than the time of a tape, the tune at the end of the tape will be faded-out in the FADE mode and the tune at the end of the tape will be erased in the ERASE mode.
7 Select the tunes you wish to record.
Using the CD player's numeric keys, input the track numbers of the tunes you wish to record in the desired order.
- The TOTAL TIME display shows the remaining time left on side A or B.
- When FADE is displayed while inputting track Nos. in [CROSS] mode, stop inputting then and press the CCRS key. When recording of side A is completed, then input the track Nos. for side B.
- When "FULL" appears on the display, no more tunes can be programmed.

8 Press the CCRS key.
For normal-speed recording
For high-speed recording
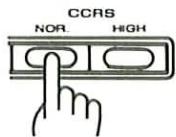
- HIGH or NOR. is displayed in the display.
Recording is carried out as shown below (example for when tunes are recorded from three CDs).
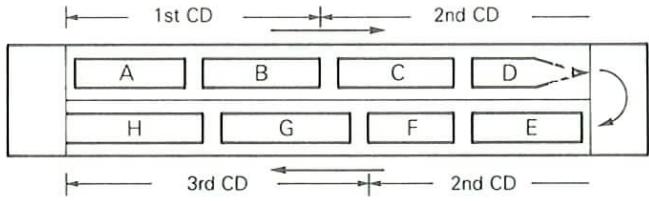
flowchart
graph TD
    A["Block A"] --> B["Block B"]
    B --> C["Block C"]
    C --> D["Block D"]
    D --> E["Block E"]
    E --> F["Block F"]
    F --> G["Block G"]
    G --> H["Block H"]
    H --> I["Block I"]
    I --> J["1st CD"]
    J --> K["2nd CD"]
    style A fill:#f9f,stroke:#333
    style B fill:#f9f,stroke:#333
    style C fill:#f9f,stroke:#333
    style D fill:#f9f,stroke:#333
    style E fill:#f9f,stroke:#333
    style F fill:#f9f,stroke:#333
    style G fill:#f9f,stroke:#333
    style H fill:#f9f,stroke:#333
    style I fill:#f9f,stroke:#333
    style J fill:#f9f,stroke:#333
    style K fill:#f9f,stroke:#333
    style L fill:#f9f,stroke:#333
- When the selected tunes from the first CD finish recording, both the CD player and the cassette deck stop. The CD player's disc tray opens automatically.
- To record the second and third CDs, repeat steps 7 and 8 after changing the CDs and closing the tray of the CD player referring to the key message displayed in the cassette deck display window.
Notes:
- In step 7, the CD player's display shows "FAdE" and the end of the selected tune which is longer that the preset time is faded out.
- Programmed track numbers of 44 or greater cannot be edited.
- The SPACE key and REPEAT key do not function.
■ To check the edited contents
Press the CD player's CHECK key.
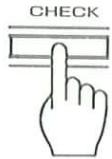
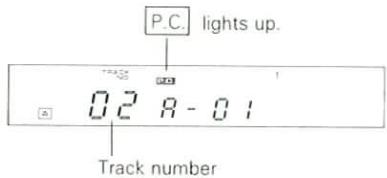
- The edited track numbers are displayed in sequence each time the key is pressed.
- During MULTI EDIT recording, only the edited tunes for the current disc are displayed.
■ To delete the edited contents
To delete the edited tunes one by one starting with the last tune (Only in MULTI EDIT mode)
Press the CD player's CLEAR key.
- The last tune in the edited sequence is deleted each time the CLEAR key is pressed.
- Only the edited tunes for the current disc are deleted.
To delete all of the edited tunes at once
Press one of the following two keys on the CD player.

- During MULTI EDIT recording, only the edited tunes for the current disc are deleted.
■ Using the CD REC key
This function allows you to listen to another music source while recording a CD.
1 Press the CD REC key of the amplifier.
2 Start recording the CD.
- Refer to "Synchro recording of CD playback" and "Recording of CD playback (CCRS)".
3 Press one of the input select keys of the amplifier to select the source to be listened.

To cancel the CD REC function
Press the key again.
Note: After CD REC recording, be sure to press the CD REC key to turn CD REC off.
The dubbing refers to the copy of the recorded contents of a tape to another tape (tape in Deck A → tape in Deck B).
Normal-speed dubbing: Copy at normal tape speed. High-speed dubbing: Copy at double the normal speed.
1 Insert tapes in the cassette decks.
Tape to be played in Deck A
Tape to be recorded onto in Deck B
Initial tape transport directions
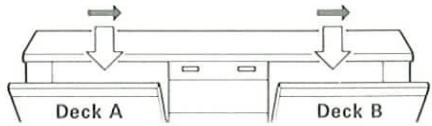
2 Set the same tape transport direction for both decks.
Refer to page 25.

3 Select one-way or two-way dubbing mode.
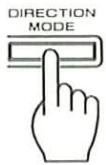
The mode changes each time the key is pressed.
flowchart
graph TD
    A[" "] --> B{Two-way dubbing}
    B --> C[" "]
    C --> D[": One-way dubbing"]
4 Press the AUTO BIAS key.
- The optimum bias is set in about 45 seconds, after which the cassette deck enters the stop mode.
5 Start dubbing.
For normal-speed dubbing

For high-speed dubbing
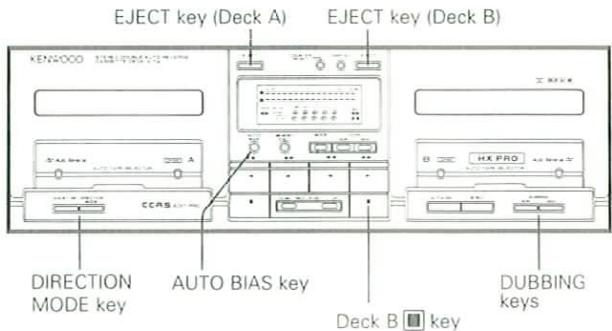
To stop dubbing
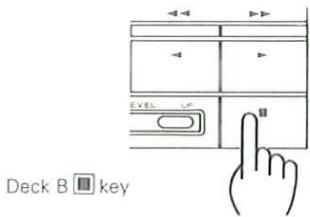
- Both decks A and B enter the stop mode.
■ To pause dubbing
Normal-speed dubbing: Press the NOR. key. Double-speed dubbing: Press the HIGH key.
- Deck B enters the record-pause mode after leaving a non-recorded space of about 4 seconds in case of normal-speed dubbing, or about 6 seconds in case of high-speed dubbing.
- To skip tunes you do not dub on another tape during dubbing, press the ▶▶ key of deck A.
- To resume dubbing after pause, press the same DUBBING key as above (NOR. or HIGH key) again.
Notes:
- The recording level cannot be adjusted during dubbing.
- The system is deactivated during dubbing operation with the result that the dubbed version features the same noise reduction as the original.
- Noise from TV may interfere with dubbed sound if high-speed dubbing is executed near a TV set. To prevent this, install the system further from the TV set.
- If the original tape was recorded at a high level, the sound quality may be degraded if high speed dubbing is used. In such a case, use normal speed dubbing.
This system's timer is provided with the following functions.
| Program Timer | : The power turns on at the ON time and then turns off at the OFF time after a broadcast is received or recorded or a tape or CD is played. Up to six programs can be made for setting ON/OFF times. The Program Timer can be used in conjunction with the AI TIMER functions. |
| AI TIMER 1 | : After the power is turned on at the ON time, the sound volume is raised in three steps to provide a wake-up effect. |
| AI TIMER 2 | : After the power is turned on at the ON time, two tracks from a CD are played and then operation automatically switches to the tuner so that a broadcast is received. |
| Sleep timer | : By setting this timer before you go to bed, the power is automatically turned off when the set time is reached. |
| One-touch timer | : The power is automatically turned on at a convenient time within a 12-hour period. This timer can be used in conjunction with the AI TIMER functions. |
| Calendar check | : If you input date figures for the year, month, and day, indicators on the display show which day of the week corresponds to the input date. |
- Read the following pages for instructions on how to set the timer.
- Program contents can be freely changed.
- Even if a program has been input, the timer will not operate until you the instruct it to execute the program.
- Turn off the AI TIMER when not in use. If left on, it will operate in conjunction with all of the programs executed on that day.
- Once a program is entered, it is not possible to completely delete the program contents. Previous program contents are erased when the program contents are changed.
- Make programs so that their respective ON/OFF times do not overlap.
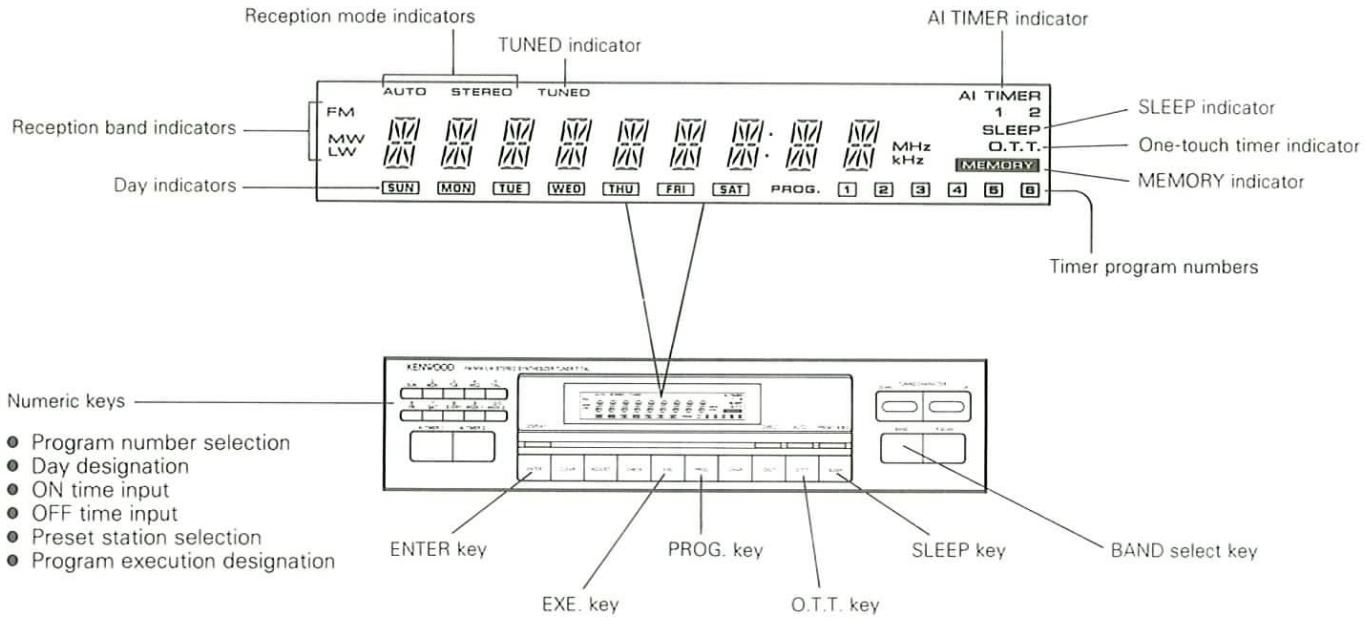
Days of the week specified using the numeric keys.
- If program execution is designated, the program will execute once only on the specified day.
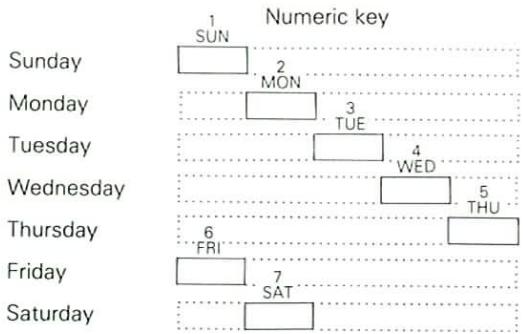
bar
| Day | Numeric key | |---|---| | Sunday | 1 SUN | | Monday | 2 MON | | Tuesday | 3 TUE | | Wednesday | 4 WED | | Thursday | 5 THU | | Friday | 6 FRI | | Saturday | 7 SAT |- If you want the timer to execute at the same time the following week, you must re-instruct the program to execute.
- If program execution is designated, the program will execute repeatedly every week.
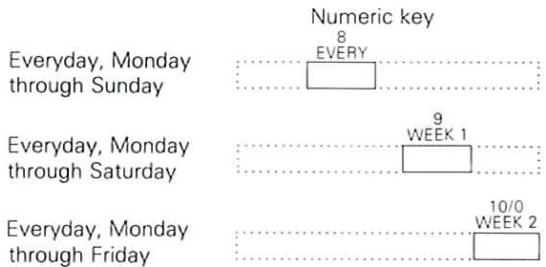
bar
| Day | Numeric key | |---|---| | Everyday, Monday through Sunday | 8 | | Everyday, Monday through Saturday | 9 | | Everyday, Monday through Friday | 10/0 | | (Not labeled) | EVERY | | (Not labeled) | WEEK 1 | | (Not labeled) | WEEK 2 |- When you do not want the timer to operate, cancel program execution.
■ Receiving a broadcast using the program timer
1 Turn on the power.
Press the POWER key of the amplifier.
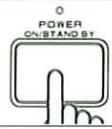
2 Set the system to program setting mode.

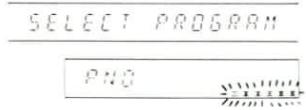
- The program numbers (1-6) blink on the display.
3 Select the desired program number.
Select a number from 1 to 6.
Press within 10 seconds.
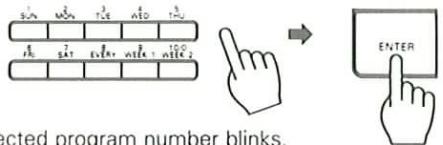
- Designate the day using the numeric keys.
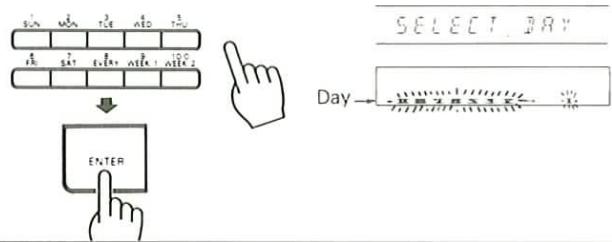
5 Input the ON time using the numeric keys.
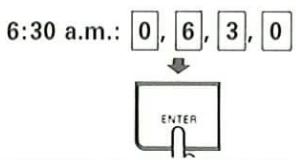
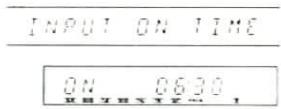
6 Input the OFF time using the numeric keys.

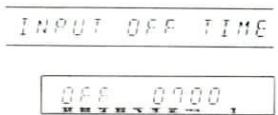
7 Set the mode to PLAY.
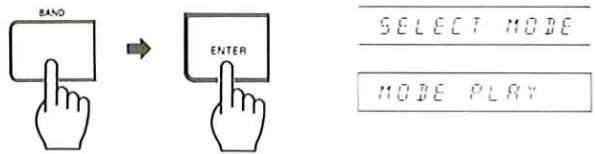
The mode switches between PLAY and REC each time the BAND key is pressed.
8 Select TUNER.
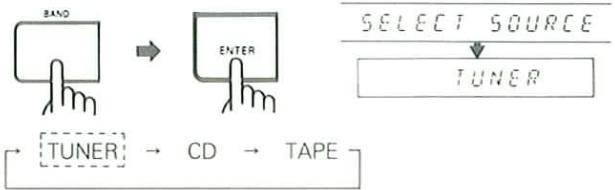
flowchart
graph TD
    A["BAND"] --> B["ENTER"]
    B --> C["TUNER"]
    C --> D["CD"]
    D --> E["TAPE"]
    F["SELECT SOURCE"] --> G["TUNER"]
The input source changes each time the BAND key is pressed.
9 Select the preset channel of the station to be received.

flowchart
graph TD
    A["PRESET A/B C"] --> B["Select PreSET"]
    B --> C["81 9250-"]
    C --> D["END"]
- Be sure to preset the station beforehand.
10 Execute the program.
①
SELECT PROGRAM
② Select the set program number using the numeric keys.
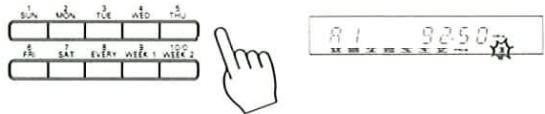
- The selected program number lights up.
11 Adjust the sound volume and tone controls.
12 Turn off the power.
Press the POWER key of the amplifier.
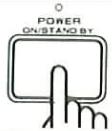
If you want to cancel the program and continue receiving the broadcast after the timer turns the power on:
① Press the CLEAR key before the OFF time is reached.
② Press the numeric key corresponding to the number of the executing program.
- When the program number is extinguished, the broadcast will continue to be received without interruption.
Notes:
- If you make a mistake in the middle of creating a program, press the CLEAR key and carry out the operation again.
- To make a change in a program after it has been set, re-input the program from the beginning.
- In step 3, if you select a program number which already contains a program, the old program will be replaced by the new one.
- If the CLEAR key or POWER key is pressed after the power has been turned on by the timer, the system will not operate normally.
■ Playing a CD using the program timer
1 Turn on the power.
Press the POWER key of the amplifier.
2 Set the system to program setting mode.

- The program numbers (1-6) blink on the display.

3 Select the desired program number.
Select a number from 1 to 6.
Press within 10 seconds.
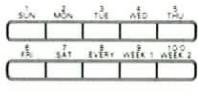

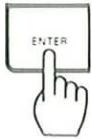
- The selected program number blinks.
4. Designate the day using the numeric keys.
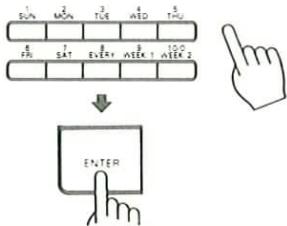
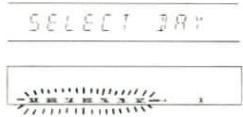
5 Input the ON time using the numeric keys.
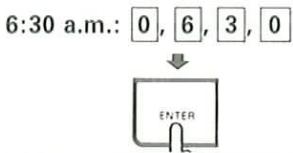
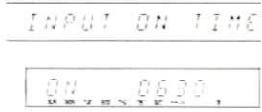
6 Input the OFF time using the numeric keys.
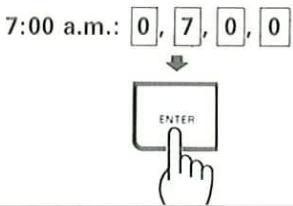
7 Set the mode to PLAY.
The mode switches between PLAY and REC each time the BAND key is pressed.
8 Select CD.
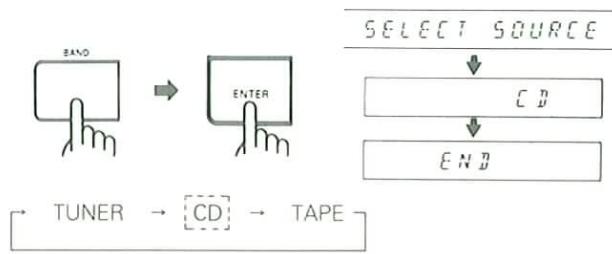
flowchart
graph TD
    A["BAND"] --> B["ENTER"]
    C["TUNER"] --> D["CD"]
    D --> E["TAPE"]
    F["SELECT SOURCE"] --> G["CD"]
    G --> H["END"]
The input source changes each time the BAND key is pressed.
9 Load a disc into the CD player.
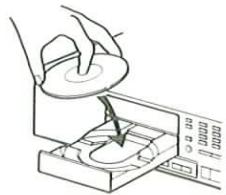
natural_image
Illustration of a hand using a tool to press or install a device into a tray (no text or symbols visible)- It is not possible to preset a CD playback program.
10 Execute the program.
①
SELECT PROGRAM
② Select the set program number using the numeric keys.
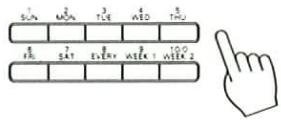
81 9250
- The selected program number lights up.
11 Adjust the sound volume and tone controls.
12 Turn off the power.
Press the POWER key of the amplifier.
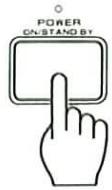
Notes:
- If you make a mistake in the middle of creating a program, press the CLEAR key and carry out the operation again.
- To make a change in a program after it has been set, re-input the program from the beginning.
- In step 3, if you select a program number which already contains a program, the old program will be replaced by the new one.
- If the CLEAR key or POWER key is pressed after the power has been turned on by the timer, the system will not operate normally.
■ Playing a tape using the program timer
1 Turn on the power.
Press the POWER key of the amplifier.
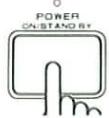
2 Set the system to program setting mode.
- The program numbers (1-6) blink on the display.
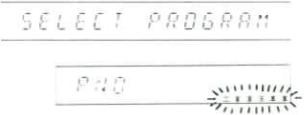
3 Select the desired program number.
Select a number from 1 to 6.
Press within 10 seconds.
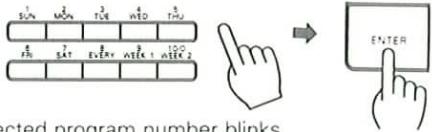
- The selected program number blinks.
4 Designate the day using the numeric keys.
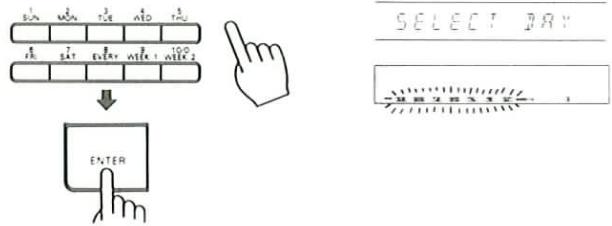
5 Input the ON time using the numeric keys.
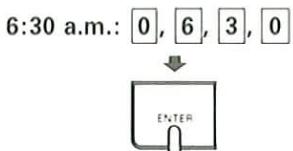
6 Input the OFF time using the numeric keys.
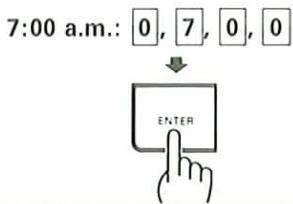
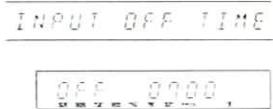
7 Set the mode to PLAY.
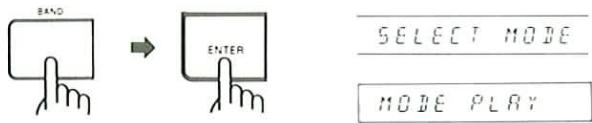
The mode switches between PLAY and REC each time the BAND key is pressed.
8 Select TAPE.
flowchart
graph TD
    A["BAND"] --> B["ENTER"]
    B --> C["TUNER → CD → TAPE"]
    D["SELECT SOURCE"] --> E["TAPE"]
    E --> F["END"]
The input source changes each time the BAND key is pressed.
9 Load a tape into the cassette deck and determine the playback conditions.
Select the sides to be played and the DOLBY NR setting.
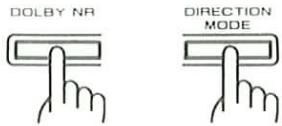
- Timer playback is possible with either Deck A or Deck B. However, if tapes are placed in both decks, playback will begin from Deck A.
10 Execute the program.
①
SELECT PROGRAM
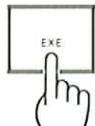
② Select the set program number using the numeric keys.

- The selected program number lights up.
11 Adjust the sound volume and tone controls.
12 Turn off the power.
Press the POWER key of the amplifier.
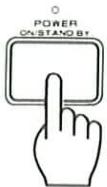
Notes:
- If you make a mistake in the middle of creating a program, press the CLEAR key and carry out the operation again.
- To make a change in a program after it has been set, re-input the program from the beginning.
- In step 3, if you select a program number which already contains a program, the old program will be replaced by the new one.
- If the CLEAR key or POWER key is pressed after the power has been turned on by the timer, the system will not operate normally.
■ Recording a broadcast using the program timer
1 Turn on the power.
Press the POWER key of the amplifier.
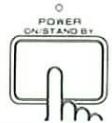
2 Set the system to program setting mode.
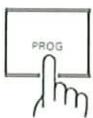
- The program numbers (1-6) blink on the display.
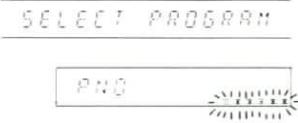
3 Select the desired program number.
Select a number from 1 to 6.
Press within 10 seconds
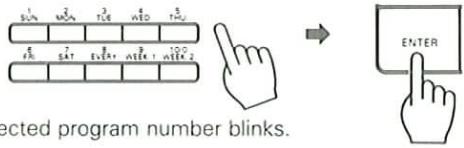
- Designate the day using the numeric keys.
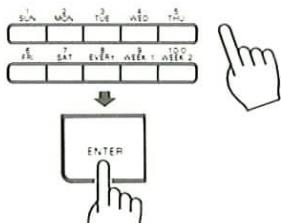
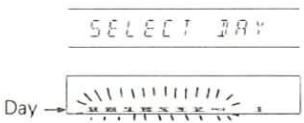
5 Input the ON time using the numeric keys.
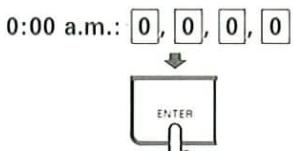
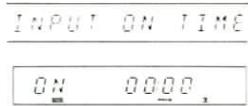
6 Input the OFF time using the numeric keys.
0:30 a.m.: 0, 0, 3, 0
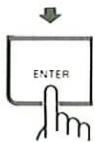
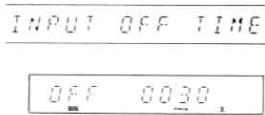
7 Set the mode to REC.
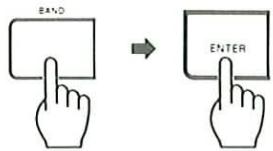
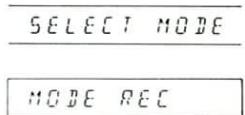
The mode switches between PLAY and REC each time the BAND key is pressed.
⑧ Select the preset channel of the station to be received.
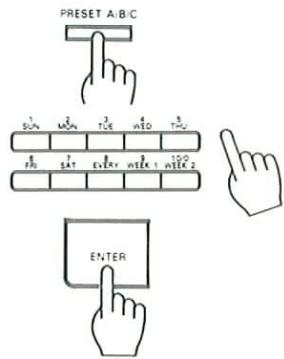
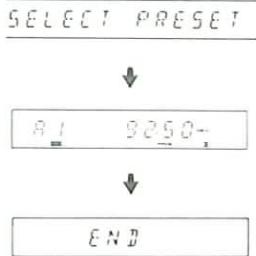
flowchart
graph TD
    A["SELECT PRESET"] --> B["A1 9250"]
    B --> C["END"]
- Be sure to preset the station beforehand using the A/B/C and numeric keys.
9 Prepare for recording.
① Load a blank tape into Deck B.
② Make sure the correct transport direction is set.
③ Select one-side or two-side recording.
④ Select the desired DOLBY NR setting.
- The auto-bias adjustment cannot be used.
10 Adjust the recording level.
11 Execute the program.
①
SELECT PROGRAM
② Select the set program number using the numeric keys.

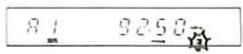
- The selected program number lights up.
12 Turn off the power.
Press the POWER key of the amplifier.
- When the power is turned ON by the timer, the volume level is automatically set to the lowest level.
Notes:
- If you make a mistake in the middle of creating a program, press the CLEAR key and carry out the operation again.
- To make a change in a program after it has been set, re-input the program from the beginning.
- In step 3, if you select a program number which already contains a program, the old program will be replaced by the new one.
- If the CLEAR key or POWER key is pressed after the power has been turned on by the timer, the system will not operate normally.
■ Checking the program contents
1 Press the PROG. key.

SELECT PROGRAM
2 Press the number of the program to be checked.

PNO
- The system will return to the original mode if the program is not designated while the program numbers are blinking.
- Each item in the program is displayed for approximately three seconds.
■ Canceling execution of a program
1 Press the CLEAR key.

SELECT PROGRAM
2 Delete the program number you do not want to execute.
Select the program number using the numeric keys.

The program number
81 9250-
- Canceling execution of a program does not erase the program contents.
Reactivating the timer
Since the program is still in memory, all you have to do besides confirming the program contents is carry out the operations starting with the "Execute the program" step.
① Press the EXE. key.
② Use the numeric keys to select the program number to execute.
③ When using the timer to receive a broadcast or play a CD or tape, adjust the sound volume and tone controls.
④ Turn off the power.
■ Using the one-touch timer
By just pressing a key, you can have the timer turn on the power at any desired time set in units of 30 minutes. The one-touch timer has priority over the Program Timer.
1 Set the ON time.
Press the O.T.T. key.
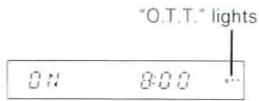
The ON time is displayed. 30 minutes is added to the ON time each time the key is pressed.
- When the key is pressed once, the timer sets a convenient time within 30 minutes from the current time. (Example: 7:40 → 8:00)
- The ON time is set in 30-minute intervals, such as 0:00, 0:30, 1:00, 1:30, etc.
- The ON time can be set up to 12 hours from the current time.
- The one-touch timer can be set even when the power is off.
2 Turn off the power.
Press the POWER key of the amplifier.
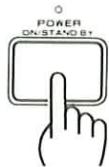
- You can check the ON time by pressing the O.T.T. key once.
- When the power turns on, the sleep timer is automatically set to 60.
- When the power turns on, the tuner receives the station you were last listening to.
To cancel the one-touch timer
Turn on the power.
or
Press the O.T.T. key until the O.T.T. indicator goes out.
If you press one of the AI TIMER keys after setting the time for the program timer, the functions described below will be added to the program timer operation.
Neither AI TIMER 1 nor AI TIMER 2 will operate during timer recording.
Using AI TIMER 1
When the power is turned on by the program timer, the sound volume of the activated component increases in three steps.
1 Complete the Program Timer setting.
Turn off the power to the amplifier.
2 Press the AI TIMER 1 key.
- The AI TIMER 1 indicator lights up.
Select the maximum volume setting.

- The maximum volume setting changes each time the key is pressed. When you remove your hand, the indicator goes out and the maximum volume setting set at that time is stored in memory.
To cancel AI TIMER 1
Press the AI TIMER 1 key and select "OFF".
- The AI TIMER 1 indicator goes off.
Reference for volume selection
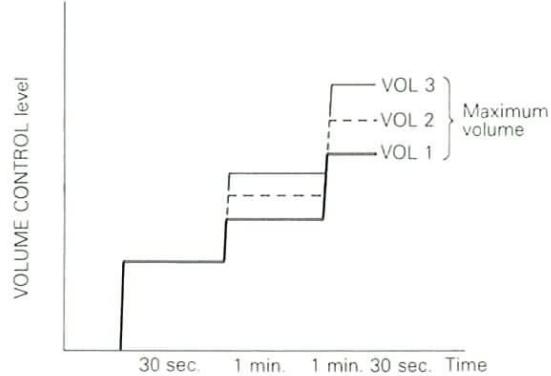
line
| Time | VOLUME CONTROL level | | ------------- | -------------------- | | 30 sec | VOLUME CONTROL level | | 1 min. | VOLUME CONTROL level | | 1 min. | VOLUME CONTROL level | | 30 sec. | VOLUME CONTROL level | | Maximum volume | VOLUME CONTROL level |- The VOLUME CONTROL knob rotates as the volume level changes.
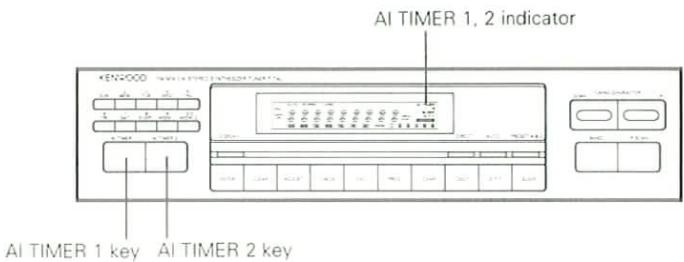
Using AI TIMER 2
When the power is turned on by the program timer, two CD tracks are played and then the input source automatically switches to the tuner to receive a broadcast. This function has priority over other program timer settings.
1 Load a disc into the CD player.
2 Select the desired station.
- Refer to "Receiving a preset station" on page 21.
3 Carry out the "Playing a CD using the program timer" procedure.
• See page 42.
- Press the AI TIMER 2 key.
- The AI TIMER 2 indicator lights up.
- If you want the sound volume to increase in three steps, press the AI TIMER 1 key.
To cancel AI TIMER 2
Press the AI TIMER 2 key again.
- The AI TIMER 2 indicator goes off.
Notes:
-
When the operation keys of the graphic equalizer or the MASTER VOLUME key on the remote control unit is pressed while the AI TIMER 1 function is carried out, the volume is fixed at the level being set.
-
If the input selector is set to a position such as TUNER or TAPE while the CD is playing during AI TIMER 2 execution, CD playback stops at that point and AI TIMER 2 is canceled.
-
If a CD player operation key is pressed while the CD is playing during AI TIMER 2 execution, CD playback stops at that point and AI TIMER 2 is canceled.
-
If you forget to load a disc into the CD player, CD playback is skipped and broadcast reception occurs.
-
Even after Program Timer operation finishes, the AI TIMER 1 and 2 indicators do not go out. When not using AI TIMER 1, be sure to turn it off so that the indicator goes out.
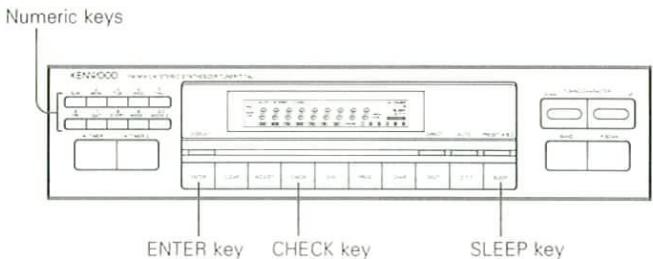
■ Using the sleep timer
The power turns off automatically when the set time is reached. This function is convenient for use when you go to bed.
The time period before the power turns off can be set in 10-minute intervals up to 90 minutes.
The sleep timer has priority over other timers.
1 Turn on the power.
Press the POWER key of the amplifier.
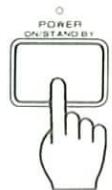
2 Set the number of minutes you want the timer to wait before turning off the power.
Press the SLEEP key.
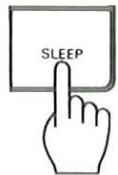


- 10 minutes is subtracted each time the key is pressed.
To cancel the sleep timer
Press the SLEEP key until the timer is canceled. Or, turn the power off.
■ Using the Calendar Check function
If you input the year, month, and day figures for a certain date, the display shows which day of the week the date falls on. Any date from January 1, 1900 to December 31, 2099 can be input.
1 Press the CHECK key.


2 Input the year using the numeric keys.
1992: 1, 9, 9, 2
3 Input the month and day using the numeric keys.
March 30: 0, 3, 3, 0
- The indicator for the day of the week corresponding to the input date lights up on the display. After several seconds, the display changes back to the original display.
What appears to be a malfunction may not always be serious. If your unit should not perform as expected, consult the table below to see if the problem can be corrected before seeking help from your dealer or service representative.
Amplifier, speakers
| Symptom | Cause | Remedy |
| Sound is not output. | The speaker cords are disconnected.The VOLUME is set to the minimum position.The MUTING key of the amplifier is set to ON and the point indicator is blinking. | Connect them properly referring to "System connections".Adjust the volume to a proper level.Press the MUTING key to OFF. |
| The input select indicator flashes and no sound comes out. | Speaker cords are short-circuited. | Turn the power off, eliminate the short-circuiting, then turn on the power again. |
| Sound is not output from one of the speakers. | The speaker cord is disconnected.The BALANCE control is set to an extreme position. | Connect it properly referring to "System connections".Adjust the Left/Right balance. |
| A hum noise is generated when the PHONO input select key is pressed. | The audio cord from the turntable is not inserted securely into the PHONO jacks.The turntable is not grounded. | Insert the audio cord plugs securely into the PHONO jacks.Connect the grounding wire to the GND terminal on the rear panel. |
Tuner
| Symptom | Cause | Remedy |
| The clock display is blinking without changing from a certain time. | There was a power failure.The power cord was unplugged. | Set the current time again.Set the current time again. |
| The timer does not work. | The current time is not set, or there was a power failure.The timer ON time and OFF time have not been set.The timer execution has not been specified. | Set the current time referring to “Time adjustment”.Set the timer ON time and OFF time.Specify execution by pressing the EXE key. |
| Radio stations cannot be received. | No antenna is connected.The broadcast band is not set properly.The frequency of the desired station is not tuned. | Connect an antenna.Set the broadcast band properly.Tune the frequency of the desired station. |
| A station which was preset cannot be received by pressing the corresponding numeric key. | The preset station belongs to a frequency that cannot be received.The preset memory was cleared because the power cord had been unplugged for a long period of time. | Preset a station with a receivable frequency.Preset the station again. |
| Interference. | Noise due to ignition noise of an automobile.Noise due to an influence from an electric appliance.Noise due to a nearby TV set. | Install the outdoor antenna apart from the road.Turn off the power of the appliance.Install the system more apart from the TV set. |
Cassette decks
| Symptom | Cause | Remedy |
| Sound is not produced when the play key is pressed. | The cords are not connected properly.The head is dirty.Tape is irregularly wound and hard to take up.A non-recorded tape is being played. | Correctly connect the cords according to the "System connections" section.Clean the head referring to "Cleaning the head section".Replace the tape.Play a recorded tape. |
| The deck does not work when an operation key is pressed. | The cassette holder is not closed completely.The operation key was pressed immediately after closing the cassette holder.The operation key was pressed within less than 3 seconds after the power was turned on.Tape is not inserted.Tape is irregularly wound and hard to take up.Tape has been fully wound to reel. | Close the cassette holder completely.Press the desired operation key in a few seconds after closing the cassette holder.Press the desired operation key in more than 3 seconds after turning the power on.Insert a tape.Replace the tape.Change the tape transport direction or insert the tape inversely. |
| DPSS malfunctions. | The tape is not suitable for DPSS operation, for example the spaces between tunes are too short. | Read "DPSS operation". |
| CCRS does not work. | A recordable tape is not inserted in Deck B.A disc is not placed in the CD player.The disc is dirty. | Insert a recordable tape in Deck B and press the CCRS key.Place a disc in the CD player and press the CCRS key.Clean the disc, place it in the CD player, and press the CCRS key. |
| The dubbing on Deck A and Deck B ends at different timing. | This is due to the difference in tape length or to the characteristics of the cassette deck mechanisms. | A small time difference is not regarded as a failure. |
| The cassette holder does not open when the EJECT key is pressed. | The key is pressed during recording or playback. | Press in the stop mode. |
| Recording is not initiated when the REC key is pressed. | The protection tab on the cassette has been broken.The cassette holder is not closed completely.The recording level is set to the minimum position.The TAPE A or B input selector is selected on the amplifier.Tape has been fully wound to a reel. | Use a cassette with unbroken tab, or close the hole.Close the cassette holder completely.Adjust the recording level referring to "Preparation for recording".Press the input selector key of the source to be recorded.Change the tape transport direction of Deck B or insert the tape inversely. |
| Sound is hoarse, or high frequencies are not audible. | The head is dirty.The tape is stretched or wrinkled. | Clean the head referring to "Cleaning the head section".Replace the tape. |
| Sound is distorted. | The recording level was too high.A tape recorded with distorted sound is being played. | Adjust the recording level referring to "Preparation for recording".Replace the tape. |
| Noise level is high. | The head is magnetized.External noise is induced.The recording level was too low.A tape recorded with DOLBY NR ON is being played with DOLBY NR OFF. | Demagnetize the head referring to "Cleaning the head section".Install the system apart from other electrical appliances and TV set.Adjust the recording level referring to "Preparation for recording".Press the DOLBY NR select key to B or C. |
| Sound is vibrating. | The capstans or pinch rollers are dirty.Tape is irregularly wound. | Clean the head referring to "Cleaning the head section".Wind the tape regularly by fast forwarding, rewinding or playing it fully from one reel to another. |
Remote control unit
| Symptom | Cause | Remedy |
| Remote control operation is not possible. | Batteries are exhausted.The flat cords and the system control cords are not connected properly.The remote control unit is too far away from the main system, controlling angle is too large, or there is an obstacle in between.The source component to be operated does not contain the analog disk, tape(s) or CD.An attempt is made to play a tape which is being recorded in the cassette deck. | Replace with new batteries.Connect properly referring to “System connections”.Operate the remote control unit within the controllable range.Place an analog disk, tape(s) or CD in the source component to be played.Wait until the recording is completed. |
Notes:
1. With some tapes, a squeaky noise is produced when the tape is stopped automatically. This is due to the tape protection function, and not a malfunction.
2. Do not use 120-minute tapes, for the tape is too thin and gets easily tangled.
3. This system is microprocessor-controlled, so malfunction may occur due to external noise or interference noise. In such a case, unplug the power cord, plug it and turn power on again.
4. Do not use contact cleaners because it could cause a malfunction. Be specially careful against contact cleaners containing oil, for they may deform the plastic components.
T-74L
FM tuner section
Tuning frequency range:..... 87.5 MHz \~ 108MHz
Usable sensitivity
(DIN at 75 Ω)
MONO: 0.6 μV
STEREO: 22 μV
Total harmonic distortion
(DIN at 1 kHz, 65.2 dBf input)
MONO: 0.2%
STEREO: 0.8%
Signal to noise ratio (DIN weighted at 1 kHz, 65.2 dBf input)
MONO: 68 dB
STEREO: 63 dB
Stereo separation
(DIN at 1 kHz):...... 42 dB
Alternate channel selectivity
(DIN ±300 kHz): 64 dB
Frequency response
(30 Hz \~ 15 kHz): ..... +0.5 dB, -3.5 dB
Output level/Impedance
(at 75 kHz dev.):.... 0.6V/3.3 kΩ
MW tuner section
Tuning frequency range:..... 531 kHz \~ 1,602 kHz
Usable sensitivity: 13 μV/500 μV/m
Signal to noise ratio (at 30% mod. 1 mV input): ... 49 dB
LW tuner section
Tuning frequency range:..... 153 kHz \~ 281 kHz
Usable sensitivity: 20 μV
Signal to noise ratio (at 30% mod. 1 mV input): ... 47 dB
General
Dimension: W: 360 mm
H: 89 mm
D: 353 mm
Weight: 3.0 kg
A-74
Continuous power output
(DIN) at 1 kHz 8 Ω:...... 70 W+70 W
(IEC/NF) at 8 Ω:....70 W+70 W
Total harmonic distortion
at 1/2 rated power: ...... 0.02%
Signal to noise ratio (IHF '66)
PHONO (MM): 76 dB
CD, TUNER, AUX, TAPE: . 98 dB
Signal to noise ratio (DIN at
50 mW output)
PHONO (MM): 58 dB
CD, TUNER, AUX, TAPE:.. 60 dB
Input sensitivity/
Impedance
PHONO (MM): 2.5 mV/47 kΩ
CD, TUNER, AUX, TAPE:.. 200 mV/47 kΩ
Frequency response
(20 Hz to 50,000 Hz):...... +0 dB, -3 dB
Tone Controls
BASS: ±10 dB (at 100 Hz)
TREBLE: ±10 dB (at 10 kHz)
Output level/impedance
TAPE REC: 200 mV/3.3 kΩ
General
Power consumption: 180 W (IEC)
Dimension: W: 360 mm
H: 129 mm
D: 375 mm
Weight (net): 7.5 kg
X-74
Type: 4 track 2 channel stereo
Heads
Playback/Record head:.... 1 (B deck)
Erasing head: 1 (B deck)
Playback head:.... 1 (A deck)
Motors: 2 (each deck)
Fast winding time: .... Approx. 90 seconds with C-60 tape
Frequency response
(B deck)
Normal tape: 30 Hz to 18,000 Hz ±3 dB
CrO_2 tape: 30 Hz to 19,000 Hz ±3 dB
Metal tape: 30 Hz to 19,000 Hz ±3 dB
Signal to noise ratio
Dolby C NR ON: 75 dB (Metal tape)
Dolby B NR ON: 67 dB (Metal tape)
Dolby NR OFF: 58 dB (Metal tape)
Harmonic distortion: .... Less than 0.8% (at 1
kHz, 0 dB, 3rd H.D.
Metal/Normal tape)
Wow and flutter: 0.08% (W.R.M.S)
±0.18% (DIN)
General
Dimension: W: 360 mm
H: 119 mm
D: 357 mm
Weight (net): 4.1 kg