
AV220 - Scanner AVISION - Notice d'utilisation et mode d'emploi gratuit
Retrouvez gratuitement la notice de l'appareil AV220 AVISION au format PDF.


| Type de produit | Scanner à alimentation automatique de documents (ADF) de bureau |
| Dimensions (L x P x H) | 162 mm x 337 mm x 167 mm |
| Poids | 3,6 kg |
| Alimentation | Adaptateur secteur 24 V, 2,0 A (réf. SA60-24) |
| Résolution optique | 600 dpi x 1200 dpi |
| Modes de numérisation | Noir et blanc, demi-teintes (64 niveaux), diffusion d'erreur, 16 bits niveaux de gris, 24 bits couleur |
| Capacité du chargeur ADF | Jusqu'à 50 pages |
| Vitesse de numérisation ADF | 25 pages par minute en simplex, 50 images par minute en duplex |
| Formats de documents supportés | Lettre, légal, A4, B5, A5, carte de visite (3,5 x 2 po à 8,5 x 14 po) |
| Poids du papier | 16 à 28 lb (60 à 105 g/m²) |
| Interface | USB 2.0 haute vitesse (compatible USB 1.1) |
| Consommation électrique | Moins de 30 W |
| Logiciels inclus | Pilote TWAIN, Roxio PhotoSuite 4 SE, ScanSoft TextBridge Pro 9.0 (OCR), AVCapture |
| Systèmes d'exploitation supportés | Windows 98/98SE/Me/2000/XP |
| Nettoyage | Nettoyer les rouleaux d'alimentation et la zone de calibrage avec de l'alcool isopropylique à 95 % |
| Pièces d'usure | Module de tampon d'alimentation (remplacement après environ 20 000 pages) |
| Conformité | FCC Classe B, CE (EN 50081-1, EN 55022 Classe B) |
| Garantie constructeur | Garantie limitée (voir document) |
FOIRE AUX QUESTIONS - AV220 AVISION
Questions des utilisateurs sur AV220 AVISION
0 question sur cet appareil. Repondez a celles que vous connaissez ou posez la votre.
Poser une nouvelle question sur cet appareil
Téléchargez la notice de votre Scanner au format PDF gratuitement ! Retrouvez votre notice AV220 - AVISION et reprennez votre appareil électronique en main. Sur cette page sont publiés tous les documents nécessaires à l'utilisation de votre appareil AV220 de la marque AVISION.
MODE D'EMPLOI AV220 AVISION
AV220 User's Manual
Avision Inc.
Trademarks
Microsoft is a U.S. registered trademark of Microsoft Corporation.
Windows and MS-DOS are trademarks of Microsoft Corporation.
IBM, PC, AT, XT are registered trademarks of International Business Machines Corp.
Other brands and product names herein are trademarks or registered trademarks of their respective holders.
Copyright
All rights reserved. No part of this publication may be reproduced, transmitted, transcribed, stored in a retrieval system, or translated into any language or computer language, in any form or by any means, electronic, mechanical, magnetic, optical, chemical, manual, or otherwise, without the prior written permission of Avision Inc.
Material scanned by this product may be protected by governmental laws and other regulations, such as copyright laws, the customer is solely responsible for complying with all such laws and regulations.
Warranty
The information contained in this document is subject to change without notice.
Avision makes no warranty of any kind with regard to this material, including, but not limited to, the implied warranties of fitness for a particular purpose.
Avision shall not be liable for errors contained herein or for incidental or consequential damages in connection with the furnishing, performance, or use of this material.
FCC Radio Frequency Interference Statement
This equipment has been tested and found to comply with the limits for a class B digital device, pursuant to Part 15 of the FCC rules. These limits are designed to provide reasonable protection against harmful interference in a residential installation. This equipment generates, uses, and can radiate radio frequency energy and, if not installed and used in accordance with the instruction manual, may cause harmful interference to radio communication. However, there is no guarantee that interference will not occur in a particular installation. If this equipment does cause harmful interference to radio or television reception, which can be determined by turning the equipment off and on, the user is encouraged to try to correct the interference by one or more of the following measures:
Reorient or relocate the receiving antenna.
- Increase the separation between the equipment and receiver.
- Connect the equipment into an outlet on a circuit different from that to which the receiver is connected.
- Consult the dealer or an experienced radio/TV technician for help.
CAUTION: Any changes or modifications not expressly approved by the manufacture of this device could void the user's authority to operate the equipment.
EC Declaration of Conformity
According to EN45014
Manufacturer's Name: AVISION INC.
Manufacturer's Address: No. 20, Creation Road I, Science-Based Industrial Park, Hsinchu, Taiwan, R.O.C.
declare that the product
Model Number: AV220
conforms to the following Product Specifications:
Emission: EN 50081-1 (1992) EN 55022 (Class B) (Conducted Radiated) (1994) EN 60555-2 (Harmonics) (1987) EN 60555-3 (Flicker) (1987)
Immunity:
EN50082-1 (1992)
IEC 1000-4-2 (ESD) (1995)
IEC 1000-4-3 (RS) (1995)
IEC 1000-4-4 (EFT/Burst) (1995)
IEC 1000-4-5 (SURGE) (1995)
System Requirements
Windows
IBM compatible PC Pentium III 600 or higher
Microsoft Windows 98 / 98SE / Me / 2000 / XP
USB port (Hi-Speed with USB 2.0 card only) (Compatible with USB 1.1)
At least 100 MB of free hard disk space
At least 128 MB of system memory
A CD-ROM drive
Table of Contents
1. Introduction 1-1
2. Scanner Installation 2-1
2.1 Installing the ADF Paper Tray. 2-2
2.2 Installing the ADF Output Paper Tray 2-3
2.3 Connecting the Cables 2-4
2.3.1 Connecting to Power 2-4
2.3.2 Turning on the Power.. 2-4
2.4 Install the Software 2-5
2.5 Connecting to Computer 2-5
3. Completing Your First Scan 3-1
3.1 Loading Your Paper 3-1
3.1.1 Notice on Using the ADF 3-1
3.1.2 Placing Your Document in the ADF Paper Tray...3-2
3.2 Scanning with image editing software.. 3-3
3.2.1 A Glance of the user interface.. 3-5
4. Editing Your Image 4-1
4.1 Using the Basic Features 4-1
4.1.1 Choosing Your Scan Method 4-1
4.1.2 Selecting a Proper Image Type 4-2
4.1.3 Determining a Proper Resolution 4-4
4.1.4 Adjusting the Brightness and Contrast.. 4-5
4.1.5 Enlarging Previewed Image. 4-6
4.1.6 Inverting and Selecting Your Image 4-7
4.1.7 Enhancing Your Image 4-9
4.2 Using the Advanced Features 4-11
4.2.1 The Switch button.. 4-11
4.2.2 djusting Highlight/Shadow Levels 4-12
4.2.3 djusting the Brightness Curve. 4-15
4.2.4 hanging Color Hue/Saturation/Lightness... 4-16
4.2.5 sing Color Balance.. 4-17
4.2.6 0lorDrop-out. 4-18
4.3 Using other Tools 4-19
- Maintenance.. 5-1
5.1 Cleaning the ADF 5-1
5.2 Cleaning the Calibration Area 5-2
5.3 Replacing the Snap-in Pad Module 5-3
- Troubleshooting 6-1
6.1 Clearing a Paper Jam 6-1
6.2 Questions and Answers 6-3
6.3 Technical Service 6-5
- Specifications 7-1
1. Introduction
Congratulations on your purchase of the AV220 color sheet-fed image scanner. Avision is one of the leading companies in the world to develop high performance sheet-fed scanners. With this scanner, you can quickly scan two-sided paper documents to effectively increase your productivity.
Before you install and operate the new scanner, please take a few minutes to read through this manual. It provides proper instructions for you to unpack, install, operate and maintain the scanner.
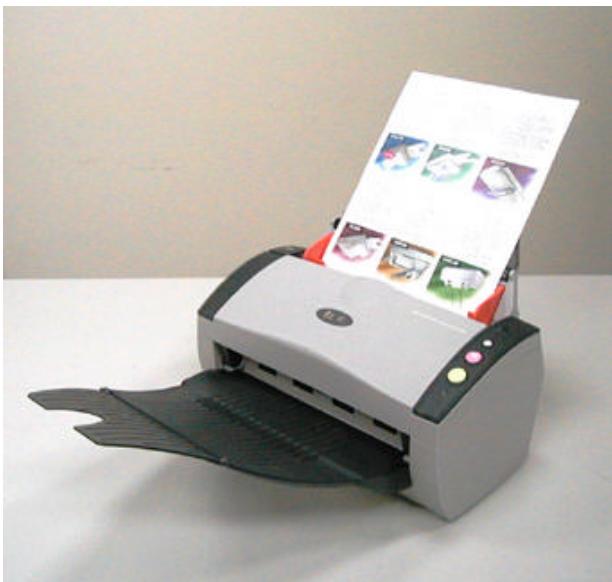
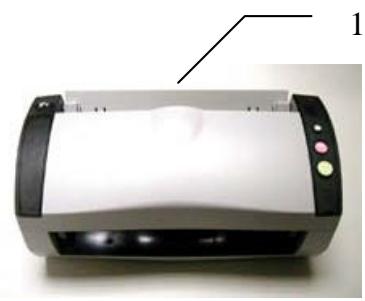
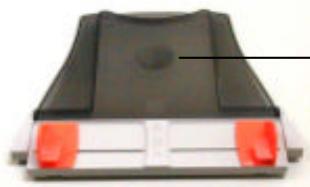
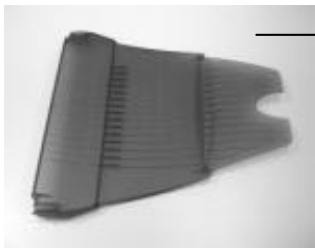
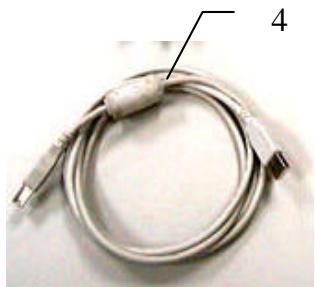
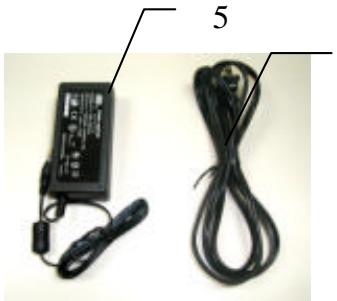
The following figure indicates the package contents. Please check all the items against your checklist. If you do not receive all the items, please contact your authorized local dealer immediately.
2
3
6
- AV220 Main Unit
- ADF Paper Tray
- Flatbed Paper Tray
- USB Cable
- Power Adapter
- Power Cord
Note:
- Only use the AC adapter (SA60-24 made by Sino-America) included in the machine. Using other AC adapters may damage the machine and void the warranty.
- Please unpack the packing carefully, and check the contents against the checklist. If any items are missing or damaged, please contact your dealer immediately.
2. Scanner Installation
Precautions
- Keep the scanner out of direct sunlight. Direct exposure to the sun or excessive heat may cause damage to the unit.
- Do not install the scanner in a humid or dusty place.
- Be sure to use the proper AC power source.
- Place the scanner securely on an even, flat surface. Tilted or uneven surfaces may cause mechanical or paper-feeding problems.
- Retain the scanner box and packing materials for shipping purposes.
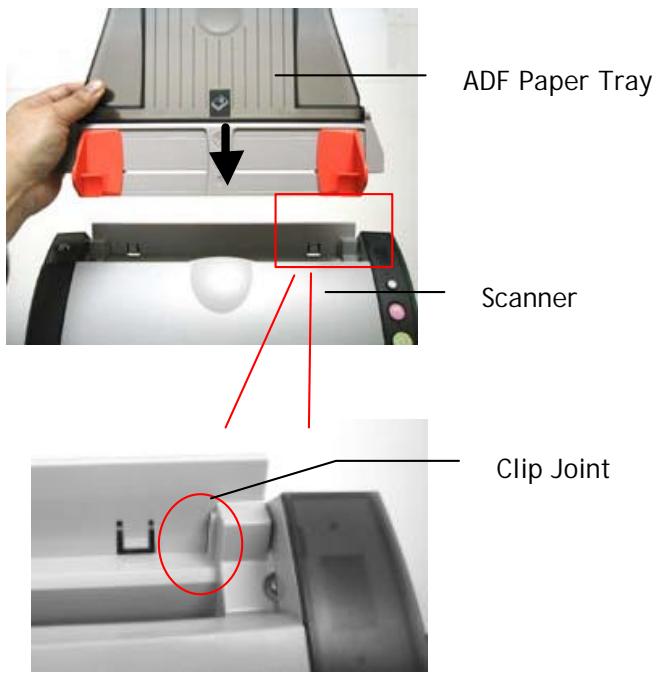
2.1 Installing the ADF Paper Tray
- Attach the ADF Paper Tray to the clip joint of the scanner as indicated below. When properly insert, you will hear a snap-in sound.
2.2 Installing the ADF Output Paper Tray
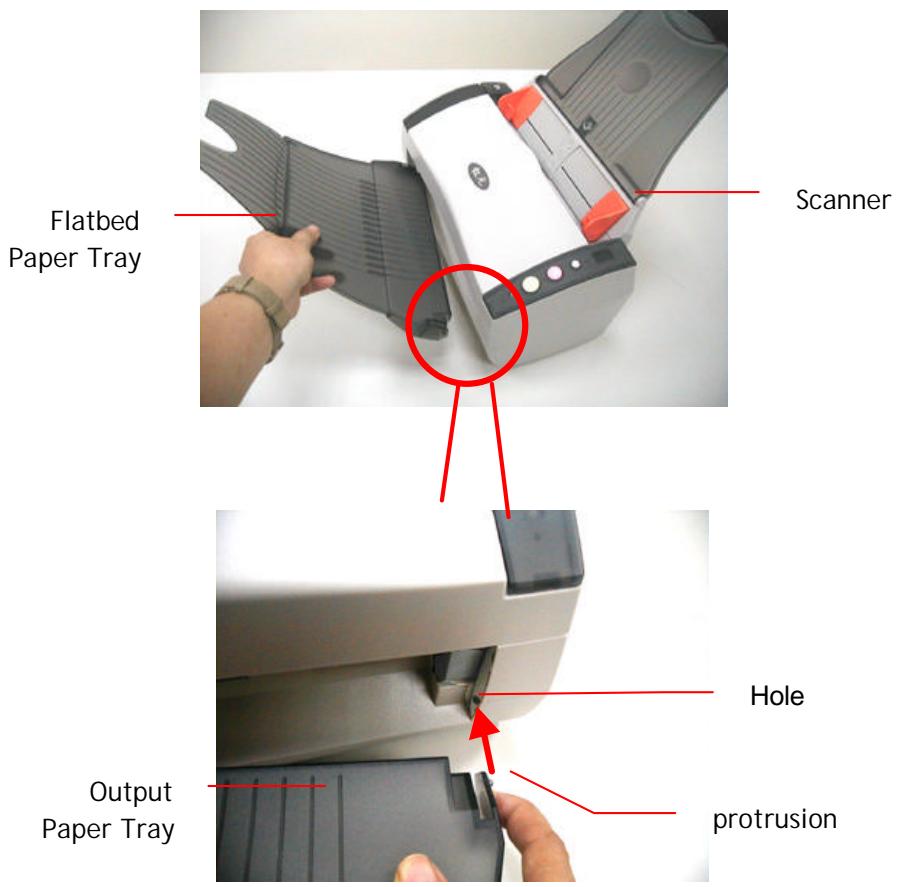
- Hold the Output paper tray some 30 degrees as shown in below.
- Insert the right protrusion of the Output Paper Tray into the hole on the front of the scanner.
- Insert the left protrusion of the Output Paper Tray slightly into the hole on the front of the scanner.
2.3 Connecting the Cables
Make sure the power of scanner is off.
2.3.1 Connecting to Power
Plug the small end of the power adaptor into the power jack of your scanner. Insert the other end to an appropriate power outlet.
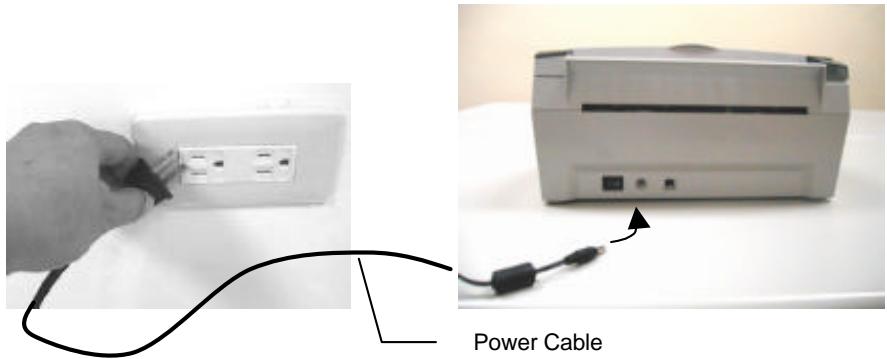
2.3.2 Turning on the Power
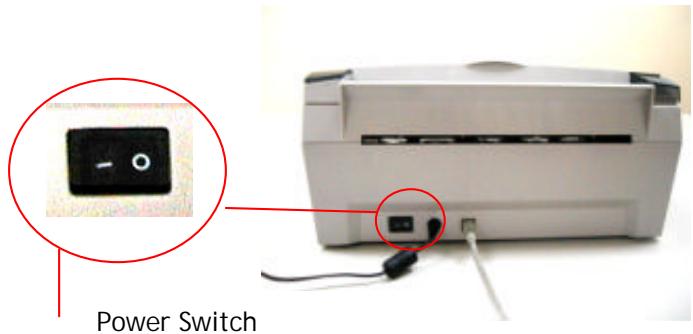
After the power cable and the USB cable have all connected, press the power switch to the "1" position to turn on the scanner. To turn off the scanner, please press the power switch to the "0" position.
2.4 Install the Software
NOTE:
1). The Windows system CD may be required when installing on some PC's.
2). To ensure your computer can identify the USB scanner, please install scanner driver first before connecting the scanner to your computer.
- Place the supplied CD-ROM onto your CD-ROM drive.
- The software installation graphic appears. If not, run "cdsetup.exe".
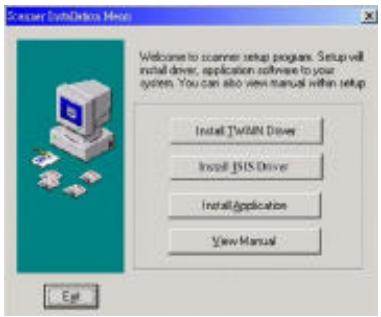
- Choose Install TWAIN Driver to install the scanner driver.
2.5 Connecting to Computer
- Connect the square end of the USB cable to the USB port of your scanner. Connect the rectangle end to the USB port of your computer.
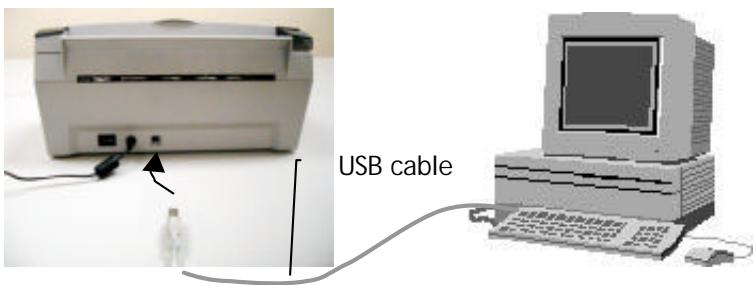
- The computer should detect a new USB device and prompt a "New
Hardware Found" message.
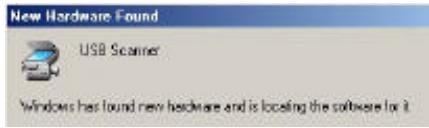
(Windows 9X/Windows ME)
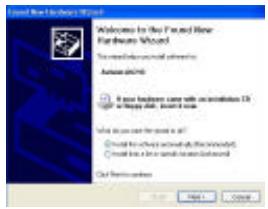
(Windows 2000/XP)
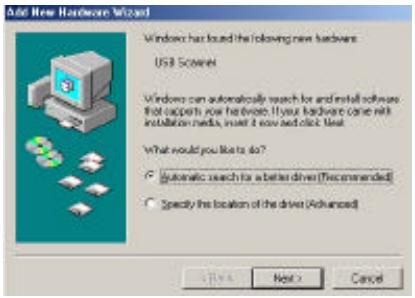
- In Windows 9X or Windows ME, confirm that the "Search for a better driver." is selected and click the "Next" button.
In Windows XP, click the Next button to continue.
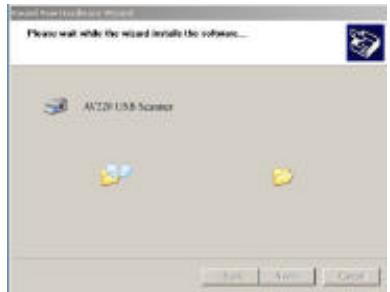
- When the Finish dialog is prompted, click the Finish button.
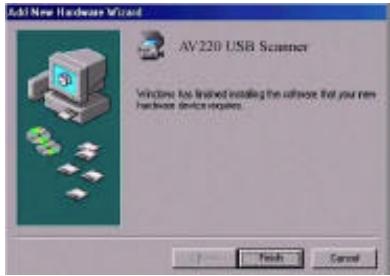
(Windows 9X/Windows ME)
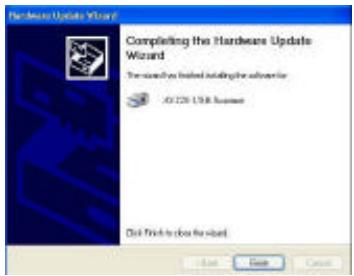
(Windows 2000/XP)
- Click "Install Application" to install the applications including Roxio PhotoSuite 4 SE (the image editing and retouching application), ScanSoft TextBridge Pro 9.0 (The OCR software application), and AVCapture (The multi-page document scanning program).
- Click "View Manual" to view or print the detailed user manual for the scanner and bundled applications respectively.
Note:
To uninstall the scanner driver in Windows XP, be sure to keep your scanner connecting to your computer.
3. Completing Your First Scan
3.1 Loading Your Paper
3.1.1 Notice on Using the ADF
Before using the ADF, please make sure that your paper meets the following specifications:
- Document(s) can range in size from 3.5 by 2 inches to 8.5 by 14 inches (Legal).
- Document(s) can range in weight from 16 to 28 lbs
- Document(s) should be square or rectangular and in good condition (not fragile or worn).
- Document(s) should be free of curl, wrinkle, tears, wet ink, or punch holes.
- Document(s) should be free of staples, paper clips, paper sticky notes.
3.1.2 Placing Your Document in the ADF Paper Tray
Fanning Your Document
Standard paper size should feed easily through the scanner. To avoid occasional paper jam when automatically feeding multiple documents, loosen the paper before loading.
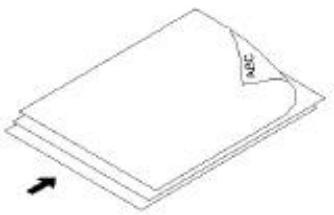
Document feeding
Place your document with the text face down on the ADF Paper Tray. Align the two sides of the document with the slide guides. Please note that the ADF Paper Tray can hold up to 20-page document at a time.
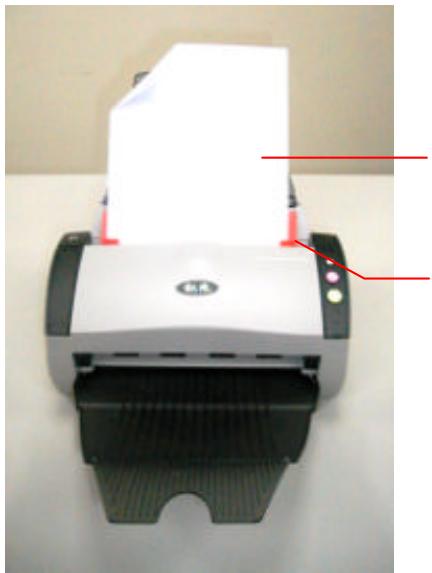
Your
Document
(Face Down)
Paper Slider
3.2 Scanning with image editing software
The scanner driver is not a stand-alone program, it has to be started from within a TWAIN-compliant or plug-in software application and then the scanner driver is able to scan and load the image to your computer. The command to start the scanner driver may vary due to different software applications.
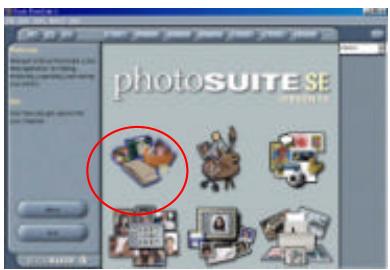
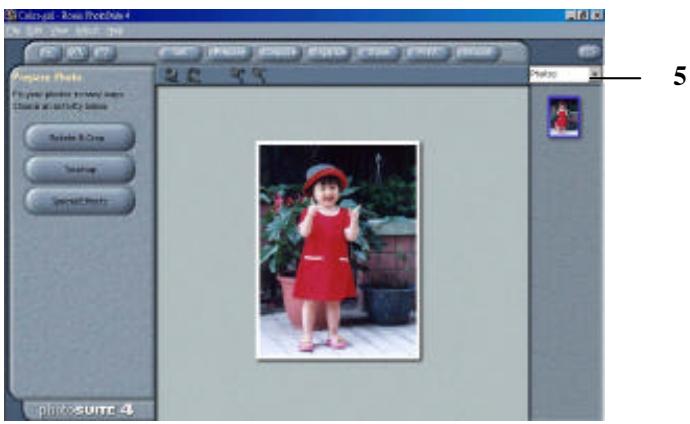
- Start a TWAIN compliant software application such as Roxio PhotoSuite 4 SE which is bundled in the CD.
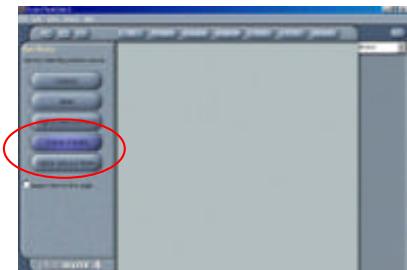
- Click Get>Scanner (TWAIN).
- Choose AV220 as your scanning source. (You only need to do this once.)
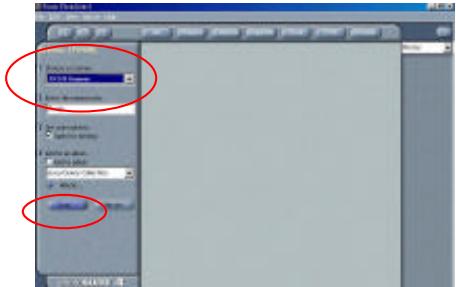
- Place the document FACE DOWN on the document glass.
- Click the Scan button to prompt the TWAIN user interface.
-
Click Preview to get an initial scan of your document. Allocate your scanned area and choose Scan button to scan the document.
-
Click Exit to return to the main screen and click Open Library and Photos at the upper-right corner to open your scanned image.
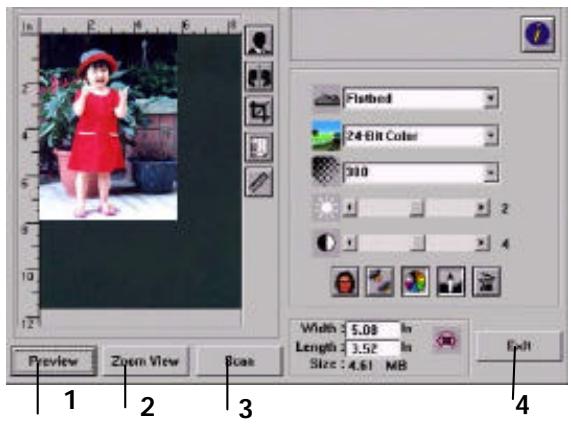
- Preview
- Zoom View
- Scan
- Exit
- Photos
3.2.1 A Glance of the user interface
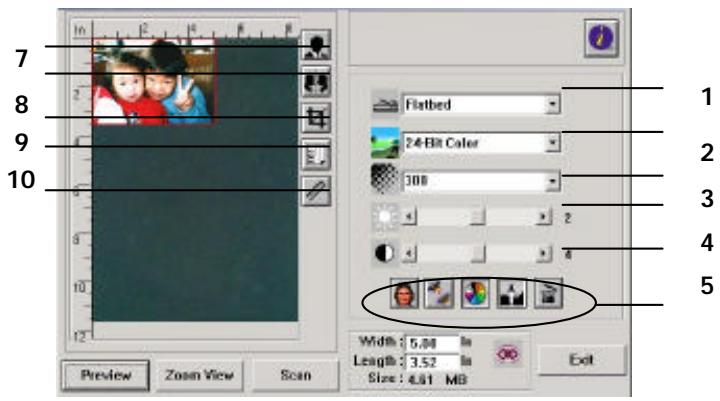
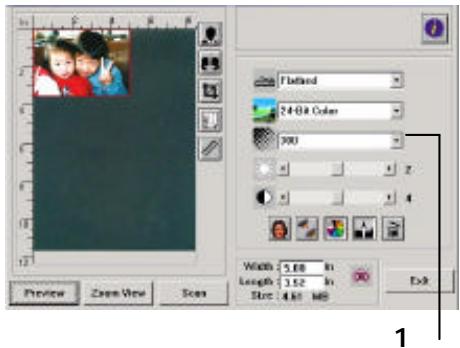
| 1. Original Source | Choice: ADF/Multipage |
| 2. Image Type | Choice: Black & White, Halftone, 8-bit Gray, 8-bit Color, 24-bit Color. |
| 3. RESOLUTION | Choice: 50, 72, 100, 144, 150, 200, 300, 600, 1200, 2400 (dpi). |
| 4. Brightness: | Adjust the brightness level from -100 to +100. |
| 5. Contrast | Adjust the contrast level from -100 to +100. |
| 6. Further Tools | Descreen, Sharpen, Color Adjustment, Auto Level, Advanced Settings (From left to right). |
| 7. Invert | Reverse the color of your scanned image. |
| 8. Mirror Function | Flap your image. |
| 9. Crop | Resize your scanned area. |
| 10. Paper Size | Select your paper size from Card 4"x2.5", Photo 5"x3", Photo 6"x4", A5, B5, A4, Letter, Legal, or scanner maximum. |
| 11. Measuring Unit | Choice: cm, Inch, and Pixel. |
4. Editing Your Image
4.1 Using the Basic Features
4.1.1 Choosing Your Scan Method
1. Scan Method
Choice:
ADF/Multipage: Select this setting if you need to scan multi-page document from the automatic document feeder (ADF).

4.1.2 Selecting a Proper Image Type
1. Image Type
Please see following table for a choice of an ideal image type.
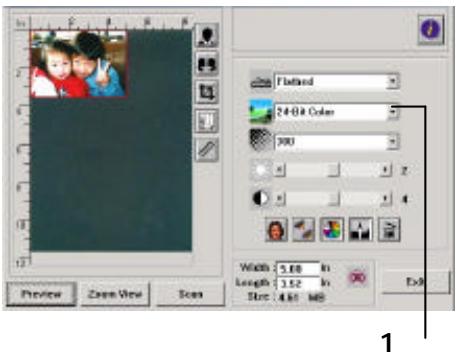
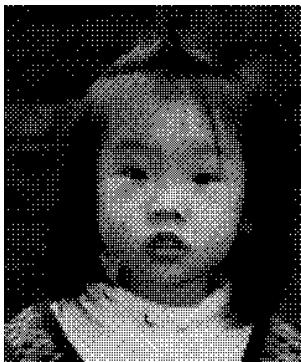
| Black & White | Choose B&W if your original contains only B&W text, pencil or ink sketch. |
| Halftone | Halftones are reproduction of image that gives the illusion gray. An example of halftone imaged would be the pictures you see in newspapers. |
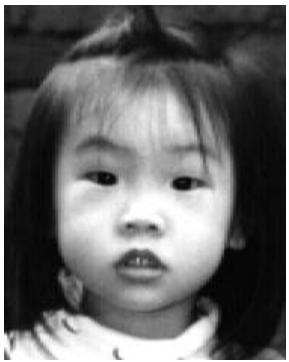
| 8-bit Gray | 8-bit Gray images contain actual shades of gray. |
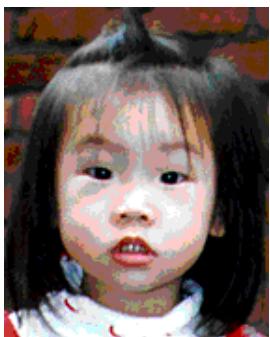
| 8-bit Color | 8-bit Color image provides 256 levels of color hues. |
| 24-bit Color | Choose 24-bit Color if you wish to scan a color image. |
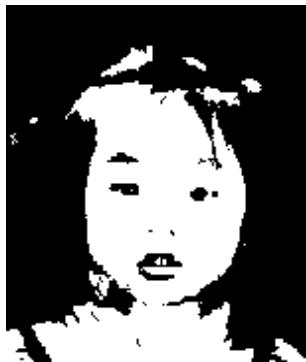
Black & White
Halftone
Gray
8-bit Color

24-bit Color
4.1.3 Determining a Proper Resolution
1. Resolution
A proper resolution reproduces a clear image with good details. The resolution is measured by dots per inch (dpi).
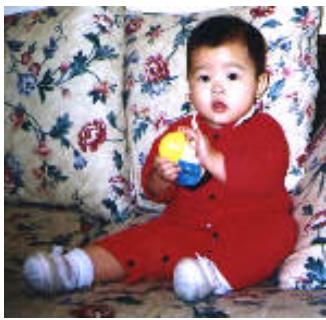
Resolution: 50 dpi
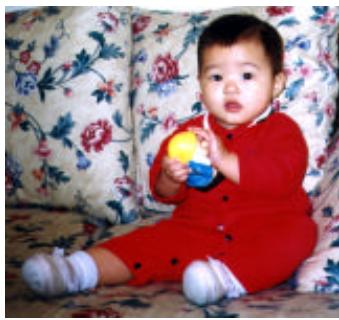
Resolution: 100 dpi
Note
For your information, an A4 size color image scanned at 300 dpi at True Color mode consumes approximately 25 MB of disk space. A higher resolution (usually means over 600 dpi) is only recommended when you need to scan a small area at True Color mode.
4.1.4 Adjusting the Brightness and Contrast
1. Brightness
Adjusts the lightness or darkness of an image. The higher the value, the brighter the image.
2. Contrast
Adjusts the range between the darkest and the lightest shades in the image. The higher the contrast, the bigger the different grayscale.
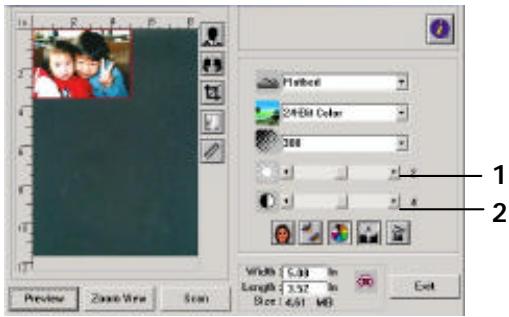

Decrease Brightness

Normal

Increase Brightness

Decrease Contrast

Normal

Increase Contrast
4.1.5 Enlarging Previewed Image
1. Zoom View
Enlarge your previewed image to the max. of the preview window.
Note this function only enlarging your preview image. This does not enlarge your real image.
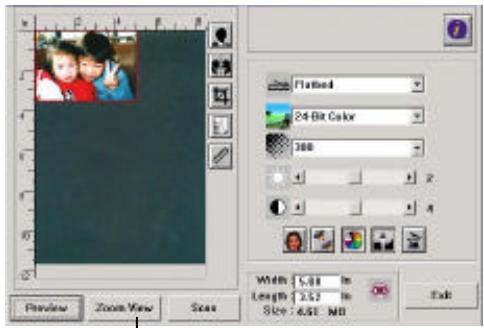
1
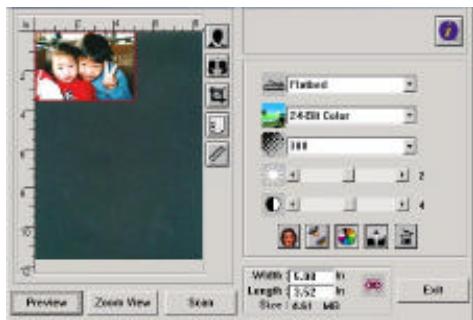
Before Zoom
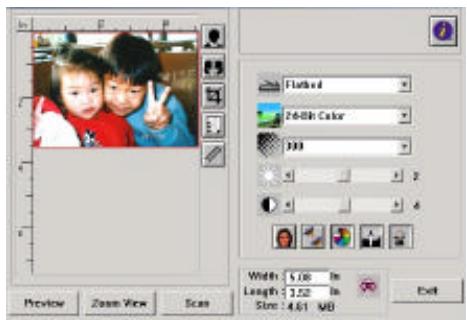
After Zoom
4.1.6 Inverting and Selecting Your Image
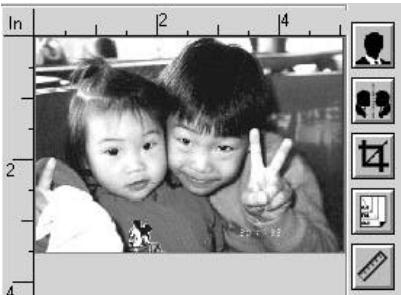
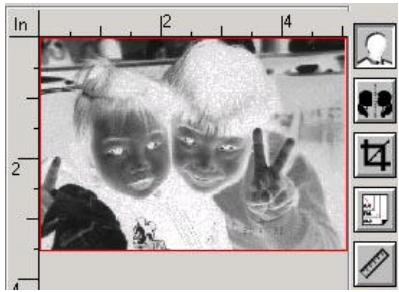
1. Invert
The invert command reverses the brightness and the color in the image. For color images, each pixel will be changed into its complementary color at the command of Invert.
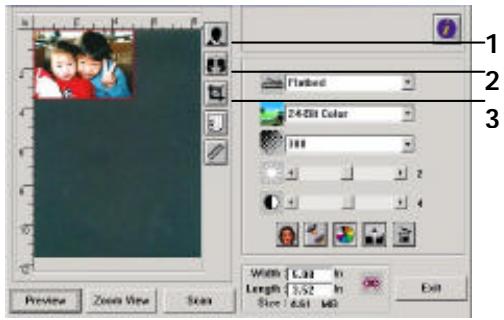
Before Invert
After Invert
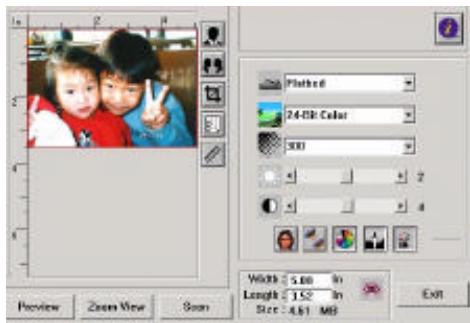
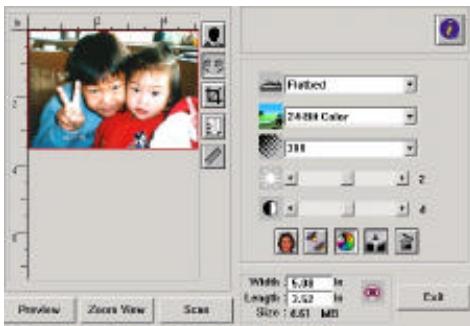
2. MIRROR FUNCTION
Reverse the right and left side of your image.
Before Mirror
After Mirror
3. Auto Select Image
Automatically set the whole image as your scan area. (Or you may resize the area by "drag and drop" diagonally.)
4.1.7 Enhancing Your Image
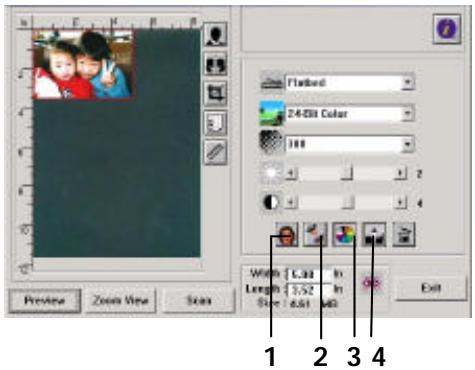
1. Desscreen
Eliminates the moire patterns* commonly found in printed matter.
2. Sharpen
Sharpen the scanned image.
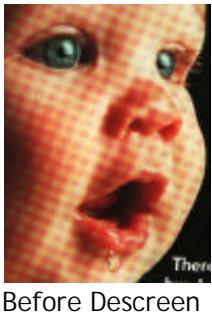


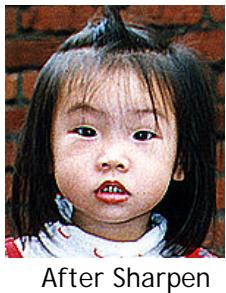
*Moire pattern: An undesirable pattern in a color printing resulting from incorrect screen angle of overprinting halftone.
3. Color Adjustment
Adjusts the color quality of the image so that it comes close to the original. This function uses default parameters to adjust the image.

Normal

After Color Matching
4. Auto Level
Automatically adjusts the highlight and shadow areas of the scanned image to optimize your image.

Normal

After Auto Level
4.2 Using the Advanced Features
4.2.1 The Switch button
- Click the button to pop up the advanced settings bar at the right side. The advanced settings include Highlight/Shadow, Hue/Saturation/Lightness, Curve, Color Balance, Color Drop-out.
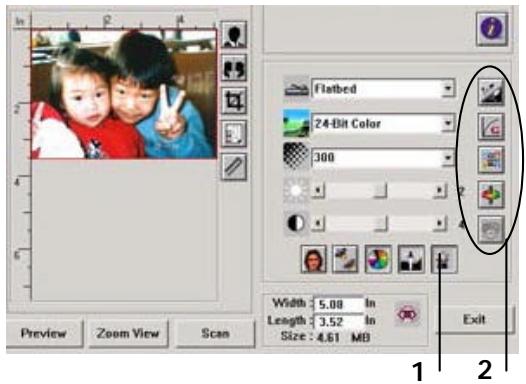
- The Advanced Settings bar
4.2.2 Adjusting Highlight/Shadow Levels

Highlight refers the lightest point in a scanned image while shadow refers the darkest point. Using Highlight and Shadow tool together allows you to extend the range of color and reveal more details in a gray or color image.
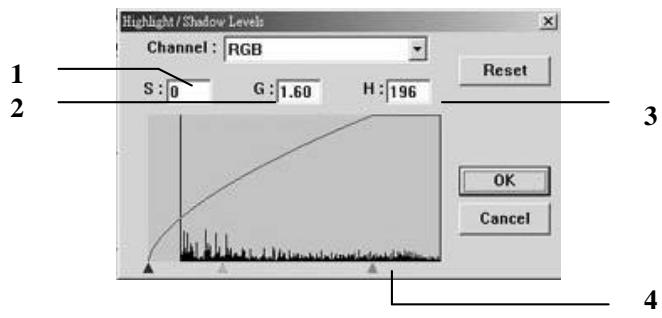
- Shadow: The darkest point of an image.
- Gamma: The midtones of the image.
- Highlight: The lightest point of an image.
- Pointer: Move the pointer to change the value.
When the value of gamma changes, the image changes accordingly.
Gamma Value: 1.0

Gamma Value: 1.4

Gamma Value: 2.0

When the value of highlight and shadow change, the image changes accordingly.
Highlight: 255/Shadow: 0(Normal)
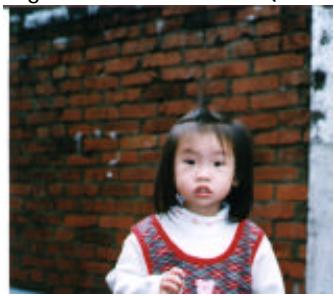

Highlight: 200/Shadow:0
Highlight: 210/Shadow: 10
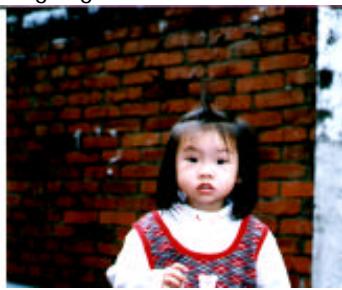

Highlight: 255/Shadow: 50
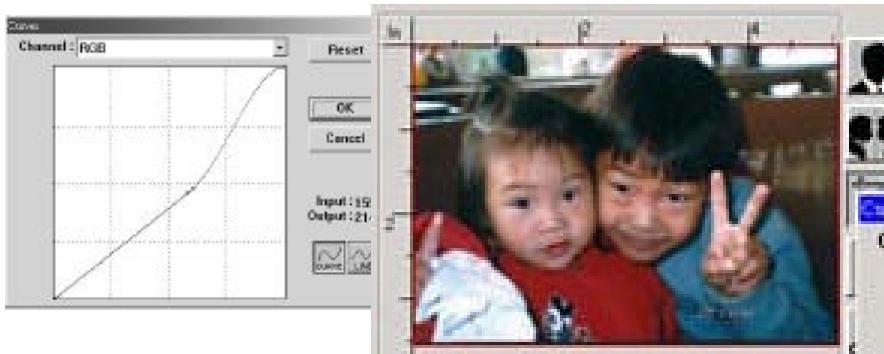
4.2.3 Adjusting the Brightness Curve

Adjusts the midtones of the image without dramatically altering then lightest and the darkest areas.
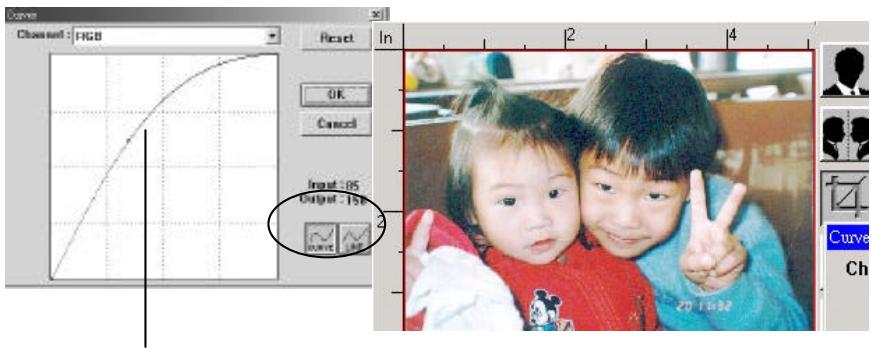
When the curve is moved up or down, the image turn brighter or darker.
4.2.4 Changing Color Hue/Saturation/Lightness

Improve your image by changing the level of hue/saturation/lightness.
(1)
(2)
(3)
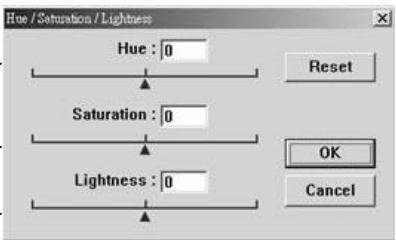
| (1). Hue | Adjust the hue by moving the triangle to the right or left. (Note the level of intensity for the color will be changed simultaneously when the hue adjustment is made). |
| (2). Saturation | Move the triangle to the right to increase the saturation level or to the left to decrease the level. The level of saturation decides if the color is pale or rich. |
| (3). Lightness | Increase the lightness by moving the triangle to the right or to the left to decrease the lightness. |
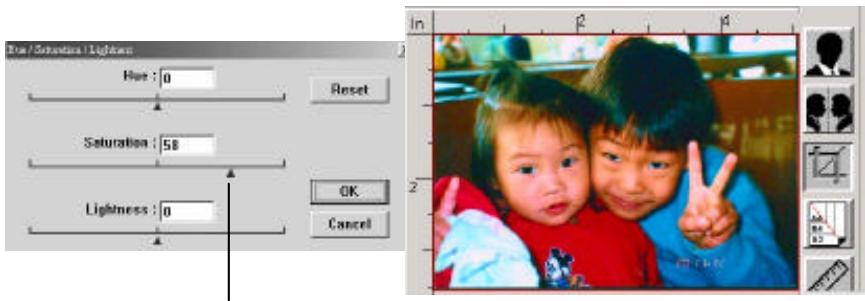
Move the Saturation pointer to the right, the color turns rich.
4.2.5 Using Color Balance

The Color Balance allows you to obtain an optimal image quality.
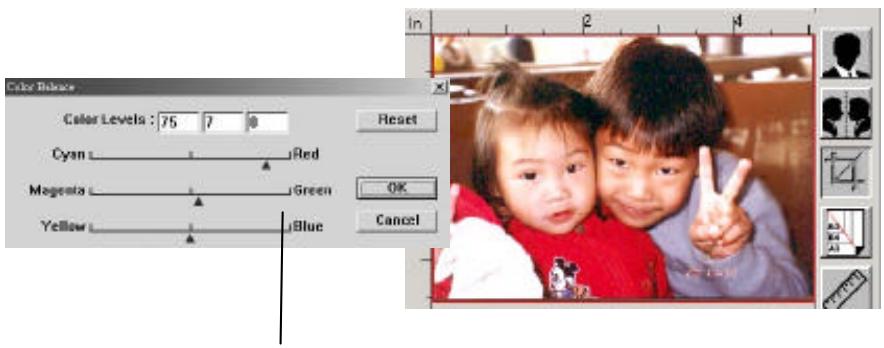
Move the pointer toward Red, the image turns into a reddish hue.
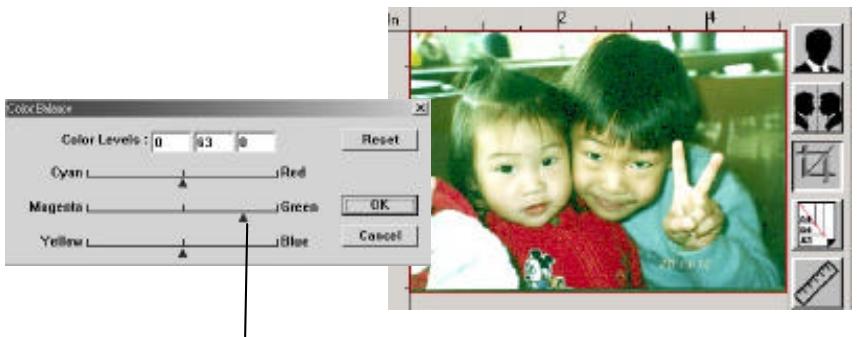
Move the pointer toward Green, the image turns into a greenish hue.
4.2.6 Color Drop-out

Click the button and a dialog box in below will be displayed. This dialog allows you to remove one of the R (Red), G (Green), or B (Blue) color channel. This function is particularly useful when you need to convert text using OCR software.
Note that this function supports only black & white and gray image. Therefore, be sure to choose any black & white or gray image type while applying this function.
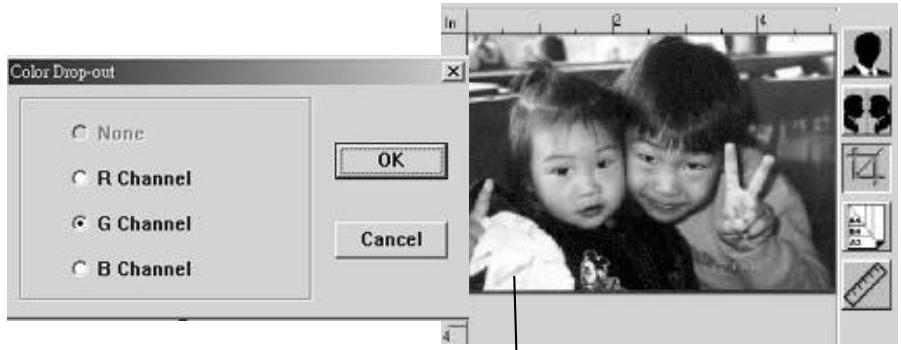
The effect on image after removing the G channel.
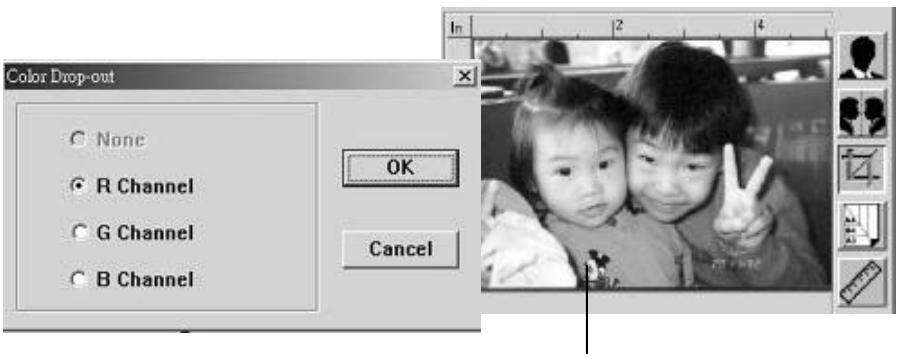
The effect on image after removing the R channel.
4.3 Using other Tools
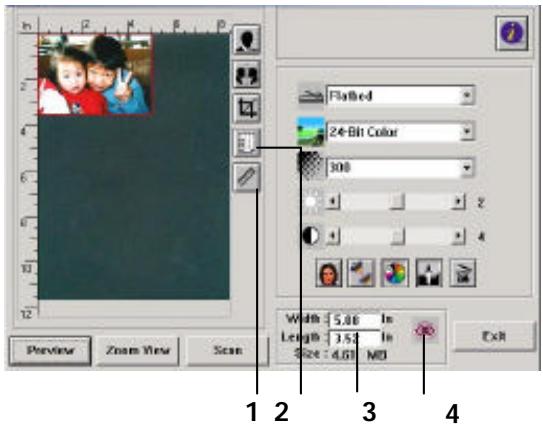
| 1. Measuring Unit | A reminder of the measuring system in use. By clicking the button, you can change the measuring unit. Choice: Inch, cm, Pixel. |
| 2. Paper Size | Provide frequently scan sizes. Choice: Card 4"x2.5", Photo 5"x3", Photo 6"x4", B5, A5, A4, Letter, and Scanner Maximum. |
| 3. Image Size | Display image size for the scanned area. |
| 4. Lock Image | Fix your output width and height. |
5. Maintenance
5.1 Cleaning the ADF
From time to time the pad assembly and feeding rollers may become contaminated with ink, toner particles or paper dust. In this case the scanner may not feed documents smoothly. If this occurs please follow the cleaning procedures to return your machine to its original state.
The Cleaning Procedures
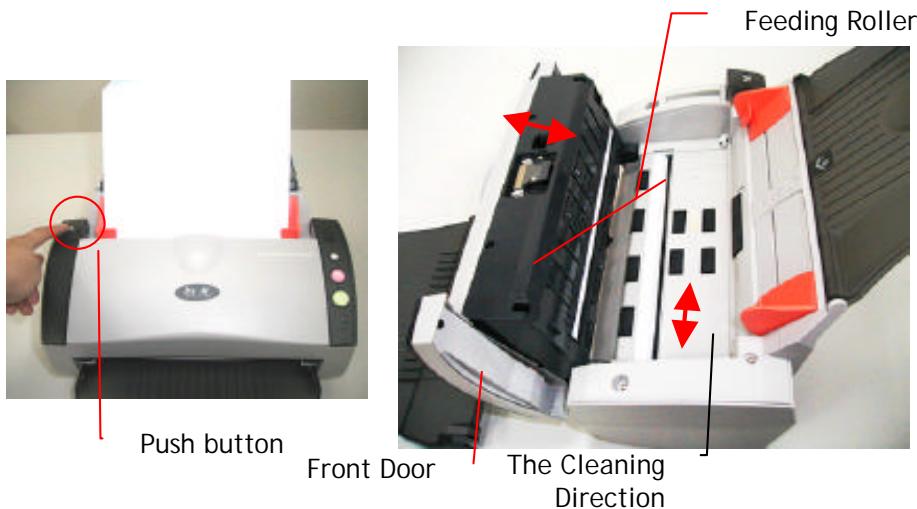
1) Soak a cotton swab with some isopropyl alcohol. (95%).
2) Press the push button on the upper-left. Open the front door slightly to the left. Wipe the upper feeding roller by moving the swab from side to side. Rotate the roller forward with your finger and repeat the cleaning steps above until the entire roller is cleaned.
3) Wipe the pad in one direction from top to bottom or the other way around. Be careful not to damage the pick springs.
4) Close the scanner front door. Your scanner is now ready for use.
5.2 Cleaning the Calibration Area
As shown below, clean the calibration area (white glass) with an airblower or a small brush to rid the board of dust or dirt. Please handle with care and dexterity.
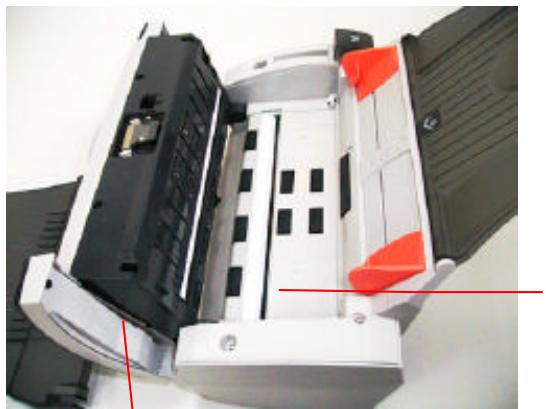
Calibration Area
ADF Front Door
5.3 Replacing the Snap-in Pad Module
After scanning approximately 20,000 pages through the ADF, the pad may be worn out and you may experience problems with document feeding. In this case, it is highly recommended to replace the pad module with a new one. For ordering the pad module, please consult your nearest dealer and follow the procedure below to replace it.
Disassembling Procedure
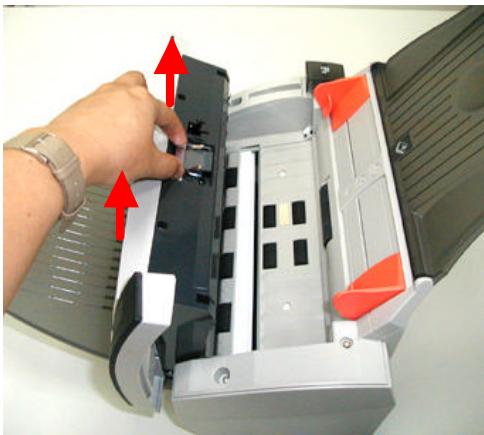
- Press the Paper jam clearing button on the upper-left corner.
- Gently open the ADF Front cover to the left.
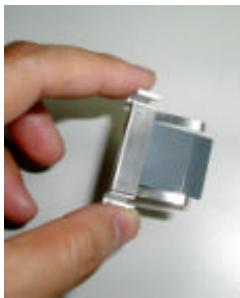
- Press both arms of the ADF snap-in pad module inwardly with your fingers to pull out the ADF snap-in pad module.
Assembling Procedure
- Take out the ADF pad module from the box.
- Press both arms of the ADF snap-in pad module inwardly with your two fingers.
- Place it into the holes until it snaps into place.
6. Troubleshooting
6.1 Clearing a Paper Jam
In the event of a paper jam, follow the procedures below to remove the paper:
- Press the ADF Release Button on the left side. Gently open the Scanner Front Door to the left.
- Carefully pull the paper out of the ADF unit.
- Close the scanner front door. Your Scanner is now ready to use.
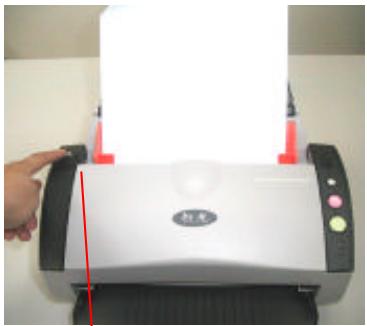
Push button
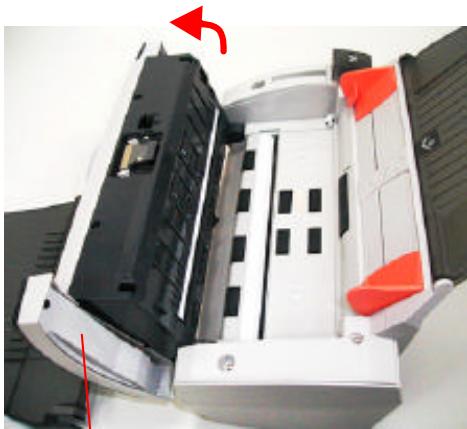
ADF Front Door
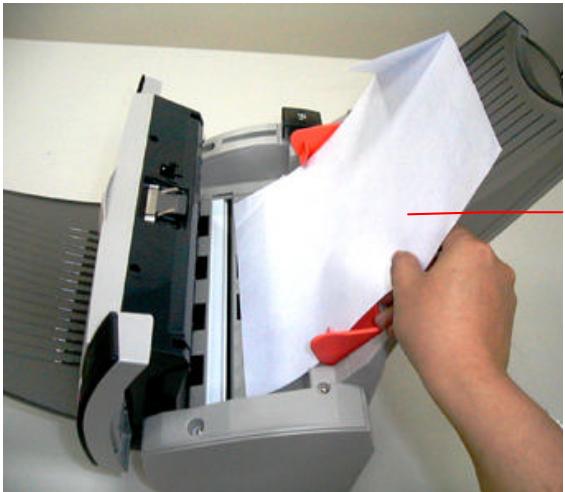
Original
Document
6.2 Questions and Answers
Question: Paper becomes jammed during scanning.
Answer: 1) Open the scanner front door.
2) Pull out the jammed paper carefully.
3) Close the scanner front door.
Question: More than one sheet of paper are fed into the scanner.
Answer: 1) Open the scanner front door.
2) Remove the multi-fed sheets of paper.
3) Close the scanner front door.
4) Flatten the corners and edges. Loosen the paper before putting it into the paper guide again.
5) Check the feeding roller condition. If necessary, follow the cleaning directions in section 5.1 and perform the cleaning.
Question: Paper becomes skewed in the scanner.
Answer: 1) Use the slide guide to keep the paper path straight.
2) Check the condition of the feeding roller. If necessary, follow the cleaning directions in Section 5.1 and perform the cleaning.
Question: Why is it my scanned image always comes out too dark?
Answer: 1) Modify the Gamma setting to 1.8 for your monitor and, when printing, set Gamma to 2.2 for your printer.
2) Use the Brightness setting of the TWAIN user interface to get a brighter image.
Question: Sometimes it seems the scanner does not detect paper?
Answer: The AV220 scanner paper sensor is located at the center of the paper guide. Please place the document you need to scan on the paper guide and use the slide guides to keep the paper path straight.
6.3 Technical Service
Before contact Avision, please prepare the following information:
- Scanner serial & revision number (located on the bottom of the scanner);
- Hardware configuration (e.g., your host CPU type, RAM size, free disk space, display card, interface card);
The name and version of your scanning software application;
The version of your scanner driver.
Please call us at:
Headquarter
Avision Inc.
No. 20, Creation Road I, Science-Based Industrial Park,
Hsinchu 300, Taiwan, ROC
TEL: +886 (3) 578-2388
FAX: +886 (3) 577-7017
E-MAIL: service@avision.com.tw
Web Site: http://www.vasion.com.tw
US and Canada Area
Avision Labs, Inc.
6815 Mowry Ave., Newark CA 94560, USA
TEL: +1 (510) 739-2369
FAX: +1 (510) 739-6060
E-MAIL: support@avision-labs.com
Web Site: http://www.avision.com
7. Specifications
All specifications are subject to change without notice.
Scanner Type:
Optical Resolution:
Scanning Modes:
Desktop sheet-fed
600 dpi * 1200 dpi
Black & White mode
Halftone mode (64-step)
Error Diffusion
16-bit gray scale
24-bit color
ADF Capacity:
ADF Scan Speed:
Up to 50 pages
25 pages per minute in simplex mode
50 images per minute in duplex mode
Document Size:
Max. Document Size:
Letter, legal, A4, B5, A5, business card
Min. Document Size:
8.5"×14" (ADF)
Paper:
3.5^ × 2^ (ADF)
Interface:
16 lbs. to 28 lbs.
Power Source:
Hi-speed USB 2.0
Power Consumption:
24V, 2.0A
Dimensions: (WxHxD)
<30W
Weight:
162 mm x 337 mm x 167 mm
3.6 kgs/7.8 lbs