KCR2610 - Radio-réveil CURTIS - Notice d'utilisation et mode d'emploi gratuit
Retrouvez gratuitement la notice de l'appareil KCR2610 CURTIS au format PDF.

| Type de produit | Radio-réveil avec TV LCD |
| Marque | CURTIS |
| Modèle | KCR2610 |
| Dimensions (approx) | 30 x 15 x 10 cm |
| Poids (approx) | 1,5 kg |
| Alimentation | AC 120 V, 60 Hz ou 8 piles C (non incluses), pile bouton de sauvegarde |
| Type d'écran | LCD TFT (environ 3,5 pouces) |
| Tuner radio | FM/AM avec recherche automatique et manuelle |
| Lecteur CD | Oui, compatible CD audio |
| Fonctions d'horloge | Affichage numérique, alarme avec radio ou buzzer, temporisateur de sommeil |
| Minuterie de cuisine | Oui, réglable |
| Égaliseur | Oui, préréglages EQ |
| Entrée auxiliaire | Oui, prise AUX |
| Compatibilité TV | TV analogique, syntonisation automatique et manuelle |
| Montage | Support de montage inclus (sous-meuble ou mural) |
| Télécommande | Oui, incluse (pile bouton) |
| Entretien et nettoyage | Chiffon doux humide, pas de solvants |
| Sécurité | Rayonnement laser (CD), choc électrique, ne pas ouvrir le boîtier |
| Pièces détachées | Pile bouton remplaçable, autres pièces non disponibles |
| Réparabilité | Aucune pièce réparable par l'utilisateur, confier à un technicien qualifié |
| Informations générales | Notice d'utilisation disponible en téléchargement |
FOIRE AUX QUESTIONS - KCR2610 CURTIS
Questions des utilisateurs sur KCR2610 CURTIS
0 question sur cet appareil. Repondez a celles que vous connaissez ou posez la votre.
Poser une nouvelle question sur cet appareil
Téléchargez la notice de votre Radio-réveil au format PDF gratuitement ! Retrouvez votre notice KCR2610 - CURTIS et reprennez votre appareil électronique en main. Sur cette page sont publiés tous les documents nécessaires à l'utilisation de votre appareil KCR2610 de la marque CURTIS.
MODE D'EMPLOI KCR2610 CURTIS

CURTIS
MODEL NO. KCR2610
UNDERCOUNTER LCD TV CLOCK RADIO
OWNER'S MANUAL
PLEASE READ BEFORE OPERATING THIS EQUIPEMT
CAUTION
RISK OF ELECTRIC SHOCK DO NOT OPEN

CAUTION: TO REDUCE THE RISK OF ELECTRIC SHOCK, DO NOT REMOVE COVER (OR BACK). NO USER- SERVICEABLE PARTS INSIDE. REFER SERVICING TO QUALIFIED SERVICE PERSONNEL.
DANGEROUS VOLTAGE
The lightning flash with arrowhead symbol, within an equilateral triangle is intended to alert the user to the presence of uninsulated dangerous voltage within the product's enclosure that may be of sufficient magnitude to constitute a risk of electric shock to persons.

ATTENTION
The exclamation point within an equilateral triangle is intended to alert the user to the presence of important operating and maintenance (servicing) instructions in the literature accompanying the appliance.

DANGER:
Invisible and hazardous laser radiation when open and interlock failed or defeated. Avoid direct exposure to beam.
LASER SAFETY: This unit employs a laser. Only qualified service personnel should attempt to service this device due to possible injury. CAUTION: USE OF CONTROLS, ADJUSTMENTS OR PERFORMANCE HEREIN MAY RESULT IN HAZARDOUS RADIATION EXPOSURE.
PREPARATION FOR USE
Unpacking and Setup
- Carefully remove the unit from the display carton and remove all packing material from the unit itself.
- The detachable AC power cord is packed in the carton separately from the unit. Make sure the AC power cord is not accidentally discarded with the carton or packing material.
- Press the CD Door OPEN/CLOSE area to open the CD compartment door. There is a white card in the CD compartment which is intended to prevent the CD pickup from moving during shipment of the product. Remove this card from the CD compartment before use.
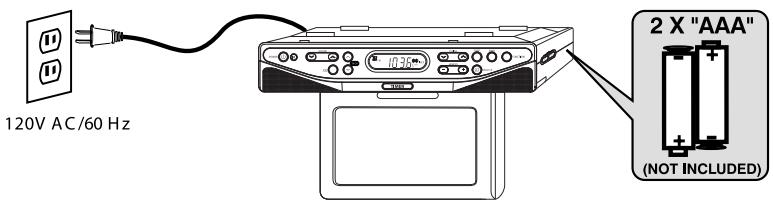
Power Sources
This portable audio system is designed to operate on AC 120V~60Hz or by using eight (8) "C" batteries, (batteries not included). Attempting to operate this unit from any other power source may cause damage to the unit, which is not covered by your warranty.
AC Operation
Unwind the AC cord and extend it to its full length. Insert the small end of the AC cord into the AC power socket on the rear of the unit. Insert the other end of the AC cord into any convenient AC 120V~60Hz household outlet.
Battery Installation
To use this unit with battery power, remove the battery compartment on the bottom of the unit by sliding it towards the rear of the unit and lifting the battery door off. Insert eight (8) "C" size batteries (batteries not included) following the diagram in the compartment.
NOTE: The power cord must be disconnected from the AC power socket on the rear of the unit in order for the unit to operate on battery power.
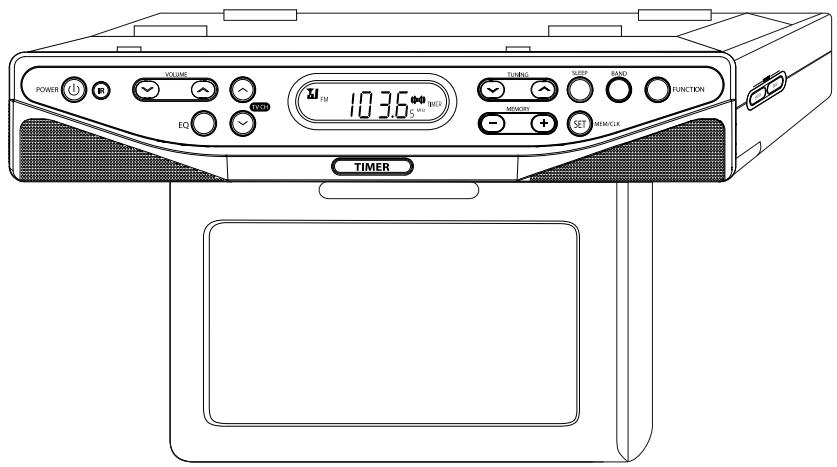
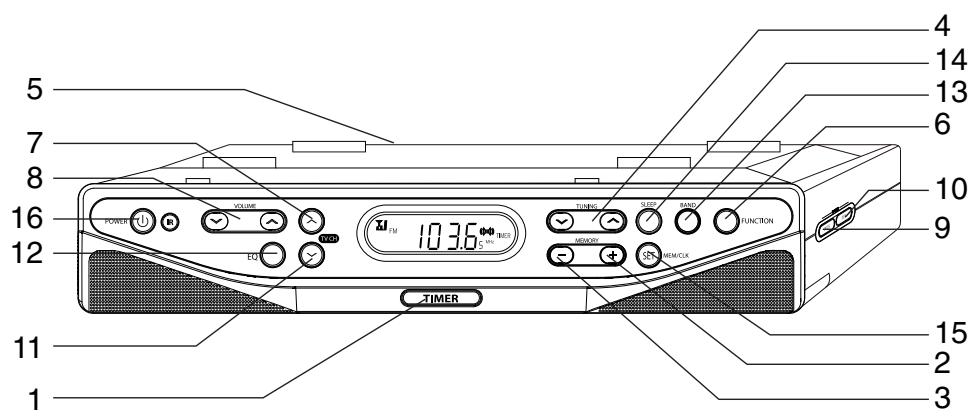
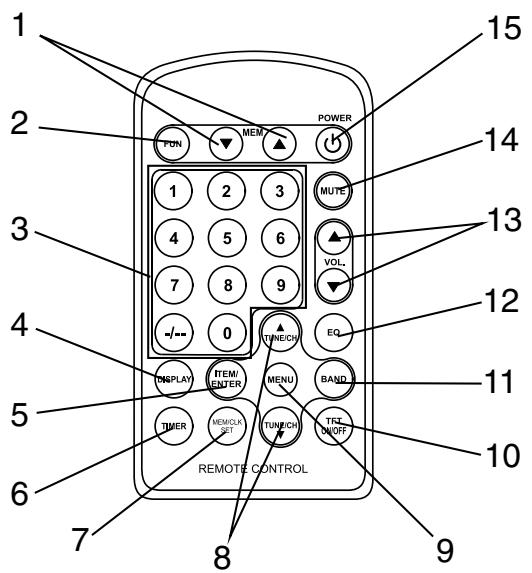
LOCATION OF CONTROLS
-
TIMER BUTTON
-
MENU BUTTON
-
MEM DN BUTTON
-
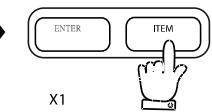
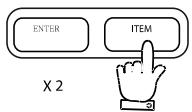
ITEM BUTTON
-
MEM UP BUTTON
-
CH.DN BUTTON
-
TUNER/CLK BUTTON
-
EQ BUTTON
-
MOUNTING BRACKET
-
BAND BUTTON
-
FUNCTION BUTTON
-
SLEEP BUTTON
-
CH. UP BUTTON
-
MEM/CLK SET BUTTON
-
VOLUME BUTTON
-
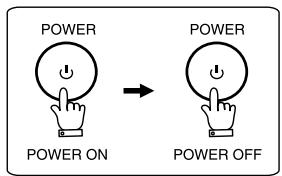
POWER BUTTON
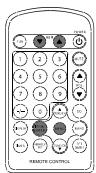
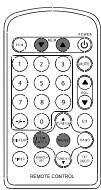
LOCATION OF CONTROLS
-
MEM. CH. UP/DN BUTTON
-
MENU BUTTON
-
FUNCTION BUTTON
-
TFT ON/OFF BUTTON
-
NUMBERDIAL BUTTONS
-
BAND BUTTON
-
DISPLAY BUTTON
-
EQ BUTTON
-
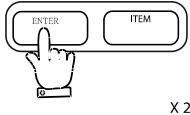
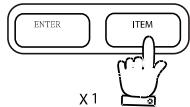
ITEM/ENTER BUTTON
-
VOLUME BUTTON
-
TIMER BUTTON
-
MUTE BUTTON
-
MEM/CLK SET BUTTON
-
POWER BUTTON
-
TUNE/CH BUTTON
POWER SOURCES
NOTE:
Battery is for time backup only. The clock and alarm memory will be retained during a power interruption. During battery backup operation, the display will not light up, but the correct time will be maintained internally.
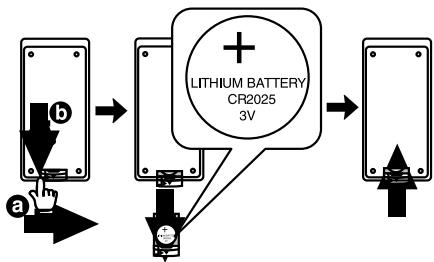
BATTERIES
NOTE:
The button cell battery contains mercury, don't put in the trash. Recycle or dispose as hazardous waste.
NOTE:
You may need to remove a protective covering from the remote's battery compartment before using the remove.
POWER SOURCES
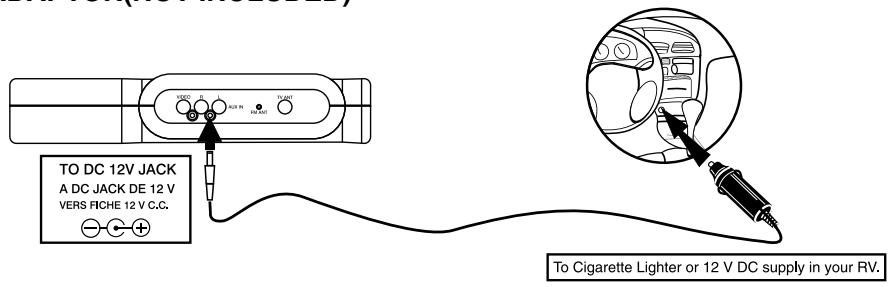
DC ADAPTOR(NOT INCLUDED)
OPERATING INSTRUCTIONS
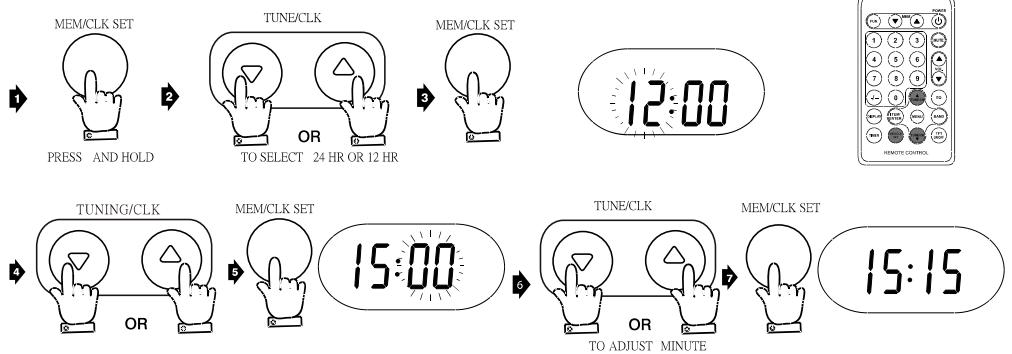
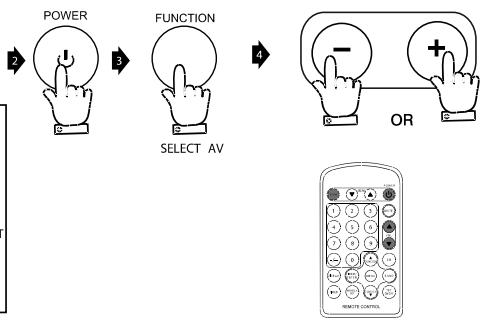
1. SETTING THE TIME (POWER OFF MODE)

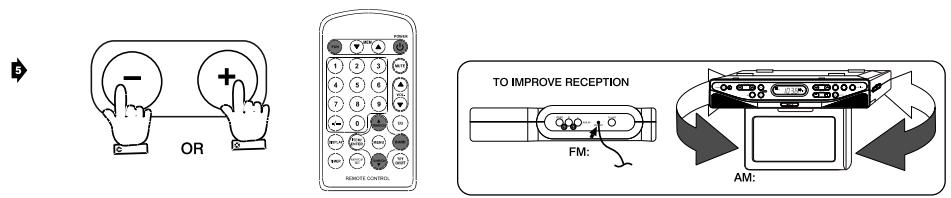
2. LISTENING TO THE RADIO
OPERATING INSTRUCTIONS
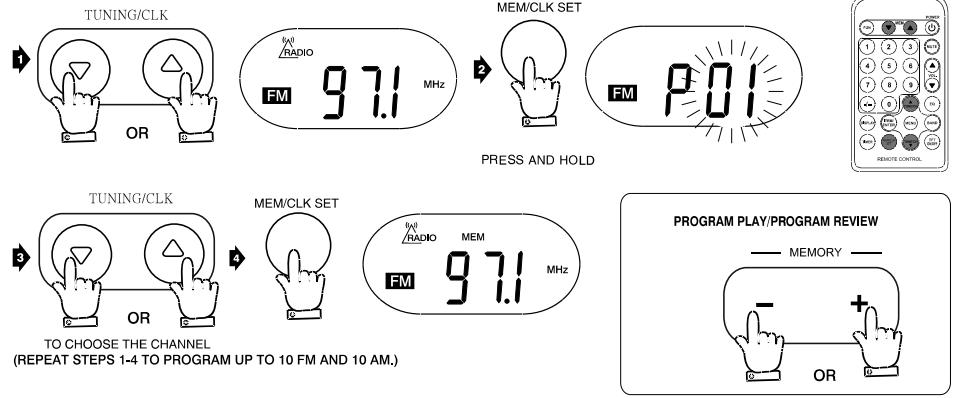
PROGRAM RADIO STATIONS
- TELEVISION OPERATION
REPEATEDLY

OPERATING INSTRUCTIONS
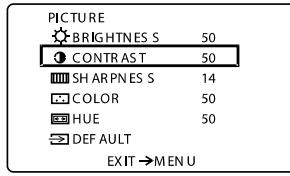
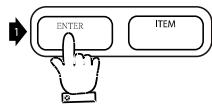
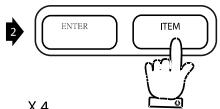
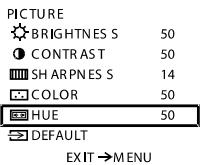
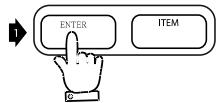
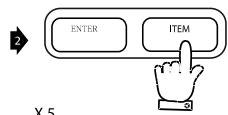
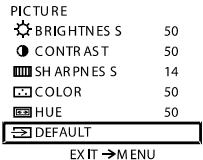
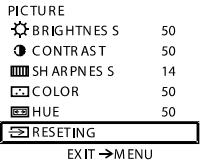
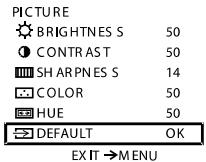
4. SET UP
PICTURE
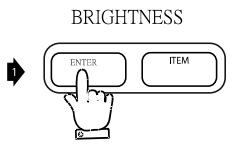
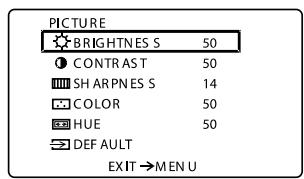


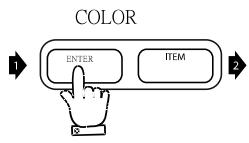
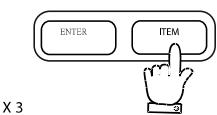
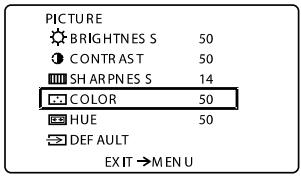


OPERATING INSTRUCTIONS
HUE

3

3

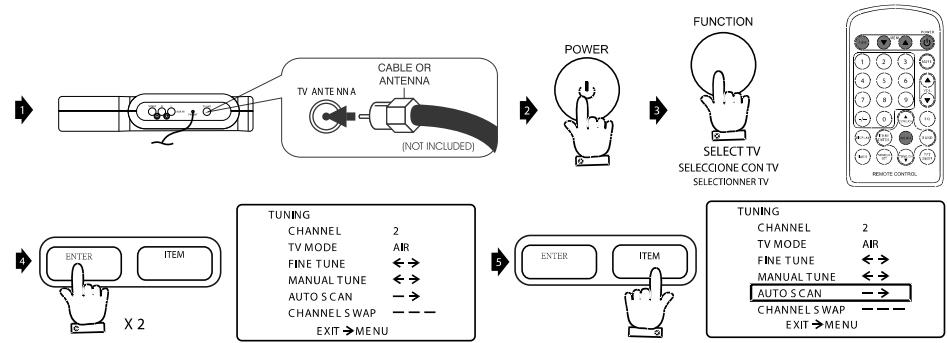
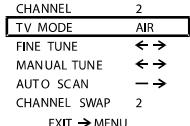
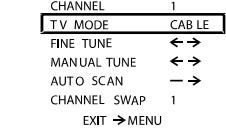
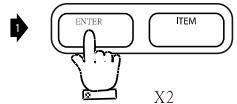
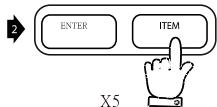
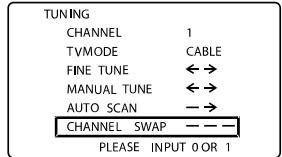
TUNING CHANNEL
1


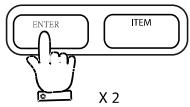
TV MODE
1
2

TUNING

3
TUNING
OPERATING INSTRUCTIONS

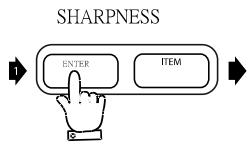
FINE TUNE

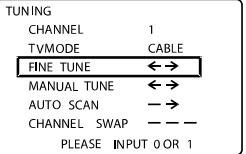
MANUAL TUNE
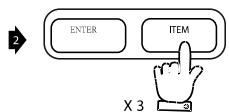
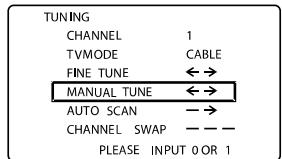
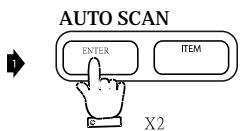
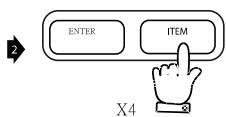
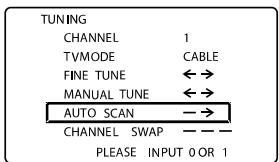
CHANNEL SWAP
OPERATING INSTRUCTIONS
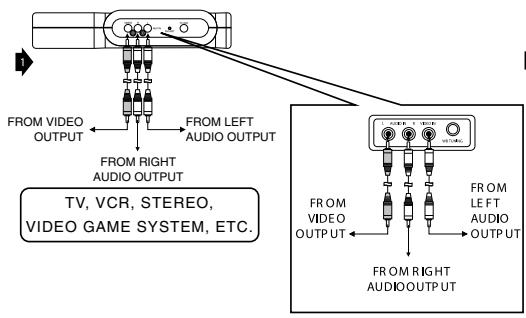
5. LISTENING TO AN AUXILIARY SOURCE
6. SETTING KITCHEN TIMER

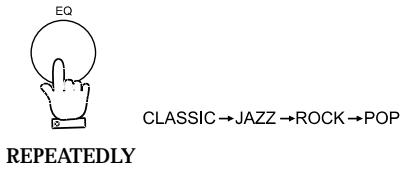
7. EQ
CARE AND MAINTENANCE
GENERAL
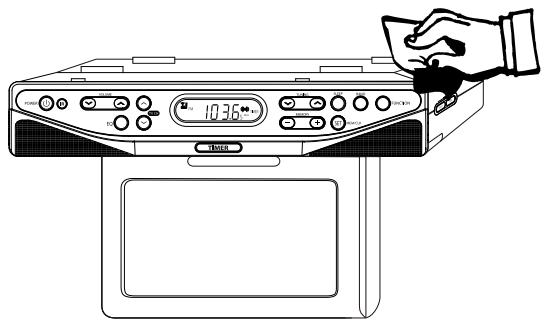
- Use a soft, clean cloth moistened with plain, luke-warm wafer to clean the exterior of the unit.
- Never use solvents such as benzene or other strong chemical cleaners since these could damage the unit's finish.
- It is important that no liquid reaches the inside of the unit.
TROUBLESHOOTING GUIDE
| PROBLEM | POSSIBLE CAUSE | SOLUTION |
GENERAL
| No sound is heard. | Power is not on. | Press the POWER button. |
| VOLUME Control is set to minimum. | Adjust the VOLUME Control. | |
| Mute is on. | Press Mute on remote. |
RADIO
| No sound is heard. | Station has not been tuned properly. | Tune station properly |
| FM reception is weak. | Extend the FM cord. | |
| Wrong function is selected. | Press the FUNCTION button to the radio position. |
TV
| Snowy picture; noisy sound. | Station has not been tuned properly. | Align the antenna or connect an external antenna. |
| Dotted lines or stripes. | This may be caused by local interference (e.g. Cars, neon signs, hair dryers, etc.) | Adjust the antenna for minimum interference or connect an optional external antenna. |
| Double images or “ghosts”. | This may be caused by reflections from nearby mountains or buildings. | A highly directional antenna may improve the picture. |
| Good picture; no sound. | VOLUME control is set to minimum. | Adjust the volume. |
| Good picture; noisy sound. | This may be caused by reflections from nearby mountains or buildings. | A highly directional antenna may improve the picture. |
| Good picture; no sound. | This may be caused by reflections from nearby mountains or buildings. | A highly directional antenna may improve the picture. |
| No picture | Power is not on. | Set the FUNCTION Switch to the TV position. |