
PHAN X2 - Montre connectée IROX - Notice d'utilisation et mode d'emploi gratuit
Retrouvez gratuitement la notice de l'appareil PHAN X2 IROX au format PDF.

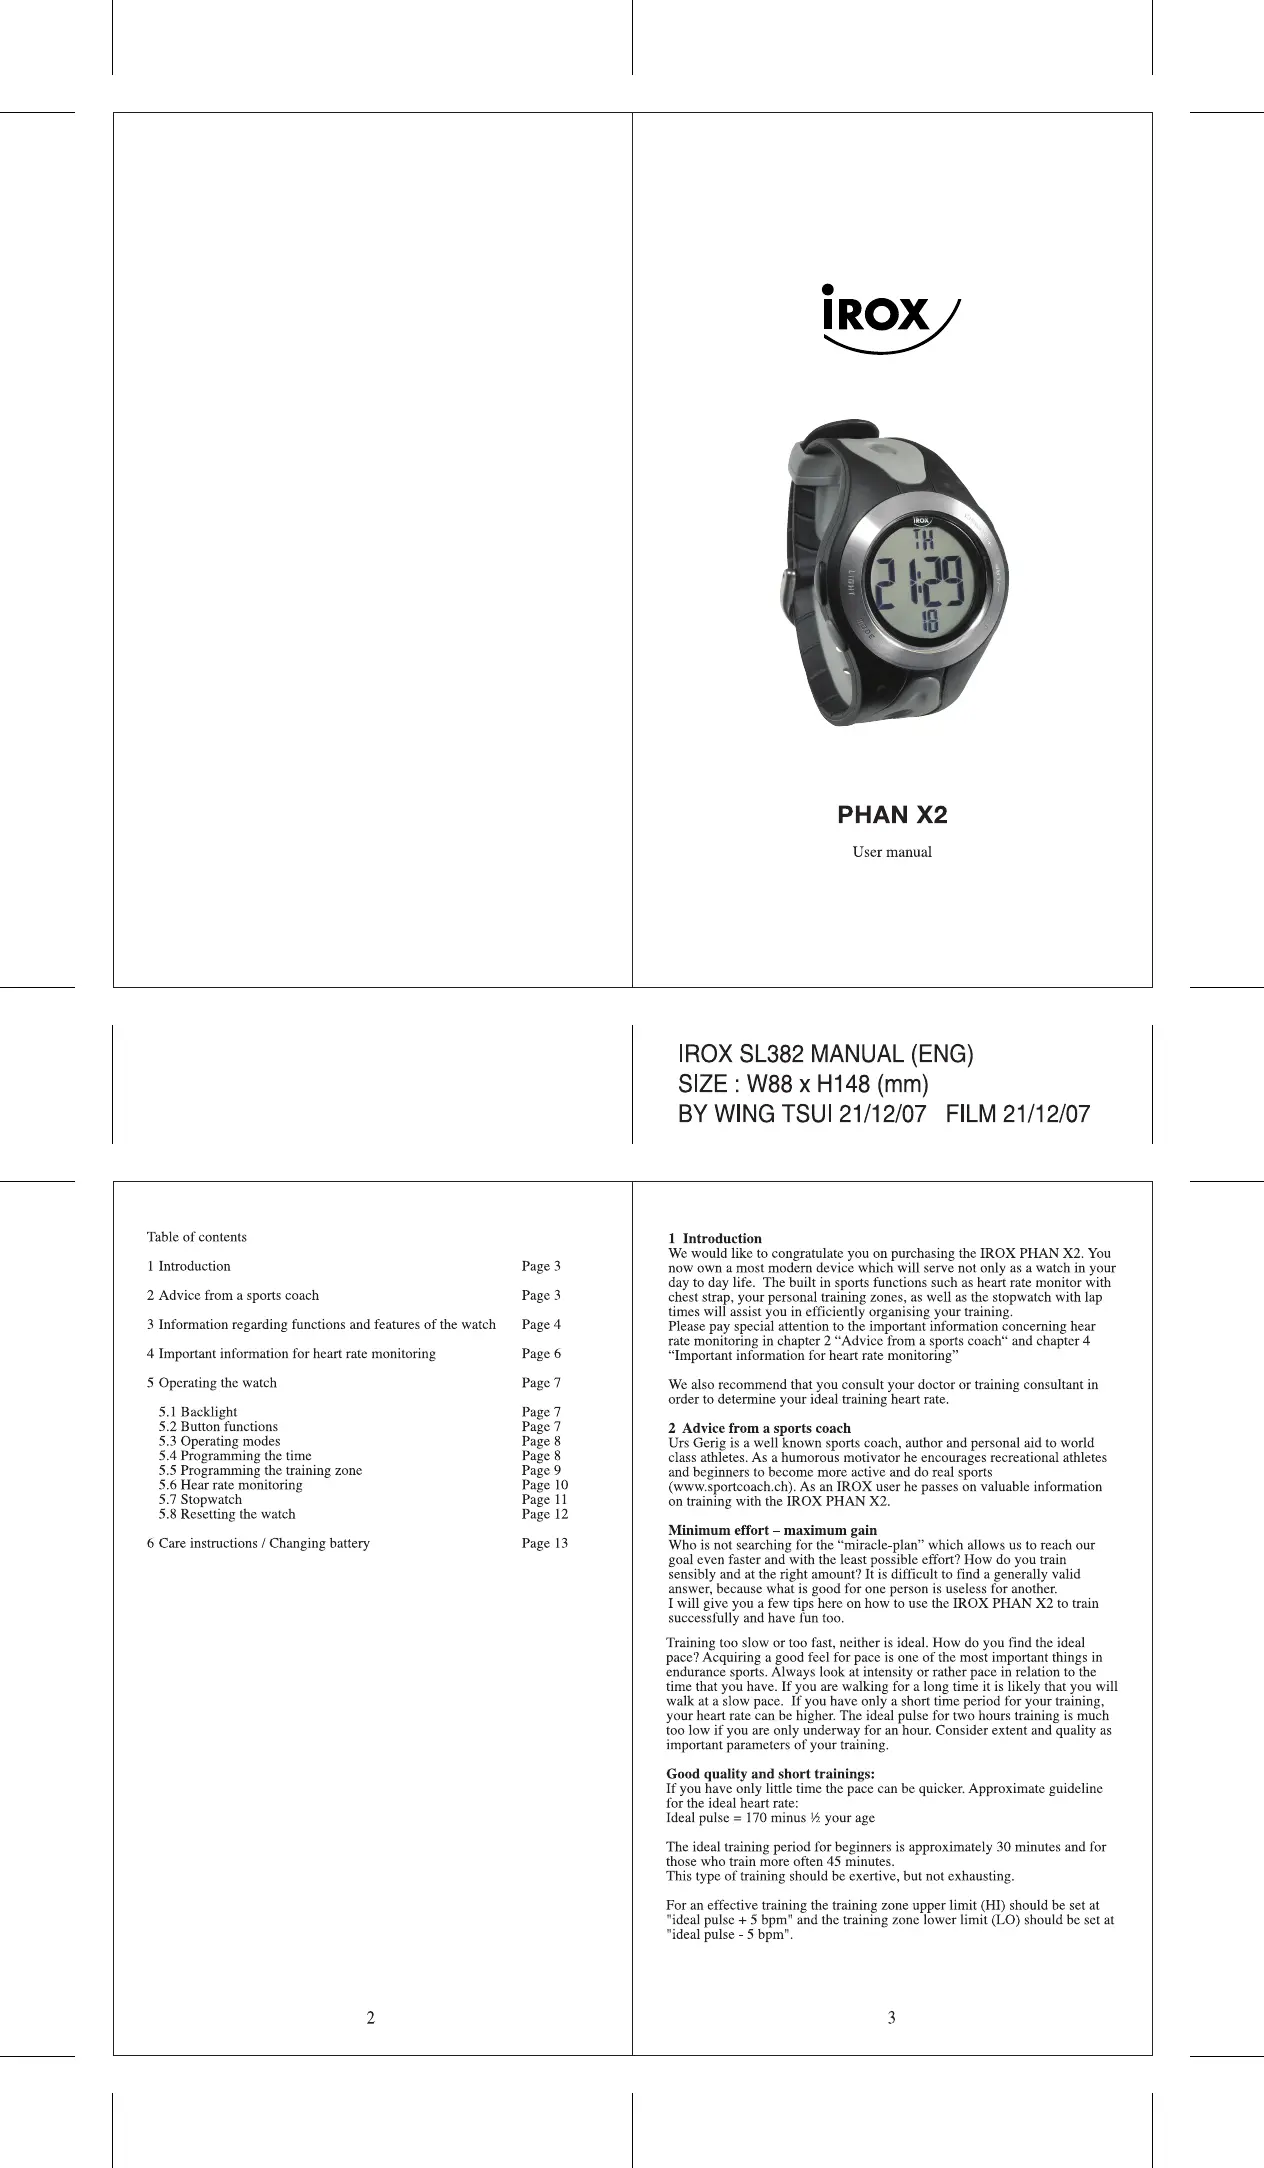
| Type d'appareil | Montre connectée |
| Affichage | Écran numérique |
| Fonction principale | Suivi de la fréquence cardiaque |
| Dimensions | 88 x 148 mm |
| Fonction coach sportif | Oui, conseils et alertes |
| Programmation de l'entraînement | Oui, avec zones de fréquence cardiaque |
| Mesure de la fréquence cardiaque | Oui, en continu |
| Fonction minuterie | Oui |
| Fonction chronomètre | Oui |
| Réglage du fuseau horaire | Oui |
| Résistance à l'eau | Non précisé |
| Autonomie batterie | Non précisé |
| Type de batterie | Rechargeable |
| Connectivité | Non précisé |
| Poids | Non précisé |
| Matériau du bracelet | Non précisé |
| Langues supportées | Anglais, autres non précisés |
| Utilisation recommandée | Entraînement sportif et suivi cardiaque |
FOIRE AUX QUESTIONS - PHAN X2 IROX
Questions des utilisateurs sur PHAN X2 IROX
0 question sur cet appareil. Repondez a celles que vous connaissez ou posez la votre.
Poser une nouvelle question sur cet appareil
Téléchargez la notice de votre Montre connectée au format PDF gratuitement ! Retrouvez votre notice PHAN X2 - IROX et reprennez votre appareil électronique en main. Sur cette page sont publiés tous les documents nécessaires à l'utilisation de votre appareil PHAN X2 de la marque IROX.
MODE D'EMPLOI PHAN X2 IROX

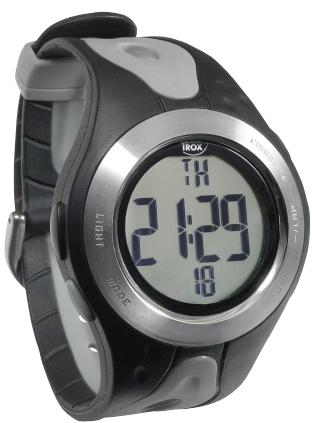
PHAN X2
User manual
IROX SL382 MANUAL (ENG)
SIZE: W88 x H148 (mm)
BY WING TSUI 21/12/07 FILM 21/12/07
Table of contents
1 Introduction Page 3
2 Advice from a sports coach Page 3
3 Information regarding functions and features of the watch Page 4
4 Important information for heart rate monitoring Page 6
5 Operating the watch
5.1 Backlight
5.2 Button functions Page 7
5.3 Operating modes Page 8
3.5 Operating modes Page 8
5.4 Programming the time Page 8
5.5 Programming the training zone
5.6 Hear rate monitoring Page 10
5.7 Stopwatch Page 1
5.8 Resetting the watch Page 1
5.8 Resetting the watch
6 Care instructions / Changing battery
1 Introduction
We would like to congratulate you on purchasing the IROX PHAN X2. You now own a most modern device which will serve not only as a watch in your day to day life. The built in sports functions such as heart rate monitor with chest strap, your personal training zones, as well as the stopwatch with lap times will assist you in efficiently organising your training. Please pay special attention to the important information concerning hearate rate monitoring in chapter 2 "Advice from a sports coach" and chapter 4 "Important information for heart rate monitoring"
We also recommend that you consult your doctor or training consultant in order to determine your ideal training heart rate.
2. Advice from a sports coach
Urs Geric is a well-known sports coach, author and personal aid to world class athletes. As a humorous motivator he encourages recreational athletes and beginners to become more active and do real sports (www.sportcoach.ch). As an IROX user he passes on valuable information on training with the IROX PHAN X2.
Minimum effort - maximum gain
Who is not searching for the "miracle-plan" which allows us to reach our goal even faster and with the least possible effort? How do you train sensibly and at the right amount? It is difficult to find a generally valid answer, because what is good for one person is useless for another. I will give you a few tips here on how to use the IROX PHAN X2 to train successfully and have fun too.
Training too slow or too fast, neither is ideal. How do you find the ideal pace? Acquiring a good feel for pace is one of the most important things in endurance sports. Always look at intensity or rather pace in relation to the time that you have. If you are walking for a long time it is likely that you will walk at a slow pace. If you have only a short time period for your training, your heart rate can be higher. The ideal pulse for two hours training is much too low if you are only underway for an hour. Consider extent and quality as important parameters of your training.
Good quality and short trainings:
If you have only little time the pace can be quicker. Approximate guideline for the ideal heart rate:
Ideal pulse = 170 minus 12 your age
The ideal training period for beginners is approximately 30 minutes and for those who train more often 45 minutes.
This type of training should be exertive, but not exhausting.
For an effective training the training zone upper limit (HI) should be set at "ideal pulse + 5 bpm" and the training zone lower limit (LO) should be set at "ideal pulse - 5 bpm".
High quality and long trainings:
Long slow distance trainings with low heart rates are particularly effective. Try to do LSD-Trainings (Long Slow Distance) once a week. LSD-Trainings can not be done too slow, only not long enough. The heart rate hereby should be approximately 20 - 30 beats below the recommended rate for a quick pace and the training period should be between 1.5 to 3 hours.
This zone is also known as the "guilty conscience zone" because one has the feeling of being too slow. In the end effect though this training, because of the distance and loss of energy and fluids, is exhausting enough.
The PHAN X2 can help you quickly develop a good feeling for pace, which helps you get the most out of your training. Look at it as a helpful and dependable device, but don't become its slave. Together you'll learn to train ideally. I wish you much fun and success!
3 Information regarding functions and features of the watch
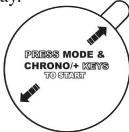
Activate the watch
If your watch does not show any numbers on the display after purchasing, then it has to be activated first. In order to do this, please press and hold the CHRONO and MODE buttons simultaneously until numbers appear on the display.
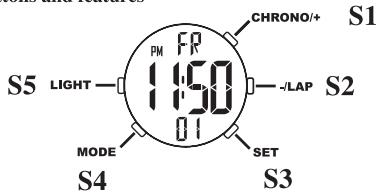
Operating buttons and features
4
The heart rate is monitored with the provided chest belt; the pulse function is also equipped with a programmable training zone with an alarm signal.
The watch has 3 operating modes: time, heart rate and stopwatch.
All buttons have a beep tone for confirmation. If there is no beep then this button does not have a function for the mode in effect or the word "Hold" will appear. In this case please continue to press the button until you hear a beep and the elements to be set appear on the display.
Battery:
CR2032 (3V button cell), one each in watch and belt
Display:
LCD with blue EL backlight (activated for 3 seconds by pressing button)
Operating temp.
0^ to 55^
Water resistance:
The watch is water resistant against rainwater, water during showering and normal bathing and swimming. Do not, under any circumstances push any buttons when under water or use the watch for diving. Warning: Wild or jerky movements under water and also athletic swimming can cause unwanted activation of buttons allowing water to enter into the watch! HRM functions:
Measuring range 30-240 heart beats per minute and corresponding display
Training monitoring:
Programming training zones with optional alarm function when beyond
training zone.
Upper limit adjustable from 31-240, lower limit from 30-239.
Watch functions:
Display of hours, minutes and seconds (12 or 24 hr format)
Calendar with month, day and weekday for the years 2000-2099
Stopwatch:
Stopwatch with 1/100 resolution for the first hour thereafter 1 second
resolution
LAP (lap time) function
Time measuring up to 99 hours 59 minutes 59 seconds
5
4 Important information for heart rate monitoring
General information
- Please consult your doctor for your ideal and non-harmful training information (maximum pulse rate) if you have problems with your heart or have, in your lifetime, had a medical intervention on your heart.
- If you have just begun your training or are you planning on beginning regular training we strongly recommend that you set up a trainings plan with a doctor or fitness coach.
Heart rate monitoring with a chest belt
For persons with intensive physical activities (sports such as cycling, jogging etc.) and trainings where a focus is placed on the use of training zones, using a heart rate monitor is of great value. Following rules apply hereby:
- The wireless pulse rate transmission distance from the chest belt to the watch is up to maximum 60~cm (that means approximately arm's length).
- Monitoring requires a good contact of the measuring surface to your body. The belt must be well attached to the body (so that the transmitter containing the battery is in the middle of the body or rather over the heart in the upper part of the chest muscle and just below the base of the breastbone). Avoid areas with a lot of hair.
- Moisten the contact surfaces (left and right of the transmitter) with a conductive fluid (contact gel is ideal, sweat or saliva. Normally tap water is also suitable.)
-
In a dry and cold climate it may take a while for the transmitted values to become stable. This problem will resolve itself as soon as you begin to sweat from physical activity.
-
Incorrect or missing transmission of data can be caused by the following:
-
The chest belt has insufficient contact with the body (skin is too dry or chest belt does not fit correctly)
- Weak or empty batteries in the chest belt or in the watch
- Your heart rate is under 30 beats per minute
- Electro magnetic disturbances in the area (transformer station, electrical overland lines, thermionic screens from PCs and TVs, electric motors, in the car etc.)
- Please note that the transmission distance of approximately 60~cm from a transmitter belt of a person in your immediate area can also be received on your watch. The overlapping of the signal from your belt and the foreign belt usually leads to very high monitored rates. This is also possible with chest belts from other brands! A bit of extra distance between you and the other person or wearing the watch on the other wrist usually solves this problem.
- High amounts of chlorine in swimming pools and the salt content in sea water can, because of increased conductivity, affect monitoring.
5 Operating the watch
The IROX PHAN X2 is a heart rate monitor with time / date and a stop watch. With its five push buttons it is very easy to operate.
5.1 Backlight
Press button S5 to activate the EL backlight for 3 seconds. If during this time another button is pressed, the light is re-activated for 3 seconds.

5.2 Button functions
S1 (CHRONO/+)
- Date display (in TIME mode)
- Activation of connection between chest belt and watch (in HRM mode)
- START/STOP for the stopwatch (in STW mode)
- "+" adjustments in setup mode
S2 (LAP/)
- For activated stopwatch: to record lap times
- -adjustments in setup mode
S3 (SET)
- To get to setup mode (press and keep pressed as long as "Hold" is
displayed) - To RESET the stopwatch and to delete (!) the 15 lap memory
- In setup mode to skip to next adjustment
S4 (MODE)
- To switch operating mode (switch function)
- In setup mode: Accept settings and end setup mode
S5 (LIGHT)
- Press shortly: EL backlight is activated for 3 seconds
- Light remains activated as long as another button is pushed within the 3 seconds. During this time other buttons can also be operated.
5.3 Operating modes
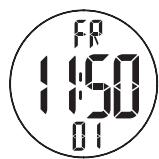
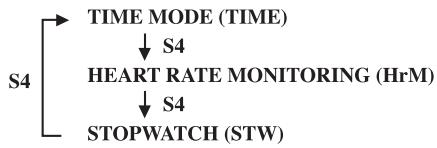
In order to reach the next operating mode, press the S4 button.
5.4 Programming the time
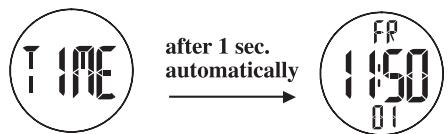
- Press the S4 (MODE) button as shown above in order to reach the TIME operating mode. "TIME" will be indicated in the display for one second.
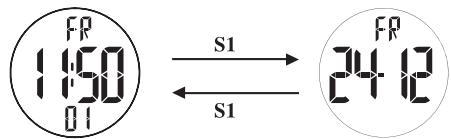
- If you press the S1 button while still in the "TIME" operating mode the date (weekday, month and day) will be displayed. Pressing the S1 button again will return to the time display.
- To set the time, press and hold the S3 button (SET) for 2 seconds (the word "Hold" will appear) to get to the setup mode. The year display will begin to blink allowing you to set the time and the date.
-
Press the S1 (+) or S2 (-) button to set the year. Press and hold the S1 or S2 button for a faster changing of the values.
-
Press the S3 (SET) button to conduct all other programming, the sequence is defined as follows:
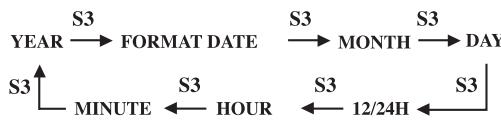
Information:
- The year can be set from 2000 to 2099.
- The date format is D-M or M-D (D=Day, M=Month)
- As soon as you have programmed everything press the S4 button to leave the setup mode. The watch will then begin running at 00 seconds, if the time has been re-set.
- The weekday in the date display is automatically determined by the date entered. The display is in English (MO, TU, WE, TH, FR, SA, SU).
Please note:
If in the setup mode, for the duration of approx. 1 minute, no button is pressed, the watch automatically switches back into the time operating mode and the settings will be taken over.
5.5 Programming the training zone
In order to monitor the heart rate with the training zone you must follow the setup below. But please note: If you do not want a training zone then you can go directly to chapter 5.6.
Programming information for pulse monitoring with training zones:
- Press the S4 button until you reach the heart rate monitoring mode, in the display "HrM" appears for 1 second.
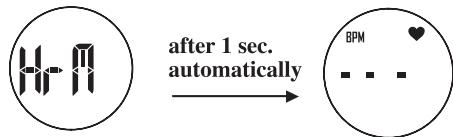
- Then press and hold the S3 button for 2 seconds (the word "Hold" appears) to get to the setup mode. The upper limit (HI) begins to blink and can be programmed.
- Press the S1 or S2 button to program the limit. Press and hold the S1 or S2 button for a faster changing of values.
- Now press the S3 button to program the lower limit (LO) and then again to set the acoustic training zone alarm ("BEEP") on (ON) or off (OFF).
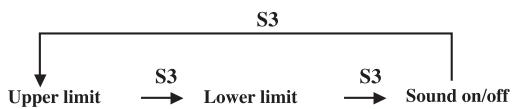
- The acoustic training zone alarm "BEEP" is switched on (ON) or (OFF) with the S1 button.
- As soon as you have made all adjustments leave the setup mode with the S4 button.
Please note:
- The programming of the limit values lies between 30 and 240 BPM (heartbeats per minute). Attention: The upper limit must be higher than the lower!
- If in the setup mode, for the duration of approx. 1 minute, no button is pressed the watch automatically switches back into the heart rate monitoring mode.
- To use the heart rate monitoring chest belt please read chapter 4 ("Important information on heart rate monitoring").
5.6 Heart rate monitoring
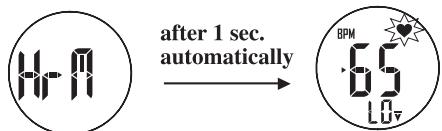
- Press the S4 (MODE) button until you reach the heart rate monitoring mode in the display "HrM" appears for 1 second.
- The heart symbol blinks when a signal is being received from the chest belt and your heart rate is shown in the middle of the display. If the heart symbol does not blink, please read section 4 carefully.
- If you have activated the training zone alarm 2 "beep signals" will sound every 14 seconds if your pulse drops below the "lower limit" and every 14 seconds 4 "beep signals" if your pulse goes over the "upper limit".
Following signals appear on the display for HI/LO:
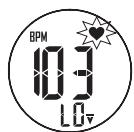
Pulse under the lower limit
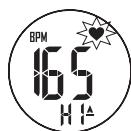
Pulse over the upper limit
Please note:
If the chest belt is not receiving a signal, "---" (heart symbol does not blink) will appear in the middle of the display. If this happens please follow section 4. As soon as a pulse is being received the heart symbol on the upper right of the display will blink and shortly thereafter the measured heart rate will be shown. If no signal is received for more than 6 minutes the display automatically switches back to the TIME mode.
2.If you have switched off the training zone alarm no alarm will sound. The warning displays (LO and HI A)will still appear.
5.7 Stopwatch
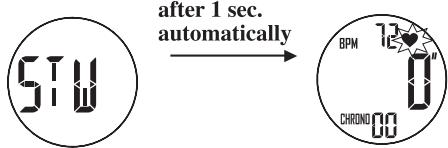
Stopwatch:
- Press the S4 (MODE) button until you reach the stopwatch operating mode, "STW" (for stopwatch) will appear on the display for 1 second.
- Press the S1 (CHRONO) button to start and/or stop the stopwatch. The procedure (start/stop) can be repeated endlessly.
- For the first minute the stopwatch displays seconds and 1/100 seconds, then minutes, seconds and 1/100 seconds. For measuring longer than an hour the stopwatch displays hours, minutes and seconds (without 1/100 seconds).
Lap times (LAP)
- Up to 15 lap times can be recorded with the "LAP" button when the stopwatch is activated. The lap number (1-15) will be shown and then the display will immediately return to the time being measured (when all 15 memories are used, the text "FULL" will be shown on the display). The stopwatch with the totally elapsed time continues to run in the background until you stop the stopwatch with the S1 (CHRONO) button.
When the stopwatch is stopped the total time elapsed ("end time") is displayed. At this point you can use following functions:
Button S2 (LAP):
Each time you press this button you can view the lap times from 1 - 15. The heart rate shown in the display is the pulse measured at the end of the corresponding round.
Button S4 (MODE):
After reading the lap times you can return to the end time by pressing this button twice.
Button S3 (SET):
All recorded lap times and elapsed time is deleted!
Pulse display:
In this mode the heartbeats per minute are also shown on the top line. When the pulse signal is received by the chest belt the heart symbol blinks and your pulse is displayed. It is irrelevant hereby whether the stopwatch is running or not.
If you have activated the training zone alarm 2 "beep signals" will sound every 14 seconds if your pulse drops below the "lower limit" and every 14 seconds 4 "beep signals" if your pulse goes over the "upper limit".
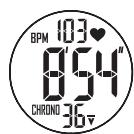
Pulse under the lower limit
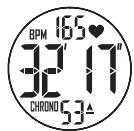
Pulse over the upper limit
Please note:
- If the chest belt is not receiving a signal, "---" (heart symbol does not blink) will appear in the middle of the display. As soon as a pulse signal is received the heart symbol on the upper right of the display will blink and shortly thereafter (in about 6-10 seconds) the measured pulse will be displayed.
- For the first hour the stopwatch has a resolution of 1/100 seconds, for measuring longer than an hour the stopwatch displays a resolution of one second. Measuring up to 24 hours is possible, thereafter the stopwatch stops automatically.
- If you have deactivated the training zone alarm no alarm will sound. The warning displays (,) will still appear.
5.8 “RESET” THE WATCH
Simultaneously press and hold the S1, S2, S3, and S4 buttons for approx. 3 seconds.
The watch, or rather the processor in the watch, will be restarted. After this all display elements will appear followed by the display "0:00".
Attention: All settings will be lost and must be reset as described in this user manual.
A reset is recommended directly after changing the battery in the watch or if the watch, for unknown reasons, does not function correctly.
6 Care instructions and battery changing
The PHAN X2 is a high quality instrument which has been produced in a modern, hard wearing, and lightweight design completely fulfilling all common sports requirements. You should still avoid rough mechanical exposure like blows or scratching/scouring contacts.
It is recommended, after each training and competition, to carefully clean the watch and the chest belt with warm water perhaps also with a bit of skin kind soap, rinse off and cleanse from sweat and skin particles. Then please rinse well and dry with a soft towel. At no time should aggressive cleaning solutions be used!
According to use it may sooner or later become necessary to change the batteries. You can change the batteries in the watch and in the belt yourself. In each case you must pay close attention that on the watch as well as on the belt the seals are replaced correctly. Putting in the screws and watchband holders requires a bit of routine and patience, any damages caused to the instruments hereby do not fall under the warranty.
In case of doubt we recommend having the batteries exchanged in a good specialist shop.

RoHS

