
IBR923 - Station Météo IROX - Notice d'utilisation et mode d'emploi gratuit
Retrouvez gratuitement la notice de l'appareil IBR923 IROX au format PDF.

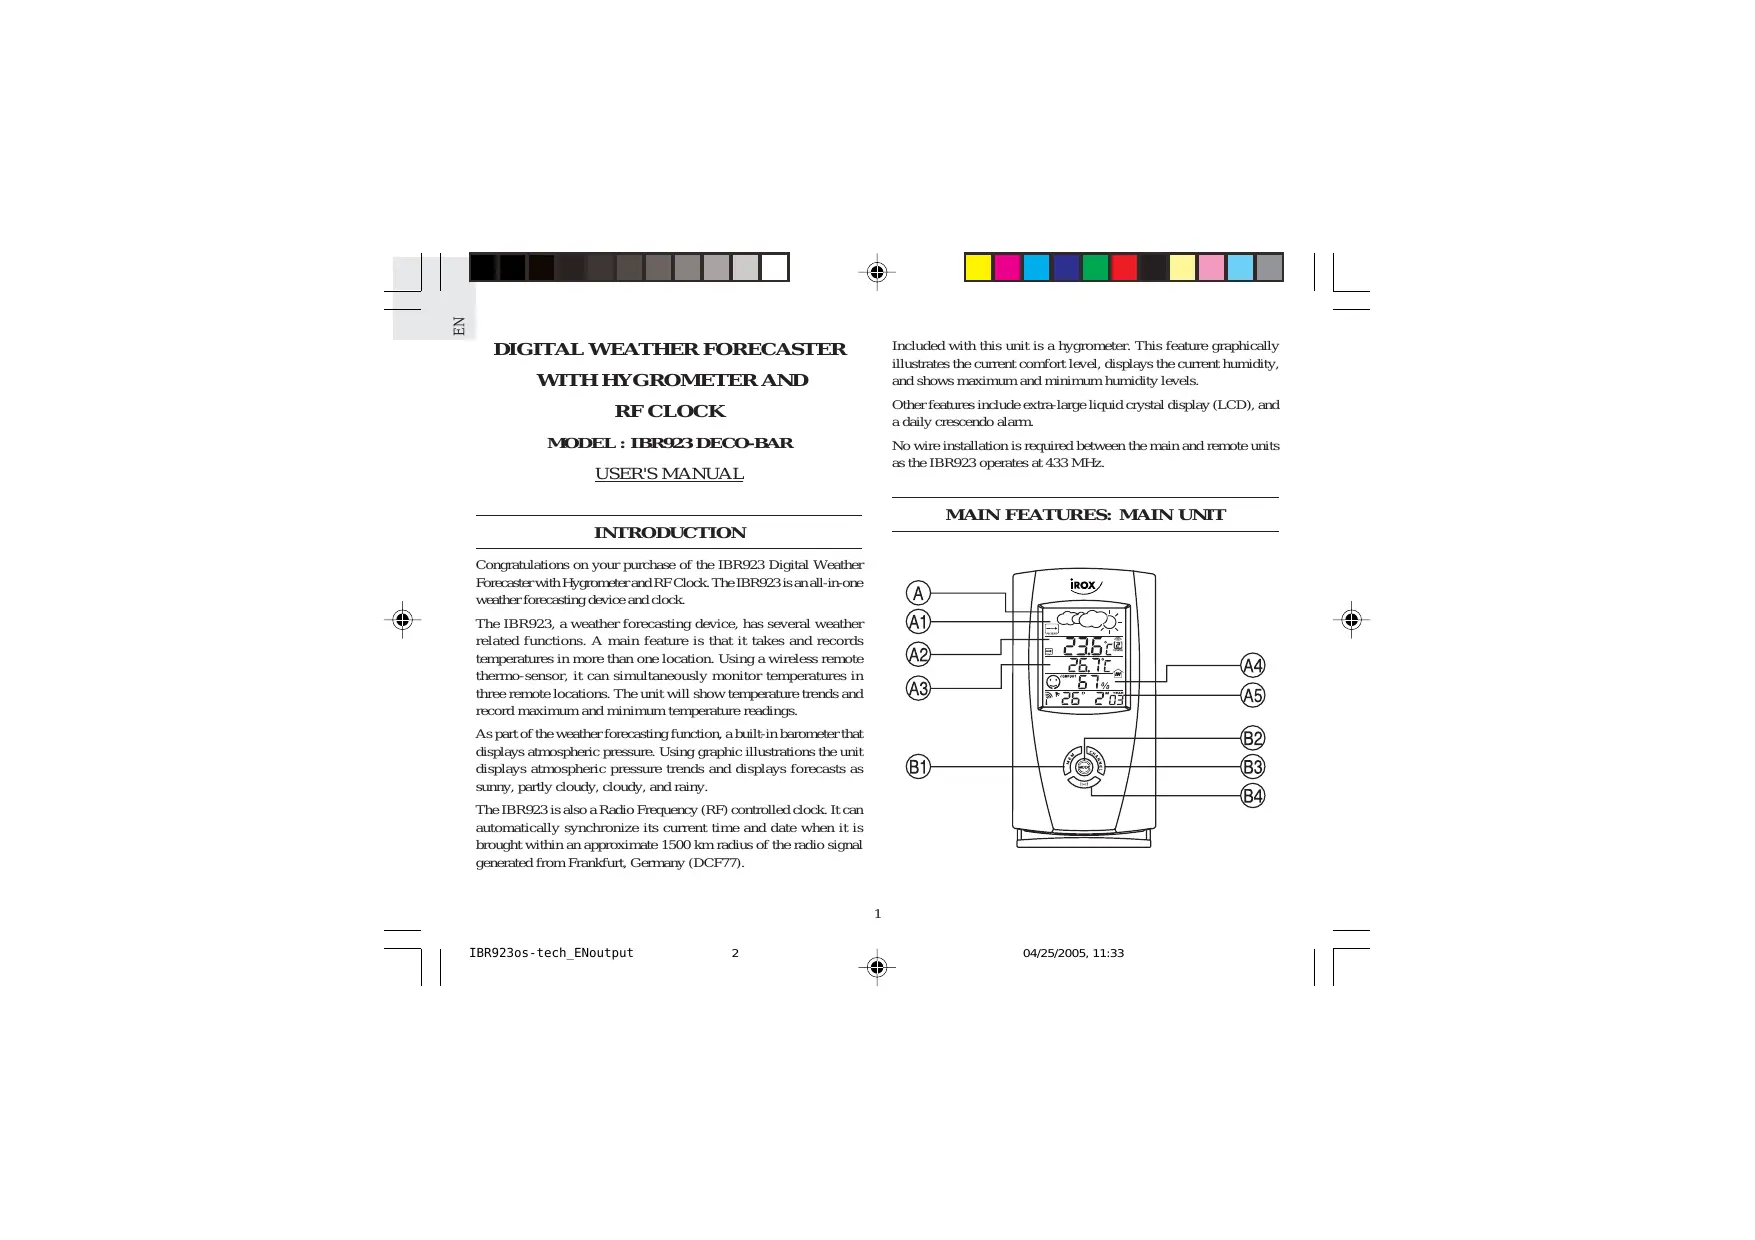

| Type d'appareil | Station météo digitale |
| Fonctions principales | Prévision météo, hygromètre, horloge radio-pilotée |
| Affichage | Écran LCD |
| Mesure de la température | Oui |
| Mesure de l'humidité | Oui |
| Horloge | Horloge radio-pilotée (RF) |
| Alimentation | Piles ou adaptateur secteur (non précisé) |
| Transmission sans fil | Oui, fréquence radio |
| Précision de la température | Non précisé |
| Précision de l'humidité | Non précisé |
| Dimensions | Non précisées |
| Poids | Non précisé |
| Fonctions supplémentaires | Prévision météo par icônes, alarme |
| Langue d'affichage | Anglais (modifiable possible) |
| Utilisation | Intérieur |
| Garantie | Non précisée |
FOIRE AUX QUESTIONS - IBR923 IROX
Questions des utilisateurs sur IBR923 IROX
0 question sur cet appareil. Repondez a celles que vous connaissez ou posez la votre.
Poser une nouvelle question sur cet appareil
Téléchargez la notice de votre Station Météo au format PDF gratuitement ! Retrouvez votre notice IBR923 - IROX et reprennez votre appareil électronique en main. Sur cette page sont publiés tous les documents nécessaires à l'utilisation de votre appareil IBR923 de la marque IROX.
MODE D'EMPLOI IBR923 IROX
DIGITAL WEATHER FORECASTER
WITH HYGROMETER AND
RF CLOCK
MODEL:IBR923DECO-BAR
USER'S MANUAL
INTRODUCTION

Congratulations on your purchase of the IBR923 Digital Weather Forecaster with Hygrometer and RF Clock. The IBR923 is an all-in-one weather forecasting device and clock.
The IBR923, a weather forecasting device, has several weather related functions. A main feature is that it takes and records temperatures in more than one location. Using a wireless remote thermo-sensor, it can simultaneously monitor temperatures in three remote locations. The unit will show temperature trends and record maximum and minimum temperature readings.
As part of the weather forecasting function, a built-in barometer that displays atmospheric pressure. Using graphic illustrations the unit displays atmospheric pressure trends and displays forecasts as sunny, partly cloudy, cloudy, and rainy.
The IBR923 is also a Radio Frequency (RF) controlled clock. It can automatically synchronize its current time and date when it is brought within an approximate 1500km radius of the radio signal generated from Frankfurt, Germany (DCF77).
Included with this unit is a hygrometer. This feature graphically illustrates the current comfort level, displays the current humidity, and shows maximum and minimum humidity levels.
Other features include extra-large liquid crystal display (LCD), and a daily crescendo alarm.
No wire installation is required between the main and remote units as the IBR923 operates at 433MHz
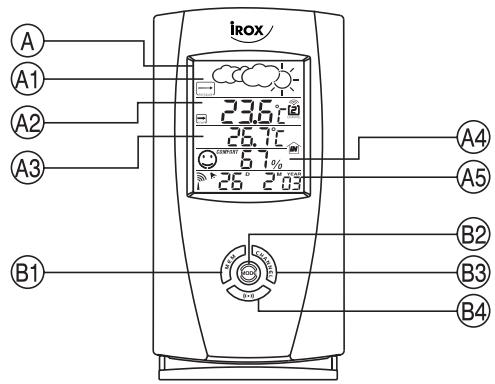
MAIN FEATURES: MAIN UNIT
1



A. FRONT DISPLAY
The extra-large LCD occupies the front panel. The LCD is subdivided into five easy-to-read sections. Each section has a specific purpose that relates to weather forecasting, temperature, humidity, or clock / calendar / alarm functions.
A1. WEATHER FORECAST WINDOW
- Graphically illustrates a weather forecast
- Indicates trends in atmospheric pressure
- Indicates when main unit battery is low
A2. REMOTE TEMPERATURE WINDOW
- Displays current temperature, remote sensor unit
- Indicates the minimum / maximum remote temperature
- Displays remote temperature as Fahrenheit(°F) or Celsius (°C)
- Indicates remote temperature trend
- Indicates when the remote sensor battery is low
- Indicates the remote sensor channel
A3. MAIN UNIT TEMPERATURE WINDOW
- Displays current indoor temperature
- Indicates minimum / maximum indoor temperature
- Displays indoor temperatures as Fahrenheit(°F)/Celsius(°C)
A4. HYGROMETER WINDOW
- Graphically illustrates the level of comfort.
- Current humidity
- Maximum and minimum humidity level
A5. TIME / DATE / ALARM WINDOW
- Displays the current time, date (day, month, and year), or alarm time
- Radio Frequency (RF) status indicator [1]
- "ALARM ON" icon, indicates when the alarm is active [▶]
- Alarm indicator [ALARM]
A.M. / P.M. indicator
B. CONTROL BUTTONS
B1. MEMORY BUTTON [MEM]
Displays minimum and maximum temperature readings, and erases memory data
B2. MODE BUTTON
Changes the display mode of the clock, and alters time/date setting
B3. CHANNEL BUTTON
Sets the remote sensor channel.
B4. ALARM SET BUTTON [()]
Displays the alarm time, or changes the alarm time
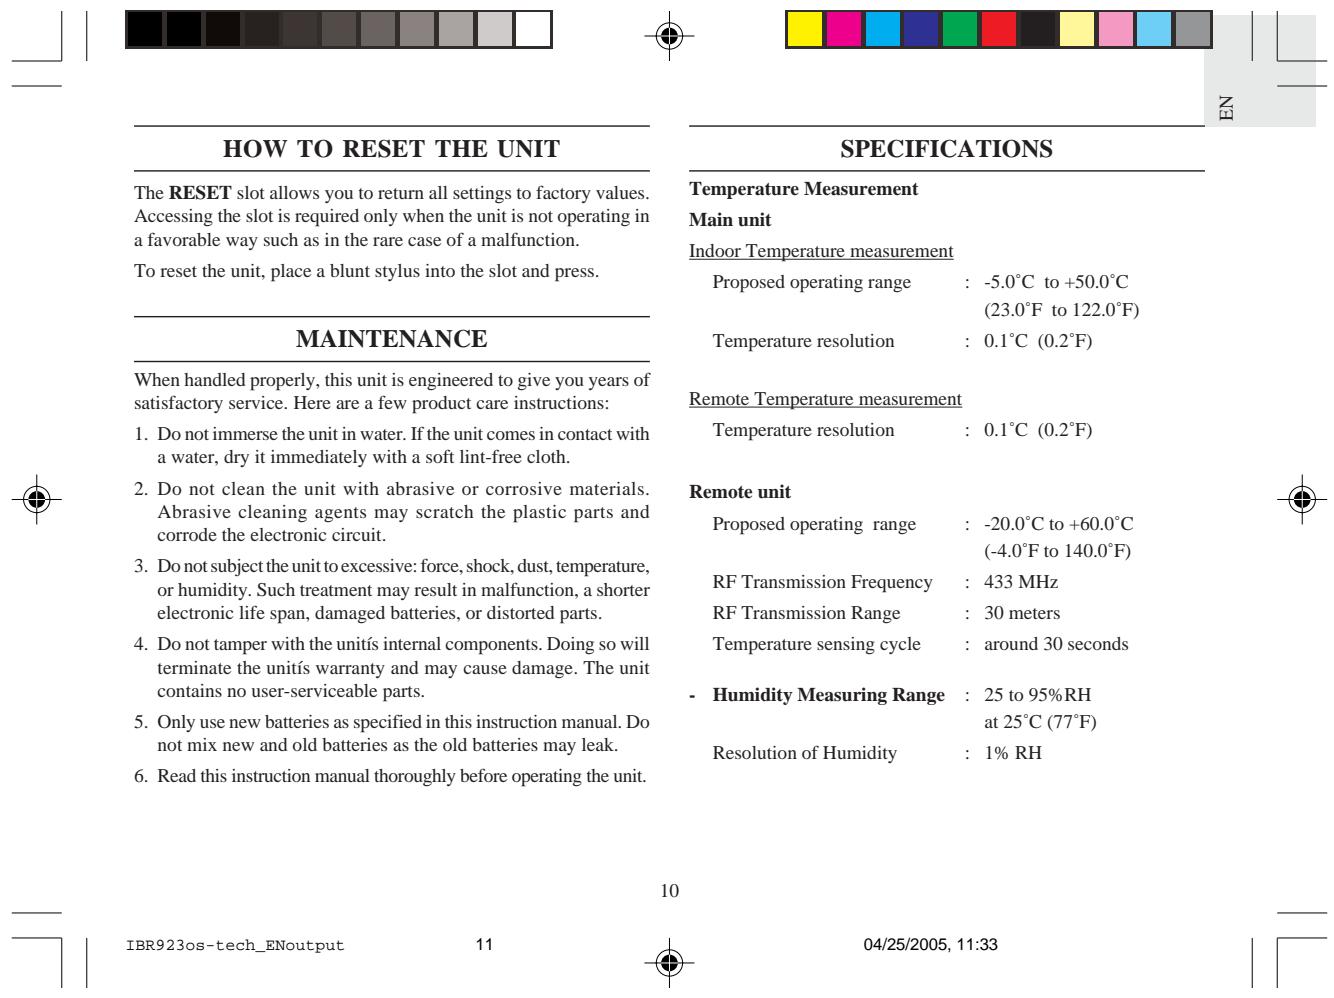
B5. RESET SLOT
Resetstheunitbyreturningall settingto their defaultvalues
B6. ALARM ON/OFF BUTTON [AL ON/OFF]
Activates and deactivates the alarm
B7. 'C/F SLIDE SWITCH
Selects between Centigrade (^) or Fahrenheit(°F) display
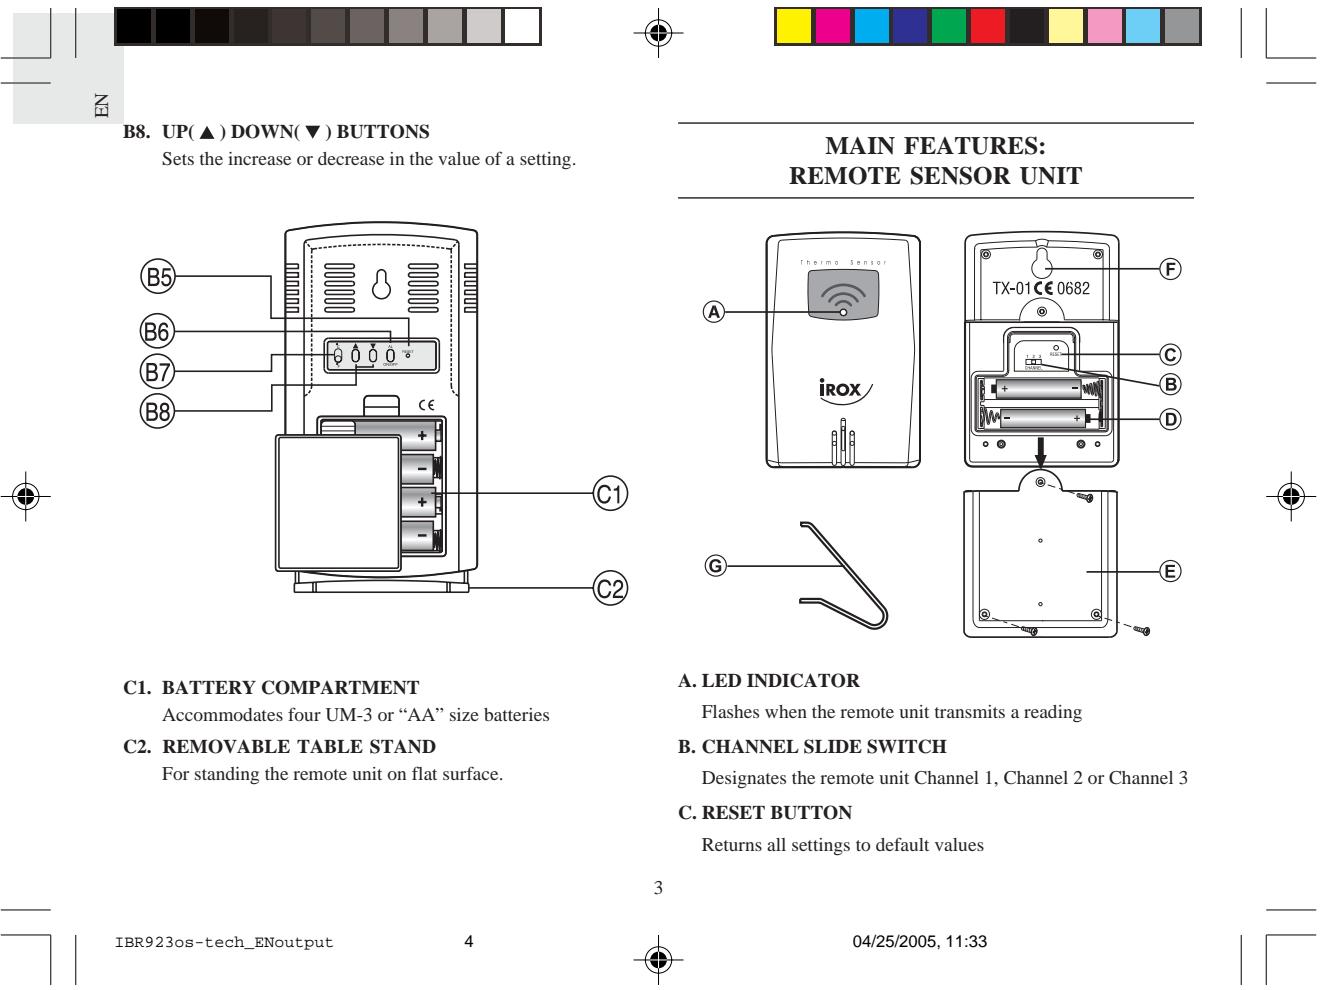

D. BATTERY COMPARTMENT
Accommodates two UM-4 or AAA-size batteries
E. BATTERY DOOR
F. WALL-MOUNT HOLE
Supports the remote until in wall-mounting
G.MOVABLE TABLE STAND
For standing the remote unit on a flat surface
BEFORE YOU BEGIN
For best operation:
- Insert batteries for the remote unit first. Then proceed with inserting the batteries for the main unit.
- Position the remote unit and the main unit within effective transmission range. In usual circumstances, the effective range is 30 meters.
- Though the remote unit is weather proof, it should be placed away from form direct sunlight, rain or snow.

BATTERY AND CHANNEL INSTALLATION: REMOTE UNIT
- Remove the screws on the battery door.
- Select the channel number on the CHANNEL slide switch.
- Install 2 alkaline batteries (UM-4 or "AAA" size 1.5V)strictly according to the polarities shown.
- Replace the battery compartment door and secure its screws.
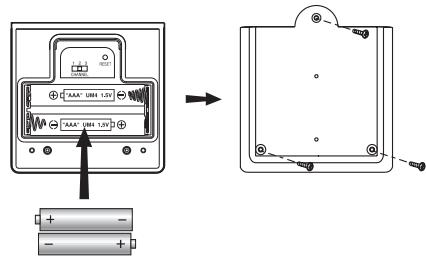
Note that once a channel is assigned to a remote unit, you can only change it by removing the batteries or resetting the unit.
BATTERY INSTALLATION: MAIN UNIT
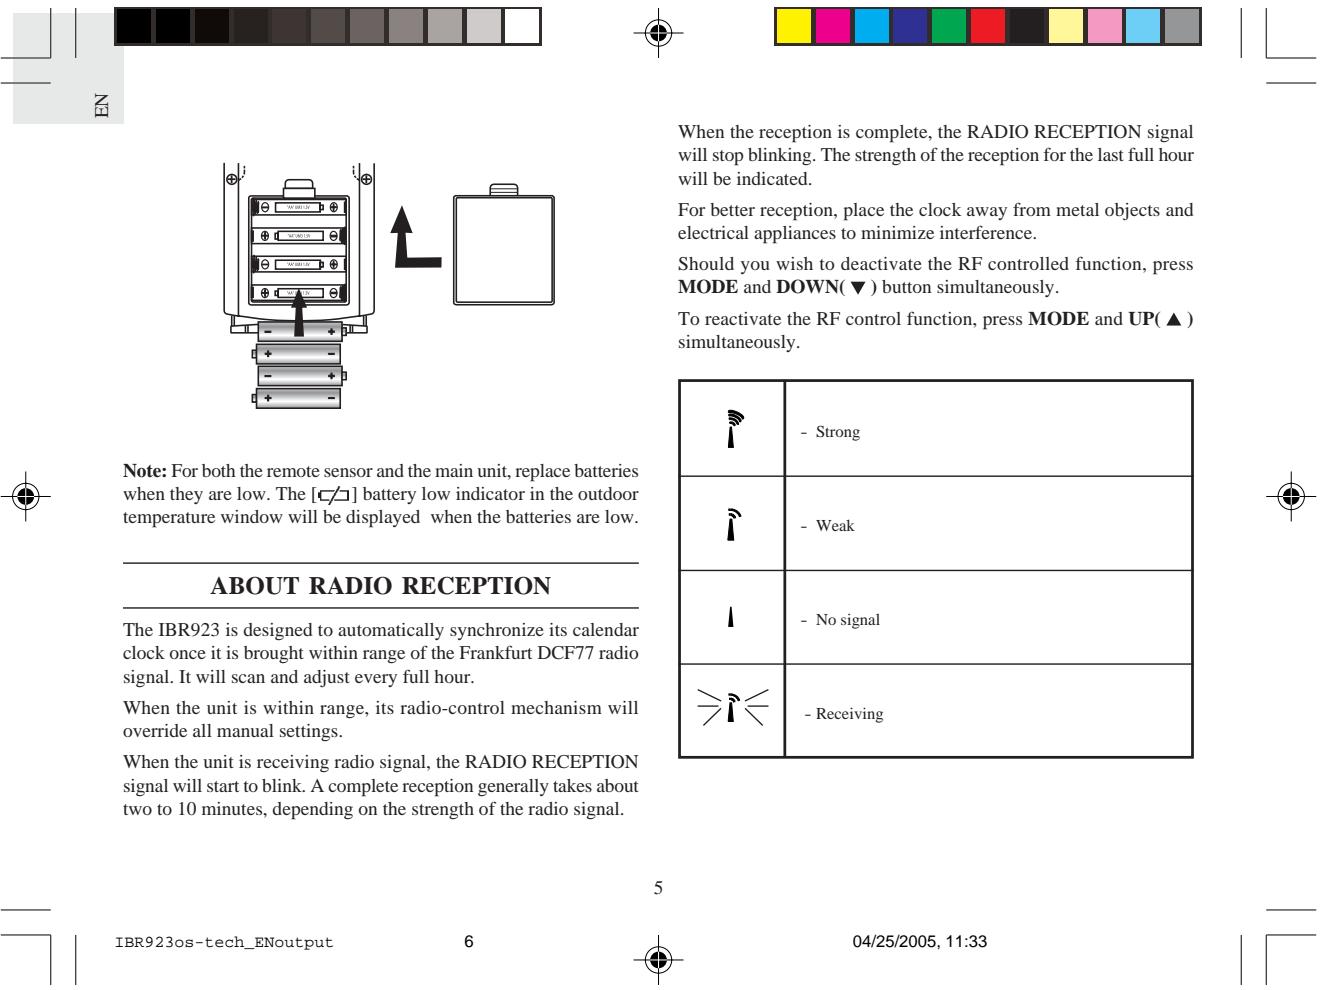
- Gently lift the tab on the battery compartment door.
- Insert four UM-3 or "AA" size alkaline batteries.
- Replace the battery compartment door.



HOW TO MANUALLY SET THE CLOCK
1. Setting the 12hr./24hr. clock display
Press MODE and hold for three seconds. The 12-hr value will flash. Use the UP() or DOWN () buttons to make a selection between a twenty-four hour display and a twelve hour display.
2. Setting the Multilingual Day-Of-The-Week Function
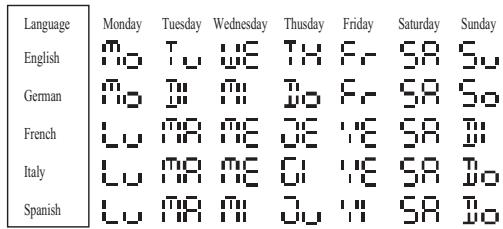
The day-of-the-week can be expressed as an abbreviation in five different languages. The languages and their selected abbreviations for each day of the week are shown in the language chart below.
Proceeding from the clock display:
Press MODE again and the language setting will flash. Use the UP() or DOWN(▼) button to select E for English, I for Italian, D for German, F for French, or S for Spanish.
3. Setting the time
Press MODE again, the hour settings will flash. Use the UP (▲) or DOWN (▼) button to enter the hours. Holding down either the up or down position will increase or decrease the value rapidly.
Press MODE again, the minute settings will flash. Again, use the UP() or DOWN(▼) button to change the minutes.
4. Setting the calendar
Proceeding for the time display:
Press MODE again, the calendar settings are displayed and the year is flashing. Use the UP() or DOWN(▼) button to change the year.
Press MODE button, the month settings will flash. Enter the appropriate month using the UP(▲) or DOWN(▼) button.
Press MODE button, the day settings will flash. Enter the appropriate day using the UP() or DOWN(▼) button.
Press MODE again. The day (D) and month (M) symbols will flash. The unit provides an option that allows either the day or the month to be indicated first. Using the UP() or DOWN() button, select whether the calendar reads as: Day/Month; or Month/Day.
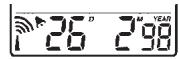
Day / Month
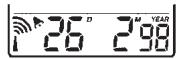
Month / Day
Press MODE again to confirm and exit.

#



HOW TO SET AND ACTIVATE THE ALARM
1. To set the Alarm
Press ALARM button to display the alarm time.
Press ALARM and hold for three seconds, the value for the hour setting will flash.
Press UP() or DOWN(▼) buttons to make changes to the alarm hour setting.
Press ALARM, the minute setting will flash. Enter the value for the minute setting.
Press ALARM to exit.
The alarm is automatically activated.
2. To deactivate the alarm setting
Press ALARM ON/OFF [AL ON/OFF] to activate or deactivate the alarm setting. When the ALARM ON icon [▶] is visible, the alarm is set. The alarm will active at the specified time.
ALARM FUNCTION
When the alarm activates, the ALARM ON icon [▶] will flash.
The alarm function has a built in crescendo type alarm system. Initially, the active alarm will have a gentle sound. The intensity will increase in three stages. Without interruption, the unit will alarm for two minutes.
To stop the alarm, press any button.
CHECKING INDOOR AND REMOTE SENSOR TEMPERATURES
The indoor temperature readings, and indoor temperature maximum/minimum indicator are all part of the INDOOR TEMPERATURE window.
The OUTDOOR temperature window displays remote sensor temperatures, maximum and minimum temperatures and outdoor temperature trends. This window also displays the remote sensor channels and a remote sensor battery low [ ] icon.
The temperature can be shown in Centigrade (^) or Fahrenheit (^) . Select the appropriate reading by using the ^ C / ^ slide switch. Slide the switch to ^ C for Centigrade or ^ F for Fahrenheit.
NOTE ON OUTDOOR-REMOTE TEMPERATURE
Once batteries are in place in the remote unit, it will start transmitting samplings at 30 second intervals.
If no signals are received when the outdoor-remote temperature is selected, " " will be displayed. To force the main unit to search for remote sensor signals, press MEM and CHANNEL simultaneously.
If that fails, check that the remote sensor is still in place. Make sure the transmission is within range and the path is clear of obstacles and interference.
Repeat this procedure whenever you find discrepancies between the display on the main unit and the display on the remote sensor.

NOTE ON SETTING REMOTE SENSOR CHANNELS
The unit has an auto-scan function that sequentially displays temperature readings of three remote sensors. To activate this function, press and hold the [channel] button for 3 seconds. To deactivate press the [channel] button again.
MAXIMUM AND MINIMUM TEMPERATURES
The maximum and minimum recorded temperatures will be automatically stored in memory. To display them, press MEM. Press MEM again to alternate between the maximum, minimum, and current temperatures. The respective MAX or MIN indicator will be displayed.
To clear the memory, press MEM button and hold for three seconds. The maximum and minimum recorded temperatures will be erased.
TEMPERATURE TRENDE
The temperature trend indicator shows the trend of temperatures collected at that particular remote sight. Three trends: rising, steady, and falling will be shown.
| Arrow indicator | TEMP | TEMP | TEMP |
| Temperature Trend | Rising | Steady | Falling |


ATMOSPHERIC PRESSURE
The atmospheric pressure indicator, in the weather forecast window, uses arrows to indicate if the atmospheric pressure is increasing, remaining stable, or decreasing.
| Arrow indicator | TEMP | TEMP | TEMP |
| Temperature Trend | Rising | Steady | Falling |
WEATHER FORECAST
The unit is capable of detecting atmospheric pressure changes. Based on collected data, it can predict the weather for the forthcoming 12 to 24 hours. The effective range covers an area of 30 to 50km
| Indicator displays on the unit | - | |||
| Forecast | Sunny | Slightly Cloudy | Cloudy | Rainy |
NOTE:
- It is not necessary and not possible to adjust the altitude of the weather station. After the initial start-up of the weather station, a first forecast will be made within the first 24 hours of operation.
- In periods of long stable weather conditions, it becomes difficult to make a reliable forecast.
备

- The weather forecast is solely calculated on the basis of barometric air pressure changes.
- The probability of a correct weather forecast is approximately 70% and is valid for an area of approx. 20 - 30km around the location of the weather station.
- The forecast "Sunny" means at night "cloudless weather". Fog is not indicated by the weather station as this can occur with different weather conditions.
- If you travel with the weather station, a reliable weather forecast will become impossible due to changes in altitude and location. You'll have to wait up to 24 hours so that the weather station can calculate a new forecast based on the conditions at the new location.
HOW TO USE THE RELATIVE HUMIDITY
The relative humidity is displayed as a percent. The corresponding "happy face" illustration graphically illustrates the level of humidity as comfortable, wet, or dry.
| Comfort | Wet | Dry |
To see the maximum or minimum relative humidity, press MEM. Press MEM again to switch between the maximum and minimum reading.

HOW TO WALL MOUNT OR USE THE TABLE STAND (REMOTE UNIT)
The unit can be wall-mounted using its recessed screw holes or place on a flat surface using the table stand.
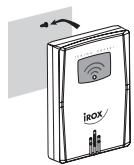
Wall-mount
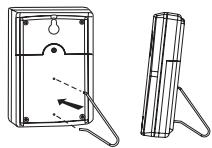
Table stand
HOW TO WALL MOUNT OR USE THE TABLE STAND (MAIN UNIT)
The unit can be wall-mounted using its recessed screw holes or placed on a flat surface using the table stand.
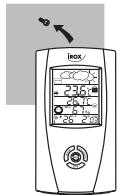
Wall-mount
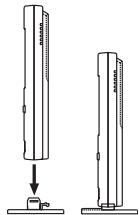
Table stand
#
Power
Main unit use four (4) UM-3 or "AA" 1.5V alkaline batteries
Remote sensing unit
: use two (2) UM-4 or "AAA" 1.5V alkaline battery
Weight
Main unit : 184gm (without battery)
Remote sensing unit : 54gm (without battery)
- Dimension
Main unit : 165(L)× 85(W)× 56(T)mm
Remote sensing unit : 92(L)× 60(W)× 20(T)mm
CAUTION
- The content of this manual is subject to change without further notice.
- Due to printing limitation, the displays shown in this manual may differ from the actual display.
- The contents of this manual may not be reproduced without the permission of the manufacturer.
P/N.: 086-003308-03
IBR923os-tech_ENoutput
12


EC-DECLARATION OF CONFORMITY
This product contains the approved transmitter module TX 01 and complies with the essential requirements of Article 3 of the R&TTE 1999/5/EC Directives, if used for its intended use and that the following standard(s) has/have been applied:
Efficient use of radio frequency spectrum (Article 3.2 of the R&TTE Directive)
applied standard(s) EN 300 220-1(2,3):1997
Electromagnetic compatibility
(Article 3.1.b of the R&TTE Directive)
applied standard(s)
ETS 300 683:1997
Safety of information technology equipment
(Article 3.1.a of the R&TTE directive)
applied standard(s)
EN 60950:1997
Additional information:
The product is therefore conform with the Low Voltage Directive 73/23/EC, the EMC Directive 89/336/EC and R&TTE Directive 1999/5/EC (appendix II) and carries the respective CE marking.
Carmelo Cubito
Agrate Briznaza (MI) / Italy January 2004
EC Representative of Manufacturer
RTTE Compliant Countries :
All EC countries, Switzerland (CH)
And Norway
11

04/25/2005, 11:33
