WH-7900-C24-CL - Roues de vélo SHIMANO - Notice d'utilisation et mode d'emploi gratuit
Retrouvez gratuitement la notice de l'appareil WH-7900-C24-CL SHIMANO au format PDF.

| Type d'appareil | Vélo électrique |
| Type de roue | Roue arrière avec moyeu intégré |
| Nombre de vitesses | Non précisé |
| Type de cassette | Non précisé |
| Type de moyeu | Moyeu à engrenages internes |
| Remplacement de la cassette | Possible avec démontage du moyeu |
| Remplacement des pignons | Oui, en suivant la procédure spécifique |
| Lubrification | Utiliser de la graisse spéciale pour engrenages |
| Outils nécessaires | Clé à ergots, tournevis, clé dynamométrique |
| Couple de serrage | Non précisé |
| Installation des pignons | Respecter l'ordre et la position des pignons |
| Entretien | Nettoyer et lubrifier régulièrement |
| Précautions | Ne pas forcer lors du montage, éviter la contamination par la poussière |
| Compatibilité | Non précisé |
| Poids | Non précisé |
| Matériaux | Non précisé |
| Garantie | Non précisé |
| Instructions de sécurité | Lire attentivement avant toute intervention |
FOIRE AUX QUESTIONS - WH-7900-C24-CL SHIMANO
Questions des utilisateurs sur WH-7900-C24-CL SHIMANO
0 question sur cet appareil. Repondez a celles que vous connaissez ou posez la votre.
Poser une nouvelle question sur cet appareil
Téléchargez la notice de votre Roues de vélo au format PDF gratuitement ! Retrouvez votre notice WH-7900-C24-CL - SHIMANO et reprennez votre appareil électronique en main. Sur cette page sont publiés tous les documents nécessaires à l'utilisation de votre appareil WH-7900-C24-CL de la marque SHIMANO.
MODE D'EMPLOI WH-7900-C24-CL SHIMANO
General Safety Information
WARNING
- Before use, check the wheels to make sure that there are no bent or loose spokes, dents, scratches or cracks on the rim surface. Do not use the wheel if any of these problems are found.
- Do not use in combination with bottom link-type suspension forks. With these types of forks, the clearance between the hub axle and the brake shoes can change due to the operation of the suspension, so that when the brakes are applied, the brake shoes may touch the spokes.
- If the quick release mechanism is not used correctly, the wheel may come off the bicycle and serious injury could result. Read the Service Instructions for the quick release mechanism thoroughly before use.
- These wheels are designed for riding on paved surfaces. If the wheels are used on unpaved surfaces, the wheels may become bent or damaged, and accidents may result.
- Check that the wheels are fastened securely before riding the bicycle. If the wheels are loose in any way, they may come off the bicycle and serious injury may result.
- The hollow on the opposite side to the valve hole is an indicator for the amount of rim wear. If this hollow can no longer be seen, stop using the rim.
If you continue using the rim, it may break, and the bicycle may fall over and an accident may result.
- Obtain and read the service instructions carefully prior to installing the parts. Loose, worn or damaged parts may cause the bicycle to fall over and serious injury may occur as a result. We strongly recommend only using genuine Shimano replacement parts.
- Read these Technical Service Instructions carefully, and keep them in a safe place for later reference.
CAUTION
- The tires should be inflated to the pressure indicated on the tires before use.
- Use rim tape which can withstand high pressures, otherwise the tires may suddenly puncture and come off, and severe injury may result.
NOTICE
- The Shimano R55HC (high performance) brake shoes use an aggressive compound designed with an emphasis on maximum performance in wet conditions, however they will cause accelerated rim wear.
Shimano accepts no responsibility for reduced rim life which might occur from using R55HC brake shoes. - Use of genuine Shimano spokes and nipples is strongly recommended. If non-Shimano parts are used, the area where the spokes fit into the hub unit may become damaged.
- Before use, check that there are no pieces of metal or other foreign objects sticking to the brake pads. If any such items are present, they may cause damage to the rim when the brakes are applied.
- The nipples have large diameters and are easy to rotate in order to make it easier to increase the spoke tension. However, be careful not to overtighten the nipples when adjusting the spoke tensions. If the nipples are overtightened, damage to the rim may result.
(We recommended that you ask authorized bicycle dealers to make the adjustments.)
Note:
- If the wheel becomes stiff and difficult to turn, you should lubricate it with grease.
- Do not apply any oil to the inside of the hub, otherwise the grease will come out.
- Special spoke wrenches are available as optional accessories.
- We recommend that you ask authorized bicycle dealers to adjust the spoke tensions if there is any initial play in the spokes and after the first 1,000km of riding.
- Spoke protectors (CP-WH23) are also sold separately. Please ask your bicycle dealer for details.
- For maximum performance we highly recommend Shimano lubricants and maintenance products.
- Reflectors (manufactured by CATEYE) are also sold separately. Please ask your bicycle dealer for details.
Technical Service Instructions
| Model number | Specification | Color |
| RR-550-WUWSW | CPSC | White |
| RR-550-WUASW | AS | Amber |
| RR-317-WUASW | DIN | Amber |
- Parts are not guaranteed against natural wear or deterioration resulting from normal use.
SI-4GP0A-002
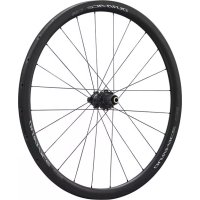
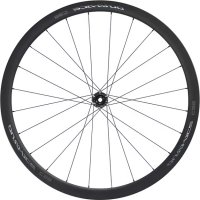
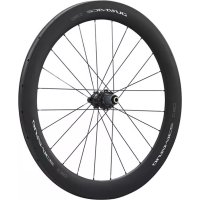
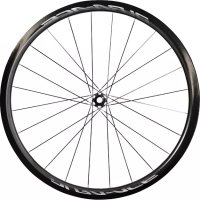
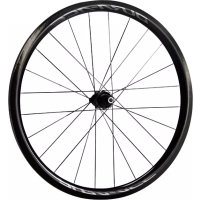
WH-7900-C24-CL
Wheel
In order to realize the best performance, we recommend that the following combination be used.
| Applicable tire size | Clincher tire | |
| 700C (19C – 25C) | ||
| Chain | 10-speed | CN-7901 |
| Cassette sprocket | 10-speed | CS-7900 |
This wheel can be used with 8-gear, 9-gear and 10-gear sprocket sets.
(If using a 10-gear sprocket set other than for a junior bicycle, use the accessory 1-mm spacer.) Refer to the Product Technical Information for details on combination with other parts such as chains and cassette sprockets.
Specifications
| Series | DURA-ACE |
| Model number | WH-7900-C24-CL |
| Speeds | 8 / 9 / 10 |
| Rim size | 700C (622 × 15C) |
| Rim width | 20.8 mm |
Cassette sprocket
Sprockets marked by are secured.
| Model No. | CS-7900 | |
| Sprocket tooth configuration | 11T - 21T | 11T, 12T, 13T, 14T, 15T, 16T, 17T, 18T, 19T, 21T |
| 11T - 23T | 11T, 12T, 13T, 14T, 15T, 16T, 17T, 19T, 21T, 23T | |
| 11T - 25T | 11T, 12T, 13T, 14T, 15T, 17T, 19T, 21T, 23T, 25T | |
| 11T - 27T | 11T, 12T, 13T, 14T, 15T, 17T, 19T, 21T, 24T, 27T | |
| 11T - 28T | 11T, 12T, 13T, 14T, 15T, 17T, 19T, 21T, 24T, 28T | |
| 12T - 23T | 12T, 13T, 14T, 15T, 16T, 17T, 18T, 19T, 21T, 23T | |
| 12T - 25T | 12T, 13T, 14T, 15T, 16T, 17T, 19T, 21T, 23T, 25T | |
| 12T - 27T | 12T, 13T, 14T, 15T, 16T, 17T, 19T, 21T, 24T, 27T |
Replacing the spokes
Hook the spokes through the hub as shown in the illustration to install them.
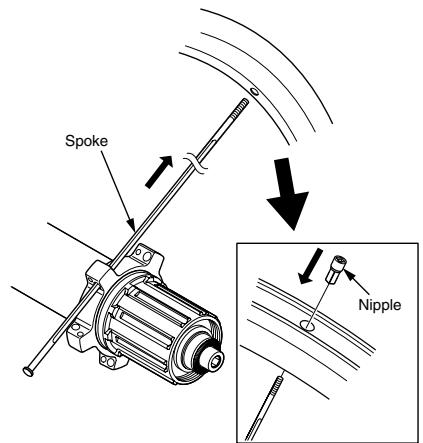
At the front, fit the heads of the spokes securely into the slots in the hub unit, otherwise damage may occur.
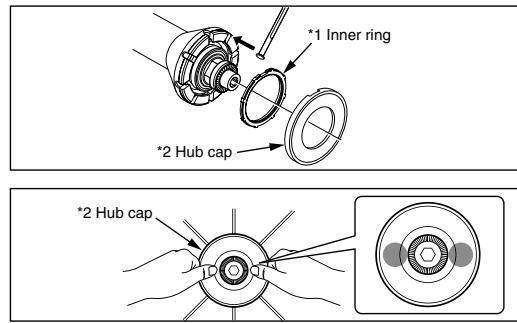
1 Install the inner ring so that it is fully set inside the tabs of the hub unit.
2 Install the hub cap properly so that the tabs are fit completely into the inner ring by pressing it in until it clicks and then making sure that it cannot be detached by hand before using it.
Spoke lacing
Lace the spokes as shown in the illustration.
(For front)
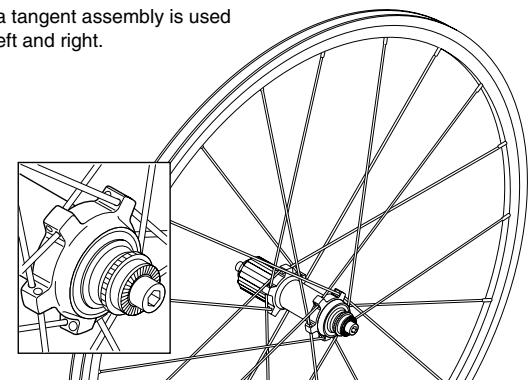
At the front, a radial assembly is used at both the left and right
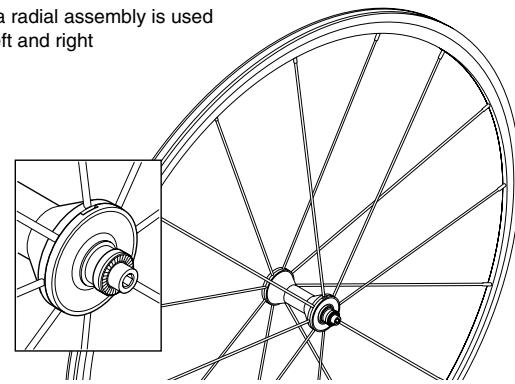
(For rear)
At the rear, a tangent assembly is used at both the left and right.
| Spoke tension value | ||
| For front | For rear | |
| 1000 - 1400 N(225 - 315 lbf) | Right (sprocket) side | Left side |
| 1200 - 1500 N(270 - 338 lbf) | 600 - 900 N(135 - 203 lbf) | |
- These values should be used as a guide only.
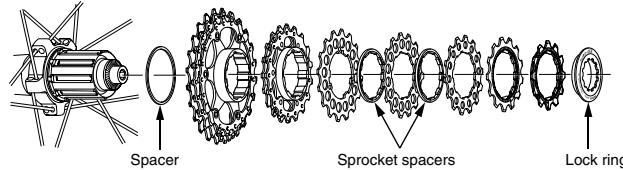
Installation of the HG sprockets
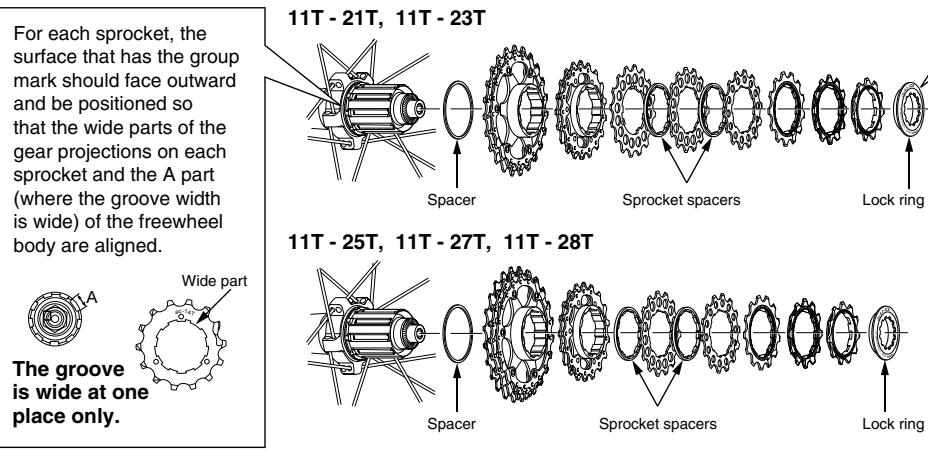
When installing the CS-7900 (10-gears) freehub, install a spacer in the position shown in the illustration.
12T-23T, 12T-25T, 12T-27T
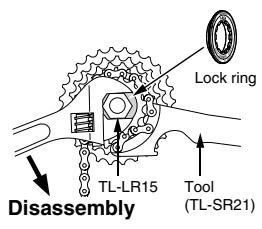
For installation of the HG sprockets, use the special tool (TL-LR15) to tighten the lock ring.
Tightening torque: 30 - 50 N·m {261 - 435 in. lbs.}
To replace the HG sprockets, use the special tool (TL-LR15) and TL-SR21 to remove the lock ring.
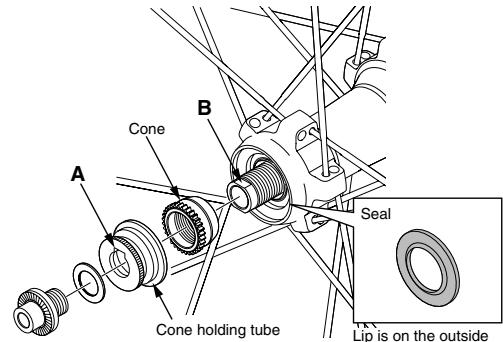
A
Hub axle
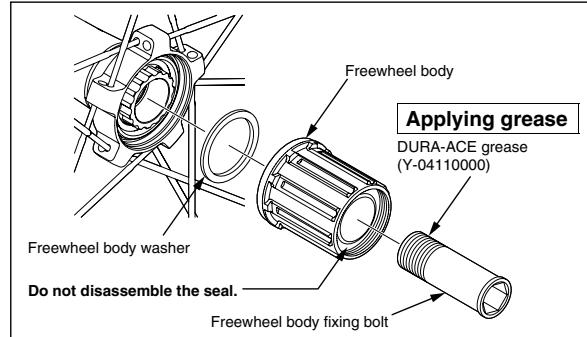
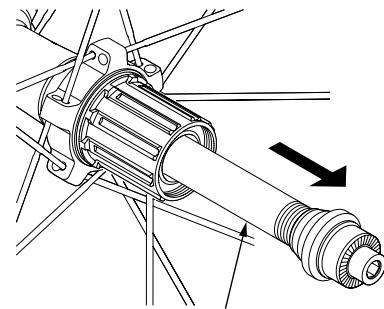
Replacement of the freewheel body
■ First, pull out the hub axle by following the procedure shown in the illustration. Disassembly from the freewheel side is not possible.
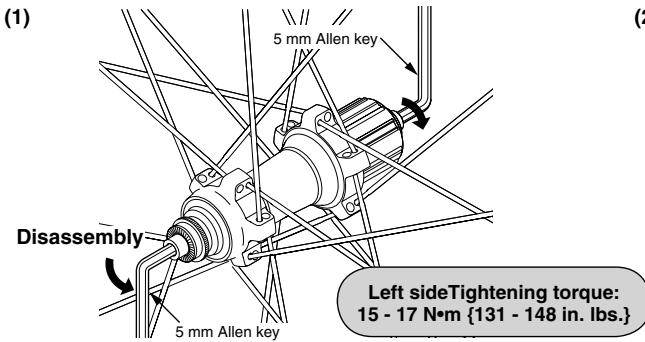
Tightening torque: 45 - 50 N·m
{392 - 435 in. lbs.}
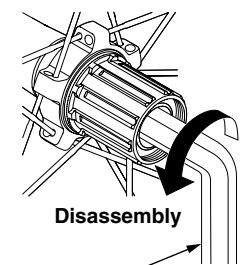
14 mm Allen key
These service instructions explain how to use and maintain the Shimano bicycle parts which have been used on your new bicycle. For any questions regarding your bicycle or other matters which are not related to Shimano parts, please contact the place of purchase or the bicycle manufacturer.
- Service Instructions in further languages are available at: http://techdocs.shimano.com
Please note: specifications are subject to change for improvement without notice. (English)
SHIMANO
SHIMANO AMERICAN CORPORATION
One Holland, Irvine, California 92618, U.S.A. Phone: +1-949-951-5003
SHIMANO EUROPE B.V
Industriebeg 24, 8071 CT Nunspeet, The Netherlands Phone: +31-341-27222 3-77 Oimatsu-cho, Sakai-ku, Sakai-shi, Osaka 590-8577, Japan
© Nov. 2010 by Shimano Inc. AWS. Printed in Malaysia.