
G512 - Clavier GENIUS - Notice d'utilisation et mode d'emploi gratuit
Retrouvez gratuitement la notice de l'appareil G512 GENIUS au format PDF.


| Type de produit | Clavier filaire |
| Marque | Genius |
| Modèle | G512 |
| Connexion | USB filaire |
| Disposition des touches | AZERTY (France) / QWERTY (international) |
| Nombre de touches | 104 touches (standard) |
| Rétroéclairage | Non |
| Reposoir de poignet | Non |
| Longueur du câble | 1,5 mètre |
| Dimensions (L x l x h) | 440 x 140 x 25 mm |
| Poids | Environ 600 g |
| Alimentation | Alimentation via port USB (5 V, 100 mA) |
| Systèmes d'exploitation supportés | Windows, macOS, Linux |
| Fonctions principales | Saisie de texte, touches de navigation, touches de fonction |
| Entretien et nettoyage | Débrancher avant nettoyage ; utiliser un chiffon doux légèrement humide ; ne pas utiliser de solvants |
| Sécurité | Ne pas exposer à l'eau ou à l'humidité ; éviter les chocs |
| Pièces détachées et réparabilité | Aucune pièce détachée disponible ; produit non réparable par l'utilisateur |
| Informations générales | Garantie 2 ans ; fabrication en Chine |
FOIRE AUX QUESTIONS - G512 GENIUS
Questions des utilisateurs sur G512 GENIUS
0 question sur cet appareil. Repondez a celles que vous connaissez ou posez la votre.
Poser une nouvelle question sur cet appareil
Téléchargez la notice de votre Clavier au format PDF gratuitement ! Retrouvez votre notice G512 - GENIUS et reprennez votre appareil électronique en main. Sur cette page sont publiés tous les documents nécessaires à l'utilisation de votre appareil G512 de la marque GENIUS.
MODE D'EMPLOI G512 GENIUS
FCC STATEMENT
This device complies with Part 15 of the FCC Rules. Operation is subject to the following two conditions:
- This device may not cause harmful interference, and
- This device must accept any interference received, including interference that may cause undesired operation
Note:
This equipment has been tested and found to comply with the limits for Class B digital devices, pursuant to Part 15 of the FCC rules. These limits are designed to provide reasonable protection against harmful interference in a residential installation. This equipment generates uses and can radiate radio frequency energy and, if not installed and used in accordance with the instructions, may cause harmful interference to radio communications. However, there is no guarantee that interference will not occur in a particular installation. If this equipment does cause harmful interference to radio or television reception, which can be determined by turning the equipment off and on, the user is encouraged to try to correct the interference by one or more of the following measures:
Reorient or relocate the receiving antenna.
Increase the separation between the equipment and receiver.
Connect the equipment into an outlet on a circuit different from that to which the receiver is connected.
Use of shielded cable is required to comply with Class B limits in Subpart B of Part 15 of the FCC rules.
Do not make any changes or modifications to the equipment unless otherwise specified in the manual. If such changes or modifications should be made, you could be required to stop operation of the equipment.
READ THIS FIRST
Notice:
- The bundled driver, software, design, specifications and user's manual that were packaged with the camera are subject to change without notice.
- The accessories that come with the camera may vary between regions.
-
For driver updates, you can check the "Download" section of our website, www.geniusnet.com.tw.
-
We are not liable whatsoever for any compensation arising from errors in descriptions in this user's manual.
WARNING
- Do not use the camera if it is emitting smoke, becomes unusually hot to be touched, emitting any unusual odor or noise, or if it is in any other abnormal state. Operating the camera in any of these situations may cause a fire or an electrical shock. Stop using the camera immediately, turn the camera off, and then disconnect the power source (batteries or AC power adapter). If you are using the AC power adapter, unpl插 the adapter from the AC power outlet after you have disconnected the camera. After checking that smoke is no longer being emitted, contact your dealer or a local authorized service facility and request repairs. Never attempt to repair the camera yourself, as this will terminate the warranty.
- Do not use the camera if any foreign objects have entered the camera. Turn the camera off, and disconnect the power source (batteries or AC power adapter). If you are using the AC power adapter, unplug the adapter from the AC power outlet after you have disconnected the camera. Then contact your dealer or a local authorized service facility. Do not continue to use the camera as this may cause a fire or an electrical shock.
If the camera has been dropped or if the camera case has been damaged, turn the camera off, and then disconnect the power source (batteries or AC power adapter). If you are using the AC power adapter, unplug the adapter from the AC power outlet after you have disconnected the camera. Then contact your dealer or a local authorized service facility. Do not continue to use the camera as this may cause a fire or an electrical shock. - Do not place the camera in any unstable locations such as on a wobbly table or sloping surface where the camera may fall or tip over and cause injury.
- Do not expose the camera to moisture and make sure that there is no water getting into the camera. Take particular care when using the camera under extreme weather conditions such as rain or snow, or when operating the camera at the beach on near water. Water in the camera may cause a fire or an electrical shock.
Do not attempt to modify the camera. This may cause a fire or an electrical shock. - Do not remove the camera casing. This may cause an electrical shock. Your dealer should only carry out internal inspection, maintenance and repairs or a local authorized service facility.
- Do not touch the power plug during a thunderstorm if you are using the AC power adapter. This may cause an electrical shock.
CAUTION
Do not place the camera in damp or dusty locations. This may cause a fire or an electrical shock.
- Do not place the camera in a location affected by oil fumes or steam, such as near a cooking stove or humidifier. This may cause a fire or an electrical shock.
- Do not cover or wrap the camera or the AC power adapter with a cloth or quilt. This may cause heat to build up and distort the case and cause a fire. Always use the camera and its accessories in well-ventilated locations.
■ Handle the camera carefully and do not bump the camera into any hard object. Handling the camera roughly may cause a malfunction.
- Do not move the camera while it is switched on. (If you are using the AC power adapter, unplug the adapter from the AC power outlet after you have switched off the camera.) Ensure that any connector cords or cables to other devices are disconnected before moving the camera. Failure to do so may damage the cords or cables and cause a fire or an electrical shock.
When leaving the camera unused for long periods, such as during a vacation, always remove the batteries from the camera or unplug it from the power source (AC power adapter) for safety. If you are using the AC power adapter, unplug the adapter from the AC power outlet after you have disconnected the camera. Failure to do so could result in a fire.
Do not use batteries other than those specified for use with the camera. The use of unsuitable batteries may result in the batteries splitting or leaking and causing a fire, injury, or soiling of the battery compartment.
When placing the batteries into the camera, check the polarity markings on the battery (- and +) to ensure that you insert the battery correctly. Incorrect battery polarity may result in the batteries splitting or leaking and causing a fire, injury, or soiling of the battery compartment.
Remove the batteries if the camera will not be used for an extended period of time. The batteries may leak and cause a fire, injury or soiling of the battery compartment. If the batteries leak, clean and wipe the battery compartment carefully and install new batteries. Wash your hands carefully if you touch the battery fluid.
CONTENTS
INTRODUCTION. 6
Overview
Package contents
GETTING TO KNOW YOUR
CAMERA 7-10
Names of Parts
LCD Display
GETTING STARTED. 10-15
Installing the batteries
Using an power adapter
Charging the battery
Loading and Removing an
SD/MMC Memory Card
Attaching the Strap
Turning the Power On/Off
Setting the Date and Time
Setting Image Resolution and
Quality
RECORD MODE. 15-19
Taking still Images
Normal Mode
Macro Mode
Digital Zoom
Self-Timer
Flash
PLAYBACK MODE. 19-26
Viewing Images
Zoom Playback
Displaying Thumbnail Images
Auto play
Deleting Images
Protect
Setting the DPOF
Format
Copy to Card
E-frame
MOVIE MODE 26-28
Recording video with audio
Voice recording
Viewing video clips
MP3 Player 28
TRANSFERRING RECORDED
IMAGES AND VIDEOS TO YOUR
COMPUTER 29-31
Step 1: Installing the USB
driver
Step 2: Connecting the camera
to your computer
Step 3: Downloading images
and video clips
USING THE CAMERA AS
APC CAMERA 31-32
Step 1: Installing the PC Camera Driver
Step 2: Connecting the Camera to Your
Computer
Step 3: Running Your Application
Software
MENU OPTIONS 33-40
Setup Menu
Sharpness
WB (White Balance)
EV (Exposure Value)
LCD BRIGHTNESS
LANGUAGE
VIDEO OUT
FREQENCY
AUTO POWER OFF
IMPRINT
SOUND EFFECT
START-UP SOUND
START-UP IMAGE
DEFAULT SETTING
CONNECTING THE
CAMERA TO OTHER
DEVICES 40
CAMERA
SPECIFICATIONS 41
TROUBLESHOOTING. 42-43
INTRODUCTION
Overview
Your new digital camera delivers high quality, 2560 × 1920 resolution images using a 3.1 Mega pixel sensor. Using the 1.5^ TFT color image LCD monitor, you can compose images and then examine them in detail. An auto-flash sensor automatically detects the shooting (lighting) conditions and determines whether the flash should be used. This feature helps ensure that your images turn out right.
16MB internal (built-in) memory lets you capture and store images without the need for an additional memory card. However, you may wish to expand the memory capacity (up to 1GB capacity) by using an external memory card.
In addition to still images, you can record short videos using the movie function.
Images you have taken can be downloaded to your computer using the USB cable (USB driver required for Win 98) You can enhance and retouch your images on your computer by using the provided editing software, or image editing software you may already own. You may share your images with your friends via e-mail, in a report, or on a website.
Package contents
Carefully unpack your camera and ensure that you have the following items:
Digital camera
USB cable
Video cable
Camera strap
One Lithium battery
Earphones
Software CD-ROM
Multi-Language User's manual
Multi-Language Quick guide
Camera pouch
DC Plug Adaptor for EU to US and EU to UK
DC Adaptor
Note: Accessories and components vary by retailer.
GETTING TO KNOW YOUR CAMERA
Name of Parts
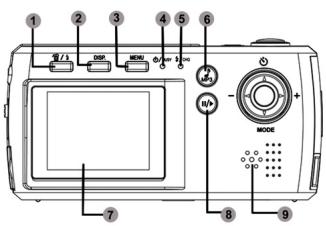
- Delete/Flash
- Display
- Menu
- Self-timer/Busy indicator
- Flash/Charging indicator
- MP3 Player
- LCD Display
- Play / Pause
- Speaker
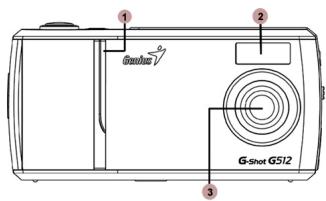
- Power-on / Self-timer Light
- Flash light
- Lens
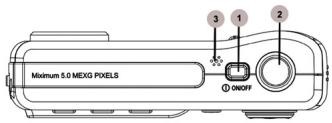
- Power ON/OFF
2.Shutter button - Microphone
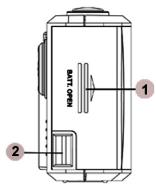
- Battery Cover
- Strap attachment
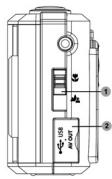
- Focus
Adjustment
- USB/A/V
OUT terminal
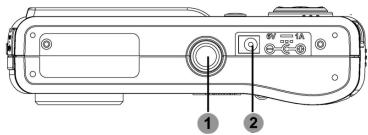
- Tripod socket
- DC IN 6V terminal
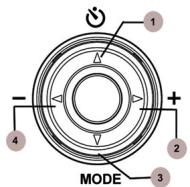
- Self-Timer/Selection
- Zoom Out/Selection
- Mode/Selection
- Zoom in/Selection
LCD Display
Display icons - Still Image Record Mode:
- Snapshot, Movie Clip mode
- Focus mode

Normal Mode

Macro Mode
- Flash mode

Auto flash

Red-eye reduction

Flash off
- White Balance display

Auto

Daylight

Tungsten

Fluorescent
- Single Image or Continuous images mode

Single: 1 shot mode (default)

Continuous: Pictures can be taken continuously 3 photos (except 5M resolution)
- Image Quality

Super Fine

Fine

Normal
- Image Resolution
| 5M | 2560 x 1920 |
| 3M | 2048 x 1536 (Default Value) |
| 2M | 1600 x 1200 |
| 1.3M | 1280 x 1024 |
| VGA | 640 x 480 |
- SD Memory Card
- Self-timer status
- Possible number of shots remaining
- Digital Zoom lever
- Timer status
- Battery level
Full battery power
Medium battery power
Low battery power
Virtually no battery power
GETTING STARTED
Installing the Battery
- Make sure the camera power is off.
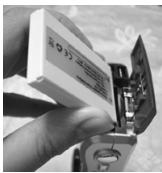
- Open the battery/SD Memory Card cover.
-
Insert the battery in the correct orientation shown.
-
Insert the battery following the orientation of the arrow on the battery's label.
Insert the battery as far as it can go. -
Close the battery/SD Memory Card cover.

NOTE
Use only the specified battery type (Lithium Ion).
If you are not going to use the battery for an extended period of time, remove it from the
camera to prevent leakage or corrosion.
- Never use different type of battery.
- Avoid using battery in extremely cold environments as low temperatures can shorten the battery life and reduce the camera performance.
Using an AC Power Adapter
- Make sure the camera power is off.
- Connect one end of the AC power adapter to the DC IN 6V terminal.
- Connect the other end of the AC power adapter to a power outlet.
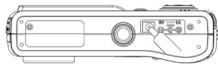

NOTE
Make sure to use only the AC power adapter specified for the camera. Damage caused by the use of an incorrect adapter is not covered under the warranty.
Using an AC power adapter while transferring images to your computer in order to prevent unexpected automatic power off of the camera.
Charging the Battery
- Make sure the camera power is off.
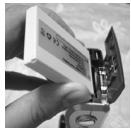
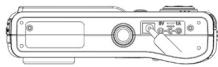
- Slide the battery/SD Memory Card cover into the direction of the [OPEN] arrow.
- Insert the battery, noting correct polarity (+ and -).
- Close the battery/SD Memory Card cover firmly.
- Connect one end of the AC power adapter to the DC IN 6V terminal.
- Connect the other end of the AC power adapter to a power outlet.
Charging start: Green indicator
Charging end: Indicator off
7. Notice:
A. Before you use a new battery, it should be charged for 3 hours the first time.
B. If the green LED is on when power is connected, it indicates the battery charger is operating normally and ready for battery charging.
C. If the LED indicator is not on when the power is connected, it indicates that the battery charger is defective. The user should turn AC power off.
D. If it is necessary to charge a backup battery, the user should wait until the charging battery is completely charged. Then remove the charged battery and charge the backup battery.

NOTE
- Make sure to use only the AC power adapter specified for the camera. Damage caused by the use of an incorrect adapter is not covered under the warranty.
- When the charging is not started even if preceding the operation above. Press power button on at any mode after LCD indication appears, then turn the power off.
Never use the battery unspecified for the camera. - Do not place the camera in hot temperature. Use it at room temperature.
Loading and Removing an SD/MMC Memory Card
The camera comes with 16MB of internal memory, allowing you to store images and video clips in the camera. However, you can expand the memory capacity by using the SD (Secure Digital) memory card so that you can store additional images and video clips.
- Make sure the camera is turned off.
-
Slide the battery/SD card cover in the direction of the [OPEN] arrow.
-
Insert the SD memory card.
If the card cannot be inserted, check the orientation. This camera is also compatible with the MultiMediaCardTM.
- Close the battery/SD card cover.
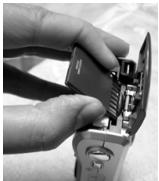
To remove a memory card:
Make sure the camera is turned off. Open the battery/memory card cover. Press lightly on the edge of the memory card and it will eject.

NOTE
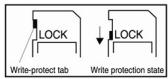
To prevent valuable data from being accidentally erased from an SD memory card you can slide the write-protected tab (on the side of the SD memory card) to "LOCK".
To save, edit, or erase data on an SD memory card, you must unlock the card.
Attaching the Strap
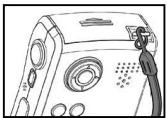
To prevent accidental slippage during the use, always use the strap. Attach the hand strap as follows:
- Thread the small loop of the hand strap through the strap eyelet on the camera.
- Pull the large loop through the small loop until the strap is firmly secured.
Turning the Power On/Off
Load the battery and insert an SD card before starting.
Turning the power on
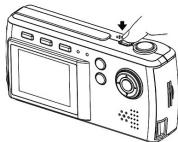
Press the POWER button to turn the power on.
The LED lights green and the camera is initiated.
- When the power is turned on, the camera will start in the mode that was set with the mode dial.
Turning the power off
Press the POWER button to turn the power off.

NOTE
The power is turned off automatically when the camera has not been operated for a fixed period time. To resume the operation condition, turn the power on again.
Setting the Date and Time
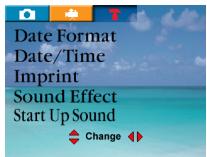
- Press the MENU button.
The menu screen appears.
- Use the or button to select the T item to set.
- Use the or button to select Date/Time.
- Select the year, month, day, and time fields by using the / button.
M/D/Y: month, day, year
D/M/Y: day, month, year
Y/M/D: year, month, day
- Press the OK button to confirm the setting after all item values are set.
Setting Image Resolution and Quality
Resolution and quality settings determine the pixel size (dimension), image file size, and compression ratio for your image. These settings affect the number of images that can be stored in internal memory, or on an SD memory card. As you get to know the camera, it is recommended that you try each quality and resolution setting to get an appreciation for the effects that these settings will have on your images.
Higher resolution and higher quality images offer the best photographic results but produce
large files sizes. Therefore, few images will take up a lot of memory space.
High resolution and quality settings are recommended for printed output and situations requiring the finest detail. Lower resolution/quality images take up less
memory space and may be quite suitable for sharing images via e-mail, in a report, or on a web page.
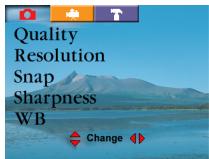
To change image resolution or image quality, perform the steps below:
- Press the MENU button.
The menu screen appears.
- Select Quality or Resolution by using the or button.
- Select the desired image quality or image resolution setting by using the or button.
- Press OK button to confirm and exit menu.
The table below shows the approximate number of shots that you can take at each setting based on 16MB internal memory.
| 16MB | Quality/Resolution | 2560x1920 | 2048x1536 | 1600x1200 | 1280x1024 | 640x480 |
| * Super Fine | 6 | 12 | 25 | 41 | 125 | |
| * Fine | 20 | 31 | 62 | 83 | 156 | |
| * Normal | 35 | 62 | 104 | 156 | 418 |
- The above data shows the standard testing results. The actual capacity varies according to the shooting conditions and settings.
RECORD MODE
Snapshot Mode □ Taking Still Images
- Turn the camera on by pressing the power ① button. (The camera will always power-up in still-image record mode.)
- If not in snapshot mode, toggle the / MODE button to the mode.
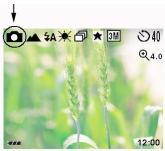
- Compose your shot on the display screen.
- Press the Shutter button.

NOTE
The LCD monitor does not work well under direct sunlight and bright light.
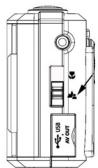
Normal Mode
The normal mode, suitable for scenery shooting, is used when the distance from 60cm to infinity.
- Power on the camera. Make sure the camera is in snapshot mode.
- Set the focus dial located on the front side of the camera to the position.
The icon appears on the LCD monitor.
- Compose your scene.
- Press the shutter button.
Macro Mode
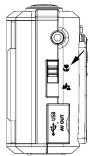
Use the macro mode to shoot a close-up of the subject. The effective range is between 15cm and 18cm
- Power on the camera. Make sure the camera is in snapshot mode.
- Set the focus dial located on the front side of the camera to the position.
The icon appears on the LCD monitor.
- Compose your scene.
- Press the shutter button.

NOTE
The flash mode is disabled in the macro mode.
Digital Zoom
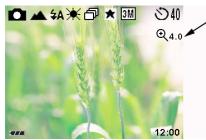
By using digital zoom, image is able to be enlarged. The subject then can appear closer.
Whereas digital zoom is a compelling feature, the more an image is enlarged (zoomed), the more pixilated (grainier) the image will appear.
-
Turn the camera on by pressing the power ① button.
-
Press MENU button to select snapshot mode.
- Compose the picture on the LCD screen
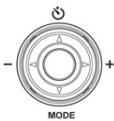
- Press the Zoom button (+I-) to zoom in or zoom out on the subject. The zoom bar indicates the current digital zoom level. The camera has a 4.0 digital zoom function.
- Press the Shutter button to capture a zoomed image.

NOTE
The more the image is enlarged, the more pixilated (grainier) the image.
Self-Timer
The self-timer duration is ten seconds. Activate the self-timer by pressing the shutter button. The self-timer LED blinks slowly for seven seconds and then blinks rapidly for the last three seconds. This allows you to get into the scene when taking group images.
- Secure the camera to a tripod or place it on a stable surface.
- Power on the camera. Make sure the camera is in snapshot mode.
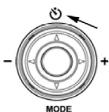
- Press the button.
The icon appears on the LCD monitor. - Compose the scene.
- Press the shutter button.
The self-timer function is activated. - After ten seconds, the camera takes an image.
To cancel the self-timer at any time, press the shutter button to disrupt the sequence.
| [10 sec.] | The camera automatically takes a picture after ten seconds delay. |
| [10+2 sec.] | The camera automatically takes a picture after ten seconds delay, and takes again after two seconds. In case of flash light capacitor is not charged up, the second take can be done at two second after charged. |

NOTE
After an image is taken using self-timer, the self-timer mode is turned off.
If you wish to take another image using the self-timer, repeat these steps.
Flash button
- Power on the camera. Make sure the camera is in snapshot mode.
- Press the button repeatedly until the desired flash mode appears.
- Compose the image and press the shutter button.
| Flash Mode | Description |
| [SA] Auto Flash | The flash fires automatically according to the ambient conditions. Select this mode for general photography. |
| [4] Red-eye Reduction | The flash emits a precursor-flash before the main flash fires. This Red-eye reduction causes the pupil in the human eye to constrict, reducing the red-eye phenomenon. Select this mode when taking images of people and animals in low-light conditions. |
| [4] Fill Flash on | The flash will always fire regardless of the surrounding brightness. Select this mode for recording images with high contrast (backlighting) and deep shadows. Also known as forced flash. |
| [4] Flash off | Flash off The flash will not fire. Select this mode when taking images in a place where flash photography is prohibited, or when the distance to the subject is beyond the effective range of the flash. |
PLAYBACK MODE
In playback mode, you can view, magnify, delete images, play video clips, or run a slide show. Playback mode also provides a thumbnail image display, allowing you to quickly scan for the image you want.
Viewing Images
- Turn the camera on by pressing the power ① button.
- Toggle the button to the playback mode.
- View your images using the / button.
To view the previous image, press the button.
To view the next image, press the button.
Press the OK button to rotating image.

NOTE
If there are no images stored in memory, the "□" message will appear on the LCD monitor.
Zoom Playback
While reviewing your images, you may enlarge a selected portion of an image. This magnification allows you to view fine details.
- Turn the camera on by pressing the power ① button.
- Toggle Play/Pause button to the playback mode.
- Select the image that you want to view using the / button.
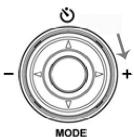
- Enlarge the image by pressing the ZOOM (+) button.
- To view the different portion of the enlarged image, press the / / button.
- To return to the regular display (cancel playback zoom) from 4X-enlarged status, press the ZOOM button again.
Displaying Thumbnail Images
This function allows you to view nine thumbnail images on the LCD monitor simultaneously so that you can quickly scan for a particular image.
-
Turn the camera on by pressing the power ① button.
-
Press Play/Pause button until the thumbnail screen appears.
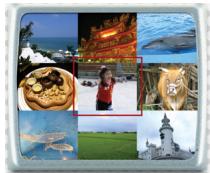
Nine thumbnail images appear on the LCD monitor (assuming there are nine or more images in memory).
To view a full-size image, selecting it by using the / / / button, and then press the Display button and the selected image will be displayed in the full LCD frame.
Auto Play
The Auto Play function enables you to playback your images back automatically in sequential order as a slide show. This is a very useful and entertaining feature for reviewing recorded images and for presentations.
- Turn the camera on by pressing the power ① button.
- Press the Play/Pause button, then click MENU button.
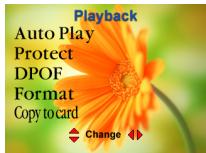
- Select to Auto Play by using the button.
- Set the playback interval by using the / button and press the OK button.
The auto play starts, displaying your images on the LCD monitor, one by one, at the set interval.
To stop the auto play display, press the OK button.

NOTE
- You can adjust the slideshow display interval from 1 to 10 seconds ([1 SEC], [3 SEC], [10 SEC], [off]).
Deleting Images
You can delete an image or video clip or all images and video clips at once by using the Erase function in the Playback menu.
To delete one image or video clip:
- Press Play/Pause button to playback mode.
- Press the button.
-
Select ERASE ONE by using the / button and press the OK button.
-
To delete the selected image/video clip, use the button to select [YES], and press the OK button.
The next image/video clip appears.
To cancel the deletion, select [NO] and press the OK button. It will return to the playback mode.
- Continue deletions, as desired. If all images are deleted, the "..." message will be displayed.
To delete all images or video clips (at once):
- Press Play/Pause button to playback mode.
- Press the button.
- Select ERASE ALL by using the / button and press the OK button.
- Select [YES] by using the / button and press the OK button to delete all images.
- The "message appears because all images and video clips have been deleted.
To exit from this screen, press Play/Pause (u) button.

NOTE
- To delete images or videos stored in internal memory, do not insert a memory card into the camera. Otherwise, you will delete the images or video clips stored on the memory card.
Protect
This function can prevent the image files stored in the camera from being erased accidentally.
- Turn the camera on by pressing the power ① button.
- Press the Play/Pause button, then click MENU button.
| Cancel | Cancel the set up in the Protect mode |
| One | You can just protect only one image Use the▲/▼/▲/▲ button to select the image you want to protect→Press Click Menu button→Use the▲ or▼ to select Protect mode→Use the▲ or▼ to select Protect One |
| All | Protect all of the images stored in the camera Press Click Menu button→Use the▲/▼ to select Protect mode→Use the▲ or▼ to select Protect All |
| Unprotect All | Disable the “Protect” function on the protected file Press Click Menu button→Use the▲/▼ to select Protect mode→Use the▲ or▼ to select Unprotect All |
| Selected | You can select several images to protect Press MENU button→Use the▲/▼ to select Protect mode→Use the▲ or▼ to select Selected →Use the▲/▼/▲/▲ button to select the image you want to protect→Press ◷/▲ button to select or cancel the selection. You will see icon on the protected images. |
- Press OK button to confirm.
Setting the DPOF
DPOF is a standard for recording printing information directly on the SD memory cards and other media. Files saved in the DPOF format can be printed using compatible printers or through a laboratory printing device.
- Turn the camera on by pressing the power ① button.
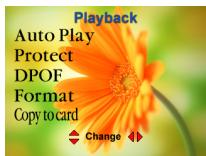
- Press Play/Pause

button, then click MENU button.
- You can select the desired DPOF sub-menu by using the / button, and press the OK button to confirm the setting.
ONE BY ONE: Set image quantity on the selected image.
Select the image by using the / button.
Set the desired quantity (0: Disable, 1~9: Enable) by using the / button, and press the OK button.
ALL 1 PCS: Set image quantity as 1.
DELETE ALL: Delete all DPOF settings (Quantity:0).
| Cancel | Cancel DPOF function |
| Set | You can just protect only one image After selecting DPOF function→ use the▲ /▼ /▲ /▲ button to select the image you want to protect→ Press Menu button to add up the number of prints or press Display button to minus the number of prints |
- To exit from the menu mode at anytime, press the OK button again.

NOTE
This function can be used only on still image files that are saved on memory cards.
Format
- Turn the camera on by pressing the power ① button.
- Press Play/Pause button, then click MENU button.
- Use the or to select Format mode.
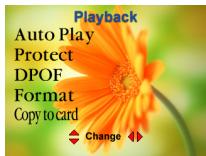
- Use the or to the choose Cancel or OK to not do the formatting or format the card or internal memory.

NOTE
If you don't have the memory card inserted in the camera, the formatting function is doing on the internal memory. However, if you have the memory card in the camera, the memory card will be formatted when you select OK to activate the format function.
Copy to Card
This feature allows you to copy your images from the camera's internal memory to a memory card. Of course, you can only do this if you have a memory card installed and some
images in internal memory.
- Turn the camera on by pressing the power ① button.
- Press Play/Pause button, then click MENU button.
- Use the or to select Copy to Card mode.
4.Use the or to thechoose Yes or No.
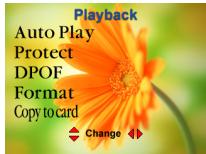
If you select "Yes", the camera will copy all the files in the internal memory to the SD memory card. If you choose No, the camera won't copy the files in the internal memory to the SD memory card.
- Press OK button to confirm and exit.
E-frame
-
Turn the camera on by pressing the power ① button.
-
Press Play/Pause button, then click MENU button.
- Use the / / / to select the picture you want do the photo-frame effect and then Press OK button to confirm
- Press MENU button Choose E-Frame Select the frame you prefer Click OK button to confirm.
- The photo with frame effect will be stored. The original image (without photo-frame effect) will still be stored in the camera.

NOTE
Resolution is always 320 × 240 pixels.
MOVIE MODE
Recording mode enables you to record movie clips. The recording length depends on the capacity of internal memory or memory card.
Recording Video with Audio
- Turn the camera on by pressing the power ① button.
-
Toggle MODE button to Record mode.
-
Press MENU button to select by using the / button
The amount of time available for movie recording is displayed on the LCD monitor. (The time format is Hours: Minutes: Seconds)
- Compose your shot on the image LCD display.
- To start recording a video clip press (and release) the shutter button.
The elapsed time is displayed and the recording indicator ( ) blinks on the LCD monitor while recording.
To stop recording, press the shutter button again.

NOTE
Resolution is always 320 × 240 and image quality cannot be specified.
The self-timer cannot be adjusted used.
The flash mode is disabled.
Voice Recording
- Turn the camera on by pressing the power ① button.
-
Toggle MODE button to Record mode.
-
Press MENU button to select by using the button
The amount of time available for movie recording is displayed on the LCD monitor. (The time format is Hours: Minutes: Seconds)
-
Compose your shot on the image LCD display.
-
To start voice recording press (and release) the shutter button.
The elapsed time is displayed and the recording indicator ( ) blinks on the LCD monitor while recording.
To stop recording, press the shutter button again.
Viewing Video Clips
To view the recorded video clips, follow the steps below.
- Power on the camera, and toggle the Play/Pause button to the playback mode.
- Select the video clip you wish to view using the / button.
- Press the Display button to start.
To stop playback at any time, press the Display button.
To exit this movie playback and return to the playback mode, press the Play/Pause

button.

NOTE
The zoom function cannot be activated during movie playback.
To play the video clip back on your computer, you may use either Windows Media Player or Apple "QuickTime Player".
- QuickTime basic player is available free of charge, compatible with both Mac- and Windows computers and can be download from the Apple web site at www.apple.com. For help using QuickTime Player usage, please refer to the QuickTime on-line help for more information.
MP3 Player Mode
- Turn the camera on by pressing the power ① button.
- Press MP3 button.
- Press Play/Pause button to play the music. If you want to pause the music, press Play/Pause button again.
- Press or to play the previous or next track.
- Press the or button to raise and lower the volume.

NOTE
The MP3 display is as following:
- Play/Pause: Press
- Stop
- Forward
- Rewind
- Repeat All
- Repeat One
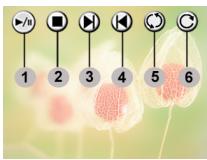
TRANSFERRING RECORDED IMAGES TO YOUR COMPUTER
To transfer images/video clips from the camera to your computer, follow these steps:
Step 1: Installing the USB driver (Windows 98SE users only)
Step 2: Connecting the camera to your computer
Step 3: Downloading image and video files
System Requirements (Windows)
Pentium II 400 MHz or higher
Windows 98SE/Me/2000/XP
64MB RAM
128MB hard disk space
CD-ROM drive
Available USB port
Step 1: Installing the USB driver
Windows 98SE computers
The USB driver on the CD-ROM is exclusively for Windows 98SE computers. Installing the USB driver on computers running Windows 2000/ME/XP is not necessary.
- Insert the CD-ROM that came with the camera into your CD-ROM drive. The welcome screen appears.
- Click "DRIVER". Follow the on-screen instructions to complete the installation. After the USB driver has been installed, restart your computer.
Step 2: Connecting the camera to your computer
-
Connect one end of the USB cable to an available USB port on your computer.
-
Connect the other end of the USB cable to the USB connector on the camera.
- The MSDC menu appears on the screen.
- From the Windows desktop, double click on "My Computer"
- Look for a new "removable disk" icon. This "removable disk" is actually the memory (or memory
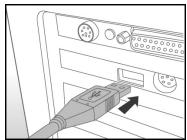
card) in your camera. Typically, the camera will be assigned drive letter "e" or higher.
- Double click on the removable disk and locate the DCIM folder.
- Double click on the DCIM folder to open it to find more folders.
Your recorded images and video clips will be inside these folders.
Copy & Paste or Drag-N-Drop image and video files to a folder on your computer.
Step 3: Downloading Images/Video clips
When the camera is turned on and connected to your computer, it is considered as a disk drive, just like a floppy disk or CD. You can download (transfer) images/video clips by copying them from the "removable disk" to your computer hard drive or to another kind of disk.
Windows-
Open the "removable disk" and subsequent folders by double clicking on them. Your images are inside these folder(s). Select the images that you want, and then choose "Copy" from the "Edit" menu. Open the destination location (folder) and choose "Paste" from the "Edit" menu. You may also drag and drop image files from the camera to a desired location.

NOTE
Memory card users may prefer to use a memory card reader (highly recommended).
USING THE CAMERA AS A PC CAMERA
Your camera can act as a PC camera, which allows you to videoconference with business associates, or have a real-time conversation with friends or family.
To use the camera as a PC camera, follow these steps:
Step 1: Installing the PC camera driver (same as USB driver)
Step 2: Connecting the camera to your computer
Step 3: Running your application software (i.e. Windows NetMeeting)

NOTE
Video conferencing (or video editing) software is not included with the camera.
This mode is not supported for Mac.
General System Requirements for Videoconferencing
To use the camera for videoconferencing, your computer system must include:
Microphone
Sound card
Speakers or headphones
Network or Internet connection
Step1: Installing the PC Camera Driver
The PC-camera driver included on the CD-ROM is exclusively for Windows. The PC camera function is not supported for Mac platforms.
- Insert the CD-ROM that came with the camera into your CD-ROM drive. The welcome screen appears.
- Click "DRIVER". Follow the on-screen instructions to complete the installation. After the driver installation is completed, restart your computer.

NOTE
The USB driver that bundled inside the CD-ROM is designed in a form 2 in 1 (USB & PC camera driver).
a) On Windows 98SE, the Windows OS will install both USB & PC camera drivers.
b) On Windows 2000/ME/XP, it will only install PC camera driver.
Step2: Connecting the Camera to Your Computer
- Connect one end of the USB cable to an available USB port on your computer.
- Connect the other end of the USB cable to the USB connector on the camera.
- The PC-Cam menu appears on the screen.
- Position the camera steadily on top of your computer monitor or use a tripod.
Step3: Running Your Application Software (i.e. Windows NetMeeting)
To use Windows NetMeeting for videoconferencing:
- Go to Start Programs Accessories Communications NetMeeting to launch the NetMeeting program.
- Click the Start Video button to view live video.
- Click the Place Call button.
- Type the e-mail address or the network address of the computer that you are calling.
- Click Call. The person that you are calling must also have Windows NetMeeting running and be willing accept your call to start the videoconference.

NOTE
The video resolution for videoconferencing applications is generally 320 × 240 .
For more information about the operation of videoconference application software, refer to its respective help documentation.
MENU OPTIONS
SETUP MENU
By using the Setting Mode, you can set up the camera with personal preferences and image-related settings.
You can use the snapshot menu to adjust exposure and white balance. You can also access the Setup menu in the snapshot menu. To access the snapshot menu, toggle the MENU button to the
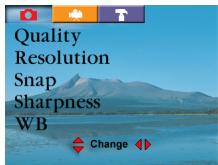
mode and press the or button. Scroll through the menu options by using the / button.
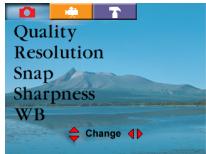
Sharpness
Use the sharpness to adjust the sharpness of image. The higher the sharpness, the clearer image will be.
- Turn the camera on by pressing the power ① button.
- Press MENU button to select Snapshot mode.
- Use the or button to select Sharpness mode.
- Use the or button to choose the Normal, Soft, or Sharp.
- Press OK button to confirm and exit menu.
WB (White Balance)
Your camera adjusts the white balance of each scene automatically. However, the images that your camera captures will appear different under different lighting conditions (daylight, cloudy, fluorescent, tungsten lights). Unlike your eyes, which can easily adjust to different lighting conditions (lighting temperatures), a digital camera cannot always differentiate between lighting types. Under some lighting conditions the image may appear in strange
shades. If that occurs you may change the white balance setting by specifying a lighting condition (temperature) most appropriate for your scene.
- Turn the camera on by pressing the power ① button.
- Press MENU button to select Snapshot mode.
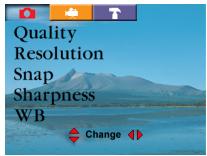
- Use the or button to select WB mode.
-
Use the or button to choose the desired mode.
-
Press OK button to confirm and exit.
| A | Auto | Adjust the white balance automatically. (Default) |
| Daylight | Adjust the white balance for bright daylight conditions. | |
| Tungsten | Adjust the white balance for illumination by tungsten light. | |
| Fluorescent | Adjust the white balance for illumination by Fluorescent light. | |
EV (Exposure Value)
Your camera adjusts the exposure of each scene automatically. However, if the subject is
very dark, or very bright, you may override the camera's automatic exposure determination to make the subject brighter or darker. This is called EV compensation.
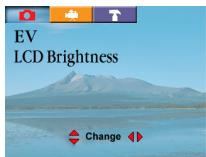
- Turn the camera on by pressing the power ① button.
- Press MENU button to select Snapshot mode.
- Use the or button to select EV mode.
- When you select EV mode, there will be another small screen popped out and EV bar on the LCD display. Use the or button to specify the desired EV (The more to the right,
the higher the EV is and vice versa). In the small screen, you can preview the result after adjusting EV. The EV range is from -2 to +2 in steps of 0.5 EV.
- Press OK button to confirm and exit menu.
Examples of Exposure Compensation -
Positive (+) Compensation
Imaging printed text (black characters on white paper)
Portraiture with back lighting
Very bright scenes (such as snow) and highly reflective subjects
Shots made up predominantly of sky
Negative (-) Compensation
Spot lighted subjects, particularly against dark backgrounds
Imaging of printed text (white characters on black paper)
Scenes with low reflectivity, such as shots of green or dark foliage
LCD BRIGHTNESS
This option adjusts the brightness of the LCD monitor.
- Turn the camera on by pressing the power button.

- Press MENU button to select Snapshot mode.

- Use the or button to select LCD Brightness mode
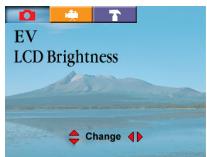
- To adjust the LCD brightness, you may increase or decrease the LCD brightness by using the / button.
- Press OK button to confirm and exit menu.
LANGUAGE
This option allows you to select the language for the menus and the text displayed on the LCD monitor.
Set the language for the camera's menu.
- Turn the camera on by pressing the power ① button.
- Press MENU button to select Setup T mode.
- Use the or button to select Language mode.
- Use the or button to select the language you would like to have
- Press OK button to confirm and exit menu.
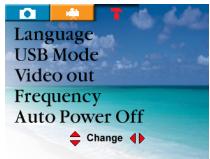
VIDEO OUT
Using the TV-Out function offered by the camera, you can transfer images to TV.
To transfer the images, follow this method:
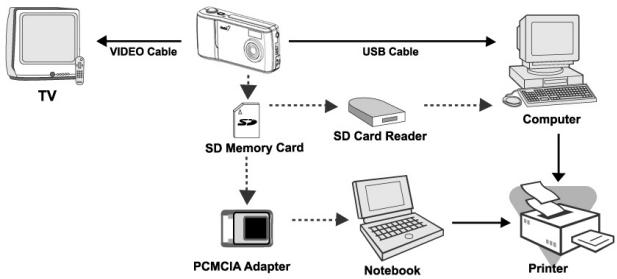
- When you use this function; please use the video cable provided with the camera to connect the camera and output device.
- Turn the camera on by pressing the power ① button.
- Press MENU button to select Setup T mode.
- Use the or button to select Video Out mode.
- Use the or button to select the NTSC or PAL, which depends on your country's TV system.
- Press OK button to confirm and exit menu.

NOTE
- The camera will perform normally when you enable the TV-Out function. The only difference is the location to show the images, and the image information will be from the LCD Monitor to the video output device's display.
- While using the camera, after you connect the video cable to the camera, the images will be no longer shown on the LCD Monitor. If you want to restore the display status on the LCD Monitor, please disconnect the video cable from the camera.
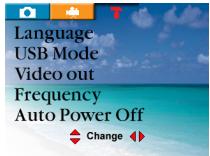
FREQUENCY
The camera supports different lighting frequencies: 50Hz and 60Hz. You need to select the correct frequency setting depending on your local area's voltage before using the camera.
- Turn the camera on by pressing the power ① button.
- Press MENU button to select Setup Tmode.
- Use the or button to select Frequency mode.
- Use the or button to select your local area's voltage: 50Hz or 60Hz.
- Press OK button to confirm and exit menu.
AUTO POWER OFF
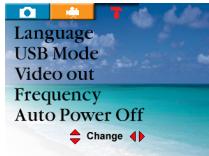
If there is no camera activity (no buttons are pressed) for a defined period of time while the camera is powered on, the camera will eventually turn itself off to conserve power.
- Turn the camera on by pressing the power ①
button.
- Press MENU button to select Setup T mode.
- Use the or button to select Auto Power Off mode.
- Use the or button to select the desired setting.
- Press OK button to confirm and exit menu.
[I~10MIN],[OFF]
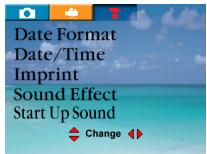
IMPRINT
You can have Date/Time printed or not on your picture when you print out the pictures.
- Turn the camera on by pressing the power ① button.
- Press MENU button to select Setup T mode.
- Use the or button to select Imprint Format mode.
- Use the or button to select the desired setting.
Off: Disable Date/Time printed function
Date: Print with date
Date/Time: Print with date and time
- Press OK button to confirm and exit.
SOUND EFFECT
The camera produces a sound (beep) each time you press a camera button, if this function is enabled.
- Turn the camera on by pressing the power button.
- Press MENU button to select Setup T mode.
- Use the or button to select Sound Effect mode
- Select [ON] or [OFF] by using the or button.
- Press OK button to confirm and exit.
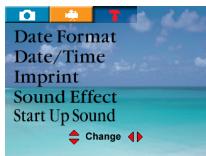
START UP SOUND
This function let you to have your personalized sound. When you power on the camera, you can see your personalized sound right away.
- Turn the camera on by pressing the power ① button.
- Press MENU button to select Setup T mode.
- Use the or button to select Start Up mode
- Use the or button to select the desired sound.
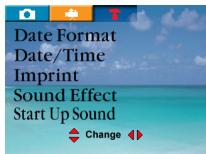
For saving your favorite images as star up image, please follow the steps:
Power on the camera by pressing power ① button Press Play/Pause button Use the / / / to select the sound you want to save as start up sound and then Press OK button to confirm Press Menu button Choose Start Up Sound Select the file name you would like Click OK button to confirm
- Press OK button to confirm.
START UP IMAGE
This function let you to have your personalized image. When you power on the camera, you can see your personalized image right away.
- Turn the camera on by pressing the power ① button.
- Press MENU button to select Setup T mode.
- Use the or button to select Start Up Image mode
- Use the or button to select the desired image.
For saving your favorite images as star up image, please follow the steps:
Power on the camera by pressing power ① button Press Play/Pause button Use the / / / to select the picture you want to save as start up image and then
Press OK button to confirm Press Menu button Choose Start Up Image Select the file name you would like Click OK button to confirm
- Press OK button to confirm.
DEFAULT SETTING
- Turn the camera on by pressing the power ① button.
- Press MENU button to select Setup T mode.
- Use the or button to Highlight Default Setting
- Use the or button to select Yes or No.
If Yes, the camera will go back to the original settings. If No, the camera will keep all of your own settings.
- Press OK button to confirm and exit.
CONNECTING THE CAMERA TO OTHER DEVICES
CAMERA SPECIFICATIONS
| Item | Description |
| Sensor | Approx. 3.1 Mega pixels |
| Image resolution | 5M: 2560 x 1920 pixels (F/W interpolation to 5 Mega pixels) 3M: 2048 x 1536 pixels 2M: 1600 x 1200 pixels 1.3M: 1280 x 1024 pixels VGA: 640 x 480 pixels |
| LCD | 1.5" color LTPS LCD |
| Self-timer | 10-second delay, 10+2 second |
| Zoom | 4X digital zoom |
| Capture modes | Still Image, Video (movie) recording |
| Memory type | 16 MB internal memory (common) SD memory card, MMC (optional, up to 1G capacity) |
| Lens | Fixed focal length: 8.46 mm |
| Range of Focus | Normal: 0.6 meters to infinity Macro: 15~18cm |
| Exposure and Compensation | Automatic exposure with manual EV compensation +/- 2.0EV in 0.5EV steps |
| White balance | Automatic with presets for Auto, Tungsten, Fluorescent, Daylight |
| Shutter Speed | 1/15~1/1000 sec. |
| Files formats | JPEG, AVI (Motion JPEG) for video clip |
| File standards | JPEG, EXIF 2.1, DPOF 1.0, DCF 1.1, M-JPEG |
| Interface (Ports) | VIDEO OUT jack, USB connector |
| Power | Rechargeable Lithium Lon battery, AC adapter (6V) |
| Dimensions | 104.2 x 51 x 22.3mm (W x H x D) (exclusive of protruding features) |
| Weight | Approx. 110g(without batteries and the SD memory card) |
*Design and specifications are subject to change without notice.
TROUBLESHOOTING
Error Message Table
| Symptoms | Causes | Solutions |
| The power won't turn on. | · The battery is out of power. · The AC power adapter is not connected or is damaged. | · Use the AC power adapter to charge the battery. · Make sure the AC power is connected and it's not damaged. |
| The power turns off during use. | · The battery is out of power. · Auto power off is enabled. · The battery/SD card cover is opened when in use. · The adapter has not been connected properly. | · Use the AC power adapter to charge the battery. · Switch on the power. · Do not open the battery/SD card cover when the camera is in use. · Connect the adapter correctly. |
| The camera does not take pictures when the shutter button is pressed. | · The external temperature is too cold. · The battery is not used for a long time. | · Keep the camera away from extreme temperatures. · Recharge the battery with AC power adapter. |
| The close-up image is blurred. | · Select the correct focus range. | · If the subject is within 15cm, select Macro mode. |
| There is something wrong with the color of the captured image. | · White balance is not set properly. | · Set the white balance to Auto Flash mode. |
| The picture is too bright or too dark. | · There is excessive or inadequate exposure. | · Reset exposure compensation. |
| The camera cannot download images to the | · Cable is not connected properly. | · Check the cable connection. |
PC.
-
Camera is off.
-
Turn on the power.
There is no battery or the adapter is not well connected.
-
Load new battery or check the AC power adapter connection.
-
USB driver is not installed.
Install USB driver.

- FCC STATEMENT
- Note:
- READ THIS FIRST
- Notice:
- WARNING
- CAUTION
- CONTENTS
- INTRODUCTION. 6
- GETTING TO KNOW YOUR
- GETTING STARTED. 10-15
- RECORD MODE. 15-19
- PLAYBACK MODE. 19-26
- MOVIE MODE 26-28
- MP3 Player 28
- TRANSFERRING RECORDED
- IMAGES AND VIDEOS TO YOUR
- COMPUTER 29-31
- USING THE CAMERA AS
- APC CAMERA 31-32
- MENU OPTIONS 33-40
- INTRODUCTION
- Overview
- Package contents
- GETTING TO KNOW YOUR CAMERA
- Name of Parts
- LCD Display
- Display icons - Still Image Record Mode:
- GETTING STARTED
- Installing the Battery
- NOTE
- Using an AC Power Adapter
- Charging the Battery
- Notice:
- Loading and Removing an SD/MMC Memory Card
- To remove a memory card:
- Attaching the Strap
- Turning the Power On/Off
- Turning the power on
- Turning the power off
- Setting the Date and Time
- Setting Image Resolution and Quality
- RECORD MODE
- Snapshot Mode □ Taking Still Images
- Normal Mode
- Macro Mode
- Digital Zoom
- Self-Timer
- Flash button
- PLAYBACK MODE
- Viewing Images
- Zoom Playback
- Displaying Thumbnail Images
- Auto Play
- Deleting Images
- To delete one image or video clip:
- To delete all images or video clips (at once):
- Protect
- Setting the DPOF
- Format
- Copy to Card
- E-frame
- MOVIE MODE
- Recording Video with Audio
- Voice Recording
- Viewing Video Clips
- MP3 Player Mode
- TRANSFERRING RECORDED IMAGES TO YOUR COMPUTER
- System Requirements (Windows)
- Step 1: Installing the USB driver
- Windows 98SE computers
- Step 2: Connecting the camera to your computer
- Step 3: Downloading Images/Video clips
- Windows-
- USING THE CAMERA AS A PC CAMERA
- General System Requirements for Videoconferencing
- Step1: Installing the PC Camera Driver
- Step2: Connecting the Camera to Your Computer
- Step3: Running Your Application Software (i.e. Windows NetMeeting)
- MENU OPTIONS
- SETUP MENU
- Sharpness
- WB (White Balance)
- EV (Exposure Value)
- Examples of Exposure Compensation -
- Positive (+) Compensation
- Negative (-) Compensation
- LCD BRIGHTNESS
- LANGUAGE
- VIDEO OUT
- FREQUENCY
- AUTO POWER OFF
- IMPRINT
- SOUND EFFECT
- START UP SOUND
- START UP IMAGE
- DEFAULT SETTING
- CONNECTING THE CAMERA TO OTHER DEVICES
- TROUBLESHOOTING
Marque : GENIUS
Modèle : G512
Catégorie : Clavier