
TA-RW255 - Amplificateur de cassette ONKYO - Notice d'utilisation et mode d'emploi gratuit
Retrouvez gratuitement la notice de l'appareil TA-RW255 ONKYO au format PDF.

| Type de produit | Amplificateur de cassette stéréo à double plateau avec auto-reverse |
| Marque | ONKYO |
| Modèle | TA-RW255 |
| Format de bande | 4 pistes, 2 canaux |
| Vitesse de bande | 4,76 cm/s |
| Pleurage et scintillement | 0,13% (WRMS) |
| Réponse en fréquence | 30 Hz - 15 kHz (bande métal), 30 Hz - 14 kHz (bande haute), 30 Hz - 13 kHz (bande normale) ±3 dB |
| Rapport signal/bruit | 56 dB (bande métal, Dolby off) |
| Réduction de bruit | Dolby B et C |
| Sélection automatique de bande | Oui |
| Enregistrement synchronisé CD | Oui, avec platine CD Onkyo compatible RI |
| Fonctions de copie | Copie normale et rapide (NORMAL/HIGH) |
| Affichage | Compteur numérique 4 chiffres, indicateurs de niveau crête 8 segments |
| Entrées | LINE IN (2 paires), sensibilité 80 mV, impédance 50 kΩ |
| Sorties | LINE OUT (2 paires), niveau 500 mV, impédance de charge >50 kΩ |
| Alimentation | CA 120 V 60 Hz (Amérique du Nord) ou CA 230-240 V 50 Hz (Europe) |
| Consommation | 17 W en fonctionnement ; veille 7,0 W (NA) / 0,6 W (EU) |
| Dimensions (L x H x P) | 435 x 121 x 303 mm |
| Poids | 4,9 kg |
| Entretien | Nettoyage des têtes, rouleaux et cabestans ; démagnétisation toutes les 50 heures |
| Sécurité | Ne pas exposer à l'humidité ; débrancher en cas d'orage ; ne pas ouvrir le boîtier |
| Accessoires fournis | Câbles audio (2), câble RI (1) |
FOIRE AUX QUESTIONS - TA-RW255 ONKYO
Questions des utilisateurs sur TA-RW255 ONKYO
0 question sur cet appareil. Repondez a celles que vous connaissez ou posez la votre.
Poser une nouvelle question sur cet appareil
Téléchargez la notice de votre Amplificateur de cassette au format PDF gratuitement ! Retrouvez votre notice TA-RW255 - ONKYO et reprennez votre appareil électronique en main. Sur cette page sont publiés tous les documents nécessaires à l'utilisation de votre appareil TA-RW255 de la marque ONKYO.
MODE D'EMPLOI TA-RW255 ONKYO
ONKYO®
Stereo Cassette Tape Deck
TA-RW255
Instruction Manual
Contents
Before using
Important Safety Instructions 2
Precautions 3
Features 4
Control positions and names 4
System connections 5
Power connections 5
Operation
To play a tape 6
Reverse mode function 7
Recording 8
Making good sound recordings 9
Tape dubbing 10
Useful recording functions 11
Connecting Onkyo components for
RI operation 12
Appendix
Handling cassette tapes 13
Cassette deck maintenance 14
Specifications 14
Troubleshooting guide 15
Thank you for purchasing an Onkyo Stereo Cassette Tape Deck. Please read this manual thoroughly before making connections and plugging in the unit.
Following the instructions in this manual will enable you to obtain optimum performance and listening enjoyment from your new Stereo Cassette Tape Deck.
Please retain this manual for future reference.
WARNING:
TO REDUCE THE RISK OF FIRE OR ELECTRIC SHOCK, DO NOT EXPOSE THIS APPARATUS TO RAIN OR MOISTURE.
CAUTION:
TO REDUCE THE RISK OF ELECTRIC SHOCK, DO NOT REMOVE COVER (OR BACK). NO USER-SERVICEABLE PARTS INSIDE. REFER SERVICING TO QUALIFIED SERVICE PERSONNEL.
WARNING
ISK OF ELECTRIC SHOCK DO NOT OPEN
AVIS
RISQUE DE CHOC ELECTRIQUE NE PAS OUVIRN


The lightning flash with arrowhead symbol, within an equilateral triangle, is intended to alert the user to the presence of uninsulated "dangerous voltage" within the product's enclosure that may be of sufficient magnitude to constitute a risk of electric shock to persons.

The exclamation point within an equilateral triangle is intended to alert the user to the presence of important operating and maintenance (servicing) instructions in the literature accompanying the appliance.
Important Safety Instructions
-
Read these instructions.
-
Keep these instructions.
-
Heed all warnings.
-
Follow all instructions.
-
Do not use this apparatus near water.
-
Clean only with dry cloth.
-
Do not block any ventilation openings. Install in accordance with the manufacturer's instructions.
-
Do not install near any heat sources such as radiators, heat registers, stoves, or other apparatus (including amplifiers) that produce heat.
-
Do not defeat the safety purpose of the polarized or grounding-type plug. A polarized plug has two blades with one wider than the other. A grounding type plug has two blades and a third grounding prong. The wide blade or the third prong are provided for your safety. If the provided plug does not fit into your outlet, consult an electrician for replacement of the obsolete outlet.
-
Protect the power cord from being walked on or pinched particularly at plugs, convenience receptacles, and the point where they exit from the apparatus.
-
Only use attachments/accessories specified by the manufacturer.
-
Use only with the cart, stand, tripod, bracket, or table specified by the manufacturer, or sold with the apparatus. When a cart is used, use caution when moving the cart/apparatus combination to avoid injury from tip-over.
PORTABLE CART WARNING
- Unplug this apparatus during lightning storms or when unused for long periods of time.
- Refer all servicing to qualified service personnel. Servicing is required when the apparatus has been damaged in any way, such as power-supply cord or plug is damaged, liquid has been spilled or objects have fallen into the apparatus, the apparatus has been exposed to rain or moisture, does not operate normally, or has been dropped.
Supplied accessory
Audio connection cable (2)
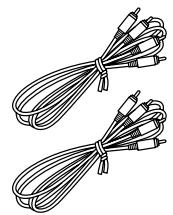
R cable (1)
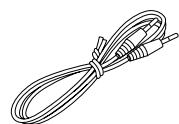
To use RI, the TA-RW255 must be connected with an RI cable and an audio connection cables.
- Damage Requiring Service
Unplug the apparatus from the wall outlet and refer servicing to qualified service personnel under the following conditions:
A. When the power-supply cord or plug is damaged,
B. If liquid has been spilled, or objects have fallen into the apparatus,
C. If the apparatus has been exposed to rain or water,
D. If the apparatus does not operate normally by following the operating instructions. Adjust only those controls that are covered by the operating instructions as an improper adjustment of other controls may result in damage and will often require extensive work by a qualified technician to restore the apparatus to its normal operation,
E. If the apparatus has been dropped or damaged in any way, and
F. When the apparatus exhibits a distinct change in performance this indicates a need for service.
- Object and Liquid Entry
Never push objects of any kind into the apparatus through openings as they may touch dangerous voltage points or short-out parts that could result in a fire or electric shock.
The apparatus shall not be exposed to dripping or splashing and no objects filled with liquids, such as vases shall be placed on the apparatus.
Don't put candles or other burning objects on top of this unit.
- Batteries
Always consider the environmental issues and follow local regulations when disposing of batteries.
- If you install the apparatus in a built-in installation, such as a bookcase or rack, ensure that there is adequate ventilation.
Leave 20cm (8") of free space at the top and sides and 10cm (4") at the rear. The rear edge of the shelf or board above the apparatus shall be set 10cm (4") away from the rear panel or wall, creating a flue-like gap for warm air to escape.
For European Models
Declaration of Conformity
We, ONKYO EUROPE
ELECTRONICS GmbH
LIEGNITZERSTRASSE 6, 82194 GROEBENZELL,
GERMANY

declare in own responsibility, that the ONKYO product described in this instruction manual is in compliance with the corresponding technical standards such as EN60065, EN55013, EN55020 and EN61000-3-2, -3-3.
GROEBENZELL, GERMANY
ONKYO EUROPE ELECTRONICS GmbH
Precautions
- Recording Copyright—Unless it's for personal use only, recording copyrighted material is illegal without the permission of the copyright holder.
- AC Fuse—The AC fuse inside the unit is not user-serviceable. If you cannot turn on the unit, contact your Onkyo dealer.
- Care—Occasionally you should dust the unit all over with a soft cloth. For stubborn stains, use a soft cloth dampened with a weak solution of mild detergent and water. Dry the unit immediately afterwards with a clean cloth. Don't use abrasive cloths, thinners, alcohol, or other chemical solvents, because they may damage the finish or remove the panel lettering.
4. Power Warning
BEFORE PLugging IN THE UNIT FOR THE FIRST TIME, READ THE FOLLOWING SECTION CAREFULLY. AC outlet voltages vary from country to country. Make sure that the voltage in your area meets the voltage requirements printed on the unit's rear panel (e.g., AC 230 V, 50 Hz or AC 120 V, 60 Hz).
Setting the [STANDBY/ON] switch to STANDBY does not fully shutdown the unit. If you do not intend to use the unit for an extended period, remove the power cord from the AC outlet.
- Never Touch this Unit with Wet Hands—Never handle this unit or its power cord while your hands are wet or damp. If water or any other liquid gets inside this unit, have it checked by your Onkyo dealer.
6. Handling Notes
- If you need to transport this unit, use the original packaging to pack it how it was when you originally bought it.
- Do not leave rubber or plastic items on this unit for a long time, because they may leave marks on the case.
- This unit's top and rear panels may get warm after prolonged use. This is normal.
- If you do not use this unit for a long time, it may not work properly the next time you turn it on, so be sure to use it occasionally.
- When you've finished using this unit, remove cassettes and turn off the power.
7. Deck Location
- Do not use or leave in direct sunlight or in other places subject to high temperature and humidity. The unit should also not be left in potentially hot places such as near heating appliances. Excessive heat and moisture can lead to internal damage and serious malfunctions (this also applies to cassette tapes). The recommended ambient temperature range is 5^ to 35^ .
- Avoid damp and dusty places and locations prone to vibrations.
- Be extremely careful with the recording/playback heads. Clean and demagnetize them regularly, but under no circumstances should magnets or other metals be used anywhere near the heads.
- This unit is extremely sensitive to magnetic fields, so do not use near large speakers or other devices which generate magnetic fields.
- Hum may even be induced by magnetic flux leakage from the power transformer in certain amplifiers. Therefore, this unit should also be kept clear of the amplifier.
- Do not remove the cabinet case. If any of the internal parts are handled, there is a considerable danger of electric shock.
8. Cassettes to Avoid:
-
Cassettes with poorly formed cases that rattle during rewind and fast forward.
-
Low cost cassettes with no guide roller or pressure pad spring should never be used for stereo.
- C-100-120 cassettes because the tape and the coating are extremely thin, distortion levels are high. Also, even a slight stretching of the tape will make it susceptible to being caught up in the pinch roller and capstan.
- Endless tapes, if used for a long period of time, can overheat.
9. Moisture Condensation
Moisture condensation may damage this unit.
Read the following carefully:
- Moisture condensation can occur in the following situations:
- The unit is moved from a cold place to a warm place.
- A heater is turned on, or cold air from an air conditioner is hitting the unit.
- In the summer, when this unit is moved from an air conditioned room to a hot and humid place.
- The unit is used in a humid place.
- Do not use this unit when there's the possibility of moisture condensation occurring. Doing so may damage your cassettes and certain parts inside this unit.
If condensation does occur, remove all cassettes and leave this unit turned on for two to three hours. By this time, the unit will have warmed up and any condensation will have evaporated.
For British models
Replacement and mounting of an AC plug on the power supply cord of this unit should be performed only by qualified service personnel.
IMPORTANT
The wires in the mains lead are coloured in accordance with the following code:
Blue: Neutral
Brown:Live
As the colours of the wires in the mains lead of this apparatus may not correspond with the coloured markings identifying the terminals in your plug, proceed as follows:
The wire which is coloured blue must be connected to the terminal which is marked with the letter N or coloured black.
The wire which is coloured brown must be connected to the terminal which is marked with the letter L or coloured red.
IMPORTANT
The plug is fitted with an appropriate fuse. If the fuse needs to be replaced, the replacement fuse must approved by ASTA or BSI to BS1362 and have the same ampere rating as that indicated on the plug. Check for the ASTA mark or the BSI mark on the body of the fuse.
If the power cord's plug is not suitable for your socket outlets, cut it off and fit a suitable plug. Fit a suitable fuse in the plug.
For Canadian Models
For models having a power cord with a polarized plug:
CAUTION: TO PREVENT ELECTRIC SHOCK, MATCH WIDE BLADE OF PLUG TO WIDE SLOT, FULLY INSERT.
Features
Full-logic record/play transports with auto reverse and continuous play
Two eight-segment peak-holding fluorescent meters
Four-digit electronic tape counter
CD synchro recording
□ Rl (Remote Interactive) compatible
Auto tape selector
Dolby B and C Noise Reduction
Auto space rec mute
Dolby noise reduction manufactured under license from Dolby Laboratories Licensing Corporation.
"Dolby" and the double-D symbol are trademarks of Dolby Laboratories Licensing Corporation.
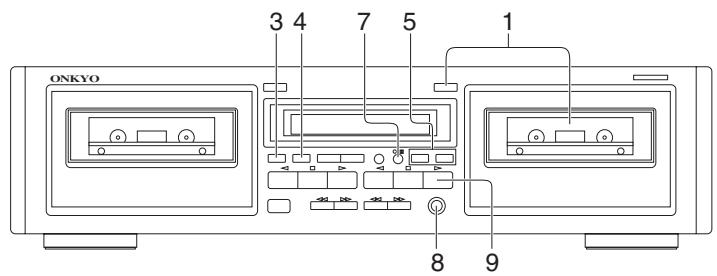
Control positions and names
For more information about a button or control, turn to the page number listed in square brackets([ ]).
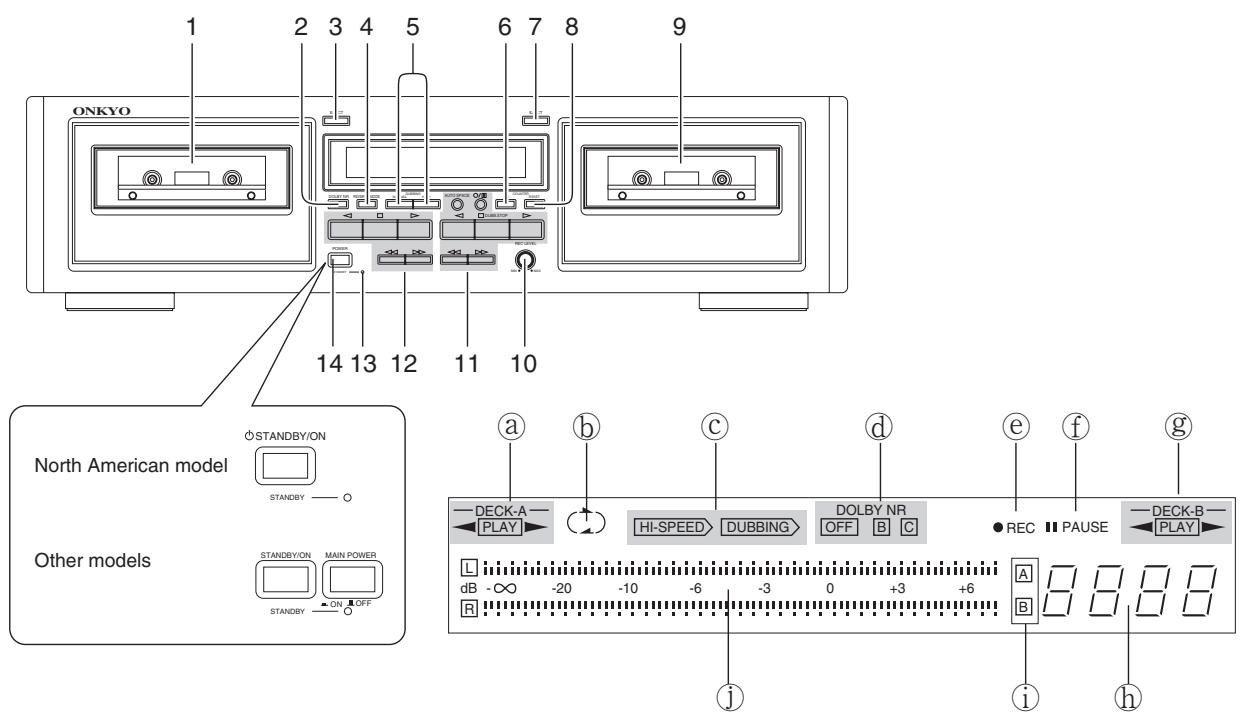
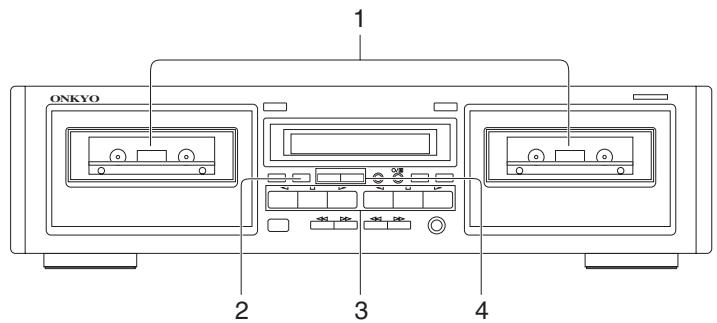
Front panel
- Deck A cassette holder [6]
- DOLBY NR button [6, 8, 9]
- Deck A EJECT button [6]
- REVERSE MODE button [6, 7, 8, 10]
- DUBBING button (NORMAL/HIGH) [10]
- COUNTER A/B button [8]
- Deck B EJECT button [8]
- COUNTER RESET button [8]
- Deck B cassette holder [8]
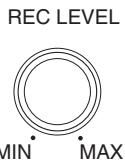
- REC LEVEL control knob [8]
- Deck B operation buttons
/ : Rec/pause button [8] AUTO SPACE : Auto space button [1]
: Rewind button [7]
:Fastforwardbutton[7]
: Reverse play button [6, 9]
DUBB.STOP:Stopbutton(DUBB.STOP)[6,9,10]
Forward play button [6, 9]
- Deck A operation buttons
: Rewind button [7]
:Fastforwardbutton[7]
: Reverse play button [6]
: Stop button [6]
Forward play button [6]
-
STANDBY indicator [5]
-
STANDBY/ON button [5]
MAIN POWER switch (Other than North American model) [5]
Display
Deck A direction indicator
包 Reverse mode indicator
Dubbing indicators
Dolby NR indicators
REC indicator
f PAUSE indicator
Deck B direction indicator
Counter
① Deck A/B indicator
① Peak level indicator
System connections
- Do not plug in the AC power cord until all other connections have been made.
- On each pair of input or output jacks, the lower jack (marked R) corresponds to the right channel, and the upper jack (marked L) to the left channel. Refer to the amplifier's instruction manual for further information on connections.

Power connections
Switching power on
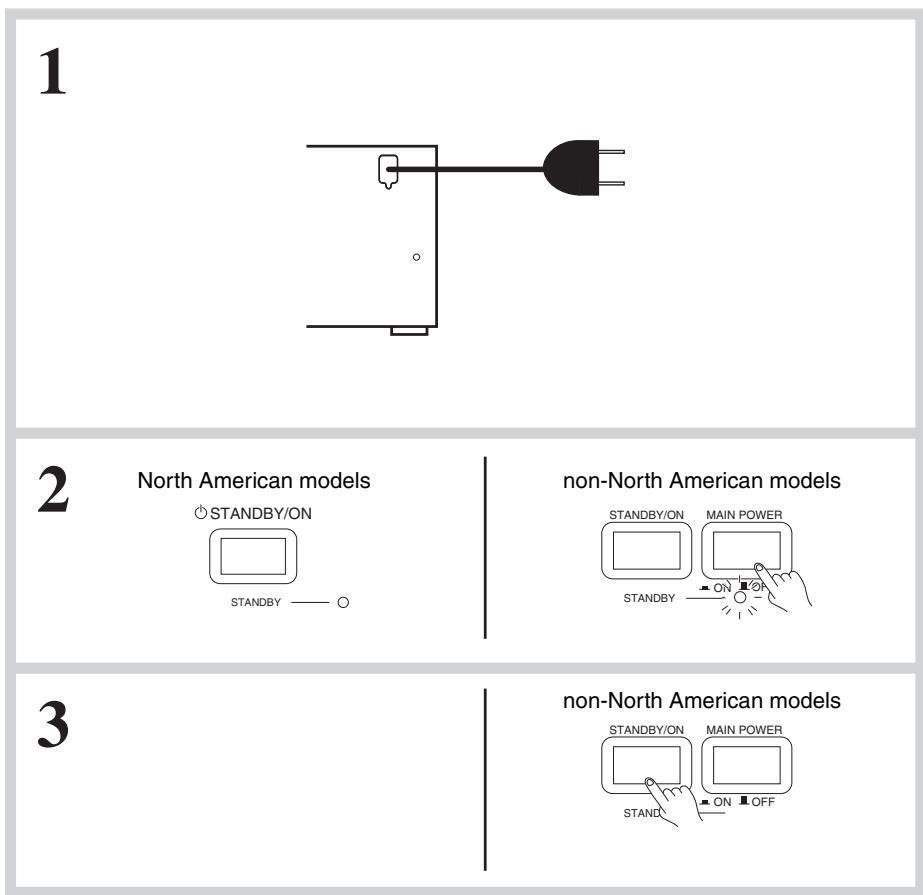
For North American model:
- Plug the AC power cord into a wall outlet.
The STANDBY indicator will light.
- Press the STANDBY/ON button.
The STANDBY indicator will go out and the display will light.
For non-North American model:
-
Plug the AC power cord into a wall outlet.
-
Press the MAIN POWER switch.
The STANDBY indicator will light.
- Press the STANDBY/ON button.
The STANDBY indicator will go out and the display will light.
- Pressing the or button of either Deck A or Deck B when the unit is in standby status will also cause the display to light and playback will start.
- If the tape deck is plugged into the amplifier's AC outlet, the amplifier's AC power cord must be plugged into a wall outlet and its power switched on before the tape deck can operate.
To play a tape
- Check once again that all connections have been completed exactly as indicated in the connections diagram and then plug in the AC power cord.
- After turning the power on, the display illuminates and the PAUSE indicator flashes (about 5 seconds). While the indicator is flashing, no operation can be performed.
- This deck holds two cassettes at once. Both Deck A and Deck B are capable of auto-reverse playback; Deck B can also record.
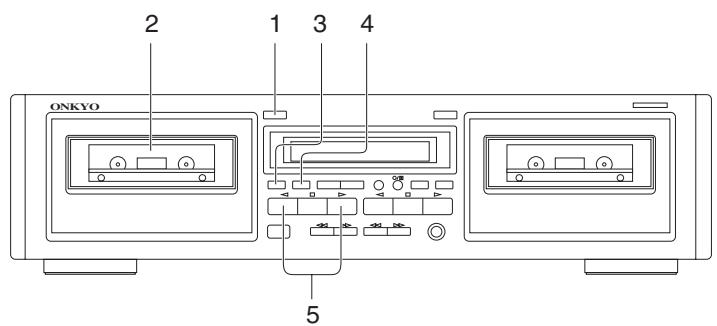
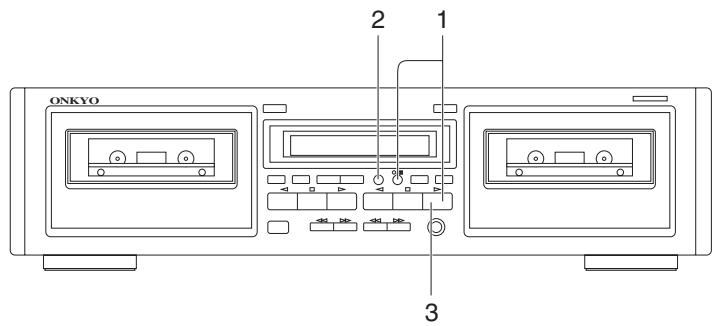
- Tapes can be played back using either Deck A or Deck B. Follow the procedure on Deck A or B. (Deck A is pictured.)
1
2
3
4
5
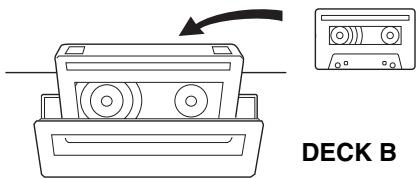
Listening to a tape
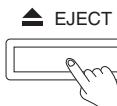
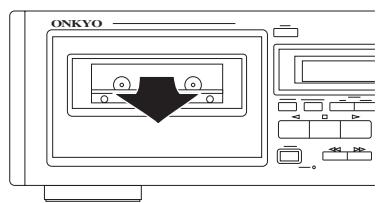
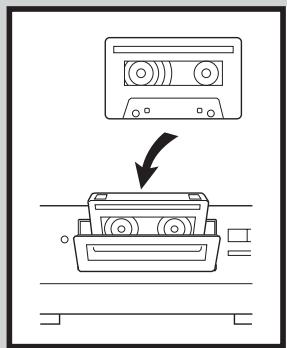
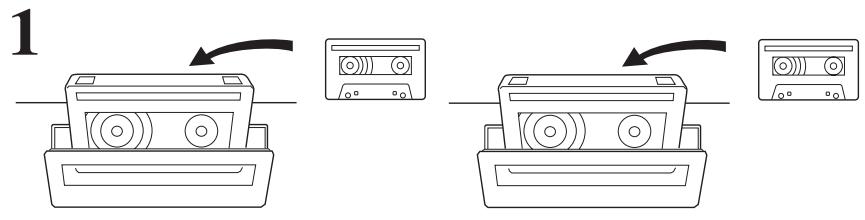
- Press the EJECT button to open the cassette holder.
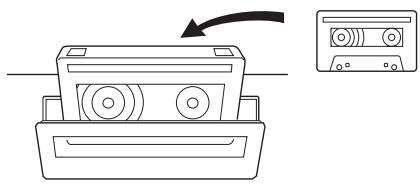
-
Insert a cassette.
-
The side of the cassette with the exposed tape should be facing downward.
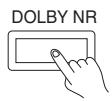
-
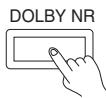
Set the Dolby NR by pressing the DOLBY NR button repeatedly until the proper Dolby NR indicator (OFF, B or C) turns on.
- Select the same noise reduction system that was used when the cassette was recorded. For instance, tapes recorded using Dolby B NR should be played back with Dolby B NR.
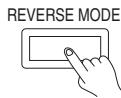
- Set the Reverse Mode by pressing the REVERSE MODE button repeatedly until the desired mode is displayed.
( ) one side: Only one side of the tape is played back.
( ) repeat: Both sides of the tape are played back repeatedly eight times or until the button is pressed.
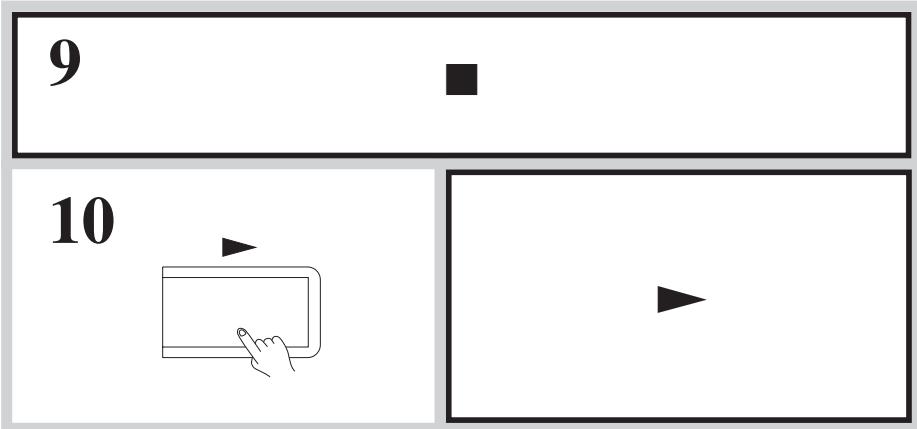
5. Start playback.
-
Press the or button depending on which side of the cassette you wish to listen to.
:Playback starts from the front side.
:Playback starts from the reverse side. -
The auto-stop mechanism will automatically stop the tape (depending on the tape transport mode) if a tape is played through to the end.
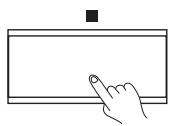
Stopping playback
Press the button.
To play a tape

Recheck the tape direction settings (shown by the Deck A and Deck B direction indicators) before pressing the or button. The following explanation assumes that the tape direction is forward ( ).
Fast forward and rewind
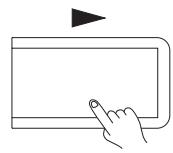
To fast forward the tape, press the button.
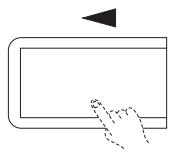
To rewind the tape, press the button.
- To stop either fast forward or rewind, press the button.
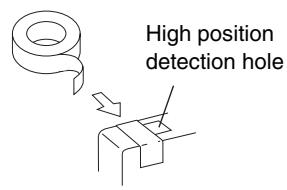
Automatic tape selection system
This deck automatically detects the type of cassette in the cassette holder and sets the bias and equalization to the correct settings. Tape selection is performed by detecting the presence or absence of identification pits on the back of the cassette shell. Cassettes manufactured before this identification system was adopted and bargain cassettes that do not incorporate these pits cannot be used with this deck.
Reverse mode function
- Recheck the tape travel direction settings (shown by the Deck A and Deck B direction indicators) before beginning playback or recording.
- The following explanation assumes that cassette side A is facing outward.
- There is a silent gap about 10 seconds long when the direction of tape travel switches from forward to reverse or from reverse to forward when the end of a tape side is reached.
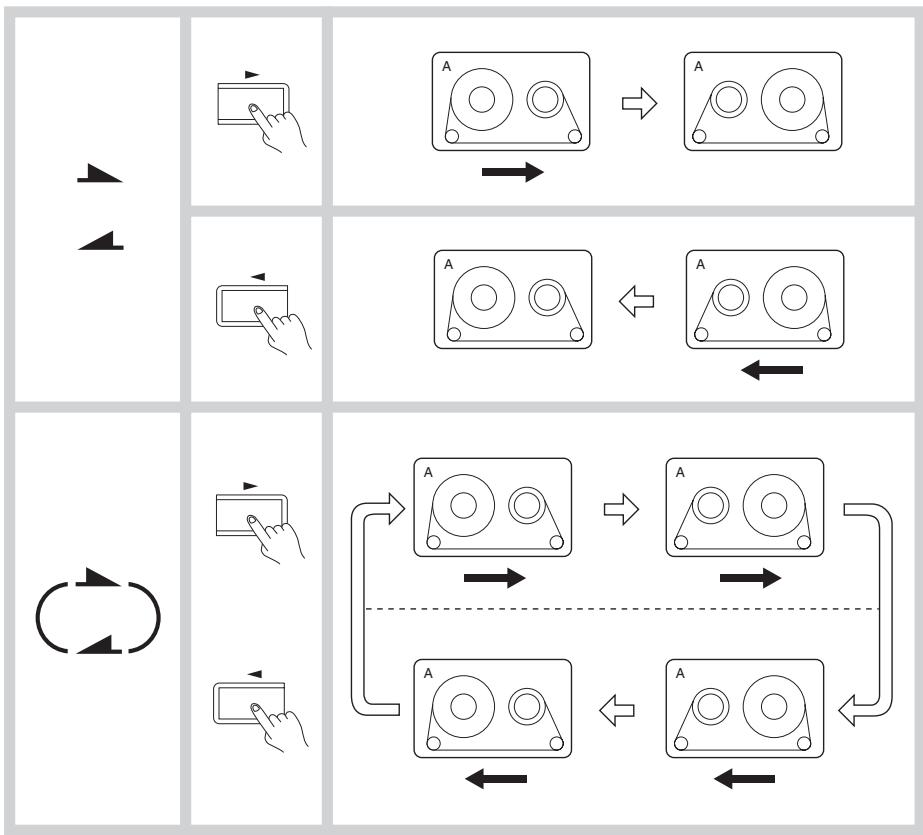
Continuous tape playback
Insert the cassettes you wish to play in Deck A and Deck B. Set the reverse mode to . Press the or button of either Deck A or Deck B.
Both sides of both cassettes will play back, one after the other, and then the process will repeat. After four complete playback cycles, playback stops automatically.
- Be sure to select the same Dolby NR system on both Deck A and Deck B.
Recording to both sides of a tape (Deck B)
Insert the cassette you wish to record in Deck B. Set the reverse mode to . Press the
/ button followed by the button of Deck B to start recording from the front side. Both sides of the cassette are recorded. Then, the auto-stop mechanism will stop the tape at the end of the reverse side.
- If recording starts in the reverse direction first, only the reverse side is recorded, after which tape travel stops automatically.
Recording
Recording can be performed on Deck B only. High-speed recording is not possible when recording from the LINE IN (REC) jacks.
- Check to see if one or both of the cassette's erasure prevention tabs have been removed. (Refer to page 13 for details)
- Confirm that the cassette deck is properly connected to the amplifier.
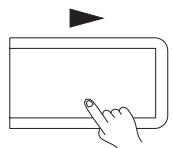
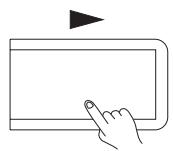
- Illustrations enclosed in solid boxes indicate source component operations.
1
2

3
4

5

6

7

8
□ 1
db ∞ -20 -10 6 -3 0 +3 +6
回
Recording
Confirm that the amplifier is set up correctly for recording. (Refer to the amplifier's instruction manual for details.)
1. Insert the cassettes.
Make sure the side to be recorded is facing outward.
- Recording is not possible on the tape leaders (the transparent sections you see at both ends of the tape.)
2. Prepare the source component to be used for the recording.
- Tune in the desired station on the tuner.
- Load a CD (or LP) into the CD player (or turntable).
- Load a cassette into the tape player (analog or DAT).
3. Set the Dolby NR by pressing the DOLBY NR button repeatedly until the desired Dolby NR indicator (OFF, B or C) turns on.
- Set the Reverse Mode by pressing the REVERSE MODE button repeatedly until the desired mode is displayed. ( ) one side: Only one side of the tape is recorded. ( ) repeat: Both sides of the tape are recorded.
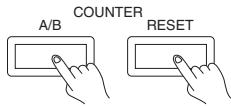
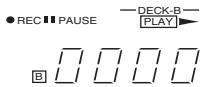
5. Press the COUNTER A/B button repeatedly until B is displayed, and press the COUNTER RESET button to return the tape counter to [0000].
- Begin playing the source component.
7. Press the / button.
-
While observing the peak level indicators, adjust the recording level.
-
The recording levels of the left and right channels are adjusted simultaneously.
- Use the REC LEVEL knob to adjust the recording level.
- When using metal cassettes, the REC LEVEL knob should be adjusted so that +3 dB indicators light periodically. When using other kinds of tapes, the 0 dB indicator should light periodically. (See "Making good sound recordings" on page 9.)
-
Put the source component into recording standby status.
-
Temporarily stop CD (or LP) play.
-
Rewind the tape to the portion you wish to start playback.
-
Press the button on this unit and begin playing the source component.
You can also use the CD Synchro Recording function if this unit is properly connected to an Onkyo CD player bearing the R1 symbol.

Stopping recording
Press the button.
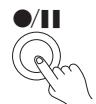
Interrupting recording briefly
Press the / button.
Making good sound recordings
Dolby Noise Reduction System
Dolby B NR is the system used in most cassette tape decks to reduce the background noise that is inherent in all cassette tapes. Dolby Laboratories then developed an even more effective noise reduction system, Dolby C NR, in response to the demand for increasingly better sound quality from cassette tapes.
Both Dolby noise reductions systems operate by boosting signals during recording that fall below a certain input level.
Dolby B and C NR operate on the higher portions of the frequency spectrum using what is called a "sliding band" technique. This is because tape hiss is most prominent during the quiet, high frequency portions of a recording. These same signals are then reduced back to their original strength during playback, thereby reducing the background noise by the same amount. In order to operate only when necessary, the Dolby NR system has a varying effect depending on the input level and frequency of the material being recorded.
Dolby C NR is capable of reducing tape hiss by 10dB more than Dolby B NR. In addition to its noise reducing function,
Dolby C NR has an anti-saturation network that lowers high input levels before recording them and returns the signals to their original strength during playback. This raises the high-frequency saturation level of cassette tapes to allow you to record signals that would normally cause distortion. This system raises the maximum output level of cassette tapes by more than 4 dB at 10kHz .
Setting the Proper Recording Level
The recording level has an important effect on the sound quality a tape will have when it is played back. A recording level that is too high will cause distortion while one which is too low will lower the signal-to-noise ratio resulting in a tape with excessive "hisss noise." It is particularly important to set the recording level correctly with cassette tapes since they have a much thinner magnetic coating than open reel tapes. The thin coating gives the tape a comparatively low saturation level which can easily be surpassed if the recording level is set too high.
The recording level indicators feature a peak-hold function for the indicators from -6 dB through +6 dB. This can come in handy when setting the recording level.
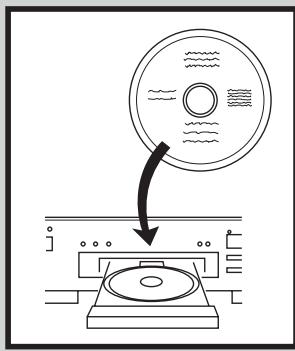
CD Synchro Recording System
Once the TA-RW255 is connected to a CD player bearing the RI mark (see page 12), press the button of the CD player will cause recording to start automatically on the TA-RW255.
- Insert a cassette with the side to be recorded facing out.
- Start the CD player.
- Press the / button to place the unit in the recording standby mode. Adjust the input level. When the recording level has been set, stop the CD player.
- Start the CD player again, and recording will begin simultaneously.
Notes:
- Even if the CD player is stopped during recording, the cassette deck will continue recording.
- If the cassette deck is in the recording standby mode when the CD is put in play, the deck will begin recording. When setting recording levels, always start the CD first.
Tape dubbing
- The recording level is automatically set to the optimum level during dubbing.
- The Dolby NR System of Deck A is automatically used to record the tape in Deck B. If you wish to monitor the signal from a Dolby NR encoded tape during dubbing, be sure to set the Dolby NR to match the type of Dolby NR with which the cassette was recorded.


Tape dubbing
- Insert the prerecorded cassette into Deck A, and insert the cassette to be recorded into Deck B.
- Set the Reverse Mode by pressing the REVERSE MODE button repeatedly until the desired mode is displayed.
( ) one side: Only one side of the tape is copied.
( ) repeat: Both sides of the tape are copied.
-
Check the Deck A and Deck B direction indicators to ensure that the tape will start in the desired direction.
-
To dub an entire tape, be sure to select the forward (▶) direction on both Decks.
-
To change the setting of the Direction indicator, press the or button followed by the button.
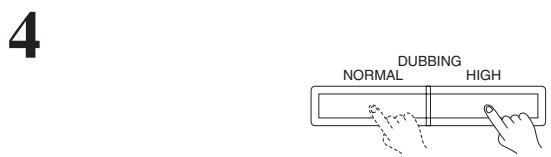
-
Begin dubbing by pressing the NORMAL or HIGH button.
[NORMAL]: Normal speed dubbing will begin.
[HIGH]: High speed dubbing about half the time normally required will begin.
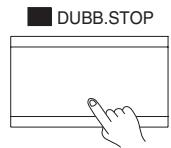
Stopping dubbing
Press the Deck B (DUBB.STOP) button.

Briefly interrupting dubbing
Press the / button.
In this case, you can change the cassette in Deck A or search the desired portion by using the buttons for Deck A. To resume dubbing, press the NORMAL or HIGH button or Deck B or button again.
Useful recording functions
1
2

3
Inserting blank spaces between songs when editing tapes
- Press the / button and the or button to begin recording.
-
Press AUTO SPACE button at any point during recording where you want to enter a blank space about five seconds long.
-
The PLAY indicator flashes on and off.
-
After the blank space has been inserted, the tape stops automatically and the deck returns to the rec/pause mode.
-
To continue recording, press the or button.
- The AUTO SPACE button works in both the record and rec/pause modes.
To insert a blank space of less than five seconds between songs
Press the / button to return to the rec/ pause mode or press the or button before a five-second period has elapsed.
To insert a blank space of more than five seconds between songs
Hold the AUTO SPACE button down for as long as you want the blank space to be. The deck will return to the rec/pause mode immediately when the button is released.

Pressing the AUTO SPACE button during dubbing
Pressing the AUTO SPACE button during dubbing causes Deck A to stop while a blank space is inserted on the tape in Deck B. Then Deck B reverts to the dubbing pause mode. To continue dubbing, press the NORMAL or HIGH button.
Connecting Onkyo components for R1 operation
If this unit is properly connected to another Onkyo component bearing the RI symbol, you will be able to control it using the other component's remote control.
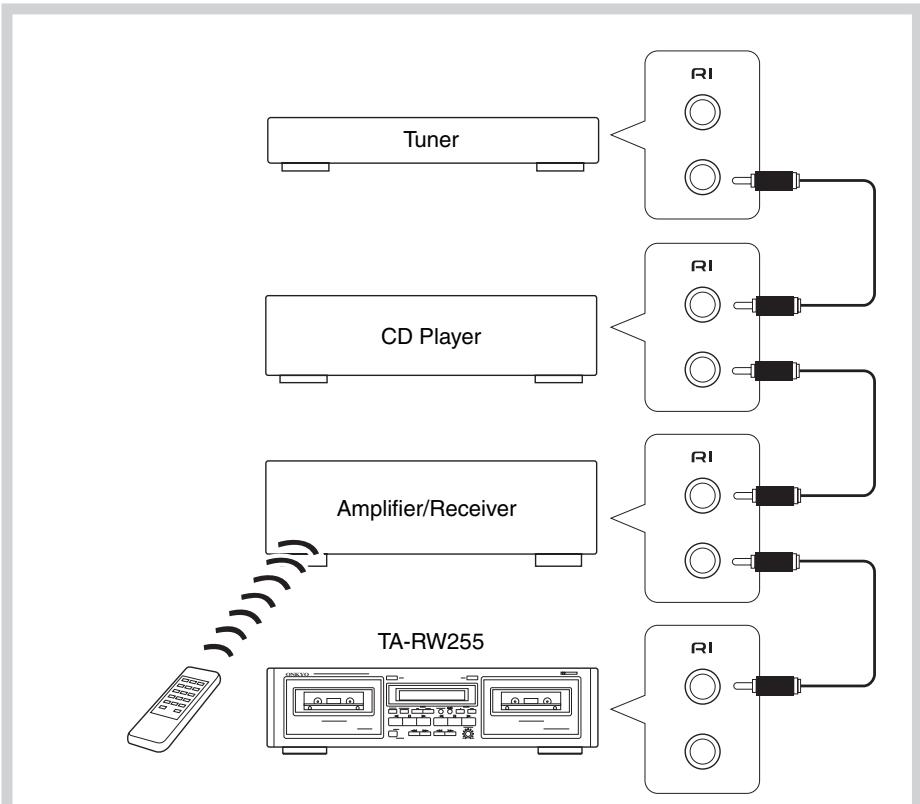
To use RI, you must make an analog audio connection between the TA-RW255 and the other component.
For remote control operation
The upper and lower remote control jacks have the same function.
For remote control operation, connect this jack to any Onkyo amplifier, receiver or CD player bearing the RI symbol using the remote control cable.
Note:
Do not attempt to connect the RI remote control jack to any equipment other than an Onkyo component bearing the RI symbol. Doing so could cause the unit to malfunction.
The function listed below can be accomplished using the remote control of the master unit.
:Play
:Rewind
Fast forward
:Stop
: Rec/Pause
CD synchro recording system
Once connections are made, as shown left, this function becomes enabled. It automatically starts recording on the cassette deck when the button of the CD player is pressed. (See page 9.)
Handling cassette tapes
Examine cassette tapes carefully before using them with the cassette tape deck.
1.
2.


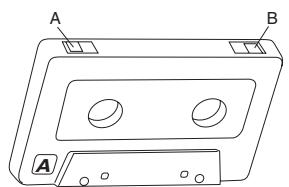
Erasure prevention
Cassette tapes are constructed with erasure prevention tabs to prevent accidental erasure of the tape.
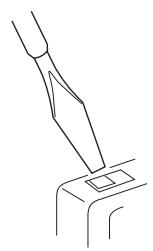
1 If you wish to protect a recording from accidental erasure, break off the tab(s) on the appropriate side(s). It will no longer be possible to use the recording button with such a cassette.
2 If at some later date you wish to record the cassette, simply cover the hole(s) with small pieces of cellophane tape.
Take care not to cover the tape type ID holes.
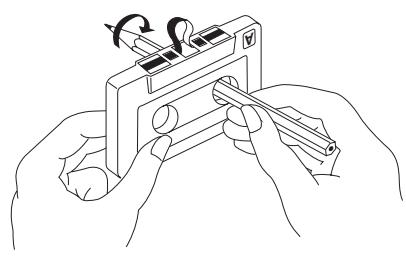
Loose tape
Loose tape can cause tangling around the pinch roller and capstan and jam the mechanism. Remove any tape slack with a pencil or similar device as shown in the diagram.
Tapes not recommended
- C-100-120 tapes
C-100-120 tape is thin and therefore easily broken. There is a possibility that tape could get caught on the pinch roller or capstan.
- Endless tapes
Do not use endless tapes.
Tape storage
- Do not touch the tape surface.
- Do not put thick paper or cardboard labels in the cassette holder.
- Do not put tapes near magnetic sources (speakers, amplifiers, TVs, etc.) Your important recording might be erased or damaged.
- Do not expose cassettes to direct sunlight.
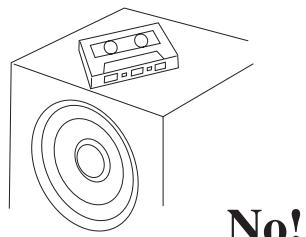
No!
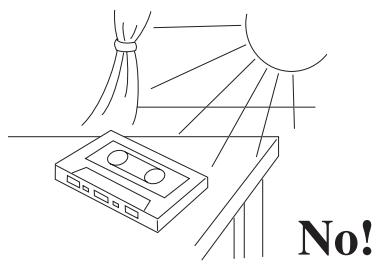
No!
Cassette deck maintenance
This deck requires no lubrication.
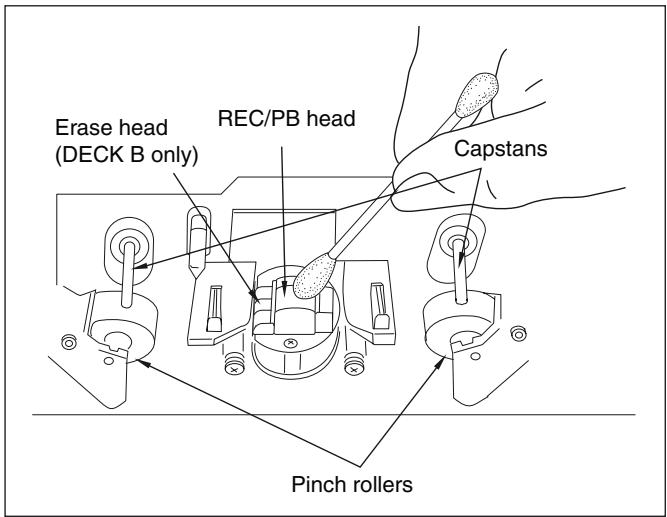
Head, Pinch Roller and Capstan Cleaning
Playback sound quality can be greatly diminished if magnetic particles are allowed to accumulate on the recording/playback head or playback head. Be sure to clean the head periodically, normally 2 - 3 times a month, to maintain your deck's original performance. Dirty heads may cause:
- Poor sound quality (lose of high frequency response)
Decreased volume - Skipping
Incomplete erasure of previous recordings
If the pinch rollers and capstan are dirty, the tape may become tangled and damaged by wrapping around the pinch roller and capstan.
To prevent these problems, clean the heads, pinch rollers and capstans with a cotton swab dipped in cleaning fluid.
Demagnetizing
Residual magnetism builds up in the heads after the cassette deck has been used for an extended period of time. This buildup introduces noise and static into tapes and impairs high frequency response. To prevent this, demagnetize the heads with any commercially available head eraser once every 50 hours of use. Refer to the instruction manual of the head eraser for detailed instructions.
Specifications
Format: Auto reverse double deck
Track format: 4-tracks, 2-channels
Recording system: AC bias
Erasing system: AC erase
Tape speed: 4.76 cm/sec. (1-7/8 i.p.s)
Wow and flutter: 0.13% (WRMS)
Frequency response:
Metal position tape 30Hz to 15kHz± 3dB
High position tape 30Hz to 14kHz± 3 dB
Normal position tape 30Hz to 13kHz± 3 dB
Signal to noise ratio: 56 dB (metal position tape/Type IV, Dolby NR off)
55 dB (high position/Type II, Dolby NR off)
50 dB (normal position/Type I, Dolby NR off)
Noise reduction of 10dB above 5kHz
and 5dB at 1kHz possible with Dolby B.
Noise reduction of 20dB at 5kHz possible with Dolby C.
Input Jacks:
LINE IN: 2
Input sensitivity: 80mV
Input impedance: 50k
Output Jacks:
LINE OUT: 2
Standard output level: 500mV
Output load impedance: over 50k
Motors: DC servo motor: 1 + 1
Heads:
PB Head: Special Hard Permalloy × 1
Rec/PB Head: Special Hard Permalloy × 1
Erase head: Ferrite × 1
Power supply rating: North American: AC 120 V, 60 Hz
European: AC 230-240 V, 50 Hz
Power consumption: 17 W
Standby power consumption:
North American: 7.0 W
European: 0.6W
Dimensions: (W x H x D):
435mm× 121mm× 303mm
(17 - 1 / 8^ × 4 - 3 / 4^ × 11 - 15 / 16^ )
Weight: 4.9kg (10.8 lbs.)
Operation condition temperature/humidity:
5^ - 35^ / 5% -85% no condensation)
Specifications and external appearance are subject to change without notice because of product improvements.
Troubleshooting guide
The following guide lists problems which do not require professional servicing. If, however, the problem cannot be remedied using this guide, contact an Onkyo authorized service center for assistance.
No power.
Cause: Power cord plug is loose
Remedy: Insert plug properly into outlet.
- Playback but no sound.
Cause: Incorrect connection.
Remedy: Check and connect correctly according to page 5.
Cause: Stereo amplifier input selector switch is set to incorrect position.
Remedy: Change switch position.
- Tape does not move.
Cause: Slack tape wound around pinch roller.
Remedy: Take up slack with a pencil (see page 13).
- / button does not engage.
Cause: No tape in cassette holder.
Remedy: Insert cassette tape.
Cause: Erasure prevention tab(s) removed.
Remedy: Change cassette or cover tab hole with cellophane tape.
- Hoarse sound, balance unstable.
Cause:Playback head dirty.
Remedy: Clean head (see page 14).
Cause: Tape is stretched.
Remedy: Replace cassette.
- Excessive noise and tape hiss.
Cause: Head has become magnetized.
Remedy: Demagnetize (see page 14).
Cause: Tape with high noise level.
Remedy: Replace cassette.
Distorted sound.
Cause: Distortion in tape.
Remedy: Tape is probably bad but confirm by listening to another.
- Recordings are distorted.
Cause: Recording was done at too high a level.
Remedy: Readjust REC LEVEL knob according to the directions on page 8.
- Tape squeal and skipping.
Cause: Dirty heads, pinch rollers or capstan shafts.
Remedy: Clean (see page 14).
Cause: Cassette shell is binding tape or tape is stretched.
Remedy: Change cassette or try correcting with fast forward and rewind.
- Excessive hum during playback.
Cause: Connecting cables not inserted firmly.
Remedy: Insert plugs firmly.
Cause: External flux leakage from nearby amplifier or TV set.
Remedy: Move deck away from hum source.
- High frequencies too strong.
Cause: Dolby NR encoded tape played back with NR off.
Remedy: Select the same noise reduction (Dolby NR B or C) used when the cassette was recorded.
Cause: Incorrect equalization.
Remedy: Confirm that cassette has tape type detection holes.
- No high frequency sounds.
Cause: Tape not encoded with Dolby NR played back with Dolby B or C NR on.
Remedy: Select the appropriate NR mode using the DOLBY NR button (OFF).
Cause: Heads have become dirty.
Remedy: Clean (see page 14).
- The skip function does not operate properly.
Cause: The silent sections between songs are too short or noisy.
Remedy: Use a cassette with sufficiently silent sections of sufficient length between songs.
- Deck does not operate properly.
Cause: Tape transport control microcomputer has been exposed to interference from power supply or static electricity.
Remedy:
North American model: Unplug the power cord from the wall outlet, wait approximately 10 seconds and then plug it again.
Other model: Press the MAIN POWER switch to turn off the power.
Wait approximately 10 seconds and turn it on again.
In catalogs and on packaging, the letter at the end of the product name indicates the color. Specifications and operation are the same regardless of color.
ONKYO CORPORATION
Sales & Product Planning Div.: 2-1, Nisshin-cho, Neyagawa-shi, OSAKA 572-8540, JAPAN
Tel: 072-831-8023 Fax: 072-831-8124
ONKYO U.S.A. CORPORATION
18 Park Way, Upper Saddle River, N.J. 07458, U.S.A.
Tel: 201-785-2600 Fax: 201-785-2650 http://www.us.onkyo.com/
ONKYO EUROPE ELECTRONICS GmbH
Liegnitzerstrasse 6, 82194 Groebenzell, GERMANY
Tel: +49-8142-4401-0 Fax: +49-8142-4401-555 http://www.eu.onkyo.com/
ONKYO EUROPE UK Office
Suite 1, Gregories Court, Gregories Road, Beaconsfield, Buckinghamshire, HP9 1HQ
UNITED KINGDOM Tel: +44-(0)1494-681515 Fax: +44(0)-1494-680452
ONKYO CHINA LIMITED
Units 2102-2107, Metroplaza Tower I, 223 Hing Fong Road, Kwai Chung,
N.T., HONG KONG Tel: 852-2429-3118 Fax: 852-2428-9039
http://www.ch.onkyo.com/

10504-1