
M9 - Montre connectée SUUNTO - Notice d'utilisation et mode d'emploi gratuit
Retrouvez gratuitement la notice de l'appareil M9 SUUNTO au format PDF.
| Type de produit | Montre connectée multifonction pour la voile |
| Poids | 76 g |
| Alimentation | Batterie rechargeable interne (chargeur secteur 110/220 V, adaptateur allume-cigare en option) |
| Fonctions principales | GPS 12 canaux, boussole 3D compensée en inclinaison, altimètre, baromètre, thermomètre, modes Time, Weather, Compass, Sailing, Navigation, Racing, chronomètre, alarmes, mémoire de points, suivi de parcours, fonctions de régate (ligne de départ, vent, etc.) |
| Entretien et nettoyage | Essuyer avec un chiffon humide (eau tiède), éviter les produits chimiques (essence, solvants). Nettoyer les contacts du PC avec une brosse à dents. |
| Sécurité | Résiste à l'eau jusqu'à 10 bars (100 m) selon ISO 2281. Ne pas utiliser en plongée. Ne pas actionner les boutons sous l'eau. |
| Pièces détachées et réparabilité | Batterie remplaçable par un centre agréé uniquement. Ne pas tenter de démonter. Confier toute réparation à un revendeur agréé Suunto. |
| Informations générales | Température d'utilisation : -20°C à +60°C. Stockage : -30°C à +60°C. Verre minéral. Connexion PC via station d'accueil et logiciel Suunto Sail Manager. Compatible avec SuuntoSports.com. |
FOIRE AUX QUESTIONS - M9 SUUNTO
Questions des utilisateurs sur M9 SUUNTO
0 question sur cet appareil. Repondez a celles que vous connaissez ou posez la votre.
Poser une nouvelle question sur cet appareil
Téléchargez la notice de votre Montre connectée au format PDF gratuitement ! Retrouvez votre notice M9 - SUUNTO et reprennez votre appareil électronique en main. Sur cette page sont publiés tous les documents nécessaires à l'utilisation de votre appareil M9 de la marque SUUNTO.
MODE D'EMPLOI M9 SUUNTO
SUUNTO
M9
INSTRUCTION MANUAL
CUSTOMER SERVICE CONTACTS
Suunto Oy
Phone +358 9 875870
Fax +358 9 87587301
Suunto USA
Phone 1 (800) 543-9124
Canada
Phone 1 (800) 776-7770
European Call Center
Phone +358 2 284 11 60
PC-related questions
softwarehelpdesk@suunto.com
Suunto Website
www.suunto.com
TABLE OF CONTENTS
1. INTRODUCTION 6
1.1 CHECKLIST 6
1.2 CARE AND MAINTENANCE 6
1.3 WATER RESISTANCE 6
1.4 CHARGING THE BATTERY 7
2. HOW TO USE YOUR SUUNTO M9 8
2.1 DISPLAY 8
2.1.1 Mode Indicator 8
2.1.2 Battery Indicator 8
2.1.3 Alarm Symbol 8
2.1.4 GPS Activity and Accuracy Bar Display 8
2.2 BUTTONS 9
2.2.1 Short and Long Press 9
2.2.2 Start/Data Button 9
2.2.3 Stop/Cancel Button 9
2.2.4 Enter Button 10
2.2.5 Arrow Buttons 10
2.2.6 Key Lock 11
2.3 MENUS 12
2.3.1 Basic Menu Structure 12
2.3.2 Navigating in Menus 13
2.4 Understanding GPS 13
2.4.1Overview 13
2.4.2 Line-of-sight Needed 14
2.4.3 Accuracy 14
2.4.4 GPS Usage 14
2.4.5 Versatility 15
3.MODES 16
3.1 GENERAL INFORMATION 16
3.2 TIME MODE 16
3.2.1 Main Display 16
3.2.2 Stopwatch 17
3.2.3 Function Menu 17
3.2.4 Alarm 17
3.2.5 Time/Date 18
3.2.6 General 20
3.2.7 Units 22
3.3 WEATHER MODE 26
3.3.1 Main Display 26
3.3.2 Function Menu 26
3.3.3 Barometric Memory 26
3.3.4 Weather Alarm 27
3.4 COMPASS MODE 28
3.4.1 Main Display 28
3.4.2 Function Menu 28
3.4.3 Calibrate 29
3.4.4 Declination 31
3.5 SAILING MODE 32
3.5.1 Main Display 32
3.5.2 Function Menu 34
3.5.3 Tracking 34
3.5.4 Tracks 35
3.5.5 Race 36
3.6 NAVIGATION MODE 36
3.6.1 Main Display 36
3.6.2 Function Menu 37
3.6.3 Navigate 37
3.6.4 Routes 38
3.6.5 Race 42
3.7 RACING MODE 43
3.7.1 Main Display 43
3.7.2 Function menu 46
3.8 FUNCTION MENU 52
3.8.1 GPS 52
3.8.2 MOB 53
3.8.3 Memory Point 54
3.8.4 POSITION 55
3.8.5 WINDdir 56
4. ADDITIONAL FEATURES 57
4.1 PC INTERFACE 57
4.1.1 Transferring Data 57
4.2 SUUNTO SAIL MANAGER 58
4.2.1 Suunto Sail Manager Features 58
4.2.2 Changing the Suunto M9 Settings 59
4.3 SUUNTOSPORTS.COM 60
4.3.1 System Requirements 60
4.3.2 SuuntoSports.com Sections 60
5. TECHNICAL SPECIFICATIONS 63
6. GPS DATUM LISTING 64
7. GLOSSARY 72
8.COPYRIGHT AND TRADEMARK NOTICE 75
9. CE COMPLIANCE 76
10. LIMITS OF LIABILITY AND ISO 9001 COMPLIANCE 76
11.DISCLAIMER 77
1. INTRODUCTION
Congratulations, your newly purchased Suunto M9 is designed to provide years of enjoyment in your sailing activities.
Suunto M9 is a reliable high precision electronic instrument intended for recreational use.
NOTE: Suunto M9 should not be substituted for acquiring measurements that require professional or industrial precision.
1.1 CHECKLIST
After purchasing this instrument, make sure the package contains the following items:
Suunto M9
- Docking Station
- Charger
PC-interface cable
- CD containing the Suunto Sail Manager software and Suunto M9 instruction manual
Suunto M9 Quick Guide
Should any of these be missing from the package, contact the resale agent who sold you the package.
1.2 CARE AND MAINTENANCE
Only perform the procedures described in this manual. Never attempt to disassemble or service your Suunto M9. Protect your Suunto M9 from shocks, extreme heat and prolonged exposure to direct sunlight. If not in use, your Suunto M9 should be stored in a clean, dry environment at room temperature.
Suunto M9 can be wiped clean with a lightly moistened (warm water) cloth. If there are stubborn stains or marks, you can apply mild soap to the area. Do not expose Suunto M9 to strong chemicals such as gasoline, cleaning solvents, acetone, alcohol, insect repellents, adhesives and paint, as they will damage the unit's seals, case and finish. Keep the PC interface pins clean with e.g. a toothbrush. Make sure the area around the sensor is kept free of dirt and sand. Never insert any objects into the sensor opening.
1.3 WATER RESISTANCE
Suunto M9 is water resistance-tested up to 10 bar (equivalent of 100m / 330ft depth) according to ISO 2281 standard (www.iso.ch). However, it is not a diving instrument
and therefore it should not be used to obtain data under water. Do not push the buttons under water.
NOTE: Large amounts of water or dirt under the cover of Suunto M9 may disturb the satellite signal reception.
1.4 CHARGING THE BATTERY
Suunto M9 is equipped with an internal rechargeable battery. You can recharge the battery approximately 500 times. The life expectancy of a single charge depends on the use of the GPS, Compass and data storage functions. When the battery level indicator on the display reaches the red zone, the battery voltage is low. When this occurs, you should recharge the battery. However, extremely cold weather affects the battery voltage even when the battery is still fully operational.
If the battery warning indicator is activated in temperatures above 10^ (50^) , recharge the battery.
Do not attempt to change the battery, as this will void warranty. Take the Suunto M9 to an authorized Suunto dealer for a battery change.
You can charge the battery with either 110V or 220 V mains charger (depending on the area of purchase), with a car cigarette lighter charger (optional) or with a 9 V battery.
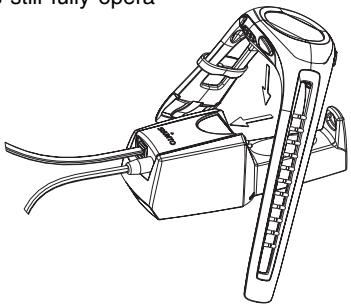
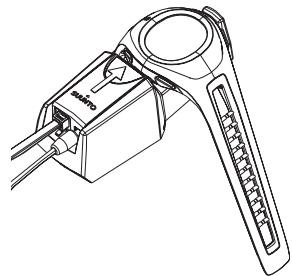
To charge the battery:
- Place Suunto M9 on the docking station with the display facing up.
- Plug the charger in the docking station. Plug the charger in an electric outlet.
- When the battery indicator shows a full battery, disconnect the charger from the electric outlet. Suunto M9 is now ready for use.
NOTE: Heavy use of the GPS, backlight and compass will significantly reduce the battery life.
2. HOW TO USE YOUR SUUNTO M9
2.1 DISPLAY
2.1.1 Mode Indicator
On the left side of the display there is a mode indicator that shows the currently active mode. The mode indicator displays the modes from the top down in the following order: TIME, WEATHER, COMPASS, SAILING and NAVIGATION. The active mode is indicated by the moving segment next to the indicator bar. When the RACING mode is active, both the SAILING and the NAVIGATION segments are displayed.
2.1.2 Battery Indicator
On the right side of the display there is a battery indicator that shows the battery voltage. When the indicator is in the red zone, the battery needs recharging. When the battery is being recharged, the battery indicator moves up continuously until the battery is full, and the indicator is shown in full length.
2.1.3. Alarm Symbol
If a regular alarm or a Baro Alarm is activated, a rectangular symbol is displayed at the right side of the lower horizontal dot line.
2.1.4. GPS Activity and Accuracy Bar Display
When the GPS is set on, a dot bar display appears on the upper horizontal dot line of the display. When the GPS is on but does not have a fix, an empty rectangular dot is displayed. When the GPS has a fix, 1 to 5 filled rectangular dots are displayed. The amount depends on the fix quality. More dots represent better satellite coverage and signal reception.
2.2 BUTTONS
2.2.1 Short and Long Press
The buttons may have different functions depending on how long you press them.
The ordinary press or short press means that the button is pressed quickly.
The long press means that the button is pressed for more than 2 seconds.
2.2.2 Start/Data Button
Short Press
- In the Time mode, it starts the timing and records the split times.
- Activates the information displays in the Sailing, Navigation and Racing modes and in the MOB function. Returns to the main display from the Sailing, Navigation, Racing and MOB information displays.
Long Press
- Activates the backlight when the backlight is not set to the off position. The backlight stays on as long as a selection is active and 5 seconds after the last selection. For more information about backlight settings, see page 20.
2.2.3 Stop/Cancel Button
Short Press
- Returns to the previous menu level or to the previous selection without accepting the selection.
- In the main mode displays, it acts as a shortcut button that toggles the lowest field of the main display between three different alternatives. The selection stays active even if the mode or menu level is changed. Changing the shortcut in the Time mode is possible only after the Stopwatch has been reset.
- In the Time mode, it stops the timing and scrolls the split times on the display.
Long Press
- Returns to the main display of the current mode without accepting the last selection.
- In the Time/Stopwatch mode, it resets the stopwatch.
2.2.4 Enter Button
Short Press
- Moves to a lower menu level.
- Activates the Function menu in all the main modes.
- Records all the Function menu parameters in the temporary memory. The parameters are erased when the unit returns to the main mode, except for the one that has been confirmed by the user. For more information on the Function menu, see section 3.8, Function Menu.
- If the GPS is not active, it accesses the Function menu in order to turn the GPS on. Accepting any selection that requires GPS usage, also turns the GPS on.
- With two possible selections (e.g. light on/off), it activates the selection and accepts the selections made with the arrow keys.
- Accepts the selections made on the information displays and returns to the main display.
Long Press
- Moves to the Set menu from the main displays. (The individual Set menu names are identical to the mode names.)
- Accepts the selections made with the arrow keys and returns to the main display.
2.2.5 Arrow Buttons
Short Press
- Scroll the menus up and down.
Move between the main modes
- From the Racing mode, the up arrow navigates to the Sailing mode and the down arrow navigates to the Navigation mode.
NOTE: You can only access the racing mode after you have activated it. (For more information on this, see sections 3.5.5 and 3.6.5 race.)
- Change the values. The up arrow increases the value and the down arrow decreases the value. With two possible selections (e.g. light on/off), both arrows change the value.
2.2.6 Key Lock
The key lock prevents you from pushing the buttons accidentally.
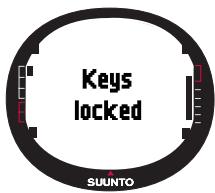
Activating the key lock
To activate the key lock:
- Short press Enter. Suunto M9 switches to the Function menu.
- Press Start/Data within 3 seconds. The buttons are now locked and the message "KEYS LOCKED" is displayed. Suunto M9 switches to the main display of the current mode and the key lock function indicator is displayed.
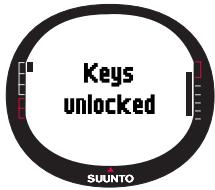
Deactivating the key lock
To deactivate the key lock:
- Press Enter.
- Press Start/Data within 3 seconds. The text "KEYS UNLOCKED" is displayed.

2.3 MENUS
2.3.1 Basic Menu Structure
The menus are organized hierarchically under the modes. When you select a mode, first the name of the mode, then its main display appears. When you press the up or down arrow quickly, only the names of the modes are shown. When you long press Enter in the mode's main display, the mode's Set menu is displayed. The Set menu includes several functions, all of which include sub-functions or settings. This is called the hierarchical menu structure.
By pressing Enter the Suunto M9 records data in the temporary memory, from all the sensors. The data is utilized in the Function menu features.
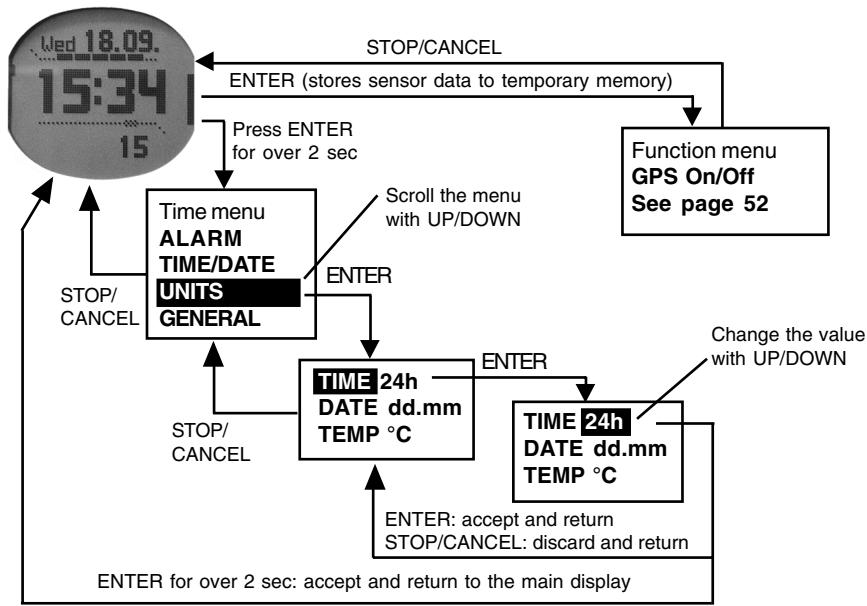
2.3.2 Navigating in Menus
The menu items can be scrolled with the up and down arrows located on the right side of Suunto M9. Three menu items are displayed at the same time. The menu item that is currently active and can thus be selected is displayed in reversed color. The indicator bar on the left side of the display shows the active mode. To move deeper into the hierarchy, select a menu item and press Enter. To return one step up in the hierarchy, press Stop/Cancel. Remember that if you just press Stop/Cancel, the changes made in the menu are not saved. First you have to accept the changes with the Enter button.
If you want to return directly to the main display of the active mode, press either Enter (saves the changes) or Stop/Cancel (discards the last change) for more than 2 seconds.
Suunto M9 has been designed to guide you as much as possible when you navigate in the menus. When you perform a function, Suunto M9 often returns automatically to the menu item you are likely to use next.
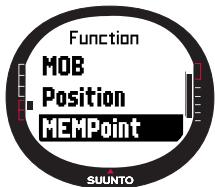
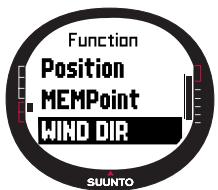
Short pressing Enter in any of the modes brings up the Function menu. The Function menu is almost identical in all the main modes. In the Function menu you can:
- Turn the GPS on or off manually (GPS On/Off)
- Record and store the coordinates of a Man Over Board situation (MOB)
View the current position (Position) - Store a memory point (MEMPoint)
- Store the wind direction (WIND DIR)
For more information on the Function menu, see section 3.8 Function Menu.
The Function menu of the Racing mode differs to a certain extent from other modes. For more information refer to the Racing mode section 3.7.2 Function menu.
2.4. UNDERSTANDING GPS
2.4.1. Overview
Suunto M9 uses Global Positioning System (GPS) in determining the user's position. GPS incorporates a set of satellites orbiting the Earth at an altitude of 2000km , at the speed of 4km/s . The satellites send relatively weak radio signals at power levels comparable to normal household light bulbs. So, the GPS reception gets disturbed much more easily than, for example, cellular phone signal reception because the GPS signals that reach the Earth are thousands of times weaker than cell phone signals.
However, due to the extreme sensitivity of the built-in GPS radio receiver, even the faintest signals can be picked up.
2.4.2. Line-of-sight Needed
To ensure a good position measurement, there must be a line-of-sight connection between the satellites and the receiver. This means that the objects or materials between the satellites and the GPS receiver must not excessively attenuate the signal. In practice, water-containing objects, such as people, trees or other dense vegetation, can cause problems. The signals will not penetrate rocks or buildings or any metallic materials. However, the receiver typically works well under relatively thin plastic, fabric or wooden covers, e.g. inside boats.
2.4.3. Accuracy
To calculate a position, a GPS receiver usually requires simultaneous reception from at least four satellites. The position accuracy typically increases with the number of satellites being tracked but the most important factor is actually the relative geometric position of the satellites. The best position estimate is obtained when satellites from different directions and angles can be tracked. In other words, the less obstructed the receiver's view of the sky, the better the accuracy.
The accuracy also improves with the number of measurements made on the same spot, as some errors will be averaged out. Under all-in-view satellite conditions a global average horizontal positioning error is 7.8 meters (95% confidence level). However, depending on the satellite constellation and the distortion the GPS signal experiences when traveling through the ionosphere, the instantaneous accuracy can vary from a couple of meters to over ten meters. The vertical position estimate is roughly two times more inaccurate than the horizontal.
2.4.4. GPS Usage
When you turn on the GPS, the receiver starts searching for radio signals from the satellites and as soon as one is found, data starts flowing from the satellite to the receiver. The data includes a list of the satellite positions and the GPS time. The GPS time is highly accurate because each satellite has an atomic clock on board.
The data flows quite slowly and usually a little less than a minute is needed for the calculation of the first position estimate. To minimize the duration, you should maintain an unobstructed view of the sky right after turning on the GPS. You need the satellite
positions and the GPS time before you can perform the actual position calculation and before the GPS becomes functional. After the first position fix has been established, it still takes additional 10 minutes before all relevant data has been received from the satellites. The position estimate accuracy improves during this time as more satellites can be used for position calculation.
The downloaded data is valid roughly for the next four hours during which the receiver starts more quickly, typically in less than 10 seconds if it was turned off in between.
You should turn off the GPS when you do not need it. This is because satellite tracking consumes large amounts of power. Suunto M9 uses the lowest power consuming GPS technology available but you should still turn off the GPS when you do not need it.
2.4.5. Versatility
The GPS system is run by the United States Department of Defense and has been fully operational since 1995. At least 24 operational satellites circle the globe every 12 hours in 6 orbital planes with 4 satellites per plane to provide a true global coverage. A worldwide ground control network monitors the health and status of the satellites. The system works 24 hours a day regardless of the weather. It can provide service to an unlimited number of users and it is free of charge.
NOTE: The very first time you initiate the GPS, it will take longer than usual for the GPS to start, as it has no reference to its current location. This may also happen if the GPS has not been used for a long time.
Please activate your new Suunto M9 GPS at least once before sailing out. Subsequent GPS starts will take less time. To minimize the GPS initiation time, hold the unit steady in one position with the display facing up and make sure you are located in an open area so that the unit has a clear view to the sky. After starting the GPS (i.e. after it has a fix), the unit can be moved more freely without losing the connection to the satellites. The signal strength bar on the unit's display indicates the fix. (See section 2.1.4, GPS Activity and Accuracy Bar Display)
3.MODES
3.1 GENERAL INFORMATION
Suunto M9 has six different modes: Time, Weather, Compass, Sailing, Navigation and Racing. You can switch between the modes with the arrow buttons. Each mode has several sub-modes. The mode indicator on the left side of the display indicates the active mode.
3.2 TIME MODE
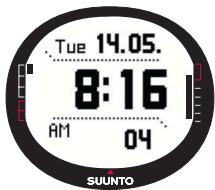
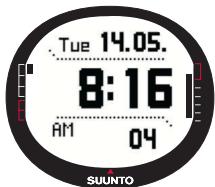
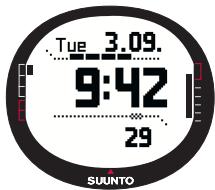
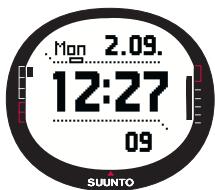
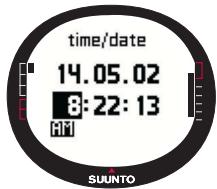
3.2.1 Main Display
When you select the Time mode, the main display opens.
The main display has three rows:
Date
The first row displays the date in the selected format. For more information about changing the date format, see page 23.
Time
The second row displays the time in the selected format. For more information about changing between 12- and 24-hour displays, see page 22.
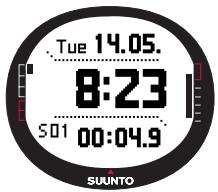
Shortcuts
The third row displays either the stopwatch, the seconds or Dual time. To switch between these, short press Stop/Cancel.
- Seconds: Displays seconds.
- Dual time: Displays the dual time if it has been set. For more information on setting the dual time, see page 19.
- Stopwatch: (For information on operating the stopwatch, see section 3.2.2 below.)
3.2.2 Stopwatch
Press Start/Data to start the timing. If you want to view a split time, press Start/Data again. The time stops for three (3) seconds to show the split time and then returns to showing the running time.
Press Stop/Cancel to stop the timing. After the timing has been stopped, you can scroll the split times with Stop/Cancel.
To reset the timer, long press Stop/Cancel. If the stopwatch has not been reset after stopping the timing, press Start/Data to continue the timing.
Suunto M9 can display up to 29 split times.
NOTE: When you have used the stopwatch, you cannot select other shortcuts before resetting the timer.
NOTE: The maximum time you can record with the stopwatch is 10 hours.
3.2.3 Function Menu
For more information on the Function menu, see section 3.8 Function Menu.
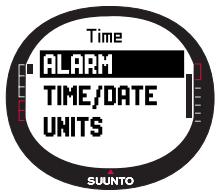
3.2.4 Alarm
You can set altogether three independent alarms. When the alarm is set, the alarm symbol appears on the display.
Activating alarms
To activate an alarm:
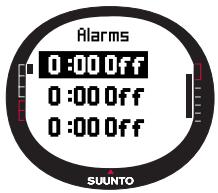
- In the Set menu, Alarm is already the first menu item. Short press Enter to select it. The alarm menu displays the status of the alarms. When you open the menu for the first time, the alarm indicators are set to off as default.
- Scroll to the alarm you want to set and short press Enter. The alarm information is displayed and the on/off indicator is displayed as active (in reversed color). When you open the alarm information for the first time, the time is 0:00.
- Press either the up or down arrow to change the alarm status to on.
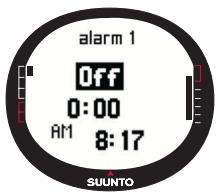
- Short press Enter. The alarm indicator changes to on and the hour selection is activated.
- Set the correct hour with the arrow buttons and short press Enter. The minute selection is activated.
- Set the correct minutes with the arrow buttons and short press Enter. The alarm is now set.
Deactivating alarms
To deactivate the alarm:
- In the Set menu, Alarm is already the first menu item. Short press Enter to select it.
- Scroll to the alarm you want to set off and short press Enter. The alarm information is displayed and the On/Off indicator is displayed in reversed color.
- Press either the up or down button to change the alarm status to off and short press Enter. The alarm symbol disappears from the display.
Acknowledging alarms
When you hear the alarm, you can acknowledge it by pressing any of the Suunto M9 buttons.
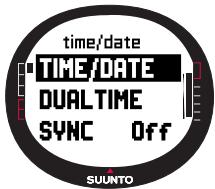
3.2.5 Time/Date
The current time is visible on the second row of the Time mode's main display.
Dual time allows you to keep track of another time, for example, another time zone when you are traveling. The dual time is displayed on the third row of the Time mode's main display as a shortcut. To scroll to the dual time shortcut, press Stop/Cancel in the Time mode's main display.
NOTE: The GPS checks and sets the correct time and date when activated if the Sync function is on. You can change the UTC time offset in the Time/Date feature of the Set menu or in the PC. You must always change the Dual time manually.
| Off | GPS does not affect the time settings |
| On | GPS sets the time but does not update the time zone (uses the UTC offset set in the device or the Suunto Sail Manager) |
Sync
You can set the GPS time synchronization on or off.
To set the time synchronization:
- In the Set menu, scroll to Time/Date and short press Enter.
- Scroll to Sync and short press Enter. The On/Off selection is activated.
- Change the On/Off status with the arrow buttons and short press Enter. The time synchronization is now set. You return to the Set menu.
NOTE: The time is synchronized each time the GPS is activated and it makes the first fix. The time is not updated continuously.
Setting the time and the dual time
To set the time and the dual time:
- In the Set menu, scroll to Time/Date and short press Enter. The menu with the options Time/Date and Dual time is displayed.
- Scroll to either Time/Date or Dual time and short press Enter. The hour selection is activated.
NOTE: If the time is displayed as a 12-hour clock, the symbol AM or PM is displayed on left side of the last row. For dual time, the AM/PM-symbol is displayed on the right side of the time. (For more information on the 12/24-hour clock, see page 22.)
3. Change the hour with the arrow buttons and short press Enter. The minute selection is activated.
4. Change the minutes with the arrow buttons and short press Enter. The second selection is activated.


- When you press the down arrow button, the seconds are zeroed. If you want to set specific seconds, press the up arrow button and the seconds start running. When the settings are correct, short press Enter. The date selection is activated.
- Change the date with the arrow buttons and short press Enter. The month selection is activated.
- Change the month with the arrow buttons and short press Enter. The year selection is activated.
- Change the year with the arrow buttons and short press Enter. You automatically return to the Set menu.
NOTE: When you set the seconds for the time, they are automatically updated in the dual time as well.
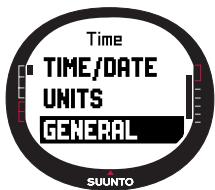
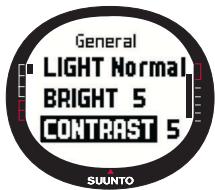
3.2.6 General
The General function includes the general settings for using your Suunto M9.
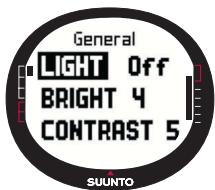
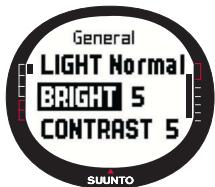
Setting the light
Light means the backlight of the Suunto M9 display. Light has three possible settings:
- Normal: The light switches on when you press Start/Data for more than 2 seconds. The light is on for 5 seconds after the last press of any button.
- Off: The light does not switch on from any button.
- Night Use: The light switches on when you press any of the buttons and stays on for 5 seconds after the last press of a button.
To change the light setting:
- In the Set menu, scroll to General and short press Enter. The General menu is displayed.
- Light is already the first menu item. Short press Enter to select it. The current light setting is displayed in reversed color.
- Select the suitable light setting with the arrow buttons and short press Enter. The light settings are now ready and you return to the Set menu.
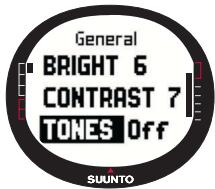
Setting the brightness
This setting adjusts the brightness of the Suunto M9 backlight. The brightness is measured on a scale of 1 to 7. Brighter displays consume more battery power.
To change the brightness:
- In the Set menu, scroll to General and short press Enter. The General menu is displayed.
- Scroll to Bright and short press Enter. The brightness setting is activated.
- Change the value with the arrow buttons and short press Enter. The brightness is set and you return to the Set menu.
NOTE: The default brightness setting is 3.
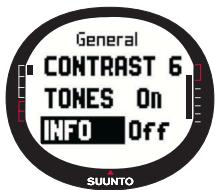
Setting the contrast
This setting adjusts the contrast of the Suunto M9 display. The contrast is measured on a scale of 1 (minimum) to 9 (maximum). The maximum contrast setting consumes more power than the minimum setting.
To change the contrast:
- In the Set menu, scroll to General and short press Enter. The General menu is displayed.
- Scroll to Contrast and short press Enter. The contrast setting is activated.
- Change the value with the arrow buttons and short press Enter. Contrast is now set.
NOTE: The default contrast setting is 4.
Setting the tones
Tones are the sounds that indicate that you have successfully pressed the buttons. The tones can be set to the on or off position.
To set the tones on or off:
- In the Set menu, scroll to General and short press Enter. The General menu is displayed.
- Scroll to Tones and short press Enter. The On/Off field is
activated.
- Change the value of the field to either on or off with the arrow buttons and short press Enter. The tones are now set.
NOTE: The default setting is On.
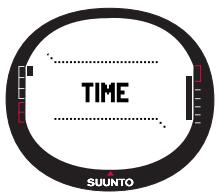
Setting the display information
The display information that shows the names of the modes can also be turned on or off.

To turn the display information on or off:
- In the Set menu, scroll to General and short press Enter. The General menu is displayed.
- Scroll to Info and short press Enter. The display information setting is activated.
- Turn the display information on or off with the arrow buttons and short press Enter. The display information is now set.
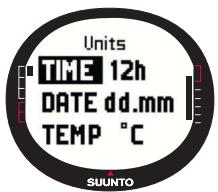
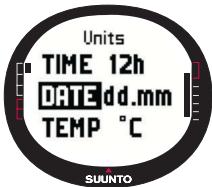
3.2.7 Units
This menu includes the units and format settings that are used with all the Suunto M9 functions. The unit settings affect the way information is displayed in all the Suunto M9 modes.
Setting the time format
The time format setting defines whether the 12h or the 24h format is used.
To change the time format:
- In the Set menu, scroll to Units and short press Enter. The Units menu is displayed.
- Scroll to Time and short press Enter. The time format field is activated.
- Select the correct time format with the arrow buttons and short press Enter. The time format is now set.
Setting the date format
The date settings define the format in which the date is displayed. The possible formats are:
- DD.MM: Day before the month, e.g. 27.11.
MM.DD: Month before the day, e.g. 11.27.
To change the date format:
- In the Set menu, scroll to Units and short press Enter. The Units menu is displayed.
- Scroll to Date and short press Enter. The date format field is activated.
- Select the correct date format with the arrow buttons and short press Enter. The date format is now set.
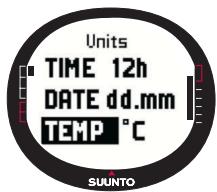
Setting the temperature unit
The Temp setting defines the unit in which the temperature is displayed. The options are Celsius (^) and Fahrenheit (^) .
To change the temperature unit:
- In the Set menu, scroll to Units and short press Enter. The Units menu is displayed.
- Scroll to Temp and short press Enter. The temperature unit field is activated.
- Select the correct unit with the arrow buttons and press Enter. The temperature unit is now set.
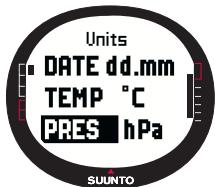
Setting the air pressure unit
The Pres setting defines the unit in which the air pressure is displayed. The options are hPa and inHg .
To change the air pressure unit:
- In the Set menu, scroll to Units and short press Enter. The Units menu is displayed.
- Scroll to Pres and short press Enter. The air pressure unit field is activated.
- Select the correct unit with the arrow buttons and short press Enter. The air pressure unit is now set.
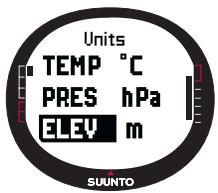
Setting the elevation unit
The Elev setting defines the unit in which the elevation is displayed. The options are meters (m) and feet (ft).
To change the elevation unit:
- In the Set menu, scroll to Units and short press Enter. The Units menu is displayed.
-
Scroll to Elev and short press Enter. The elevation unit field is activated.
-
Select the correct unit with the arrow buttons and short press Enter. The elevation unit is now set.
NOTE: Elevation is displayed only in position display as GPS elevation.
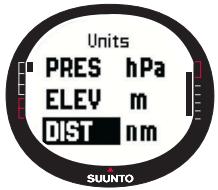
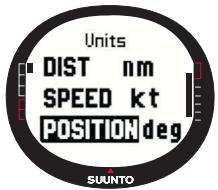
Setting the distance unit
The Dist setting defines the unit in which the distance is displayed. The units are kilometers (km), miles (mi) and nautical miles (nm). The short distance units are meters (m), feet (ft) and yards (yd); set separately using the Suunto Sail Manager software.
To change the distance unit:
- In the Set menu, scroll to Units and short press Enter. The Units menu is displayed.
- Scroll to Dist and press Enter. The distance unit selection is activated.
- Select the distance unit with the arrow buttons and short press Enter. The distance unit is now set.
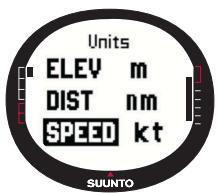
Setting the speed unit
The Speed setting defines the unit in which the speed is displayed. The options are kilometers per hour (km/h), miles per hour (mph), knots (kt) and meters per second (m/s).
To change the speed unit:
- In the Set menu, scroll to Units and short press Enter. The Units menu is displayed.
-
Scroll to Speed and short press Enter. The speed unit field is activated.
-
Select the correct unit with the arrow buttons and short press Enter. The speed unit is now set.
Setting the position format
The Position setting defines the format in which position is displayed. The possible formats are degrees (deg), and degrees and minutes (dm), for example, 60.50000^ or 60^30.000' respectively.
To change the position format:
- In the Set menu, scroll to Units and short press Enter. The Units menu is displayed.
- Scroll to Position and short press Enter.
- Select the correct format with the arrow buttons and short press Enter. The position format is now set.
NOTE: All positions are stored in WGS84 format in the Suunto M9 memory. The position format setting refers only to the coordinates in the position display.
Setting the datum
The Datum setting defines the map datum you use. (For more information on different datums and their corresponding numbers, see the GPS Datum Listing appendix.)
To set the datum:
- In the Set menu, scroll to Units and short press Enter. The Units menu is displayed.
- Scroll to Datum and short press Enter.
- Select the correct datum number with the arrow buttons and short press Enter. The datum format is now set.
Setting the wind unit
The wind unit is set using the PC-interface. For more information, refer to the Suunto Sail Manager Help.
3.3 WEATHER MODE
3.3.1 Main Display
When you select the Weather mode, the main display opens. The main display has three rows:
Absolute air pressure
The first row displays the absolute air pressure.
Air pressure graph
The second row shows a graphical presentation of the air pressure development during the last 6 hours in 15-minute intervals.
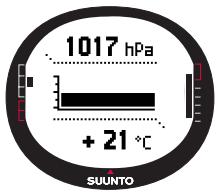
Shortcuts
The third row shows alternatively the temperature or the current time.
Change the displayed information with Stop/Cancel.
- Temperature: Displays the temperature in the selected unit. (For more information on defining the temperature unit, see page 23.)
Time: Displays the current time.
3.3.2 Function Menu
For more information on the Function menu, see section 3.8 Function Menu.
3.3.3 Barometric Memory
Barometric memory stores weather-related information from the last 7 days/168 hours. Each day is displayed individually.
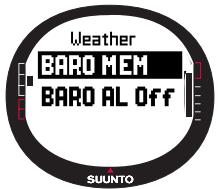
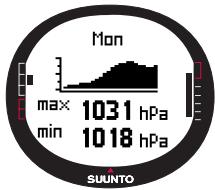
To view the weather information stored in the memory:
- In the Set menu, scroll to Baro mem with the arrow buttons and short press Enter. The first information page is displayed, and you can view the following information:
Day
- A graphical presentation of the air pressure during the period measured
Maximum air pressure during the period measured.
- Minimum air pressure during the period measured.
- Scroll the information with the arrow buttons. The up arrow scrolls forward and the down arrow backward.
- To stop viewing the memory content, press either Enter or Stop/Cancel at any time.
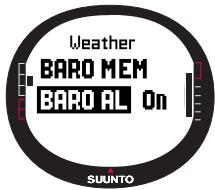
3.3.4 Weather Alarm
When active, the weather alarm informs you if the air pressure drops more than 4 hPa (0,118 inHg) in 3 hours.
To activate or deactivate the weather alarm:
- In the Set menu, scroll to Baro AI with the arrow buttons. The current status of the alarm can be seen in the Set menu.
- Short press Enter. The on/off field is activated.
- Change the field to either on or off with the arrow buttons and short press Enter.
When the weather alarm goes on, the message "WEATHER ALARM ACTIVATED" is displayed. If the backlight is set to Night Use, also the backlight goes on. To acknowledge the weather alarm, press any button.
3.4 COMPASS MODE
Suunto M9 includes a 3D compass. The compass allows tilting up to +/-30 degrees while still displaying the correct bearing.
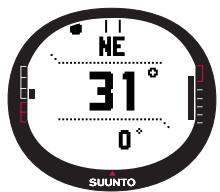
3.4.1 Main Display
When you select the Compass mode, the main display opens. The compass displays the heading with the bearing value and cardinal points above.
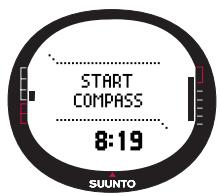
The magnetic sensor of the compass functions for 45 seconds at a time. After this period the compass goes into the power-saving mode and the message "START COMPASS" is displayed. To activate the compass again, press Start/Data.
The main display has three rows:
Cardinal points: The first row displays the cardinal and half-cardinal point abbreviations.
Bearing: The second row displays the bearing in degrees.
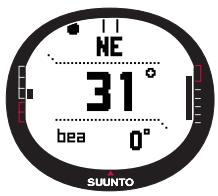
Shortcuts:
- Bearing Lock: This feature helps you to follow a certain bearing. Select a bearing by turning the Suunto M9 horizontally until the correct bearing is displayed on the second row and press Start/Data. The sighting marks are fixed on the upper edge of the display and the bearing indicator appears on the outer rim of the display. The bearing indicator is represented by a closed circle. When the bearing indicator is inside the sighting marks, you are moving in the direction of the set bearing.
The bearing indicator moves in a 120-degree arc in the upper part of the display. If the direction of the unit deviates more than this from the tracked bearing, the unit prompts the direction where to turn the unit with arrows. Once the circle appears on top of the display, the accurate bearing can be tracked again. Pressing Start/Data again selects a new bearing.
Time: Displays the current time.
- Bearing: If you are navigating a route from the Navigation menu, the third shortcut displays the bearing to the next waypoint. If you have not activated a route and the GPS is on, the shortcut displays the bearing to the position of the initial GPS fix. If the GPS is not on, the shortcut displays the latest value when the GPS was on.
3.4.2 Function Menu
For more information on the Function menu, see section 3.8 Function Menu.
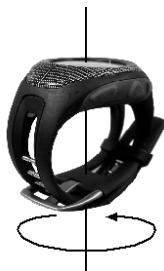
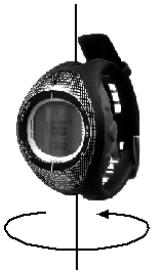
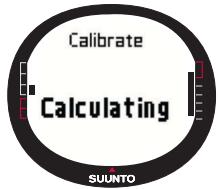
3.4.3 Calibrating the Compass
You should calibrate the compass if it does not seem to work well, for example, when it displays the wrong compass heading or the heading changes too slowly. Strong electromagnetic fields, such as electric lines, loudspeakers and magnets, can affect the compass operation. Therefore you should calibrate the compass if your Suunto M9 has been exposed to these fields.
NOTE: Calibrate the compass before using it for the first time, and before you leave for an extended outdoor activity.
NOTE: Remember to hold the Suunto M9 level in the plane of calibration during the calibration sequence.

To calibrate the compass:
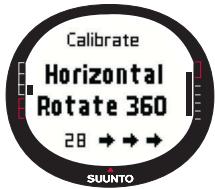
- In the Set menu scroll to Calibrate and short press Enter.
- Hold the Suunto M9 horizontally level and rotate it 360 degrees for 30 seconds.
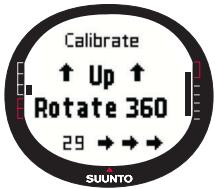
- Hold the Suunto M9 vertically level and rotate it 360 degrees for 30 seconds.
- When the calibration is finished, you return to the Set menu.
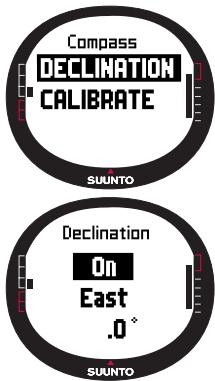
3.4.4 Declination
You can set the compass declination manually or with the GPS.
Setting the compass declination manually
To set the compass declination manually:
- In the Set menu, scroll to Declination and short press Enter. The declination setting field is activated, and you can now set the declination to On, Off or Auto.
- Select On to set the compass declination manually and short press Enter.
- The direction field is activated. Select East/West with the arrow buttons and short press Enter.
- The degree field is activated. Change the degrees with the arrow buttons and short press Enter.
- The declination is now set and you return to the Set menu.
| Off | Compass points to the magnetic north |
| On | Compass points to the geographic north based on the manually set declination |
| Auto | Compass points to the geographic north based on the declination from the GPS database value for the current location |
Setting the compass declination with the GPS
To set the compass declination with the GPS:
- Scroll to Declination and short press Enter. The manual/automatic field is activated.
- Select Auto with the arrow buttons and short press Enter. The GPS automatically sets the compass declination.
NOTE: The GPS declination database is based on a global 2-degree latitude x 2-degree longitude grid.
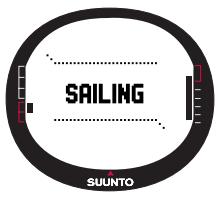
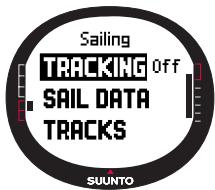
3.5 SAILING MODE
3.5.1 Main Display
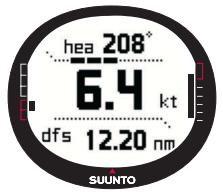
When you select the Sailing mode, the main display opens. The main display has three rows:
Heading: The first row displays the heading in degrees.
Speed: The second row displays the vessel's speed in the unit of your choice.
Shortcuts:
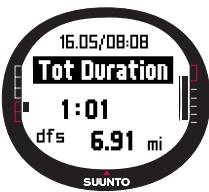
The third row shows alternatively the time or the distance from start or the average speed. Change the displayed information with Stop/Cancel. You can select a shortcut from the Sail Data display to replace the average speed.
- Distance from start (dfs): Displays the distance from start in the selected unit.
- Time from start (tfs): Displays the time from start.
- Average speed (avg): Displays the average speed in the selected unit.
Sailing Data display
The Sailing, Navigation and Racing modes and the MOB function have special information displays that can be accessed from the main display of each respective mode.
To view the Sailing Data display:
- Press Start/Data in the Sailing display. The Sailing Data display opens. The active shortcut is displayed in reversed color.

- Scroll the data with the arrow buttons. The list contains the following items:
Average speed (avg)
Maximum speed (max)
- Velocity made on course (vmc)
- Velocity against wind (vaw)
- Distance to waypoint (dtw)
- Distance to finish (dtf)
Cross track error (xte)
- Distance made on course (dmc)
- Distance made good (dmg)
Estimated time of arrival (eta)
Estimated time enroute (ete)
Time of sunrise (tsr)
Time of sunset (tss)
- Distance to lay line (dll); works only in Racing mode
- Time to lay line (tll); works only in Racing mode
- To set one of these items as a shortcut, select the item and short press Enter. If you do not want to change the shortcuts, press Start/Data to return to the Sailing display.
NOTE: When you set a new shortcut in the Sailing Data display, the same shortcut is also displayed in the Navigation and the Racing modes.
3.5.2 Function Menu
For more information on the Function menu, see section 3.8 Function Menu.
3.5.3 Tracking
The tracking function stores the vessel's position heading and speed in the Suunto M9 memory between a selected time period. You can only set the tracking function on or off. If you wish to alter the time period, you need to do it in the Suunto Sail Manager software.
NOTE: When tracking is on and the GPS is activated, an indicator is displayed in the middle of the lower horizontal dotted line of the display.
To set the tracking function on or off:
- In the Set menu, scroll to Tracking and short press Enter. The On/Off field is activated.
- Change the setting to On or Off with the arrow buttons and short press Enter. The tracking is now set.
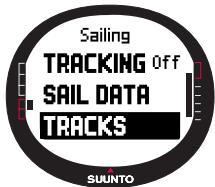
3.5.4 Tracks
The Tracks function is used to view the information recorded with the Tracking function.
Viewing the recorded tracks
To view the recorded tracks:
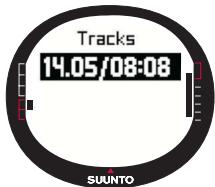
- In the Set menu, scroll to Tracks and short press Enter. A list of all the recorded tracks is displayed. The latest track is displayed in reversed color.
-
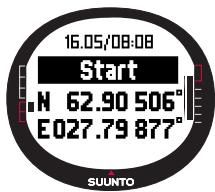
Select a track with the arrow buttons and short press Enter. The following information is displayed:
-
Start time and coordinates.
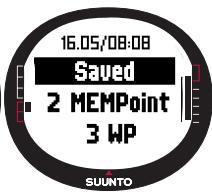
Finish coordinates. - Total duration of the track in hours and minutes, and the length of the track in selected units.
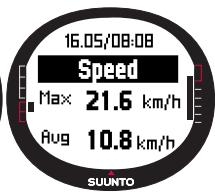
Maximum and average speed during the track. -
The number of recorded memory points. If the track has been recorded on a route created earlier, the number of navigated waypoints is also displayed. See Creating a route on page 39.
-
Long press Enter to exit the Tracks function.

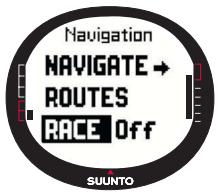
3.5.5 Race
When you select Race, Suunto M9 switches into the Racing mode. (For more information on the Racing mode, see page 43.)
To select the Racing mode:
- In the Set menu, scroll to Race and press Enter. The On/Off selection is activated.
- Set the race function On with the arrow buttons and press Enter. The Racing mode is activated and you return to the Sailing menu.
3.6 NAVIGATION MODE
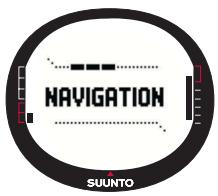
3.6.1 Main Display
When you select the Navigation mode, the main display opens. Suunto M9 displays the direction to the destination with a circle on the outer rim of the display. The upper part of the display shows fixed sighting marks and a bearing indicator represented by a circle. When the bearing indicator is inside the sighting marks, you are moving in the direction of the set bearing.
The bearing indicator moves in a 120-degree arc in the upper part of the display. If the direction of the unit deviates more than this from the tracked bearing, the unit prompts the direction where to turn the unit with arrows. Once the circle appears on top of the display, the accurate bearing can be tracked again.
The main display has three rows:
Waypoint/Route: When Navigate is on, the first row displays the name and number of the navigated waypoint. If Navigate is off, the name of the activated route is displayed.
Heading/Length: When Navigate is on, the second row displays the heading in degrees. If Navigate is off, the total length of the activated route is displayed.
NOTE: If the GPS is off the unit always displays the selected route and total length.
Shortcuts:
The third row shows alternatively the bearing, speed, average speed or memory status. Change the displayed information with Stop/Cancel. You can select a shortcut from the Sailing or Racing Data display to replace the average speed.

- Bearing (bea): Displays the bearing to the next waypoint in degrees.
- Speed (spd): Displays the vessel's speed in the selected unit.
- Average speed (avg): Display's the vessel's average speed in knots.
- Memory status (mem): Displays the percentage of free memory space.
If the GPS is off, the shortcuts display the latest values when the GPS was on.
When Navigate is off but the GPS is on, the shortcut values refer to the starting point where the GPS had its initial fix.
NOTE: A rectangular indicator is displayed on the left side of the lower horizontal dotted line of the display when Navigate is on.
Navigation Data display
The Sailing, Navigation and Racing modes and the MOB function have special information displays that you can access from the main display of the respective mode. The Navigation data display shows either Waypoint information or a summary of the route. To activate the display, press Start/Data in the Navigation display.
When Navigation is on, the Navigation Data display shows Waypoint information on four rows:
Route: The first row displays the name of the route.
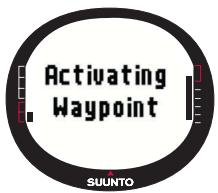
Waypoint: The second row displays the name and number of the waypoint being navigated. You can scroll the waypoints with the arrow buttons. Long press Enter to activate the selected waypoint. Suunto M9 begins displaying the navigation data to the new waypoint. The active waypoint is indicated with reversed color symbol.
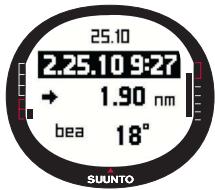
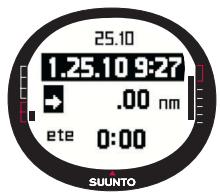
Distance: The third row displays the distance from the previous waypoint. When the active waypoint is displayed the unit displays distance from the current location.
Bearing (bea): The non-active waypoints indicate only bearing.
Estimated time enroute (ete): Displays the ETE to the active waypoint at current speed.
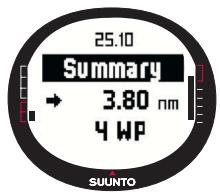
The summary contains the following information:
Route: The first row displays the name of the route.
Length of the route: The second row displays the length of the route from the first waypoint to the last in nautical miles.
Number of waypoints: The third row displays the total number of waypoints on the route.
NOTE: When the GPS is on, the unit displays active waypoint when entering information display. If GPS is off, route summary is displayed.
3.6.2 Function Menu
For more information on the Function menu, see section 3.8 Function Menu.
3.6.3 Navigate
The Navigate function starts the navigation and lets you choose the preferred way of navigating through a route or to a single waypoint.
To start Navigation:
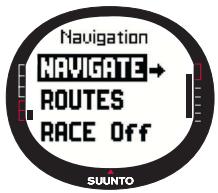
In the Set menu, Navigate is already the first menu item. Short press Enter to select it. Now you can choose one of the four options marked by symbols next to the Navigate item by short pressing Enter.
Right arrow: Activates the route for navigating in the correct order, from beginning or active waypoint to the end
Left arrow: Activates the route for navigating in the reversed order, from the end or from the active waypoint to the beginning
Dot: Activates the navigation to a single chosen waypoint on the selected route
Dash: Selected route is not active and activates the navigation to the location of the first GPS fix after turning on the GPS, instead of from the route start point
NOTE: When navigating to a single waypoint, the unit does not automatically change to the next waypoint. This must be done manually. In normal route navigation, the unit automatically switches to the next waypoint when the vessel arrives inside a radius of 50 meters of the waypoint or passes at a distance larger than 100 meters of the perpendicular line to the route that goes through the waypoint.
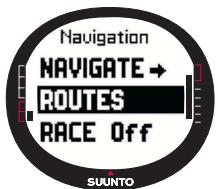
3.6.4 Routes
The Routes menu contains information on the routes recorded in the Suunto M9 memory. The routes and their individual waypoints can be viewed, edited and erased.
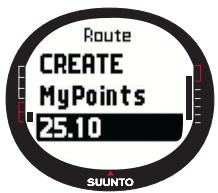
Creating a new route
To create a new route:
- In the Set menu, scroll to Routes and short press Enter.
- Scroll to Create and short press Enter.
- The last GPS fix is displayed on the screen. Change the coordinates with the arrow buttons and short press Enter to confirm the selections. The next waypoint field is activated.
- If you do not wish to change a coordinate, accept it with the Enter button.
- Press Stop/Cancel to go back to a coordinate you wish to change.
- Press Enter to scroll the next waypoint.
- Long press Enter to confirm the new route and return to the Navigation display.

Activating a route
To activate a route for navigation:
- In the Set menu, scroll to Routes and press Enter. The message "LOADING ROUTELIST" is displayed, and then the list is displayed.
- Select a route with the arrow buttons and long press Enter to activate it.
NOTE: Long pressing Enter activates the selected route. Short pressing Enter displays the route menu of the selected route.
Creating a new waypoint
With this function you can add new waypoints to previously created routes.
To create a new waypoint:
- In the Set menu, scroll to Routes and short press Enter. The Route list is displayed.
- Scroll the list with the arrow buttons and select a route by short pressing Enter.
- In the route menu, scroll to Create WP with the arrow buttons and short press Enter.
- The new waypoint of the route is displayed. Enter the number of the waypoint on the route and the coordinates with the arrow buttons. Short press Enter to confirm the new waypoint.
- To stop creating a new waypoint, short press Stop/Cancel and you return to the Set menu.
Erasing a route
To erase a route:
- In the Set menu, scroll to Routes and short press Enter. The Route list is displayed.
- Scroll the list with the arrow buttons and select a route to erase and short press Enter.
- In the route menu, scroll to Erase and short press Enter.
- Suunto M9 displays the message "ERASING ROUTE"; you return to the routes menu.
Viewing and erasing route waypoints
To view or erase route waypoints:
- In the Set menu, scroll to Routes and short press Enter. The Route list is displayed.
- Select a route with the arrow buttons and short press Enter to view the route information. A list of waypoints is displayed.
- The first waypoint is displayed in reversed color. Select a waypoint with the arrow buttons and short press Enter.
-
The waypoint menu is displayed. View is already the first menu item. Short press Enter to select it. The following waypoint information is displayed:
-
Bearing and distance to the waypoint: The bearing and distance to the waypoint are displayed from the previous waypoint, or if the GPS is active, from the current location.
-
Waypoint coordinates: The coordinates of the selected waypoint.
-
Short press Stop/Cancel to exit the waypoint information and return to the waypoint list.
- To erase a waypoint, scroll to Erase in the waypoint menu and short press Enter. Suunto M9 displays the message "ERASE WAYPOINT?" Short Press Enterto confirm the action. You return to the waypoint list.
Editing a route waypoint
To edit a waypoint:
- In the Set menu, scroll to Routes and short press Enter. The Route list is displayed.
- Select a route with the arrow buttons and short press Enter. The waypoint list opens and the first waypoint is displayed in reversed color.
- Select a waypoint with the arrow buttons and short press Enter. The waypoint menu is displayed.
- Scroll to Edit with the arrow buttons and short press Enter.
- The attributes of the waypoint are activated. Choose the order number of the waypoint in the waypoint list and change the attributes of the coordinates with the arrow buttons and short press Enter to accept the changes. Press Stop/Cancel if you want to return to the waypoint list without
accepting changes.
- Long press Enter to accept the changes and return to the main menu.
My Points
The My Points function stores up to 50 individual waypoints in the Suunto M9 memory that are not affixed to a route. For creating, viewing and editing My Points, refer to section 3.6.4 Routes.
NOTE: When creating routes or waypoints in the Suunto M9, the unit names them with current date and time.
3.6.5 Race
When you select Race in the Set menu, Suunto M9 switches to the Racing mode. For more information on the Racing mode, see page 43.
To select the Racing mode:
- In the Set menu, scroll to Race and short press Enter. The On/Off selection is activated.
- Change the setting to On with the arrow buttons and short press Enter. The Racing mode is activated.
3.7 RACING MODE
The Racing mode is a main mode reserved for racing functions, and can only be activated in the Sailing and Navigation modes. The main display of the Racing mode
changes according to the race situation.
3.7.1 Main Display
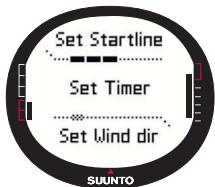
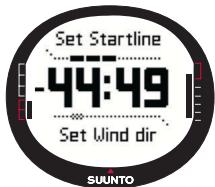
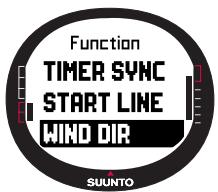
Before starting the race, Suunto M9 asks you to set the parameters for the start line, race timer and wind direction.
Before the parameters have been set in the Function menu, the following is displayed:
Set Startline: The first row prompts to set the start line.
Set Timer: The second row prompts to synchronize the timer.
Set Wind dir: The third row prompts to save the wind direction.
NOTE: When the Navigation is on, an indicator is displayed on the left side of the lower horizontal dot line of the display.
To set the parameters in the Function menu, short press Enter
in the Racing mode's main display. (For information on the Function menu before the race, see page 46.)
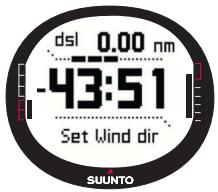
After you have set the parameters, the following is displayed:
Distance to start line (dsl): The first row displays the distance to the start line.
Timer: The second row displays the time left to the start.
Time to start line (tsl): The third row displays the time left to cross the start line
based on current speed, and heading.
The Info display shows the line bias (wind deviation from the perpendicular line to the start line) with corresponding time (minutes) before start and favorable side of the line. P means wind is biased to port side and S means starboard.
Press Start/data to access info display.
Press Start/data, Enter or Stop/cancel to return to main display.
Main Display During the Race
After the start timer reaches zero, the timing starts automatically and Suunto M9 enters the main display after start, the following is displayed:
Heading: The first row displays the vessel's heading in degrees.
Speed: The second row displays the vessel's current speed in knots.
Shortcuts: The third row displays alternatively the race timer, the tacking angle difference or the average speed. Change the displayed information with Stop/Cancel. You can select a shortcut from the Racing Data display to replace the average speed.
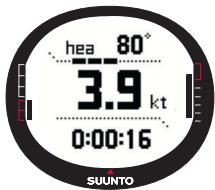
- Race Timer: Displays the time from the start of the race.
- Tacking Angle Difference (TAD): Displays the vessel's tacking angle difference.
- Average speed: Displays the vessel's average speed in the selected unit.
Racing data display
The Sailing, Navigation and Racing modes have special information displays that you can access from the main displays of the respective modes. During the race, the Racing data display contains statistics about the race.
To view the Racing data display:
- Press Start/Data in the Racing mode's main display to access the Racing data display.
The following data is displayed:
Average speed (avg)
Maximum speed (max)
- Velocity made on course (vmc)
- Velocity against wind (vaw)
- Distance to waypoint (dtw)
- Distance to finish (dtf)
Cross track error (xte)
- Distance made on course (dmc)
- Distance made good (dmg)
Estimated time of arrival (eta)
Estimated time enroute (ete)
Time of sunrise (tsr)
Time of sunset (tss) -
Distance to lay line (dll)
Time to lay line (tll) -
Scroll the data with the arrow buttons and short press Enter to select a shortcut. You return to the Racing display. Press Stop/Cancel to return to the Racing display without selecting a shortcut.
Main Display After the Race (Race summary)
When the race ends and the user confirms the finish line from the Function menu, Suunto M9 displays the following information:
Distance from start: The first row displays the distance from the start
Total distance: The second row displays the distance sailed during the race in nautical miles.
Shortcuts: The third row displays either average speed or the timer. To switch between these, short press Stop/Cancel.
Average speed: Average speed during the race in knots.
Timer: Time sailed in the race.
3.7.2 Function Menu
Function menu before the race
The Racing mode has a unique Function menu that you can access by short pressing Enter. The contents of this menu adapt to the situation in the race. The following options are available before the race has started:
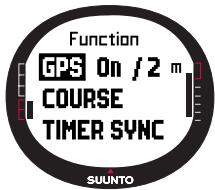
GPS
The GPS function allows you to turn the GPS on or off and to examine the accuracy of the GPS readings.
To turn the GPS on or off:
- In the Function menu, scroll to GPS with the arrow buttons and short press Enter.
- Change the status to On or Off with the arrow buttons and short press Enter. The GPS is now set.
NOTE: GPS is set on automatically 15 minutes prior to start.
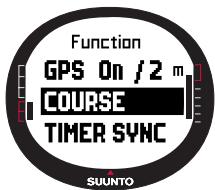
Course
The Suunto M9 allows to load 10 different race courses into the memory. These courses have the unique ability to store the same waypoint (buoy) several times, into the waypoint list.
If exact buoy positions are not known, updating the location of a certain buoy also updates all the same buoys in the waypoint list. This is helpful when going around the buoys multiple times. The Suunto M9 can thus calculate layline and other information related to the buoys once their exact location has first been updated (see Suunto Sail Manager Help).
The user can select a course from the Suunto M9 memory.
To select a course:
- In the Function menu, scroll to Course with the Arrow buttons and short press Enter.
- Select a course with the arrow buttons and short press Enter.
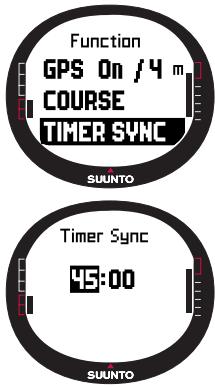
Synchronizing the timer
To synchronize the timer:
NOTE: The timer starts running when enter is pressed and the unit enters the function mode.
- In the Function menu, scroll to Timer sync and short press Enter. The time field is activated.
- Change the time with the arrow buttons and short press Enter. The message "TIMER SYNCHRONIZED" is displayed and you return to the Function menu.
The timer will show the time from the instant when enter was pressed to enter the function mode.
NOTE: Selecting, for example, 120.00 sets the countdown to 120 minutes. The start timer sounds an alarm every ten minutes between 120 and 60 minutes. Between 60 and 15 minutes the alarm sounds every five minutes. Between 15 and 1 minute the alarm sounds every minute. The alarm sounds every 10 seconds during the last minute. The alarm sounds every second during the last ten seconds.
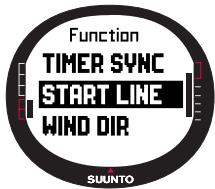
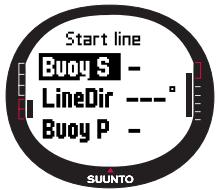
Start line
You can set the locations of the start line buoys and line direction. This information enables Suunto M9 to determine the line bias and calculate the time left to the start line. You can either set both buoys or a single buoy and the line direction.
To set the start line parameters with two buoys:
- Sail to the first buoy and short press Enter in the Racing mode's main display. Buoy location is now stored in the temporary memory.
- Scroll to Startline and short press Enter.
- Scroll to either Buoy S or Buoy P and short press Enter to confirm selection. The text "BUOY STORED" is displayed. Stop/Cancel erases buoy location and returns back to the main mode.
- Sail to the second buoy and short press Enter in the Racing
mode's main display. The second buoy location is now stored in the temporary memory.
- Scroll to Startline and short press Enter.
- Scroll to either Buoy S or Buoy P and short press Enter. The text "buoy stored" is displayed. The start line is now set, and you return to the Function menu. Suunto M9 begins to display the distance to the start line.
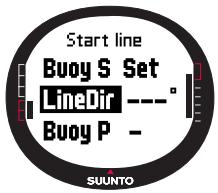
To set the start line information with one buoy and line direction:
- Sail to the buoy and short press Enter in the Racing mode's main display.
- Scroll to Startline and short press Enter. The buoy location is now stored in the temporary memory.
- Scroll to either Buoy S or Buoy P and short press Enter to confirm selection. The unit goes back to the main mode.
- The start line direction is calculated from the compass reading of the unit. Sail along the start line and align the unit with the line. Short press Enter to store the compass bearing into the temporary memory.
- Scroll to LineDir with the arrow buttons and short press Enter. The degree field is activated.
- The start line is now set.
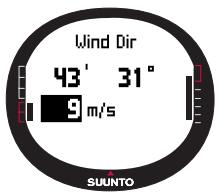
WINDdir
The WINDdir function allows you to record the wind direction and force.
To record the wind direction:
- Point the Suunto M9 to the wind and short press Enter. The WINDdir is stored to the temporary memory.
-
Scroll to Wind Dir and short press Enter. The following information is displayed:
-
Sailing Timer
Line Bias
Wind force -
If you wish to change the wind force, change the value with the arrow buttons and short press Enter. The text "WIND DIR STORED" is displayed. You return to the Racing mode's main display.
NOTE: The wind directions can be observed in the information display by pressing Start/data.
NOTE: The wind force is measured in zones of 0-3, 3-6, 6-9, 9-12, 12-15, 15-18 and 18-meters per second or the equivalent
in knots. Wind strength unit is set up in the Suunto Sail Manager software.
Function menu during the race
During the race, the Function menu allows you to record the locations of the turn buoys, set tack headings for tacking angle difference measurement, store and view wind directions and store MOB location.
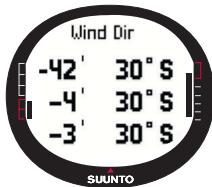
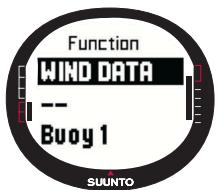
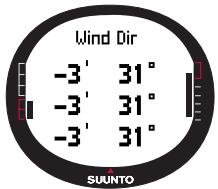
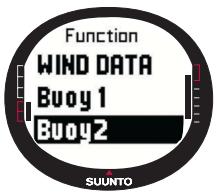
Wind Data
The Wind Data function displays the recorded wind directions.
To view the wind data:
- In the Function menu, scroll to Wind Data and short press Enter. The Wind Data is displayed.
- Scroll the wind directions with the arrow buttons. Short press Enter to return to the Function menu.
NOTE: Before race start, the wind direction is the line bias (angle between the wind and the perpendicular line to the start line). After race start, wind direction displays geographic wind direction (derived from unit's compass sensor)
Starboard/Port Tack
The Starboard/Port Tack function allows you to set the reference heading for tacking angle difference measurement (TAD).
- Short press Enter in the Racing mode's main display to access the Function menu. The unit stores the current heading in the temporary memory.
- Scroll to STB TACK/PORT TACK and short press Enter. The tacking angle is recorded. The TAD measurement is based on reference heading stored. The message "STB/PORT TACK SET" is displayed.
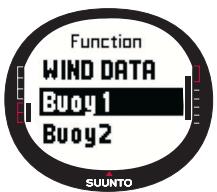
Turn Buoy
The turn buoy function allows you to update the correct the locations of the turn buoys during the race.
To record the turn buoys:
- Sail to the first buoy. Short press Enter in the Racing mode's main display to access the Function menu. The unit stores the location in the temporary memory.
- Scroll to Turn buoy1 and short press Enter. The first buoy is recorded. The message "buoy stored" is displayed.
- Sail to the next buoy. Suunto M9 suggests the following buoys automatically.
- Record the location by short pressing Enter.
- To record other than the suggested buoy, select the buoy with the arrow buttons and short press Enter.
NOTE: Suunto M9 automatically suggests a buoy to be recorded when navigation is set to On. When you navigate to the Function menu, Turn buoy 1 is displayed in reversed color. After you have recorded the first buoy, Suunto M9 suggests you to record the next buoy (Turn buoy 2) and so on. Suunto M9 offers as many buoys as included in the race type.

WINDDir
For more information on the WINDDir function, see page 56.
MOB
With this function you can record the location of Man Over Board situations.
(For more information on the MOB function, see page 53.)
Restart
Returns to the main display before race and prompts to reset the race timer for the next start, without resetting the start line buoys and wind data.
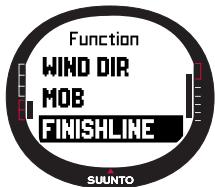
Finish line
Select the finish line function when the vessel passes the finish line and the race ends.
To mark the finish line:
- In the Function menu, scroll to Finishline and short press Enter. The message "TIMER STOPPED" is displayed, and you automatically enter the race summary display.
3.8 FUNCTION MENU
To access the Function menu, short press Enter in any of the main displays. Pressing the Enter button records all the information needed for the functions in the functions menu. The information is time, date, barometer pressure, temperature, compass heading, GPS location. When using the various functions, the Suunto M9 keeps the necessary information to complete the function and discards the rest.
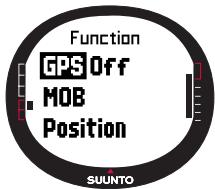

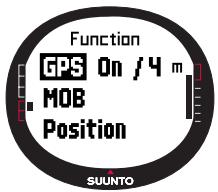
3.8.1 GPS
The GPS function allows you to turn the GPS on or off and to examine the accuracy of the GPS readings.
To turn the GPS on or off:
- In the Function menu, scroll to GPS with the arrow buttons and short press Enter.
- Change the status to on or off with the arrow buttons and short press Enter. The GPS function indicator appears on the main display.
NOTE: The GPS On status dispalys EPE (Estimated Position Error) after the On annotation. Refer to position display for more information on EPE).
3.8.2 MOB
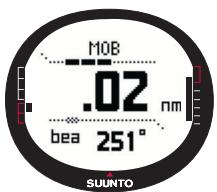
The Man Over Board, or MOB function records the location where the MOB situation took place. After the location point has been recorded, Suunto M9 begins displaying the bearing and the distance to the location.
The MOB display shows the following:
MOB: The first row displays the identifier of the MOB function.
Distance: The second row displays the distance to the MOB location in the unit of your choice.
Bearing: The third row displays the bearing to the MOB location in degrees.
Activating the MOB function
To activate the MOB function:
- The MOB location is recorded by short pressing enter in any of the main modes. If the GPS is not on the GPS is first activated after selecting the MOB. In this case MOB location is recorded after the GPS makes its first fix. In the Function menu, scroll to MOB and short press Enter. The bearing and distance to the MOB location are displayed.
- If you wish to exit and stop the MOB function, press Stop/Cancel and scroll to Shut Down. Press Enter and you return to the main display.
- If you wish to exit and keep the MOB function active, press Stop/Cancel and scroll to Keep Active. Press Enter and you return to the main display.


NOTE: If the GPS is not on when you activate the MOB function, the GPS is automatically turned on and the text "mob activating" is displayed before entering the MOB menu.
NOTE: Shutting down the MOB function erases the location recorded earlier. Keeping MOB active keeps the MOB location in the units memory until the function is shut down.
NOTE: Suunto G9 uses the GPS for guidance when you are moving. When standing still, the direction to the marked position is indicated by the compass bearing.
MOB Data display
The MOB function has a special information display that contains the coordinates and the recording time of the location point being tracked.
To view the MOB data display:
- Short press Start/Data to enter the MOB Data display in the MOB display.
- Short press Stop/Cancel to exit the MOB Data display.
3.8.3 Memory Point
The Memory point function records the coordinates and all other sensor data of the current location.
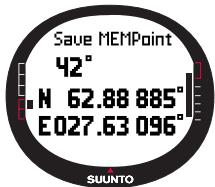
To store a memory point press Enter in the main mode. The current data is recorded in the temporary memory:
- In the Function menu, scroll to MEMpoint and short press Enter. The coordinates and the heading are displayed.
- Short press Enter to store the location. All other sensor data is stored as well. The message “MEMPOINT STORED” is displayed and you return to the main display.
- Short press Stop/Cancel to return to the function menu without storing the location.
NOTE: Make sure the GPS is turned on before using the Memory point function. Activating the Memory point function does not activate the GPS.
NOTE: The memory points can be viewed only in the Suunto Sail Manager software.
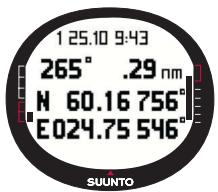
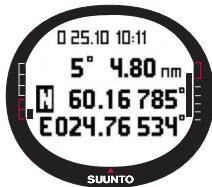
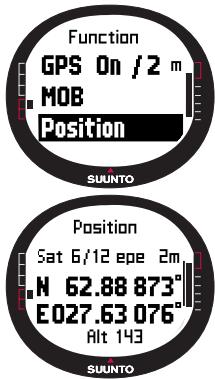
3.8.4 Position
The Position function allows you to view the current position on the display.
To view the position:
- In the Function menu, scroll to Position and short press Enter. The following information is displayed:
- Sat: The first number is the number of satellites used in fix and the second is the number of visible satellites.
- Epe: Estimated position error of the GPS reading.
- Coordinates of the position fix
- Current altitude
- Start/Data toggles between altitude and time to first fix.
- Press Stop/Cancel to return to the main display.
NOTE: Make sure the GPS is turned on before using the Position function. If the GPS is not on when you enter the Position menu, the coordinates of the last GPS fix are displayed.
NOTE: The position coordinates are updated as the instrument's position changes.
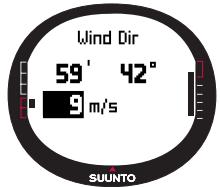
3.8.5 WINDdir
The WINDDir function allows you to record the wind direction and force.
To record the wind direction:
-
In the Function menu, scroll to Wind Dir, point the Suunto M9 to the wind and short press Enter. The following information is displayed:
-
Timer: When not racing, the Timer displays 0.00.
-
Heading: Wind geographic heading
Wind force -
If you wish to change the wind force, change the value with the arrow buttons and press Enter. The message "Wind Dir stored" is displayed and you then return to the main display.
NOTE: The wind force is measured in zones of 0-3, 3-6, 6-9, 9-12, 12-15, 15-18 and 18 meters per second or the equivalent in knots. The wind strength unit can be selected in Suunto Sail Manager.
4. ADDITIONAL FEATURES
4.1 PC INTERFACE
With the PC Interface you can transfer information between Suunto M9 and your computer. The information can be either routes stored in the Suunto M9 memory, tracks recorded with the tracking function or waypoints. When the data has been transferred, you can easily organize, view and add related information in it with the Suunto Sail Manager software.
The PC Interface cable and the Suunto Sail Manager software
are delivered in the same package with your Suunto M9. The installation instructions for the software can be found on the cover of the Suunto Sail Manager CD-ROM.
The PC interface allows the use of the ARCS electronic charts. The ARCS (Admiralty Raster Chart Service) charts are manufactured by the United Kingdom Hydrographic Office, UKHO. Suunto M9 contains the user permits for the charts and has to be connected to the docking station and the PC while charts are read. Check your local dealer for the availability of the ARCS products.
NOTE: When purchasing ARCS charts you must have your user permit and PIN code available in order to register for the use of the chart. The user permit and PIN code is provided in the Suunto M9 sales package.
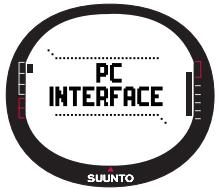
4.1.1 Transferring Data
To transfer data:
- Make sure your computer has a free serial port.
- Attach the Suunto M9 firmly to the docking station with the display facing up. Plug the adapter to the docking station and to an electric outlet. Plug the docking station to the serial port of the computer. The wristop enters automatically the PC INTERFACE mode.
- Open Suunto Sail Manager.
- Click to open the Suunto M9 panel from the bottom left corner of the display. Click connect to download the contents list and display them in a tree view in the Suunto M9 panel.
-
To transfer data between the Suunto M9 and the Suunto Sail Manager, select an item and drag it to the destination folder.
-
When a confirm dialog appears, click to start downloading.
- When you have transferred the files to your PC, you can delete them from the Suunto M9 memory with Suunto Sail Manager and make room for new log files.
For further information, see the Suunto Sail Manager Help in the Help menu.
4.2 SUUNTO SAIL MANAGER
The Suunto Sail Manager software is included in your Suunto M9 package on a CD-ROM. The instructions for installing the software are displayed on the cover of the CD.
The latest version of the Suunto Sail Manager can always be downloaded from www.suunto.com or www.suuntosports.com. Please check for updates regularly as new features are developed continuously.
4.2.1 Suunto Sail Manager Feature
Tracks:
View tracks on chart or a list of track points, edit track-related information, sort tracks in folders and upload tracks to SuuntoSports.com.
- Routes:
Create new routes, edit existing routes, view routes on chart, sort routes in folders and upload routes to Suunto M9 or SuuntoSports.com.
My Points:
Add, edit and view underwater rocks, shallow rocks, visible rocks, anchorages markers and waypoints. You can also download these from SuuntoSports.com.
- Boat:
Keep track of useful information related to your boat(s) and view the logbook related to each one.
- Charts: View, zoom and pan charts, install new charts or update old charts.
- M9: Modify Suunto M9 settings and clear the Suunto M9 memory to make room for new data.
4.2.2 Changing the Suunto M9 Settings
Click the M9 panel on the bottom left corner of the display. The Suunto M9 settings tab will open in the center of the display. After modifying the following settings click update wristop.
- Clock (12h, 24h)
- Date (mm.dd, dd.mm)
- Altitude (m, ft)
- Temperature (C, F)
- Pressure (hPa, inHg)
- Distance (km, mi, nm)
- Short Distance (n/a, m, ft, yd)
- Speed (km/h, m/s, mph, kt)
- Wind unit (m/s, kt)
- Position (deg, dm)
- Info (off, on)
- Tones (off, on)
- Datum (WGS84 etc.)
- UTC Offset
Select the correct time zone in relation to Greenwich time.
Fixrate
Define how often the Suunto M9 displays updates of GPS-related information. You can set different fixrate for normal and race use.
- Log interval
Every x:th fix is saved in the Suunto M9 memory. You can set different log intervals for normal and race use.
- UKHO Information, Pin code and User Permit
The values are saved in the Suunto M9 and cannot be edited. The information is needed when purchasing ARCS charts.
4.3 SUUNTOSPORTS.COM
SuuntoSports.com is an international free Web community where you can refine and share the data that you have measured with your personal Suunto instrument and analyzed with the sport-specific PC interface. SuuntoSports.com offers you a number of features that help you to get the most out of your sport and your Suunto M9.
If you already own a personal Suunto sports instrument you can access all sport-specific functions through registration. If you do not have an instrument yet, you may either log in as a guest or register yourself. As a guest you can view and read, but registration gives you the right to use other functions and participate to discussions.
4.3.1 System Requirements
SuuntoSports.com has the following system requirements:
- Internet Connection
- Modem: recommended 56k or faster
- Browser: IE 4.0 or better, Netscape 4.7x or newer
- Resolution: minimum 800 x 600, best viewed with 1024 x 768
4.3.2 SuuntoSports.com Sections
SuuntoSports.com includes three sections all of which have several functions. The following paragraphs describe only the basic functions of SuuntoSports.com. You can find detailed descriptions of all the site functions and activities and step-by-step instructions for using them in the site Help. The Help is available on each page and its icon is located on the right side of the bar that divides the screen. The Help is frequently updated as the site develops.
SuuntoSports.com offers several possibilities for searching the information on the website. In addition to the free search, you can search, for example, for groups, users, resorts, logs and sports.
The information published on the SuuntoSports.com contains internal links so that you do not always have to search for the information from the very beginning. For example, if you view a resort description, you can follow the links and view the personal information of the one who sent the resort information, the logs related to the resort and charts created from the logs if the sender has made this information public.
My Suunto
This section is meant for your personal information. You can store information about yourself, your wristop computer, your sailing activities, etc. When you upload your personal logs to SuuntoSports.com with Suunto Sail Manager, they are displayed in your personal information but not shown to anybody else. In My Suunto you can also manage the logs and decide whether they can be published within communities or presented to all SuuntoSports users.
When you have uploaded logs to SuuntoSports.com. You can also publish your logs and compare them with other users' logs. You can use the ARCS electronic charts and navigation functions.
The section also contains a personal calendar that you can use to mark personal events or practice information. The training diary can be filled with facts about your training and development, training locations and other useful information.
My Suunto offers access to a route planner where the users may plan their routes and view their routes and tracks. This feature contains a world wide database of ARCS electronic charts.
Communities
In the Communities section, SuuntoSports.com users can form and manage their own groups or search for other groups. For example, you can create a group for all your sailor friends, and share information about each other's results, give advice and discuss, where and when you could go for a sailing trip together. Groups can be either open or closed. Closed groups mean that you have to apply for membership and be accepted before you can participate in group activities.
All groups have a home page that displays information about group events and includes sections for news, notice board and other information. Group members can also use group-specific bulletin boards, chat rooms and group calendars, and add links and create group activities. All registered SuuntoSports users are automatically members of the World of SuuntoSports community.
All logs can be viewed with track visualizer where the different participants of a community may observe their sailed tracks on a single chart.
Sport Forums
SuuntoSports.com has its own forum for each Suunto sport. The basic features and functions are the same for all sport forums - sport-specific news, bulletin boards and chat rooms. Users can also suggest links to sports-related websites and tips regarding the sport and equipment to be published on the website. They can also publish their own travel reports.
Sport forums include presentations of the sport-related resorts. Users can rank the resorts and comment on them, and the results are published next to the resort information. You can also create ranking lists for other things - for example, where is the highest peak, what group has most members, who has uploaded most logs, and so on.
Getting Started
To join the SuuntoSports.com community, connect to the Internet, open your Web browser and go to http://www.suuntosports.com www.suuntosports.com. When the opening page appears, click the Register icon and register yourself and your Suunto sports instrument. You can change and update your personal and equipment profiles in the My Suunto section afterwards.
After the registration you will automatically enter the SuuntoSports.com home page that introduces the site structure and functional principles.
NOTE: SuuntoSports.com is continuously developed further and its content is subject to change.
5. TECHNICAL SPECIFICATIONS
General
- Operating temperature -20^ to +60^ / -5^ to +140^
- Storage temperature -30^ to +60^ / -22^ to +140^
Weight 76g
Water resistant to 10 bar (ISO 2281 standard) - Mineral crystal glass
- Rechargeable battery
- Docking station
- PC interface with a serial connector
Charger
- 240V or 110V depending on area of purchase
Cigarette lighter charger 12V (optional accessory)
Memory
- 50 routes (10 race routes)
- 500 waypoints
Barometer
- Display range 300 to 1100hPa / 8.90 to 32.40 inHg
- Resolution 1hPa / 0.05 inHg
Thermometer
- Display range -20°C to +60°C/-5°F to +140°F
- Resolution 1^ C / 1^ F
Compass
Resolution 1^
- Tilt compensated to +/- 30 degrees from horizontal plane
GPS
- Resolution 1m / 3 ft
12 channels
6. GPS DATUM LISTING
Suunto M9 offers the use of several different GPS datum that can be activated with the Suunto Sail Manager software with the help of the PC interface. There is a list of the available GPS datum and the number codes used in the activation process below. For information about activating GPS datum, refer to Suunto Sail Manager.
For information about setting the correct GPS datum, see page 25.
| Number | Name | Description |
| 000 | ADI-M | Mean Solution (Ethiopian and Sudan) |
| 001 | ADI-E | Burkina Faso |
| 002 | ADI-F | Cameroon |
| 003 | ADI-A | Ethiopia |
| 004 | ADI-C | Mali |
| 005 | ADI-D | Senegal |
| 006 | ADI-B | Sudan |
| 007 | AFG | Somalia |
| 008 | ARF-A | Botswana |
| 009 | ARF-H | Burundi |
| 010 | ARF-B | Lesotho |
| 011 | ARF-C | Malawi |
| 012 | ARF-D | Swaziland |
| 013 | ARF-E | Zaire |
| 014 | ARF-F | Zambia |
| 015 | ARF-G | Zimbabwe |
| 016 | ARS-M | Mean Solution (Kenya and Tanzania) |
| 017 | ARS-A | Kenya |
| 019 | PHA | Djibouti |
| 020 | BID | Guinea-Bissau |
| 021 | CAP | South Africa |
| 022 | CGE | Tunisia |
023 DAL Guinea
024 EUR-F Egypt
025 EUR-T Tunisia
026 LEH Ghana
027 LIBeria
028 MAS Eritrea
029 MER Morocco
030 MIN-A Cameroon
031 MIN-B Nigeria
032 MPO Gabon
033 NSD Algeria
034 OEG Old Egypt
035 PTB Mean Solution (Burkina Faso and Niger)
036 PTN Congo
037 SCK Namibia
038 SRL Sierra Leone
039 VOR Algeria
040 AIN-A Bahrain Island
041 AIN-B Saudi Arabia
042 BAT Sumatra
043 EUR-H Iran
044 HKD Hong Kong
045 HTN Taiwan
046 IND-B Bangladesh
047 IND-I India and Nepal
048 INF-A Thailand
049 ING-A Vietnam
050 ING-B Con Son Island (Vietnam)
051 INH-A1 Thailand (1997)
052 IDN Indonesia
053 KAN Sri Lanka
054 KEA West Malaysia and Singapore
055 KGS Korean Geodetic System
056 NAH-A Masirah Island (Oman)
057 NAH-B United Arab Emirates
058 NAH-C Saudi Arabia
059 FAH Oman
060 QAT Qatar
061 SOA Singapore
062 TIL Brunei and East Malaysia (Sarawak and Sabah)
063 TOY-M Mean Solution (Japan, Okinawa and South Korea
064 TOY-A Japan
065 TOY-C Okinawa
066 TOY-B South Korea
067 AUA Australia and Tasmania (Australian Geodetic 1966)
068 AUG Australia and Tasmania (Australian Geodetic 1984)
069 EST Estonia
070 EUR-M Mean Solution (Europe 1950)
071 EUR-A Western Europe (1950)
072 EUR-E Cyprus
073 EUR-G England, Channel Islands, Scotland and Shetland Islands
074 EUR-K England, Ireland, Scotland and Shetland Islands
075 EUR-B Greece
076 EUR-I Italy (Sardinia)
077 EUR-J Italy (Sicily)
078 EUR-L Malta
079 EUR-C Finland and Norway
080 EUR-D Portugal and Spain
081 EUS Mean Solution (European 1979)
082 HJO Iceland
083 IRL Ireland
084 OGB-M Mean Solution (England, Isle of Man, Scotland, Shetland Islands and Wales)
085 OGB-A England
086 OGB-B England, Isle of Man and Wales
087 OGB-C Scotland and Shetland Islands
088 OGB-D Wales
089 MOD Sardinia
090 SPK-A Hungary
091 SPK-B Poland
092 SPK-C Czechoslovakia
093 SPK-D Latvia
094 SPK-E Kazakhstan
095 SPK-F Albania
096 SPK-G Romania
097 CCD Czechoslovakia
098 CAC Mean Solution (Florida and Bahamas
099 NAS-C Mean Solution (CONUS)
100 NAS-B Western USA
101 NAS-A Eastern USA
102 NAS-D Alaska (excluding Aleutian islands)
103 NAS-V Aleutian islands (East of 180deg W)
104 NAS-W Aleutian islands (West of 180deg W)
105 NAS-Q Bahamas (excluding San Salvador Island)
106 NAS-R San Salvador Island
107 NAS-E Canada Mean Solution (including Newfoundland)
108 NAS-F Alberta and British Columbia
109 NAS-G Eastern Canada
110 NAS-H Manitoba and Ontario
111 NAS-I NW Territories and Saskatchewan
112 NAS-J Yukon
113 NAS-O Canal Zone
114 NAS-P Caribbean
115 NAS-N Central America
116 NAS-T Cuba
117 NAS-U Greenland (Hayes Peninsula)
118 NAS-L Mexico
119 NAR-A Alaska (excluding Aleutian Islands)
120 NAR-E Aleutian Islands
121 NAR-B Canada
122 NAR-C CONUS
123 NAR-H Hawaii
124 NAR-D Mexico and Central America
125 BOO Columbia
126 CAI Argentina
127 CHU Paraguay
128 COA Brazil
129 PRP-M Mean Solution (Bolivia, Chile, Columbia, Ecuador, Guyana, Peru and Venezuela)
130 PRP-A Bolivia
131 PRP-B Northern Chile (near 19deg S)
132 PRP-C Southern Chile (near 43deg S)
133 PRP-D Colombia
134 PRP-E Ecuador
135 PRP-F Guyana
136 PRP-G Peru
137 PRP-H Venezuela
138 HIT Southern Chile (near 53deg S)
139 SAN-M Mean Solution
140 SAN-A Argentina
141 SAN-B Bolivia
142 SAN-C Brazil
143 SAN-D Chile
144 SAN-E Colombia
145 SAN-F Ecuador (excluding Galapagos Islands)
146 SAN-J Baltra, Galapagos Islands
147 SAN-G Guyana
148 SAN-H Paraguay
149 SAN-I Peru
150 SAN-K Trinidad and Tobago
151 SAN-L Venezuela
152 ZAN Suriname
153 AIA Antigua, Leeward Islands
154 ASC Ascension Island
155 SHB St. Helena Island
156 BERmuda Islands
157 DID Deception Island, Antarctica
158 FOT Nevis, St. Kitts, Leeward Islands
159 GRA Faial, Graciasa, Pico, Sao Jorge and Terceira Islands (Azores)
160 ISG South Georgia Islands
161 LCF Cayman Brac Island
162 ASM Montserrat, Leeward Islands
163 NAP Trinidad and Tobago
164 FLO Corvo and Flores Islands (Azores)
165 PLN Canary Islands
166 POS Porto Santo and Maderira Islands
167 PUR Puerto Rico and Virgin Islands
168 QUO South Greenland
169 SAO Sao Miguel, Santa Maria Islands (Azores)
170 SAP East Falkland Island
171 SGM Salvage Islands
172 TDC Tristan Da Cunha
173 ANO Cocos Islands
174 GAA Republic of Maldives
175 IST Diego Garcia
176 KEG Kerguelen Island
177 MIK Mahe Island
178 REU Mascarene Island
179 AMA American Samoa Islands
180 ATF Iwo Jima
181 TRN Tern Island
182 ASQ Marcus Island
183 IBE Efate and Erromango Islands
184 CAO Phoenix Islands
185 CHI Chatham Islands (New Zealand)
186 GIZ Gizo Island (New Georgia Islands)
187 EAS Eastern Islands
188 GEO New Zealand
189 GUA Guam
190 DOB Guadalcanal Island
JOH Johnston Island
192 KUS Caroline Islands, Fed.States of Micronesia
193 LUZ-A Philippines (excluding Mindanao Island)
194 LUZ-B Mindanao Island
195 MID Midway Islands
196 OHA-M Mean Solution (Old Hawaiian)
197 OHA-A Hawaii
198 OHA-B Kauai
199 OHA-C Maui
200 OHA-D Oahu
201 PIT Pitcairn Islands
202 SAE Espirito Santo Island
203 MVS Viti Levu Island (Fiji Islands)
204 ENW Marshall Islands
205 WAK Wake Atoll
206 BUR Bungka and Belitung Islands
207 CAZ Camp McMurdo Area, Antarctica
208 EUR-S Iraq, Israel, Jordan, Lebanon, S. Arabia and Syria
209 GSE Kalimantan (Indonesia)
210 HEN Afghanistan
211 HER Former Yugoslavia
212 IND-P Pakistan
213 PUK Russia
214 TAN Madagascar
215 VOI Tunisia/Algeria
216 VOI-2 Tunisia/Algeria
217 YAC Uruguay
218 RT90 Sweden
254 KKJ Kartta Koordinaatisto Järjestelma, Finland
255 WGS84 Global WGS84 coordinate system
7.GLOSSARY

| Bearing (bea) a destination. | The compass direction from your current location to |
| Course | A selected route between two locations, not necessarily a straight line. |
| Course Made Good (cmg) | Heading from the starting point to the current location. |
| Cross Track Error (xte) | Aberration from the selected course towards the destination in degrees. |
| Distance from start (dfs) | Distance from the start point. |
| Distance Made Good (dmg) | The distance traveled on a straight line from the starting point towards the destination. |
| Distance Made on Course (dmc) | The distance traveled on the chosen course towards the destination. |
| Distance to lay line (dll) | Distance to the optimal line towards a waypoint. |
| Distance to finish (dtf) | Distance to the finish line. |
| Distance to start line (dsl) | Distance to start line. |
| Estimated Time of Arrival (eta) | The estimated time of day when you will reach your destination based on the current velocity. |
| Estimated Time Enroute (ete) | The estimated travel time to your current destination based on the current velocity and heading. |
Global Positioning System (GPS) A satellite tracking system.
Heading (hea) Compass direction on the present course.
Knots (kt Velocity in nautical miles per hour.
Latitude Angular distance North or South of the Equator.
Lay line Optimal line towards a waypoint based on the wind direction.
Longitude Angular distance West or East of the prime meridian.
Nautical Mile One nautical mile equals 1852 meters.
Navigation Traveling between two locations on a route with knowledge of the current location in relation to the route.
Position Exact map coordinates of a given location.
Tack Direction of the vessel in relation to the wind.
Tack angle difference (tad) A change in the tack angle caused by the wind.
Time to Lay line (ttl) Time to reach an optimal line towards a waypoint.
Time to Start line (tsl) Time to reach the start line based on the current velocity and location.
Time of Sunrise (tsr) Estimated time to sunrise based on a GPS fix.
Time of Sunset (tss)
Estimated time to sunset based on a GPS fix.
Time to Waypoint (ttw)
Estimated time to the next waypoint based on current velocity and location.
Velocity Made Good (vmg)
Effective velocity towards the wind.
Velocity Made on Course (vmc)
Velocity on the course to the current destination.
Waypoint
Location coordinates on a course recorded in the Suunto M9 memory.
Wind shift
Course change due to wind in degrees.
8. COPYRIGHT AND TRADEMARK NOTICE
This publication and its contents are proprietary to Suunto Oy and are intended solely for the use of its clients to obtain knowledge and key information regarding the operation of Suunto M9 products.
Its contents shall not be used or distributed for any other purpose and/or otherwise communicated, disclosed or reproduced without the prior written consent of Suunto Oy.
Suunto, Suunto M9s and their logos are all registered or unregistered trademarks of Suunto Oy. All rights are reserved.
While we have taken great care to ensure that information contained in this documentation is both comprehensive and accurate, no warranty of accuracy is expressed or implied. Its content is subject to change at any time without notice. The newest version of this documentation can always be downloaded in www.suunto.com.
9. CE
The CE mark is used to mark conformity with the European Union EMC directive 89/336/EEC.
10. LIMITS OF LIABILITY AND ISO 9001 COMPLIANCE
If this product should fail due to defects in materials or workmanship, Suunto Oy will, at its sole option, repair or replace it with new or rebuilt parts, free of charge, for two (2) year from the date of its purchase. This warranty is extended only to the original purchaser and only covers failures due to defects in materials and workmanship that occur during normal use while in the period of the warranty.
It does not cover battery replacement, damage or failures resulting in accident, misuse, neglect, mishandling, alteration or modifications of the product, or any failure caused by operation of the product outside the scope of its published specifications, or any causes not covered by this warranty.
There are no express warranties except as listed above.
The client can exercise the right to repair under the warranty by contacting Suunto Oy's Customer Service department to obtain a repair authorization.
Suunto Oy and its subsidiaries shall in no event be liable for any incidental or consequential damages arising from the use of or inability to use the product. Suunto Oy and its subsidiaries do not assume any responsibility for losses or claims by third parties that may arise through the use of this device.
Suunto's Quality Assurance System is certified by Det Norske Veritas to be ISO 9001 compliant in all SUUNTO Oy's operations (Quality Certificate No. 96-HEL-AQ-220)
11.DISCLAIMER
Since the GPS satellites and the delivery system are neither owned nor maintained by Suunto, Suunto takes no responsibility for possible malfunctions, changes in positioning quality or the discontinuity of the GPS service in the future. Suunto will not reclaim products because of changes in the GPS service.
This device complies with Part 15 of the FCC limits for class B digital devices. This equipment generates, uses, and can radiate radio frequency energy and, if not installed or used in accordance with the instructions may cause harmful interference to radio communications. There is no guarantee that interference will not occur in a particular instance. If this equipment does cause harmful interference to other equipment, try to correct the problem by relocating the equipment.
Consult an authorized Suunto dealer or other qualified service technician if the problem cannot be corrected. Operation is subject to the following conditions: (1) This device cannot cause harmful interference, and, (2) this device must accept any interference received, including interference that may cause undesired operation. Repairs should be made by authorized Suunto service personnel. Unauthorized repairs will void warranty.
WARNING
Read this manual. Carefully read this instruction manual in its entirety paying attention to all the warnings listed below. Make sure you understand the use, displays and limitations of this instrument before utilizing it.
WARNING
Do not use Suunto M9 as the only navigation aid. Use all available navigation aids such as charts, compass, visual sightings etc. and compare them with the Suunto M9 navigation information. Make sure all conflicting information is resolved before continuing with navigation.
WARNING
This instrument is intended for recreational use only. Do not use this instrument for obtaining measurements that require professional or industrial precision.
- SUUNTO
- M9
- INSTRUCTION MANUAL
- CUSTOMER SERVICE CONTACTS
- TABLE OF CONTENTS
- INTRODUCTION 6
- HOW TO USE YOUR SUUNTO M9 8
- BUTTONS 9
- MENUS 12
- Understanding GPS 13
- 3.MODES 16
- GENERAL INFORMATION 16
- TIME MODE 16
- Main Display 16
- WEATHER MODE 26
- COMPASS MODE 28
- SAILING MODE 32
- NAVIGATION MODE 36
- RACING MODE 43
- FUNCTION MENU 52
- ADDITIONAL FEATURES 57
- TECHNICAL SPECIFICATIONS 63
- GPS DATUM LISTING 64
- GLOSSARY 72
- 8.COPYRIGHT AND TRADEMARK NOTICE 75
- CE COMPLIANCE 76
- LIMITS OF LIABILITY AND ISO 9001 COMPLIANCE 76
- 11.DISCLAIMER 77
- INTRODUCTION
- CHECKLIST
- CARE AND MAINTENANCE
- WATER RESISTANCE
- CHARGING THE BATTERY
- HOW TO USE YOUR SUUNTO M9
- DISPLAY
- Mode Indicator
- Battery Indicator
- Alarm Symbol
- GPS Activity and Accuracy Bar Display
- BUTTONS
- Short and Long Press
- Start/Data Button
- Short Press
- Long Press
- Stop/Cancel Button
- Enter Button
- Arrow Buttons
- Move between the main modes
- Key Lock
- Activating the key lock
- Deactivating the key lock
- MENUS
- Basic Menu Structure
- Navigating in Menus
- UNDERSTANDING GPS
- Overview
- Line-of-sight Needed
- Accuracy
- GPS Usage
- Versatility
- 3.MODES
- GENERAL INFORMATION
- TIME MODE
- Main Display
- Date
- Time
- Shortcuts
- Stopwatch
- Function Menu
- Alarm
- Activating alarms
- Deactivating alarms
- Acknowledging alarms
- Time/Date
- Sync
- Setting the time and the dual time
- General
- Setting the light
- Setting the brightness
- Setting the contrast
- Setting the tones
- Setting the display information
- Units
- Setting the time format
- Setting the date format
- Setting the temperature unit
- Setting the air pressure unit
- Setting the elevation unit
- Setting the distance unit
- Setting the speed unit
- Setting the position format
- Setting the datum
- Setting the wind unit
- WEATHER MODE
- Main Display
- Absolute air pressure
- Air pressure graph
- Function Menu
- Barometric Memory
- Weather Alarm
- COMPASS MODE
- Main Display
- Shortcuts:
- Function Menu
- Calibrating the Compass
- Declination
- Setting the compass declination manually
- Setting the compass declination with the GPS
- SAILING MODE
- Main Display
- Sailing Data display
- Function Menu
- Tracking
- Tracks
- Viewing the recorded tracks
- Race
- NAVIGATION MODE
- Main Display
- Navigation Data display
- Function Menu
- Navigate
- Routes
- Creating a new route
- Activating a route
- Creating a new waypoint
- Erasing a route
- Viewing and erasing route waypoints
- Editing a route waypoint
- My Points
- Race
- RACING MODE
- Main Display
- Main Display During the Race
- Racing data display
- Main Display After the Race (Race summary)
- Function Menu
- GPS
- Course
- Synchronizing the timer
- Start line
- WINDdir
- Function menu during the race
- Wind Data
- Starboard/Port Tack
- Turn Buoy
- MOB
- Restart
- Finish line
- FUNCTION MENU
- GPS
- MOB
- Activating the MOB function
- MOB Data display
- Memory Point
- Position
- WINDdir
- ADDITIONAL FEATURES
- PC INTERFACE
- Transferring Data
- To transfer data:
- SUUNTO SAIL MANAGER
- Suunto Sail Manager Feature
- Changing the Suunto M9 Settings
- SUUNTOSPORTS.COM
- System Requirements
- SuuntoSports.com Sections
- My Suunto
- Communities
- Sport Forums
- Getting Started
- TECHNICAL SPECIFICATIONS
- General
- Charger
- Memory
- Barometer
- Thermometer
- Compass
- GPS DATUM LISTING
- 7.GLOSSARY
- COPYRIGHT AND TRADEMARK NOTICE
- CE
- LIMITS OF LIABILITY AND ISO 9001 COMPLIANCE
- 11.DISCLAIMER
- WARNING
Marque : SUUNTO
Modèle : M9
Catégorie : Montre connectée