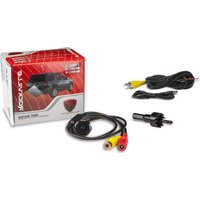
RBC2 - Caméra de recul Rockville - Notice d'utilisation et mode d'emploi gratuit
Retrouvez gratuitement la notice de l'appareil RBC2 Rockville au format PDF.


| Type de produit | Caméra de recul |
| Marque | Rockville |
| Modèle | RBC2 |
| Dimensions (approx.) | 7 x 5 x 4 cm |
| Poids (approx.) | 150 g |
| Alimentation | 12 V CC |
| Angle de vision | 170° grand angle |
| Vision nocturne | Oui, avec LED infrarouge |
| Résolution | PAL/NTSC, 720x576 pixels |
| Indice de protection | IP67 (étanche) |
| Sortie vidéo | Composite RCA |
| Système de transmission | Filaire (câble d'environ 10 m) |
| Température de fonctionnement | -20°C à 60°C |
| Entretien et nettoyage | Nettoyer la lentille avec un chiffon doux et sec |
| Sécurité | Installation sécurisée pour éviter les chocs et l'humidité |
| Pièces détachées et réparabilité | Contactez le support Rockville pour les pièces |
| Informations générales | Caméra de recul conçue pour améliorer la visibilité lors des manœuvres |
FOIRE AUX QUESTIONS - RBC2 Rockville
Questions des utilisateurs sur RBC2 Rockville
0 question sur cet appareil. Repondez a celles que vous connaissez ou posez la votre.
Poser une nouvelle question sur cet appareil
Téléchargez la notice de votre Caméra de recul au format PDF gratuitement ! Retrouvez votre notice RBC2 - Rockville et reprennez votre appareil électronique en main. Sur cette page sont publiés tous les documents nécessaires à l'utilisation de votre appareil RBC2 de la marque Rockville.
MODE D'EMPLOI RBC2 Rockville
ROCKVILLE


RBC SERIES
REARVIEW BACK-UP CAMERAS OWNER'S MANUAL
WIRING DIAGRAM (RBC-2 shown, wiring procedure is the same for all cameras)
![graph TD A["IMAGE"] --> B["YELLOW PLUGS: VIDEO OUT to MONITOR"] B --> C["RED PLUG"] B --> D["BLACK PLUG"] C --> E["POWER DC 12V to REVERSE LIGHTS"] D --> E E --> F["CAMERA"] G["DIAGRAM"] --> H["Black (-)"] G --> I["Red (+)"] H --> J["Connect RED (+) wire to RED or positive wire of reverse light. Con…](/content/2026/07/1439763/images/c0cd4dc7c5ca07d8b8ee84b1d95b5f04468a4f59a232d5333e2b2254fc23bd9a.jpg)
MOUNTING DIAGRAM
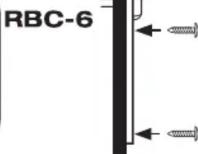
BUTTERFLY BRACKET MOUNT
- Drill two holes into vehicle exterior at desired installation area
- Use screens provided to
- Use screws provided to secure camera to vehicle exterior.
- Insert camera cable through secondary hole.
![graph TD A["Car Body"] --> B["RBC-3"] B --> C["Car Body"] D["RBC-4"] --> E["3. Continue to insert camera until you hear a click and the camera body is flush with the vehicle exterior."]](/content/2026/07/1439763/images/de342a3e4f346f92a039df104acdf3a89d46f4755262998f7c724ae93abaa2b4.jpg)
FLUSH MOUNT A
- Drill proper size hole (18.5mm) into
- Insert camera through the hole from the exterior of the vehicle.

- Continue to insert camera until you hear a click and the camera body is flush with the vehicle exterior.

FLUSH MOUNT B
- Drill proper size hole (18.5mm) into vehicle rear bumper. Optional butterfly mount included. Follow Butterfly Bracket Mount directions.
- Insert camera through the hole from the exterior of the vehicle.

- Continue to insert camera until you hear a click and the lens is flush with the vehicle exterior.

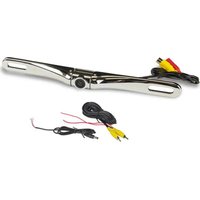
LICENSE PLATE MOUNT
- Drill proper size hole into vehicle
- Remove license plate top screws. Attach camera to license plate using provided screws.

FULL LICENSE PLATE MOUNT


FEATURES
• Waterproof and Fog Resistant
- Easy Installation
- Auto Turn-On
• True Color Reproduction
• Automatic White Balance
• Guidance Distance Grid
- Includes: DC Power Cable, RCA Video Control Cable, Mounting Screws
SPECIFICATIONS
• NIGHT VISION IMAGE SENSORS: PC6070
• POWER SUPPLY: DC9V - 15V
- LENS ANGLE: 170°
• TV SYSTEM: PAL/NTSC
• VIDEO OUTPUT: 1.0vp-p,75ohm
• S/N RATIO: ≥48dB
• IP RATING: Ip67
• OPERATING TEMPERATURE: -22°F - 158°F
• RELATIVE HUMIDITY: 95% Max.
- WHITE BALANCE: Auto
• MINIMUM ILLUMINATION: 0.0 to 0.1Lux (depending on model)
- AGC: Auto
• ELECTRONIC SHUTTER: 1/60(NTSC) 1/50(PAL), 1/10,000second
• EFFECTIVE PIXELS: 648H x 488V
• RESOLUTION (TV LINES): 420
TROUBLESHOOTING
NO IMAGE: Check that POWER cable is connected properly.
Check that VIDEO cable is connected properly
Make sure vehicle is in reverse.
Make sure monitor is properly installed.
IMAGE BLURRING: Make sure CAMERA LENS is clean.
IMAGE SHAKING: Make sure MOUNTING SCREWS are tight.
IMAGE SLANTING: Adjust CAMERA ANGLE.
Never attempt to disassemble camera as there are no user serviceable parts.
Should you need assistance, please call our technical help line at 1-646-758-0144, Monday through Friday, 9am to 5pm EST.
ROCKVILLE

RockvilleAudio.com
© 2020 ROCKVILLE // Features and specifications are subject to change and or improvement without notice.
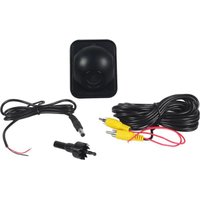
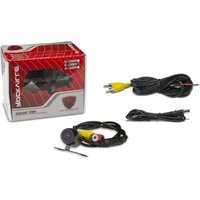
Marque : Rockville
Modèle : RBC2
Catégorie : Caméra de recul