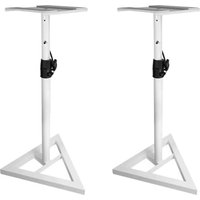
RVSM1 - Support haut-parleur Rockville - Notice d'utilisation et mode d'emploi gratuit
Retrouvez gratuitement la notice de l'appareil RVSM1 Rockville au format PDF.


| Type de produit | Enceinte active Bluetooth |
| Marque | Rockville |
| Modèle | RVSM1 |
| Dimensions (L x H x P) | 30 x 25 x 20 cm |
| Poids | 5 kg |
| Alimentation | Secteur 220-240 V, 50/60 Hz |
| Consommation électrique | 50 W |
| Type de haut-parleur | Subwoofer 8 pouces |
| Puissance de sortie | 100 W RMS |
| Connectivité | Bluetooth 5.0, entrée auxiliaire 3.5 mm |
| Réponse en fréquence | 40 Hz - 20 kHz |
| Matériau du boîtier | Bois MDF avec finition noire |
| Fonctions principales | Lecture audio sans fil, contrôle de volume, égaliseur intégré |
| Entretien et nettoyage | Essuyer avec un chiffon sec et doux. Ne pas utiliser de produits abrasifs. |
| Sécurité | Ne pas exposer à l'eau ou à une humidité excessive. Débrancher avant nettoyage. |
| Pièces détachées | Disponibles via le service client Rockville |
| Réparabilité | Indice de réparabilité non communiqué |
| Accessoires inclus | Câble d'alimentation, câble auxiliaire, manuel d'utilisation |
| Garantie | 2 ans |
| Informations générales | Conçu pour une utilisation domestique. Compatible avec la plupart des appareils Bluetooth. |
FOIRE AUX QUESTIONS - RVSM1 Rockville
Questions des utilisateurs sur RVSM1 Rockville
0 question sur cet appareil. Repondez a celles que vous connaissez ou posez la votre.
Poser une nouvelle question sur cet appareil
Téléchargez la notice de votre Support haut-parleur au format PDF gratuitement ! Retrouvez votre notice RVSM1 - Rockville et reprennez votre appareil électronique en main. Sur cette page sont publiés tous les documents nécessaires à l'utilisation de votre appareil RVSM1 de la marque Rockville.
MODE D'EMPLOI RVSM1 Rockville

OWNER'S MANUAL
RVSM1
Adjustable Near-Field Studio Monitor Stands
תָרִיּאָהַעְשָׁה
Thank you for purchasing these RVSM1 Adjustable Near-Field Studio Monitor Stands. Please read these instructions carefully before use. Make sure all parts are included. If any parts are missing please contact our technical help line at 1-646-758-0144, Monday through Thursday, 9am to 10pm EST., and Fridays, 9am to 3pm EST.
This heavy duty monitor stand is designed with home and project recording studios in mind. The height is adjustable for listening while sitting or standing, and locks in place with a security pin. Three rubber pads on the bottom of the base keep this stand stable on any surface. The entire stand breaks down into four pieces for easy storage and travel.
An accident or injury can result if the stand is incorrectly assembled or unspecified parts are used. After assembly, keep this manual where it can be consulted when necessary.
Using this product safely and properly
The indicator symbols shown below are used in this manual and on the stand to ensure proper and safe use of the product, to prevent injuries and avoid damage to surrounding items. Please become familiar with these symbols and their associated information before proceeding to the assembly instructions of this manual.

WARNING
This symbol indicates that death or serious injury may result from improper installation if this information is overlooked.

CAUTION
This symbol indicates that injury may result or damage to property could occur from improper installation if this information is overlooked.

WARNING
Do not place this stand on a tall object or high shelf. If the stand were to fall, it could cause an injury.
DO NOT EXCEED INDICATED MAXIMUM WEIGHT CAPACITY.

CAUTION
- This stand is meant for use with speakers ONLY. Do not use the stand for other purposes. Improper use of the stand may result in an unstable condition with the potential to cause an injury by falling.
- Assemble the stand on a level surface. Placing the stand on an uneven surface can lead to overturning and result in an injury.
- Do not place the stand where people regularly move past it. Bumping into the stand can cause an injury.
- Do not drop or drag the stand when assembling or transporting it. Pushing over or dragging the stand can result in an injury or cause damage to the floor.
- Do not climb onto or hang from the stand. Be especially careful about children trying to do this. If the stand falls over it can cause an injury.
- This stand is heavy, so be sure 2 or more people cooperate in unpacking or moving it. Improper lifting can cause a back injury and dropping the stand can injure feet.
- If the stand becomes dirty, clean it by lightly wiping with a soft cloth and a neutral cleaning solution. Do not use a substance like thinner or benzene.
PARTS LIST:
| platform |  | 2 pcs |
| baseplate |  | 2 pcs |
| telescoping shaft |  | 2 pcs |
| shaft mounting plate | 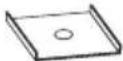 | 2 pcs |
| metal spike |  | 6 pcs |
| rubber foot |  | 6 pcs |
| washers |  | 4 pcs |
| long screw | 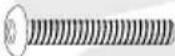 | 2 pcs |
| short screw |  | 2 pcs |
| cable clip |  | 4 pcs |
| Allen key | 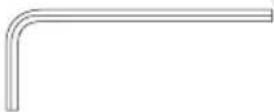 | 2 pcs |
ASSEMBLY INSTRUCTIONS:
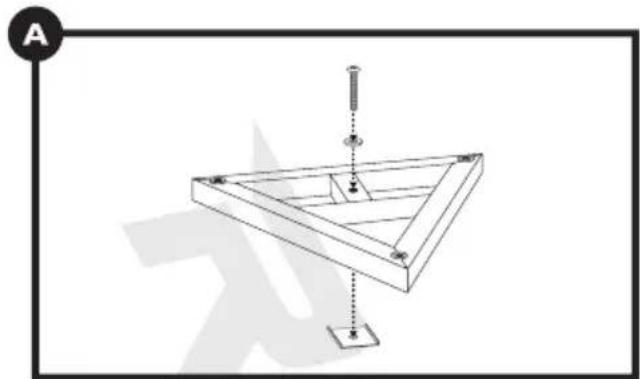
Turn the triangular base so that the insertion points for the rubber feet/steel spikes are facing up. Insert a long screw and washer through the opening on the base and through the opening in the shaft mounting plate. Push the plate against the base so that it fits snugly.
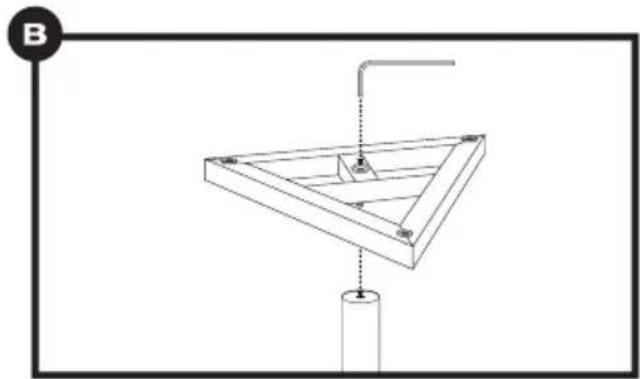
Turn the telescoping shaft 180 degrees and rest it on the platform. Align the end of the bolt (that was placed through the base plate and mounting plate) with the screw whole on the shaft. Use the Allen key to tighten the screw. Do not overtighten.

Hold the telescoping shaft vertically with the locking mechanism on top. With the indentation facing down, align the platform so that the indentation sits in the opening of the shaft. Insert a short screw and washer through the opening. Use the Allen key to tighten the screw. Do not overtighten.
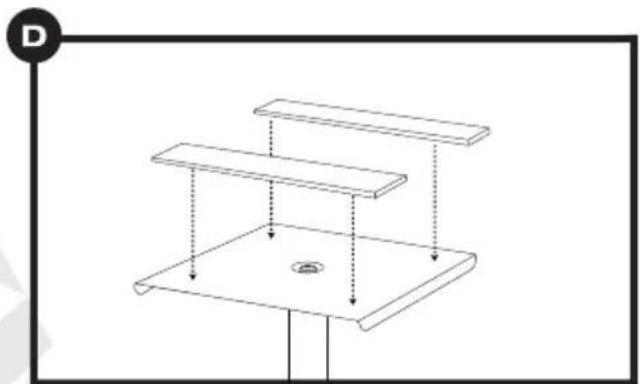
Apply the non-slip pads to the surface of the platform by removing the covering on the adhesive and carefully placing it onto the surface.

To place the stand on a carpeted floor, use the metal isolation spikes. Attach the spikes to the bottom of the base plate. If needed, adjust the spike height to keep the stand level.

If you are placing the stand on a wood, laminate, tile, or bare floor you should use the included rubber feet. To use the rubber feet, simply screw them into the holes at the bottom of the base plate.
ASSEMBLY INSTRUCTIONS (continued):

Finally, connect the cable clips to the small holes found on the rear of the stand. There is one just underneath the speaker platform and one near the base. Once they are in place, guide the speaker wires through the top clip, then along the telescoping shaft to the bottom clip. This will help keep the speaker cables tidy and out of the way.
Repeat the steps A to G to assemble the second stand.

WEIGHT CAPACITY: 80 lbs
ADJUSTABLE HEIGHT RANGE: 33 – 45 inches
BASE: 17.7 x 17.7 x 17.7 inches
TOP PLATE: 7.87 x 7.87 inches
TOP TUBE DIAMETER: 1.37 inches
LOWER TUBE DIAMETER: 1.5 inches
CONSTRUCTION: Steel
COLOR: Black
ROCKVILLE

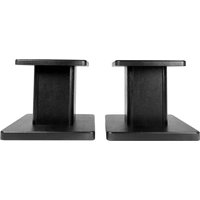

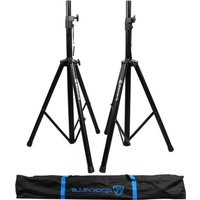
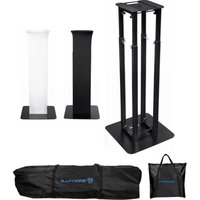
Marque : Rockville
Modèle : RVSM1
Catégorie : Support haut-parleur