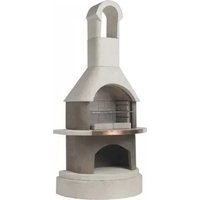
St. Moritz - Barbecue BUSCHBECK - Notice d'utilisation et mode d'emploi gratuit
Retrouvez gratuitement la notice de l'appareil St. Moritz BUSCHBECK au format PDF.


| Type de produit | Barbecue à charbon |
| Marque | Buschbeck |
| Modèle | St. Moritz |
| Dimensions (L x l x H) | Environ 100 x 60 x 90 cm |
| Poids | Environ 15 kg |
| Matériau | Acier peint, grille en acier chromé |
| Surface de cuisson | Environ 2000 cm² |
| Allumage | Manuel (allume-feu ou mèche) |
| Réglage hauteur grille | Oui, par chaînette ou crémaillère |
| Couvercle | Oui, avec thermomètre intégré |
| Roues | 2 roues pour le déplacement |
| Bac à cendres | Amovible pour nettoyage facile |
| Entretien | Nettoyer la grille après chaque usage, vider les cendres |
| Sécurité | Utiliser sur une surface plane et stable, loin de matériaux inflammables |
| Pièces détachées | Disponibles via le service client Buschbeck |
| Réparabilité | Indice de réparabilité estimé à 7.5/10 |
| Garantie | 2 ans |
| Utilisation | Pour grillades en extérieur, idéal pour 4-6 personnes |
FOIRE AUX QUESTIONS - St. Moritz BUSCHBECK
Questions des utilisateurs sur St. Moritz BUSCHBECK
0 question sur cet appareil. Repondez a celles que vous connaissez ou posez la votre.
Poser une nouvelle question sur cet appareil
Téléchargez la notice de votre Barbecue au format PDF gratuitement ! Retrouvez votre notice St. Moritz - BUSCHBECK et reprennez votre appareil électronique en main. Sur cette page sont publiés tous les documents nécessaires à l'utilisation de votre appareil St. Moritz de la marque BUSCHBECK.
MODE D'EMPLOI St. Moritz BUSCHBECK

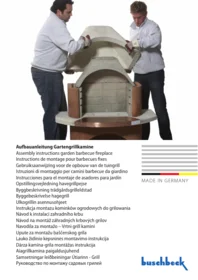
Buschbeck BBQ / Outdoor Fireplace
ASSEMBLY INSTRUCTIONS
MADE IN GERMANY



buschbeck
INHALT | TABLE OF CONTENTS
Page 3
GB Tools
Page 4
GB Explanations/symbols
Page 5
GB Types
Page 6-7
GB Step-by-Step Instructions
Page 8
GB Descriptions
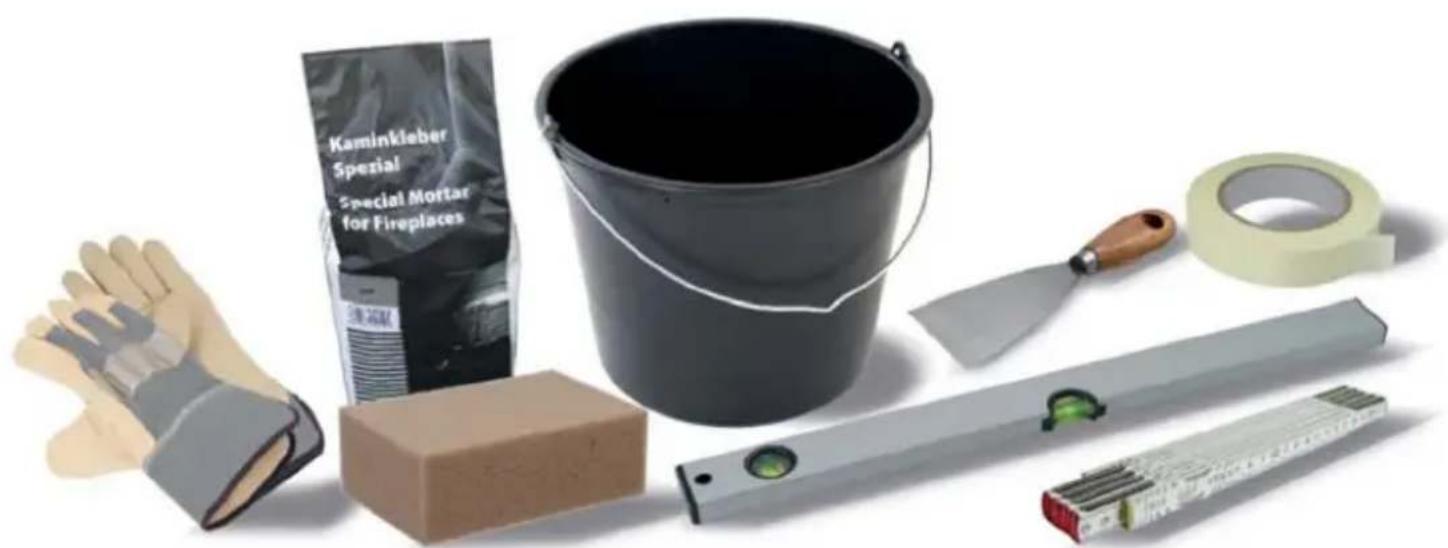
GB You will need these tools:
-Bucket
-Gloves
-Sponge
-Masking Tape
-Level
-Extendable Ruler
-Scraper
-mortar (provided)


GB
Caution!
Information
Can be heated with charcoal
Can be heated with wood
Does not have to be plastered or painted


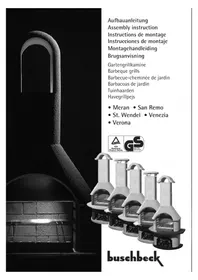
St. Moritz
Ambiente


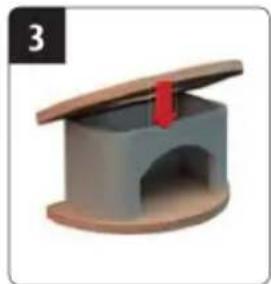

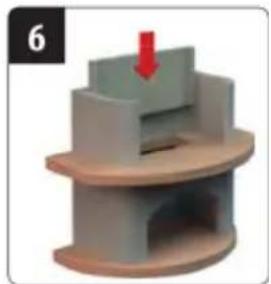




STEP-BY-STEP

1
2
3

4
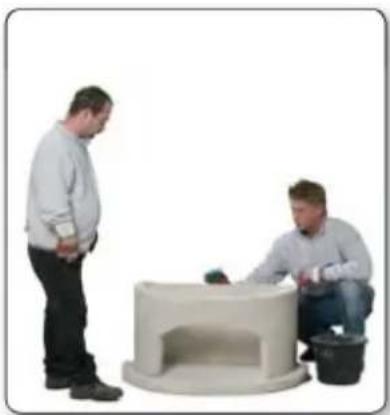
5

6
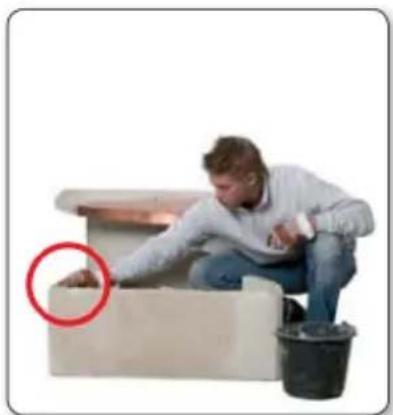
7
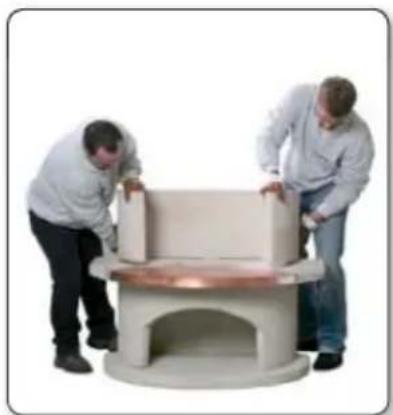
8

9

10

11

12
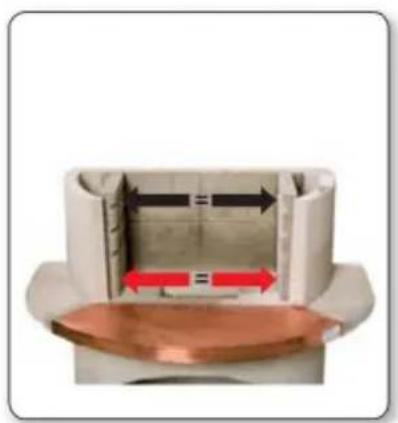
13

14

15

16

17

18

19

20

21

22

23

24
IF THE HAZARD INFORMATION, WARNINGS AND SAFETY INSTRUCTIONS ARE IGNORED, THERE IS A RISK OF UNJURIES OR MATERIAL DAMAGE DUE TO A FIRE OR EXPLOSION.
Do not use in enclosed spaces. This barbecue may only be used outdoors. Toxic vapours may otherwise accumulate that can lead to serious or even fatal injuries. Do not use the barbecue in a garage, building, in connecting passages between buildings or under flammable roofs, shelters etc.
! BEWARE! Do not use ethyl alcohol or petrol to light or re-light the barbecue!
! Use only firelighters in accordance with EN 1860-3!
Pay attention to your clothing when grilling – easily flammable fabrics are unsuitable for work at or near the barbecue! You should always wear a barbecue apron to protect your clothing from the heat and any grease splashes.
An incorrect assembly may present a risk. Observe the assembly instructions at all times.
! Only use this barbecue when all of the parts have been correctly assembled and stuck together.
Do not place any lighting fluid or charcoal soaked in lighting fluid on hot or worm charcoal.
! Close the lighting fluid after use and place at a safe distance from the barbecue.
Take corresponding care when using the barbecue.
The barbecue gets hot during use. Do not touch any metal parts or the grill without gloves. Do not leave the barbecue unattended during use.
CAUTION! Keep children and pets away from the barbecue. Never leave infants, children or pets unattended near a hot barbecue.
This barbecue should only ever be used at a distance of at least 1.5 m from flammable materials. Flammable materials include (not only) wood, treated wooden floors, wooden patios and wooden porches.
Never throw hot ashes or smouldering briquettes away. There is a risk of fire. Only dispose of the ash and charcoal residue when these have gone out completely and have cooled down.
Keep the surface of the barbecue free from inflammable gases and liquids (e.g. fuel, alcohol etc.) as well as other flammable materials.
This barbecue is not a heater and may not be used as a heater.
BEFORE SETTING UP YOUR GARDEN BARBECUE FIREPLACE, MAKE SURE THAT THE BASE OF CONCRETE, TERRACE TILES OR CONCRETE PAVING IS LEVEL AND FIRM. THE BASE SHOULD BE AT LEAST 10 CM THICK. MAKE SURE THE BARBECUE IS PLACED AT A SUFFICIENT DISTANCE FROM FLAMMABLE OR COMBUSTIBLE OBJECTS.
GB
Assembly
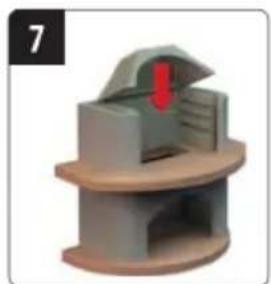
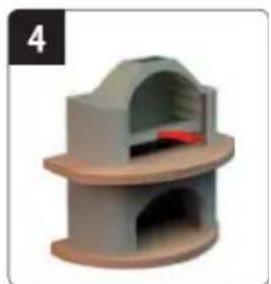
All of the parts of the chimney, except for the refractory concrete base plate 4, the three-part fireproof insert 6 and the refractory concrete hood 7, should be stuck together – at least at points – with the special adhesive enclosed.
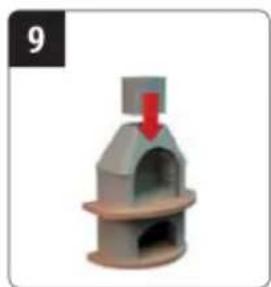
All parts above and including the concrete hood 8 are to be stuck together all-over with the adhesive.
The adhesive take around 24 hours to set completely.
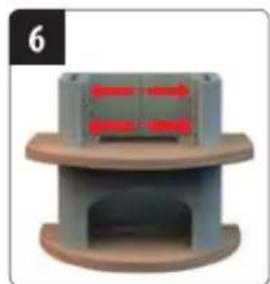
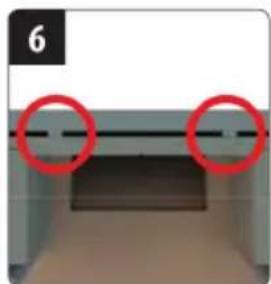
Make sure that there is an approx. 2 cm gap between the three-part fireproof insert 6 and the fireplace 4 all round.
The rear wall of the three-part fireproof insert 6 is fixed to the rear wall of the fireplace 5 with two spots of adhesive.
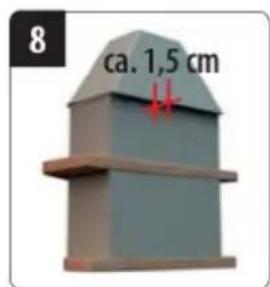
The hood 8 is mounted with an overhang at the rear of approx. 1.5 cm.
The cover plate A.1 is mounted so that the front is flush with the three-part fireproof insert 6 and with an overhang at the rear resulting from this.
All of the parts of the side table T.1 - T.3 must be stuck together all over with the enclosed adhesive.
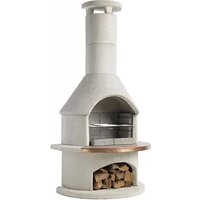
The garden barbecue fireplace can be heated with charcoal or firewood – depending on the model! Please pay special attention to which model is yours.
! Heat up your garden barbecue fireplace carefully (small flames) so that no cracks appear at high temperatures. This is particularly important during damp weather (wet concrete).
? Please use normal charcoal or similar combustible ma-
Operation
terials to heat up your garden barbecue fireplace (max. 5 kg charcoal or firewood) along with the intended solid firelighters. Large cracks may appear if the maximum amount of fuel is ignored.
If small cracks appear there is no cause for alarm and these will not have any negative effects on the safety and function of the barbecue since all parts of the chimney are reinforced with steel. The formation of hairline cracks is completely normal and these do not constitute any grounds for complaints about the product.
The surface of the garden barbecue fireplace can be cleaned of algae, for example, with a high-pressure cleaner.
Product features
Copper is a natural material and can of course tarnish under the influence of the weather. We recommend customary polishing pastes for cleaning.
The granite cornice plate should be stuck in place well with the enclosed adhesive. Since granite is a natural product, hairline cracks may appear when it is heated; these will not affect the function of the barbecue fireplace. Hairline cracks in the granite cornice pate are not product defects.
! Since concrete is a natural product, slight deviations in the dimensions may appear when the parts dry. These are within the tolerances and can be compensated with the enclosed adhesive. They do not constitute grounds for complaint.
Efflorescence in parts of coloured concrete does not constitute a ground for complaint but are the result of a natural process of lime evaporation. The lime is slowly dissolved through rain and other atmospheric influences. The efflorescence disappears in time by itself.

Buschbeck
www.buschbeck.com.au
© 2015 Buschbeck GmbH | Grebedesign | AS GK/G8 04.15 | Rev I | 20.000 | FA
DE technische Änderungen vorbehalten / GB Subject to technical changes. / FR Sous réserve de modifications techniques / NL Technische vrijzögen vorbehouden / IT Con riserva di modifiche lemiche / ES Salvo modificaciones técnicas / DM Med forbehold for teknikie ændringer / SE Med reservation för tekniska ändringar / NO Med forbehold om teknikke endfänger / FI Pludätämme oleukuten sekrisiin muutakšin / PL Zmiany techniczze zastrzezone / CZ Techniké změny vyraczeny / SK Techniké změny vyhradene / SI To je predmet technitrihl spermiemb / HR Podložno technikšim iznjenama / LT Paslikam tese keristi technimus duomenis / LV Iespějmas techniskas izmaljas. / EE Étatame endale ögúse teha technilis muudatusi / SI Tekničegar breyíngar áskildar / RU Produkovatívůs-сорраняет за собой право на внесение в издение технических изменений.
buschbeck

- INHALT | TABLE OF CONTENTS
- PAGE 3
- PAGE 4
- PAGE 5
- PAGE 6-7
- PAGE 8
- GB YOU WILL NEED THESE TOOLS
- STEP-BY-STEP
- IF THE HAZARD INFORMATION, WARNINGS AND SAFETY INSTRUCTIONS ARE IGNORED, THERE IS A RISK OF UNJURIES OR MATERIAL DAMAGE DUE TO A FIRE OR EXPLOSION
- BEFORE SETTING UP YOUR GARDEN BARBECUE FIREPLACE, MAKE SURE THAT THE BASE OF CONCRETE, TERRACE TILES OR CONCRETE PAVING IS LEVEL AND FIRM. THE BASE SHOULD BE AT LEAST 10 CM THICK. MAKE SURE THE BARBECUE IS PLACED AT A SUFFICIENT DISTANCE FROM FLAMMABLE OR COMBUSTIBLE OBJECTS
- ASSEMBLY
- OPERATION
- PRODUCT FEATURES
Marque : BUSCHBECK
Modèle : St. Moritz
Catégorie : Barbecue