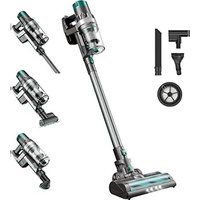
U11 - Aspirateur Ultenic - Notice d'utilisation et mode d'emploi gratuit
Retrouvez gratuitement la notice de l'appareil U11 Ultenic au format PDF.


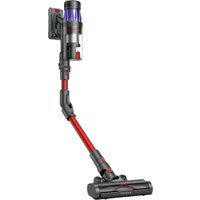
| Type de produit | Aspirateur balai sans fil |
| Marque | Ultenic |
| Modèle | U11 |
| Dimensions (L x l x h) | 26 x 25 x 110 cm |
| Poids | 2,5 kg |
| Capacité du réservoir à poussière | 0,6 L |
| Autonomie | Jusqu'à 40 minutes en mode standard |
| Temps de charge | 4-5 heures |
| Type de batterie | Lithium-ion 22,2 V / 2200 mAh |
| Puissance d'aspiration | 120 AW (Air Watt) |
| Système de filtration | Cyclonique et filtre HEPA lavable |
| Niveau sonore | Environ 72 dB |
| Fonctions principales | Aspiration de sols durs, tapis, meubles, fentes |
| Modes de vitesse | Standard, Turbo, Auto |
| Affichage | LED avec indicateur de batterie et mode |
| Accessoires inclus | Suceur longue fente, brosse 2-en-1, mini-brosse motorisée |
| Montage mural | Support mural inclus |
| Entretien et nettoyage | Réservoir, filtre et brosses lavables à l'eau |
| Sécurité | Arrêt automatique en cas de surchauffe ou blocage |
| Pièces détachées et réparabilité | Batterie et filtre remplaçables par l'utilisateur |
| Garantie | 2 ans |
FOIRE AUX QUESTIONS - U11 Ultenic
Questions des utilisateurs sur U11 Ultenic
0 question sur cet appareil. Repondez a celles que vous connaissez ou posez la votre.
Poser une nouvelle question sur cet appareil
Téléchargez la notice de votre Aspirateur au format PDF gratuitement ! Retrouvez votre notice U11 - Ultenic et reprennez votre appareil électronique en main. Sur cette page sont publiés tous les documents nécessaires à l'utilisation de votre appareil U11 de la marque Ultenic.
MODE D'EMPLOI U11 Ultenic
Itenic
Instruction manual Bedienungsanleitung Notice d'instructions Manuale di istruzioni Manual de instrucciones Инструкция
U11 Series

EN
IMPORTANT SAFETY INSTRUCTIONS
BEFORE USING THIS APPLIANCE READ ALL INSTRUCTIONS AND CAUTIONARYMARKINGS IN THIS MANUAL AND ON THE APPLIANCE
When using an electrical appliance, basic precautions should always be followed, including the following
WARNING
These warnings apply to the appliance, and also where applicable, to all tools, accessories, chargers or main adaptors.
TO REDUCE THE RISK OF FIRE, ELECTRIC SHOCK, OR INJURY:
- This proscenic appliance can be used by children aged from 8 years and above and persons with reduced physical, sensory or reasoning capabilities, or lack of experience and knowledge, only if they have been given supervision or instruction by a responsible person concerning use of the appliance in a safe way and understand the hazards involved. Cleaning and user maintenance shall not be made by children without supervision.
- Do not allow to be used as a toy. Close attention is necessary when used by or near children. Children should be supervised to ensure that they do not play with the appliance.
- Use only as described in this procenic Operating Manual. Do not carry out any maintenance other than that shown in this manual, or advised by the procenic Helpline.
- Suitable for dry locations ONLY. Do not use outdoors or on wet surfaces.
- Do not handle any part of the plug or appliance with wet hands.
- Do not use with a damaged cable or plug. If the supply cable is damaged it must be replaced by proscenic, its service agent or similarly qualified person in order to avoid a hazard.
- If the appliance is not working as it should, has received a sharp blow, has been dropped, damaged, left outdoors, or dropped into water, do not use and contact the proscenic Helpline.
8 Contact the proscenic Helpline when service or repair is required. Do not disassemble the appliance as incorrect reassembly may result in an electric shock or fire. - Do not stretch the cable or place the cable under strain. Keep the cable away from heated surfaces. Do not close a door on the cable, or pull the cable around sharp edges or corners. Arrange the cable away from traffic areas and where it will not be stepped on or tripped over. Do not run over the cable.
- Do not unplug by pulling on the cable. To unplug, grasp the plug, not the cable. The use of an extension cable is not recommended.
- Do not use to pick up water.
- Do not use to pick up flammable or combustible liquids, such as petrol, or use in areas where they or their vapours may be present
- Do not pick up anything that is burning or smoking, such as cigarettes, matches, or hot ashes.
- Keep hair, loose clothing, fingers, and all parts of the body away from openings and moving parts, such as the brush bar. Do not point the hose, wand or tools at your eyes or ears or put them in your mouth.
- Do not put any object into openings. Do not use with any opening blocked; keep free of dust, lint, hair, and anything that may reduce airflow.
- Use only proscenic recommended accessories and replacements parts.
- Do not use without the clear bin and filter in place.
18 Unplug when not in use for extended periods and before maintenance or servicing - Use extra care when cleaning on stairs.
- Do not install, charge or use this appliance outdoors, in a bathroom or within 3 metres (10 feet) of a pool. Do not use on wet surfaces and do not expose to moisture, rain or snow.
- Use only proscenic chargers for charging this proscenic appliance. Use only proscenic batteries: other types of batteries may burst, causing injury to persons and damage.
- Do not incinerate this appliance even if it is severely damaged. The battery may explode in a fire.
- Always turn 'OFF' the appliance before connecting or disconnecting the motorised brush bar.
- The appliance is only to be used with the power supply unit provided with the appliance.
READ AND SAVE THESE INSTRUCTIONS
THIS PROSCENIC APPLIANCE IS INTENDED FOR HOUSEHOLD US ONLY

Do not use near naked flames.
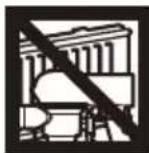
Do not store near heat sources.
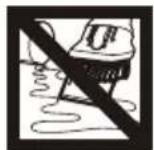
Do not pick up water or liquids.

Do not pick up burning objects.
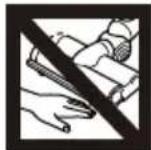
Do not put hands near the brush bar when the appliance is in use.
Product composition 1
Accessory installation 2
Engine charging 3
Product use 4-5
Disassembly and maintenance 6-9
Troubleshooting 10
Parameter 11
Product Composition

Attention:
- The center filter assembly must be dried if it is washed before it can be assembled for normal use.
- The central filter assembly can be washed. For optimum cleaning performance, please dump the garbage and clean the center filter assembly in time. Please clean the center filter assembly after about 10 times' use. However, in order to ensure the best performance of the machine, it is recommended to replace the filter assembly every 3–6 months according to the machine usage.
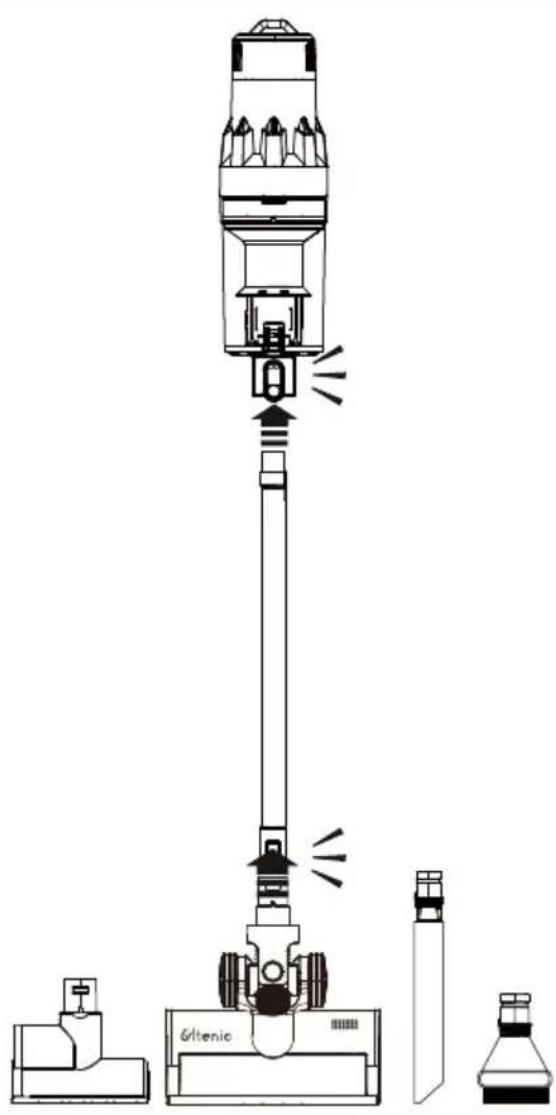
Accessory installation

Engine charging
DC port charging
Plug the power adapter into a power outlet and connect the output into the charging socket of the battery.
The three power indicators light up in increasing order during charging.
When the battery is fully charged, the three compartment power indicator is solid white light. (It takes about 3 hours to fully charge)
When the battery gets low, the first cell power indicator is flashing white, please charge it in time. When the power is too low, the machine will automatically shut down to protect the battery.
At this time, the machine will not work when the power button is pressed. The first power indicator flashes white. You must charge the battery or replace with a fully charged battery.

Floor-mounted storage stand charging
Connecting the power adapter to the Floor-mounted storage stand, place the vacuum on the stand, and you can charge then.
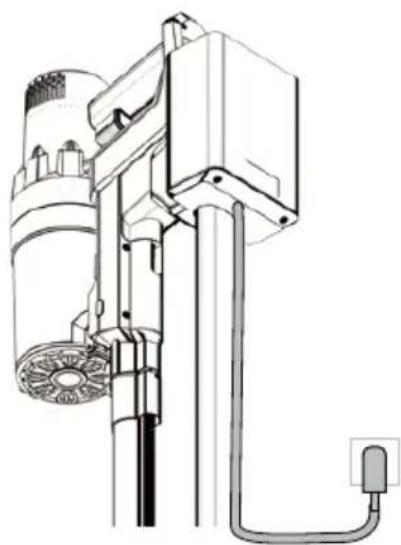
Attention:
- This machine can only be charged with the supplied power adapter;
- The machine can't work during the charging process. At this time, pressing the power switch, the machine does not work;
Engine use
Start: Press the power button to start the machine, it works with AUTO mode by default.
Power modes: There are 3 levels of suction power in total, press the icon “ ⚙ ” on the display panel at the end of the main unit to adjust the power level – Quiet mode, Auto mode and Powerful mode.
Power off: In the power-on state, press the power button again to turn off the machine.
Note: The power switch is a jog button which just needs to be turned on/off with a single tap.

Use of attachments
The desired suction tip can be used by connecting it to the suction tip holder.
The metal extension tube can be selectively used depending on the actual environment.
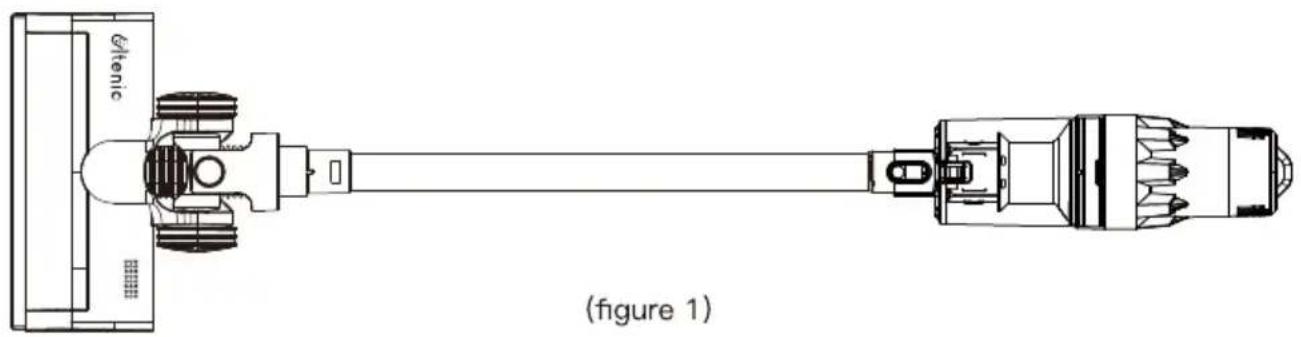
Use of the electric floor broom
The electric floor broom can be used to clean hard floors, floor tiles or short-haired carpets. It is recommended to use a metal extension tube for a better experience. (figure 1)
Use of the electric anti-mite brush
Insert the electric anti-mite brush into the suction tip holder and fix it for use.
The electric anti-mite brush can be used to clean sofas, mattresses, cribs, etc. (figure 2)

(figure 2)
Use of the long flat suction tip
Insert the long flat suction tip into the suction tip holder and fix it for use.
The long flat suction tip can be used to clean ceilings, bookshelves, computer keyboards and narrow gaps that are not easy to be cleaned up, etc. (figure 3)

(figure 3)
Use of the round suction tip
Insert the round suction tip into the suction tip holder and fix it for use.
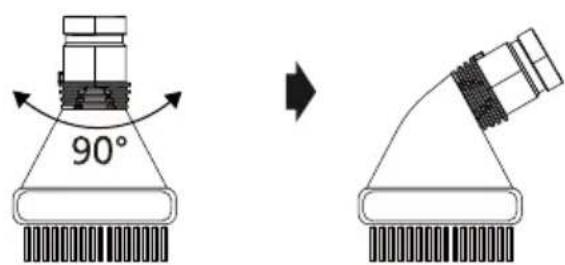
- Directly connected to the engine, the round suction tip can be used to clean the desktop, cabinet, sofa, short-hair carpet and so on. (Figure 4)
- Attached the metal extension tube, the round suction tip can be used to clean high place such as the ceiling, curtains, etc. (Figure 5)

(Figure 4)
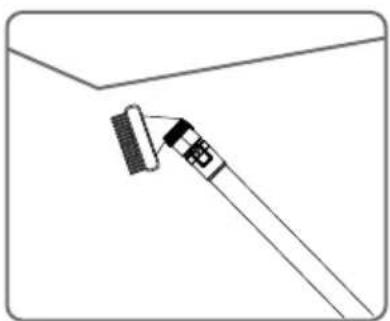
(Figure 5)
Disassembly and maintenance
Dust container and filter assembly
Detach dust container
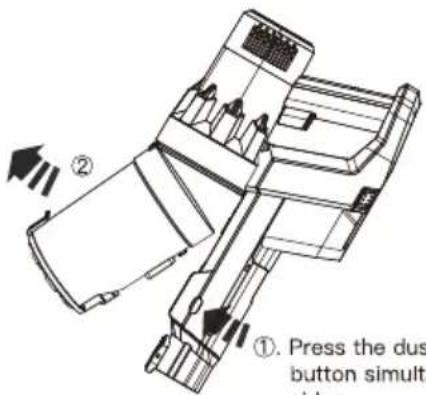
①. Press the dust container release button simultaneously on both sides.




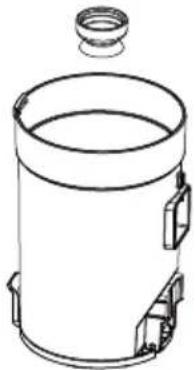
Clean filter assembly
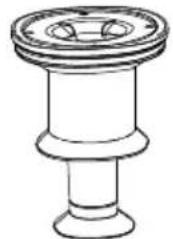

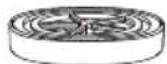




Note: After washing the HEPA filter and filter sponge, please dry them before use.
(Do not expose them to the sun)
Disassembly and maintenance
Installation of filter components
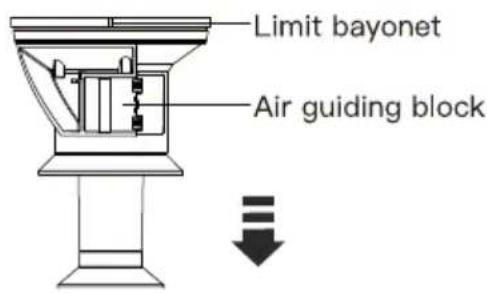
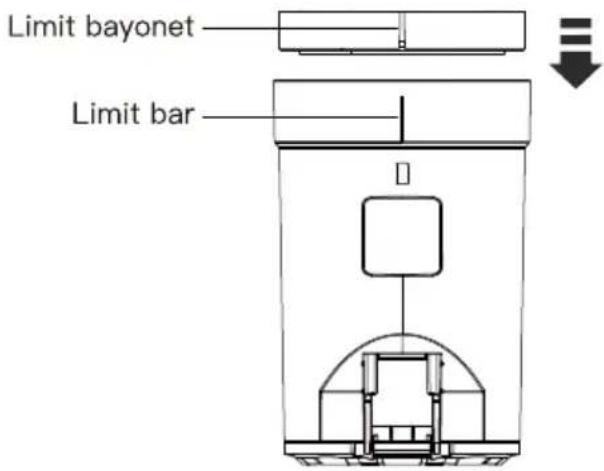
- Keep the air guiding block of the stainless steel filter assembly on the same side as the dust container inlet, and install the stainless steel filter assembly into the dust container from the top of the dust container. Note that the limit bayonet must be aligned with the dust container limit bar.

Installation of dust container
-
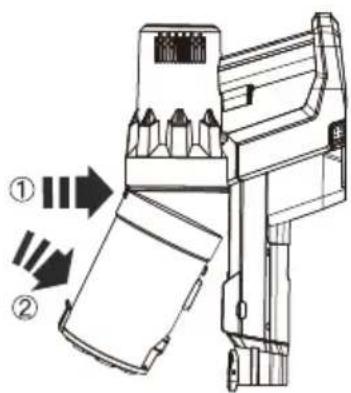
Snap the dust container into the engine. Please note that the snaps needs to be in the place.
-
Put the filter sponge into the bottom of the HEPA cover. And note that the filter sponge needs to be completely fixed with the 5 bumps. Otherwise it will affect the filtering effect.

- Keep the HEPA assembly with the rope face up, and put the HEPA assembly into the dust container from the top of the dust container. Please note that the limit bayonet of the HEPA assembly must be aligned with the dust container limit bar.
- Push the bottom of the dust container in the direction shown in the picture, until you hear a click.
Disassembly and maintenance
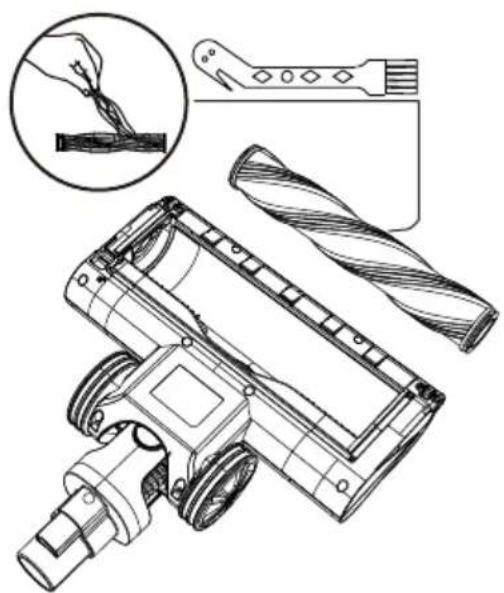
The floor broom and the roller brush


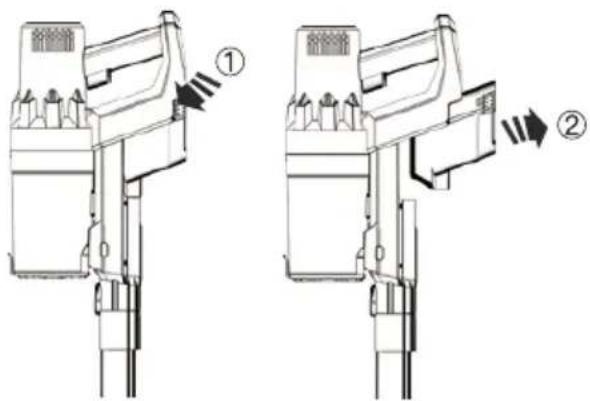
Battery disassembly
Remove battery: Press the battery release buttons on both sides simultaneously, and grab the battery and pull it out at the same time

Install battery: Align the battery slot with the card slot, press the bottom to slide into the battery slot until it snaps tightly.

Disassembly and maintenance
Floor-mounted storage stand

Troubleshooting
| Fault phenomenon | Reason | Solution |
| The fan does not work | Battery is not installed | Please install the battery correctly |
| Battery has no electricity | Charge the vacuum cleaner | |
| Suction diminishes | The dust container and the HEPA filter are not installed well | Install dust container and HEPA filter correctly |
| The HEPA filter is used for a long time | Replace the HEPA filter | |
| The dust container is full of dust | Dump garbage in the dust container | |
| The dust container filter is full of dust | Clean or replace the dust container filter | |
| Blockage happens in the air inlet pipe or in the roller brush | Clean up the trash inside the broom head | |
| Charging indicator does not light up while charging | The charging terminal is not fully inserted into the DC terminal | Insert the charging terminal completely into the charging port |
| Insufficient use time | Insufficient charging time | Fully charge the battery according to the instructions in the charging section |
| Battery aging | The battery is a lossy product and needs to be replaced at the designated service point | |
| Rolling brush stops | Inhalation of Oversized foreign body | Clean the roller brush and restart the machine |
| The roller brush is entangled with excess fiber | ||
| Error code | The floor broom blockage | Clear the windings of the floor broom |
| Ensure that the floor broom and metal extension tube are assembled firmly | ||
| Error code | Short circuit of the floor broom | Please go to the designated repair point to replace the floor broom or return it for repair |
| Error code | Fan abnormal | Check if the suction port is blocked and clean up the congestion |
| If the engine is hot, turn it off and wait for a while | ||
| The air outlet is hot | Filter assembly blocked | Clean the dust container and the HEPA filter |
| No water coming out | Insufficient water | Please fill water in time |
| The water outlet of the tank is blocked | Please check the water outlet and use a toothpick or other thin object to unblock it. |
Please check the above points before entrusting the maintenance department.
Note: If the power cord is damaged, and special tools are required, they must be replaced at the manufacturer's designated service point.
If you need to purchase consumables (HEPA filter, etc.), please contact customer service.
Parameters
| Nominal voltage | 28.8V |
| Rated power | 260W |
| Rated input current | 1A |
| Adapter rated input | 100–240V~50/60Hz |
| Adapter rated output | 34.2V |
| Charging time | 2–2.5h |

- ITENIC
- U11 SERIES
- EN
- IMPORTANT SAFETY INSTRUCTIONS
- WARNING
- TO REDUCE THE RISK OF FIRE, ELECTRIC SHOCK, OR INJURY
- READ AND SAVE THESE INSTRUCTIONS
- PRODUCT COMPOSITION
- ATTENTION
- ACCESSORY INSTALLATION
- ENGINE CHARGING
- DC PORT CHARGING
- FLOOR-MOUNTED STORAGE STAND CHARGING
- ENGINE USE
- USE OF ATTACHMENTS
- USE OF THE ELECTRIC FLOOR BROOM
- USE OF THE ELECTRIC ANTI-MITE BRUSH
- USE OF THE LONG FLAT SUCTION TIP
- USE OF THE ROUND SUCTION TIP
- DISASSEMBLY AND MAINTENANCE
- INSTALLATION OF FILTER COMPONENTS
- INSTALLATION OF DUST CONTAINER
- BATTERY DISASSEMBLY
- TROUBLESHOOTING
- PARAMETERS
Marque : Ultenic
Modèle : U11
Catégorie : Aspirateur