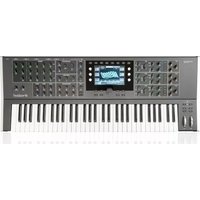
Quantum - Synthétiseur WALDORF - Notice d'utilisation et mode d'emploi gratuit
Retrouvez gratuitement la notice de l'appareil Quantum WALDORF au format PDF.


| Type de produit | Synthétiseur numérique hybride (wavetable, granulaire, virtuellement analogique) |
| Polyphonie | 16 voix |
| Oscillateurs par voix | 3 (wavetable, VA, impulsion, bruit, avec modulation) |
| Filtres | Multimode (passe-bas, passe-haut, passe-bande, notch) avec résonance et modulation |
| Effets | Réverbération, delay, chorus, flanger, distorsion, etc. (qualité studio) |
| Modes de synthèse | Wavetable, granulaire, virtuellement analogique, échantillonnage |
| Séquenceur | Polyphonique pas-à-pas avec modulation intégrée |
| Alimentation | Secteur 100-240V CA, 50/60 Hz (adaptateur interne) |
| Dimensions (L × P × H) | 30 × 30 × 10 cm |
| Poids | 5,5 kg |
| Entretien et nettoyage | Essuyer avec un chiffon doux et sec ; ne pas utiliser de solvants. Débrancher avant tout nettoyage. |
| Sécurité | Utiliser uniquement sur secteur ; ne pas exposer à l'humidité ou aux chocs. Débrancher en cas d'orage. |
| Pièces détachées et réparabilité | Contactez le SAV agréé Waldorf. Réparation par un technicien qualifié recommandée. |
| Informations générales | Synthétiseur haut de gamme destiné aux professionnels et passionnés. Notice complète disponible en téléchargement. |
FOIRE AUX QUESTIONS - Quantum WALDORF
Questions des utilisateurs sur Quantum WALDORF
0 question sur cet appareil. Repondez a celles que vous connaissez ou posez la votre.
Poser une nouvelle question sur cet appareil
Téléchargez la notice de votre Synthétiseur au format PDF gratuitement ! Retrouvez votre notice Quantum - WALDORF et reprennez votre appareil électronique en main. Sur cette page sont publiés tous les documents nécessaires à l'utilisation de votre appareil Quantum de la marque WALDORF.
MODE D'EMPLOI Quantum WALDORF
QUANTUM
SYNTHESIZER
Foreword
Thank you for purchasing the Waldorf Quantum. You now own a high-class hybrid synthesizer featuring a wide range of unique sounds with approved Waldorf quality – made in Germany!
What to read?
The biggest problem with any manual is to find a way to address the needs of absolute beginners and experts alike. Some people read a manual cover to cover while others don't even touch it. Opting for the latter is a poor choice, especially when the manual describes a Waldorf instrument.
Anyone reading the following manual is in for a lot of fun while learning about and working with the Waldorf Quantum.
Your Waldorf Team
Hint
Waldorf Music is not liable for any erroneous information contained in this manual. The contents of this manual may be updated at any time without prior notice. We made every effort to ensure the information herein is accurate and that the manual contains no contradictory information. Waldorf Music extends no liabilities in regard to this manual other than those required by local law.
This manual or any portion of it may not be reproduced in any form without the manufacturer's written consent.
Waldorf Music GmbH, Lilienthalstraße 7, D-53424 Remagen, Germany

Foreword
Quantum Development Team
Software: Rolf Wöhrmann
Hardware/Housing:
Oliver Rockstedt, Frank Schneider, Rolf Wöhrmann
Design: Axel Hartmann
Manual:
Holger Steinbrink
Sounddesign: Kurt Ader, Wolfram Franke,
Reinhold Heil, SonicMayhem, Howard Scarr, Brian Transeau (BT)
Revision:
1.1, Junel 2018

Please visit our website for further support and downloads for your Quantum: www.waldorfmusic.com/quantum
We would like to thank
Thomas Brenner, Karsten Dubsch, Willie Eckl, Joachim Flor, Roger Keller, Jonathan Miller, Pierre Nozet, Miroslav Pindus, Lukas Schütte, Stefan Stenzel, Michael von Garnier, Kurt 'Lu' Wangard, Haibin Wu and anyone we have forgotten.

waldorf
3 Quantum Manual
Content
Content
Foreword 2
Control Features & Connections....5
Front Panel....5
Rear Panel & Connections 6
Introduction 7
About this Manual 7
General Safety Guidelines....8
Setup and Connections .... 10
Setup....10
Connections 10
The Rear Panel Connections....12
Basic Operation....17
The Quantum Modes....17
The Touch Screen Display 18
Selecting Programs 19
Editing Parameters....21
Sound Parameter 24
Overview of Functions 24
Oscillator Section 25
Oscillator Mixer (OSC MIX) Section....63
Glide Section....63
Dual Analog Filter Section 64
Digital Former Section....70
Envelopes Section....79
LFO Section 85
Komplex Modulator Section....91
The Effects Section 100
Output Section 114
The Modulations of Quantum 116
Additional Modes 122
Perform Mode 122
Layer Mode....132
Global Mode....140
Loading & Editing Samples 147
Appendix....156
Wavetable Synthesis ....156
Waveform Oscillators Introduction....158
A Short Introduction in Granular Synthesis....164
Updating the System Software....166
Modulation Sources and Destination....167
Technical Data 167
Glossary 172
Product Support 178

waldorf
4 Quantum Manual
Control Features & Connections
Front Panel

1) Wheel Section
5) Selection Dial & Mode Pages Buttons
9) Effects Section
2) Oscillator Section
6) Dual Analog Filter & Digital Filter Sections
10) Output Section
3) LFO Section
7) Envelopes Section
4) Touchscreen Display
8) Komplex Modulator

Rear Panel & Connections

1) Headphones Output
5) USB Connections
2) Main & Out Outputs
6) SD Card Slot
3) Audio Inputs
7) MIDI In / Out / Thru Jacks
4) Pedal Inputs
8) Power Jack & Switch

Introduction
About this Manual
This manual was written to help you to become familiar with the Quantum synthesizer. It will also aid experienced users with routine tasks.
To avoid confusion, the terminology in this manual is based on the Quantum parameter names. You will find a glossary at the end of this manual; it explains the various terms used.
We also used a uniform set of symbols to show you topics of particular interest or significance. Important terms are highlighted in bold letters.
Symbols

Caution - The comments that follow this symbol will help you avoid errors and malfunctions.

Info - Additional information on a given topic.
Instruction - Follow these guidelines to execute a desired function.

Example - Real-world examples to try out.
Highlighted Control Features and Parameters
All of the Quantum's buttons, controls and parameters are highlighted in bold letters throughout the manual.
Examples:
- Press the Load button.
• Turn the Cutoff knob.
The Quantum's different modes and parameter pages are illustrated in a depiction of the display.
The value range of a continuous parameter is indicated from low to high with both values shown in italic letters, separated by three dots.
Example:
Cutoff 0...127

General Safety Guidelines

Please read the following safety tips carefully! They include several precautions you should always observe when dealing with electronic equipment. Read all of the instructions before operating your device.
Suitable Operating Conditions
• Use the device in enclosed rooms only.
- Never use the device in damp conditions such as bathrooms, washrooms, or around indoor swimming pools.
- Do not use the device in extremely dusty or dirty environments.
- Make sure that adequate ventilation is available on all sides of the device.
- Do not place the device near heat sources such as radiators.
- Do not expose the device to direct sunlight.
- Do not expose the device to extreme vibrations.
Power Supply
• Only use the power cable that came with the Quantum.
- Unplug the device when you are not using it for longer periods.
• Never touch the plug with wet hands.
- Always pull the plug when unplugging the device - never the cable.
Operation
- Never place objects containing liquids on or near the device.
- Place the device on a stable base only. Use a suitable platform.
- Make sure no foreign objects find their way into the chassis. If for some reason this occurs, switch the power off, unplug the device, and consult a qualified repair center.
- This device can generate volume levels that may do irreparable damage to your hearing when used on its own or with amplifiers, speakers, or headphones. For this reason you should keep the volume at tolerable levels.

Maintenance
- Do not open the device or remove the cover. Refer all service and repair tasks to qualified personnel. The interior of the chassis contains no components that require user maintenance.
- Use only a dry, soft cloth or brush to clean the device. Never use alcohol, cleaning solutions or similar chemicals. They will damage the surface of the chassis.
Proper Use
This device is designed exclusively to produce low-frequency audio signals for the purpose of generating sound. Any other use is prohibited and voids the warranty extended by Waldorf Music. Waldorf Music is not liable for damages due to incorrect use.

Don't place your Quantum anywhere near children, mothers-in-law or pets. This could lead to critical interactions.

Setup and Connections
The Waldorf Quantum comes complete with:
• The Waldorf Quantum Synthesizer itself
- A power cable
• A printed Quick Start manual
Please ensure all the above items were included. If something is missing, contact your local dealer.
We recommend that you save the original packing material for future transport.
Setup
Place the Quantum on a clean, even surface.
Connections
In order to get started with your Quantum you will need an AC power outlet, a mixing console, an amp, and/or an audio monitor such as a speaker cabinet or a headphone.
You can also use a computer or sequencer to make use of Quantum's MIDI features.
To connect the devices:
- Turn all units off.
- Connect the Quantum's Main Out audio outputs to your mixing console or your computer audio interface. Optionally connect the stereo Headphones outputs to a headphone.
- If you want to use a computer, connect the Quantum's Computer USB port with a USB cable to your computer (Windows or macOS). Thereafter, the Quantum becomes automatically available as a MIDI device.
- Optionally you can connect the Quantum's MIDI ports to a computer MIDI interface or other MIDI devices.
- If desired, connect the Controller USB input to any suitable class-compliant USB hardware controller to send MIDI data to control functions of the Quantum.
- Connect the power cable that came with the Quantum to a suitable AC power outlet.
- Press the power switch on the rear panel of your Quantum.

waldorf
10 Quantum Manual
Setup and Connections
- Then switch on your computer (if connected), the mixing console and finally the amplifier or active monitor speakers.
The startup procedure is about 10-15 seconds. After this, the Quantum is ready to play.
The overall volume of the Quantum can be controlled with the Master Volume dial. This also affects the Headphones output but not the AUX output.
If you do not choose to connect a mixing console, you can patch the Quantum's output signals directly to an amplifier or an audio interface. Use an input usually called Line, Aux or Tape input.
The Quantum's audio outputs deliver unbalanced line levels. When connecting to an amplifier, a mixing console or an audio interface with automatic balanced/unbalanced sensing inputs, please make sure to use TS mono jack cables and not TRS stereo jack cables.
Before connecting and disconnecting the Quantum to a power supply source, turn your amp's volume con-
trol all the way down to avoid damage due to on/off switching noise. The Quantum produces a high level output signal. Please take care that the connected playback device is suitable for the high level of an electronic instrument. Never use the microphone or phono input of the connected amp!

The Rear Panel Connections
The Quantum provides two analog stereo audio outputs and a headphones output. The Main and Headphone outputs are affected by the setting of the Master Volume control and the Comp(ressor) dial. Use 2 TS mono jack cables to connect the Main output to a mixer. The Quantum is a stereo instrument. There is no inherent mono output. Use your mixing console to appropriately distribute the stereo channels in case.
Headphones Output and Headphone Volume
Here you can connect any headphone with a 1/4-inch stereo plug. The headphone output uses the same signal as the main output. The Headphones Volume controls the Quantum's headphone volume in addition to the Main Volume knob. Use this knob to amplify or attenuate headphones level to individual headphone loudness and impedan
Volume


Headphones
adjust for
Main Output
Connect the left and right jack with 1/4-inch mono plugs.

MAIN OUT
Aux Output
Connect the left and right jack with 1/4-inch mono plugs. The Aux Output contains no signal unless specified in the Layer page for example when using split or layered sounds. The Aux Outputs are neither affected by the Master Volume nor an compressor. For more information Aux output please read 'The Layer Pa

AUX OUT
Audio Input
The Quantum offers a stereo audio input (2x mono jacks) that can be used to feed an external audio signal into the Quantum. Therefore, the signal can either be routed through the Quantum's signal path

AUDIO IN
for realtime live processing or directly recorded by using the Audio Recorder on the Global page. For more information, please refer to the 'The Audio Tab' chapter within the Global Page description and also 'The Layer Page' chapter.

Pedal Inputs
A sustain pedal switch connected to the Sustain input enables you to hold played notes as long as you press the pedal. As some pedals open contacts when pressed and others close, it is necessary that the connected pedal is not pressed when switching on the Quantum. This enables the Quantum to match the pedal.

The Control Pedal input allows you to connect any suitable pedal. In the simplest case, you can plug in an expression pedal. For using its full-range signal as a modulation source the pedal needs to be calibrated using the "Control Pedal" button in Global->System->Calibrate.
Connect a suitable passive pedal or any active CV source (control voltage with 0-5V range) from modular systems, say, as a modulation source in the Quantum.
The USB Connections
Quantum offers two USB ports. The Controller USB input lets you connect any suitable class-compliant USB hardware controller to send MIDI data to control functions of the Quan-

tum. You can also use the MIDI Learn function for most of the Quantum's parameters that can be controlled by an external MIDI hardware controller. Further any sound module with an appropriate USB input could be connected and played from the Quantum keyboard.
The Computer USB port connects the Quantum to your computer or iOS device with the following system requirements:
• Windows PC: Windows 7 or newer, a USB 2 port
• Apple: Intel Mac with macOS 10.9 or newer, a USB 2 port
- Apple iPad with iOS 9 or newer by using an optional Apple "Lightning to USB Camera Adapter" cable
The Computer USB connection of the Quantum allows transmitting and receiving of MIDI data
Make sure that you use a USB 2 port on your computer and a USB 2 compatible cable to avoid problems with data transmission.
Read more about the configuration of USB MIDI in 'The Global Page' chapter

waldorf
13 Quantum Manual
SD Card Slot
It is important to use a FAT, FAT32 or exFAT file system formatted SD card. Other file formats won't work.
! Please insert the SD Card upside down, i.e. with the contacts showing to the upper side. This is due to the mechanical construction of the Quantum. Please insert the card with normal force to avoid any damage.
A connected SD card allows:
- Updating the Quantum's operating system. Read more in 'The Global Page' chapter.
- Importing and saving audio files.
- Importing and saving Quantum-specific data - e.g. sound patches, oscillator presets, wavetables, MIDI Maps, etc.
MIDI In/Thru/Out Jacks
Although we can hardly believe it, the Quantum might not be

enough for some people, so we added an elegant way to control external sound modules with the Quantum keyboard: just connect the DIN MIDI out (or USB Controller port) to your external gear and play. For use with a computer we recommend the Computer USB port.
Read more about the configuration of the MIDI ports in 'The Global Menu' chapter.
The Wheel Section
Octave Down/Up Buttons
Although the MIDI standard requires 128 keys, Quantum offers only 61, so we added these buttons to enable you to reach more keys than are

physically accessible. Press Octave Down to go one octave lower, and Octave Up to go one octave higher. Transposition is maximum two octaves up and two octaves down.
! Press both Octave buttons simultaneously to send an All Notes Off message. This will terminate any stuck notes.

Mono Button
Switches polyphonic to monophonic mode and vice versa. If the Mono button lights up (or blinks depending on the button backlight mode, see Global


-> Colors page for more information), the monophonic mode is active. Mono means that only the last played note sounds. All other notes are stored in an internal list but aren't played. As soon as you release the note that is currently played, the second last note is played and so on. When you play legato, only the first note that was played triggers those envelopes which have the SingleTrig parameter activated. Those envelopes with SingleTrig deactivated will re-trigger at each note even when played legato. You can freely mix and match SingleTrig settings between all envelopes. The SingleTrig mode is for sustained sounds like typical 1970s solo sounds.


Latch Button
If active, all played notes are held. This also affects the arpeggiator. The Latch button acts similar to a pressed sustain pedal, but in addition you could release individual latched notes by pressing them again. Press Latch again to disable it.
Chord Button
Chord is a variant of the Latch mode. Instead of latching based on a single key basis, an active Chord mode will latch all notes played within a short period of time like when you play a chord. If you then play another chord, the new chord will replace the previous chord. Press the Chord button again to end the Chords mode. In order to visualise that the Chord mode is a variant of the Latch mode, each time the Chord mode button is activated, the Latch mode button is activated too.
Arpeggiator (Arp) Button
Press this button to activate or deactivate the Arpeggiator or the Step Sequencer. When you press a note or a chord on the keyboard or via MIDI, it is split up and repeated rhythmically. Read more about the Arpeggiator and the Sequencer in 'The Perform Mode' chapter.

Pitch Bend Wheel
Use this wheel to alter the pitch of the played notes. It will jump to the center position when you release it.
Modulation Wheel
Use this wheel to alter the sound of the played notes. In contrast to the pitch bend wheel it does not go back to its default position on release.
Don't worry if sometimes the sound does not change. In this case it is likely that the sound programmer simply forgot to assign it.

Pitch

Mod
Pitch Bend wheel and Modulation wheel can be calibrated by using the corresponding function on the Global page. For more information, please refer to this chapter.

Basic Operation
Switching On / Off
The Quantum is equipped with a power switch.
To switch the Quantum on:
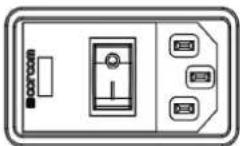
- Press the Power switch to switch on the Quantum. The boot procedure may take a few seconds. After this, the display is lit and the Quantum is ready to play.
To switch the Quantum off:
- Press the Power switch to switch off the Quantum.
Master Volume
The Master Volume controls the Quantum's overall volume. The volume setting is global and affects the level of the Main audio outputs including the Headphones output. The level of the Aux audio output is not affected.

Master Volume
The Quantum Mode Pages
The Quantum offers mode pages in addition to the panel parameters or for global settings. To enter a desired mode page, just press the corresponding mode button above or below the touchscreen display. The following mode pages are available:

• LFOs (6x Low Frequency Oscillators) mode page
• OSC 1, 2 and 3 (Oscillators) mode page
• FILTERS (Dual Analog Filter, Digital Former and Routing) mode page
• ENVELOPES (Amp-, Filter 1 & 2-, Free 1, 2, 3 envelopes) mode page
• MOD (Modulation Matrix & Komplex Modulator) mode page
• EFFECTS (Effects 1 to 5) mode page
- Load mode page
- Save mode page
• Mod (Modulation Assignment)


• Perform mode page (Favorites, Arpeggiator, Sequencer and ModulationPad)
- Layer mode page (Levels & Routing and Voices assignment)
- Global mode page (Scope, Pitch, Audio, MIDI, Settings, System)


All modes will be described in detail in the corresponding chapters of this manual.
The Touchscreen Display
The Touchscreen display gives you an overview of the actual Mode page, parameter changes, and delivers additional information. To select a desired function, open a pop-up menu, or to edit a graphic (e.g. envelopes) just tap on it and move your finger up and down or from left to right (and vice versa). The six parameter dials on the left and the right side of the display control the corresponding parameter that is shown in the display next to the dials. The display presentation depends on the selected mode, but the lower part always shows the same overview:

1) The Monitor section in the lower left corner displays a VU meter unit to show the sound level of the left/right channels of the main output signal and the eight played voices. Here you can also see the polyphonic workload as well as the used voices for each Layer with its own color code. Tap on the monitor section to open a pop-up menu. Here you can choose other representations of this section. Scope delivers a realtime waveform display of the current stereo signal. The scope can be further configured in the Global Scope screen. Analyzer (lin) offers a realtime analyzer to display the linear frequency content of the signal, while Analyzer (log) delivers a logarithmic representation like most audio analyzers. Finally, a MIDI Monitor displays all MIDI messages that Quantum creates (Internal) as well as incoming MIDI messages (from MIDI In and the USB ports).
2) The Sound Name section shows the current loaded sound program. Active sound filters (can be set in the Load browser) are also displayed. Read more about the Layer modes in 'The Layer Mode'. Tap on the sound name to enter the Load mode. Read more about the Load mode page in the 'Loading Programs' chapter. Left to the sound name the program number is shown. Tap on the program number to select a program by entering its number.
3) The Layer buttons show which Layer is active. Tap on the corresponding button Layer 1 or Layer 2 to switch

between the layers. Under each layer button it is noted, if its program uses specific modes like Arp, Sequencer, Unisono, Mono and such. In case of an active split-mode, an appropriate icon of the split is displayed above the layer buttons. For a layered sound playebd by both layers simultaneously, an icon is displayed above the layer buttons. Read more about the layers in 'The Layer Page' chapter.
Loading Programs
The Quantum offers different ways of loading sound programs:
- When in Load mode (Load button lights), use the Selection dial to select the desired sound program in the sound list. Turning the dial clockwise increases the Program number, turning the dial counterclockwise decreases it. To load the desired sound program,
press the Selection dial once. You can also tap on the 1234 button to enter a desired sound number. After that, tap on Return to load this sound program. Tapping a sound in the list will select the sound and the details section on the right is shwo more information about the sound. Selection is depicted by showing a turquoise frame. Tapping the sound a second time, i.e. tapping an already
Load
selected sound will load it. The loaded sound in the list is depicted by a white background.
You can also enter the Load mode page by tapping on the sound program name.
You can also enter the sound number by tapping on the sound program number.
- Press the Next or Prev buttons to load the next or previous

sound program immediately. This function is available in nearly every mode and on every display page.
If the current sound is a Split or Layered sound, then an option will be shown to load the patch only into the current layer and keep the other layer as it is. This option will be only shown when using the Load button so as not to slow down performance-oriented patch loading – like from Favorites page or via Next / Prev buttons.
The right section of the Load Patch page gives you more information about the selected sound. Beside the sound name, here you find the Bank, the Author and also the Attributes. These settings can be made while saving a sound programm (see chapter 'Saving Sounds').

By tapping on the Init button, you can initialize the current loaded sound. No sound program is overwritten during this action. If in Layered mode, a popup window will open where you can choose, if the current selected layer (Current) or the complete sound program (Reset) will be initialized. If Reset is chosen, the initialized sound program will be a single layer program. By tapping on the Delete button, you can delete the current selected sound. This procedure must confirmed before, because it is irreversible.
Tap on the Favorites button to open a new page for managing your favorite sounds. You can select any sound from the left list and add it to the Favorites list on the right side. You can add sounds to empty slots, replace or remove sound programs or change their positions (Up & Down). Tap on Back to leave the Favorites page. Read more about the Favorites Tab within the chapter 'The Perform Mode Page'.
Tab on the Actions pop-up menu to perform the following actions:
- Import lets you import sound programs from a connected SD card.
- Export lets you export the current sound program to a connected SD card.
- Rebuild Cache lets you rebuild the internal data cache in case of any problems.
![Load Patch Actions Attribute [0] The Quantum Manual All [1] Red Rexonator 1 [2] Stretcher Bank [3] Fanfare Bells [4] Wheel of Fortune [5] Dry Funky Mono All [6] Timptams Author [7] Muted Morpher 1 [8] Muted Morpher 2 All [9] PS Low Strings Load 1234 Init Delete Favorites 0000 The Quantum Manual Layer1 Layer2 Mode: Single](/content/2026/06/1388670/images/640e2426fcec1e38fe8cdd8cf75cb931b7ca345c0aaebed02e1b93d5992f1a53.jpg)
The Load mode display page

Editing Parameters
In order to change or edit a sound program, you must access the appropriate parameters. Depending on the type of parameters, there are different ways to achieve this:
- The controls on the Quantum's front panel offer direct access to the most important sound parameters. The panel is divided into several sections, each containing knobs and dials associated with that section. By adjusting the controls on the panel you have instant access to the sound. These parameters are called Panel Parameters. When editing a Panel parameter, this is displayed in the lower part of the touchscreen display (parameter name and corresponding value).
All Panel parameter dials and pots are capable of sending MIDI Controller data via USB and MIDI Out. Read more in 'The Global Menu' chapter. - Most sections offer additional sound parameters that are available through the touchscreen display. To edit an additional parameter, press the corresponding mode button above or below the touchscreen (e.g. LFOs) and use the six display knobs to the left and the right of the touchscreen display. The touchscreen display page includes additional parameters that are not accessible directly via the control elements on the panel. These
parameters are called Display Menu Parameters. For each parameter the original value from a loaded patch is indicated by a vertical bar in the main bottom area and in the encoder displays.
- Some functions can be edited via the touchscreen display directly. Use your finger to tap on the corresponding parameter/option/button on the touchscreen to open pop-up menus or sliders which can be moved to change values or to edit graphics (e.g. envelopes).
- On most display pages the Selection dial can be used to control the most important parameter – for example Cutoff 1 on the Dual Analog Filter page.
Some parameters can be found on the panel and also as touchscreen display parameters – for example the Envelope phases.
All rotary controls consist of endless dials or potentiometers. Turning a dial clockwise increases the corresponding value; turning it counterclockwise decreases it. Bipolar parameters (parameters with positive and negative values) use special gradation when changing their values. As soon as the value 0 is reached, the sweep is stopped for a short period to make it easier to edit the Quantum.
Read more about basic settings for the knobs in 'The Global Page' chapter.
Saving Programs
After you have finished editing a sound program you must save it if you intend to use it again. All of the Quantum's memory locations are available for this purpose.

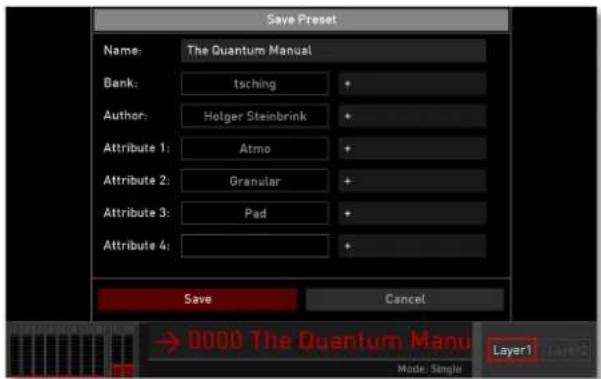
To save a sound program:
- Press the Save button to activate the Save Preset page. The Save button is red lit.
- Edit the Name (if desired). Tap on the sound name on the touchscreen to open a virtual key-
board. The program name can use up to 40 characters. Tap on Return to confirm. Tap on Cancel to cancel the naming procedure.
- Tap on the Bank name to open a pop-up menu for selecting a desired sound bank. You can also add a new bank by tapping on + next to the bank name.
- Tap on the Author name to select a desired author in the pop-up menu. You can also add a new author name by tapping on + next to the author name.
- You can also choose up to four attributes for your sound. Tap on the corresponding Attribute 1 to 4 on the touchscreen to open a pop-up menu selection list. Select the desired attribute. You can also add a new attribute by tapping on + next to the corresponding attribute name. It is strongly recommended to select an appropriate attribute for your sound. This helps you to locate your sound later.
- Use the Prev/Next button or the Selection dial to select the desired sound program number, where the sound is saved to. Alternatively, tap on the number field at the bottom of the screen to enter the sound program number manually.
Basic Operation
- Finally, tap on Save on the touchscreen to store the sound program at the selected location.
- By tapping on Cancel in the touchscreen or pressing any button on the front panel, you can discard the storing process at any time.
!
Whenever you save a program, the selected memory location is overwritten. Therefore, any previously stored program at this location will be erased and there is no way to get it back. So, you should do backups of your sounds regularly by using Export in the Load screen's Action pop-up menu.
!
Use the Save function for copying sound programs. There is no need to edit a program before storing it.

Sound Parameter
Overview of Functions
The Waldorf Quantum consists of numerous sound-shaping components. The following pages describe all parameters in detail.
Note that the Quantum consists of two different types of components for sound generation and sound shaping:
- Sound synthesis: Oscillator models, Filters, Digital Former, Amplifier, Effects. These modules represent the audio signal flow. Sound generation actually occurs within the oscillators. They can produce different shapes based on the selected model – e.g. classic waveforms such as square, sawtooth, triangle, and sine, or wavetables and samples. The analog filter shapes the sound by amplifying (boosting) or attenuating (dampening) certain frequencies. Digital Former delivers digital filters and effects for sound processing. The Amplifier and the Effects are located at the end of the signal chain. They determine the overall volume of the signal and add up to five effects like chorus, flanger, delay, and reverb, etc.

flowchart
graph TD
    A["Osc 1"] --> B["Filt 1"]
    C["Osc 2"] --> B
    D["Osc 3"] --> B
    B --> E["Filt 2"]
    E --> F["DF"]
    F --> G["Amp"]
    G --> H["Master"]
    H --> I["AUX"]
    J["FX 1"] --> K["FX 2"]
    K --> L["FX 3"]
    L --> M["FX 4"]
    M --> N["FX 5"]
    N --> O["AUX"]
Potential signal routing for an audio signal
- Modulators: LFOs, Envelopes, Komplex Modulator, Modulation Matrix. These modules are called Modulators. The Modulators are designed to manipulate or modulate the sound generating components to add dynamics to sounds. The Low-frequency Oscillators (LFOs) are designed for periodic or recurring modulations while Envelopes are normally used for modulations that only occur once on each note. These generators are assigned to parameters through the Modulation Matrix and influence these parameters to alter a sound.

Oscillator Section

The Oscillator Section for Oscillator 1
The Quantum offers three oscillators with different capacities: Wavetable Generator, Waveform Oscillator, Particle Generator, and Resonator.
The most important oscillator controls can be found in the Oscillator section on the Quantum's user panel.
Choose the desired oscillator model by pressing the corresponding button. The button of the chosen model lights up. Every model uses its own color - as is the case for the oscillator parameter knobs. For example, if the Particle Generator for Oscillator 1 is selected, the whole section lights up in blue.
If you press an active oscillator model button, the current oscillator is switched off completely. This gives you a better overview when editing sounds because you can use it as a mute function.
Based on the selected model the oscillator parameter knobs have different functions. This will be explained in detail in the next chapters.

Wavetable Oscillator
➢ Press the Wavetable button to activate the wavetable generator for the corresponding oscillator 1, 2 or 3. The whole oscillator section lights up in torque

An explanation of Wavetable synthesis can be found in the 'Sound Synthesis Basics' chapter.
Further parameters can be found on the corresponding Oscillator display page. Read more on page 27.
Wavetable Oscillator Panel Parameters
Semitones
Sets the pitch of the wavetable oscillator in semitone steps. The standard setting for this parameter is θ , but there are cases where different values are interesting as well.
Fine Pitch
Fine-tunes the oscillator within the range of a semitone up or down. The audible result of detuned oscillators is a chorus-like effect. Use a positive setting for one oscillator and an equivalent negative setting for another.
Spectrum
The spectral envelope of a sound can be controlled independently from the pitch. Furthermore, the Wavetable oscillator can perfectly produce a periodic sound up to noisy components. The Spectrum parameter transposes the spectrum of a sound – specifically the spectral envelope. Negative values move the spectrum down; higher values move it up. The default setting is 0, where no transposition happens. This is the behaviour of classic wavetable synthesis.
Noisy
This parameter adds a noisy sound character to the wavetable oscillator. The spectrum is unaffected by the setting of this parameter.
Position
This parameter defines the start-point of the selected wavetable. A setting of θ selects the first wave; the maximum setting selects the last wave of the wavetable.
FX
Determines the amount of saturation/gain that is added to the wavetable signal. If set to 0, no saturation/gain will be

added - the signal will remain clean, in other words. Lower values will add some harmonics to the signal, resulting in a warm character. Increasing the value will add more and more distortion/gain. The result depends on the selected FX Type (Off, Drive, Gain) which can be found on the Timbre tab page. Please refer to the corresponding section below.
Travel
Allows cyclic moving through a wavetable. Positive values allow a forward movement; negative values a backward movement. Lower values slow down the movement speed; higher values speed it up. Cyclic means, that a wavetable starts automatically again from the beginning when the end is reached. If you don't want a cyclic modulation, use the Position parameter modulated with an envelope, an LFO, or any other modulation source. You can also set up different Travel Modes. Please refer to the corresponding section below.

Use Travel with a value setting of 3 seconds to get an impression of the sound diversity of the factory wavetables.
Wavetable Oscillator Display Page
To access the Wavetable Oscillator display page, press the corresponding OSC 1, 2 or 3 button.
Here you can switch between two modes: Control and Timbre. Tap on the corresponding tab to select it. The display switches to this mode. A third tab displays the current oscillator model. Tap on it to select another model or to switch it off.
Control Mode Tab
Here you find parameters for tuning and some basic settings.


Semitones
Same functionality as for the corresponding panel parameter.
Tap on Semitones to open a pop-up menu for further settings:
- Set Default: sets Semitones to its default value θ .
- Set Last Loaded: resets the parameter to the last loaded value from the current sound patch.
- Modulations: opens the Mod menu to sets up a modulation for this parameter. How to set up a modulation can be read in 'The Modulation Mode' chapter. In contrast to the stepped nature of the semitone control, the pitch modulation is changing the pitch continuously according to the modulation source shape.
- MIDI Learn CC: activates the MIDI Learn function, which maps an incoming MIDI control change to this parameter.
Fine Pitch
Same functionality as for the corresponding panel parameter.
Tap on Fine Pitch to open a pop-up menu for further settings:
• Normal: Fine Pitch parameter change is about 2 cents.
• Fine: Fine Pitch parameter change is about 0.2 cents.
• Super Fine: Fine Pitch parameter change is about 0.02 cents.
- Set Default: sets Fine Pitch to its default value 0 .
- Set Last Loaded: resets the parameter to the last loaded value from the current sound patch.
- MIDI Learn CC: activates the MIDI Learn function, which maps an incoming MIDI control change to this parameter.
Keytrack
Determines how much the pitch of the selected oscillator depends on the MIDI note number. The reference note for Keytrack is C3, note number 60. For positive settings, the oscillator pitch rises on notes above the reference note; for negative settings the oscillator pitch falls by the same amount, and vice versa. A setting of +100% corresponds to a 1:1 scale - e.g. when an octave is played on the keyboard the pitch changes for the same amount. Settings other than

+100% make sense, especially when using ring modulation.
Tap on Keytrack to open a pop-up menu for further settings:
• Normal: Keytrack change is about 4%.
• Fine: Keytrack change is about 0.4%.
• Super Fine: Keytrack change is about 0.04 %.
- Set Default: sets Keytrack to its default value 100%.
- Set Last Loaded: resets the parameter to the last loaded value from the current sound patch.
- MIDI Learn CC: activates the MIDI Learn function, which maps an incoming MIDI control change to this parameter.
Osc 1/2/3 Vol
Same functionality as for the corresponding panel parameter.
Tap on Osc 1/2/3 Vol to open a pop-up menu for further settings:
• Normal: changes Oscillator volume on a normal scale.
• Fine: changes Oscillator volume more fine grained.
- Super Fine: Offers the most precise oscillator volume change.
- Set Default: sets Osc 1 volume to its default value 0 dB , and Osc 2 & 3 to their defaults -inf.
- Set Last Loaded: resets the parameter to the last loaded value from the current sound patch.
- Modulations: opens the Mod menu to sets up a modulation for this parameter. How to set up a modulation can be read in 'The Modulation Mode' chapter.
- MIDI Learn CC: activates the MIDI Learn function, which maps an incoming MIDI control change to this parameter.
Osc 1/2/3 Pan
Determines the stereo panning position of the corresponding oscillator.
Tap on Osc 1/2/3 Pan to open a pop-up menu for further settings:
• Normal: Oscillator panning change is about 2 %.
• Fine: Oscillator panning change is about 0.2 %.
• Super Fine: Oscillator panning change is about 0.02 %.

Sound Parameter
- Set Default: Sets Osc 1/2/3 panning to its default setting Center.
- Set Last Loaded: Resets the parameter to the last loaded value from the current sound patch.
- Modulations: opens the Mod menu to sets up a modulation for this parameter. How to set up a modulation can be read in 'The Modulation Mode' chapter.
- MIDI Learn CC: Activates the MIDI Learn function, which maps an incoming MIDI control change to this parameter.
Osc 1/2/3 Dest
Here you can determine the routing of the corresponding wavetable oscillator signal. The following routing options are available:
- Main: routes the signal to the full signal path (Dual Analog Filter, Digital Former, VCA) as determined with the Routing parameter on the Filter page.
• VCA: routes the signal directly to the VCA without passing through the filter section. - DF – Fil settings: offers a different setting for the signal relationship between the Digital Former section (DF) and the Dual Analog Filter section (Fil). If you want to
send the signal, for example, through the Digital Former section by 30% and through the analog filter by 70%, select DF 30 Fil 70 here. The routing also depends on the Routing parameter setting on the Filter page.
Tap on Osc 1/2/3 Dest to open a pop-up menu for further settings:
- Set Default: sets Osc 1/2/3 Dest to its default setting Main.
- Set Last Loaded: resets the parameter to the last loaded value from the current sound patch.
- MIDI Learn CC: activates the MIDI Learn function, which maps an incoming MIDI control change to this parameter.
RingMod (only available for Osc 2 and 3)
Controls the volume of the ring modulation between Osc 1 and 2 (for Osc 2) or 1 and 3 (for Osc 3).

What is ring modulation? From a technical point of view, ring modulation is the multiplication of two oscillators' signals. The result of this operation is a waveform that contains the sums and the differences of the source frequency components. Since the ring modulation generates inharmonic components, it can be used to add metallic distorted sound characteristics. Please note that in a complex waveform all harmonic components behave like interacting sine waves, resulting in a wide spectral range of the ring modulated sound.
Tap on RingMod to open a pop-up menu for further settings:
- Normal: ring modulation volume change is about 0.4 dB.
• Fine: ring modulation volume change is about 0.04 dB. - Super Fine: Ring modulation volume change is about 0.004 dB.
- Set Default: sets RingMod volume to its default value 0 dB.
- Set Last Loaded: resets the parameter to the last loaded value from the current sound patch.
- MIDI Learn CC: activates the MIDI Learn function, which maps an incoming MIDI control change to this parameter.
PB Range Osc 1, 2 or 3
Determines the intensity of the pitch wheel in semitones for the selected oscillator from -24 to +24. Negative values inverse the direction of the pitch bend.
Tap on PB Range to open a pop-up menu for further settings:
- Set Default: sets PB Range to its default value +12.
- Set Last Loaded: resets the parameter to the last loaded value from the current sound patch.
- MIDI Learn CC: activates the MIDI Learn function, which maps an incoming MIDI control change to this parameter.
PitchVar
To simulate the pitch variations that analog circuits have due to component tolerances, missing calibration and temperature effects, the Quantum assigns each oscillator of each voice a random out-of-tune coefficient at startup. The amount by which these out-of-tune coefficients affects
Sound Parameter
each oscillators pitch is controlled by the PitchVar parameter. The higher the value, the stronger the variation. Setting this parameter to 0 will disable this variation. While each oscillator of each voice has an individual out-of-tune coefficient, the PitchVar parameter is global to all oscillators of all voices.
Tap on PitchVar to open a pop-up menu for further settings:
- Set Default: sets Pitchvar to its default value 0.17.
- Set Last Loaded: resets the parameter to the last loaded value from the current sound patch.
- MIDI Learn CC: activates the MIDI Learn function, which maps an incoming MIDI control change to this parameter.
Timbre Mode Tab
Here you find specific parameters for the wavetable generators.
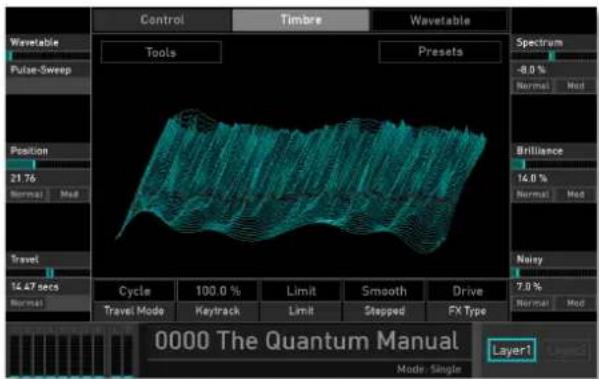
Wavetable
Here you can select all available factory wavetables and your own custom wavetables.
Tap on Wavetable to open a pop-up menu for further settings:
- Set Default: sets the wavetable to its default Resonant.
- Set Last Loaded: resets the parameter to the last loaded value from the current sound patch.

waldorf
32 Quantum Manual
- MIDI Learn CC: activates the MIDI Learn function, which maps an incoming MIDI control change to this parameter.
Position
Same functionality as for the corresponding panel parameter.
Tap on Position to open a pop-up menu for further settings:
• Normal: Wavetable position change is about 0.64.
• Fine: Wavetable position change is about 0.06.
• Super Fine: Wavetable position change is about 0.06.
- Set Default: sets Wavetable position to its default value 0.00.
- Set Last Loaded: resets the parameter to the last loaded value from the current sound patch.
- Modulations: opens the Mod menu to sets up a modulation for this parameter. How to set up a modulation can be read in 'The Modulation Mode' chapter.
- MIDI Learn CC: activates the MIDI Learn function, which maps an incoming MIDI control change to this parameter.
Travel
Same functionality as for the corresponding panel parameter.
Tap on Travel to open a pop-up menu for further settings:
• Normal: Travel change is about 1 sec.
• Fine: Travel change is about 0.1 sec.
• Super Fine: Travel change is about 0.01 sec.
- Set Default: sets Travel to its default value off.
- Set Last Loaded: resets the parameter to the last loaded value from the current sound patch.
- MIDI Learn CC: activates the MIDI Learn function, which maps an incoming MIDI control change to this parameter.
Spectrum
Same functionality as for the corresponding panel parameter.
Tap on Spectrum to open a pop-up menu for further settings:
• Normal: Spectrum change is about 2 %.

Sound Parameter
• Fine: Spectrum change is about 0.2 %.
• Super Fine: Spectrum change is about 0.02 %.
- Set Default: sets Spectrum to its default value + 0.0 %.
- Set Last Loaded: resets the parameter to the last loaded value from the current sound patch.
- Modulations: opens the Mod menu to sets up a modulation for this parameter. How to set up a modulation can be read in 'The Modulation Mode' chapter.
- MIDI Learn CC: activates the MIDI Learn function, which maps an incoming MIDI control change to this parameter.
Brilliance
A setting of this parameter is only audible; when Spectrum is transposed relative to the original pitch of a sound. Higher settings result in narrow peaks. This can lead to an effect, whereby the perceived pitch comes from the sound spectrum instead of the oscillators' pitch. Value changes of this parameter are sometimes subtle.
Tap on Brilliance to open a pop-up menu for further settings:
• Normal: Brilliance change is about 1 %.
• Fine: Brilliance change is about 0.1 %.
• Super Fine: Brilliance change is about 0.01 %.
- Set Default: sets Brilliance to its default value 0.0% .
- Set Last Loaded: resets the parameter to the last loaded value from the current sound patch.
- Modulations: opens the Mod menu to sets up a modulation for this parameter. How to set up a modulation can be read in 'The Modulation Mode' chapter.
- MIDI Learn CC: activates the MIDI Learn function, which maps an incoming MIDI control change to this parameter.
Noisy
Same functionality as for the corresponding panel parameter.
Tap on Noisy to open a pop-up menu for further settings:
• Normal: Noisy change is about 1 %.
• Fine: Noisy position change is about 0.1 %.
• Super Fine: Noisy position change is about 0.01 %.

waldorf
34 Quantum Manual
Sound Parameter
- Set Default: sets Noisy position to its default value 0.0 %.
- Set Last Loaded: resets the parameter to the last loaded value from the current sound patch.
- Modulations: opens the Mod menu to sets up a modulation for this parameter. How to set up a modulation can be read in 'The Modulation Mode' chapter.
- MIDI Learn CC: activates the MIDI Learn function, which maps an incoming MIDI control change to this parameter.
Travel Mode
There are several modes available for the wavetable cycling.
Tap on Travel Mode to open a pop-up menu with the following options:
- Cycle: a wavetable starts automatically again from beginning when the end is reached. Every played note starts its own travel cycle.
-
Global Cyc.: a wavetable starts automatically again from beginning when the end is reached. Every played note uses the same travel cycle.
-
Sync: the Travel speed is controlled by the internal tempo of Quantum (adjustable with the Arpeggiator or Sequencer Bpm parameter) or an incoming synchronisation signal via MIDI. If Sync is selected, you can set up Travel in musical values. The highest amount is 1024, where one turn needs 1024 beats.
- One Shot: a wavetable stops when the last wave is reached. The last wavetable position is played and held. Every played note starts its own travel cycle.
- Ping Pong: a wavetable automatically starts a reverse playback when the end is reached and vice versa. Every played note starts its on travel ping pong cycle.
- Global P. P.: a wavetable automatically starts a reverse playback when the end is reached and vice versa. Every played note uses the same travel cycle.
Tap on Travel Mode to open a pop-up menu for further settings: - Set Default: sets the Travel Mode to its default Ping Pong.
- Set Last Loaded: resets the parameter to the last loaded value from the current sound patch.

- MIDI Learn CC: activates the MIDI Learn function, which maps an incoming MIDI control change to this parameter.
Keytrack
The default setting is 100%; so that the spectrum is in conjunction with the pitch of a sound. The pitch doesn't affect the spectrum when Keytrack is set to 0%. This setting is recommended for speech or vocals; that way the formants are not influenced by the pitch. Based on this, we have included a speech synthesizer for wavetables (See the 'Tools Button' chapter). Keytrack can also be set to other values so that the spectrum is transposed to the pitch.
Tap on Keytrack to open a pop-up menu for further settings:
- Set Default: sets the Keytrack to its default 100.0%.
- Set Last Loaded: resets the parameter to the last loaded value from the current sound patch.
- MIDI Learn CC: activates the MIDI Learn function, which maps an incoming MIDI control change to this parameter.
Limit
Determines the wavetable interpolation quality when using the Travel parameter.
- Wrap: uses a smooth interpolation when Travel reaches the end of the wavetable and blends back to the start wave position. This setting is useful when the Travel Mode is set to Cycle.
- Limit: uses no interpolation as in older Waldorf wave-table synthesizers (e.g. Microwave) when Travel reaches the end of the wavetable and blends back to the start wave position.
Tap on Limit to open a pop-up menu for further settings:
- Set Default: sets the Limit to its default setting Limit.
- Set Last Loaded: resets the parameter to the last loaded value from the current sound patch.
- MIDI Learn CC: activates the MIDI Learn function, which maps an incoming MIDI control change to this parameter.
Stepped
Determines the wave interpolation for traveling and modulation.

Sound Parameter
- Smooth: a very smooth interpolation is used to create a clean wavetable sound.
- Stepped: no interpolation is used to create a more pristine sound
- 2/4/8 Steps: only every second, fourth, or eighth wave is interpolated. This creates a harsher sound for some wavetables.
Tap on Stepped to open a pop-up menu for further settings:
- Set Default: sets Stepped to its default setting Smooth.
- Set Last Loaded: resets the parameter to the last loaded value from the current sound patch.
- MIDI Learn CC: activates the MIDI Learn function, which maps an incoming MIDI control change to this parameter.
FX Type
Determines the saturation/gain type that is added to the wavetable signal. The amount can be set with the FX parameter in the oscillator section.
• Drive: selects a drive type for signal saturation.
- Gain: selects an additional gain stage after the wavetable oscillator for adjusting the oscillator level.
- Off: no FX type is used. The FX parameter dial has no function.
Tap on FX Type to open a pop-up menu for further settings:
- Set Default: sets FX Type to its default setting Drive.
- Set Last Loaded: resets the parameter to the last loaded value from the current sound patch.
- MIDI Learn CC: activates the MIDI Learn function, which maps an incoming MIDI control change to this parameter.
Tools Button
Tap on the Tools button to open a pop-up menu for creating and exporting your own wavetables. The following options are available:
- Talk: allows you to enter one or more words with a virtual keyboard that automatically opens. These words will be synthesized as a new wavetable when tapping on Return.

Sound Parameter
- Analyze: enables you to select an audio file from the Audio File browser of Quantum's Flash memory. This audio file will be automatically synthesized as a new wavetable. Select the desired file and tap on Analyze.
- Load: imports a wavetable from the internal Flash memory (Internal) or a connected SD Card into the Quantum's Flash memory. This enables you to exchange user wavetables with other Quantum users.
- Save: exports the current wavetable to the internal Flash memory (Internal) or a connected SD Card. This enables you to exchange your own created wavetables with other Quantum users.
Presets Button
Tap on the Presets button to open a pop-up window for loading, saving, and managing Wavetable oscillator settings. Here, the following options are available:
- On the left side you find a list of all Wavetable oscillator presets. Tap on the desired name to select it and load it immediately. Current Wavetable oscillator settings will be overwritten.
-
With the Save option you can save the current Wave-table oscillator settings. You can also enter a desired name for the preset.
-
Import: imports a Wavetable oscillator presets from a connected SD card into the Quantum's Flash memory. The imported preset is shown within the Wavetable oscillator preset list.
- Export: exports the current selected Wavetable oscillator presets to a connected SD card.
- Delete: deletes the current selected Wavetable oscillator preset after a security confirmation.
- Init: initializes the current selected Wavetable oscillator to its default settings.
- Close: closes the pop-up window. No further action is taking place.

Waveform Oscillator
Quantum offers a standard oscillator model to create typical analog waveforms.
② Press the Waveform button to activate the Waveform oscillator for the corresponding oscillator 1, 2, or 3. The whole oscillator section lights up i

An explanation of waveform synthesis can be found in the 'Sound Synthesis Basics' chapter.
Further parameters can be found on the corresponding OSC page. Read more on page 39.
Waveform Oscillator Panel Parameters
Semitones
Sets the pitch of the oscillator in semitone steps. The standard setting for this parameter is 0, but there are cases where different values are interesting as well.
Fine Pitch
Fine-tunes the oscillator in steps of 1/128th of a semitone. The audible result of detuned oscillators is a Chorus effect. Use a positive setting for one oscillator and an equivalent negative setting for another.
Count
The waveform oscillator can generate up to eight oscillator signals simultaneously. This is determined by the Count knob. Up to eight kernels (equivalent to oscillators) are possible. Values in between two integer values mean that an additional oscillator is mixed in at a reduced level.
Use Count to generate super-saw like waves, for example.
Detune
Detunes the multi oscillator when Count is set to any kernel value greater than 1.0.
Shape
Use this knob to select the desired waveform. The following waveforms are available:

Sound Parameter
- Sawtooth selects the sawtooth waveform. A sawtooth wave has all the harmonics of the fundamental frequency in descending magnitude.
- Sine consists of the fundamental frequency only. It has no harmonics at all.
- Triangle selects the triangle waveform. The triangle wave mainly consists of the odd harmonics with very low magnitudes.
- Square selects the pulse waveform. A pulse waveform with a pulse width of 50% has only the odd harmonics of the fundamental frequency present. This waveform produces a hollow/metallic sound.
- Pink Noise – this special kind of noise produces higher levels in the deeper frequency range. It is a better match with the human hearing than the unfiltered white noise.
- White Noise is a fundamental source for any kind of analog-type percussion. It offers the same level over the complete frequency range. Wind and other sound effects can also be created by using noise.
Warp
Depending on the selected Shape, the Warp function alters the basic shape of a waveform.
- If Sawtooth is selected, the Warp parameter blends from a double saw wave (lowest setting) into a regular saw wave (middle setting) to a square wave (highest setting).
- If Sine is selected, the Warp parameter blends from a soft rising saw wave (lowest setting) into a regular sine wave (middle setting) to a soft falling saw wave (highest setting).
- If Triangle is selected, the Warp parameter blends from a rising saw wave (lowest setting) into a regular triangle wave (middle setting) to a falling saw wave (highest setting).
- If Square is selected, the Warp parameter changes the pulse width of the square wave
- If Pink Noise or White Noise is selected, the Warp parameter blends from a filtered noise (lowest setting) into the corresponding selected noise (middle setting) to a pitched noise (highest setting).
Sync
Adds a typical oscillator synchronisation to the selected oscillator shape (except Noise types). As a result, interesting sound effects may be generated - especially when higher Sync settings are used.

Sound Parameter
Waveform Oscillator Display Page
To access the Waveform Oscillator display mode, press the corresponding OSC 1, 2 or 3 button above the touchscreen display.
Here you can switch between two modes: Control and Timbre. Tap on the corresponding tab to select it. The display switches to this mode. A third tab displays the current oscillator model. Tap on it to select another model or to switch it off.
Control Mode Tab
Here you find parameters relating to tuning and some basic settings. The functions and options are the same as for the Wavetable oscillator. Please refer to the corresponding chapter.
Timbre Mode Tab
Here you find specific parameters for the Waveform oscillators.

Shape
Same functionality as for the corresponding panel parameter.
Tap on Shape to open a pop-up menu for further settings:
- Set Default: sets Shape to its default Sawtooth.
Sound Parameter
- Set Last Loaded: resets the parameter to the last loaded value from the current sound patch.
- MIDI Learn CC: activates the MIDI Learn function, which maps an incoming MIDI control change to this parameter.
Warp
Same functionality as for the corresponding panel parameter.
Tap on Warp to open a pop-up menu for further settings:
• Normal: Warp position change is about 1 %.
• Fine: Warp position change is about 0.1 %.
• Super Fine: Warp position change is about 0.01 %.
- Set Default: Warp position is set to its default value of 50.0 %.
- Set Last Loaded: resets the parameter to the last loaded value from the current sound patch.
- Modulations: opens the Mod menu to sets up a modulation for this parameter. How to set up a modulation can be read in 'The Modulation Mode' chapter.
- MIDI Learn CC: activates the MIDI Learn function, which maps an incoming MIDI control change to this parameter.
Sync
Same functionality as for the corresponding panel parameter.
Tap on Sync to open a pop-up menu for further settings:
• Normal: Sync change is about 0.3 semi.
• Fine: Sync change is about 0.03 semi
• Super Fine: Sync change is about 0.003 semi.
- Set Default: sets Sync to its default value 0.0 %.
- Set Last Loaded: resets the parameter to the last loaded value from the current sound patch.
- Modulations: opens the Mod menu to sets up a modulation for this parameter. How to set up a modulation can be read in 'The Modulation Mode' chapter.
- MIDI Learn CC: activates the MIDI Learn function, which maps an incoming MIDI control change to this parameter.

Count
Same functionality as for the corresponding panel parameter.
Tap on Count to open a pop-up menu for further settings:
• Normal: Count change is about 0.3 semi.
• Fine: Count change is about 0.03 semi
• Super Fine: Count change is about 0.003 semi.
- Set Default: sets Count to its default value 1.0 kernels.
- Set Last Loaded: resets the parameter to the last loaded value from the current sound patch.
- MIDI Learn CC: activates the MIDI Learn function, which maps an incoming MIDI control change to this parameter.
Detune
Same functionality as for the corresponding panel parameter.
Tap on Detune to open a pop-up menu for further settings:
• Normal: Detune change is about 0.3 cents.
• Fine: Detune change is about 0.03 cents
• Super Fine: Detune change is about 0.003 cents.
- Set Default: sets Detune to its default value 0.0 % cents.
- Set Last Loaded: resets the parameter to the last loaded value from the current sound patch.
- Modulations: opens the Mod menu to sets up a modulation for this parameter. How to set up a modulation can be read in 'The Modulation Mode' chapter.
- MIDI Learn CC: activates the MIDI Learn function, which maps an incoming MIDI control change to this parameter.
Stereo
When Count is set to any kernel value higher than 1.0, this parameter determines the stereo panning for every played oscillator kernel signal. In Center setting, all oscillators are played on both stereo channels. Higher settings move the signals within the stereo field.
Tap on Stereo to open a pop-up menu for further settings:
• Normal: Stereo change is about 2 degree.
• Fine: Stereo change is about 1 degree.
• Super Fine: Stereo change is about 0.1 degree.

- Set Default: sets Stereo to its default value of 0.0 %.
- Set Last Loaded: resets the parameter to the last loaded value from the current sound patch.
- MIDI Learn CC: activates the MIDI Learn function, which maps an incoming MIDI control change to this parameter.
Semitone 1 - 4
Here you can individually transpose the first four oscillator kernels in semitones. If more than four kernels are selected then kernels 5 to 8 use the same pitch settings as kernels 1 to 4. Tap on the corresponding Semitone button to open a pop-up menu with semitone settings from -12 up to +12.
Tap on Semitone 1 - 4 to open a pop-up menu for further settings:
- Set Default: sets Semitone to its default value of +0 .
- Set Last Loaded: resets the parameter to the last loaded value from the current sound patch.
- MIDI Learn CC: activates the MIDI Learn function, which maps an incoming MIDI control change to this parameter.
Phase
Determines the start phase of the selected oscillator shape.
- Running results in free-running oscillators as in analog synthesizers. A played note „jumps in“ the current phase cycle.
- Reset forces the oscillator waveform to start with phase 0 for every played new note. Use this setting if you want to create drum-like sounds where every played note sounds similar during its attack phase.
Tap on Phase to open a pop-up menu for further settings:
- Set Default: sets Phase to its default setting Running.
- Set Last Loaded: resets the parameter to the last loaded value from the current sound patch.
- MIDI Learn CC: activates the MIDI Learn function, which maps an incoming MIDI control change to this parameter.
Presets
Tap on the Presets button to open a pop-up window for loading, saving and managing Waveform oscillator settings. For more information on the available options please refer to the Presets chapter in the Wavetable section.

Particle Generator
➢ Press the Particle button to activate the Particle Generator for the corresponding oscillator 1, 2, or 3. The whole oscillator section lights up in bl
This generator creates its sound by playing back audio samples. There are two different ways of sample playback: normal playback and granular playback. Read more about the sample playback in the following chapters.
The Particle Generator needs to be fed with one or more samples. The Particle Generator can use one single sample as well as multi samples that are mapped over the keyboard.
For more information about loading and editing samples, please refer to the 'Loading & Editing Samples' chapter.
This is where the samples can come from:
- From Quantum's internal Flash memory. Here are located lot of factory samples, that can be loaded into the Particle generator.
- From SD card: you can import own samples from a connected SD card into the Quantum's internal Flash
memory and load it from there into the Particle generator.
- From audio recordings done with the Quantum. The Global page features an audio recorder. All recorded files are stored into the internal Flash memory and can be loaded into the Particle generator.
- From the audio input of the Quantum by using the Live Granular mode. Read more on this in the corresponding section.
The Quantum can playback WAV or AIFF/AIFC files (stereo or mono) with any sample rate and bit rate. We recommend to use samples with a rate of 44.1 kHz to keep the original pitch.
An explanation of granular synthesis can be found in the 'Sound Synthesis Basics' chapter.
Further parameters can be found on the corresponding display page. Read more on page 45.
Particle Generator Panel Parameters
Semitones
Sets the pitch of the particle generator in semitone steps. The standard setting for this parameter is 0, but there are cases where different values are interesting as well.
Fine Pitch
Fine-tunes the particle generator in steps of 1/128th of a semitone. The audible result of detuned oscillators is a Chorus effect. Use a positive setting for one oscillator and an equivalent negative setting for another
Count/Grain Poly (only in Granular Mode)
The Particle generator can generate up to eight grain streams for simultaneous playback. This is determined by the Count/Grain Poly knob. Up to eight kernels (equivalent to grain oscillators) are possible. Values in between two integer values mean that an additional grain oscillator is mixed in at a reduced level.
Detune/Pitch Spread (only in Granular Mode)
Determines the amount the grains that are displaced from center pitch, when Count/Grain Poly is set to any kernel value higher than 1.0.
Position (only in Granular Mode)
Determines the sample start position for grain playback. The higher the value, the later the sample starts.
Length (only in Granular Mode)
Determines the length of the grains that are used for playback. The higher the value (up to 250 ms), the more precise the playback.
Travel (only in Granular Mode)
Determines the speed by which the position is wandering in the sample. This allows for cyclic moving through a granular sample. Positive values allow a forward movement, negative values a backward movement. Lower values slow down the movement speed, higher values speed it up. Cyclic means that a sample starts automatically again from beginning when the end is reached. If you don't want a cyclic modulation, use the Position parameter modulated with an envelope, an LFO, or any other modulation source. You can also set up different Travel Modes. Please refer to the corresponding section below.

Sound Parameter
Particle Generator Display Page
To access the Particle Generator display page, press the corresponding OSC 1, 2 or 3 button above the touchscreen display.
Here you can switch between two modes: Control and Timbre. Tap on the corresponding tab to select it. The display switches to this mode. A third tab displays the current oscillator model. Tap on it to select another model or to switch it off.
Control Mode Tab
Here you find parameters for tuning and some basic settings. The functions are the same as for the Wavetable oscillator. Please refer to the corresponding chapter.
Timbre Mode Tab
Here you find specific parameters for the Particle Generator as well as the option to load samples into this generator.
Here, the display visualizes the envelopes and grain distribution.
Particle / Sample Buttons
Tap on the corresponding button to switch between Particle and Sample mode. Depending on the selected mode, the display parameter differs.

The Particle parameter page can only be reached, if the Mode is set to 'Granular'. This can be done by tapping on the Particles button (and confirming the granular mode switch) or selecting Granular with the Mode parameter.
For more information about loading and editing samples, please refer to the 'Loading & Editing Samples' chapter.
Position (only in Granular Mode)
Same functionality as for the corresponding panel parameter.
Tap on Position to open a pop-up menu for further settings:
• Normal: Sample position change is about 0.01.
• Fine: Sample position change is about 0.001.
• Super Fine: Sample position change is about 0.0001.
- Set Default: sets Sample position to its default value 0.00.
- Set Last Loaded: resets the parameter to the last loaded value from the current sound patch.
- Modulations: opens the Mod menu to sets up a modulation for this parameter. How to set up a modulation can be read in 'The Modulation Mode' chapter.
- MIDI Learn CC: activates the MIDI Learn function, which maps an incoming MIDI control change to this parameter.
Position Jitter (Pos Jitter, only in Granular Mode)
Determines the amount of how much the grain position will be randomized. The higher this value, the more random the sample start based on the initial Position setting.
Tap on Pos Jitter to open a pop-up menu for further settings:
• Normal: Sample position variation change is about 0.01.
• Fine: Sample position variation change is about 0.001.
• Super Fine: Sample position variation change is about 0.0001.
- Set Default: sets Sample position variation to its default value of 0.30.
- Set Last Loaded: resets the parameter to the last loaded value from the current sound patch.

- MIDI Learn CC: activates the MIDI Learn function, which maps an incoming MIDI control change to this parameter.
Travel (only in Granular Mode)
Same functionality as for the corresponding panel parameter.
Tap on Travel to open a pop-up menu for further settings:
• Normal: Travel change is about 2%.
• Fine: Travel change is about 0.2%.
• Super Fine: Travel change is about 0.02%.
- Set Default: sets Travel to its default value of +0.0% .
- Set Last Loaded: resets the parameter to the last loaded value from the current sound patch.
- Modulations: opens the Mod menu to sets up a modulation for this parameter. How to set up a modulation can be read in 'The Modulation Mode' chapter.
- MIDI Learn CC: activates the MIDI Learn function, which maps an incoming MIDI control change to this parameter.
Length (only in Granular Mode)
Same functionality as for the corresponding panel parameter.
Tap on Length to open a pop-up menu for further settings:
• Normal: Length change is about 2.5 msec.
• Fine: Length change is about 0.25 msec.
• Super Fine: Length change is about 0.025 msec
- Set Default: sets Length to its default value of 0.00.
- Set Last Loaded: resets the parameter to the last loaded value from the current sound patch.
- Modulations: opens the Mod menu to sets up a modulation for this parameter. How to set up a modulation can be read in 'The Modulation Mode' chapter.
- MIDI Learn CC: activates the MIDI Learn function, which maps an incoming MIDI control change to this parameter.
Gate Length (only in Granular Mode)
Determines the amount of the length that is used for its envelope - much like a Gate parameter. Smaller values
produce gaps between the grains. Gate Length could also be called density.
Tap on Gate Length to open a pop-up menu for further settings:
• Normal: Gate Length change is about 0.9%.
• Fine: Gate Length change is about 0.09 %.
• Super Fine: Gate Length change is about 0.009 %.
- Set Default: sets Gate Length to its default value of 100.0%.
- Set Last Loaded: resets the parameter to the last loaded value from the current sound patch.
- Modulations: opens the Mod menu to sets up a modulation for this parameter. How to set up a modulation can be read in 'The Modulation Mode' chapter.
- MIDI Learn CC: activates the MIDI Learn function, which maps an incoming MIDI control change to this parameter.
Grain Jitter (only in Granular Mode)
Determines the amount by which the grain length and gate is randomized.
Tap on Grain Jitter to open a pop-up menu for further settings:
• Normal: Grain Jitter change is about 1 %.
• Fine: Grain Jitter change is about 0.1 %.
• Super Fine: Grain Jitter change is about 0.01 %.
- Set Default: sets Grain Jitter to its default value 0.0% .
- Set Last Loaded: resets the parameter to the last loaded value from the current sound patch.
- Modulations: opens the Mod menu to sets up a modulation for this parameter. How to set up a modulation can be read in 'The Modulation Mode' chapter.
- MIDI Learn CC: activates the MIDI Learn function, which maps an incoming MIDI control change to this parameter.
Travel Mode (only in Granular Mode)
There are several modes available for the granular cycling process.
- Continuous: a granular sample automatically starts again from beginning when the end is reached. Every note played starts its own travel cycle.

• One Shot: a granular sample stops when the end is reached. Every note played starts its own travel cycle.
- Ping Pong: a granular sample automatically starts a reverse playback when the end is reached and vice versa. Every note played starts its own travel cycle.
- Global: a granular sample automatically starts again from beginning when the end is reached. Every note played uses the same travel cycle.
Tap on Travel Mode to open a pop-up menu for editing.
- Set Default: sets Travel Mode to its default setting Continuous.
- Set Last Loaded: resets the parameter to the last loaded value from the current sound patch.
- MIDI Learn CC: activates the MIDI Learn function, which maps an incoming MIDI control change to this parameter.
Attack (only in Granular Mode)
Determines the attack phase of a grain. The higher the value, the smoother the grain playback. Attack can strongly influences the spectrum of the sound.
Tap on Attack to open a pop-up menu for editing.
- Set Default: sets Attack to its default value of 0.25.
- Set Last Loaded: resets the parameter to the last loaded value from the current sound patch.
- Modulations: opens the Mod menu to sets up a modulation for this parameter. How to set up a modulation can be read in 'The Modulation Mode' chapter.
- MIDI Learn CC: activates the MIDI Learn function, which maps an incoming MIDI control change to this parameter.
Decay (only in Granular Mode)
Determines the decay phase of a grain. The higher the value, the smoother the grain playback. Decay can strongly influences the spectrum of the sound.
Tap on Decay to open a pop-up menu for editing.
- Set Default: sets Count to its default value of 0.25.
- Set Last Loaded: resets the parameter to the last loaded value from the current sound patch.
- Modulations: opens the Mod menu to sets up a modulation for this parameter. How to set up a modulation can be read in 'The Modulation Mode' chapter.

Sound Parameter
- MIDI Learn CC: activates the MIDI Learn function, which maps an incoming MIDI control change to this parameter.
Grain Poly (only in Granular Mode)
Same functionality as for the corresponding panel parameter.
Tap on Grain Poly to open a pop-up menu for editing.
- Set Default: sets Count to its default value 8.
- Set Last Loaded: resets the parameter to the last loaded value from the current sound patch.
- MIDI Learn CC: activates the MIDI Learn function, which maps an incoming MIDI control change to this parameter.
Stereo Width
The grain streams are panned to left/right based on the setting of this parameter. It determines the position of the granular streams in the stereo field. The lower the value, the less the stereo width (0% is mono).
Tap on Stereo Width to open a pop-up menu for further settings:
• Normal: Stereo Width change is about 1.0 %.
• Fine: Stereo Width change is about 0.1%.
• Super Fine: Stereo Width change is about 0.01%.
- Set Default: sets Stereo Width to its default value of 50.0%.
- Set Last Loaded: resets the parameter to the last loaded value from the current sound patch.
- MIDI Learn CC: activates the MIDI Learn function, which maps an incoming MIDI control change to this parameter.
If a granular stereo sample is routed through the Dual Analog Filter section, it automatically becomes mono because of the mono signal path within this circuitry.
Grain Pitch Button
On this display page, you can make settings relating to the tuning of the granular pitch response.


Pitch Spread
Determines the amount that grains are displaced from center pitch.
Tap on Pitch Spread to open a pop-up menu for further settings:
• Normal: Pitch Spread change is about 0.1
• Fine: Pitch Spread change is about 0.01.
• Super Fine: Pitch Spread change is about 0.001.
- Set Default: sets Pitch Spread to its default value of 0.10.
- Set Last Loaded: resets the parameter to the last loaded value from the current sound patch.
- Modulations: opens the Mod menu to sets up a modulation for this parameter. How to set up a modulation can be read in 'The Modulation Mode' chapter.
- MIDI Learn CC: activates the MIDI Learn function, which maps an incoming MIDI control change to this parameter.
Pitch Mode
Determines by which method pitches will be altered. Here you can select between five options:
- Random: randomizes the pitch for each grain at grain-start.
- Cluster: constantly displaces each lane equidistant from its neighbouring lane.
- Spread: works similar to "Cluster" but with much more spread while keeping the overall pitch amplitude (from highest to lowest lane) constant, regardless of grain poly.

- Mapped: will constantly displace the grains based on a semitone map of up to six intervals specified at the bottom of the display page.
- Mapped Random: works like "Mapped" but the grain pitch is chosen randomly from the semitone map at each grain start.
For the "Mapped" modes the Pitch Spread parameter will determine how many parts of the semitone map will be used. For example, at lower values, only the first one or two semitones will be used; turned up to maximum, all semitone items will be used. The Pitch Spread can be modulated; so you can animate the chord or scales to be used. The semitone entries do not need to be in any order, such as rising or falling, and could be anything.
Tap on Pitch Mode to open a pop-up menu for further settings:
- Set Default: sets Pitch Mode to its default setting Cluster.
- Set Last Loaded: resets the parameter to the last loaded value from the current sound patch.
- MIDI Learn CC: activates the MIDI Learn function, which maps an incoming MIDI control change to this parameter.
Pitch Jitter
Adds an extra random pitch regardless of the current pitch.
Tap on Pitch Jitter to open a pop-up menu for editing.
• Normal: Pitch Jitter change is about 2 cents.
• Fine: Pitch Jitter change is about 0.2 cents
• Super Fine: Pitch Jitter change is about 0.02 cents.
- Set Default: sets Pitch Jitter to its default value of +/-0.0 cents.
- Set Last Loaded: resets the parameter to the last loaded value from the current sound patch.
- MIDI Learn CC: activates the MIDI Learn function, which maps an incoming MIDI control change to this parameter.
Semitone 1 - 6
Here you can set up a map with up to six intervals - see also Pitch Mode. Tap on the corresponding Semitone button to open a pop-up menu with semitone settings from -0 up to 24.

Sound Parameter
Tap on Semitone 1 - 6 to open a pop-up menu for further settings:
- Set Default: sets Semitone to its default value of θ .
- Set Last Loaded: resets the parameter to the last loaded value from the current sound patch.
- MIDI Learn CC: activates the MIDI Learn function, which maps an incoming MIDI control change to this parameter.
Presets
Tap on the Presets button to open a pop-up window for loading, saving and managing Particle Generator settings. For more information on the available options please refer to the Presets chapter in the Wavetable section.

Resonator
➢ Press the Resonator button to activate the Resonator for the corresponding oscillator 1, 2 or 3. The whole oscillator section lights up in red.
Further parameters can be found on the corresponding display page. Read more on page 55.
The basic concept of the Resonator is sound creation by using an initial exciter signal (mostly a short noise impulse) which goes through a bandpass filter bank, where its resonating filters finally produce a ringing sine-like sound.
Based on different Timbre modes, the partials of this signal can be adjusted in many ways.
The Resonator can also feed with one or more samples (instead of using a noise impulse). You can load one single sample as well as multi samples that were mapped over the keyboard range.
For a better understanding on how the Resonator works, we recommend initializing a sound program (on the Load page) and starting with a default Resonator. Try out all parameters to become familiar with the functionality of this powerful sound creation tool.
For more information about loading and editing samples, please refer to 'The Loading & Editing Samples' chapter.
Resonator Panel Parameters
Semitones
Sets the pitch of the Resonator in semitone steps. The standard setting for this parameter is θ , but there are cases where different values are interesting as well.
Fine Pitch
Fine-tunes the Resonator in steps of 1/128th of a semitone. The audible result of detuned oscillators is a Chorus effect. Use a positive setting for one oscillator and an equivalent negative setting for another.

Repeats
Determines how often the exciter signal is repeated. The higher the value (up to 16), the more repeats include the sound. The speed of the repeats depends on the Decay settings at the Resonator display page.
Spread
Extends or compresses the partials of the resonator, which leads to massive timbre changes. There are two Spread modes that can be set at the Resonator display page.
Timbre
Based on the Timbre Mode at the Resonator display page, this parameter changes the structure of the partials. In some cases this works similar to a filter, which cuts off partials. In other cases the partials are emphasized.
Exciter
Determines the sound of the exciter signal. Fully counterclockwise, a short impulse is generated while higher settings fade this impulse into a short noise. Use higher settings when you want to simulate the blowing sound of a wind instrument. If a loaded sample is used as exciter, this parameter influences how the sample sounds.
For more information about loading and editing samples, please refer to 'The Loading & Editing Samples' chapter.
Q
Determines the resonance of the created partials. The higher the setting, the longer the duration of the created sounds.
Resonator Display Page
To access the Resonator display page, press the corresponding OSC 1, 2, or 3 button above the touchscreen display.
Here you can change between two modes: Control and Timbre. Tap on the corresponding tab to select it. The display changes to this mode. A third tab displays the current oscillator model. Tap on it to select another model or switch it off.
Control Mode Tab
Here you find parameters relating to the tuning and some basic settings. The functions are the same as for the Wave-table generator. Please refer to the corresponding chapter.
Timbre Mode Tab
Here you find specific parameters for the Resonator.

Q
Same functionality as for the corresponding panel parameter.
Tap on Q to open a pop-up menu for further settings:
• Normal: Q change is about 0.01.
• Fine: Q change is about 0.001.
• Super Fine: Q change is about 0.0001.
- Set Default: sets Q to its default value of 0.68.
- Set Last Loaded: resets the parameter to the last loaded value from the current sound patch.
- Modulations: opens the Mod menu to sets up a modulation for this parameter. How to set up a modulation can be read in 'The Modulation Mode' chapter.
- MIDI Learn CC: activates the MIDI Learn function, which maps an incoming MIDI control change to this parameter.
Q Curve
Determines the resonance performance of the partials. The higher the setting, the more partials are emphasized.
Tap on Q Curve to open a pop-up menu for further settings:
• Normal: Q Curve change is about 0.01.
• Fine: Q Curve change is about 0.001.
• Super Fine: Q Curve change is about 0.0001.
• Set Default: sets Q Curve to its default value of 0.32.

- Set Last Loaded: resets the parameter to the last loaded value from the current sound patch.
- MIDI Learn CC: activates the MIDI Learn function, which maps an incoming MIDI control change to this parameter.
Spectrum Skew
Determines the level of the partials in relation to themselves. The higher the setting, the smoother the sound. Very low values result in partials with a similar level.
Tap on Spectrum Skew to open a pop-up menu for further settings:
• Normal: Spectrum Skew change is about 0.01.
• Fine: Spectrum Skew change is about 0.001.
• Super Fine: Spectrum Skew change is about 0.0001.
- Set Default: sets Spectrum Skew to its default value of 0.25.
- Set Last Loaded: resets the parameter to the last loaded value from the current sound patch.
- MIDI Learn CC: activates the MIDI Learn function, which maps an incoming MIDI control change to this parameter.
Attack
Works similar to the attack parameter of an envelope. It controls the attack phase of the exciter. The more partials the exciter has (e.g. Exciter parameter set to maximum), the more the Attack parameter has an influence.
Tap on Attack to open a pop-up menu for further settings:
• Normal: Attack change is about 0.01.
• Fine: Attack change is about 0.001.
• Super Fine: Attack change is about 0.0001.
- Set Default: sets Attack to its default value of 0.00.
- Set Last Loaded: resets the parameter to the last loaded value from the current sound patch.
- MIDI Learn CC: activates the MIDI Learn function, which maps an incoming MIDI control change to this parameter.
Decay
Determines the decay phase of the exciter signal. When Repeat is set to 1, this parameter has no effect. For higher Repeat settings, Decay also controls the speed of the repeats.

Tap on Decay to open a pop-up menu for further settings:
• Normal: Decay change is about 0.01.
• Fine: Decay change is about 0.001.
• Super Fine: Decay change is about 0.0001.
- Set Default: sets Decay to its default value of 0.10.
- Set Last Loaded: resets the parameter to the last loaded value from the current sound patch.
- MIDI Learn CC: activates the MIDI Learn function, which maps an incoming MIDI control change to this parameter.
Acceleration
Controls the repeat speed behaviour. Positive settings accelerate the speed of the repeats by time while negative settings will slow it down accordingly.
Tap on Acceleration to open a pop-up menu for further settings:
• Normal: Acceleration change is about 0.01.
• Fine: Acceleration change is about 0.001.
• Super Fine: Acceleration change is about 0.0001.
- Set Default: sets Acceleration to its default value of +0.0%.
- Set Last Loaded: resets the parameter to the last loaded value from the current sound patch.
- MIDI Learn CC: activates the MIDI Learn function, which maps an incoming MIDI control change to this parameter.
Timbre Mode
Here you can select different modes that affect the partial editing when using the Timbre parameter.
- Peak Mode: in the lowest Timbre setting the partials fade out exponentially. This sounds as a sawtooth wave. Higher settings create a partial shift with random peaks. The maximum setting emphasizes every 2nd partial so that the result sounds like a square wave.
- Sin Mod: this mode exhibits almost the same behaviour as the Peak mode, except that the maximum setting results in a triangle wave sound.
- Saw-Square: this mode starts from a regular partial fade out and removes most of the 2nd partials as Timbre is turned up. The result sounds like a square wave.

waldorf
60 Quantum Manual
Sound Parameter
- Sin-Saw: this mode starts with a sine-like sound (only the fundamental note is heard). It adds more and more partials as Timbre is turned up. The result sounds like a sawtooth wave.
- Modulo: in the lowest Timbre setting the partials fade out exponentially. This sounds like a sawtooth wave. The more Timbre is turned up, the more partials will suddenly disappear. This leads to a less complex sound.
Tap on Timbre Mode to open a pop-up menu for further settings:
- Set Default: sets Timbre Mode to its default Peak Mod setting.
- Set Last Loaded: resets the parameter to the last loaded value from the current sound patch.
- MIDI Learn CC: activates the MIDI Learn function, which maps an incoming MIDI control change to this parameter.
Spread Mode
Here you can determine the distance of the partials when using the Stretch parameter.
- Stretch: uses a wide range of stretching. The Stretch parameter can produce drastic changes to the timbre of a sound.
- Stiffness: uses a smaller range of stretching. The results of the Stretch parameter are less drastic.
Tap on Spread Mode to open a pop-up menu for further settings:
- Set Default: sets Timbre Mode to its default Stretch setting.
- Set Last Loaded: resets the parameter to the last loaded value from the current sound patch.
- MIDI Learn CC: activates the MIDI Learn function, which maps an incoming MIDI control change to this parameter.
HiCut
Determines the hi-cut frequency for cutting high frequencies. This filter is located between the exciter and the filter bank. Use it if the exciter signal is producing too many overtones.
Tap on HiCut to open a pop-up menu for further settings:
- Set Default: sets HiCut to its default value of 0.10.
Sound Parameter
- Set Last Loaded: resets the parameter to the last loaded value from the current sound patch.
- MIDI Learn CC: activates the MIDI Learn function, which maps an incoming MIDI control change to this parameter.
Stereo
Spreads the signal in the stereo field. Keep in mind that if a signal is routed through the Dual Analog Filter section, it automatically becomes mono because of the mono signal path within this circuitry. If you want to hear the full stereo effect, you should route the signal directly to the VCA or to the Digital Former only (DF 100 Fil 0). This can be done with the Osc Dest parameter on the Control page.
Tap on Stereo to open a pop-up menu for further settings:
- Set Default: sets Stereo to its default value of 0.50.
- Set Last Loaded: resets the parameter to the last loaded value from the current sound patch.
- MIDI Learn CC: activates the MIDI Learn function, which maps an incoming MIDI control change to this parameter.
F0 Boost
F0 is the denomination for the fundamental note. This parameter boosts F0 independently from the partials.
Tap on F0 Boost to open a pop-up menu for further settings:
- Set Default: sets F0 Boost to its default value of 0.15.
- Set Last Loaded: resets the parameter to the last loaded value from the current sound patch.
- MIDI Learn CC: activates the MIDI Learn function, which maps an incoming MIDI control change to this parameter.
Presets
Tap on the Presets button to open a pop-up window for loading, saving, and managing Resonator settings. For more information on the available options please refer to the Presets chapter in the Wavetable section.

Oscillator Mixer (OSC MIX) Section
In the Oscillator Mixer section you control the volumes of the three oscillators. If an oscillator volume dial is turned fully counterclockwise, no signal is passed. The LED below the dial doesn't light up.
Level Osc 1 / Osc 2 / Osc 3
Determines the volume of the corresponding oscillator.
Glide Section
Press the On button to activate the Glide effect. 'Glide' or 'Portamento' describes the continuous gliding from one note to another. This effect can be created on fretless stringed instruments or some brass instruments (e.g. trombone). It is very common on synthesizers and used throughout all music styles. Please note that Glide affects the pitch of all oscillators.

Rate
Use Rate to determine the glide time. Low values will give a short glide time in a range of milliseconds that gives a special character to the sound. Higher values will result in a long glide time of up to several seconds which can be useful for solo and effect sounds.
Type
Press this button to switch between two Glide modes:
- Onset means that a continuous glide is performed on all new notes.
- Legato means that a continuous glide is performed only when notes are played legato. Staccato played notes start on the exact pitch of their note.

Dual Analog Filter Section
Quantum offers two analog lowpass filters with additional settings. With the Mode parameter different filter routings can be realized.
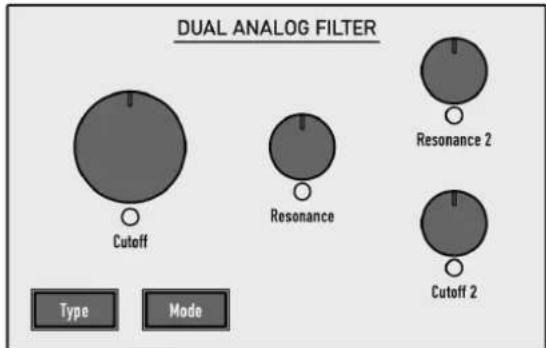
The Dual Analog Filter Section
Due to the fact that the Quantum offers eight analog filter voices the maximum polyphony is about eight voices.
The Dual Analog Filter section can be bypassed by using the Osc Dest parameter on the corresponding Oscillator display pages.
Further filter parameters can be found on the Filter display page.
Filter Panel Parameters
Cutoff 1 & 2
Controls the cutoff frequency for the lowpass filters, which dampens all frequencies above the cutoff frequency. You can bring more movement into the sound by modulating the cutoff frequency via the LFOs, the filter envelope or the Keytrack parameter of the filter. The functionality on these knobs depends on the Mode setting.
Resonance 1 & 2
Controls the emphasis of the frequencies around the cutoff point. Use lower values to give more brilliance to the sound. At higher values the sound exhibits typical filter characteristics with a strong boost around the cutoff frequency. When the setting is raised to maximum, the filter starts to self-oscillate, generating a pure sine wave. This feature can be used to create analog-style effects and per-

cussion-like electronic toms, kicks, zaps, etc. The functionality of these knobs depends on the Mode setting.
Type
Selects the filter slope for the lowpass filter (LP):
- 12dB LP removes frequencies above the cutoff point with a 12dB slope. The oscillator signal need to be sent to a DA converter before passing the analog filter circuitry. The necessary signal adaption is done by a soft limiter. This leads to a neutral audio signal.
- 12dB sat. LP removes frequencies above the cutoff point with a 12dB slope. The oscillator signal need to be sent to a DA converter before passing the analog filter circuitry. The necessary signal adaption is done by a saturation stage. This leads to a light driven audio signal.
- 24dB LP removes frequencies above the cutoff point with a 24dB slope. The oscillator signal need to be sent to a DA converter before passing the analog filter circuitry. The necessary signal adaption is done by a soft limiter. This leads to a neutral audio signal.
- 24dB sat. LP removes frequencies above the cutoff point with a 24dB slope. The oscillator signal need to be sent to a DA converter before passing the analog fil-
ter circuitry. The necessary signal adaption is done by a saturation stage. This leads to a light driven audio signal.
Mode
Switches between the available filter modes. Depending on the selected mode the effect of the Cutoff and Resonance parameters as well as the behaviour of Filter 1 and 2 differs. The following modes are available:
- Single: only Cutoff 1 and Resonance 1 (Filter 1) have an affect on the sound signal. Cutoff 2 and Resonance 2 have no influence here.
- Boost: only Cutoff 1 and Resonance 1 (Filter 1) have an affect on the sound signal. Cutoff 2 is set to an automatic cutoff value depending on the settings of Cutoff 1. This leads to a boosted signal. Resonance 2 has no influence here.
- Twin Peaks: both filter cutoff values are set to a constant frequency distance where Cutoff 1 is higher than Cutoff 2. Cutoff 2 and Resonance 2 have no influence here.
- Escaping: both filter cutoff values are set to a constant frequency distance where Cutoff 2 is higher than Cutoff 1. Cutoff 2 and Resonance 2 have no influence here.
Sound Parameter
- Opposition: Cutoff 1 controls the frequency of Filter 1 and 2. Higher values increase Cutoff 1 and decrease Cutoff 2. Lower values increase Cutoff 2 and decrease Cutoff 1. Cutoff 2 and Resonance 2 have no influence here.
- Endless: similar to Opposition, but cutoff frequency from Filter 2 has a different behaviour relationship. Cutoff 2 and Resonance 2 have no influence here.
- Independent: both filters allow independent settings for Cutoff 1 and 2 and Resonance 1 and 2.
- Linked: both filters allow independent settings for Cutoff 1 and 2 and Resonance 1 and 2, but Cutoff 1 controls the overall frequency cutoff.
Filter Display Page
To access the Filter display page for further Filter parameters press the FILTERS button. With the tabs in the upper part of the display you can call up the Dual Analog Filter parameters and also Digital Former and Routing. Tap on the desired tab to select the corresponding page.
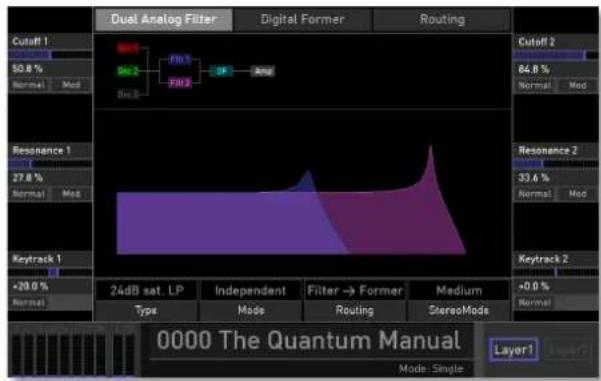
! Digital Former and Routing will be explained in the corresponding chapters.
Cutoff 1 & 2
See corresponding description in the 'Filter Panel Parameters' chapter.
Tap on Cutoff 1 or Cutoff 2 to open a pop-up menu for further settings:
• Normal: Cutoff change is about 1 %.
• Fine: Cutoff change is about 0.1 %.
• Super Fine: Cutoff change is about 0.01 %.
- Set Default: sets Cutoff to its default value of 100.0 %.
- Set Last Loaded: resets the parameter to the last loaded value from the current sound patch.
- Modulations: opens the Mod menu to sets up a modulation for this parameter. How to set up a modulation can be read in 'The Modulation Mode' chapter.
- MIDI Learn CC: activates the MIDI Learn function, which maps an incoming MIDI control change to this parameter.
Resonance 1 & 2
See corresponding description in the 'Filter Panel Parameters' chapter.
Tap on Resonance 1 or Resonance 2 to open a pop-up menu for further settings:
• Normal: Resonance change is about 1 %.
• Fine: Resonance change is about 0.1 %.
• Super Fine: Resonance change is about 0.01 %.
- Set Default: sets Resonance to its default value of 0.0%.
- Set Last Loaded: resets the parameter to the last loaded value from the current sound patch.
- Modulations: opens the Mod menu to sets up a modulation for this parameter. How to set up a modulation can be read in 'The Modulation Mode' chapter.
- MIDI Learn CC: activates the MIDI Learn function, which maps an incoming MIDI control change to this parameter.
Keytrack 1 & 2
Determines how much the cutoff frequency depends on the MIDI note number. The reference note for Keytrack is E3, note number 64. For positive settings the cutoff frequency rises on notes above the reference note; for negative settings the cutoff frequency falls by the same amount,

and vice versa. A setting of +100% corresponds to a 1:1 scale, so, for example, when an octave is played on a keyboard, the cutoff frequency changes by the same amount.

On most bass sounds lower settings in the range of around +30% are optimal to keep the sound smooth at higher notes.
Tap on Keytrack 1 or Keytrack 2 to open a pop-up menu for further settings:
• Normal: Keytrack change is about 2 %.
• Fine: Keytrack change is about 0.2 %.
• Super Fine: Keytrack change is about 0.02 %.
- Set Default: sets Keytrack to its default value of +0.0 %.
- Set Last Loaded: resets the parameter to the last loaded value from the current sound patch.
- MIDI Learn CC: activates the MIDI Learn function, which maps an incoming MIDI control change to this parameter.
Type
See corresponding description in the 'Filter Panel Parameters' chapter.
Tap on Type to open a pop-up menu for selection.
- Set Default: sets Type to its default setting 12 dB LP.
- Set Last Loaded: resets the parameter to the last loaded value from the current sound patch.
- MIDI Learn CC: activates the MIDI Learn function, which maps an incoming MIDI control change to this parameter.
Mode
See corresponding description in the 'Filter Panel Parameters' chapter.
Tap on Mode to open a pop-up menu for selection.
- Set Default: sets Mode to its default Single setting.
- Set Last Loaded: resets the parameter to the last loaded value from the current sound patch.
- MIDI Learn CC: activates the MIDI Learn function, which maps an incoming MIDI control change to this parameter.

Routing
Determines the routing of the audio signal that comes from the oscillators.
- Former -> Filter: the audio signal first leads into the Digital Former section and from there into the Dual Analog Filter section.
- Filter -> Former: the audio signal first leads into the Dual Analog Filter section and from there into the Digital Former section.
- Parallel: the audio signal is routed in equal parts to the Digital Former section as well as into the Dual Analog Filter section. This enables simultaneous parallel processing.
Tap on Routing to open a pop-up menu for selection:
- Set Default: sets Routing to its default setting Filter -> Former.
- Set Last Loaded: resets the parameter to the last loaded value from the current sound patch.
- MIDI Learn CC: activates the MIDI Learn function, which maps an incoming MIDI control change to this parameter.
Stereo Mode
Due to the fact that the Dual Analog Filter section produces a mono output signal, this parameter reconstructs the signal and produces a similar type of stereo signal.
- Neutral: the signal that leaves the Dual Analog Filter section is unaffected by the Stereo Mode effect.
• Medium: this produces a light stereo effect of the output signal.
• Strong: this produces a strong stereo effect of the output signal.
Tap on Stereo Mode to open a pop-up menu for selection.
- Set Default: sets Stereo Mode to its default setting Medium.
- Set Last Loaded: resets the parameter to the last loaded value from the current sound patch.
- MIDI Learn CC: activates the MIDI Learn function, which maps an incoming MIDI control change to this parameter.

Digital Former Section
This section offers additional digital filters and signal enhancer effects, such as Drive and Bit Crusher.
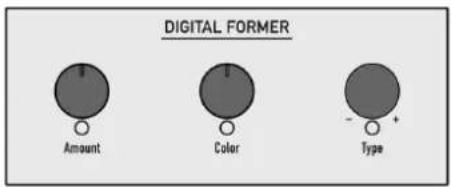
The Digital Former Section
Keep in mind that the Routing parameter determines if the audio signal is routed into the Dual Analog Filter section before or after passing the Digital Former section. Therefore, the Routing parameter is available on the Digital Former as well on the Dual Analog Filter display page.
Digital Former Panel Parameters
Type
The following Digital Former types are available. Depending on the selected type, Amount and Color control different settings. This will be explained in the following list:
- Bypass: no effect is used. Amount and Color have no effect on the signal.
- Drive: adds a drive effect. Amount determines the amount of saturation that is added to the signal. If set to 0.00, no saturation will be added – in other words, the signal will remain clean. Lower values will add some harmonics to the signal, resulting in a warm character. Increasing the value will bring in more and more distortion, suitable for harder lead sounds and effects. Model determines the character of the drive. You can also deactivate the drive curves completely. The following drive curves are available:
- PNP generates a distortion based on a bipolar transistor.
- Tube simulates the asymmetric distortion of a tube circuit.
Sound Parameter
- PickUp simulates an electrostatic pickup. This drive type sounds very interesting, when the audio signal level is modulated.
• Diode generates a typical diode distortion. -
Crunch is a sinusoidal waveshaper. It generates FM-like sounds that can be extremely distorted.
-
Gain: offers an adjustable gain level. Gain increases the level of the audio signal. With Gain Phase you can switch the phase of the signal between Normal and Reverse.
- Comb + / Comb -: a comb filter is basically a very short delay that can be controlled in length and feedback. The delay time is so short that you can't hear its individual taps but rather a colorization of the original signal created by peaks or holes in the frequency spectrum. The frequency of the colorization is set by the delay length, which is controlled through Freq, while the amount of colorization is set by the Comb filter feedback, which is controlled through Feedback. Quantum offers two comb filter types (+ and -) which differ in the shape of the peaks.
- Bit Crusher: produces lo-fi sound effects by decimating and truncating the audio signal. Bits determines the bit resolution of the audio signal. Rate determines
the amount by which the audio samples are decimated. At the lowest setting no processing takes place. Higher settings eliminate more and more of the information describing the original audio signal, turning it into unrecognizable noise.
- Nave LP 12 / LP 24: offers a lowpass filter with resonance as in the Waldorf Nave synthesizer. This filter type was implemented due to compatibility reasons because Quantum can load sound programs from Nave. LP12/24 Freq controls the cutoff frequency while LP12/24 Reso controls the emphasis.
- PPG LP 12 / LP 24: offers a lowpass filter with resonance as in the Waldorf PPG Wave 3.V synthesizer. LP12/24 Freq controls the cutoff frequency while LP12/24 Reso controls the emphasis.
- Largo LP 12 / LP 24: offers a lowpass filter with resonance as in the Waldorf Largo synthesizer. LP12/24 Freq controls the cutoff frequency while LP12/24 Reso controls the emphasis.
- Nave HP 12 / HP 24: offers a highpass filter with resonance as in the Waldorf Nave synthesizer. This filter type was implemented due to compatibility reasons because Quantum can load sound programs from Nave. HP12/24 Freq controls the cutoff frequency while HP12/24 Reso controls the emphasis.
- Largo HP 12 / HP 24: offers a highpass filter with resonance as in the Waldorf Largo synthesizer. HP12/24 Freq controls the cutoff frequency while HP12/24 Reso controls the emphasis.
- Nave BP 12 / BP 24: offers a bandpass filter with resonance as in the Waldorf Nave synthesizer. This filter type was implemented due to compatibility reasons because Quantum can load sound programs from Nave. BP12/24 Freq controls the cutoff frequency while BP12/24 Reso controls the emphasis.
- Largo BP 12 / BP 24: offers a bandpass filter with resonance as in the Waldorf Largo synthesizer. BP12/24 Freq controls the cutoff frequency while BP12/24 Reso controls the emphasis.
- Nave Notch 12 / Notch 24: offers a notch filter with resonance as in the Waldorf Nave synthesizer. This filter type was implemented due to compatibility reasons because Quantum can load sound programs from Nave. Notch12/24 Freq controls the cutoff frequency while Notch12/24 Reso controls the emphasis.
- Largo Notch 12 / Notch 24: offers a notch filter with resonance as in the Waldorf Largo synthesizer. Notch12/24 Freq controls the cutoff frequency while Notch12/24 Reso controls the emphasis.
Amount
Depending on the selected Type, this parameter controls filter frequency or gain amount. Please refer to the corresponding Types.
The Main Encoder also controls the amount, depending on the selected Type.
Color
Depending on the selected Type, this parameter controls the filter resonance or selects the Drive type. Please refer to the corresponding Types.
Further Digital Former parameters can be found in the Filter display page.

Digital Former Display Page
To access the Digital Former display page for further parameters, press the FILTERS button. Tap on the Digital Former tab on the touchscreen to select the corresponding display page.

Digital Former display page with Nave LP24 Type
Based on the selected Type, the display may look different.
Type
See corresponding description in the 'Digital Former Panel Parameters' chapter.
Tap on Type to open a pop-up menu for further settings:
- Set Default: sets Type to its default Bypass setting.
- Set Last Loaded: resets the parameter to the last loaded value from the current sound patch.
- MIDI Learn CC: activates the MIDI Learn function, which maps an incoming MIDI control change to this parameter.
Amount
See corresponding description in the 'Digital Former Panel Parameters' chapter. Depending on the selected Type, this parameter can be named different. Please refer to the corresponding Types.
Tap on Amount to open a pop-up menu for further settings:
• Normal: Amount change will be normal.
• Fine: Amount change will be fine.
• Super Fine: Amount change will be very fine.

Sound Parameter
- Set Default: sets Amount to its default setting.
- Set Last Loaded: resets the parameter to the last loaded value from the current sound patch.
- Modulations: opens the Mod menu to sets up a modulation for this parameter. How to set up a modulation can be read in 'The Modulation Mode' chapter.
- MIDI Learn CC: activates the MIDI Learn function, which maps an incoming MIDI control change to this parameter.
Color
See corresponding description in the 'Digital Former Panel Parameters' chapter. Depending on the selected Type, this parameter can be named different. Please refer to the corresponding Types.
Tap on Color to open a pop-up menu for further settings:
• Normal: Color change will be normal.
• Fine: Color change will be fine.
• Super Fine: Color change will be very fine.
- Set Default: sets Color to its default setting.
- Set Last Loaded: resets the parameter to the last loaded value from the current sound patch.
- Modulations: opens the Mod menu to sets up a modulation for this parameter. How to set up a modulation can be read in 'The Modulation Mode' chapter.
- MIDI Learn CC: activates the MIDI Learn function, which maps an incoming MIDI control change to this parameter.
Routing
Determines the routing of the audio signal that comes from the oscillators.
- Former -> Filter: the audio signal first leads into the Digital Former section and from there into the Dual Analog Filter section.
- Filter -> Former: the audio signal first leads into the Dual Analog Filter section and from there into the Digital Former section.
- Parallel: the audio signal is routed in equal parts to the Digital Former section as well as into the Dual Analog Filter section. This enables simultaneous parallel processing.

Sound Parameter
Tap on Routing to open a pop-up menu for further settings:
- Set Default: sets Routing to its default Filter -> Former setting.
- Set Last Loaded: resets the parameter to the last loaded value from the current sound patch.
- MIDI Learn CC: activates the MIDI Learn function, which maps an incoming MIDI control change to this parameter.
Routing Display Page
To access the Routing display page press the FILTERS button. Tap Routing on the touchscreen to select the Routing display page.
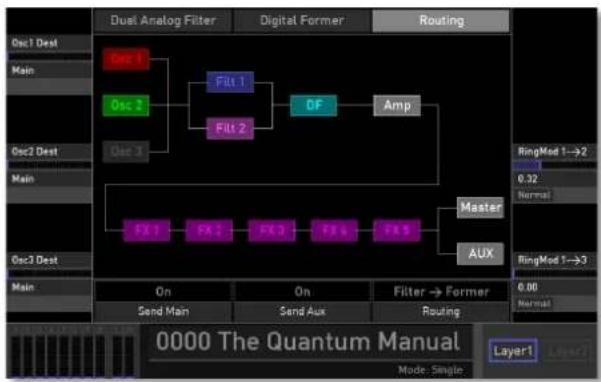
flowchart
graph TD
    A["Dual Analog Filter"] --> B["Oct1 Dest"]
    B --> C["Oct2"]
    C --> D["Oct3"]
    D --> E["Oct4"]
    E --> F["Filt 1"]
    F --> G["Filt 2"]
    G --> H["DF"]
    H --> I["Amp"]
    I --> J["Master"]
    J --> K["AUX"]
    K --> L["FX 1"]
    K --> M["FX 2"]
    K --> N["FX 3"]
    K --> O["FX 4"]
    K --> P["FX 5"]
    Q["RingMod 1→2"] --> R["0.32 Normal"]
    S["RingMod 1→3"] --> T["0.88 Normal"]
Here you will get a graphic overview of the Quantum's signal routing. You can also control the routing of the three oscillators, the ring modulators, and set up the audio outputs for the current sound.

The Graphic Routing Overview
The central area of the display shows the current audio signal path from the sound generation (Osc 1, 2, 3) through the Dual Analog Filters (Filt 1 and 2), the Digital Former section (DF), and the Amplifier (AMP), followed by the Effects section (FX 1 to 5). The audio signal finally leaves the Quantum via the Master output and/or AUX output.
The signal path changes when one of the following parameters are edited:
- Osc 1, 2, 3: the Osc block lights up in the color of the selected oscillator model when the corresponding Osc Mix parameter is turned up. An Osc block is moved to another signal position when the Osc Dest parameter is set to VCA. An Osc block shows another routing when the Osc Dest parameter is set to one of the DF Filter settings.
- Based on the setting of the Routing parameter, the Filter and DF blocks change their position within the graphic. If Digital Former Type is set to Bypass, the DF block is greyed out.
- Depending on the defined audio outputs, the FX5 output leads to Master, AUX, both outputs, or no outputs (you don't really want to use that setting, believe us).
Osc 1/2/3 Dest
Here you can determine the routing of the corresponding oscillator signal. The following routing options are available:
- Main: routes the signal to the full signal path (Dual Analog Filter, Digital Former, VCA) as determined with the Routing parameter on the Filter page.
• VCA: routes the signal directly to the VCA without passing both filter sections. - DF - Fil settings: offers different signal relationship settings between the Digital Former section (DF) and the Dual Analog Filter section (Fil). If you want to send the signal, for example, through the Digital Former section by 30% and by 70% through the analog filter, select DF 30 Fil 70 here. The routing also depends on the Routing parameter setting on the Filter page.
Tap on Osc 1/2/3 Dest to open a pop-up menu for further settings:
- Set Default: sets Osc 1/2/3 Dest to its default Main setting.
- Set Last Loaded: resets the parameter to the last loaded value from the current sound patch.
- MIDI Learn CC: Activates the MIDI Learn function, which maps an incoming MIDI control change to this parameter.
RingMod 1-->2, 1-->3
Controls the volume of the ring modulation between Osc 1 and 2 and Osc 1 and 3.
Tap on the corresponding RingMod to open a pop-up menu for further settings:
• Normal: RingMod volume change is about 0.4 dB.
• Fine: RingMod volume change is about 0.04 dB.
• Super Fine: RingMod volume change is about 0.004 dB.
- Set Default: sets RingMod volume to its default value of 0 dB.
- Set Last Loaded: resets the parameter to the last loaded value from the current sound patch.
- MIDI Learn CC: activates the MIDI Learn function, which maps an incoming MIDI control change to this parameter.
Send Main
Determines, if the audio signal is sent to the Main Out jacks (On) or not (Off).
The audio signal can be sent to both Outputs simultaneously, if desired.
Tap on Send Main to open a pop-up menu for further settings:
- Set Default: sets Send Main to its default On setting.
- Set Last Loaded: resets the parameter to the last loaded value from the current sound patch.
- MIDI Learn CC: activates the MIDI Learn function, which maps an incoming MIDI control change to this parameter.
Send Aux
Determines, if the audio signal is sent to the Aux Out jacks (On) or not (Off).
The audio signal can be sent to both Outputs simultaneously, if desired.

Tap on Send Aux to open a pop-up menu for further settings:
- Set Default: sets Send Aux to its default On setting.
- Set Last Loaded: resets the parameter to the last loaded value from the current sound patch.
- MIDI Learn CC: activates the MIDI Learn function, which maps an incoming MIDI control change to this parameter.
Routing
Determines the routing of the audio signal that comes from the oscillators.
- Former -> Filter: the audio signal first leads into the Digital Former section and from there into the Dual Analog Filter section.
- Filter -> Former: the audio signal first leads into the Dual Analog Filter section and from there into the Digital Former section.
- Parallel: the audio signal is routed in equal parts to the Digital Former section as well as into the Dual Analog Filter section. This enables simultaneous parallel processing.
Tap on Routing to open a pop-up menu for further settings:
- Set Default: sets Routing to its default Filter -> Former setting.
- Set Last Loaded: resets the parameter to the last loaded value from the current sound patch.
- MIDI Learn CC: activates the MIDI Learn function, which maps an incoming MIDI control change to this parameter.

Envelopes Section
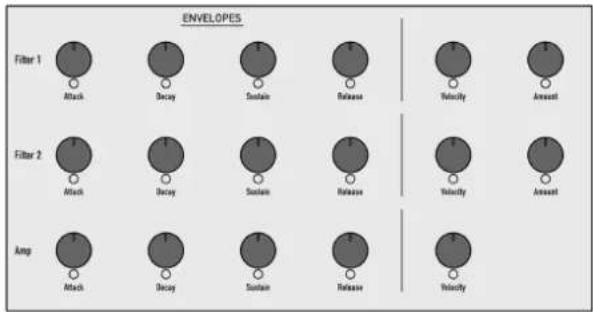
flowchart
graph TD
    subgraph Filter_1
        A1["Attack"] --> B1["Decay"]
        B1 --> C1["Sustain"]
        C1 --> D1["Release"]
    end
    subgraph Filter_2
        A2["Attack"] --> B2["Decay"]
        B2 --> C2["Sustain"]
        C2 --> D2["Release"]
    end
    subgraph Jung
        A3["Attack"] --> B3["Decay"]
        B3 --> C3["Sustain"]
        C3 --> D3["Release"]
    end
    E1["Velocity"] --> F1["Amount"]
    G1["Velocity"] --> H1["Amount"]
    I1["Velocity"] --> J1["Amount"]
    K1["Velocity"] --> L1["Amount"]
The Envelope Section with Filter 1+2 and Amp envelopes
The Quantum's envelopes allow you to manipulate sound parameters via rate or timed modulations. The Quantum offers six independent programmable envelopes for every sound program:
- Two Filter Envelopes. These envelopes are designed to control the Dual Analog Filter 1 and 2 but can also be used for other modulations.
- An Amplifier Envelope. This envelope is designed to control the sound volume, but can also be used for other modulations.
- Three additional Free Envelopes. These envelopes can be used freely to perform additional modulations on any module.
Only the Filter 1 + 2 and Amplifier envelopes can be edited via the front panel parameter controls. All envelopes are completely accessible via the Envelopes display page.
Most traditional synthesizers feature ADSR envelopes. These envelopes are made up of four parameters that determine their response: Attack, Decay, Sustain, and Release.
The envelope is started by pressing a key. It ascends to its maximum value at the rate determined by the Attack parameter. It then descends at the rate determined by the Decay value until it reaches the predetermined Sustain value. It remains at this value until the key is released. The envelope then descends to zero at the rate determined by the Release parameter.
Envelope Panel Parameters
The Panel parameter controls of the Filters envelopes and the amplifier envelope are almost identical.

Attack
Determines the attack rate or amount of time it takes for a signal to go from zero to maximum level.
Decay
Determines the decay rate or amount of time it takes for a signal to reach the Sustain level.
Sustain
Determines the sustain level that is held until a note ends.
Release
Once the note has ended, the release phase begins. During this phase, the envelope fades to zero at the rate determined by the release value.
Velocity
Determines the amount of influence the corresponding envelope has on the routed parameter - for example, cutoff frequency for the filter envelope, based on key velocity. This parameter works similarly to the Amount parameter with the difference that its intensity is velocity based. Use this feature to give a more expressive character to the sound. When you hit the keys smoothly only minimal modulation is applied. Hit them harder, the modulation amount increases likewise.
Amount (not for Amp Envelope)
Determines the amount of influence the corresponding envelope has on the modulated parameter - for example, cutoff frequency. For positive settings, the modulation is increased by of the envelope; for negative settings, it is decreased.
The overall modulation applied to the corresponding parameter is calculated as the sum of both the Amount and Velocity parameters. Therefore, you should always bear this total in mind - especially when a filter does not behave as you expect. You can also create interesting effects by setting one parameter to a positive and the other to a negative amount.

Envelopes Display Page
To access the Envelope display page, press the ENV button. Tap on the corresponding tab (Amp, Filter 1, Filter 2, Free 1 to 3) to select the desired envelope you want to edit.

The display page parameters for every one of the six envelopes are similar.
Attack, Decay, Sustain, Release
See corresponding parameter in the 'Envelope Panel Parameters' chapter.
Tap on the corresponding parameter to open a pop-up menu for further settings:
• Normal: amount change will be normal.
• Fine: amount change will be fine.
• Super Fine: amount change will be very fine.
- Set Default: sets amount to its default setting.
- Set Last Loaded: resets the parameter to the last loaded value from the current sound patch.
- Modulations: opens the Mod menu to sets up a modulation for this parameter. How to set up a modulation can be read in 'The Modulation Mode' chapter.
- MIDI Learn CC: activates the MIDI Learn function, which maps an incoming MIDI control change to this parameter.
Delay
Delays the start of the envelope by the selected time after a note trigger happens.
Sound Parameter
Tap on Delay to open a pop-up menu for further settings:
• Normal: Delay change will be normal.
• Fine: Delay change will be fine.
• Super Fine: Delay change will be very fine.
- Set Default: sets Delay to its default setting of 0 secs.
- Set Last Loaded: resets the parameter to the last loaded value from the current sound patch.
- MIDI Learn CC: activates the MIDI Learn function, which maps an incoming MIDI control change to this parameter.
EnvelopeVar
Creates an analog-like behaviour when a note is triggered. The higher the setting, the more the attack and decay envelope phases differ from their original values.
Tap on EnvelopeVar to open a pop-up menu for further settings:
• Normal: EnvelopeVar change is about 0.01.
• Fine: EnvelopeVar change is about 0.001.
• Super Fine: EnvelopeVar change is about 0.0001.
- Set Default: sets EnvelopeVar to its 0.35 default value.
- Set Last Loaded: resets the parameter to the last loaded value from the current sound patch.
- MIDI Learn CC: activates the MIDI Learn function, which maps an incoming MIDI control change to this parameter.
Attack Curve
Sets the characteristic of the attack phase.
- Exponential (Exp) switches the attack phase to exponential.
- RC simulates an analogue circuit and delivers a convex attack envelope phase.
• Linear (Lin) switches the attack phase to linear.
Tap on Attack Curve to open a pop-up menu for further settings:
- Set Default: sets Attack Curve to its default RC setting.
- Set Last Loaded: resets the parameter to the last loaded value from the current sound patch.

waldorf
82 Quantum Manual
- MIDI Learn CC: activates the MIDI Learn function, which maps an incoming MIDI control change to this parameter.
Decay Curve
Sets the characteristic of the decay phase.
- Exponential (Exp) switches the decay phase to exponential.
- Alternate Exponential (Exp alt) switches the decay phase to an alternative exponential curve.
• Linear (Lin) switches the decay phase to linear.
Tap on Decay Curve to open a pop-up menu for further settings:
- Set Default: sets Decay Curve to its Exp default setting.
- Set Last Loaded: resets the parameter to the last loaded value from the current sound patch.
- MIDI Learn CC: activates the MIDI Learn function, which maps an incoming MIDI control change to this parameter.
Release Curve
Sets the characteristic of the release phase.
- Exponential (Exp) switches the release phase to exponential.
- Alternate Exponential (Exp alt) switches the release phase to an alternative exponential curve.
• Linear (Lin) switches the release phase to linear.
Tap on Release Curve to open a pop-up menu for further settings:
- Set Default: sets Release Curve to its Exp default setting.
- Set Last Loaded: resets the parameter to the last loaded value from the current sound patch.
- MIDI Learn CC: activates the MIDI Learn function, which maps an incoming MIDI control change to this parameter.
Loop Mode
Sets one of the two available loop functions for the corresponding envelope:
- AD Loop repeats the Attack and Sustain phases while a note is held until it gets released and normal fade out starts. After releasing the note, Release phase of the envelope starts.

Sound Parameter
- ADSR Loop is identical to AD. As soon as the Release phase starts, the loop will go on.
Tap on Loop Mode to open a pop-up menu for further settings:
- Set Default: sets Loop Mode to its default Off setting.
- Set Last Loaded: resets the parameter to the last loaded value from the current sound patch.
- MIDI Learn CC: activates the MIDI Learn function, which maps an incoming MIDI control change to this parameter.
Single Trigger
All envelopes offer a single trigger function. It works in Mono mode only, which can be activated with the Mono button:
- When set to Off, every note starts the envelope of its own voice; also works when playing legato.
- When set to On, the envelopes of all voices of a selected patch behave like a single envelope. This is the perfect setting for playing legato. The common envelope starts as soon as the first note is played. The sustain level remains until the last note is released. Afterwards the release phase is active.
Tap on Single Trig to open a pop-up menu for further settings:
- Set Default: sets Single Trigger to its Off default setting.
- Set Last Loaded: resets the parameter to the last loaded value from the current sound patch.
- MIDI Learn CC: activates the MIDI Learn function, which maps an incoming MIDI control change to this parameter.
Mod Targets Button
Read more in the 'Modulation' chapter.

LFO Section
In addition to the main oscillators, the Quantum is equipped with six low frequency oscillators (LFOs) that can be used for modulation purposes. Each LFO generates a periodic waveform with adjustable frequency and shape.
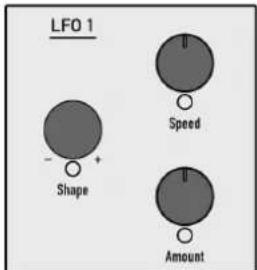
The LFO Section for LFO 1
The basic parameters of LFO1, LFO2, and LFO3 can be edited via the Panel parameter controls. LFO 4 through to 6 are completely accessible via the LFO display page.
Tap on the corresponding LFO waveform on the touchscreen display to modify the Speed and Warp parameters.
LFO 1 - 3 Panel Parameters
Shape
Sets the type of waveform generated by the corresponding LFO.
- The Sine shape is best suited for oscillator FM or pan modulations.
- The Triangle shape is perfect for smooth pitch, filter or volume modulations.
- The Square shape can be interesting for hard pan modulations or special effects.
- The Saw (down) shape can generate interesting filter or volume changes. It creates a falling sawtooth wave.
- The Saw (up) shape can generate interesting filter or volume changes. It creates a rising sawtooth wave.
- S&H (Sample & Hold) samples a random value and holds it until the next value is generated. If Speed is set to 0, a random value is generated on each new note.
Speed
Determines the frequency of the corresponding LFO. At low values it might take four minutes for the LFO to per-

Sound Parameter
form a complete cycle while higher values are in the audible range.
When the LFO Sync parameter is set to On, you can adjust Speed in musical values. The lowest possible value is 1024 bars, meaning that a complete LFO cycle would need 1024 bars.
Amount
Determines the amount of the corresponding LFO modulation applied to all destinations. Since the modulation is in fact, a multiplication of the source signal and this parameter, the resulting amplitude depends on the type of modulation source you select.
LFO Display Page
To access the LFO display page, press the LFO button. Tap on the corresponding tab (LFO1 to 6) to select the desired LFO you want to edit.

The display page parameters for every one of the six LFOs are similar.
Shape
See corresponding description in the 'LFO Panel Parameters' chapter.

Tap on Shape to open a pop-up menu for further settings:
- Set Default: sets Shape to its default Sine setting.
- Set Last Loaded: resets the parameter to the last loaded value from the current sound patch.
- MIDI Learn CC: activates the MIDI Learn function, which maps an incoming MIDI control change to this parameter.
Speed / Speed Ratio
See corresponding description in the 'LFO Panel Parameters' chapter.
Tap on Speed to open a pop-up menu for further settings:
• Normal: Speed change is about 2.8 Hz.
• Fine: Speed change is about 0.28 Hz.
• Super Fine: Speed change is about 0.028 Hz.
- Set Default: sets Speed to its default value of 6.25 Hz.
- Set Last Loaded: resets the parameter to the last loaded value from the current sound patch.
- Modulations: opens the Mod menu to sets up a modulation for this parameter. How to set up a modulation can be read in 'The Modulation Mode' chapter.
- MIDI Learn CC: activates the MIDI Learn function, which maps an incoming MIDI control change to this parameter.
Warp
Depending on the selected LFO Shape, the Warp parameter folds the corresponding waveform. Here are the results for the different LFO waveforms:
- If Sine is selected, positive or negative values compress the upper or lower phase of the waveform.
- If Triangle is selected, higher values turn the wave into a rising sawtooth wave while lower values create a falling sawtooth wave.
- If Square is selected, Warp changes the pulsewidth of the waveform.
- If Saw (down or up) is selected, the waveform is folded. Settings below 0.00% also reduce the LFO phase from bipolar to unipolar.
- If S&H (Sample & Hold) is selected, Warp shapes the edges of the held waveform and smooths it.
Tap on Warp to open a pop-up menu for further settings:
• Normal: Warp change is about 2.0 %.

Sound Parameter
• Fine: Warp change is about 0.2 %.
• Super Fine: Warp change is about 0.02 %.
- Set Default: sets Warp to its default value of +0.0% .
- Set Last Loaded: resets the parameter to the last loaded value from the current sound patch.
- MIDI Learn CC: activates the MIDI Learn function, which maps an incoming MIDI control change to this parameter.
All Amounts
See corresponding description in the 'LFO Panel Parameters' chapter.
Tap on All Amounts to open a pop-up menu for further settings:
• Normal: All Amounts change is about 2.0 %.
• Fine: All Amounts change is about 0.2 %.
• Super Fine: All Amounts change is about 0.02 %.
Attack
Controls the speed with which the LFO is faded in. With this parameter you can create slowly rising modulations that might create interest when routed to pitch or volume.
Tap on Attack to open a pop-up menu for further settings:
• Normal: Attack change is normal.
• Fine: Attack change is fine.
• Super Fine: Attack change is super fine.
- Set Default: sets Attack to its default value of 0 secs.
- Set Last Loaded: resets the parameter to the last loaded value from the current sound patch.
- MIDI Learn CC: activates the MIDI Learn function, which maps an incoming MIDI control change to this parameter.
Decay
Controls the speed with which the LFO is faded out. With this parameter you can create slowly falling modulations that might create interest when routed to pitch or volume.
Tap on Decay to open a pop-up menu for further settings:
• Normal: Decay change is normal.

• Fine: Decay change is fine.
• Super Fine: Decay change is super fine.
- Set Default: sets Decay to its default Off setting.
- Set Last Loaded: resets the parameter to the last loaded value from the current sound patch.
- MIDI Learn CC: activates the MIDI Learn function, which maps an incoming MIDI control change to this parameter.
Sync
When Sync is activated, the corresponding LFO is synced to the global Tempo of the Quantum (can be set with the Bpm parameter). The Speed setting (called Speed Ratio here) can be changed to offer musically meaningful values.
Tap on Sync to open a pop-up menu for further settings:
- Set Default: sets Sync to its default Off setting.
- Set Last Loaded: resets the parameter to the last loaded value from the current sound patch.
- MIDI Learn CC: activates the MIDI Learn function, which maps an incoming MIDI control change to this parameter.
Mode
When set to Global, the LFO phases of all voices are synced so that they sound as one LFO. This can be interesting when the LFO is applied to modulate Cutoff. If set to Poly, every note triggers its own LFO.
Tap on Mode to open a pop-up menu for further settings:
- Set Default: sets Mode to its default Poly setting.
- Set Last Loaded: resets the parameter to the last loaded value from the current sound patch.
- MIDI Learn CC: activates the MIDI Learn function, which maps an incoming MIDI control change to this parameter.
Slew
Determines the slew rate of the selected LFO waveform. The higher the setting, the smoother the slew rate. Higher settings also change the phase from a bipolar LFO waveform to nearly unipolar.
Tap on Slew to open a pop-up menu for further settings:
- Set Default: sets Slew to its default value of 40.0%
- Set Last Loaded: resets the parameter to the last loaded value from the current sound patch.
Sound Parameter
- MIDI Learn CC: activates the MIDI Learn function, which maps an incoming MIDI control change to this parameter.
Phase
Controls the initial phase of the corresponding LFO when a new note is started. Free means that the LFO isn't restarted on a new note but runs freely while other values set the LFO phase to the respective offset in degrees.
Tap on Phase to open a pop-up menu for further settings:
- Set Default: sets Phase to its default setting of 0.0 deg.
- Set Last Loaded: resets the parameter to the last loaded value from the current sound patch.
- MIDI Learn CC: activates the MIDI Learn function, which maps an incoming MIDI control change to this parameter.
Delay
Controls the delay in seconds, with which the corresponding LFO is faded in. With this parameter you can create slowly rising modulations that might create interest when routed to wave, pitch, or volume.
Tap on Delay to open a pop-up menu for further settings:
- Set Default: sets Delay to its default value of 0 secs..
- Set Last Loaded: resets the parameter to the last loaded value from the current sound patch.
- MIDI Learn CC: activates the MIDI Learn function, which maps an incoming MIDI control change to this parameter.
Mod Targets Button
Read more in the 'Modulation' chapter.

Komplex Modulator Section
The Komplex Modulator could be described as a complex LFO with two different curves that can be mixed together, if desired. The output signal of this section can be used as modulation source to create morphing atmospheres, drones, and blurring sounds.

The Komplex Modulator Section
To hear result of the Komplex Modulator you should define it as a modulation source for a desired parameter like pitch, filter cutoff frequency, or any other parameter you like.
Komplex Modulator Panel Parameters
Speed
Determines the frequency of the Komplex Modulator waveform. At low values it might take four minutes to perform a complete cycle while higher values go up to the audible range.
When the Komplex Modulator Sync parameter is set to On, you can adjust the Speed in musical values. The lowest possible value is 1024 bars, meaning that a complete cycle would need 1024 bars.
Blend
Mixes the result of Curve A and Curve B. The leftmost setting (A 100%) only uses the signal from Curve A as modulation source while the rightmost setting (B 100%) only uses Curve B. Other settings morph Curve A into Curve B, and vice versa.
Warp
Depending on the created Komplex Modulator shape the Warp parameter folds the waveform. The result may look different, based on the initial waveform.

Sound Parameter
Amount
Determines the amount of the Komplex Modulator modulation applied to all destinations. Since the modulation is in fact, a multiplication of the source signal and this parameter, the resulting amplitude depends on the type of modulation source you select.
Envelope
Controls the speed with which the Komplex Modulator is faded in and out. With this parameter you can create slowly rising and falling modulations that might create interest when routed to pitch or volume.
Entropy
Determines how intensive a random noise signal has influence on the time axis. The higher the Entropy value, the more randomly the complete waveform seems to be in all cycles. The graphic display of the waveform may give an idea of what exactly is happening. Otherwise the result is far from accurate.

Further Komplex Modulator parameters can be found on the Mod display page.
Komplex Modulator Display Page
To access the Komplex Modulator display page for further parameters, press the MOD button. Tap on the Komplex Modulator tab to select the corresponding display page.
The Komplex Tab
Here you find parameters that are used for the overall Komplex Modulator signal.


waldorf
92 Quantum Manual
Blend
See corresponding description in the 'Komplex Modulator Panel Parameters' chapter.
Tap on Blend to open a pop-up menu for further settings:
• Normal: Blend change is about 1%.
• Fine: Blend change is about 0.1%.
• Super Fine: Blend change is about 0.01%.
- Set Default: sets Blend to its default value of A100% .
- Set Last Loaded: resets the parameter to the last loaded value from the current sound patch.
- Modulations: opens the Mod menu to sets up a modulation for this parameter. How to set up a modulation can be read in 'The Modulation Mode' chapter.
- MIDI Learn CC: activates the MIDI Learn function, which maps an incoming MIDI control change to this parameter.
Speed
See corresponding description in the 'Komplex Modulator Panel Parameters' chapter.
Tap on Speed to open a pop-up menu for further settings:
• Normal: Speed change is about 0.01.
• Fine: Speed change is about 0.001.
• Super Fine: Speed change is about 0.0001.
- Set Default: sets Speed to its default 0.50 value.
- Set Last Loaded: resets the parameter to the last loaded value from the current sound patch.
- Modulations: opens the Mod menu to sets up a modulation for this parameter. How to set up a modulation can be read in 'The Modulation Mode' chapter.
- MIDI Learn CC: activates the MIDI Learn function, which maps an incoming MIDI control change to this parameter.
Warp
See corresponding description in the 'Komplex Modulator Panel Parameters' chapter.
Tap on Warp to open a pop-up menu for further settings:
• Normal: Warp change is about 0.02.
• Fine: Warp change is about 0.002.
• Super Fine: Warp change is about 0.0002.

Sound Parameter
- Set Default: sets Warp to its default value of +0.0% .
- Set Last Loaded: resets the parameter to the last loaded value from the current sound patch.
- Modulations: opens the Mod menu to sets up a modulation for this parameter. How to set up a modulation can be read in 'The Modulation Mode' chapter.
- MIDI Learn CC: activates the MIDI Learn function, which maps an incoming MIDI control change to this parameter.
All Amounts
See corresponding description in the 'Komplex Modulator Panel Parameters' chapter.
Tap on All Amounts to open a pop-up menu for further settings:
• Normal: All Amounts change is about 2.0 %.
• Fine: All Amounts change is about 0.2 %.
• Super Fine: All Amounts change is about 0.02 %.
Envelope
See corresponding description in the 'Komplex Modulator Panel Parameters' chapter.
Tap on Envelope to open a pop-up menu for further settings:
• Normal: Envelope change is about 0.01.
• Fine: Envelope change is about 0.001.
• Super Fine: Envelope change is about 0.0001.
- Set Default: sets Envelope to its default value of 0.00.
- Set Last Loaded: resets the parameter to the last loaded value from the current sound patch.
- MIDI Learn CC: activates the MIDI Learn function, which maps an incoming MIDI control change to this parameter.
Entropy
See corresponding description in the 'Komplex Modulator Panel Parameters' chapter.
Tap on Entropy to open a pop-up menu for further settings:
• Normal: Entropy change is about 0.1.
• Fine: Entropy change is about 0.01.
• Super Fine: Entropy change is about 0.001.

waldorf
94 Quantum Manual
- Set Default: sets Entropy to its default value of 0.00.
- Set Last Loaded: resets the parameter to the last loaded value from the current sound patch.
- Modulations: opens the Mod menu to sets up a modulation for this parameter. How to set up a modulation can be read in 'The Modulation Mode' chapter.
- MIDI Learn CC: activates the MIDI Learn function, which maps an incoming MIDI control change to this parameter.
Sync
When Sync is activated, the Komplex Modulator is synced to the global Tempo of the Quantum, which can be determined via the Arpeggiator or Sequencer pages. The Speed setting (called Speed Ratio here) changes to offer musically meaningful values.
Tap on Sync to open a pop-up menu for further settings:
- Set Default: sets Sync to its default Off setting.
- Set Last Loaded: resets the parameter to the last loaded value from the current sound patch.
- MIDI Learn CC: activates the MIDI Learn function, which maps an incoming MIDI control change to this parameter.
Mode
When set to Global, the Komplex Modulator phases of all voices are synced so that they sound as one Komplex Modulator. This can be interesting when the Komplex Modulator is applied to modulate Cutoff. If set to Poly, every note triggers its own Komplex Modulator. If set to Envelope, the Komplex Modulator acts as a free-form envelope. In this mode the graphic representation changes to a single envelope based on the settings made for Curve A and B.
Tap on Mode to open a pop-up menu for further settings:
- Set Default: sets Mode to its default Poly setting.
- Set Last Loaded: resets the parameter to the last loaded value from the current sound patch.
- MIDI Learn CC: activates the MIDI Learn function, which maps an incoming MIDI control change to this parameter.

Slew
Determines the slew rate of the created Komplex Modulator waveform. The higher the setting, the smoother the slew rate. Higher settings also change the phase from the bipolar Komplex Modulator waveform to nearly unipolar.
Tap on Slew to open a pop-up menu for further settings:
- Set Default: sets Slew to its default 0.40 value.
- Set Last Loaded: resets the parameter to the last loaded value from the current sound patch.
- MIDI Learn CC: activates the MIDI Learn function, which maps an incoming MIDI control change to this parameter.
Phase
Controls the initial phase of the Komplex Modulator shape when a new note is started. Free means that the Komplex Modulator isn't restarted on a new note but runs freely while other values set the Komplex Modulator phase to the respective offset in degrees.
Tap on Phase to open a pop-up menu for further settings:
- Set Default: sets Phase to its default value of 0.0.
- Set Last Loaded: resets the parameter to the last loaded value from the current sound patch.
- MIDI Learn CC: activates the MIDI Learn function, which maps an incoming MIDI control change to this parameter.
Delay
Controls the speed in seconds, at which the Komplex Modulator is faded in. With this parameter you can create slowly rising modulations that might create interest when routed to wave, pitch or volume.
Tap on Delay to open a pop-up menu for further settings:
- Set Default: sets Delay to its default value of 0 secs.
- Set Last Loaded: resets the parameter to the last loaded value from the current sound patch.
- MIDI Learn CC: activates the MIDI Learn function, which maps an incoming MIDI control change to this parameter.
The Mod Tgts (Modulation Targets) Button
Read more in the 'Modulation' chapter.

The Presets Button
Tap on the Presets button to open a pop-up window for loading, saving, and managing Komplex Modulator settings. For more information on the available options please refer to the Presets chapter in the Wavetable section.
The Curve A & B Tabs
Here you can edit the two curves A and B. Tap on the button Curve A or Curve B to open the corresponding edit page.


Curve A and B use the same parameters for editing.
Editing Curves within the Curve Graphic
To edit a curve in the graphic display you can do the following:
- Tap on the corresponding step and move your finger up or down to change its level. The selected step is lit in red.
- You can also tap and hold a step and move your finger to the left or to the right to draw the level of the steps in one go.
- If you double tap above or below a step, the level jumps immediately to this position.

For more precise editing of steps we recommend using the corresponding display page parameters.
Step A/B
Selects a desired step for further editing. The current selected step is lit in red.
Num Steps A/B
Determines the number of available steps. Here you can set up step numbers from a minimum of two through to a maximum of 32.

Tap on Num Steps A or B to open a pop-up menu for further settings:
- Set Default: sets Num Steps to its default value of 8.
- Set Last Loaded: resets the parameter to the last loaded value from the current sound patch.
- MIDI Learn CC: activates the MIDI Learn function, which maps an incoming MIDI control change to this parameter.
Level A/B
Determines the level of the selected step.
Tap on Level to open a pop-up menu for further settings:
• Normal: Level change is about 2%.
• Fine: Level change is about 0.2%.
• Super Fine: Level change is about 0.02%.
- Set Default: sets Level to its default setting.
- Set Last Loaded: resets the parameter to the last loaded value from the current sound patch.
- MIDI Learn CC: activates the MIDI Learn function, which maps an incoming MIDI control change to this parameter.
All Amounts
See corresponding description in the 'Komplex Modulator Panel Parameters' chapter.
Tap on All Amounts to open a pop-up menu for further settings:
• Normal: All Amounts change is about 2.0 %.
• Fine: All Amounts change is about 0.2 %.
• Super Fine: All Amounts change is about 0.02 %.
Curve Type A/B
Selects the curve type that is used for the selected step. The following curve types are available:
• Lin: uses a linear curve.
- Step: uses a step that switches directly to the level of the next step.
• Cos: uses a cosine curve.
- Saw: uses a sawtooth-like curve that rises or falls to the next step. This depends on the step level.
- Curve: uses a curve characteristic that can be defined with the Curve Type parameter.

Tap on Curve Type to open a pop-up menu for further settings:
- Set Default: sets Curve Type to its default Lin setting.
- Set Last Loaded: resets the parameter to the last loaded value from the current sound patch.
- MIDI Learn CC: activates the MIDI Learn function, which maps an incoming MIDI control change to this parameter.
Curve Val A/B
If the Curve Type is set to Curve, you can shade the curve from exponential to linear to inverse exponential.
Tap on Curve Val to open a pop-up menu for further settings:
• Normal: Curve Val change is about 0.01.
• Fine: Curve Val change is about 0.001.
• Super Fine: Curve Val change is about 0.0001.
- Set Default: sets Curve Val to its default setting of 0.50.
- Set Last Loaded: resets the parameter to the last loaded value from the current sound patch.
- MIDI Learn CC: activates the MIDI Learn function, which maps an incoming MIDI control change to this parameter.
The Edit Button
Tap on the Edit button to open a pop-up window with additional tools for editing Curve A or B. This parameter doesn not affect the number of the steps.
• Clear: clears all steps and sets their levels to 0.
• All Steps: sets all steps to the Step curve type.
• All Lin: sets all steps to the linear curve type.
• All Saw: sets all steps to the sawtooth curve type.
• All Cos: sets all steps to the cosine curve type.
• All Curve: sets all steps to the Curve type.

The Effects Section
Quantum offers five effect units with a bunch of different effect types. Two basic parameters of the first three effect units can be controlled via panel parameters while deeper editing is done on the Effect display page.

The Effects Section for effect 1, 2 and 3
Keep in mind that the five effect units provide insert effects with a serial routing. That means that the signal will first go through Effect 1, then through Effect 2 after that, and so on.
Effects Panel Parameters (for Effect 1 to 3)
Depending on the selected effect type, both dials offer different parameters.
Amount for Effect 1, 2, and 3
In most cases, this parameter controls the Dry/Wet mix for the selected effect type:
- For Phaser, Chorus, Flanger, Delay, EQ and Drive, Amount controls the Dry/Wet level of the signal.
- For the Reverb effect, Amount controls the reverb Gain.
• For the Compressor, Amount controls the Threshold.
Control for Effect 1, 2, and 3
Controls a basic parameter of the selected effect:
- When Phaser is selected, Control determines the Speed of the Phaser effect.
- When Chorus or Flanger is selected, Control sets the Depth of the corresponding effect.
- When Delay is selected, Control determines the Feedback of the delays.

- When Reverb is selected, Control determines the reverb Time.
- When the EQ is selected, Control sets the Frequency Shifting of the EQ frequencies.
- When Drive is selected, Control determines the Amount of the chosen drive type.
- When Compressor is selected, Control determines the Ratio of the compression.
Effects Display Page
To access the Effects display page for further effect parameter press the EFFECTS button. Tap on the corresponding Effect tab to select the desired effect unit you want to edit.
The overall editing of the five effect units is similar. Depending on the selected effect type, different effect parameters are provided.
Hint: most of the effect parameters can be modulated by any modulation source the Quantum offers.
How to select an effect?
1) Tap on the desired Effect tab (Effect 1 to 5) you wish to use.
2) Tap on the Effect pop-up menu below the Effect tab button. Hint: you can skip step 1, because opening an Effect pop-up menu jumps automatically to the corresponding Effect unit.
3) Select the desired effect from the effect list.
4) All effect types can only be used once. This means, for example, that if you have set up a Delay for Effect 2 and you also select a Delay for Effect 4, Effect 2 is set to Off. All parameter edits made will be adopted. This enables you to perform an insert swapping of effects.
5) After an effect is loaded it can be edited by using the display page parameters.
Common Effect Parameters
Every effect type offers an Active and a Presets button. Tap on it to activate its function:
- By tapping on Active the corresponding effect unit is set to bypass. No effect signal is generated. Tap on Bypass to unmute the effect again.
- Tap on Presets to open a pop-up window. Here you can load, save, and manage effect presets for the corresponding effect type. Here the following options are available:
- On the left side you find a list of all presets for the current effect type. Tap on the desired name to select it and load it immediately. Already made effect settings will be overwritten.
- With the Save option you can save the selected effect settings. You can also enter a desired name.
- Import imports an effect preset from a connected SD card into the Quantum's Flash memory. The imported preset is shown within the effect preset list.
- Export exports the current selected effect preset to a connected SD card.
- Delete deletes the current selected effect preset after a security confirmation.
- Init initializes the current selected effect preset to its default settings.
- Close closes the pop-up window. No further action takes place.
The Effect Types of Quantum
Phaser
Phase shifting is a sweeping effect that was first popularized in the 1960s. It adds motion and a swirling character to the sound. It works by splitting the incoming signal, changing the phase of one side, and recombining it with the unaffected signal. This creates a notch-comb filter that can be swept through the frequency spectrum, causing the signature 'whooshing' sound of the phase shifter. The sweep is caused when the phase of the affected half is modulated by a LFO, with the frequency determined by the Speed control. Depth sets the amplitude for the action of the filtering, while Feedback amplifies certain harmonics.

For the typical Phaser effect sound the Dry/Wet parameter should be set to 50%.
Dry/Wet
This parameter controls the volume ratio between the original signal and the effect output. If set to 0%, the dry signal is sent to the output only so that no effect can be heard. Higher values will increase the effect signal. At maximum setting of 100% the pure effect signal will be heard.
Speed
Sets the LFO speed of the Phaser effect.
Depth
Sets the modulation depth of the Phaser effect.
Center
Sets the phase offset of the modulation oscillator between the left and right audio channels. Higher values lead to a wider stereo range.
Spread
Controls the phase position of the Phaser signal. Lower settings produce a more resonant Phaser effect.
Feedback
Controls the feedback amount of the signal.
Phase Diff
Determines the start phase of the modulation waveform in degrees.
Shape
Determines the shape of the LFO waveform, which is used for the phaser modulation. You can select between a sine and a triangle waveform.
Stages
Determines the numbers of stages that are used for the Phaser effect. The Phaser offers five phaser types with either two, four, eight, 12, or 16 independent delay lines, where half of them are routed to the left input and output and the others to the right input and output.
Model
Determines the Phaser model that is used. You can select between the Phaser from Waldorf's Nave and PPG Wave 3.V.
Tap on the corresponding effect parameter to open a pop-up menu for further settings (not all settings are available for all effect parameters):
• Normal: parameter change is about 1%.
• Fine: parameter change is about 0.1%.
• Super Fine: parameter change is about 0.01%.
- Set Default: sets the parameter to its default value.
- Set Last Loaded: resets the parameter to the last loaded value from the current sound patch.
- Modulations: opens the Mod menu to sets up a modulation for this parameter. How to set up a modulation can be read in 'The Modulation Mode' chapter.
- MIDI Learn CC: activates the MIDI Learn function, which maps an incoming MIDI control change to this parameter.
Chorus
A Chorus effect is generated by using comb filters that generate slightly detuned copies of the input signal and mix it into the output signal. The result sounds like an ensemble of several simultaneous sounds, like a choir as opposed to a single voice – hence being called Chorus. The detuning is generated by an internal LFO that can be controlled in speed and depth.


For the typical Chorus effect sound the Dry/Wet parameter should be set to 50%.
Dry/Wet
This parameter controls the volume ratio between the original signal and the effect output. If set to 0%, the dry signal is sent to the output only so that no effect can be heard. Higher values will increase the effect signal. At maximum of 100%, the pure effect signal will be heard.
Depth
Sets the modulation depth of the Chorus effect.
Speed
Sets the LFO speed of the Chorus effect.
Delay
Determines a delay for the chorus signal in milliseconds.
Feedback
Controls the feedback amount of the signal.
Spread
Controls the phase position of the chorus signal. Lower settings produce a more resonant chorus effect.
Shape
Determines the shape of the LFO waveform, which is used for the chorus modulation. You can select between a sine and a triangle waveform.
Stages
Determines the numbers of stages that are used for the Chorus effect. The Chorus offers four chorus types with either two, four, six, or eight independent delay lines, where half of them are routed to the left input and output and the others to the right input and output.
HighCut
Reduces the high frequencies of the chorus signal.
LowCut
Reduces the low frequencies of the chorus signal.
Tap on the corresponding effect parameter to open a pop-up menu for further settings (not all settings are available for all effect parameters):
• Normal: parameter change is about 1%.
• Fine: parameter change is about 0.1%.
• Super Fine: parameter change is about 0.01%.
- Set Default: sets the parameter to its default value.
- Set Last Loaded: resets the parameter to the last loaded value from the current sound patch.
- Modulations: opens the Mod menu to sets up a modulation for this parameter. How to set up a modulation can be read in 'The Modulation Mode' chapter.
- MIDI Learn CC: activates the MIDI Learn function, which maps an incoming MIDI control change to this parameter.
Flanger
The flanger effect is very similar to the chorus effect, but features feedback circuitry to feed the generated signal back into the comb filter. This generates a deeper detuning and colorizes the signal. With extreme settings you can hear a whistling sound which is very characteristic of a flanger effect.
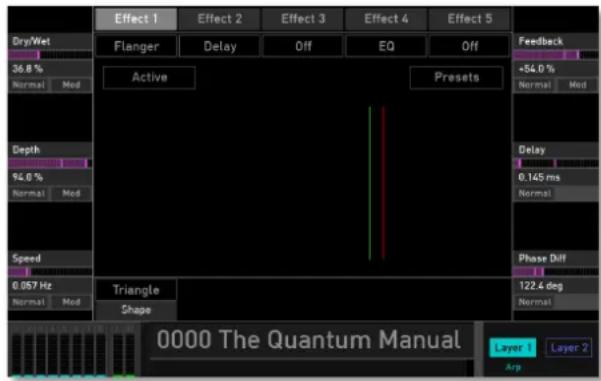
For the typical Flanger effect sound the Dry/Wet parameter should be set to 50%.

Dry/Wet
This parameter controls the volume ratio between the original signal and the effect output. If set to 0%, the dry signal is sent to the output only so that no effect can be heard. Higher values will increase the effect signal. At maximum setting of 100% the pure effect signal will be heard.
Depth
Sets the modulation depth of the Flanger effect.
Speed
Sets the LFO speed of the Flanger effect.
Feedback
Controls the feedback amount of the flanger-signal.
Delay
Determines a delay for the flanger signal in milliseconds.
Phase Diff
Determines the start phase of the modulation waveform in degrees.
Shape
Determines the shape of the LFO waveform, which is used for the flanger modulation. You can select between a sine and a triangle waveform.
Tap on the corresponding effect parameter to open a pop-up menu for further settings (not all settings are available for all effect parameters):
• Normal: parameter change is about 1%.
• Fine: parameter change is about 0.1%.
• Super Fine: parameter change is about 0.01%.
- Set Default: sets the parameter to its default value.
- Set Last Loaded: resets the parameter to the last loaded value from the current sound patch.
- Modulations: opens the Mod menu to sets up a modulation for this parameter. How to set up a modulation can be read in 'The Modulation Mode' chapter.
- MIDI Learn CC: activates the MIDI Learn function, which maps an incoming MIDI control change to this parameter.
Sound Parameter
Delay
A Delay is an effect that produces echoes of the input signal.

Dry/Wet
This parameter controls the volume ratio between the original signal and the effect output. If set to 0%, the dry signal is sent to the output only so that no effect can be heard. Higher values will increase the effect signal. At maximum setting of 100% the pure effect signal will be heard.
Feedback
Controls the amount of signal that is routed back into the Delay line. Lower values, therefore, produce fewer echoes than higher values.
Delay-L
Sets the length of the Delay tap for the left channel in milliseconds or rather seconds. If Sync is activated, the delay length can be entered in musical values.
PingPongPan
Controls the feedback send from the left channel to the right one and vice versa.
Decouple
This parameter delays the synced delay differently for the right and the left channel. This leads to a less static delay sound.
Delay-R
Sets the length of the Delay tap for the right channel in milliseconds or rather seconds. If Sync is activated, the delay length can be entered in musical values.
Sync
Synchronizes the delay to the internal tempo of the Quantum. If activated, you can set up Delay-L and Delay-R in musical values.
LR Linked
If this parameter is set to on, both delay signals (Delay-L and Delay-R) work as one signal. Delay-L is used to set the delay length; Delay-R has no function.
HighCut
Dampens the high frequencies produced by the Delay effect. This filter is routed before the feedback circuitry meaning that adjacent taps of the Delay will be dampened further. This creates the typical 'high frequency loss' that often happens in natural echoes. A minimal setting means that the signal isn't filtered, while higher settings filter the high frequencies of the feedback signal.
LowCut
Dampens the low frequencies produced by the Delay effect.
Tap on the corresponding effect parameter to open a pop-up menu for further settings (not all settings are available for all effect parameters):
• Normal: parameter change is about 1%.
• Fine: parameter change is about 0.1%.
• Super Fine: parameter change is about 0.01%.
- Set Default: sets the parameter to its default value.
- Set Last Loaded: resets the parameter to the last loaded value from the current sound patch.
- Modulations: opens the Mod menu to sets up a modulation for this parameter. How to set up a modulation can be read in 'The Modulation Mode' chapter.
- MIDI Learn CC: activates the MIDI Learn function, which maps an incoming MIDI control change to this parameter.
Reverb
The Reverb effect is probably the most widely used effect in music production. Quantum's reverb effect is an addition to the sound to make it more expressive with a three-dimensional feel.

Sound Parameter
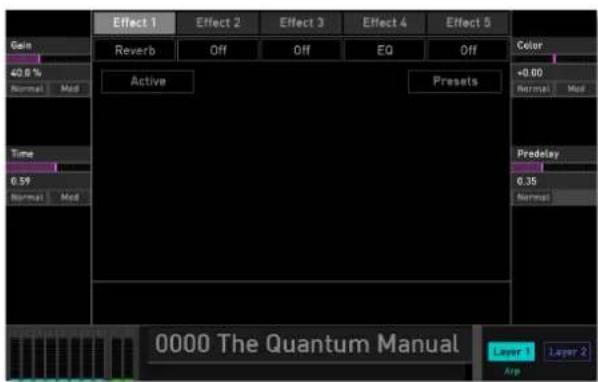
Gain
This parameter controls the volume of the reverb effect. If set to 0%, the dry signal is sent to the output only so that no effect can be heard. Higher values will increase the reverb level. At maximum setting of 100% the pure reverb effect signal will be heard.
Time
Determines the reverb time. Lower settings simulate a normal room while higher settings simulate a big hall or church.
Color
Determines the spectral colorization of the reverb sound. Negative values dampen the higher frequencies while positive settings dampen the lower frequencies.
Predelay
Determines the delay between the direct sound and the reverb effect output. Lower settings connect the reverb more to the original signal while higher settings separate the effect signal to produce a more spacious sound.
Tap on the corresponding effect parameter to open a pop-up menu for further settings (not all settings are available for all effect parameters):
• Normal: parameter change is about 1%.
• Fine: parameter change is about 0.1%.
• Super Fine: parameter change is about 0.01%.
- Set Default: sets the parameter to its default value.
- Set Last Loaded: resets the parameter to the last loaded value from the current sound patch.
- Modulations: opens the Mod menu to sets up a modulation for this parameter. How to set up a modulation can be read in 'The Modulation Mode' chapter.

waldorf
110 Quantum Manual
Sound Parameter
- MIDI Learn CC: activates the MIDI Learn function, which maps an incoming MIDI control change to this parameter.
EQ (Equalizer)
Quantum offers a parametric equalizer to adjust the sound frequencies to your needs.

Tap on the corresponding EQ curve in the touchscreen display to edit the Frequency and Gain parameters.
The equalizer features four bands with the following parameters:
EQ Dry/Wet
This parameter controls the volume ratio between the original signal and the effect output. If set to 0%, the dry signal is sent to the output only so that no effect can be heard. Higher values will increase the effect signal. At maximum setting of 100% the pure effect signal will be heard.
Low Freq
Controls the cutoff frequency of the low band. This shelf filter type looks like a normal or an inverted 'S' and it sounds and works similar to a low filter with adjustable stop band attenuation or boost.
Low Gain
Controls the gain boost or cut of the low band.
Freq Shift
Frequency shifting moves each frequency in a signal by the set amount. This is different to pitch shifting. For example, set an EQ Mid band to 2000 Hz with a Gain of 10 dB; every frequency within the signal is shifted by the same amount so that the harmonic relationships within the signal are broken, resulting in a very different sound.
High Freq
Controls the cutoff frequency of the high band. This shelf filter type looks like a normal or an inverted 'S' and it works and sounds similar to a hi-pass filter with adjustable stop band attenuation or boost.
High Gain
Controls the gain boost or cut of the high band.
Mid Freq / Mid 2 Freq
Controls the center frequency of the corresponding band. This bell filter looks like a normal or inverted bell and works and sounds similar to a band pass or notch filter - again with variable boost or attenuation and also with variable width.
Mid Gain /Mid 2 Gain
Controls the gain boost or cut of the corresponding band.
Mid Q / Mid2 Q
Controls the quality or width of the corresponding band. Higher values result in a narrower band, lower values widen it.
Master Gain
Working with an equalizer mostly affects the level of the output signal. Use Master Gain to adjust the overall gain to suit your needs.
Tap on the corresponding effect parameter to open a pop-up menu for further settings (not all settings are available for all effect parameters):
• Normal: parameter change is about 1%.
• Fine: parameter change is about 0.1%.
• Super Fine: parameter change is about 0.01%.
- Set Default: sets the parameter to its default value.
- Set Last Loaded: resets the parameter to the last loaded value from the current sound patch.
- Modulations: opens the Mod menu to sets up a modulation for this parameter. How to set up a modulation can be read in 'The Modulation Mode' chapter.
- MIDI Learn CC: activates the MIDI Learn function, which maps an incoming MIDI control change to this parameter.

Drive
Adds gain to a signal causing it to clip and distort. It introduces new harmonics that add a harsh edge to sounds.

Tap on the drive curve in the touchscreen display to edit the Amount parameter.
Dry/Wet
This parameter controls the volume ratio between the original signal and the effect output. If set to 0%, the dry signal is sent to the output only so that no effect can be
heard. Higher values will increase the effect signal. At maximum setting of 100% the pure effect signal will be heard.
Amount
Determines the amount of saturation that is added to the signal. If set to 0.00%, no saturation will be added or, in other words, the signal will remain clean. Lower values will add some harmonics to the signal, resulting in a warm character. Increasing the value will bring in more and more distortion, suitable for harder lead sounds and effects.
Gain
Working with the drive effect mostly affects the level of the output signal. Use Gain to adjust the overall gain to your needs.
Type
Determines the character of the drive. The following drive curves are available:
- PNP generates a distortion based on a bipolar transistor.
-
Tube simulates the asymmetric distortion of a tube circuit.
-
PickUp simulates an electrostatic pickup. This drive type sounds very interesting, when the audio signal level is modulated.
• Diode generates a typical diode distortion. - Crunch is a sinusoidal waveshaper. It generates FM-like sounds that can be extremely distorted.
Tap on the corresponding effect parameter to open a pop-up menu for further settings (not all settings are available for all effect parameters):
• Normal: parameter change is about 1%.
• Fine: parameter change is about 0.1%.
• Super Fine: parameter change is about 0.01%.
- Set Default: sets the parameter to its default value.
- Set Last Loaded: resets the parameter to the last loaded value from the current sound patch.
- Modulations: opens the Mod menu to sets up a modulation for this parameter. How to set up a modulation can be read in 'The Modulation Mode' chapter.
- MIDI Learn CC: activates the MIDI Learn function, which maps an incoming MIDI control change to this parameter.
Compressor
An Compressor reduces signals which exceed a certain Threshold level in volume by an adjustable Ratio. The speed of this level reduction is controlled by Attack, when the signal starts to exceed the threshold, and Release, when it drops below the threshold again.
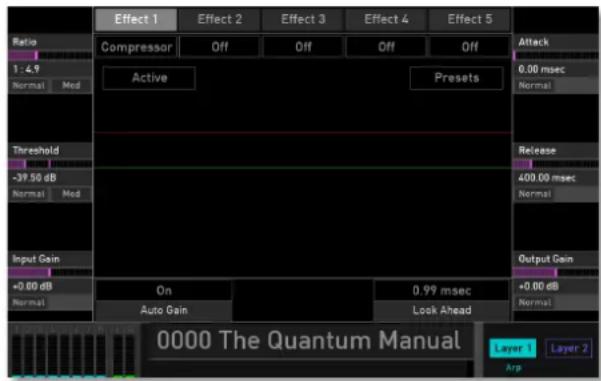
Ratio
Sets the amount of gain reduction (compression) applied to signals above the set threshold. A ratio of 4:1 means that for every 4 dB the input level increases, the output level increases by 1 dB.

Threshold
Determines to which signal level the compressor will be working. Only signal levels above threshold are processed.
Input Gain
Determines the input gain of the incoming audio signal.
Attack
Determines how fast the compressor responds to audio signals above the set Threshold. If the attack time is high, more of the transient parts of the signal passes through unprocessed.
Release
Sets the time after which the gain returns to its original level when the signal drops below the threshold.
Output Gain
Compensates for output gain loss caused by compression.
Auto Gain
Switch on the Auto Gain function for an automatic control of Output Gain when adjusting the Threshold.
Look Ahead
Higher Look Ahead values produce more accurate processing, but adds a certain amount of latency.
Keep in mind, that the Compressor effect settings are stored with the current sound program. This is not valid for the Compressor in the Output section.
Tap on the corresponding effect parameter to open a pop-up menu for further settings (not all settings are available for all effect parameters):
• Normal: parameter change is about 1%.
• Fine: parameter change is about 0.1%.
• Super Fine: parameter change is about 0.01%.
- Set Default: sets the parameter to its default value.
- Set Last Loaded: resets the parameter to the last loaded value from the current sound patch.
- Modulations: opens the Mod menu to sets up a modulation for this parameter. How to set up a modulation can be read in 'The Modulation Mode' chapter.
- MIDI Learn CC: activates the MIDI Learn function, which maps an incoming MIDI control change to this parameter.

Output Section
Compress
A 'one knob - one function' tool. Reduces the dynamic range of the audio signal. The signal seems to be louder and more assertive. The compressor effect is positioned after the effect units and before the Master Volume.
Keep in mind that the setting of the Compress knob is not saved within a sound preset.
Master Volume
Controls the overall output of the audio signal. Master Volume controls the Main Outs, the Aux Outs as well as the Headphones Out. Keep in mind that the headphones output contains an extra volume dial that works in addition to Main V
The Modulations of Quantum
Modulation can be described as a signal-generating unit's influence upon a sound parameter. The terms used in this context are 'Source' and 'Destination'. The Quantum offers 40 independent modulation assignments (slots) each with individual settings of source, destination, and amount. The Modulation Matrix (Mod Matrix) is key to the power of every Waldorf synthesizer, so start experimenting with it right now.
A complete table of all available sources and destinations can be found in the Appendix.
Direct Panel Modulations
Quantum offers an easy way to determine modulation by using the dials on the panel. This modulation assignment can be called up in different ways:
- Press the Mod button
or
- Tap on one of the display parameter names (the three parameters on the left and right side) to open a pop-up menu. Select the Modulation option. Keep in mind that not all parameters include this option.

The display shows the Modulation Assignment window. The basic concept is to select a modulation destination first (a parameter or function to be modulated), then select a modulation source (a function, such as an LFO or a wheel, that will modulate the destination) and finally determine the amount of modulation. This is also called modulation depth or intensity.
If you have opened the Modulation Assignment window by clicking on a display parameter, the modulation destination is already defined by this parameter.
This is how the Modulation Assignment works:
1) If you have pressed the Mod button, first select a modulation destination by turning one of the parameter dials that are lit in blue. This step is not necessary if the Modulation option is selected in the pop-up menu of a display parameter.
2) Select the corresponding modulation source by either turning one of the available panel dial sources (the LED below any dials/sources is lit in yellow). By turning the dial you can directly set the desired modulation amount. This will be also shown in the display.
3) You can also select one of the six modulation sources in the display. Turn the corresponding dial (e.g. wheel) to select the desired modulation amount.
4) You can add other modulation assignments by repeating step 2. Any assignment will be shown in the display by its Source, its Amount and the Destination.
5) Amounts can be changed at any time by turning the corresponding modulation source dial.
Keep in mind that you can set up positive or negative modulation amounts. Positive amounts will be shown as as green bar while negatives will be shown as a red bar. The same goes for the LEDs below the corresponding modulation source.
The Modulation Assignment window includes some more options:
- Clear Selected button: tap on the desired modulation entry to select it. Tap on the Clear Selected button to delete the selected modulation assignment.
- Clear All button: tap on this button to delete all modulation assignments that are shown in this list.
Sound Parameter
- Go to Matrix button: tap on this button to open the Modulation Matrix. Read more on this in the next chapter.
- Close button: closes the Modulation Assignment window. Already made modulation assignments will not be deleted.
Modulation Matrix Display Page
To access the Modulation Matrix display page press the MOD button. Tap on the Modulation Matrix tab on the touchscreen to select the display page.

This page shows all modulation assignments in a list. You can set up to 40 assignments.
How to setup a modulation:
1) Select the desired slot by using the Slot dial or tap on the slot in the list. You can scroll the list up and down by tapping and holding on it, then moving your finger up or down.
2) Select the desired modulation source by using the Source dial. Within the Source list there are 43 sources.
3) Select the desired modulation destination by using the Destination dial. Within the Destination list there are 158 destinations.
4) Set the desired modulation amount by turning the Amount dial. You can set a positive or negative amount.
5) You can also add a Controller with a Control Amount to a modulation assignment. More on this below.
Slot
Selects the respective Modulation Slots 1 to 40.

Source
Defines the modulation source.
Tap on Source to open a pop-up menu for further settings:
- Set Default: sets the parameter to its default Off setting.
- Set Last Loaded: resets the parameter to the last loaded value from the current sound patch.
- MIDI Learn CC: activates the MIDI Learn function, which maps an incoming MIDI control change to this parameter.
Controller
All modulation sources can also be used as controllers for the selected Source. A controller is used to scale the output of the modulation source. A typical example is the Modulation wheel as source and a LFO as the controller. This allows you to control the intensity of the LFO modulation using the wheel.
Tap on Controller to open a pop-up menu for further settings:
- Set Default: sets the parameter to its default Off setting.
- Set Last Loaded: resets the parameter to the last loaded value from the current sound patch.
- MIDI Learn CC: activates the MIDI Learn function, which maps an incoming MIDI control change to this parameter.
Amount
Determines the amount of modulation applied to the destination. Since the modulation is, in fact, a multiplication of the source signal and this parameter, the resulting amplitude depends on the type of modulation source you select:
- For the so-called unipolar modulation sources the resulting amplitude lies within the range of 0...+1 - if Amount is positive or 0...-1 - if Amount is negative. These sources are: all envelopes; all MIDI controllers including Mod Wheel, Pedal, etc; Velocity; Release Velocity; Aftertouch (Pressure; and Polyphonic Pressure.
- For the so-called bipolar modulation sources the resulting amplitude lies within the range of -1...0...+1. These sources are: all LFOs, Keytrack, and Pitchbend.
Tap on Amount to open a pop-up menu for further settings:
• Normal: parameter change is about 2%.

Sound Parameter
• Fine: parameter change is about 0.2%.
• Super Fine: parameter change is about 0.02%.
- Set Default: sets the parameter to its default value of +0.0%.
- Set Last Loaded: resets the parameter to the last loaded value from the current sound patch.
- MIDI Learn CC: activates the MIDI Learn function, which maps an incoming MIDI control change to this parameter.
Destination
Defines the modulation destination.
Tap on Destination to open a pop-up menu for further settings:
- Set Default: sets the parameter to its default Off setting.
- Set Last Loaded: resets the parameter to the last loaded value from the current sound patch.
- MIDI Learn CC: activates the MIDI Learn function, which maps an incoming MIDI control change to this parameter.
Control Amount
Determines an additional amount for the selected Controller. Amount and Control Amount is summed up to the total amount.
Tap on Control Amount to open a pop-up menu for further settings:
• Normal: parameter change is about 2%.
• Fine: parameter change is about 0.2%.
• Super Fine: parameter change is about 0.02%.
- Set Default: sets the parameter to its default value of +0.0%.
- Set Last Loaded: resets the parameter to the last loaded value from the current sound patch.
- MIDI Learn CC: activates the MIDI Learn function, which maps an incoming MIDI control change to this parameter.
Active Button
Select a desired modulation entry. Tap on the Active button to disable the corresponding modulation assignment. The button is labeled 'Disabled' and the modulation slot is

Sound Parameter
greyed out. Use this to temporarily bypass a modulation. Tap on Disabled to activate the modulation again.
Clear Slot Button
Select a desired modulation entry. Tap on the Clear Slot button to delete this modulation assignment.
Clear All Button
Tap on this button to delete all modulation assignments that are shown in the modulation matrix. A confirmation to finish this process is necessary.
Modulation Matrix List
The matrix list shows all currently made modulations. If a Controller is selected, it will also be shown in the Source column. If a Control Amount is set, it will also be shown as a separate bar in the Amount column.

Additional Modes
Perform Mode Page
To access the Perform display page press the Perform button below the touchscreen display. To select the desired option tap on the corresponding tab in the upper display area.
If you open the Perform display page, the Modulation Pad tab is automatically entered.
Favorites Tab
This is a special perform mode for live musicians. Here you can set up 20 sound programs per Set for faster selection. You can define up to six Sets, which means that you have fast access to 120 sound programs with just two taps.
You can also access the Favorites tab by pressing the selection dial. This is valid from every location except when the Load, Save, or Favorites display page is open.

Here is how it works.
1) Select the desired sound program by using the Prev/Next buttons or tapping on the sound name in the lower display section.
2) Tap and hold on one of the 20 blocks. After a little while a pop-up window will be shown. Here you can Assign the current sound program to the selected block. You can also Clear the selected block or Cancel any action.

3) Repeat steps 1 and 2 until you have filled the matrix with your favorite sound programs. You can tap on Set 1 to 6 to select a new favorite matrix.
4) To call up a favorite sound program just tap on the desired matrix block or use the Selection dial to scroll through the sound programs of the current Set. If you want to load a sound program, press the Selection dial.
5) One Set can contain only one sound program at any given time. This means that if you want to add the same sound program as previously added, the older one disappears when saving the new one to a desired location.
Arpeggiator (Arp) Tab
An Arpeggiator is a device that splits an incoming chord into its individual notes and repeats them rhythmically. Different sequence modes can be defined for the Arpeggiator to cover a wide range of applications. In addition to the synthesis features Quantum offers a programmable arpeggiator. It can play a wide range of different rhythm patterns.
Click on the Arp button in the Wheel section to activate or deactivate the arpeggiator.
The arpeggiator outputs MIDI notes in case the MIDI Out function on the Global menu page is enabled.
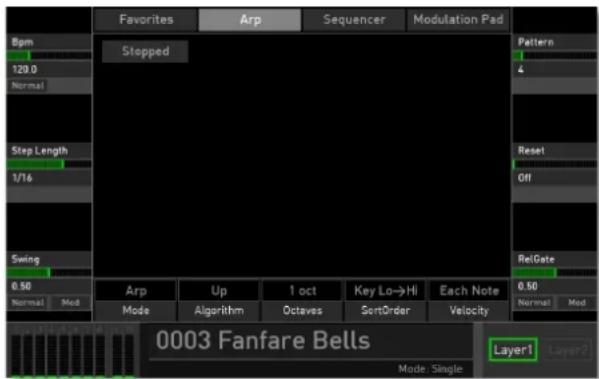
Bpm
Sets the overall tempo for the Arpeggiator and the Sequencer in Bpm (beats per minute). This tempo also affects the functions that can be affected by tempo (e.g. LFOs, Komplex Modulator, Delay effect).

Step Length
Determines the rate at which notes are triggered – that is to say, the speed at which the arpeggio is running. In addition to the Bpm parameter this gives you further control over the playback speed. You can specify a value in fractions of beats. For example, if Step Length is set to 1/8, the arpeggio plays eight notes per measure.
Swing
Determines how much the timing affects an arpeggio step. If Swing is set to 0.50, the arpeggio is played back without any shuffled timing. Settings from 0.51 to 0.95 increase the shuffling of the notes and creates a typical swing. You can also use settings below 0.50 to influence the timing.
Pattern
With the pop-up menu Pattern you can select one of the 31 internal rhythm and accent patterns.
Reset
Can set up a limit for the played notes. This is useful to create inclined measures. Set Reset to 8 or 16 to start an arpeggio at the beginning of a measure.
RelGate (Release Gate)
With the settings of the pop-up menu RelGate you can determine the note length depending on the original length. The lower the value, the shorter the played notes.
Mode
Quantum also offers a programmable Step Sequencer. This can be used as a luxury arpeggiator. Therefore, most of the parameters are shared by the Arpeggiator and the Sequencer. Here you can switch between the Arpeggiator mode, which uses the standard arp parameters, and Sequencer mode, where own patterns can be programmed.
Mode is available on the Arpeggiator page and the Sequencer page.
Algorithm
Sets the direction that is used to play back the arpeggio. This parameter works in conjunction with Octaves and Sort Order:
- If Up is selected, the note list is played forward and the octaves are transposed upward. The arpeggio starts in the original octave and goes up to the highest octave (determined with Octaves). Then the arpeggio is repeated.

Additional Modes
- If Down is selected, the note list is played backward and the octaves are transposed downward. The arpeggio starts in the highest octave (determined with Octaves) and goes down to the original octave. Then the arpeggio is repeated.
- If Up Down is selected, the note list is first played forward and the octaves are transposed upward. After reaching the last note of the note list in the highest octave to play, the note list is played backward and the octaves are transposed downward down to the first note of the note list in the original octave. Then the arpeggio is repeated.
- If Up - Down is selected, the note list is first played forward and the octaves are transposed upward. After reaching the last note of the note list in the highest octave to play, this note is repeated and the note list is played backward and the octaves are transposed downward down to the first note of the note list in the original octave. Then the arpeggio is repeated.
- If Down \ v \ Up is selected, the note list is first played backward and the octaves are transposed downward. The arpeggio starts in the highest octave (determined with Octaves). After reaching the first note of the note list in the original octave, the note list is played forward and the octaves are transposed upward up to the
last note of the note list in the highest octave to play. Then the arpeggio is repeated.
- If Down - Up is selected, the note list is first played backward and the octaves are transposed downward. The arpeggio starts in the highest octave (determined with Octaves). After reaching the first note of the note list in the original octave, this note is repeated and the note list is played forward and the octaves are transposed upward up to the last note of the note list in the highest octave to play. Then the arpeggio is repeated.
- If Random is selected, the note list will be played randomly.
Octaves
Determines the range of the single notes in octaves. When it is set to 1 oct, the note list will be played back in the same octave as originally entered. Higher octave values mean that the note list is repeated in higher or lower octaves. The octave in which the arpeggio starts is determined by the Algorithm parameter. If you play notes that span more than one octave, they are still kept in the note list and played back before the note list is transposed.
SortOrder
With the settings in the pop-up menu SortOrder you can determine how the notes you originally play are split up for the arpeggio:
- If As Played is selected, the notes are sorted in the exact order you played them.
- If Reversed is selected, the notes are sorted in reverse order to which you played them. If, for example, you press E1, G1 and C1, the note list is sorted to C1, G1, and E1.
- If Key Lo->Hi is selected, the notes are sorted from the lowest note to the highest note. If, for example, you press E1, G1 and C1, the note list is sorted to C1, E1, and G1.
- Key Hi->Lo is the opposite of Key Lo->Hi. The example would be sorted as G1, E1, and C1.
- If Vel \ Lo->Hi is selected, the notes are sorted from the softest to the loudest velocity.
• Vel Hi->Lo is the opposite of Vel Lo->Hi. - If Chord is selected, the arpeggiator plays a chord based on all notes from the note list.
Velocity
With the settings in the pop-up menu Velocity you can determine how velocity is interpreted in the arpeggio:
- If Each Note is selected, each note of the arpeggio is played back with the velocity that you originally played.
- If First Note is selected, the first note you played sets the velocity for all arpeggio steps.
- If Last Note is selected, the last note you played sets the velocity for all arpeggio steps.
Tap on the corresponding arpeggiator parameter to open a pop-up menu for further settings (not all settings are available for all arpeggiator parameters):
• Normal: parameter change is about normal.
• Fine: parameter change is about fine.
• Super Fine: parameter change is about super fine.
- Set Default: sets the parameter to its default value.
- Set Last Loaded: resets the parameter to the last loaded value from the current sound patch.

Additional Modes
- Modulations: opens the Mod menu to sets up a modulation for this parameter. How to set up a modulation can be read in 'The Modulation Mode' chapter.
- MIDI Learn CC: activates the MIDI Learn function, which maps an incoming MIDI control change to this parameter.
Sequencer Tab
This display page contains a programmable step sequencer, where you can use up to 32 steps per measure. For each step the note length, velocity, and pitch can be defined. You can also create four additional controller sequences that can be used as modulation sources.
The sequencer outputs MIDI notes in case the MIDI Out function on the Global menu page is enabled.

To start the sequencer playback, tap on the Off button (it switches to Running) and play one or more notes on the keyboard. You can also press the Arp button in the Wheel section to start the sequencer.
The Sequencer Graphic
The display gives you an overview of all steps of a sequence. You can edit this graphic directly by using the following tools:
• Each block in the center of the graphic represents a step. The number of blocks depends on the settings of
the Step Length parameter. Up to 32 blocks/steps are possible. Tap on a step to select it (it lights up in red). Move your finger up and down to change the pitch of the selected step. Move your finger from left to right or vice versa to 'draw' a sequence.
- Below the graphic you find the same number of blocks. Each block represents a step. Tap on a desired block to mute the corresponding step. the same applies for unmuting. A selected block lights up in red and displays the current pitch (e.g. +3).
- For a more accurate editing of a selected step you can use the Pitch parameter.
- To get a better overview you can divide the graphic in steps overview from 1-16 and 17-32, if desired. Tap on the corresponding button above the graphic.
- Based on the selected step overview the blocks display pitch, velocity, gate (note length), or one of the four modulation parameters.
Bpm
Sets the overall tempo for the Sequencer and the Arpeggiator in Bpm (beats per minute). This tempo also affects the functions that can be affected by tempo (e.g. LFOs, Komplex Modulator, Delay effect).
Step Length
Determines the rate at which notes are triggered – that is to say, the speed at which the sequence is running. In addition to the Bpm parameter this gives you further control over the playback speed. You can specify a value in fractions of beats. For example, if Step Length is set to 1/8, the sequence plays eight notes per measure.
Swing
Determines how much the timing affects a sequence step. If Swing is set to 0.50, the sequence is played back without any shuffled timing. Settings from 0.51 to 0.95 increase the shuffling of the notes and create a typical swing. You can also use settings below 0.50 to influence the timing.
Pitch/Velocity/Gate/Param 1 - 4
This parameter depends on the setting of the Notes button above the graphic. If Notes is selected, Pitch is shown and you can set the pitch for the selected step. If Velo is selected, you can edit the velocity for the selected step and so on.

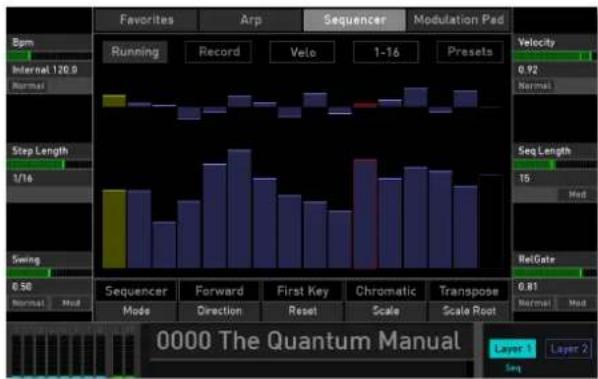
bar
| Category | Value | |---|---| | Sequencer Mode | 0.50 | | Forward Direction | 1/16 | | First Key Reset | 15 | | Chromatic Scale | 0.81 | | Transpose Scale Root | 0.81 | | Running | 0.92 | | Record | 0.92 | | Velo | 0.92 | | 1-16 Presets | 0.92 | | Velocity | 0.92 | | Seq Length | 15 | | RelGate | 0.81 | | Layer 1 | 0.81 | | Layer 2 | 0.81 | | Bgm Internal 120.0 Normal | 0.81 | | Step Length | 0.81 | | Swing | 0.81 | 0000 The Quantum ManualThe Sequencer in Velocity mode
Seq Length
Determines the length of the step sequence. A sequence must contain a minimum of one step. You can set up to 32 steps.
RelGate (Release Gate)
With the settings of the pop-up menu RelGate you can determine the note length depending on the original length. The lower the value, the shorter the played notes.
Mode
Here you can switch between the Sequencer and the Arpeggiator mode. Mode is available on the Arpeggiator page and the Sequencer page.
Direction
Sets the direction that is used to play back the sequence:
- If Forward is selected, the notes are running from the first step to the last. Then the sequence is repeated.
- If Backwards is selected, the notes are running from the last step to the first. Then the sequence is repeated.
- If Ping-Pong is selected, the notes are running from the first step to the last, then back to the first note and so on.
- If Forw-Back is selected, the notes are running from the first step to the last. The last step is repeated and the sequence is running back to the first note, which also is repeated and so on.
- If One-Shot is selected, the notes are running from the first step to the last. Then the sequence stops.
Reset
Determines the behaviour of the Step sequencer when a new note is triggered:
- If First Key is selected, the sequence always starts from the beginning when a new note is triggered.
- If No Reset is selected, the sequence always runs, regardless of any new notes, that are triggered.
- If Random is selected, the sequence always starts from a random position, when a new note is triggered.
Scale
Opens a pop-up menu with numerous musical scales, e.g. Chromatic, Major, Minor or Lydian dominant.
Scale Root
Determines the tonic keynote for used scale.
Tap on the corresponding sequencer parameter to open a pop-up menu for further settings (not all settings are available for all sequencer parameters):
• Normal: parameter change is about normal.
• Fine: parameter change is about fine.
• Super Fine: parameter change is about super fine.
- Set Default: sets the parameter to its default value.
- Set Last Loaded: resets the parameter to the last loaded value from the current sound patch.
- Modulations: opens the Mod menu to sets up a modulation for this parameter. How to set up a modulation can be read in "The Modulation Mode" chapter.
- MIDI Learn CC: activates the MIDI Learn function, which maps an incoming MIDI control change to this parameter.
The Sequencer Buttons
Above the graphic you find four buttons for further settings.
Running/Off
Here you start or stop the sequencer playback. You can also use the Arp button in the Wheel section.
Record/Stop Record
Here you can start and stop the realtime recording function. It records a played note (pitch) for each step, one at a time.

Additional Modes
1-32/1-16/17-32
Tap on this button to open a pop-up menu where you can switch between the graphic overview of the steps. You can display all steps (1-32), only steps 1-16, or only steps 17-32.
Presets
Tap on the Presets button to open a pop-up window for loading, saving, and managing Step sequences. For more information on the available options please refer to the Presets chapter in the Wavetable section.
Modulation Pad Tab
This page provides a X-Y pad, a two-dimensional controller based on two selected modulation parameters.

First you need to define the X and Y controller within the Modulation Matrix. You can, for example, easily set up a modulation for Cutoff (Pad X) and Resonance (Pad Y).
X/Y Polarity
Both controllers can be switched from Bipolar to Unipolar. For the so-called unipolar modulation sources the resulting amplitude lies within the range of 0...+1. For the so-called bipolar modulation sources the resulting amplitude lies within the range of -1...0...+1.

Spring Back X/Y
If set to On, the button jumps back in the middle of the pad, when you release your finger. If set to Off, the button stays in its last position.
Tap on the corresponding Modulation Pad parameter to open a pop-up menu for further settings:
- Set Default: Sets the parameter to its default value.
- Set Last Loaded: Resets the parameter to the last loaded value from the current sound patch.
- MIDI Learn CC: Activates the MIDI Learn function, which maps an incoming MIDI control change to this parameter.
Keep in mind that the Modulation Pad tab opens automatically when the Perform button is pressed.
Layer Mode Page
To access the Layer mode page press the Layer button below the touchscreen display.
Here you can make settings regarding the two sound layers as well as the audio output routing. You will also find the display controls for the Unisono voices mode.
To select the desired mode tap on the corresponding tab (Levels & Routing or Voices).
Levels & Routing Tab
Quantum offers a dual sound mode which means that two different sounds can be played simultaneously either as layered or as split sounds.
To switch between Layer 1 and Layer 2 just tap on the corresponding Layer button in the lower right corner of the touchscreen display. The current selected Layer button lights up. Below the Layer buttons the current layer mode is displayed as well as the running state of the arpeggiator or the sequencer.
Keep in mind that both sound layers will share the maximum polyphony of eight voices.

Basic layer settings can also be made on the Voices tab display page.

Vol (Volume)
Here you determine the volume of the selected layer.
Tap on Vol to open a pop-up menu for further settings:
• Normal: Volume change with normal values.
• Fine: Volume change with fine values.
• Super Fine: Volume change with super fine values.
- Set Default: sets Volume to its default value of 0 dB.
- Set Last Loaded: resets the parameter to the last loaded value from the current sound patch.
- Modulations: opens the Mod menu to sets up a modulation for this parameter. How to set up a modulation can be read in 'The Modulation Mode' chapter.
- MIDI Learn CC: activates the MIDI Learn function, which maps an incoming MIDI control change to this parameter.
Pan (Panning)
Here you determine the panning of the selected layer.
Tap on Pan to open a pop-up menu for further settings:
• Normal: panning change is about 2%.
• Fine: panning change is about 0.2%.
• Super Fine: panning change is about 0.02%.
- Set Default: sets panning to its default Center value.
- Set Last Loaded: resets the parameter to the last loaded value from the current sound patch.
- Modulations: opens the Mod menu to sets up a modulation for this parameter. How to set up a modulation can be read in 'The Modulation Mode' chapter.
- MIDI Learn CC: activates the MIDI Learn function, which maps an incoming MIDI control change to this parameter.
Input Volume
Here you determine the input volume of an external audio signal for the selected layer. Use this parameter if you want to feed an external audio signal through the Quantum's signal path in Live Granular mode. Be careful with this setting because higher values could disturb the sound.
Tap on Input Volume to open a pop-up menu for further settings:
• Normal: Input Volume change with normal values.
• Fine: Input Volume change with fine values.
- Super Fine: Input Volume change with super fine values.
- Set Default: sets Input Volume to its default value of -inf dB.
- Set Last Loaded: resets the parameter to the last loaded value from the current sound patch.
- MIDI Learn CC: activates the MIDI Learn function, which maps an incoming MIDI control change to this parameter.
Amp Velo Amt. (Amplifier Velocity Amount)
Specifies how much volume will be affected by keyboard velocity. Use this feature to give more expression to the sound. With a setting of 0.0% velocity will have no effect on the volume. Classic organs work in this way because they do not have dynamic response. For positive settings the volume rises with higher velocities. This is the most commonly used setting, which gives a piano-like character. With negative settings, the volume decreases at higher velocities. This gives an atypical character is suited for effect sounds. As this parameter always works in conjunction with the Amplifier Envelope it actually determines the envelope velocity amount.
Tap on Amp Velo Amt. to open a pop-up menu for further settings:
- Normal: Amp velocity amount changes with normal values.
• Fine: Amp velocity amount changes with fine values. - Super Fine: Amp velocity amount changes with super fine values.

Additional Modes
- Set Default: sets Amp velocity amount to its default value of +0.0% .
- Set Last Loaded: resets the parameter to the last loaded value from the current sound patch.
- MIDI Learn CC: activates the MIDI Learn function, which maps an incoming MIDI control change to this parameter.
Gain
Here you determine the gain for an external signal. Make sure to adapt the overall level of an external audio signal by using Input Volume in conjunction with Gain.
Tap on Gain to open a pop-up menu for further settings:
• Normal: Gain changes with normal values.
• Fine: Gain changes with fine values.
• Super Fine: Gain changes with super fine values.
- Set Default: sets Gain to its default value of +0.0 dB.
- Set Last Loaded: resets the parameter to the last loaded value from the current sound patch.
- MIDI Learn CC: activates the MIDI Learn function, which maps an incoming MIDI control change to this parameter.
Input Routing
Here you can determine the signal flow for an incoming audio signal. Tap on Input Routing to open a pop-up menu with the following options:
• Off: an incoming signal is ignored.
- Main Output: an incoming audio signal is directly routed to the Quantum's Main Output.
- Aux Output: an incoming audio signal is directly routed to the Quantum's Aux Output.
- FX Layer 1: an incoming audio signal is directly routed into the Effect section of Layer 1.
- Filter L1: an incoming audio signal is directly routed into the Dual Analog Filter section of Layer 1.
- Former L1: an incoming audio signal is directly routed into the Digital Former section of Layer 1.
- FX Layer 2: an incoming audio signal is directly routed into the Effect section of Layer 2.

Additional Modes
- Filter L2: an incoming audio signal is directly routed into the Dual Analog Filter section of Layer 2.
• Former L2: an incoming audio signal is directly routed into the Digital Former section of Layer 2.
Send Main
Determines if the currently selected Layer sound is sent to the Quantum's Main outputs (On) or not (Off).
Send Aux
Determines if the currently selected Layer sound is sent to the Quantum's Aux outputs (On) or not (Off).

Keep in mind that you can route both layers to all outputs, if desired. You can also set up different audio outputs for each layer.
Voices Tab
Here you determine the layer mode and how many voices are triggered when a note is played.

Voices tab display page with active Unisono section
Timbre Mode
Quantum offers three different modes for the Sound layers:
- Single: both Sound layers have individual settings and cannot be played together. You can switch between

two layers by tapping on the Layer 1 or Layer 2 button in the touch screen display.
- Split: Layer 1 and Layer 2 use a dedicated keyboard range for playing. A typical situation is that a bass sound is played in the lower range of the keyboard while a lead sound is played in the upper range. Use the Voices and Min Key/Max Key parameters of both Layers to set the desired keyboard ranges for the split sounds.
- Layered: both Sound layers are played simultaneously over the whole keyboard range. Use this option to combine two sounds, such as a pad sound and a poly lead.
Unisono Count
Here you determine the number off voices that are stacked when playing a note. This means that the selected number of voices are triggered when a note is played. Only the first voice has high priority, meaning that it can cut off other played notes. The other voices can only sound if any voices are free or if there are other unison voices with lower priority that could be cut off. This ensures that older notes play at least one voice as long as the voice allocation isn't forced to even steal this voice for a new note. You can select a maximum of eight voices.
Tap on Count to open a pop-up menu for further settings:
- Set Default: sets Count to its default value of Off.
- Set Last Loaded: resets the parameter to the last loaded value from the current sound patch.
- MIDI Learn CC: activates the MIDI Learn function, which maps an incoming MIDI control change to this parameter.
! Please note that the chosen number of Unisono voices will respectively lower the number of available voices.
The following parameters (Unisono Detune, Pan and Delay) are only available if Unisono Count is set to a voice value higher than 1.
Unisono Detune
Controls the detuning of the Unisono voices. Each voice is detuned differently; with Detune you control the overall amount.
Tap on Detune to open a pop-up menu for further settings:
• Normal: Detune changes with normal values.
• Fine: Detune changes with fine values.
Additional Modes
• Super Fine: Detune changes with super fine values.
- Set Default: sets Detune to its default value of 0.20.
- Set Last Loaded: resets the parameter to the last loaded value from the current sound patch.
- MIDI Learn CC: activates the MIDI Learn function, which maps an incoming MIDI control change to this parameter.
Unisono Pan
Controls the panning of the Unisono voices. Each voice is panned differently; with Pan you control the overall degree amount.
Tap on Pan to open a pop-up menu for further settings:
• Normal: Pan changes with normal values.
• Fine: Pan changes with fine values.
• Super Fine: Pan changes with super fine values.
- Set Default: sets Pan to its default value of 90 deg.
- Set Last Loaded: resets the parameter to the last loaded value from the current sound patch.
- MIDI Learn CC: activates the MIDI Learn function, which maps an incoming MIDI control change to this parameter.
Unisono Delay
Controls the delay of the Unisono voices relating to the first played note. Each voice is delayed differently; with Delay you control the overall delay amount.
Tap on Delay to open a pop-up menu for further settings:
• Normal: Delay changes with normal values.
• Fine: Delay changes with fine values.
• Super Fine: Delay changes with super fine values.
- Set Default: sets Delay to its default value of 0.25.
- Set Last Loaded: resets the parameter to the last loaded value from the current sound patch.
- MIDI Learn CC: activates the MIDI Learn function, which maps an incoming MIDI control change to this parameter.
The following parameters are only available if Timbre Mode is set to Split.

Voices (only for Split Mode)
Here you determine, how many voices the corresponding sound layer is able to play. Keep in mind that the Quantum offers an overall polyphony of eight voices. If you set Layer 1 to five voices, Layer 2 automatically switches to three voices, and vice versa.
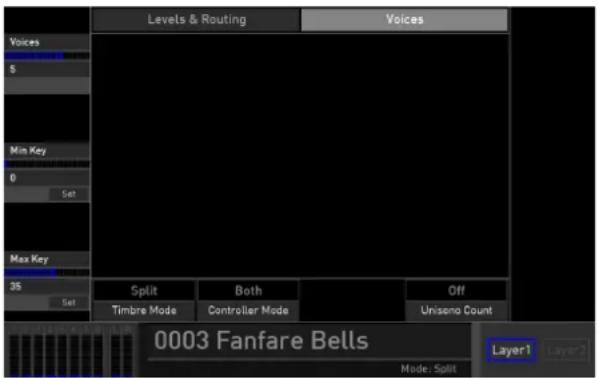
Voices tab display page in Split Layer mode
Min Key / Max Key (only for Split Mode)
Here you determine the keyboard range for the selected layer when in Split mode. The lowest setting is 0 (note C-2); the highest is 60 (note C8).
Tap on Min Key or Max Key to open a pop-up menu for further settings:
- Set Default: sets Min Key/Max Key to its default value.
- Set Last Loaded: resets the parameter to the last loaded value from the current sound patch.
- MIDI Learn CC: activates the MIDI Learn function, which maps an incoming MIDI control change to this parameter.
- Set From Keys: play a key on your keyboard to set the corresponding note.
Controller Mode (only for Split Mode)
Determines which layer will be affected by local Mod wheel, Pitch bend, Aftertouch and Modulation pad.
• Both: wheels and play controls affect both layers.
- Layer 1 / Layer 2: wheels and play controls affect Layer 1 or Layer 2.
- Selected: wheels and play controls affect the current selected layer.

Global Mode
To access the Global Mode page press the Global button below the touchscreen display. To select the desired function tap on the corresponding tab in the upper display next pages, we describe every Tab mode in de

Scope Tab
Here you can select a graphic representation of the current sound that is played. Tap on Source, Type, or Mode to open a pop-up menu with further settings.

- Source: here you can determine the signal that is shown in the graphic representation. You can select single signals (as for Osc 1, 2 or 3) or the signal that passes a component of Quantum's signal flow (Filter, DigiFormer, VCA), a layer signal or the Input signal of the external audio input.
- Type: you can choose three types of graphic representation: Scope shows a realtime stereo wavemeter (see also Mode), Analyzer (lin), and Analyzer (log) shows a graphic analyzer of the frequency spectrum of the signal, either with a linear (lin) or a logarithmic (log) representation.
- Mode/FFT Size: depends on the selected Type. If Scope is selected, you can choose between One Shot (a momentary shot of the corresponding sound), Pitch (a continuous representation) and Continuous (a realtime wavemeter). If any other Type is chosen, it determines the block size of the FFT (Fast Fourier transformation) spectrum analyzer. Higher block sizes provide more resolution in the lower frequency range, but decrease time coherence (time precision) in the higher frequency range - the higher frequency information becomes over-averaged.

Pitch Tab
Here you can make settings relating to the overall tuning of the Quantum.
- Transpose: allows a global pitch transposition for the tone generator. Played notes are shifted by the number of semitones.
- Master Tuning: determines the Quantum's overall pitch in Hertz. The value specified here is the reference pitch for MIDI note A3. The default setting is 440 Hz, which is commonly used by most instruments.
- Scale: opens a pop-up menu for a wide-ranging selection of musical scales - chromatic, major, minor, or lydian dominant, for example.
- Scale Root: determines the tonic keynote for the selected scale.
You can also import Tuning tables that are made with the free software application Scala by Huygens-Fokker Foundation (http://www.huygens-fokker.org/scala).
Tap on Import Tuning to import a Scala (*.scl) file from a connected SD card.
Tap on Show Tuning/Hide Tuning to display the current tuning settings for each note by MIDI pitch and its interval.
Use MIDI Note to scroll through the Tuning list. With Hide Tuning you can close this window.
Audio Tab
Here you find a simple and easy-to-use Audio Recorder to record any audio signal from the Audio Input or the Outputs into the Quantum's Flash memory.
Here is how to proceed:
1) Tap on the button right beside the Recording from label to select the desired input signal. You can either record an external audio signal (Input) or the output signal of Quantums Main or Aux outs. In the latter case, no further signal connection is necessary since the signal is recorded internally without any loss.
2) Tap on Record to start the recording process.
3) Tap on Stop to end the recording process.
4) Tap on Play to playback your recording. Use the Playback Vol parameter to control the playback volume.
5) If you want to save your recording in the Quantum's Flash memory, tap in Save to open the Save Audio file window.

6) You can also search the internal Flash memory by tapping on Browse.
7) Use the Import and Export buttons to import or export an audio file to or from the Flash memory.
MIDI Tab
Here you can make further settings relating to the MIDI inputs and outputs as well as for the synchronisation. You can also manage the MIDI Controller Learn settings. Tap on the desired button to open the corresponding setting window.
Inputs
Here you can make settings regarding the MIDI inputs (DIN In, USB Controller In, USB Computer In):
- State: tap on the first state button to switch the corresponding MIDI In port on or off.
- Layer 1/2 Input Channel: tap on the corresponding button to open a pop-up menu. Here you can select the desired MIDI channel on which Layer 1 and Layer 2 reacts.
- Local Keyboard: determines whether incoming MIDI messages are received (On) or ignored (Off) by the keyboard.
Outputs
Here you can make settings relating to the MIDI outputs (DIN Out, USB Controller Out, USB Computer Out).
- State: tap on this button to switch the corresponding MIDI Out on or off.
- Send CC Mappings: here you can activate all mapped MIDI Control Change (MIDI CC) data being sent out for the panel pots, buttons, and encoder.
If you have MIDI Controller routed in both directions, you could use your DAW automation function to easily control the Quantum.
Sync
Determines how the Quantum reacts to incoming MIDI Clock messages.
Tap on Sync Source, to determine the sync behaviour:
- Internal means that the Quantum doesn't react to incoming MIDI Clock, nor does it send MIDI Clock. The

Quantum only syncs to its own tempo base that is set by Bpm. This sparameter can be also found on the Arpeggiator/Sequencer page.
- External means that the Quantum automatically syncs to incoming MIDI Clock if it is sent by an external device like a sequencer or drum machine.
Tap on Snap to Downbeat, to activate (On) or deactivate (Off) the external synchronisation to the downbeat.
Mappings
Opens a page with all mapped MIDI Control Change data. This page gives you an overview of all used MIDI mappings. You can also change or set up settings.
Use the MIDI CC parameter dial or your finger to scroll through the list and select a desired MIDI CC.
Below the list there are a few more buttons regarding the MIDI CC editing:
- Set: tap on set to open a page for set up a desired MIDI CC connection to any panel parameter dial, potentiometer, or button. Follow the instructions on the touchscreen display.
-
Clear: deletes the current selected MIDI Controller mapping.
-
Clear All: deletes all MIDI Controller mappings after a confirmation.
• Used/All: switches between used MIDI Controller mappings and the complete list representation. - Load: loads a MIDI Controller mapping from the Flash memory. Current MIDI Controller mappings will be overwritten.
- Save: saves the current MIDI Controller mapping to the Quantum's Flash memory.
Settings Tab
Here you can make general settings relating to the dials, the display, and further options.
General Page
- Load at Startup: determines, which sound program the Quantum should load after starting up the machine: you can choose between the Last Loaded preset, an Init Sound program, and Patch 0 (sound program number 0000).
- Display Brightness: controls the brightness of the touchscreen display from 0 to 100%.

- LED Brightness: controls the brightness of all LEDs from 0 to 100% .
Edit Page
- Pot Mode: tap on this button to select the behaviour of the potentiometers (not the endless dials). Immediate means that a parameter value will jump immediately to the corresponding dial position. Pick-Up means that you have to turn the dial until it reaches the current parameter value. If reached, the value is changed. Catch works almost the same as Pick-Up, but the current value moves while turning – if the dial position matches the value.
- Touch Mode: controls the behaviour of value changes with the touch display, especially when editing sliders and faders. Direct means that the value jumps directly to the value that is tapped on, while Relative means that a value must be picked up before changing.
- Switch Screens: here you can determine whether the touchscreen display should automatically open the corresponding parameter page when editing any sound parameter in any panel section (At Edit) or not (Off).
- Edit Popup Time: here you can determine how long a popup window/menu will be shown in the touchscreen display. The basic setting is 2.0 sec.
Colors Page
Here you can switch on/off the backlight LEDs for all buttons and determine a personal color scheme.
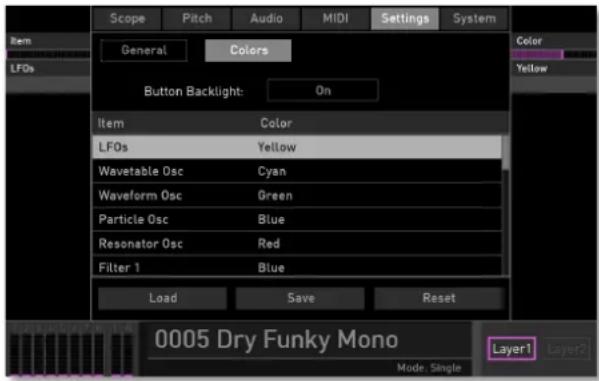
- Button Backlight: here you can switch on/off the backlight LEDs for all buttons. We recommend switching it on when the ambient light is dark.

Additional Modes
- Custom Section Color List: here you can define a custom LED color for every parameter section, for example, the LFOs or the Resonator. Select the corresponding section with the Item parameter or by tapping on the touchscreen and choose the desired LED color with the Color parameter. You can Save and Load color setups or Reset the complete list to its default setting.
System Tab
This page gives you information on the current operating system and your serial number (UID). Here you can also update the operating system software and calibrate the Quantum keyboard and wheels.

- Calibrate Tab: tap on this button to open the Calibration display page. Here you can calibrate the keyboard, the wheels (Wheels & AT) and also connected pedals (Control Pedal). Please follow the onscreen instructions. You can also determine the Velocity Sensitivity for the Quantum keyboard from Soft to Hard. The basic setting is Medium. Tap on Display to adjust the display horizontally and vertically.
- Info Tab: tap on this button to open the Info display page. Here you are able to update the operating system software (Update). Read more in the next section. You can also use the Flash Panel button to update the pa-

nel. Tap on Support Log to save a log file onto a connected SD card in case you need support or service for your Quantum.
How to update the Quantum operating system
The Quantum has a service-friendly feature that makes it possible to update the system software without changing any parts.
All software updates come in the form of a download file. The fastest way to get this file is by downloading it from our website at:
http://www.waldorfmusic.com/quantum
If downloaded onto your computer hard disk, please proceed as follows:
1) Connect a suitale SD card (formatted with FAT file system) to your computer.
2) Copy the quantum.update.bin file to the SD card ans move it into the top folder (if necessary).
3) Connect the SD card to your Quantum via the SD card slot.
4) Tap on the Update button on the System tab page (Info tab).
5) Follow the onscreen instruction.
6) Wait until the operation is completed. If updating was successful, the Quantum will perform a system reset and start up.

Do not under any circumstances turn off the Quantum while the update is in progress. A complete loss of data may occur!

Loading & Editing Samples
As you may know, the Quantum can play back samples via the Particle generator or as an exciter for the Resonator.
Out of the box the Quantum is delivered with a bunch of audio samples, but you can also use your own samples to create interesting sounds.
! Quantum is capable of loading WAV and AIFF/AIFC samples with bit rates from 8 to 32 (including floating point format) and all sample rates. We recommend using 44.1 kHz as the sample rate, otherwise you have to use the Pitch parameter to set the sample pitch accordingly. Sample loops are also recognized by Quantum.
Stereo samples are supported, but you can also use mono samples and multichannel files. In the latter case, only channels 1 and 2 are used.
There are three ways to load/import samples for further usage:
- Factory samples: you can load and edit all of the factory samples. This is the easiest way to start exploring the sample capabilities of your Quantum.
- Import own audio samples: you can import your own samples from a connected SD card and load them in the Quantum's Flash memory. Here the samples are stored permanently and can be used for loading and further editing.
- Record own audio samples: you can use the Audio Recorder on the Global page to record samples via the external audio input or they can be resampled via the Main/Aux outputs. Recordings are stored in the Quantum's Flash memory. Here they can be used for loading and further editing.
You can use samples within the Quantum with the following oscillator modes:
- Particle Generator: one or more samples can be used for normal or for granular playback. Read more about the Particle Generator on page 43. To use a sample, simply tap on the Particles button within the Particle Generator display page. The Sample display page opens.
- Resonator: one ore more samples can be used as an exciter for the Resonator. Read more about the Resonator on page 54. To use a sample, simply tap on the Resonator button within the Resonator display page. The Sample display page opens.
The Sample Display Page
Here you can load, manage, and edit your sample(s). To close the Sample display page, simply tap on the Samples button.

To edit the following parameters we recommend loading a sample. For more information please refer to 'The Actions Tab' chapter.
The Display Representation
If one sample is loaded, the central display shows a graphic waveform representation of this sample. If more than one sample is loaded, the display also shows a sample file list. The currently selected sample is highlighted.
Selected Sample
If more than one sample is loaded, you can use this parameter to select the desired sample for further editing. You can also tap on the desired sample file in the display list to select it.
Read more about adding samples later in this chapter.
From Velo / To Velo
Here you determine the velocity range of the currently selected sample. You can set up a minimum velocity for triggering (From Velo) and a maximum velocity value (To Velo) so the incoming velocity determines which sample is played. Use this function to create stacked samples that react on different velocities.
Pitch
Determines the pitch of the currently selected sample. Use this parameter to tune samples that don't match up with your desired tone pitch.
Tap on Pitch to open a pop-up menu for further settings:
• Normal: Pitch change is about 10.0 cents.
• Fine: Cutoff change is about 1.0 cents
• Super Fine: Cutoff change is about 0.1 cents.
- Set From Keys: play a key on your keyboard to set the corresponding pitch.
From Note / To Note
Here you determine the keyboard range of the currently selected sample. You can set up a minimum key (From Note) and a maximum key (To Note). Use this function to create multi-samples where every sample has its own playback range.
Tap on From Note or To Note to open a pop-up menu for further settings:
- Set From Keys: play a key on your keyboard to set the corresponding note.
Mode (only available for Particle Generator)
Determines the playback mode of all loaded samples.
- Normal: plays back the loaded sample(s) in a regular way. If only one sample is loaded, it will mapped automatically over the complete keyboard. This also affects the original pitch and length. When this mode is selected, some parameters of the Particle Generator are not available.
- Granular: uses the Quantum Particle engine for granular playback.
- Live Granular: uses Quantum's Audio Input for a live granular transformation. Make sure to set up the audio input on the Layer page (Input Volume, Input Routing).
Tap on Mode open a pop-up menu for further settings:
- Set Default: sets the parameter to its default value.
- Set Last Loaded: resets the parameter to the last loaded value from the current sound patch.
- MIDI Learn CC: activates the MIDI Learn function, which maps an incoming MIDI control change to this parameter.

Rule (only available for Particle Generator)
Determines the playback rule if more than one sample is loaded.
- Round Robin: the samples are played repeatedly one after the other from the top of the sample list to the end, and so on.
- Reverse Robin: the samples are played repeatedly one after the other from the end of the sample list to the top and so on.
- Ping Pong: the samples are played repeatedly one after the other from the top of the sample list to the end and backwards.
- Random Robin: the samples are played repeatedly one after the other in a random way. No sample is played twice.
- Random: the samples are played repeatedly one after the other, in a random way. Samples can be played twice or more.
Tap on Rule open a pop-up menu for further settings:
- Set Default: sets the parameter to its default value.
- Set Last Loaded: resets the parameter to the last loaded value from the current sound patch.
- MIDI Learn CC: activates the MIDI Learn function, which maps an incoming MIDI control change to this parameter.
Stereo Width (only available for Particle Generator)
The Quantum is able to playback mono and stereo sample files. Sometimes stereo samples have a stereo width that doesn't fit with your needs. Use Stereo Width to adapt the stereo width of all samples as desired.
Tap on Stereo Width open a pop-up menu for further settings:
- Set Default: sets the parameter to its default value.
- Set Last Loaded: resets the parameter to the last loaded value from the current sound patch.
- MIDI Learn CC: activates the MIDI Learn function, which maps an incoming MIDI control change to this parameter.

Overall Gain (only available for Particle Generator)
Determines the overall gain of all loaded samples. If you want to change the gain of a single sample, please use the Sample Gain option on the Edit page.
Tap on Overall Gain open a pop-up menu for further settings:
- Set Default: sets the parameter to its default value.
- Set Last Loaded: resets the parameter to the last loaded value from the current sound patch.
- MIDI Learn CC: activates the MIDI Learn function, which maps an incoming MIDI control change to this parameter.
The Action Button
Here you load and manage your samples. Tap on this button to open a pop-up menu with further options:
- Add: opens the Add Samples window. Here you have full access to all the samples in Quantum's Flash memory. Here you can select a sample by tapping through the directories. By tapping the corresponding button below the window you can perform further options:
- New Dir: creates a new directory folder. The directory path depends on the selected row. You need to name the new folder.
- Delete: deletes the selected folder/sample after a confirmation.
- Rename: renames the selected folder/sample.
- Move: moves the selected sample/folder. If performed, the folder/sample is copied into a clipboard. Use Insert to move it to the desired location.
• Play: plays back the selected sample. - Cancel: closes the Add Sample windows. No further action is taken.
- Add: finally adds the selected sample to the Particle Generator or the Resonator.

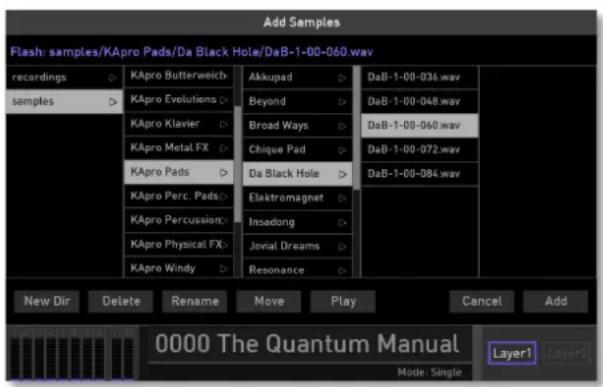
The Add Samples window
- Remove: removes the selected sample from the list.
- Auto-Map: if more than one sample is loaded, Auto-Map maps the samples over the keyboard. This means that the keyboard range (From Note and To Note) is set automatically.
- Load Map: loads a Map from the Flash memory.
- Save Map: samples and their settings can be saved as a Map in the Flash memory. Tap on Save Map to perform the storing process.
• Clear Map: deletes all samples and their settings.
- Import: imports a sample from a connected SD card into the Quantum's Flash memory. If imported, the sample can be loaded by using the Add function.
- Reload: if one or more samples don't work properly, the Reload function can be helpful to load it again.
The Edit Button
Tap on the Edit button to enter the Sample Edit mode. The display representation changes in some partitions.
In Sample Edit mode you can perform further editing at the sample start and end, as well as loop settings.


The Display Representation
The central display shows a graphic waveform representation of the currently selected sample with some rulers. If more than one sample is loaded, the display also shows a sample file list. The currently selected sample is highlighted.
Selected Sample
If more than one sample is loaded, you can use this parameter to select the desired sample for editing. You can also tap on the desired sample file in the display list to select it.
Sample Start / Sample End
Here you determine the start position (Sample Start) and end position (Sample End) of the currently selected sample. Use this function to adapt the sample length to your needs. Within the waveform representation two green rulers shows the loop start and end.
Tap on Sample Start or Sample End to open a pop-up menu for further settings:
• Normal: parameter change is normal.
• Fine: parameter change is fine.
• Super Fine: parameter change is super fine.
Pitch
Determines the pitch of the currently selected sample. Use this parameter to tune samples that don't match with your desired tone pitch.
Tap on Pitch to open a pop-up menu for further settings:
• Normal: Pitch change is about 10.0 cents.
• Fine: Pitch change is about 1.0 cents
• Super Fine: Pitch change is about 0.1 cents.

- Set From Keys: play a key on your keyboard to set the corresponding pitch.
Loop Start/ Loop End
If Loop Mode is set to On, you can define a Loop Start and Loop End. Within the waveform representation two yellow rulers shows the loop start and end.
Tap on Loop Start or Loop End to open a pop-up menu for further settings:
• Normal: parameter change is normal.
• Fine: parameter change is fine.
• Super Fine: parameter change is super fine.
Mode (only available for Particle Generator)
Determines the playback mode of all loaded samples.
- Normal: plays back the loaded sample(s) in a regular way. If only one sample is loaded, it will be mapped automatically over the complete keyboard. This also affects the original pitch and length. When this mode is selected, some parameters of the Particle Generator are not available.
- Granular: uses the Quantum Particle engine for granular playback.
- Live Granular: uses Quantum's Audio Input for a live granular transformation. Make sure to set up the audio input on the Layer page (Input Volume, Input Routing).
Tap on Mode open a pop-up menu for further settings:
- Set Default: sets the parameter to its default value.
- Set Last Loaded: resets the parameter to the last loaded value from the current sound patch.
- MIDI Learn CC: activates the MIDI Learn function, which maps an incoming MIDI control change to this parameter.
Loop Mode
Determines if the sample loop is active (On) or not (Off).
Pan (only available for Particle Generator)
Determines the panning for the currently selected sample.
Sample Gain
Determines the gain for the currently selected sample.

Loading & Editing Samples
Presets
Tap on the Presets button to open a pop-up window for loading, saving, and managing sample settings. For more information on the available options please refer to the Presets chapter in the Wavetable section.

waldorf
155 Quantum Manual
Appendix
Wavetable Synthesis
The sound generation of the wavetables in Quantum is based on wavetable synthesis.
The following overview explains how the Wavetable Synthesis works:
A wavetable is a table consisting of single waveforms. Each waveform is classified by its own special sound character. The main difference of wavetable synthesis in comparison with other sound-generation principles is the ability to not only to play one waveform per oscillator but also to step through the wavetable via different modulations, thereby creating wavetable sweeps. The results can be dramatic - much more so than anything any sample playback-based system could ever produce.
This principle offers powerful capabilities. To give some examples:
• Each note on a keyboard can access a different wave of a wavetable.
- The Travel parameter allows a cyclic run through all waves of a wavetable.
- An LFO can modulate the position within the wavetable. You can create subtle to drastic sound changes.
- User-selected controllers, such as the mod wheel, can change the position within the wavetable. When you turn the wheel while playing a chord, each note's wave will be modified instantly.
You should keep the following sentence in mind:
A wavetable is a list with two or more waves, among which you can move at will.
Modulating Waves over time
The graphic below shows a wavetable with 60 waves and some of its included waves from position 0 to 59 on the vertical axis. The horizontal axis represents the audio signal that is generated and the diagonal line in the graphic shows the attack stage over time.

Appendix

line
| Time | Wave Position | |------|---------------| | 0 | 0 | | 1 | 16 | | 2 | 32 | | 3 | 48 | | 4 | 59 |As soon as you play a note the envelope moves through the wavetable positions generating different waveforms over time.
The decay stage would move through these waves in the opposite direction while ultimately holding a certain wave at its sustain stage. When you release the note, the envelope decays to zero.
Most wavetables are created so that they start with a hollow wave at position 0 and go through increasingly brighter waves up to maximum position. This results in a behaviour similar to a low pass filter so that they can be conveniently controlled by an envelope.
If Attack is 0 and Decay set to a medium value you get a percussive sound; if you turn up the attack, you get a soft-sounding start.
You can also use an LFO to modulate the wavetable position and, depending on the selected LFO Shape, you might get a wave scanning that goes back and forth (triangle) only into one direction followed by a hard reset to the origin (sawtooth) or between only two waves (square)
Exceeded Waves of a Wavetable
Of course you can combine envelope and keytrack modulations or add other modulation sources. All these modulations will be added so that maybe the end or the beginning of a wavetable could be exceeded. In such cases, the waves will be cyclically repeated.

Waveform Oscillators Introduction
The oscillator is the first building block of a synthesizer. It delivers the signal that is transformed by all other components of the synthesizer. In the early days of electronic synthesis, Robert A. Moog found out that most real acoustic instrument waveforms could be reproduced by using abstracted electronic versions of these waveforms.
He wasn't the first who came to that conclusion, but he was the first to recreate them electronically and build them into a machine that could be used commercially.
What he implemented into his synthesizer were the still well-known waveforms sawtooth, square and triangle. For sure, this is only a minimal selection of the endless variety of waveforms, but the Waldorf Quantum provides all those waveforms, plus other classic waveforms like square (which is the father of the pulse waveform) and the sine wave (also part of every other waveform).
You probably know how these waveforms look and sound, but the following chapter gives you a small introduction into the deeper structure of these waveforms. Let's start with the most basic one.
The Sine Wave
The Sine Wave is the purest tone that can be generated. It consists of only one harmonic, the fundamental, and has no overtones. The following picture shows the sine wave and its frequency representation:

bar_line
| Time | Amplitude | Magnitude | |------|-----------|---------| | 14812 | Peak | 1 | | 16 | Low | High |The Sine Wave
There is no acoustic musical instrument that generates a pure sine wave; the only instrument that comes close to it is the pitch fork. Therefore, the sine wave sounds a little artificial to the ear. However, the sine wave can be an interesting oscillator waveform to emphasize a certain harmonic while other oscillators are playing more complex waveforms, or as an FM source for frequency modulation.
The sine wave is the most basic building block of each waveform. Any waveform can be broken down into several (or many) sine waves that are arranged with different frequencies and magnitudes. These sine waves are called partials. In most waveforms the partial with the lowest frequency is dominant, meaning that this partial is used by the ear to determine the pitch of the tone. This partial is called the fundamental. All other partials are called overtones. So the second partial is the first overtone.

Appendix
Cyclic waveforms such as the waveforms in the Quantum only feature sine waves in integer frequency ratios to the fundamental like double frequency, triple frequency and so on. Those partials are called harmonics because their frequency is a harmonic multiple of the fundamental.
Confusing? Let's generalize it to cyclic waveforms: a cyclic waveform – like sawtooth, square, etc. – only consists of harmonic partials. The harmonic with the lowest frequency is dominant and therefore called the fundamental. All other harmonics are called overtones.
The Sawtooth Wave
The Sawtooth Wave is the most popular synthesizer waveform. It consists of all harmonics in which the magnitude of each harmonic descends by the factor of its position. This means that the first harmonic (the fundamental) has full magnitude, the second harmonic has half magnitude, the third harmonic has a third magnitude, and so on. The following picture shows how the individual harmonics build up the sawtooth wave:

line
| Harmonic Magnitude | Frequency Range | Amplitude Trend | | ------------------ | --------------- | --------------- | | 1st | ~0.5 | Wavy waveform | | 2nd | ~1.0 | Wavy waveform | | 3rd | ~1.5 | Wavy waveform | | 4th | ~2.0 | Wavy waveform |Additive components of the Sawtooth wave
The sawtooth wave was thought as an abstraction of the timbre of string and brass instruments. You can easily understand that when you think of a violin. Imagine a bow

Appendix
pulling the string slightly into one direction. At one point, the string abruptly comes off the bow and swings back to its original position. The bow is still moved and so it catches the string again and the procedure is repeated. The result is a waveform that looks like a sawtooth. The same is true for a brass instrument. In this case the 'string' are the lips while the bow is the air. The lips are moved by the air to a certain extent and abruptly move back to their original position.
The Square Wave
The Square Wave is a special waveform generated by a pulse waveform with 50% pulse width. This means that the positive part of the waveform has equal length to the negative part. The pulse waveform can have other pulse widths as you will read later. For now, we'll talk about the square wave as a unique waveform. The square wave consists of all odd harmonics in which the magnitude of each harmonic descends by the factor of its position. This means that the first harmonic has full magnitude, the third harmonic has a third magnitude, the fifth harmonic has a fifth magnitude and so on. The following images illustrates how the individual harmonics build up the sawtooth wave:
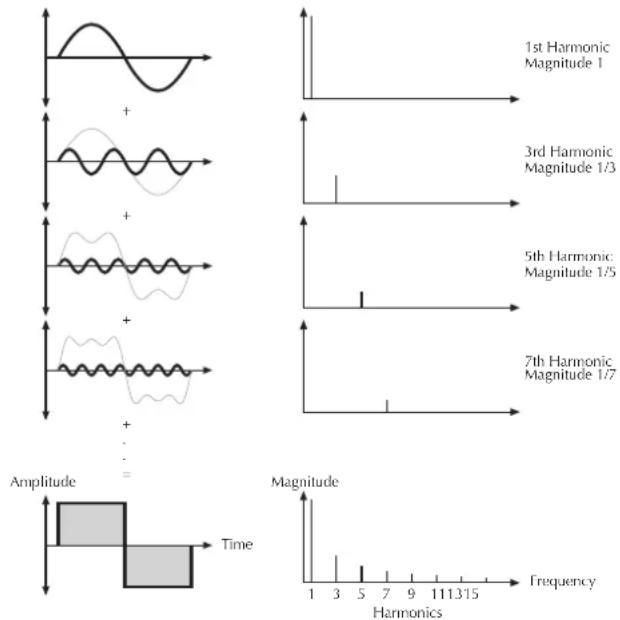
Additive components of the square wave with 50% pulse width
The square wave was thought as an abstraction of wind instruments like a pan flute or a recorder. They consist of a

Appendix
tube that can contain a certain amount of air. The player blows air through the tube in such a way that the air starts to vibrate. This vibration is almost completely symmetrical, resulting in a hollow timbre.
The Square Wave
The Square wave is the most versatile wave in a classic synthesizer because its shape and therefore its harmonic content can be changed in realtime. This is done by changing the width of the upper and lower portion of the waveform cycle. These portions are called pulses – hence the pulse width name. The width of the first pulse is used to distinguish between different pulse waves and it is measured in percent. The following image illustrates several pulse waves with different pulse widths:
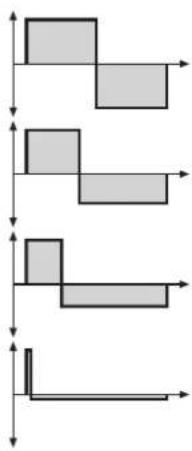
flowchart
graph TD
    A["Step 1"] --> B["Step 2"]
    B --> C["Step 3"]
    C --> D["Step 4"]

bar
| Pulse Width | 50% Pulse (Square Wave) | 33% Pulse | 25% Pulse | <1% Pulse (Impulse) | |---|---|---|---|---| | 1 | High peak at 1 | Low peak at 1 | High peak at 1 | Low peak at 1 | | 3 | Medium peak at 3 | Medium peak at 3 | Medium peak at 3 | Medium peak at 3 | | 5 | Low peak at 5 | Low peak at 5 | Low peak at 5 | Low peak at 5 | | 7 | Low peak at 7 | Low peak at 7 | Low peak at 7 | Low peak at 7 | | 9 | Low peak at 9 | Low peak at 9 | Low peak at 9 | Low peak at 9 | | 11 | Low peak at 11 | Low peak at 11 | Low peak at 11 | Low peak at 11 | | 13 | Low peak at 13 | Low peak at 13 | Low peak at 13 | Low peak at 13 | | 15 | Low peak at 15 | Low peak at 15 | Low peak at 15 | Low peak at 15 |Additive components of Pulse wave with different pulse widths
The first thing you probably observe is that the lower part of the wave has a narrower excursion. This is because the energy of the wider pulse is higher than the one of the narrower pulse. If this were not compensated, the overall signal would have an unwanted DC offset.
As you have read in the previous chapter the harmonic content of a 50% pulse wave is a special case. It has a very

Appendix
symmetrical harmonic content while all other pulse widths create peaks or troughs at certain frequencies. Another special case is a pulse wave with a very narrow pulse width – labelled as < 1% in the previous image. An infinitely thin pulse creates a spectrum that has all harmonics with equal magnitudes. In a digital synthesizer, 'infinitely' necessarily means one sample.
The pulse wave is an artificial wave, which means that it doesn't occur in nature. It was built into synthesizers because it could create a lot of different timbres with a minimum of technical effort. However, certain pulse widths sound very close to the timbres of acoustic (or semi-acoustic) instruments - i.e. guitar or bass guitar, e-piano, or even a flute.
The most powerful feature of the pulse wave is the ability to change its width while sounding. This is called pulse width modulation. When the pulse width is changed the waveform starts to sound thicker. This happens because the effect is very similar to what you hear when you have two oscillators running with slightly different frequencies. They interfere and create irregular troughs in the resulting waveforms.
The Triangle Wave
The Triangle Wave is very similar to the square wave. It is composed of the same harmonics as the square wave but with different magnitude ratios. The magnitude of each harmonic is divided by the power of its number. This means that the third harmonic's magnitude is a ninth, the fifth harmonic is a twenty-fifth and so on. The following image illustrates the harmonic content:
Appendix

line
| Harmonic Magnitude | Amplitude | | ------------------ | --------- | | 1 | Peak | | 3 | Low | | 1/9 | Medium | | 1/25 | High | | 1/49 | Medium |Additive components of the Triangle wave
The reason why the triangle wave is so popular in classic synthesizers is that it can act as a sub-oscillator wave, to emphasize certain frequencies or to frequency modulate other oscillators.
The triangle wave sounds like a woodwind instrument - i.e. a clarinet. It can also be used for mallet instruments like vibraphone and xylophone, etc.

A Short Introduction to Granular Synthesis
Granular synthesis is based on a simple idea: instead of playing back an entire sample, only short portions of the sample – the so-called grains – are played. These grains can be played back in any order. Each time a grain ends, a new one starts. To avoid discontinuities in the playback, and to minimize artefacts, envelopes are applied to the grains. Granular synthesis can be used to extract interesting spectra from all kinds of samples creating sound effects by completely scrambling a sample, or for low-fidelity time stretching, for example.
Very short grains produce sounds with an individual pitch. For that reason you can also use samples without a distinct pitch – such as drum loops and sound effects – to extract pitched spectra from them. Sounds with longer grains usually play back with the pitch of the original sample.
If you play back the same portion of a sample over and over again, the sound may become too static. You can use the Particle Generator parameters to compensate for this and bring more liveliness into the sound. By adding more grain streams (kernels) the grain and sound density can be increased to produce a richer sound.
Filter Introduction
Once the oscillator signal leaves the mixer it is sent to the filters (Dual Analog Filters and Digital Former). The Quantum offers two filter units, each with its own individual settings. The signal flow in the filters can be controlled via the Routing function on the Filter page. The filters are components that have significant influence on the Quantum's sound characteristics.
Now, we'll explain the basic function of a filter discussing the type used most commonly in synthesizers: the lowpass filter.
The lowpass filter type dampens frequencies that lie above a specified cutoff frequency. Frequencies below this threshold are hardly affected. The frequency below the cutoff point is called the pass band range; the frequencies above are called the stop band range. The Quantum's filter dampens frequencies in the stop band with a certain slope. The slope can be 12dB or 24dB per octave. This means that the level of a frequency that lies an octave above the cutoff point will be 12dB or 24dB less than those frequencies of the signal that fall into the pass band. The following image illustrates the basic principle of a low pass filter:
Appendix
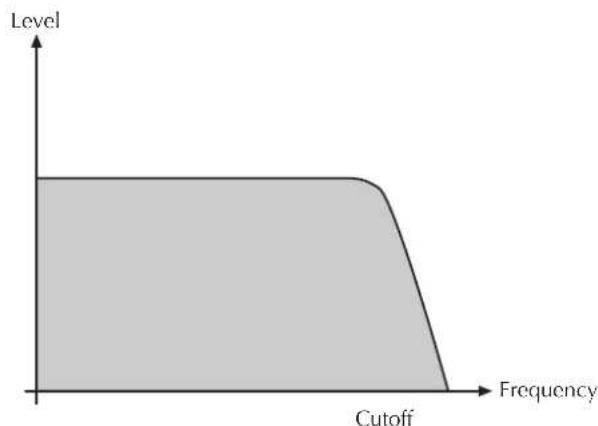
area
| Cutoff | Level | | ------ | ----- | | Low | High | | High | High |To give you an idea of the extent of damping, consider this example of a lowpass filter: a reduction of 24dB reduces the original level one octave above the cutoff point by approx. 94%. The damping factor two octaves above the cutoff point reduces the original level by more than 99%, which in most cases means this portion of the signal is no longer audible.
The Quantum's filter also features a resonance parameter. Resonance in the context of a low, band or high pass filter means that a narrow frequency band around the cutoff point is emphasized. The following image illustrates the
effect of the resonance parameter on the filter's frequency curve:

area
| Frequency | Level | | --------- | ----- | | Low | 0 | | Peak | ~100 | | High | Decreasing from peak to drop-off | | Cutoff | 0 |If the resonance is raised to a great extent then the filter will begin self-oscillation - i.e. the filter generates an audible sine wave even when it does not receive an incoming signal.

Updating the System Software
The Quantum has a service-friendly feature that makes it possible to update the system software without changing any parts.
All software updates come in the form of a .bin file that can be copied on every FAT file formatted SD card. The fastest way to get this file is by downloading it from our web site at:
http://www.waldorfmusic.com/quantum
Please make sure to download the following files:
- quantum_vxx.bin (if it is newer than the one installed in your Quantum)
- changelog.txt (always download this one, because it explains the latest changes)
To update the Quantum's system software:
• Copy the .bin file onto a suitable SD card.
- Switch the Quantum off and insert the SD card into the Quantum's SD card slot.
- Switch the Quantum on.
- Press the Global button to enter the Global page.
- Tap on the System tab to open the System sub page. Tab on the Info tab.
- Tap on the Update button and follow the onscreen instructions.
• After the file is installed correctly, the Quantum burns the update into its FLASH memory. - Wait until the operation is completed. If updating was successful, the Quantum will perform a system reset and start up.
Do not under any circumstances turn off the Quantum while the update step is in progress. A complete loss of data may occur and it will be impossible for you to make your machine work again!

Modulation Sources and Destinations
Modulation Sources
| Source | Description |
| Off | No modulation source |
| Amp Env | Amplifier Envelope signal |
| Filter1 Env | Filter 1 Envelope signal |
| Filter2 Env | Filter 2 Envelope signal |
| Free Env1 | Free Envelope 1 signal |
| Free Env2 | Free Envelope 2 signal |
| Free Env3 | Free Envelope 3 signal |
| LFO1 | LFO 1 signal |
| LFO2 | LFO 2 signal |
| LFO3 | LFO 3 signal |
| LFO4 | LFO 4 signal |
| LFO5 | LFO 5 signal |
| LFO6 | LFO 6 signal |
| Komplex | Komplex Modulator signal |
| Wheel | Modulation wheel (CC #1) |
| Pitchbend | MIDI Pitchbend signal |
| Aftertouch | MIDI channel pressure |
| Pedal | MIDI Sustain pedal (CC #64) |
| Expression | MIDI Expression pedal (CC #11) |
| Breath Control | MIDI Breath Controller (CC #2) |
| CC22 - CC31 | MIDI CC #22 - #31 |
| Keytrack | MIDI Note number |
| Velocity | MIDI Velocity |
| Voice Number | Number of played voice |
| Unisono Idx | Number of Unisono voices |
| Poly Idx | MIDI polyphonic pressure |
| Rand Trig | Random Trigger signal unipolar |
| Rand Trig Bipol | Random Trigger signal bipolar |
| Constant | Constant modulation value |
| Mod Pad X | Modulation Pad position X |
| Mod Pad Y | Modulation Pad position Y |
| SeqParam 1 - 4 | Step Sequencer parameter values |
Modulation Destinations
| Destination | Description |
| Off | No modulation destination |
| Pitch | Global pitch of all three Oscillators at once |
| Osc1/Osc2/Osc3 Pitch | Pitch of Oscillator 1...3 |
| Osc1/Osc2/Osc3 Mix | Level of Oscillator 1...3 |

Appendix
| Osc1/Osc2/Osc3 Pan | Panning of Oscillator 1...3 |
| WT1/WT2/WT3 Position | Wavetable Position of Oscillator 1...3 |
| WT1/WT2/WT3 Noisy | Wavetable Noisy of Oscillator 1...3 |
| WT1/WT2/WT3 Brilliance | Wavetable Brilliance of Oscillator 1...3 |
| WT1/WT2/WT3 FX | Wavetable FX of Oscillator 1...3 |
| WF1/WF2/WF3 Warp | Waveform Warp of Oscillator 1...3 |
| WF1/WF2/WF3 Sync | Waveform Sync of Oscillator 1...3 |
| WF1/WF2/WF3 Detune | Waveform Detune of Oscillator 1...3 |
| PT1/PT2/PT3 Length | Particle Length of Oscillator 1...3 |
| PT1/PT2/PT3 Gate | Particle Gate of Oscillator 1...3 |
| PT1/PT2/PT3 Jitter | Particle Jitter of Oscillator 1...3 |
| PT1/PT2/PT3 Attack | Particle Attack of Oscillator 1...3 |
| PT1/PT2/PT3 Decay | Particle Decay of Oscillator 1...3 |
| PT1/PT2/PT3 Pos | Particle Position of Oscillator 1...3 |
| PT1/PT2/PT3 Travel | Particle Travel of Oscillator 1...3 |
| PT1/PT2/PT3 PSpread | Particle Pitch Spread of Oscillator 1...3 |
| RS1/RS2/RS3 Timbre | Resonator Timbre of Oscillator 1...3 |
| RS1/RS2/RS3 Exciter | Resonator Exciter of Oscillator 1...3 |
| RS1/RS2/RS3 Spread | Resonator Spread of Oscillator 1...3 |
| RS1/RS2/RS3 Q | Resonator Q of Oscillator 1...3 |
| DF Amount | Digital Filter Amount (based on the selected Type) |
| DF Color | Digital Filter Color (based on the selected Type) |
| F1 Cutoff/F2 Cutoff | Cutoff of Filter 1/2 |
| F1 Reso/F2 Reso | Resonance of Filter 1/2 |
| VCA | VCA |
| AmpEnv Attack | Attack rate of Amp Envelope |
| AmpEnv Decay | Decay rate of Amp Envelope |
| AmpEnv Sustain | Sustain level of Amp Envelope |
| AmpEnv Release | Release rate of Amp Envelope |
Appendix
| Filt1/2 Env Attack | Attack rate of Filter Envelope 1/2 |
| Filt1/2 Env Decay | Decay rate of Filter Envelope 1/2 |
| Filt1/2 Env Sustain | Sustain level of Filter Envelope 1/2 |
| Filt1/2 Env Release | Release rate of Filter Envelope 1/2 |
| Free1/2/3 Env Attack | Attack rate of Free Envelope 1/2/3 |
| Free1/2/3 Env Decay | Decay rate of Free Envelope 1/2/3 |
| Free1/2/3 Env Sustain | Sustain level of Free Envelope 1/2/3 |
| Free1/2/3 Env Realease | Release rate of Free Envelope 1/2/3 |
| FX1/2/3/4/5 DryWet | FX Dry Wet for Effect 1...5 |
| FX1/2/3/4/5 Control | FX Control for Effect 1...5 (based on the selected FX Type) |
| Volume | Amplifier output volume |
| Pan | Output Panning |
| LFO1/2/3/4/5/6 Speed | Speed of LFO 1...6 |
| LFO1/2/3/4/5/6 Gain | Gain of LFO 1...6 |
| Komplex Speed | <- see destination name |
| Komplex Blend | <- see destination name |
| Komplex Entropy | <- see destination name |
| Komplex Warp | <- see destination name |
| Komplex Gain | <- see destination name |
| Glide Rate | <- see destination name |
| Chorus DryWet | <- see destination name |
| Chorus Depth | <- see destination name |
| Chorus Speed | <- see destination name |
| Chorus Feedback | <- see destination name |
| Phaser DryWet | <- see destination name |
| Phaser Depth | <- see destination name |
| Phaser Speed | <- see destination name |
| Phaser Feedback | <- see destination name |
| Phaser Spread | <- see destination name |
| Flanger DryWet | <- see destination name |
| Flanger Depth | <- see destination name |
| Flanger Speed | <- see destination name |
| Flanger Feedback | <- see destination name |
| Reverb Gain | <- see destination name |
| Reverb Time | <- see destination name |
| Reverb Color | <- see destination name |

Appendix
| Delay DryWet | <- see destination name |
| Delay Feedback | <- see destination name |
| Delay Time L | <- see destination name |
| Delay Time R | <- see destination name |
| EQ DryWet | <- see destination name |
| EQ FreqShift | <- see destination name |
| Drive DryWet | <- see destination name |
| Drive Amount | <- see destination name |
| Drive Gain | <- see destination name |
| Compress Ratio | <- see destination name |
| Compress Thresh | <- see destination name |
| Arp/Seq RelGate | <- see destination name |
| Arp/Seq Swing | <- see destination name |
| Seq Length | <- see destination name |

Appendix
Technical Data
Power Supply
Supply Voltage 100 - 240 V AC / 47-63 Hz
Maximum current consumption: 1.3 A
Maximum power consumption: 50 W
Dimensions and Weight
Width: 1006 mm
Depth: 401 mm
Height (including knobs): 131 mm
Total weight: 17,8 kg

waldorf
171 Quantum Manual
Appendix
Glossary
Aftertouch
The majority of contemporary keyboards are capable of generating aftertouch messages. On this type of keyboard, when you press harder on a key you are already holding down, a MIDI Aftertouch message is generated. This feature makes sounds even more expressive (e.g. through vibrato).
Aliasing
Aliasing is an audible side effect arising in digital systems as soon as a signal contains harmonics higher than half the sampling frequency.
Amount
The extent to which modulation influences a given parameter.
Amplifier
An amplifier is a component that influences the volume level of a sound via a control signal. This control signal is often generated by an envelope or an LFO.
Arpeggiator
An arpeggiator is a device that splits an incoming chord into its individual notes and repeats them rhythmically. Most arpeggiators feature different sequence modes to cover a wide range of applications. Typical controls for an arpeggiator are the octave range, the direction, the speed and the clock, which means the repetition interval. Some arpeggiators also feature preset or programmable rhythm patterns.
Attack
An envelope parameter. 'Attack' is a term that describes the ascent rate of an envelope from its starting point to the point where it reaches its highest value. The Attack phase is initiated immediately after a trigger signal is received – i.e. after you play a note on the keyboard.
Clipping
Clipping is a sort of distortion that occurs when a signal exceeds its maximum value. The curve of a clipped signal is dependent of the system where the clipping takes place. In the analog domain, clipping effectively limits the signal to its maximum level. In the digital domain clipping is similar to a numerical overflow and so the polarity of the signal's part above the maximum level is negated.

Appendix
Control Change (Controllers)
MIDI messages enable you to manipulate the response of a sound generator to a significant degree.
This message essentially consists of two components:
- The Controller number, which defines the element to be influenced. It can be between 0 and 120.
- The Controller value, which determines the extent of the modification.
Controllers can be used for effects such as slowly swelling vibrato, changing the stereo panorama position and influencing filter frequency.
Decay
'Decay' describes the descent rate of an envelope once the Attack phase has reached its zenith and the envelope drops to the level defined for the Sustain value.
Envelope
An envelope is used to modulate a sound-shaping component within a given time frame so that the sound is changed in some manner. For instance, an envelope that modulates the cutoff frequency of a filter opens and closes this filter so that some of the signal's frequencies are filtered out. An envelope is started via a trigger – usually a fixed trigger. Normally the trigger is a MIDI Note. The classic envelope consists of four individually variable phases: Attack, Decay, Sustain, and Release. This sequence is called an ADSR envelope. Attack, Decay, and Release are time or slope values, and Sustain is a variable volume level. Once an incoming trigger is received, the envelope runs through the Attack and Decay phases until it reaches the programmed Sustain level. This level remains constant until the trigger is terminated. The envelope then initiates the Release phase until it reaches the minimum value.
Filter
A filter is a component that allows some of a signal's frequencies to pass through it and dampens other frequencies. The most important aspect of a filter is the filter cutoff frequency. The most common type is the lowpass filter. A lowpass filter dampens all frequencies above the cutoff frequency.
Filter Cutoff Frequency
The filter cutoff frequency is a significant factor for filters. A lowpass filter dampens the portion of the signal that lies above this frequency. Frequencies below this value are allowed to pass through without being processed.

Appendix
LFO
LFO is an acronym for Low-Frequency Oscillator. The LFO generates a periodic oscillation at a low frequency and features variable waveshapes. Similar to an envelope, an LFO can be used to modulate a sound-shaping component.
Low Pass Filter
Synthesizers are often equipped with a lowpass filter. A lowpass filter dampens all frequencies above its cutoff frequency. Frequencies below the cutoff point are not affected.
MIDI
The acronym MIDI stands for Musical Instrument Digital Interface. It was developed in the early '80s so that diverse types of electronic musical instruments by different manufacturers could interact. At the time a communications standard for different devices did not exist, so MIDI was a significant advance. It made it possible to link any MIDI-equipped device with another through simple, uniform connections.
Essentially, this is how MIDI works: One sender is connected to one or several receivers. For instance, if you want to use a computer to play the Quantum, then the computer is the sender and the Quantum acts as the receiver. With a few exceptions, the majority of MIDI devices are equipped with two or three ports for this purpose: MIDI In, MIDI Out and in some cases, MIDI Thru. The sender transfers data to the receiver via the MIDI Out jack. Data is sent via a cable to the receiver's MIDI In jack.
MIDI Thru has a special function. It allows the sender to transmit to several receivers. It routes the incoming signal to the next device without modifying it. Another device is simply connected to this jack, thus creating a chain through which the sender can address a number of receivers. Of course it is desirable for the sender to be able to address each device individually. Consequently, there is a rule that is applied to ensure each device responds accordingly.
MIDI Channel
This is a very important element of most messages. A receiver can only respond to incoming messages if its receive channel is set to the same channel as the one the sender is using to transmit data. Consequently, the sender can address specific receivers individually. MIDI Channels 1 through 16 are available for this purpose.

Appendix
MIDI Clock
The MIDI Clock message determines the tempo of a piece of music. It serves to synchronize processes based on time.
Modulation
Modulation influences or changes a sound-shaping component via a modulation source. Modulation sources include envelopes, LFOs, or MIDI messages. The modulation destination is a sound-shaping component such as a filter or an amplifier.
Note On / Note Off
This is the most important MIDI message. It determines the pitch and velocity of every generated note. The time of arrival is simultaneously the start time of the note. Its pitch is derived from the note number, which lies between 0 and 127. The velocity lies between 1 and 127. A value of 0 for velocity is similar to 'Note Off'.
Panning
The process of changing the signal's position within the stereo panorama.
Pitchbend
Pitchbend is a MIDI message. Although pitchbend messages are similar in function to control change messages, they are a distinct type of message. The reason for this distinction is that the resolution of a pitchbend message is substantially higher than that of a conventional Controller message. The human ear is exceptionally sensitive to deviations in pitch so the higher resolution is used because it relays pitchbend information more accurately.
Program Change
These are MIDI messages that switch sound programs. Program numbers 1 through 128 can be changed via program change messages.
Release
An envelope parameter. The term 'Release' describes the descent rate of an envelope to its minimum value after a trigger is terminated. The Release phase begins immediately after the trigger is terminated, regardless of the envelope's current status. For instance, the Release phase may be initiated during the Attack phase.

Resonance
Resonance is an important filter parameter. It emphasizes a narrow bandwidth around the filter cutoff frequency by amplifying these frequencies. This is one of the most popular methods of manipulating sounds. If you substantially increase the resonance, to a level where the filter begins self-oscillation then it will generate a relatively clean sine waveform.
Spectrum
A basic component of sounds are periodic oscillations. The perceived pitch corresponds to the fundamental frequency of this oscillation. The frequency spectrum of periodic oscillations is a line spectrum, the lowest frequency corresponds to the fundamental frequency (fundamental) and other frequencies-integer multiples of the fundamental frequency (harmonics). A spectrum display like that which is in the Quantum is a graphical overview of all the frequencies of a wavetable with their amplitudes over time.
Sustain
An envelope parameter. The term 'Sustain' describes the level of an envelope that remains constant after it has run through the Attack and Decay phases. Sustain lasts until the trigger is terminated.
System Exclusive Data
System exclusive data allow access to the heart of a MIDI device, enabling access to data and functions that no other MIDI messages are able to address. 'Exclusive' in this context means that this data pertains to only one device type or model. Every device has unique system exclusive data. The most common applications for SysEx data include transfer of entire memories and complete control of a device via a computer.
Trigger
A trigger is a signal that activates events. Trigger signals are very diverse. For instance, a MIDI note or an audio signal can be used as a trigger. The events a trigger can initiate are also very diverse. A common application for a trigger is use to start an envelope.
Volume
The term describes a sound's output level
USB
The Universal Serial Bus (USB) is a serial bus system to connect a computer with an external device. USB equipped

Appendix
devices can be plugged together while active. The recognition is made automatically.
Wave
In this context, a Wave is a digitally-memorized reproduction of one single wave pass insofar as it is identical to a sample that is looped after one single wave pass. In contrast to the samples in a sampler, all Waves in Waldorf Wavetable synthesizers have the same lengths and are played back in the same pitch.
Wavetable
One oscillator shape in the Quantum is based on waveform sets called Wavetables. You should think of these as a sequence of up to up to 128 single Waves. This can be played back in a static way or rplayed through dynamically, which results in their typically interesting sound transformations. If the Waves do not differ much, then the Wavetable will probably sound smooth and pleasant. If they have a completely different structure then this will result in wild spectral changes.

Appendix
Product Support
If you have any questions about your Waldorf product, feel free to contact us via one of the three options listed below:
① Send us an email message. This is the most efficient and fastest way to contact us. Your questions will be forwarded immediately to the resident expert and you will quickly receive an answer.
support@waldorfmusic.de
② Send us a letter. It will take a bit longer, but it is just as dependable as an email.
Waldorf Music GmbH
Lilienthal Str. 7
53424 Remagen, Germany
③ Visit our support forum at www.waldorfmusic.com

Waldorf Music GmbH • Lilienthal Straße 7 • D-53424 Remagen
© 2018 Waldorf Music GmbH • All rights reserved
www.waldorfmusic.com
waldorf
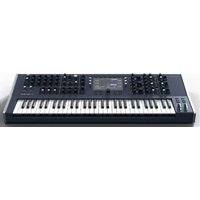
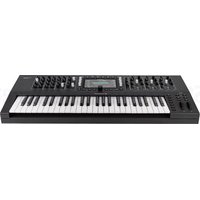

- QUANTUM
- SYNTHESIZER
- Foreword
- What to read?
- Hint
- Quantum Development Team
- We would like to thank
- Content
- Control Features & Connections
- Rear Panel & Connections
- Introduction
- About this Manual
- Symbols
- Highlighted Control Features and Parameters
- General Safety Guidelines
- Suitable Operating Conditions
- Power Supply
- Operation
- Maintenance
- Proper Use
- Setup and Connections
- Setup
- Connections
- The Rear Panel Connections
- Headphones Output and Headphone Volume
- Main Output
- Aux Output
- Audio Input
- Pedal Inputs
- The USB Connections
- SD Card Slot
- MIDI In/Thru/Out Jacks
- The Wheel Section
- Octave Down/Up Buttons
- Mono Button
- Latch Button
- Chord Button
- Arpeggiator (Arp) Button
- Pitch Bend Wheel
- Modulation Wheel
- Basic Operation
- Switching On / Off
- Master Volume
- The Quantum Mode Pages
- The Touchscreen Display
- Loading Programs
- Load
- Editing Parameters
- Saving Programs
- To save a sound program:
- !
- Sound Parameter
- Overview of Functions
- Oscillator Section
- Wavetable Oscillator
- Wavetable Oscillator Panel Parameters
- Semitones
- Fine Pitch
- Spectrum
- Noisy
- Position
- FX
- Travel
- Wavetable Oscillator Display Page
- Control Mode Tab
- Keytrack
- Osc 1/2/3 Vol
- Osc 1/2/3 Pan
- Osc 1/2/3 Dest
- RingMod (only available for Osc 2 and 3)
- PB Range Osc 1, 2 or 3
- PitchVar
- Timbre Mode Tab
- Wavetable
- Brilliance
- Travel Mode
- Limit
- Stepped
- FX Type
- Tools Button
- Presets Button
- Waveform Oscillator
- Waveform Oscillator Panel Parameters
- Count
- Detune
- Shape
- Warp
- Sync
- Waveform Oscillator Display Page
- Stereo
- Semitone 1 - 4
- Phase
- Presets
- Particle Generator
- Particle Generator Panel Parameters
- Count/Grain Poly (only in Granular Mode)
- Detune/Pitch Spread (only in Granular Mode)
- Position (only in Granular Mode)
- Length (only in Granular Mode)
- Travel (only in Granular Mode)
- Particle Generator Display Page
- Particle / Sample Buttons
- Position Jitter (Pos Jitter, only in Granular Mode)
- Gate Length (only in Granular Mode)
- Grain Jitter (only in Granular Mode)
- Travel Mode (only in Granular Mode)
- Attack (only in Granular Mode)
- Decay (only in Granular Mode)
- Grain Poly (only in Granular Mode)
- Stereo Width
- Grain Pitch Button
- Pitch Spread
- Pitch Mode
- Pitch Jitter
- Semitone 1 - 6
- Resonator
- Resonator Panel Parameters
- Repeats
- Spread
- Timbre
- Exciter
- Q
- Resonator Display Page
- Q Curve
- Spectrum Skew
- Attack
- Decay
- Acceleration
- Timbre Mode
- Spread Mode
- HiCut
- F0 Boost
- Oscillator Mixer (OSC MIX) Section
- Level Osc 1 / Osc 2 / Osc 3
- Glide Section
- Rate
- Type
- Dual Analog Filter Section
- Filter Panel Parameters
- Cutoff 1 & 2
- Resonance 1 & 2
- Mode
- Filter Display Page
- Keytrack 1 & 2
- Routing
- Stereo Mode
- Digital Former Section
- Digital Former Panel Parameters
- Amount
- Color
- Digital Former Display Page
- Routing Display Page
- The Graphic Routing Overview
- RingMod 1-->2, 1-->3
- Send Main
- Send Aux
- Envelopes Section
- Envelope Panel Parameters
- Sustain
- Release
- Velocity
- Amount (not for Amp Envelope)
- Envelopes Display Page
- Attack, Decay, Sustain, Release
- Delay
- EnvelopeVar
- Attack Curve
- Decay Curve
- Release Curve
- Loop Mode
- Single Trigger
- Mod Targets Button
- LFO Section
- LFO 1 - 3 Panel Parameters
- Speed
- LFO Display Page
- Speed / Speed Ratio
- All Amounts
- Slew
- Komplex Modulator Section
- Komplex Modulator Panel Parameters
- Blend
- Envelope
- Entropy
- Komplex Modulator Display Page
- The Komplex Tab
- The Mod Tgts (Modulation Targets) Button
- The Presets Button
- The Curve A & B Tabs
- Editing Curves within the Curve Graphic
- Step A/B
- Num Steps A/B
- Level A/B
- Curve Type A/B
- Curve Val A/B
- The Edit Button
- The Effects Section
- Effects Panel Parameters (for Effect 1 to 3)
- Amount for Effect 1, 2, and 3
- Control for Effect 1, 2, and 3
- Effects Display Page
- How to select an effect?
- Common Effect Parameters
- The Effect Types of Quantum
- Phaser
- Dry/Wet
- Depth
- Center
- Feedback
- Phase Diff
- Stages
- Model
- Chorus
- HighCut
- LowCut
- Flanger
- Delay-L
- PingPongPan
- Decouple
- Delay-R
- LR Linked
- Reverb
- Gain
- Time
- Predelay
- EQ (Equalizer)
- EQ Dry/Wet
- Low Freq
- Low Gain
- Freq Shift
- High Freq
- High Gain
- Mid Freq / Mid 2 Freq
- Mid Gain /Mid 2 Gain
- Mid Q / Mid2 Q
- Master Gain
- Drive
- Compressor
- Ratio
- Threshold
- Input Gain
- Output Gain
- Auto Gain
- Look Ahead
- Output Section
- Compress
- The Modulations of Quantum
- Direct Panel Modulations
- Modulation Matrix Display Page
- Source Amount Destination
- Slot
- Source
- Controller
- Destination
- Control Amount
- Active Button
- Clear Slot Button
- Clear All Button
- Modulation Matrix List
- Additional Modes
- Perform Mode Page
- Favorites Tab
- Arpeggiator (Arp) Tab
- Bpm
- Step Length
- Swing
- Pattern
- Reset
- RelGate (Release Gate)
- Algorithm
- Octaves
- SortOrder
- Sequencer Tab
- The Sequencer Graphic
- Pitch/Velocity/Gate/Param 1 - 4
- Seq Length
- Direction
- Scale
- Scale Root
- The Sequencer Buttons
- Running/Off
- Record/Stop Record
- 1-32/1-16/17-32
- Modulation Pad Tab
- X/Y Polarity
- Spring Back X/Y
- Layer Mode Page
- Levels & Routing Tab
- Vol (Volume)
- Pan (Panning)
- Input Volume
- Amp Velo Amt. (Amplifier Velocity Amount)
- Input Routing
- Voices Tab
- Unisono Count
- Unisono Detune
- Unisono Pan
- Unisono Delay
- Voices (only for Split Mode)
- Min Key / Max Key (only for Split Mode)
- Controller Mode (only for Split Mode)
- Global Mode
- Scope Tab
- Pitch Tab
- Audio Tab
- MIDI Tab
- Inputs
- Outputs
- Mappings
- Settings Tab
- General Page
- Edit Page
- Colors Page
- System Tab
- How to update the Quantum operating system
- http://www.waldorfmusic.com/quantum
- Loading & Editing Samples
- The Sample Display Page
- The Display Representation
- Selected Sample
- From Velo / To Velo
- Pitch
- From Note / To Note
- Mode (only available for Particle Generator)
- Rule (only available for Particle Generator)
- Stereo Width (only available for Particle Generator)
- Overall Gain (only available for Particle Generator)
- The Action Button
- Sample Start / Sample End
- Loop Start/ Loop End
- Pan (only available for Particle Generator)
- Sample Gain
- Appendix
- Wavetable Synthesis
- Modulating Waves over time
- Exceeded Waves of a Wavetable
- Waveform Oscillators Introduction
- The Sine Wave
- The Sawtooth Wave
- The Square Wave
- The Triangle Wave
- A Short Introduction to Granular Synthesis
- Filter Introduction
- Updating the System Software
- Modulation Sources and Destinations
- Technical Data
- Dimensions and Weight
- Glossary
- Aftertouch
- Aliasing
- Amplifier
- Arpeggiator
- Clipping
- Control Change (Controllers)
- Filter
- Filter Cutoff Frequency
- LFO
- Low Pass Filter
- MIDI
- MIDI Channel
- MIDI Clock
- Modulation
- Note On / Note Off
- Panning
- Pitchbend
- Program Change
- Resonance
- System Exclusive Data
- Trigger
- Volume
- USB
- Wave
- Product Support
- support@waldorfmusic.de
Marque : WALDORF
Modèle : Quantum
Catégorie : Synthétiseur