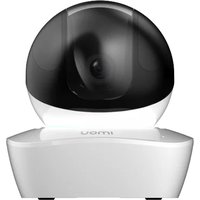
Ranger Pro Z 4MP - Appareil photo IMOU - Notice d'utilisation et mode d'emploi gratuit
Retrouvez gratuitement la notice de l'appareil Ranger Pro Z 4MP IMOU au format PDF.


| Type de produit | Appareil photo de surveillance |
| Marque | Imou |
| Modèle | Ranger Pro Z 4MP |
| Résolution | 4 MP (2560 x 1440 pixels) |
| Vision nocturne | Infrarouge jusqu'à 10 mètres |
| Connectivité | Wi-Fi 2.4 GHz, Ethernet |
| Angle de vue | Horizontal 110°, diagonal 130° |
| Stockage | Carte MicroSD jusqu'à 256 Go, Cloud |
| Alimentation | Adaptateur secteur 5V/1A (inclus) |
| Dimensions | 110 x 65 x 65 mm |
| Poids | 250 g |
| Indice de protection | IP65 (extérieur) |
| Audio | Microphone et haut-parleur intégrés |
| Fonctionnalités intelligentes | Détection de mouvement, alarme, notifications push |
| Installation | Support mural inclus, fixation simple |
| Compatibilité | iOS et Android via application Imou |
FOIRE AUX QUESTIONS - Ranger Pro Z 4MP IMOU
Questions des utilisateurs sur Ranger Pro Z 4MP IMOU
0 question sur cet appareil. Repondez a celles que vous connaissez ou posez la votre.
Poser une nouvelle question sur cet appareil
Téléchargez la notice de votre Appareil photo au format PDF gratuitement ! Retrouvez votre notice Ranger Pro Z 4MP - IMOU et reprennez votre appareil électronique en main. Sur cette page sont publiés tous les documents nécessaires à l'utilisation de votre appareil Ranger Pro Z 4MP de la marque IMOU.
MODE D'EMPLOI Ranger Pro Z 4MP IMOU
lmou
Quick Start Guide
Version 1.0.0

natural_image
Illustration of a person sitting on a sofa using a smartphone, with a coffee table and coffee cup nearby (no text or symbols)Packing List Product Appearance Product

Device*1

QSG*1

Power Adapter*1

Quick Installation Board*1

Installation Position Map*1

Screw Package*1

USB*1
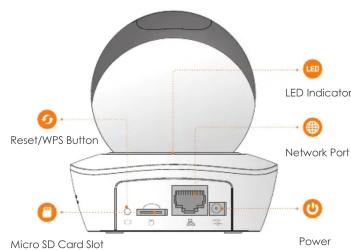
Note:
long press for 10 seconds till the light is off; to enable WPS, just press the button
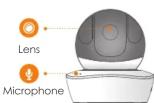


Built-in Speaker
The following table shows more information about status of indicator light
| Device StatusIndicator Light Status | |
| Spinning red | ● Booting● Device malfunction● Failed to boot up |
| Spinning green | ● Booting completed● Waiting for Wi-Fi configuration |
| Flashing yellow | ● WiFi connection process● Device has been configured with WiFi, but it failed to work normally |
| Flashing green | WPS pairing |
| Blue light stably on | ● Wi-Fi connection succeeded● Operate normally |
| Flashing blue | Device upgrade |
| Flashing red | SD card malfunction |
imou
Disclaimer
This quick start guide is for reference only. Minor difference might be found inuser interface.
All the design and software here are subject to change without prior writtennotice.
All trademarks and registered trademarks mentioned are the properties of their respective owners.
Please visit our website or contact your local service engineer for more information.
If there is any uncertainty or controversy, please refer to our final explanation.
Operation by Imou App
Step 1
Power on your camera with power adapter.
Step 2
Connect your smartphone to your Wi-Fi network, scan the QR on the packing box to download and install lmou App.
Step 3
Run Imou App, and register account for first use.
Step 4
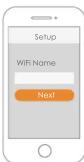
Follow the steps below to add your camera




Note:
-If you have more cameras, please follow step 4 to add them one by one.
-If you want to change the Wi-Fi signal, please reset the camera to factory default and repeat step 4 to add the camera.
Device Installation
Note:
Before installation, please make sure the installation environments can at least support 3x weight of the device.

To install the device, do the following.
Step1 Drill holes on the wall and install the expansion bolts into the drilled holes.
Step2 Fix the installation board with screws onto the wall.
Step3 Spin the device to get locked onto the installation board.
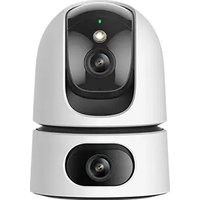
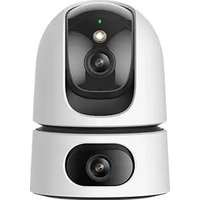
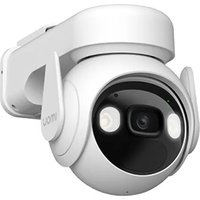
Marque : IMOU
Modèle : Ranger Pro Z 4MP
Catégorie : Appareil photo