BEYBLADE V FORCE DRANZER G B25 82691 - Jouets HASBRO - Notice d'utilisation et mode d'emploi gratuit
Retrouvez gratuitement la notice de l'appareil BEYBLADE V FORCE DRANZER G B25 82691 HASBRO au format PDF.

| Type de produit | Toupie électronique |
| Marque | HASBRO |
| Modèle | BEYBLADE V FORCE DRANZER G B25 82691 |
| Catégorie | Jouets |
| Alimentation | 4 piles bouton 1,5 V type A-76 ou LR44 (non incluses) |
| Type de piles recommandé | Alcalines |
| Interrupteur | Marche/arrêt |
| Contenu de la boîte | Toupie, lanceur, corde de lancement, Bit Chip |
| Accessoires vendus séparément | BeyStadium |
| Sens de rotation | Droite (Right Spin) |
| Âge recommandé | À partir de 8 ans |
| Sécurité | Ne pas utiliser sur des surfaces surélevées ; tenir éloigné des enfants de moins de 3 ans (piles) |
| Entretien des piles | Retirer les piles si non utilisé longtemps ; ne pas mélanger piles neuves et usagées |
| Remplacement des piles | Tournevis cruciforme nécessaire (non inclus) |
| Certification | Conforme à la partie 15 des règles FCC (classe B) |
FOIRE AUX QUESTIONS - BEYBLADE V FORCE DRANZER G B25 82691 HASBRO
Questions des utilisateurs sur BEYBLADE V FORCE DRANZER G B25 82691 HASBRO
0 question sur cet appareil. Repondez a celles que vous connaissez ou posez la votre.
Poser une nouvelle question sur cet appareil
Téléchargez la notice de votre Jouets au format PDF gratuitement ! Retrouvez votre notice BEYBLADE V FORCE DRANZER G B25 82691 - HASBRO et reprennez votre appareil électronique en main. Sur cette page sont publiés tous les documents nécessaires à l'utilisation de votre appareil BEYBLADE V FORCE DRANZER G B25 82691 de la marque HASBRO.
MODE D'EMPLOI BEYBLADE V FORCE DRANZER G B25 82691 HASBRO
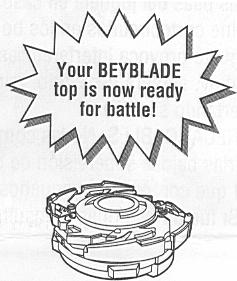
HIGH PERFORMANCE TOPS
Batteries included. Replace with 4 x 1.5V "A-76" or LR44 size button cell batteries. Alkaline batteries recommended. Phillips/cross head screwdriver needed (not included) to replace batteries. Includes BEYBLADE top, launcher, ripcord, and Bit Chip.
B-25
Electronic Type

WARNING: Do not use BEYBLADE tops or BEYSTADIUM™ on tables or other elevated surfaces.
BEYBLADE tops/BEYSTADIUM are intended to be used on the floor. Do not lean over the stadium when BEYBLADE tops are in play. BEYBLADE tops may bounce up and hit eye or face.
- Before assembly and playing, please read instructions. Please keep these instructions for future reference.
- When removing parts from runner frame, ask an adult to help you trim off any excess plastic using scissors or other suitable tool.
- The frame is numbered. Please follow the numbers carefully and make sure you are assembling the right parts.
- Discard plastic bags immediately.
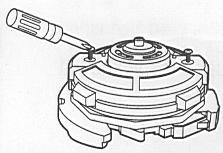
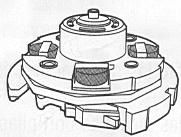
PARTS:
BEYBLADE
DRANZER G
top, Right
Spin launcher,
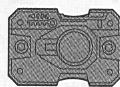
ripcord, Bit Chip
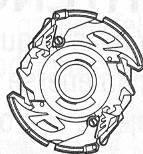

BEYSTADIUM sold separately.
TO REPLACE BATTERIES:

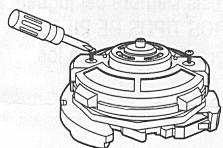
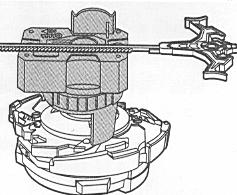
Using a Phillips/cross head screwdriver, remove the 2 screws from underside of top.

Remove base cover.
Insert 4 fresh A-76 button cell batteries as shown.
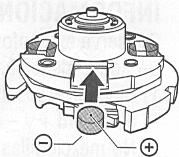

Replace base cover, and re-attach screws tightly.

LAUNCH:

-
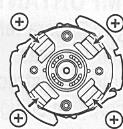
Peel and apply sticker to smooth side of Bit Chip.
-
Move ON/OFF switch to ON position. (Use tip of ripcord to move switch.)
-
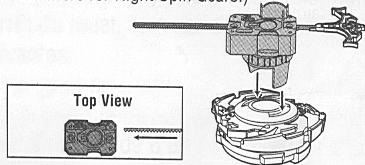
Insert ripcord into launcher as shown. (NOTE: Use left-spin launchers for Left Spin gear; use right-spin launchers for Right Spin Gears.)

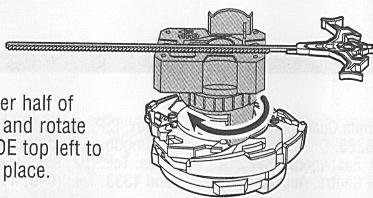
Hold lower half of launcher and rotate BEYBLADE top left to lock it in place.

Insert posts on launcher into openings in BEYBLADE* top, as shown. Launcher should stay attached to BEYBLADE top when inserted correctly.

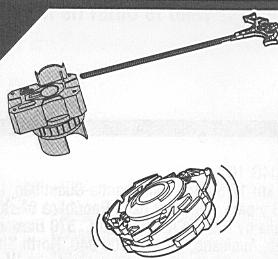
Holding the launcher securely, pull the ripcord over the BEYSTADIUM (not included)
the BEYBLADE top will spin... launch... and battle!
When not playing, move ON/OFF switch to OFF position.
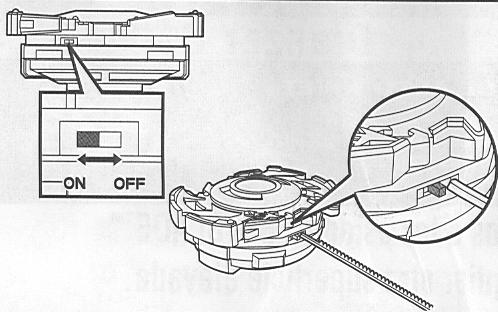
Move ON/OFF switch to ON position. (Use tip of ripcord to move switch.)
When not playing, move ON/OFF switch to OFF position.
CAUTION
- As with all small batteries, the batteries used with this toy should be kept away from small children who still put things in their mouths. If they are swallowed, promptly see a doctor and have the doctor phone (202) 625-3333 collect, or in Canada, have the doctor call your provincial Poison Control Center.
- Make sure the batteries are inserted correctly and follow the toy and battery manufacturers' instructions.
- Do not mix old and new batteries, alkaline, standard (carbon-zinc) or rechargeable (nickel-cadmium) batteries.
IMPORTANT: BATTERY INFORMATION
Please retain this information for future reference. Batteries should be replaced by an adult.
1) Always follow the instructions carefully. Use only batteries specified and be sure to insert them correctly by matching the + and - polarity markings.
2) Do not mix old batteries and new batteries, or standard (carbon-zinc) with alkaline batteries.
3) Remove exhausted or dead batteries from the product.
4) Remove batteries if product is not to be played with for a long time.
5) Do not short-circuit the supply terminals.
6) Should this product cause, or be affected by, local
electrical interference, move it away from the other electrical equipment. Reset (switching off and back on again or removing and re-inserting batteries) if necessary.
7) RECHARGEABLE BATTERIES: Do not mix these with any other types of battery. Always remove from the product before recharging. Recharge batteries under adult supervision. DO NOT RECHARGE OTHER TYPES OF BATTERIES.
8) As with all small items, these batteries should be kept away from children. If swallowed, seek medical attention immediately.
FCC Statement:
This equipment has been tested and found to comply with the limits for a Class B digital device, pursuant to part 15 of the FCC Rules. These limits are designed to provide reasonable protection against harmful interference in a residential installation. This equipment generates, uses and can radiate radio frequency energy, and, if not installed and used in accordance with the instructions, may cause harmful interference to radio communications. However, there is no guarantee that interference will not occur in a particular installation. If this equipment does cause harmful interference to radio or television reception, which can be determined by turning the equipment off and on, the user is encouraged to try to correct the interference by one or more of the following measures:
- Reorient or relocate the receiving antenna.
- Increase the separation between the equipment and receiver.
- Consult the dealer or an experienced radio/TV technician for help.