
IBU512 - Four Cylinda - Notice d'utilisation et mode d'emploi gratuit
Retrouvez gratuitement la notice de l'appareil IBU512 Cylinda au format PDF.


| Type de produit | Four encastrable |
| Marque | Cylinda |
| Modèle | IBU512 |
| Dimensions (L x H x P) | 59.5 x 59.5 x 54.8 cm |
| Poids net | 32 kg |
| Alimentation électrique | 230 V ~ 50 Hz, 16 A |
| Puissance totale | 3000 W |
| Capacité du four | 72 L |
| Nombre de fonctions | 8 modes de cuisson |
| Fonctions principales | Chaleur tournante, gril, sole, décongélation, chaleur pulsée, éclairage intérieur |
| Nettoyage | Pyrolyse (auto-nettoyant à haute température) |
| Porte | Porte froide à double vitrage amovible |
| Éclairage intérieur | Halogène, 25 W |
| Sécurité enfants | Verrouillage de la porte et des touches |
| Arrêt automatique | Oui, programmable |
| Minuterie | Affichage numérique avec fin de cuisson |
| Accessoires inclus | Grille, lèchefrite, tournebroche |
| Indice de réparabilité | 8.2/10 |
| Pièces détachées disponibles | Oui, via service client Cylinda |
| Classe énergétique | A+ |
| Consommation énergétique | 0.89 kWh (conventionnel), 0.79 kWh (chaleur tournante) |
FOIRE AUX QUESTIONS - IBU512 Cylinda
Questions des utilisateurs sur IBU512 Cylinda
0 question sur cet appareil. Repondez a celles que vous connaissez ou posez la votre.
Poser une nouvelle question sur cet appareil
Téléchargez la notice de votre Four au format PDF gratuitement ! Retrouvez votre notice IBU512 - Cylinda et reprennez votre appareil électronique en main. Sur cette page sont publiés tous les documents nécessaires à l'utilisation de votre appareil IBU512 de la marque Cylinda.
MODE D'EMPLOI IBU512 Cylinda
Lisez d'abord ce manuel d'utilisation !
Chère cliente, cher client,
Merci d'avoir choisi un produit Cylinda. Nous espérons que vous tirerez le meilleur parti de ce produit, fabriqué avec une haute qualité et une technologie de pointe. Veuillez lire attentivement l'intégralité de ce manuel d'utilisation ainsi que tous les autres documents fournis avant d'utiliser le produit, et conservez-le pour référence future. Si vous transmettez le produit à une autre personne, assurez-vous que le manuel d'utilisation l'accompagne également. Respectez tous les avertissements et les informations contenus dans le manuel.
N'oubliez pas que ce manuel d'utilisation peut également s'appliquer à plusieurs autres modèles. Les différences entre les modèles sont explicitement indiquées dans ce manuel.
Explication des symboles
Les symboles suivants sont utilisés dans ce manuel :

Informations importantes ou conseils utiles pour l'utilisateur.

Avertissement concernant des situations pouvant être dangereuses pour la vie ou les biens.

Avertissement concernant les chocs électriques.

Avertissement concernant les risques d'incendie.

Avertissement concernant les surfaces chaudes.
1 Instructions et avertissements importants pour la sécurité et l'environnement 4
Sécurité générale....4
Sécurité électrique 4
Sécurité du produit 5
Utilisation prévue....7
Sécurité des enfants....7
Élimination du produit usagé....8
Élimination de l'emballage....8
2 Informations générales 9
Vue d'ensemble....9
Contenu de l'emballage....10
Spécifications techniques 11
3 Installation 12
Avant l'installation....12
Installation et raccordement....14
Transport futur 15
4 Préparatifs 16
Conseils pour économiser l'énergie 16
Première utilisation....16
Réglage de l'heure 16
Premier nettoyage du produit 16
Chauffage initial....16
5 Utilisation du four 18
Informations générales sur la cuisson, la rôtisserie et le grill 18
Utilisation du four électrique ...... 18
Modes de cuisson 19
Utilisation de la minuterie du four.... 20
Tableau des temps de cuisson 22
Préparation du gril 23
Tableau des temps de cuisson pour le grill.... 23
6 Entretien et nettoyage 24
Informations générales....24
Nettoyage du panneau de commande 24
Nettoyage du four 24
Retirer la porte du four.... 25
Retirer la vitre intérieure de la porte.... 25
Changer l'ampoule du four 27
7 Dépannage 28
1 Instructions importantes et avertissements concernant la sécurité et l'environnement
Cette section contient des consignes de sécurité qui vous aident à éviter tout dommage corporel ou matériel. Le non-respect de ces instructions annulera la garantie.
Sécurité générale
- Cet appareil peut être utilisé par des enfants âgés d'au moins 8 ans et par des personnes ayant des capacités physiques, sensorielles ou mentales réduites, ou manquant d'expérience et de connaissances, à condition qu'ils soient surveillés ou qu'ils aient reçu des instructions concernant l'utilisation de l'appareil en toute sécurité et qu'ils comprennent les risques encourus.
Les enfants ne doivent pas jouer avec l'appareil.
Le nettoyage et l'entretien par l'utilisateur ne doivent pas être effectués par des enfants sans surveillance.
- L'appareil ne doit pas être utilisé par des personnes (y compris les enfants) ayant des capacités physiques, sensorielles ou mentales réduites, ou manquant d'expérience et de connaissances, à moins qu'elles n'aient reçu une formation ou des instructions.
Les enfants ne doivent pas jouer avec l'appareil.
- Si le produit est confié à quelqu'un pour un usage personnel ou pour une réutilisation, il faut également remettre
le mode d'emploi, les étiquettes du produit et autres documents et pièces pertinents.
- L'installation et les réparations doivent toujours être effectuées par des agents de service agréés. Le fabricant ne peut être tenu responsable des dommages résultant de travaux effectués par des personnes non agréées et cela peut annuler la garantie. Avant l'installation, lisez attentivement les instructions.
- N'utilisez pas le produit s'il est défectueux ou présente des dommages visibles.
- Vérifiez que les boutons de fonction du produit sont éteints après chaque utilisation.
Sécurité électrique
- Si le produit présente un défaut, il ne doit pas être utilisé à moins d'être réparé par le service après-vente agréé. Vous risquez un choc électrique !
- Branchez le produit uniquement sur une prise mise à la terre avec une tension et une protection conformes aux spécifications des caractéristiques techniques. L'installation de la mise à la terre doit être effectuée par un électricien qualifié, que le produit soit utilisé avec ou sans transformateur. Notre entreprise ne saurait être tenue responsable des problèmes
survenant en raison d'une mise à la terre non conforme aux réglementations locales.
- Ne lavez jamais le produit en le vaporisant ou en versant de l'eau dessus !
Vous risquez un choc électrique !
- Ne touchez jamais la prise avec des mains mouillées ! Ne débranchez jamais en tirant sur le câble, mais saisissez toujours la prise.
- Le produit doit être débranché pendant l'installation, l'entretien, le nettoyage et la réparation.
- Si le cordon d'alimentation est endommagé, il doit être remplacé par le fabricant, son service après-vente ou une personne de qualification similaire afin d'éviter tout danger.
- L'appareil doit être installé de manière à pouvoir être complètement déconnecté du réseau. La séparation doit être effectuée soit par une prise de courant principale, soit par un interrupteur intégré à l'installation électrique fixe, conformément aux règles de construction.
- La surface arrière du four devient très chaude en cours d'utilisation. Assurez-vous qu'aucun raccordement électrique n'entre en contact avec la surface arrière, cela pourrait endommager les connexions.
- Ne coincez pas le cordon d'alimentation entre la porte du four et le cadre, et ne le laissez jamais passer sur les surfaces chaudes. Sinon, l'isolant du câble pourrait
fondre et provoquer un incendie en raison d'un court-circuit.
- Tout travail sur l'équipement électrique et le système électrique ne doit être effectué que par des professionnels qualifiés.
- En cas de dommage, éteignez l'appareil et débranchez-le de la source d'alimentation. Pour ce faire, coupez le fusible à la maison.
- Vérifiez que le fusible est compatible avec l'appareil.
Sécurité du produit
- AVERTISSEMENT : L'appareil et ses accessoires deviennent chauds lors de l'utilisation. Ne touchez pas les éléments chauffants. Les enfants de moins de 8 ans ne doivent pas s'approcher de l'appareil sans surveillance.
- N'utilisez jamais l'appareil en cas de troubles du jugement ou de la coordination dus à la consommation d'alcool et/ou de drogues.
- Soyez prudent lors de l'utilisation de boissons alcoolisées dans les aliments. L'alcool se transforme en vapeur à haute température et peut s'enflammer s'il entre en contact avec des surfaces chaudes.
- Assurez-vous qu'aucun matériau inflammable ne se trouve à proximité de l'appareil, car les côtés peuvent devenir chauds pendant l'utilisation.
- Pendant l'utilisation, l'appareil devient chaud. Ne touchez pas les éléments chauffants à l'intérieur du four. • Gardez toutes les ouvertures de ventilation dégagées.
- Ne chauffez pas de boîtes de conserve ou de bocaux en verre non ouverts dans le four. La pression qui se forme dans le récipient peut le faire éclater.
- Ne placez pas de plaques de cuisson, d'assiettes ou de papier d'aluminium directement sur le fond du four. L'accumulation de chaleur peut endommager la partie inférieure du four.
- N'utilisez pas de nettoyants abrasifs ou de grattoirs métalliques tranchants pour nettoyer la vitre de la porte du four, car ils pourraient rayer la surface, ce qui pourrait entraîner le bris du verre.
- N'utilisez pas de nettoyeur vapeur pour nettoyer l'appareil, cela pourrait provoquer un choc électrique.
- (Varie selon le modèle.) Placez la grille du four et la plaque correctement sur les rails. Il est important de placer la grille du four et/ou la plaque de récupération correctement sur le rail. Faites glisser la grille du four ou la plaque de récupération entre 2 rails et assurez-vous qu'elles sont en équilibre avant d'y placer les aliments (voir l'image suivante).

Élimination du produit en fin de vie
I enlighet med WEEE-direktivet för hantering av avfallsprodukter:  Den här produkten gäller under EU WEEE-direktivet (2012/19/EU). Den här produkten är försedd med en klassificeringssymbol för avfallshantering av elektriskt och elektroniskt material (WEEE). Denna produkt är tillverkad med delar av hög kvalitet samt material som kan återanvändas och återvinnas. Produkten får inte slängas i hushållssoporna eller i annat avfall vid livsslut. Ta den till en återvinningsstation för elektrisk och elektronisk utrustning. Kontakta din kommun för mer information om närmaste återvinningsstation.Conformément à la directive RoHS :
Produkten du har köpt gäller under EU RoHS-direktivet (2011/65/EU). Den innehåller inga av de farliga eller förbjudna material som anges i direktiven.Élimination de l'emballage
\- Emballaget är farligt för barn. Förvara emballaget på en säker plats utom räckhåll för barn. Emballaget till den här produkten är tillverkat av återvinningsbart material. Sortera och avfallshantera det i enlighet med lokala lagar och regler gällande avfallshantering. Släng dem inte i hushållssoporna.2 Informations générales
Översikt   1 Kontrollpanel 2 Trådhylla 3 Tråg 4 Handtag 5 Lucka 6 Fläktmotor (bakom platta i stål) 7 Lampa 8 Övre värmeelement 9 Hyllpositioner  1 Funktionsreglage 2 Digital timer 3 Termostatreglage 4 TermostatlampaContenu de l'emballage
 Vilka tillbehör som medföljer kan variera beroende på modell. Alla tillbehör som beskrivs i den här bruksanvisningen kanske inte följer med din produkt.1. Manuel d'utilisation
2. Plaque de cuisson
Används för bakverk, fryst mat och stora stekar. 3. Plaque de base
Används för bakverk, såsom kakor och kex. 4. Grille du four
Används vid grillning och för att placera mat som ska bakas, grillas eller tillagas i grytliknande kärl.  5. Placez la grille du four et la plaque correctement sur les rails télescopiques
(Denna funktion finns som tillval. Den kanske inte finns på din produkt.) De teleskopiska gallren gör det möjligt för dig att installera och ta bort plåtar och grillgaller på ett enkelt sätt. När du använder plåten och grillgallret med de teleskopiska gallren ska du se till att stiften i bakre delen av de teleskopiska gallren står mot kanterna på grillgallret och plåten.  3 Installation
Produkten måste installeras av en behörig person i enlighet med gällande regler. Annars kommer garantin att bli ogiltig. Tillverkaren kan inte hållas ansvarig för skador som uppkommit från arbete som utförts av icke auktoriserade personer och kan göra garantin ogiltig.  Förberedelse av platsen och elinstallationen för produkten ligger på kundens ansvar.  FARA: Produkten måste installeras i enlighet med lokala lagar och regler avseende el och gas.  FARA: Innan installation ska du kontrollera produkten visuellt att den inte är defekt. Om den här defekt ska den inte installeras. Skadade produkter kan orsaka säkerhetsrisker.Avant l'installation
Enheten är avsedd för installation i kommersiellt tillgängliga köksskåp. Ett säkerhetsavständ måste lämnas mellan enheten och köksväggarna och -möblerna. Se bilden (värden in mm). - Ytor, syntetiska laminat och vidhäftande material måste vara värmeresistenta (minst 100 °C). - Köksskåp måste nivåjusteras och fixeras. - Om det finns en låda under ugnen måste en hylla installeras mellan ugnen och lådan. • Bär enheten tillsammans med minst två personer. - Håll tag i ugnen genom att använda skårorna på ugnens båda sidor när du ska flytta den. - Ta bort allt material och alla dokument från produktens insida innan du installerar den. - Köksmöbeln måste stämma överens med mätten som anges i bilden nedan. I köksmöbelns bakre ända måste en öppning skäras ut efter de mätt som anges i bilden nedan för att säkerställa tillräcklig ventilering.  Installera inte produkten intill kylskåp eller frys. Värme som produkten avger ökar energiförbrukningen för kylapparater.  Använd inte luckan och/eller handtaget när du lyfter eller flyttar produkten.     min.  * min.Installation et raccordement
\- Produkten får bara installeras och anslutas i enlighet med gällande installationskrav.Raccordement électrique
Anslut produkten till ett jordat uttag som är skyddat av en automatsäkring av lämplig kapacitet, i enlighet med "Tekniska specifikationer". Den jordade installationen ska göras av en kvalificerad elektriker medan produkten används med eller utan transformator. Vårt företag kan inte hållas ansvarig för skador som uppstått på grund av att produkten har används utan en jordad installation, i enlighet med lokala lagar och regler. DANGER :
Produkten får endast anslutas till el av en auktoriserad och behörig person. Produktens garantiperiod starter efter en korrekt installation. Tillverkaren kan inte hållas ansvarig för skador som uppkommit från arbete som utförts av icke auktoriserade personer. DANGER :
Strömsladden får inte klämmas, böjas, klämmas eller komma i kontakt med produktens heta delar. En skadad strömsladd måste bytas ut av en behörig elektriker. Annars finns risk för elektrisk stöt, kortslutning eller brand! - Anslutningen måste följa nationella lagar och regler. - Strömdata måste överensstämma med de data som anges på märkplåten på produkten. Öppna luckan på framsidan för att se märkplåten. - Produktens strömsladd måste följa värdena i "Tekniska specifikationer". DANGER :
Koppla ur produkten från strömkällan innan du påbörjar något arbete på elinstallationen. Du kan få en elektrisk stöt!  Strömsladdens kontakt måste vara lättåtkomlig efter installation (och inte löpa över hällen).  Vid anslutning av kablarna måste du följa de nationella / lokala elektriska föreskrifterna samt använda lämpligt uttag / ledning och stickkontakt för ugnen. Om produktens strömbegränsningar ligger utanför strömtillförselnivån till stickkontakten / ledningen, måste produkten anslutas direkt via fast elinstallation utan att använda stickkontakt / ledning. Koppla in strömsladden i vägguttaget.Installer le produit
1. Skjut ugnen in i skåpet, passa in det och säkra det, samtidigt som du ser till att strömsladden inte är trasig och/eller klämd.  Säkra ugnen med 2 skruvar, enligt bilden. Efter installationen ska du se till att skruvarna är ordentligt åtdragna och att det inte går att rubba ugnen. Ugnen kan välta under användning om den inte installeras enligt anvisningarna och om skruvarna inte är ordentligt åtdragna.Pour les produits avec ventilateur de refroidissement (il peut ne pas être présent sur votre produit).
 1 Nedkylningsfläkt 2 Kontrollpanel 3 Lucka Den inbyggda fläkten kyler både ned det inbyggda skåpet och produktens framsida.  Kylfläkten fortsätter att köra i 20-30 minuter efter att ugnen har slagits av. Om du har lagat mat genom att programmera timern på ugnen slås även kylfläkten av i slutet av tillagningstiden tillsammans med alla funktioner.Contrôle final
1. Använda produkten 2. Kontrollera funktionerna.Transport futur
- Spara produktens originalkartong för framtida transport av produkten. Följ instruktionerna på kartongen. Om du inte har originalkartongen kvar ska du packa in produkten i bubbelplast eller tjock kartong, och tejpa ordentligt. - För att förhindra att gallret ioch plåten nuti ugnen skadar ugnsluckan ska du placera en bit kartong på insida av ugnsluckan som ligger mot gallren. Tejpa ugnsluckan mot sidoväggarna. - Använd inte luckan eller handtaget när du lyfter eller flyttar produkten.  Kontrollera produktens allmänna utseende, om det finns några skador som kan ha uppstått under transport.4 Préparatifs
Conseils pour économiser l'énergie
Följande information hjälper dig att använda enheten på ett ekologiskt sätt och spara energi: - Använd mörka eller emaljerade kärl i ugnen eftersom värmeöverföringen blir bättre. - När du tillagar dina rätter utför du en förvärmning om detta rekommenderas i bruksanvisningen eller receptet. - Öppna inte luckan för ofta under tillagningen. - Försök att inte tillaga mer än en rätt i ugnen samtidigt. Du kan tillaga eller placera två kokkärl på ugnsgallret. - Tillaga mer än en rätt i följd. Ugnen är då redan varm. - Du kan spara energi genom att stänga av ugnen i några minuter innan tillagningstiden är slut. Öppna inte ugnsluckan. • Tina upp fryst mat före tillagning.Première utilisation Réglage de l'heure
 Om du gör några ändringar kommer respektive symbol att blinka. Tryck på +/- för att ställa in tiden på dagen efter det att ugnen är spänningssatt för första gången.  För pekkontrollmodeller, tryck på ⚠ först och använd sedan + / — för att ställa in tiden på dagen. Bekräfta inställningen genom att röra vid ⚙ symbolen vänta 4 sekunder utan att röra några knappar för att bekräfta.  1 Justeringsknapp 2 Symbol för knapplås 3 Klocksymbol 4 Larmvolym symbol (Den kanske inte finns på din produkt.) 5 Ekoläges symbol 6 Plusknapp 7 Minusknapp 8 Tids pajsymbol 9 Alarmsymbol 10 Tillagningstiden slut 11 Symbol för tillagningstid 12 Programknapp  Om den första tiden inte är inställd, kommer klockan löpa från och med 12:00 och Ⓤ symbolen visas. Den här symbolen försvinner så fort tiden har ställts in.  De aktuella tidsinställningarna avbryts vid strömavbrott. De behöver justeras om.Le premier nettoyage du produit
 Ytan kan skadas av vissa rengöringsmedel. Använd inte aggressiva rengöringsmedel, skurpulver/-mjölk eller några vassa föremål under rengöring. 1. Avlägsna allt förpackningsmaterial. 2. Torka av ytorna på produkten med en fuktig trasa eller svamp och torka sedan med en torr trasa.Chauffage initial
Värm upp enheten i omkring 30 minuter och slå sedan av den. På det här sättet bränns matrester bort och avlägsnas. AVERTISSEMENT
Heta ytor kan orsaka brännskador! Produkten kan bli het när den används. Rör aldrig vid de heta brännarna, innersektionerna på ugnen, värmeelement etc. Håll barn borta från enheten! Använd alltid värmetåliga ugnsvantar när du sätter in mat i eller tar ut mat från den heta ugnen.Four électrique
1. Ta ut alla bakplåtar och galler från ugnen. 2. Stäng ugnsluckan. 3. Välj positionen Fast. 4. Välj den högsta effekten för grillen; seSå här använder du den elektriska ugnen, sidan 18. 5. Kör ugnen i cirka 30 minuter. 6. Stänga av ugnen; se Så här använder du den elektriska ugnen, sidan 18Four grill
1. Ta ut alla bakplåtar och galler från ugnen. 2. Stäng ugnsluckan. 3. Välj den högsta effekten för grillen; se Så här förbereder du grillen, sidan 23. 4. Kör ugnen i cirka 30 minuter. 5. Stänga av grillen, se Så här förbereder du grillen, sidan 23  Doft och rök kan utvecklas under ett par timmar vid första användningen. Detta är normalt. Se till att rummet är välventilerat så att rök och lukt försvinner. Undvik direkt inandning av röken och den lukt som den sänder.5 Utilisation du four
Informations générales sur la cuisson, la rôtisserie et le grill
AVERTISSEMENT
Heta ytor kan orsaka brännskador! Produkten kan bli het när den används. Rör aldrig vid de heta brännarna, innersektionerna på ugnen, värmeelement etc. Håll barn borta från enheten! Använd alltid värmetåliga ugnsvantar när du sätter in mat i eller tar ut mat från den heta ugnen. DANGER :
Var försiktig när du öppnar luckan, eftersom det kan komma ut ånga. Kraftig ånga kan bränna dina händer, ditt ansikte och/eller dina ögon.Conseils pour la cuisson
- Använd material som inte utsätts för beläggning, exempelvis metall- eller aluminiumbehållare. • Använd gallret på bästa sätt. - Placera bakformen på gallrets mitt. - Välj gallrets position innan du slår på ugnen eller grillen. Ändra inte gallrets position när ugnen är varm. • Håll ugnsluckan stängd.Conseils pour la rôtisserie
- Om du penslar hel kyckling, kalkon eller större köttbitar med en marinad av citronsaft och svartpeppar innan stekning kommer tillagningsprestandan att öka. - Det tar ungefär 15 till 30 minuter längre att steka kött med ben jämfört med att steka samma köttstorlek utan ben. - För varje centimeter köttets tjocklek ökar ska du lägga på cirka 4 till 5 minuters tillagningstid. - Låt köttet vila i ungen i omkring 10 minuter efter att du har tillagat det. Saften fördelas bättre över steken och rinner inte ut när du skär i köttet. - Fisk ska placeras i mitten eller på den nedre falsen, i en eldfast form.Conseils pour le grill
När kött, fisk och kyckling grillas blir de snabbt bruna och får en krispig yta, samt torkar inte. Platta delar, köttbitar och korvar passar speciellt bra för grillning, samt grönsaker med högt vatteninnehåll, såsom tomater och lök. - Fördela delarna som ska grillas på ugnsgallret eller på plåten med ugnsgallret på ett sådant sätt att utrymmet som täcks inte överskrider storleken på värmaren. - Skjut in ugnsgallret eller plåten med galler på önskad nivå i ugnen. Om du grillar på ugnsgallret ska du skjuta in långpannan på den nedre falsen för att samla upp fett. Tillsätt lite vatten i långpannan för enkel rengöring.  Mat som passar för grillning kan börja brinna. Använd bara mat för grillning som är lämplig för grillvärme. Placera inte maten för långt bak på grillen. Det här är det hetaste stället och maten kan fatta eld.Utilisation du four électrique
Ugnen är utrustad med utskjutbara reglage som trycks fram när du trycker på dem. 1. Tryck inåt för att få fram reglaget och vrid sedan för att göra önskad inställning.  2. När tillagningsprocessen är klar trycker du på vredet inåt. Välj temperatur och användarläge  1 Funktionsreglage 2 Termostatreglage 1. Ställ in funktionsvredet till önskat användarläge. 2. Ställ in temperaturreglaget till önskad temperatur. » Ugnen värms upp till inställd temperatur och bibehåller den. Under uppvärmning förblir temperaturlampan på.Éteindre le four électrique
Vrid funktionsreglaget och temperaturreglaget till positionen off (av) (övre). Det är viktigt att placera ugnsgallret korrekt på gallerfalsarna. Ugnsgallret måste föras in mellan gallerfalsarna enligt bilden. Låt inte ugnsgallret stå mot ugnens bakre vägg. Dra ugnsgallret till den främre delen av gallret och placera det med hjälp av luckan, för att få bra grilleffekt. (Varierar beroende på modell.) Modes d'utilisation
Användningslägenas ordning som visas här kan skilja sig från de på din enhet.Chaleur tournante et chaleur de sole
 Över- och undervärme används. Maten upphettas simultant uppifrån och underifrån. Exempelvis är det lämpligt för kakor, småkakor eller grytor i bakformar. Tillaga maten med endast en långpanna.Chaleur de sole
 Endast undervärme används. Det är lämpligt för pizza och andra rätter som ska stekas från undersidan. Den här funktionen måste även användas för ångrengöring.Ventilation qui prend en charge le chauffage par le bas/par le haut
 Över- och undervärme plus fläkt (i bakre väggen) är på. Varm luft distribueras jämnt i ugnen med hjälp av fläkten. Tillaga maten med endast en långpanna.Entraînement par ventilateur
 Ugnen värms inte upp. Endast fläkten (i bakre väggen) används. Passar för att långsamt tina upp mat i rumstemperatur samt att kyla ner varm mat.Chaleur pulsée
 Varmluft, som värms av det bakre elementet, fördelas snabbt och jämnt i ugnen tack vare fläkten.  Detta är lämpligt att använda när du vill värma flera rätter på flera falsnivåer. Förvärmning krävs i regel inte. Lämplig för tillagning med flera långpannor. Den här funktionen måste även användas för ångrengöring.Fonction "3D"
 Över- och undervärme plus fläktassisterad värme (i bakre väggen) är på. Maten tillagas jämnt och snabbt. Tillaga maten med endast en långpanna.Grill complet
 Den stora grillen i ugnens innertak används. Detta är lämpligt när stora mängder kött ska grillas. - Placera små och medelstora portioner på rätt fals under grillvärmaren för grillning. • Ställ in temperaturen på maximal nivå. • Vänd på maten efter halva grillningstiden.Grill + ventilateur
 Grilleffekten är inte så stark som för Full grill - Placera små och medelstora portioner på rätt nivå under grillvärmaren för grillning. • Ställ in önskad temperatur. • Vänd på maten efter halva grillningstiden.Utiliser la minuterie du four
 1 Justeringsknapp 2 Symbol för knapplås 3 Klocksymbol 4 Larmvolym symbol (Den kanske inte finns på din produkt.) 5 Ekoläges symbol 6 Plusknapp 7 Minusknapp 8 Tids pajsymbol 9 Alarmsymbol 10 Tillagningstiden slut 11 Symbol för tillagningstid 12 Programknapp Cuisson en réglant la durée de cuisson ;
Du kan ställa in ugnen så att den stannar vid slutet av den angivna tiden genom att ställa in tillagningstiden på timern. 1. Välj funktionen för matlagning. 2. Rör vid Ⓤ tills → symbolen visas på skärmen för tillagningstiden. 3. Ställ in tillagningstiden med + / — knapparna. » »När tillagningstiden är inställd visas |→| symbolen och tidsdelen på displayen kontinuerligt. 4. Placera skålen i ugnen och ställ in temperaturen med temperaturknappen. Matlagningen startar. » Tillagningstiden börjar räknas ner på displayen när matlagningen startar och alla delar av tidsdelssymbolen är tänd. Den inställda tillagningstiden är indelad i 4 lika stora delar och när tiden för varje del slutar, släcks symbolen för den delen. Så du kan lätt förstå förhållandet mellan återstående tillagningstid och total tillagningstid.Si vous souhaitez régler la fin de la cuisson à une heure ultérieure :
Efter inställning av tillagningstiden på timern kan du ställa in slutet av tillagningstiden till ett senare tillfälle. 1. Välj funktionen för matlagning. 2. Rör vid Ⓤ tills → symbolen visas på skärmen för tillagningstiden. 3. Tryck på + tills — symbolen visas på displayen för tillagningstid. » »När tillagningstiden är inställd, visas |→| symbolen på displayen kontinuerligt. 4. Rör vid Ⓤ tills → symbolen visas på skärmen för tillagningstidens slut. 5. Tryck på + / — för att ställa in slutet på tillagningstiden. » När tillagningstiden är inställd, visas |→| symbolen plus →| symbolen och tidsdelen på displayen kontinuerligt. När tillagningen startar, försvinner →| symbolen. 6. Placera skålen i ugnen och ställ in temperaturen med temperaturknappen. Matlagningen startar. » Ugnstimern beräknar starttiden genom att dra av tillagningstiden från slutet av tillagningstiden du ställt in. Valt driftläge aktiveras när starttiden för tillagningen kommit och ugnen värms upp till inställd temperatur. Temperaturen behålls tills tillagningstidens slut. » Tillagningstiden börjar räknas ner på displayen när matlagningen startar och alla delar av tidsdelssymbolen är tänd. Den inställda tillagningstiden är indelad i 4 lika stora delar och när tiden för varje del slutar, släcks symbolen för den delen. Så du kan lätt förstå förhållandet mellan återstående tillagningstid och total tillagningstid. 7. När tillagningen är klar, visas "End" på displayen och timern ger en ljudvarning. 8. Larmsignalen hörs i 2 minuter. Tryck på valfri knapp för att stoppa larmet. Larmsignalen blir tyst och aktuell tid visas.  Om du trycker på en knapp, vilken som helst, vid slutet av ljudvarningen kommer ugnen startas igen. Vrid temperaturvredet och funktionsvredet till "0" läget (off/av) för att stänga av ugnen, för att förhindra att ugnen startar igen vid slutet av varningen.Activer le verrouillage des touches
Du kan förhindra att ugnen används genom att använda knapplåsfunktionen. 1. Rör vid: ≡ tills 🔒 symbolen visas på skärmen. » "OFF (AV)" visas på skärmen. 2. Tryck på +knappen för att aktivera knapplåssymbolen. » När knapplåset är aktiverat visas "On (På)" på skärmen och 🔒 symbolen fortsätter vara tänd.  Ugnsknapparna kan inte användas när knapplåsfunktionen är aktiverad. Knapplåset avbryts inte vid ett strömavbrott.Pour désactiver le verrouillage des touches
1. Tryck på ⚠️ tills 🔒 symbolen visas på displayen. » "On (På)" visas på skärmen. 2. Avaktivera knapplåset genom att trycka på knappen. » "OFF (AV)" visas efter att knapplåset har avaktiverats.Régler la minuterie
Du kan använda klockan på produkten för vilken varning som helst och påminnelse annan än tillagningsprogrammet. Alarmklockan har ingen påverkan på ugnens funktioner. Den används endast som en varning. Den kan exempelvis vara användbar när du ska vända mat i ugnen vid en viss tidpunkt. Alarmet hörs i slutet av den inställda tiden 1. Rör vid Ⓛ tills △ symbolen visas på skärmen.  Den maximala alarmtiden kan vara 23 timmar och 59 minuter. 2. Ställ in larmtiden genom att använda + / - knapparna.  Funktionsknapparna för larmsignalen, tiden på dagen, skärmens ljusstyrka och temperaturknapparna ska vara i läge 0 (OFF). » △ symbolen fortsätter vara tänd och larmtiden visas på skärmen när larmtiden är inställd. 3. I slutet av larmtiden börjar △ symbolen att blinka och larmsignalen hörs.Désactiver l'alarme
1. Larmsignalen hörs i 2 minuter. Tryck på valfri knapp för att stoppa larmet. » Larmsignalen blir tyst och aktuell tid visas.Interrompre l'alarme ;
1. Tryck och håll in — knappen tills "00:00" visas. 2. Tryck och håll in — knappen tills "00:00" visas.  Larmtiden visas. Om larmtiden och tillagningstiden ställs in samtidigt visas den kortaste tiden.Changer la tonalité de l'alarme
1. Rör vid:≡ tills ◀️ symbolen visas på skärmen. 2. Ställ in önskad larmtonen med + / — knapparna. 3. Tonen du har ställt in att aktiveras på kort tid. » Den valda larmtonen visas som "b-01", "b-02" eller "b-03" på displayen.Changer l'heure de la journée
Så här ändrar du tiden du tidigare ställt in: 1. Rör vid:≡ tills Ⓛ symbolen visas på skärmen. 2. Ställ in tiden på dagen med + /— knapparna. 3. Den tid du ställt in att aktiveras på kort tid.Mode économique
Du kan spara energi med ekonomiläget när du lagar mat genom att ställa tillagningstiden i ugnen. Det här läget avslutar matlagningen med den inre temperaturen i ugnen genom att stänga av värmarna före slutet av tillagningstiden.Réglage du mode économique
1. Rör vid:≡ tills ⓣ symbolen visas på skärmen. » "OFF (AV)" visas på skärmen. 2. Aktivera ekonomiläget genom att röra vid + knappen. » När knapplåset är aktiverat, visas "On" på displayen och miljösymbolen förblir tänd.Désactiver le mode économique
1. Tryck på: symbolen tills eco symbolen visas på displayen. » "On (På)" visas på skärmen. 2. Aktivera ekonomiläget genom att röra vid knappen. » "Off" visas när knapplåset avaktiveras.Réglage de la luminosité de l'écran (Cette fonction est une option. Elle peut ne pas être disponible sur votre produit.)
1. Rör vid: ≡ tills d-01 eller d-02 eller d-03 visas på displayen för bildskärmens ljusstyrka. 2. Ställ in önskad ljusstyrka medhjälp + / - knapparna. » Den tid du ställt in att aktiveras på kort tid. Tabell över tillagningstider| i | Tiderna i den här tabellen är endast riktlinjer. Tidsgränserna kan variera på grund av matens temperatur, tjocklek, typ och dina egna inställningar för tillagningen. |
| i | Första falsen i ugnen är den undre falsen. |
| Rätt | Tillagningsnivå | Falsposition | Temperatur i °C | Tillagningstid (i ungefärligt antal min.) | |
| Kakor på plät* | En nivå | 3 | 175 | 25 ... 30 | |
| Kakor i form* | En nivå | 2 | 180 | 40 ... 50 | |
| Kakor på bakplåtspapper* | En nivå | 3 | 175 | 25 ... 30 | |
| 2 nivåer | 1 - 5 | 175 | 30 ... 40 | ||
| 3 nivåer | 1 - 3 - 5 | 180 | 45 ... 55 | ||
| Sockerkaka* | En nivå | 3 | 200 | 5 ... 10 | |
| 2 nivåer | 1 - 5 | 175 | 20 ... 30 | ||
| Kakor* | En nivå | 3 | 175 | 25 ... 30 | |
| 2 nivåer | 1 - 5 | 170 ... 190 | 30 ... 40 | ||
| 3 nivåer | 1 - 3 - 5 | 175 | 35 ... 45 | ||
| Kaka av deg* | En nivå | 2 | 200 | 30 ... 40 | |
| 2 nivåer | 1 - 5 | 200 | 45 ... 55 | ||
| 3 nivåer | 1 - 3 - 5 | 200 | 55 ... 65 | ||
| Fylliga kakor* | En nivå | 2 | 200 | 25 ... 35 | |
| 2 nivåer | 1 - 5 | 200 | 35 ... 45 | ||
| 3 nivåer | 1 - 3 - 5 | 190 | 45 ... 55 | ||
| Surdeg* | En nivå | 2 | 200 | 35 ... 45 | |
| 2 nivåer | 1 - 3 | 190 | 35 ... 45 | ||
| Lasagne* | En nivå | 2 - 3 | 200 | 30 ... 40 | |
| Pizza* | En nivå | 2 | 200 ... 220 | 15 ... 20 | |
| Biffstek (hel)/stek | En nivå | 3 | 25 min. 250/max, sedan 180 ... 190 | 100 ... 120 | |
| Lammgryta | En nivå | 3 | 25 min. 250/max, sedan 190 | 70 ... 90 | |
| En nivå | 3 | 25 min. 250/max, sedan 190 | 60 ... 80 | ||
| Stekt kyckling | En nivå | 2 | 15 min. 250/max, sedan 180 ... 190 | 55 ... 65 | |
| En nivå | 2 | 15 min. 250/max, sedan 180 ... 190 | 55 ... 65 | ||
| Kalkon (5.5 kg) | En nivå | 1 | 25 min. 250/max, sedan 180 ... 190 | 150 ... 210 | |
| En nivå | 1 | 25 min. 250/max, sedan 180 ... 190 | 150 ... 210 | ||
| Fisk | En nivå | 3 | 200 | 20 ... 30 | |
| En nivå | 3 | 200 | 20 ... 30 | ||
| Vid tillagning med 2 plåtar samtidigt placerar du den djupa plåten på den övre falsen och den grunda på den nedre.* Vi föreslår att du använder förvärmning för all mat. | |||||
Conseils pour la cuisson de pâtisseries dans des moules
- Om bakverket är för torrt ska du öka temperaturen med 10 och minska tillagningstiden. - Om kakan är kladdig ska du använda en mindre vätskemängd och sänka temperaturen med 10 °C. - Om kakan blir för mörk ska du placera den längre ner i ugnen, sänka temperaturen och öka tillagningstiden. - Om den är välgräddad på insidan med kladdig på utsidan ska använda en mindre vätskemängd, sänka temperaturen och öka tillagningstiden.Conseils pour la cuisson de pâtisseries
- Om bakverket är för torrt ska du öka temperaturen med 10 och minska tillagningstiden. Pensla degen med en blandning av mjölk, olja, ägg och yoghurt. - Om bakverket tar för lång tid att grädda ska du kontrollera tjockleken så att den inte överskrider plåtens djup. - Om den övre sidan av bakverket blir mörkt men den undre delen är inte färdiggräddad ska du kontrollera att mängden sås för bakverket inte är för stor på undersidan av bakverket. Försök att fördela såsen jämnt mellan och på lagren av det, och överst, för att få en jämn gräddning.  Tillaga bakverket enligt det läge och den temperatur som är angiven i tillagningstabellen. Om botten inte har tillräckligt med färg ska du placera den på en lägre fals nästa gång.Conseils pour la cuisson de légumes
\- Om grönsaksrätten blir för torr ska du tillaga den i en form med lock. Ett stängt kärl förhindrar att vätskan ångar bort. \- Om grönsaksrätten inte blir färdigkokt ska du förkoka grönsakerna eller förbereda dem som konserverad mat och placera dem i ugnen.Comment préparer le gril
AVERTISSEMENT
Stäng ugnsluckan under grillning. Heta ytor kan orsaka brännskador!Allumer le gril
1. Vrid funktionsreglaget till önskad grillsymbol. 2. Ställ sedan in önskad grilltemperatur. 3. Vid behov kan du förvärma i cirka 5 minuter. » Temperaturlampan tänds.Éteindre le gril
1. Vrid funktionsvredet till positionen Av (överst).  Mat som passar för grillning kan börja brinna. Använd bara mat för grillning som är lämplig för grillvärme. Placera inte maten för långt bak på grillen. Det här är det hetaste stället och maten kan fatta eld.Tableau des temps de cuisson pour le grillage
Grillning med elgrill| Mat | Falsposition | Rekommenderad temperatur (°C)** | Grilltid (ca.) |
| Fisk | 4...5 | 250/max | 20...25 min. |
| Skivad kyckling | 4...5 | 250/max | 25...35 min. |
| Lammkotletter | 4...5 | 250/max | 20...25 min. |
| Rostbiff | 4...5 | 250/max | 25...30 min. |
| Kalvkotletter | 4...5 | 250/max | 25...30 min. |
| Rostat bröd * | 4 | 250/max | 1...3 min. |
| *beroende på tjockiek*Förvärm l fem minuter**Om produktens grillningstemperatur inte kan justeras körs grillen på den högsta temperaturen. | |||
6 Entretien et nettoyage
Informations générales
Produktens servicelivslängd ökar och vanliga problem minskar i omfattning om produkten rengörs med jämna mellanrum.| iYtan kan skadas av vissa rengöringsmedel. Använd inte aggressiva rengöringsmedel, skurpulver/-mjölk eller några vassa föremål under rengöring. |
| iAnvänd inte ångrengörare för att rengöra apparaten, det kan orsaka elektrisk stöt. |
Nettoyer le panneau de commande
Rengör kontrollpanelen och kontrollknapparna med en våt trasa och torka dem torra.| i | Om produkten är utrustad med knappar/vred ska du inte ta bort kontrollknapparna när du rengör kontrollpanelen.Kontrollpanelen kan skadas! |
Nettoyer le four
Comment nettoyer la paroi latérale
(Denna funktion finns som tillval. Den kanske inte finns på din produkt.) 1. Ta bort den främre delen av sidogallret genom att dra den i motsatt riktning mot sidoväggen. 2. Ta bort sidogallret genom att dra det mot dig. Parois catalytiques
(Denna funktion finns som tillval. Den kanske inte finns på din produkt.) De inre sidoväggarna (A) och/eller den bakre väggen (B) på din produkt kan vara täckt med katalytisk emalj. Katalytiska väggar har en ljus matt färg och en porös yta. De katalytiska väggarna i ugnen ska inte rengöras. De katalytiska väggarnas porösa ytor är självrengörande genom att de absorberar och omvandlar spillod olja (ånga och koldioxid). Nettoyage vapeur simple
Alternativet säkerställer enkel rengöring på grund av att smuts (som inte har varit inbränd för länge) mjuknar med ånga som bildas i ugnen och att vattnet droppar genom kondens på ugnens invändiga ytor. 1. Avlägsna alla tillbehör från ugnen. 2. Häll 500 ml vatten på ugnsplåten och placera plåten på ugnens andra rack.  3. Ställ in ugnens enkel ångrengöring och kör den i 100°C i 25 minuter. 4. Öppna luckan och torka av ugnens invändiga ytor med en fuktig svamp eller trasa. 5. Använd varmvatten med diskmedel, en mjuk trasa eller svamp när du rengör produkten, och torka den sedan med en torr trasa.Nettoyer la porte du four
För att rengöra ugnsluckan använder du varmvatten med diskmedel och en mjuk trasa eller svamp, och torkar den sedan med en torr trasa.  Använd inte några hårda rengöringsmedel med slipmedel eller någon vass metall som repar när du rengör ugnsluckan. De kan repa ytan och förstöra glaset.Retirer la porte du four
1. Öppna den främre luckan (1). 2. Öppna klämmorna i gångjärnshusen (2) på höger och vänster sida om den främre luckan genom att trycka dem nedåt så som visas på bilden.  1 Främre lucka 2 Gångjärn 3 Ugn   3. För den främre luckan halvvägs ned. 4. Avlägsna den främre luckan genom att dra den uppåt för att släppa den från höger och vänster gångjärn.  Stegen som utförs i borttagningsprocessen ska utföras i motsatt ordning när luckan monteras. Glöm inte att stänga klämmorna vid gångjärnshuset när du monterar luckan igen.Retirer la vitre intérieure de la porte
(Denna funktion finns som tillval. Den kanske inte finns på din produkt.) Luckans invändiga glasruta kan avlägsnas för rengöring. Öppna ugnsluckan.  1 Ram 2 Plastdel Dra mot dig och ta bort plastdelen som är installerad på den övre delen av den främre luckan.  1 Innersta glaspanelen 2 Inre glaspanelen 3 Yttersta glaspanelen 4 Plastplatsen för glaspanelen-Nedre Såsom bilden visar ska du lyfta den innersta glaspalenen något i riktning A och dra den ut i riktning B. Upprepa samma arbetsgång för att ta bort den inre glaspanelen (2).  Det första steget i att återmontera luckan är att montera den inre glaspanelen (2). Såsom bilden visar, placera det fasade hörnet på glaspanelen så att det vilar mot det fasade hörnet på plastplatsen.  Den inre glaspanelen (2) måste monteras på den plastplats som är nära den innersta glaspanelen (1). När du monterar den innersta glaspanelen (1) ska du se till att den panelsida med text på är vänd mot den inre glaspanelen. Det är viktigt att sätta de nedre hörnen på den inre glaspanelen i den nedre plastplatsen. Tryck plastdelarna mot ramen tills du hör ett "klick".Remplacer la lampe du four
 | FARA:Innan du byter ugnslampan ska du se till attprodukten har kopplats från elen och svalnat,så att du inte får en elektrisk stöt.Heta ytor kan orsaka brännskador! |
 | Ugnslampan är en speciallampa som klararupp till 300 °C. Mer information finns underTekniska specifikationer, sidan 11.Ugnslamporna kan köpas av auktoriseradeserviceombud. |
 | Lampans placering kan skilja sig något frånbilden. |
 | Lampan som används i denna apparat är intelämplig för rumsbelysning. Lampans avseddasyfte är att hjälpa användaren att se livsmedel. |
 | Lamporna som används i den här apparatenmåste kunna tåla extrema fysiskaförhållanden; såsom temperaturer över 50 °C. |
DANGER :
Si le four est équipé d'une lampe ronde :
1. Koppla bort produkten från elen. 2. Vrid glasskyddet moturs för att avlägsna det.  3. Om ugnslampan är av typen (A) som visas i figuren nedan, ta bort den genom att vrida som visas och ersätt den. Om ugnslampan är av typen (B), dra och ta bort den som visas i figuren och ersätt den.  4. Montera glasplattan på nytt.7 Dépannage
De la vapeur s'échappe du four lorsqu'il est utilisé
\- Det är normalt att ånga sipprar ut under användning. >>> Detta beror inte på något fel.Des bruits métalliques se produisent pendant le chauffage et le refroidissement.
\- När metalldelarna värms upp kan de öka i storlek och orsaka ljud. >>> Detta beror inte på något fel.Le produit ne fonctionne pas.
- Huvudsäkringen är defekt eller har gått. >>> Kontrollera säkringarna i säkringsboxen. Byt eller återställ dem vid behov. - Produkten är inte kopplad till det (jordade) uttaget. >>> Kontrollera strömanslutningen.La lumière du four ne fonctionne pas.
• Ugnslampan är defekt. >>> Byt ut ugnslampan. - Strömmen är bruten. >>> Kontrollera om det finns ström. Kontrollera säkringarna i säkringsboxen. Byt eller återställ dem vid behov.Le four ne chauffe pas.
- Är kanske inte inställd på en viss tillagningsfunktion och/eller temperatur. >>> Ställ in ugnen på en viss tillagningsfunktion och/eller temperatur. - Timern är inte ändrad i modeller som är utrustade med en timer. >>> Ändra tiden. (På produkter med mikrovågsugn styr bara timern mikrovågsugnen). - Strömmen är bruten. >>> Kontrollera om det finns ström. Kontrollera säkringarna i säkringsboxen. Byt eller återställ dem vid behov.(Sur les modèles avec minuterie) L'affichage de l'horloge clignote ou le symbole de l'horloge est allumé.
\- Ett strömavbrott har ägt rum. >>> Ändra tiden / Slå av produkten och slå på den igen.  Kontakta ett auktoriserat serviceombud eller den återförsäljare som sålde produkten till dig, om du inte kan lösa problemet med hjälp av instruktionerna i det här avsnittet. Försök aldrig att reparera en defekt produkt på egen hand.Veuillez lire ce manuel d'utilisation en premier !
Dear Customer, Thank you for purchasing this Cylinda product. We hope that you get the best results from your product which has been manufactured with high quality and state-of-the-art technology. Therefore, please read this entire user manual and all other accompanying documents carefully before using the product and keep it as a reference for future use. If you handover the product to someone else, give the user manual as well. Follow all warnings and information in the user manual. Remember that this user manual is also applicable for several other models. Differences between models will be identified in the manual.Explication des symboles
Throughout this user manual the following symbols are used:  Important information or useful hints about usage.  Warning of hazardous situations with regard to life and property.  Warning of electric shock.  Warning of risk of fire.  Warning of hot surfaces.1 Instructions importantes et avertissements pour la sécurité et l'environnement 4
General safety 4 Electrical safety 4 Product safety 5 Intended use 7 Safety for children....7 Disposing of the old product 8 Package information 82 Informations générales 9
Overview 9 Package contents 10 Technical specifications 113 Installation 12
Before installation....12 Installation and connection 14 Future Transportation....154 Préparation 16
Tips for saving energy....16 Initial use....16 Time setting 16 First cleaning of the appliance 16 Initial heating....165 Comment utiliser le four 18
General information on baking, roasting and grilling18 How to operate the electric oven 18 Operating modes.... 19 Using the oven clock 20 Cooking times table....22 How to operate the grill.... 23 Cooking times table for grilling....236 Entretien et maintenance 24
General information....24 Cleaning the control panel 24 Cleaning the oven 24 Removing the oven door 25 Removing the door inner glass 25 Replacing the oven lamp.... 267 Dépannage 27
1 Instructions importantes et avertissements pour la sécurité et l'environnement
This section contains safety instructions that will help protect from risk of personal injury or property damage. Failure to follow these instructions shall void any warranty.Sécurité générale
\- This appliance can be used by children aged from 8 years and above and persons with reduced physical, sensory or mental capabilities or lack of experience and knowledge if they have been given supervision or instruction concerning use of the appliance in a safe way and understand the hazards involved. Children shall not play with the appliance. Cleaning and user maintenance shall not be made by children without supervision. \- The appliance is not to be used by persons (including children) with reduced physical, sensory or mental capabilities, or lack of experience and knowledge, unless they have been given supervision or instruction. Children should be supervised and ensure they do not play with the appliance \- If the product is handed over to someone else for personal use or second-hand use purposes, the user manual, product labels and other relevant documents and parts should be also given. - Installation and repair procedures must always be performed by Authorised Service Agents. The manufacturer shall not be held responsible for damages arising from procedures carried out by unauthorised persons which may also void the warranty. Before installation, read the instructions carefully. - Do not operate the product if it is defective or has any visible damage. - Ensure that the product function knobs are switched off after every use.Sécurité électrique
- If the product has a failure, it should not be operated unless it is repaired by an Authorised Service Agent. There is the risk of electric shock! - Only connect the product to a grounded outlet/line with the voltage and protection as specified in the “Technical specifications”. Have the grounding installation made by a qualified electrician while using the product with or without a transformer. Our company shall not be liable for any problems arising due to the product not being earthed in accordance with the local regulations. \- Never wash the product by spreading or pouring water onto it! There is the risk of electric shock! \- Never touch the plug with wet hands! Never unplug by pulling on the cable, always pull out by holding the plug. \- The product must be disconnected during installation, maintenance, cleaning and repairing procedures. \- If the power connection cable for the product is damaged, it must be replaced by the manufacturer, its service agent or similarly qualified persons in order to avoid a hazard. \- The appliance must be installed so that it can be completely disconnected from the mains supply. The separation must be provided by a switch built into the fixed electrical installation, according to construction regulations. \- Rear surface of the oven gets hot when it is in use. Make sure that the electrical connection does not contact the rear surface; otherwise, connections can get damaged. - Do not trap the mains cable between the oven door and frame and do not route it over hot surfaces. Otherwise, cable insulation may melt and cause fire as a result of short circuit. - Any work on electrical equipment and systems should only be carried out by authorised and qualified persons. - In case of any damage, switch off the product and disconnect it from the mains. To do this, turn off the fuse at home. • Make sure that fuse rating is compatible with the product.Sécurité du produit
- WARNING: The appliance and its accessible parts become hot during use. Care should be taken to avoid touching heating elements. Children less than 8 years of age shall be kept away unless continuously supervised. - Never use the product when your judgment or coordination is impaired by the use of alcohol and/or drugs. - Be careful when using alcoholic drinks in your dishes. Alcohol evaporates at high temperatures and may cause fire since it can ignite when it comes into contact with hot surfaces. - Food Poisoning Hazard: Do not let food sit in oven for more than 1 hour before or after cooking. Doing so can result in food poisoning or sickness. \- Do not place any flammable materials close to the product as the sides may become hot during use. \- During use the appliances becomes hot. Care should be taken to avoid touching heating elements inside the oven. \- Keep all ventilation slots clear of obstructions. \- Do not heat closed tins and glass jars in the oven. The pressure that would build-up in the tin/jar may cause it to burst. \- Do not place baking trays, dishes or aluminium foil directly onto the bottom of the oven. The heat accumulation might damage the bottom of the oven. \- Do not use harsh abrasive cleaners or sharp metal scrapers to clean the oven door glass since they can scratch the surface, which may result in shattering of the glass. \- Do not use steam cleaners to clean the appliance as this may cause an electric shock. \- (Varies depending on the product model.) Placing the wire shelf and tray onto the wire racks properly It is important to place the wire shelf and/or tray onto the rack properly. Slide the wire shelf or tray between 2 rails and make sure that it is balanced before placing food on it (Please see the following figure). Mise au rebut de l'ancien produit
Conformité à la directive DEEE et mise au rebut du produit usagé :
 This product complies with EU WEEE Directive (2012/19/EU). This product bears a classification symbol for waste electrical and electronic equipment (WEEE). This product has been manufactured with high quality parts and materials which can be reused and are suitable for recycling. Do not dispose of the waste product with normal domestic and other wastes at the end of its service life. Take it to the collection center for the recycling of electrical and electronic equipment. Please consult your local authorities to learn about these collection centers.Conformité à la directive RoHS :
The product you have purchased complies with EU RoHS Directive (2011/65/EU). It does not contain harmful and prohibited materials specified in the Directive.Informations sur l'emballage
\- Packaging materials of the product are manufactured from recyclable materials in accordance with our National Environment Regulations. Do not dispose of the packaging materials together with the domestic or other wastes. Take them to the packaging material collection points designated by the local authorities.2 Informations générales
Overview   1 Control panel 2 Wire shelf 3 Tray 4 Handle 5 Door 6 Fan motor (behind steel plate) 7 Lamp 8 Top heating element 9 Shelf positions  1 Function knob 2 Digital timer 3 Thermostat knob 4 Thermostat lampContenu de l'emballage
 Accessories supplied can vary depending on the product model. Not every accessory described in the user manual may exist on your product.1. Manuel d'utilisation
2. Plateau four
Used for pastries, frozen foods and big roasts. 3. Plateau pâtisserie
Used for pastries such as cookies and biscuits. 4. Grille métallique
Used for roasting and for placing the food to be baked, roasted or cooked in casserole dishes to the desired rack.  5. Placement correct de la grille et du plateau sur les supports télescopiques
(This feature is optional. It may not exist on your product.) Telescopic racks allow you to install and remove the trays and wire shelf easily. When using the tray and wire shelf with telescopic racks, make sure that the pins at the rear section of the telescopic rack stands against the edges of the wire shelf and tray.   Technical specifications| Voltage / frequency | 220-240 V ~ 50 Hz |
| Total power consumption | 2.5 kW |
| Fuse | 16 A |
| Cable type / section | min.H05VV-FG 3 x 1,5 mm 2 |
| External dimensions (height / width / depth) | 595 mm/594 mm/567 mm |
| Installation dimensions (height / width / depth) | **590 or 600 mm/560 mm/min. 550 mm |
| Main oven | Multifunction oven |
| Inner lamp | 15/25 W |
| Grill power consumption | 2.2 kW |
Informations de base : les informations relatives à l'étiquette énergétique des fours électriques sont fournies conformément à la norme EN 60350-1 / IEC 60350-1. Ces valeurs sont déterminées en charge standard avec les fonctions chaleur tournante ou chaleur de sole et voûte (si disponibles).
Energy efficiency class is determined in accordance with the following prioritization depending on whether the relevant functions exist on the product or not. 1-Cooking with eco-fan, 2-Turbo slow cooking, 3-Turbo cooking, 4-Fan assisted bottom/top heating, 5-Top and bottom heating. ** See. Installation, page 12.  Technical specifications may be changed without prior notice to improve the quality of the product.  Figures in this manual are schematic and may not exactly match your product.  Values stated on the product labels or in the documentation accompanying it are obtained in laboratory conditions in accordance with relevant standards. Depending on operational and environmental conditions of the product, these values may vary.3 Installation
Product must be installed by a qualified person in accordance with the regulations in force. The manufacturer shall not be held responsible for damages arising from procedures carried out by unauthorized persons which may also void the warranty.| Preparation of location and electricalinstallation for the product is under customer'sresponsibility. | |
| DANGER:The product must be installed in accordancewith all local electrical regulations. | |
| DANGER:Prior to installation, visually check if theproduct has any defects on it. If so, do nothave it installed.Damaged products cause risks for your safety. |
Avant l'installation
The appliances must not be installed behind a decorative door in order to avoid overheating. The appliance is intended for installation in commercially available kitchen cabinets. A safety distance must be left between the appliance and the kitchen walls and furniture. See figure (values in mm). - Surfaces, synthetic laminates and adhesives used must be heat resistant (100 °C minimum). • Kitchen cabinets must be set level and fixed. - If there is a drawer beneath the oven, a shelf must be installed in order to separate from the oven and drawer. - Carry the appliance with at least two persons. - Hold the oven from the slots for handling on both sides to move it. • Before installing the product, remove all materials and documents inside. - Kitchen furniture must be in compliance with the dimensions given in the figure below. At the rear section of the kitchen furniture, an opening must be cut out with the dimensions given in the figure below to ensure sufficient ventilation.| Do not install the appliance next to refrigerators or freezers. The heat emitted by the appliance will lead to an increased energy consumption of cooling appliances. |
| The door and/or handle must not be used for lifting or moving the appliance. |
Installation et raccordement
\- The product must be installed in accordance with all local gas and electrical regulations.Raccordement électrique
Connect the product to a grounded outlet/line protected by a miniature circuit broker of suitable capacity as stated in the "Technical specifications" table. Have the grounding installation made by a qualified electrician while using the product with or without a transformer. Our company shall not be liable for any damages that will arise due to using the product without a grounding installation in accordance with the local regulations. DANGER :
The product must be connected to the mains supply only by an authorised and qualified person. The product's warranty period starts only after correct installation. Manufacturer shall not be held responsible for damages arising from procedures carried out by unauthorised persons. DANGER :
The power cable must not be clamped, bent or trapped or come into contact with hot parts of the product. A damaged power cable must be replaced by a qualified electrician. Otherwise, there is risk of electric shock, short circuit or fire! - Connection must comply with national regulations. - The mains supply data must correspond to the data specified on the type label of the product. Open the front door to see the type label. - Power cable of your product must comply with the values in "Technical specifications" table. DANGER :
Before starting any work on the electrical installation, disconnect the product from the mains supply. There is the risk of electric shock!  Power cable plug must be within easy reach after installation (do not route it above the hob).  While performing the wiring, you must apply with the national/local electrical regulations and must use the appropriate socket outlet/line and plug for oven. In case of the product's power limits are out of current carrying capability of plug and socket outlet/line, the product must be connected through fixed electrical installation directly without using plug and socket outlet/line. Plug the power cable into the socket.Installation du produit
1. Slide the oven into the cabinet, align and secure it while making sure that the power cable is not broken and/or trapped.  Secure the oven with 2 screws as illustrated. After the installation, make sure that the screws are sufficiently tightened and the oven does not move. Oven may tip over during use if it is not installed as per the instructions and if the screws are not sufficiently tightened.Pour les produits avec ventilateur de refroidissement (il peut ne pas exister sur votre produit).
 1 Cooling fan 2 Control panel 3 Door The built-in cooling fan cools both the built-in cabinet and the front of the product.  Cooling fan continues to operate for about 20-30 minutes after the oven is switched off. If you have cooked by programming the timer of the oven, cooling fan will also be switched off at the end of the cooking time together with all functions.Vérification finale
1. Operate the product. 2. Check the functions.Transport futur
- Keep the product's original carton and transport the product in it. Follow the instructions on the carton. If you do not have the original carton, pack the product in bubble wrap or thick cardboard and tape it securely. - To prevent the wire grill and tray inside the oven from damaging the oven door, place a strip of cardboard onto the inside of the oven door that lines up with the position of the trays. Tape the oven door to the side walls. - Do not use the door or handle to lift or move the product.  Do not place any objects onto the product and move it in upright position.  Check the general appearance of your product for any damages that might have occurred during transportation.4 Préparation
Conseils pour économiser l'énergie
The following information will help you to use your appliance in an ecological way, and to save energy: - Use dark coloured or enamel coated cookware in the oven since the heat transmission will be better. - While cooking your dishes, perform a preheating operation if it is advised in the user manual or cooking instructions. - Do not open the door of the oven frequently during cooking. - Try to cook more than one dish in the oven at the same time whenever possible. You can cook by placing two cooking vessels onto the wire shelf. • Cook more than one dish one after another. The oven will already be hot. - You can save energy by switching off your oven a few minutes before the end of the cooking time. Do not open the oven door. • Defrost frozen dishes before cooking them.Première utilisation
Réglage de l'heure
 While making any adjustment, related symbols will flash on the display. Press +/— keys to set the time of the day after the oven is energized for the first time.  For touch control models, touch :≡ first and then use + / — to set the time of the day. Confirm the setting by touching Ⓛ symbol and wait for 4 seconds without touching any keys to confirm.  1 Adjustment key 2 Keylock symbol 3 Clock symbol 4 Alarm volume symbol (It may not exist on your product.) 5 Eco mode symbol 6 Plus key 7 Minus key 8 Time slice symbol 9 Alarm symbol 10 End of Cooking Time symbol 11 Cooking Time symbol 12 Program key  If the initial time is not set, clock will run starting from 12:00 and ⏻ symbol will be displayed. The symbol will disappear once the time is set.  Current time settings are canceled in case of power failure. It needs to be readjusted.Premier nettoyage de l'appareil
 The surface might get damaged by some detergents or cleaning materials. Do not use aggressive detergents, cleaning powders/creams or any sharp objects during cleaning. Do not use harsh abrasive cleaners or sharp metal scrapers to clean the oven door glass since they can scratch the surface, which may result in shattering of the glass. 1. Remove all packaging materials. 2. Wipe the surfaces of the appliance with a damp cloth or sponge and dry with a cloth.Chauffage initial
Heat up the product for about 30 minutes and then switch it off. Thus, any production residues or layers will be burnt off and removed. AVERTISSEMENT
Hot surfaces cause burns! Product may be hot when it is in use. Never touch the hot burners, inner sections of the oven, heaters and etc. Keep children away. Always use heat resistant oven gloves when putting in or removing dishes into/from the hot oven.Four électrique
1. Take all baking trays and the wire grill out of the oven. 2. Close the oven door. 3. Select Static position. 4. Select the highest oven power; See How to operate the electric oven, page 18. 5. Operate the oven for about 30 minutes. 6. Turn off your oven; See How to operate the electric oven, page 18Four grill
1. Take all baking trays and the wire grill out of the oven. 2. Close the oven door. 3. Select the highest grill power; see How to operate the grill, page 23. 4. Operate the grill about 30 minutes. 5. Turn off your grill; see How to operate the grill, page 23  Smoke and smell may emit for a couple of hours during the initial operation. This is quite normal. Ensure that the room is well ventilated to remove the smoke and smell. Avoid directly inhaling the smoke and the smell that emits.5 Comment utiliser le four
Informations générales sur la cuisson, la rôtisserie et le grill
AVERTISSEMENT
Hot surfaces cause burns! Product may be hot when it is in use. Never touch the hot burners, inner sections of the oven, heaters and etc. Keep children away. Always use heat resistant oven gloves when putting in or removing dishes into/from the hot oven. DANGER :
Be careful when opening the oven door as steam may escape. Exiting steam can scald your hands, face and/or eyes.Conseils pour la cuisson
- Use non-sticky coated appropriate metal plates or aluminum vessels or heat-resistant silicone moulds. • Make best use of the space on the rack. - Place the baking mould in the middle of the shelf. - Select the correct rack position before turning the oven or grill on. Do not change the rack position when the oven is hot. - Keep the oven door closed.Conseils pour la rôtisserie
- Treating whole chicken, turkey and large piece of meat with dressings such as lemon juice and black pepper before cooking will increase the cooking performance. - It takes about 15 to 30 minutes longer to roast meat with bones when compared to roasting the same size of meat without bones. • Each centimeter of meat thickness requires approximately 4 to 5 minutes of cooking time. - Let meat rest in the oven for about 10 minutes after the cooking time is over. The juice is better distributed all over the roast and does not run out when the meat is cut. - Fish should be placed on the middle or lower rack in a heat-resistant plate.Conseils pour le grill
When meat, fish and poultry are grilled, they quickly get brown, have a nice crust and do not get dry. Flat pieces, meat skewers and sausages are particularly suited for grilling as are vegetables with high water content such as tomatoes and onions. - Distribute the pieces to be grilled on the wire shelf or in the baking tray with wire shelf in such a way that the space covered does not exceed the size of the heater. - Slide the wire shelf or baking tray with grill into the desired level in the oven. If you are grilling on the wire shelf, slide the baking tray to the lower rack to collect fats. Add some water in the tray for easy cleaning.  Foods that are not suitable for grilling carry the risk of fire. Only grill food which is suitable for intensive grilling heat. Do not place the food too far in the back of the grill. This is the hottest area and fatty food may catch fire.Comment utiliser le four électrique
Your oven is equipped with pop-out knobs that protrude when you press them. 1. Press inwards to protrude the knob and then turn it to make the desired setting.  2. When the cooking process is finished, press the knob inwards. Select temperature and operating mode  1 Function knob 2 Thermostat knob 1. Set the Function knob to the desired operating mode. 2. Set the Temperature knob to the desired temperature. » Oven heats up to the adjusted temperature and maintains it. During heating, temperature lamp stays on.Arrêt du four électrique
Turn the function knob and temperature knob to off (upper) position.Positions des grilles (pour les modèles avec grille métallique)
It is important to place the wire shelf onto the side rack correctly. Wire shelf must be inserted between the side racks as illustrated in the figure. Do not let the wire shelf stand against the rear wall of the oven. Slide your wire shelf to the front section of the rack and settle it with the help of the door in order to obtain a good grill performance. (Varies depending on the product model.) Modes de fonctionnement
The order of operating modes shown here may be different from the arrangement on your product.Chauffage haut et bas
 Top and bottom heating are in operation. Food is heated simultaneously from the top and bottom. For example, it is suitable for cakes, pastries, or cakes and casseroles in baking moulds. Cook with one tray only.Chauffage bas
 Only bottom heating is in operation. It is suitable for pizza and for subsequent browning of food from the bottom.  This function must be used for easy steam cleaning as well.Chauffage haut/bas avec ventilateur
 Top heating, bottom heating plus fan (in the rear wall) are in operation. Hot air is evenly distributed throughout the oven rapidly by means of the fan. Cook with one tray only.Fonctionnement avec ventilateur
 The oven is not heated. Only the fan (in the rear wall) is in operation. Suitable for thawing frozen granular food slowly at room temperature and cooling down the cooked food.Chauffage par ventilateur
 Warm air heated by the rear heater is evenly distributed throughout the oven rapidly by means of the fan. It is suitable for cooking your meals in different rack levels and preheating is not required in most cases. Suitable for cooking with multi trays. This function must be used for easy steam cleaning as well. Fonction "3D"
 Top heating, bottom heating and fan assisted heating (in the rear wall) are in operation. Food is cooked evenly and quickly all around. Cook with one tray only.Grill complet
 Large grill at the ceiling of the oven is in operation. It is suitable for grilling large amount of meat. - Put big or medium-sized portions in correct rack position under the grill heater for grilling. - Set the temperature to maximum level. • Turn the food after half of the grilling time.Grill + ventilateur
 Grilling effect is not as strong as in Full Grill - Put small or medium-sized portions in correct shelf position under the grill heater for grilling. • Set the desired temperature. • Turn the food after half of the grilling time.Utilisation de l'horloge du four
 1 Adjustment key 2 Keylock symbol 3 Clock symbol 4 Alarm volume symbol (It may not exist on your product.) 5 Eco mode symbol 6 Plus key 7 Minus key 8 Time slice symbol 9 Alarm symbol 10 End of Cooking Time symbol 11 Cooking Time symbol 12 Program key  Maximum time that can be set for end of cooking is 5 hours 59 minutes. Program will be cancelled in case of power failure. You must reprogram the oven.  While making any setting, related symbols will flash on the display. You must wait for a short time for the settings to take effect.  If no cooking setting is made, time of the day cannot be set.  Remaining time will be displayed if cooking time is set when the cooking starts.Cuisson en réglant le temps de cuisson ;
You can set the oven so that it will stop at the end of the specified time by setting the cooking time on the timer. 1. Select the function for cooking. 2. Touch ⏻ until |→| symbol appears on display for cooking time. 3. Set the cooking time with +/— keys. » » After the cooking time is set, |→| symbol and the time slice will appear on display continuously. 4. Place the dish into the oven and set the temperature with temperature knob. Cooking will start. » Cooking time starts to count down on display when cooking starts and all parts of time slice symbol is lit. The set cooking time is divided into 4 equal parts and when the time of each parts ends, the symbol of that parts turns off. So you can understand the ratio of remaining cooking time to total cooking time easily.Réglage de la fin de cuisson à une heure ultérieure ;
After setting the cooking time on the timer, you can set the end of cooking time to a later time. 1. Select the function for cooking. 2. Touch ⏻ until |→| symbol appears on display for cooking time. 3. Set the cooking time with + / - keys. »» Once the Cooking Time is set, |→| symbol will appear on display continuously. 4. Touch Ⓤ until → symbol appears on display for the end of cooking time. 5. Press + /— keys to set the end of cooking time. » After the cooking time is set, |→| symbol plus →| symbol and the time slice will appear on display continuously. Once the cooking starts, →| symbol disappears. 6. Place the dish into the oven and set the temperature with temperature knob. Cooking will start. » Oven timer calculates the startup time by deducting the cooking time from the end of cooking time you have set. Selected operating mode is activated when the startup time of cooking has come and the oven is heated up to the set temperature. It maintains this temperature until the end of cooking time. » Cooking time starts to count down on display when cooking starts and all parts of time slice symbol is lit. The set cooking time is divided into 4 equal parts and when the time of each parts ends, the symbol of that parts turns off. So you can understand the ratio of remaining cooking time to total cooking time easily. 7. After the cooking process is completed, "End" appears on the displayed and the timer gives an audio warning. 8. Audio warning sounds for 2 minutes. To stop the audio warning, just press any key. Audio warning will be silenced and current time will be displayed.  If you press any key at the end of the audio warning, the oven will restart operating. Turn the temperature knob and function knob to "0" (off) position to switch off the oven in order to prevent re-operation of the oven at the end of warning.Activation du verrouillage des touches
You can prevent oven from being intervened with by activating the key lock function. 1. Touch: ≡ until 🔒 symbol appears on display. » "OFF" will appear on the display. 2. Press + to activate the key lock. » Once the key lock is activated, "On" appears on the display and the 🔒 symbol remains lit.  Oven keys are not functional when the key lock is activated. Key lock will not be cancelled in case of power failure.Pour désactiver le verrouillage des touches
1. Touch ⚫ until 🔒 symbol appears on display. » "On" will appear on the display. 2. Disable the key lock by pressing the - key. » "OFF" will be displayed once the keylock is deactivated.Réglage de l'alarme
You can use the timer of the product for any warning or reminder apart from the cooking program. The alarm clock has no influence on the functions of the oven. It is only used as a warning. For example, this is useful when you want to turn food in the oven at a certain point of time. Timer will give an audio warning at the end of the set time. 1. Touch Ⓛ until △ symbol appears on display.  Maximum alarm time can be 23 hours and 59 minutes. 2. Set the alarm duration by using + / - keys.  Function keys for alarm tone, time of day, display brightness and temperature keys should be at 0 (OFF) position. » △ symbol will remain lit and the alarm time will appear on the display once the alarm time is set. 3. At the end of the alarm time, symbol starts flashing and the audio warning is heard.Désactivation de l'alarme
1. Audio warning sounds for 2 minutes. To stop the audio warning, just press any key. » Audio warning will be silenced and current time will be displayed.Annulation de l'alarme ;
1. Touch ⏻ until △ symbol appears on display in order to cancel the alarm. 2. Press and hold — key until "00:00" is displayed.  Alarm time will be displayed. If the alarm time and cooking time are set concurrently, shortest time will be displayed.Changement de la sonnerie de l'alarme
1. Touch : ≡ until ◀ symbol appears on display. 2. Adjust the desired alarm tone with + / - keys. 3. The tone you have set will be activated in a short time. » Selected alarm tone will appear as "b-01", "b-02" or "b-03" on the display.Changement de l'heure de la journée
To change the time of the day you have previously set: 1. Touch ⚫ until ⓣ symbol appears on display. 2. Set the time of the day with +/— keys. 3. The time you have set will be activated in a short time.Mode économique
You can save energy with economy mode while cooking by setting cooking time in the oven. This mode completes the cooking with the inner temperature of the oven by switching off the heaters before the end of cooking time.Réglage du mode économique
1. Touch :≡ symbol until eco symbol appears on display. » "OFF" will appear on the display. 2. Enable economy mode by touching + key. » Once the economy mode is activated, "On" appears on the display and the eco symbol remains lit.Désactivation du mode économique
1. Touch :≡ symbol until eco symbol appears on display. » "On" will appear on the display. 2. Disable economy mode by touching — key. » "Off" will be displayed once the eco mode is deactivated.Réglage de la luminosité de l'écran
(Cette fonction est en option. Elle peut ne pas exister sur votre produit.)
1. Touch ≡ until d-01 or d-02 or d-03 appears on display for display brightness. 2. Set the desired brightness with +/— keys. » The time you have set will be activated in a short time.Tableau des temps de cuisson
 The timings in this chart are meant as a guide. Timings may vary due to temperature of food, thickness, type and your own preference of cooking.Cuisson au four et rôtissage
 1st rack of the oven is the bottom rack.| Dish | Cooking level number | Rack position | Temperature (°C) | Cooking time (approx. in min.) | |
| Cakes in tray* | One level | 3 | 175 | 25 ... 30 | |
| Cakes in mould* | One level | 2 | 180 | 40 ... 50 | |
| Cakes in cooking paper* | One level | 3 | 175 | 25 ... 30 | |
| 2 levels | 1 - 5 | 175 | 30 ... 40 | ||
| 3 levels | 1 - 3 - 5 | 180 | 45 ... 55 | ||
| Sponge cake* | One level | 3 | 200 | 5 ... 10 | |
| 2 levels | 1 - 5 | 175 | 20 ... 30 | ||
| Cookies* | One level | 3 | 175 | 25 ... 30 | |
| 2 levels | 1 - 5 | 170 ... 190 | 30 ... 40 | ||
| 3 levels | 1 - 3 - 5 | 175 | 35 ... 45 | ||
| Dough pastry* | One level | 2 | 200 | 30 ... 40 | |
| 2 levels | 1 - 5 | 200 | 45 ... 55 | ||
| 3 levels | 1 - 3 - 5 | 200 | 55 ... 65 | ||
| Rich pastry* | One level | 2 | 200 | 25 ... 35 | |
| 2 levels | 1 - 5 | 200 | 35 ... 45 | ||
| 3 levels | 1 - 3 - 5 | 190 | 45 ... 55 | ||
| Leaven* | One level | 2 | 200 | 35 ... 45 | |
| 2 levels | 1 - 3 | 190 | 35 ... 45 | ||
| Lasagna* | One level | 2 - 3 | 200 | 30 ... 40 | |
| Pizza* | One level | 2 | 200 ... 220 | 15 ... 20 | |
| Beef steak (whole) / Roast | One level | 3 | 25 min. 250/max, then 180 ... 190 | 100 ... 120 | |
| Leg of Lamb (casserole) | One level | 3 | 25 min. 250/max, then 190 | 70 ... 90 | |
| One level | 3 | 25 min. 250/max, then 190 | 60 ... 80 | ||
| Roasted chicken | One level | 2 | 15 min. 250/max, then 180 ... 190 | 55 ... 65 | |
| One level | 2 | 15 min. 250/max, then 180 ... 190 | 55 ... 65 | ||
| Turkey (5.5 kg) | One level | 1 | 25 min. 250/max, then 180 ... 190 | 150 ... 210 | |
| One level | 1 | 25 min. 250/max, then 180 ... 190 | 150 ... 210 | ||
| Fish | One level | 3 | 200 | 20 ... 30 | |
| One level | 3 | 200 | 20 ... 30 | ||
| When cooking with 2 trays at the same time, place the deeper tray on the upper rack and the other one on the lower rack.* It is suggested to perform preheating for all foods. | |||||
Conseils pour la cuisson des gâteaux
- If the cake is too dry, increase the temperature by 10°C and decrease the cooking time. - If the cake is wet, use less liquid or lower the temperature by 10° C. - If the cake is too dark on top, place it on a lower rack, lower the temperature and increase the cooking time. - If cooked well on the inside but sticky on the outside use less liquid, lower the temperature and increase the cooking time.Conseils pour la cuisson des pâtisseries
- If the pastry is too dry, increase the temperature by 10°C and decrease the cooking time. Dampen the layers of dough with a sauce composed of milk, oil, egg and yoghurt. - If the pastry takes too long to bake, pay care that the thickness of the pastry you have prepared does not exceed the depth of the tray. - If the upper side of the pastry gets browned, but the lower part is not cooked, make sure that the amount of sauce you have used for the pastry is not too much at the bottom of the pastry. Try to scatter the sauce equally between the dough layers and on the top of pastry for an even browning.  Cook the pastry in accordance with the mode and temperature given in the cooking table. If the bottom part is still not browned enough, place it on one lower rack next time.Conseils pour la cuisson des légumes
- If the vegetable dish runs out of juice and gets too dry, cook it in a pan with a lid instead of a tray. Closed vessels will preserve the juice of the dish. - If a vegetable dish does not get cooked, boil the vegetables beforehand or prepare them like canned food and put in the oven.Comment utiliser le gril
AVERTISSEMENT
Close oven door during grilling. Hot surfaces may cause burns!Allumage du gril
1. Turn the Function knob to the desired grill symbol. 2. Then, select the desired grilling temperature. 3. If required, perform a preheating of about 5 minutes. » Temperature light turns on.Extinction du gril
1. Turn the Function knob to Off (top) position.  Foods that are not suitable for grilling carry the risk of fire. Only grill food which is suitable for intensive grilling heat. Do not place the food too far in the back of the grill. This is the hottest area and fatty food may catch fire.Tableau des temps de cuisson pour le gril
Grilling with electric grill| Food | Rack position | Recommended temperature (°C)** | Grilling time (approx.) |
| Fish | 4...5 | 250/max | 20...25 min. |
| Sliced chicken | 4...5 | 250/max | 25...35 min. |
| Lamb chops | 4...5 | 250/max | 20...25 min. |
| Roast beef | 4...5 | 250/max | 25...30 min. |
| Veal chops | 4...5 | 250/max | 25...30 min. |
| Toast bread* | 4 | 250/max | 1...3 min. |
| *depending on thickness*Preheat for 5 minutes**If the grill temperature of your product cannot be adjusted, the grill will work at the maximum temperature. | |||
6 Entretien et soin
Informations générales
Service life of the product will extend and the possibility of problems will decrease if the product is cleaned at regular intervals.| !DANGER:Disconnect the product from mains supply before starting maintenance and cleaning works.There is the risk of electric shock! |
| !DANGER:Allow the product to cool down before you clean it.Hot surfaces may cause burns! |
| iThe surface might get damaged by some detergents or cleaning materials.Do not use aggressive detergents, cleaning powders/creams or any sharp objects during cleaning.Do not use harsh abrasive cleaners or sharp metal scrapers to clean the oven door glass since they can scratch the surface, which may result in shattering of the glass. |
| iDo not use steam cleaners to clean the appliance as this may cause an electric shock. |
Nettoyage du panneau de commande
Clean the control panel and knobs with a damp cloth and wipe them dry.| iIf your product is equipped with buttons/knobs do not remove the control buttons/knobs to clean the control panel.Control panel may get damaged! |
Nettoyage du four
Pour nettoyer la paroi latérale
(This feature is optional. It may not exist on your product.) 1. Remove the front section of the side rack by pulling it in the opposite direction of the side wall. 2. Remove the side rack completely by pulling it towards you. Parois catalytiques
(This feature is optional. It may not exist on your product.) The inner side walls (A) and/or the rear wall (B) of your product may be coated with catalytic enamel. Catalytic walls have a light matte colour and a porous surface. Catalytic walls of the oven should not be cleaned. Porous surfaces of the catalytic walls are automatically cleaned by absorbing and converting the spilled oil (steam and carbon dioxide). Nettoyage à la vapeur facile
It ensures easy cleaning because the dirt (having waited not for too long) is softened with the steam that forms inside the oven and the water drops condensing on the inner surfaces of the oven. 1. Remove all accessories inside the oven. 2. Pour 500 ml of water into the oven tray and place the tray at the 2nd rack of the oven.  3. Set the oven to easy steam cleaning mode and run at 100° C for 25 minutes. 4. Open the door and wipe the inner surfaces of the oven with a damp sponge or cloth. 5. Use warm water with washing liquid, a soft cloth or sponge to clean the persistent dirt and wipe it with a dry cloth.Nettoyage de la porte du four
To clean the oven door, use warm water with washing liquid, a soft cloth or sponge to clean the product and wipe it with a dry cloth.  Don't use any harsh abrasive cleaners or sharp metal scrapers for cleaning the oven door. They could scratch the surface and destroy the glass.Dépose de la porte du four
1. Open the front door (1). 2. Open the clips at the hinge housing (2) on the right and left hand sides of the front door by pressing them down as illustrated in the figure.  1 Front door 2 Hinge 3 Oven   3. Move the front door to half-way. 4. Remove the front door by pulling it upwards to release it from the right and left hinges.  Steps carried out during removing process should be performed in reverse order to install the door. Do not forget to close the clips at the hinge housing when reinstalling the door.Dépose de la vitre intérieure de la porte (Cette fonction est optionnelle. Elle peut ne pas exister sur votre produit.)
The inner glass panel of the oven door can be removed for cleaning. Open the oven door.  1 Frame 2 Plastic part Pull towards yourself and remove the plastic part installed to upper section of the front door.  1 Innermost glass panel 2 Inner glass panel 3 Outer glass panel 4 Plastic glass panel slot-Lower As illustrated in figure, raise the innermost glass panel (1) slightly in direction A and pull it out in direction B. Repeat the same procedure to remove the inner glass panel (2).  The first step to regroup the door is reinstalling inner glass panel (2). As illustrated in figure, place the chamfered corner of the glass panel so that it will rest in the chamfered corner of the plastic slot.  Inner glass panel (2) must be installed into the plastic slot close the innermost glass panel (1). When installing the innermost glass panel (1), make sure that the printed side of the panel faces towards the inner glass panel. It is important to seat lower corner of inner glass panel into the lower plastic slot. Push the plastic part towards the frame until you hear a "click".Remplacement de la lampe du four
DANGER :
Before replacing the oven lamp, make sure that the product is disconnected from mains and cooled down in order to avoid the risk of an electrical shock. Hot surfaces may cause burns!  The oven lamp is a special electric light bulb that can resist up to 300 °C. See Technical specifications, page 11 for details. Oven lamps can be obtained from Authorised Service Agents or technician with licence.  Position of lamp might vary from the figure.  The lamp used in this appliance is not suitable for household room illumination. The intended purpose of this lamp is to assist the user to see foodstuffs.  The lamps used in this appliance have to withstand extreme physical conditions such as temperatures above 50 °C.Si votre four est équipé d'une lampe ronde :
1. Disconnect the product from mains. 2. Turn the glass cover counter clockwise to remove it.  3. If your oven lamp is of type (A) shown in the figure below, remove it by rotating as shown and replace it. If it is of type (B), pull and remove it as shown in the figure and replace it.   4. Install the glass cover.7 Dépannage
Le four émet de la vapeur lorsqu'il est en fonctionnement.
\- It is normal that steam escapes during operation. >>> This is not a fault.Le produit émet des bruits métalliques pendant le chauffage et le refroidissement.
\- When the metal parts are heated, they may expand and cause noise. >>> This is not a fault.Le produit ne fonctionne pas.
- The mains fuse is defective or has tripped. >>> Check fuses in the fuse box. If necessary, replace or reset them. • Product is not plugged into the (grounded) socket. >>> Check the plug connection.La lampe du four ne fonctionne pas.
- Oven lamp is defective. >>> Replace oven lamp. - Power is cut. >>> Check if there is power. Check the fuses in the fuse box. If necessary, replace or reset the fuses.Le four ne chauffe pas.
- Might not be set to a certain cooking function and/or temperature. >>> Set the oven to a certain cooking function and/or temperature. - In models equipped with a timer, the timer is not adjusted. >>> Adjust the time. (In products with microwave oven, timer controls only microwave oven.) - Power is cut. >>> Check if there is power. Check the fuses in the fuse box. If necessary, replace or reset the fuses.(Sur les modèles avec minuterie) L'affichage de l'horloge clignote ou le symbole de l'horloge est allumé.
\- A previous power outage has occurred. >>> Adjust the time / Switch of the product and switch it on again.  Consult the Authorised Service Agent or technician with licence or the dealer where you have purchased the product if you can not remedy the trouble although you have implemented the instructions in this section. Never attempt to repair a defective product yourself.

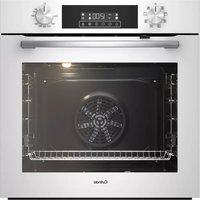
- LISEZ D'ABORD CE MANUEL D'UTILISATION
- EXPLICATION DES SYMBOLES
- INSTRUCTIONS ET AVERTISSEMENTS IMPORTANTS POUR LA SÉCURITÉ ET L'ENVIRONNEMENT
- INFORMATIONS GÉNÉRALES
- INSTALLATION
- PRÉPARATIFS
- UTILISATION DU FOUR
- ENTRETIEN ET NETTOYAGE
- DÉPANNAGE
- INSTRUCTIONS IMPORTANTES ET AVERTISSEMENTS CONCERNANT LA SÉCURITÉ ET L'ENVIRONNEMENT
- SÉCURITÉ GÉNÉRALE
- SÉCURITÉ ÉLECTRIQUE
- SÉCURITÉ DU PRODUIT
- UTILISATION PRÉVUE
- SÉCURITÉ DES ENFANTS
- VERROUILLAGE ENFANTS
- ÉLIMINATION DU PRODUIT EN FIN DE VIE
- CONFORMÉMENT À LA DIRECTIVE ROHS
- ÉLIMINATION DE L'EMBALLAGE
- CONTENU DE L'EMBALLAGE
- MANUEL D'UTILISATION
- PLAQUE DE CUISSON
- PLAQUE DE BASE
- GRILLE DU FOUR
- PLACEZ LA GRILLE DU FOUR ET LA PLAQUE CORRECTEMENT SUR LES RAILS TÉLESCOPIQUES
- AVANT L'INSTALLATION
- INSTALLATION ET RACCORDEMENT
- RACCORDEMENT ÉLECTRIQUE
- DANGER
- INSTALLER LE PRODUIT
- POUR LES PRODUITS AVEC VENTILATEUR DE REFROIDISSEMENT (IL PEUT NE PAS ÊTRE PRÉSENT SUR VOTRE PRODUIT)
- CONTRÔLE FINAL
- TRANSPORT FUTUR
- CONSEILS POUR ÉCONOMISER L'ÉNERGIE
- PREMIÈRE UTILISATION RÉGLAGE DE L'HEURE
- LE PREMIER NETTOYAGE DU PRODUIT
- CHAUFFAGE INITIAL
- AVERTISSEMENT
- FOUR ÉLECTRIQUE
- FOUR GRILL
- INFORMATIONS GÉNÉRALES SUR LA CUISSON, LA RÔTISSERIE ET LE GRILL
- CONSEILS POUR LA CUISSON
- CONSEILS POUR LA RÔTISSERIE
- CONSEILS POUR LE GRILL
- UTILISATION DU FOUR ÉLECTRIQUE
- ÉTEINDRE LE FOUR ÉLECTRIQUE
- MODES D'UTILISATION
- CHALEUR TOURNANTE ET CHALEUR DE SOLE
- CHALEUR DE SOLE
- VENTILATION QUI PREND EN CHARGE LE CHAUFFAGE PAR LE BAS/PAR LE HAUT
- ENTRAÎNEMENT PAR VENTILATEUR
- CHALEUR PULSÉE
- FONCTION "3D
- GRILL COMPLET
- GRILL + VENTILATEUR
- UTILISER LA MINUTERIE DU FOUR
- CUISSON EN RÉGLANT LA DURÉE DE CUISSON
- SI VOUS SOUHAITEZ RÉGLER LA FIN DE LA CUISSON À UNE HEURE ULTÉRIEURE
- ACTIVER LE VERROUILLAGE DES TOUCHES
- POUR DÉSACTIVER LE VERROUILLAGE DES TOUCHES
- RÉGLER LA MINUTERIE
- DÉSACTIVER L'ALARME
- INTERROMPRE L'ALARME
- CHANGER LA TONALITÉ DE L'ALARME
- CHANGER L'HEURE DE LA JOURNÉE
- MODE ÉCONOMIQUE
- RÉGLAGE DU MODE ÉCONOMIQUE
- DÉSACTIVER LE MODE ÉCONOMIQUE
- RÉGLAGE DE LA LUMINOSITÉ DE L'ÉCRAN (CETTE FONCTION EST UNE OPTION. ELLE PEUT NE PAS ÊTRE DISPONIBLE SUR VOTRE PRODUIT.)
- CONSEILS POUR LA CUISSON DE PÂTISSERIES DANS DES MOULES
- CONSEILS POUR LA CUISSON DE PÂTISSERIES
- CONSEILS POUR LA CUISSON DE LÉGUMES
- COMMENT PRÉPARER LE GRIL
- ALLUMER LE GRIL
- ÉTEINDRE LE GRIL
- TABLEAU DES TEMPS DE CUISSON POUR LE GRILLAGE
- NETTOYER LE PANNEAU DE COMMANDE
- NETTOYER LE FOUR
- COMMENT NETTOYER LA PAROI LATÉRALE
- PAROIS CATALYTIQUES
- NETTOYAGE VAPEUR SIMPLE
- NETTOYER LA PORTE DU FOUR
- RETIRER LA PORTE DU FOUR
- RETIRER LA VITRE INTÉRIEURE DE LA PORTE
- REMPLACER LA LAMPE DU FOUR
- SI LE FOUR EST ÉQUIPÉ D'UNE LAMPE RONDE
- DE LA VAPEUR S'ÉCHAPPE DU FOUR LORSQU'IL EST UTILISÉ
- DES BRUITS MÉTALLIQUES SE PRODUISENT PENDANT LE CHAUFFAGE ET LE REFROIDISSEMENT
- LE PRODUIT NE FONCTIONNE PAS
- LA LUMIÈRE DU FOUR NE FONCTIONNE PAS
- LE FOUR NE CHAUFFE PAS
- (SUR LES MODÈLES AVEC MINUTERIE) L'AFFICHAGE DE L'HORLOGE CLIGNOTE OU LE SYMBOLE DE L'HORLOGE EST ALLUMÉ
- VEUILLEZ LIRE CE MANUEL D'UTILISATION EN PREMIER
- INSTRUCTIONS IMPORTANTES ET AVERTISSEMENTS POUR LA SÉCURITÉ ET L'ENVIRONNEMENT
- PRÉPARATION
- COMMENT UTILISER LE FOUR
- ENTRETIEN ET MAINTENANCE
- SÉCURITÉ ENFANTS
- MISE AU REBUT DE L'ANCIEN PRODUIT
- CONFORMITÉ À LA DIRECTIVE DEEE ET MISE AU REBUT DU PRODUIT USAGÉ
- CONFORMITÉ À LA DIRECTIVE ROHS
- INFORMATIONS SUR L'EMBALLAGE
- PLATEAU FOUR
- PLATEAU PÂTISSERIE
- GRILLE MÉTALLIQUE
- PLACEMENT CORRECT DE LA GRILLE ET DU PLATEAU SUR LES SUPPORTS TÉLESCOPIQUES
- INFORMATIONS DE BASE : LES INFORMATIONS RELATIVES À L'ÉTIQUETTE ÉNERGÉTIQUE DES FOURS ÉLECTRIQUES SONT FOURNIES CONFORMÉMENT À LA NORME EN 60350-1 / IEC 60350-1. CES VALEURS SONT DÉTERMINÉES EN CHARGE STANDARD AVEC LES FONCTIONS CHALEUR TOURNANTE OU CHALEUR DE SOLE ET VOÛTE (SI DISPONIBLES)
- INSTALLATION DU PRODUIT
- POUR LES PRODUITS AVEC VENTILATEUR DE REFROIDISSEMENT (IL PEUT NE PAS EXISTER SUR VOTRE PRODUIT)
- VÉRIFICATION FINALE
- PREMIÈRE UTILISATION
- RÉGLAGE DE L'HEURE
- PREMIER NETTOYAGE DE L'APPAREIL
- COMMENT UTILISER LE FOUR ÉLECTRIQUE
- ARRÊT DU FOUR ÉLECTRIQUE
- POSITIONS DES GRILLES (POUR LES MODÈLES AVEC GRILLE MÉTALLIQUE)
- MODES DE FONCTIONNEMENT
- CHAUFFAGE HAUT ET BAS
- CHAUFFAGE BAS
- CHAUFFAGE HAUT/BAS AVEC VENTILATEUR
- FONCTIONNEMENT AVEC VENTILATEUR
- CHAUFFAGE PAR VENTILATEUR
- UTILISATION DE L'HORLOGE DU FOUR
- CUISSON EN RÉGLANT LE TEMPS DE CUISSON
- RÉGLAGE DE LA FIN DE CUISSON À UNE HEURE ULTÉRIEURE
- ACTIVATION DU VERROUILLAGE DES TOUCHES
- RÉGLAGE DE L'ALARME
- DÉSACTIVATION DE L'ALARME
- ANNULATION DE L'ALARME
- CHANGEMENT DE LA SONNERIE DE L'ALARME
- CHANGEMENT DE L'HEURE DE LA JOURNÉE
- DÉSACTIVATION DU MODE ÉCONOMIQUE
- RÉGLAGE DE LA LUMINOSITÉ DE L'ÉCRAN
- (CETTE FONCTION EST EN OPTION. ELLE PEUT NE PAS EXISTER SUR VOTRE PRODUIT.)
- TABLEAU DES TEMPS DE CUISSON
- CUISSON AU FOUR ET RÔTISSAGE
- CONSEILS POUR LA CUISSON DES GÂTEAUX
- CONSEILS POUR LA CUISSON DES PÂTISSERIES
- CONSEILS POUR LA CUISSON DES LÉGUMES
- COMMENT UTILISER LE GRIL
- ALLUMAGE DU GRIL
- EXTINCTION DU GRIL
- TABLEAU DES TEMPS DE CUISSON POUR LE GRIL
- ENTRETIEN ET SOIN
- NETTOYAGE DU PANNEAU DE COMMANDE
- NETTOYAGE DU FOUR
- POUR NETTOYER LA PAROI LATÉRALE
- NETTOYAGE À LA VAPEUR FACILE
- NETTOYAGE DE LA PORTE DU FOUR
- DÉPOSE DE LA PORTE DU FOUR
- DÉPOSE DE LA VITRE INTÉRIEURE DE LA PORTE (CETTE FONCTION EST OPTIONNELLE. ELLE PEUT NE PAS EXISTER SUR VOTRE PRODUIT.)
- REMPLACEMENT DE LA LAMPE DU FOUR
- SI VOTRE FOUR EST ÉQUIPÉ D'UNE LAMPE RONDE
- LE FOUR ÉMET DE LA VAPEUR LORSQU'IL EST EN FONCTIONNEMENT
- LE PRODUIT ÉMET DES BRUITS MÉTALLIQUES PENDANT LE CHAUFFAGE ET LE REFROIDISSEMENT
- LA LAMPE DU FOUR NE FONCTIONNE PAS
Marque : Cylinda
Modèle : IBU512
Catégorie : Four