
Elite Weathermaster 6 - Tente COLEMAN - Notice d'utilisation et mode d'emploi gratuit
Retrouvez gratuitement la notice de l'appareil Elite Weathermaster 6 COLEMAN au format PDF.


| Type de produit | Tente familiale 6 places |
| Marque | Coleman |
| Modèle | Elite Weathermaster 6 |
| Capacité | 6 personnes |
| Dimensions (L x l x H) | Environ 4.5 x 3.0 x 1.90 m |
| Surface au sol | 13 m² |
| Poids | 16 kg |
| Matériau du toit | Polyester enduit (hydrofuge) |
| Matériau du sol | Polyéthylène renforcé |
| Arceaux | Fibre de verre |
| Nombre de portes | 2 (entrée principale + arrière) |
| Fonctionnalités | Toile imperméable Weathermaster, coutures étanches, moustiquaires, auvent avant |
| Installation | Montage rapide avec système de clips |
| Entretien et nettoyage | Nettoyer à l'eau tiède, sécher complètement avant rangement |
| Consignes de sécurité | Ne pas utiliser de flamme nue à l'intérieur, bien ventiler |
| Pièces détachées disponibles | Arceaux de rechange, sardines, haubans |
| Réparabilité | Kit de réparation pour déchirures disponible |
| Garantie | 2 ans |
| Usage recommandé | Camping familial, 3 saisons |
FOIRE AUX QUESTIONS - Elite Weathermaster 6 COLEMAN
Questions des utilisateurs sur Elite Weathermaster 6 COLEMAN
0 question sur cet appareil. Repondez a celles que vous connaissez ou posez la votre.
Poser une nouvelle question sur cet appareil
Téléchargez la notice de votre Tente au format PDF gratuitement ! Retrouvez votre notice Elite Weathermaster 6 - COLEMAN et reprennez votre appareil électronique en main. Sur cette page sont publiés tous les documents nécessaires à l'utilisation de votre appareil Elite Weathermaster 6 de la marque COLEMAN.
MODE D'EMPLOI Elite Weathermaster 6 COLEMAN
Before you begin
Read all instructions before set up.
- Select a level site clear of rocks, branches, and other hard or sharp objects, to install your tent.
⚠ WARNING: Keep clear of overhead power lines.
- Do not set up your tent under trees because of potential lightning strikes or falling tree limbs in inclement weather.
- Secure with all stakes and guylines provided to prevent property damage or personal injury.
- For best results in windy conditions, position narrow end of tent into the wind.
- Enlist the help of at least one other person to assist you when it is time to assemble the tent.
Pole Descriptions
| Pole Pole PoleDescription Qty. Dia. Repair Kit Replacement Kit | ||||
| Long Leg Pole, steel(w/ red marking) | 4 | 19mm | N/A | 5010000608 |
| Short Leg Pole, steel | 4 | 19mm | N/A | 5010000610 |
| Curved Ridge Pole, steel(w/ red marking) | 2 | 19mm | N/A | 5010000607 |
| Curved Ridge Pole, steel | 2 | 19mm | N/A | 5010000609 |
| Awning Pole, black,fiberglass, metal tips | 1 | 6.3mm | 5010000543 | 5010000545 |
| Door Pole, long, thin, black,fiberglass, rubber tips | 1 | 6.3mm | 5010000543 | 5010000545 |
| Vert. Door Pole, short, black,fiberglass, rubber tips | 1 | 6.3mm | 5010000543 | 5010000545 |
Self-Rolling Window Spring Descriptions
| Color Code Description | Qty. | Length | Replacement Part No. |
| Red | 1 | 360mm | 5010000624 |
| Green | 3 | 610mm | 5010000627 |
| Orange | 2 | 670mm | 5010000628 |
CAUTION: "Springs" may have sharp edges. Handle with care to avoid injury. Keep out of reach of children.
To Set Up Tent
- Unfold tent and spread out on a clean, level surface with the door facing the desired direction. Unzip doors. (Fig. 1)

natural_image
Black-and-white photo of a damaged door frame with visible cracks and label 'Door' (no text or symbols beyond label)- Pull four corners of tent taut, then secure by driving stakes through web loops at an angle for better anchoring. (Fig. 2)

- Assemble four, steel, shock-corded, curved Ridge Poles. Insert Ridge Poles (with red marking) into center sleeves on top of tent with the red trim (Fig. 3). Insert the remaining curved Ridge Poles into the other two sleeves on top of tent.

- Assemble eight, steel, shock-corded, Leg Poles. Push down on steel button on tapered end and insert into end with four holes. NOTE: Make sure steel button locks into third hole on pole as shown. (Fig.4)

- Insert curved end of Leg Poles (with red marking) into the ends of the Ridge Pole (with red marking). Insert curved end of remaining short Leg Poles into the ends of the remaining Ridge Poles. (Fig. 5 & 6)


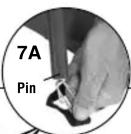
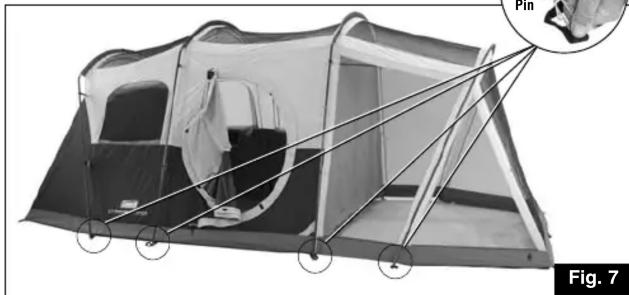
- Rotate all eight Leg Poles upright and insert pin on each web loop at the side locations as shown. (Fig. 7 & 7A)
natural_image
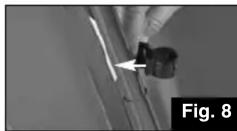
Diagram of a camping tent with labeled parts and a close-up inset showing a person walking (no text or symbols present)- Locate the plastic hooks at sides and corners of tent, then snap onto Leg Poles to attach. (Fig. 8)
-
To stretch tent to finished size:
-
Push in button on Leg Pole while twisting lower Leg Pole section counterclockwise (Fig.9);
- Pull up on top Leg Pole section until tent is taut;
- Twist the lower Leg Pole clockwise until the button locks into the center or lowest hole;
- Repeat on remaining Leg Poles.

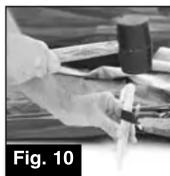
- Insert plastic stakes through web straps located on both sides of tent, then drive in to secure. (Fig. 10)
NOTE: It may be necessary to remove metal stakes through web straps at side of tent and screen room, pull tent taut, and drive in stakes to secure.
Hinged, Rigid Door
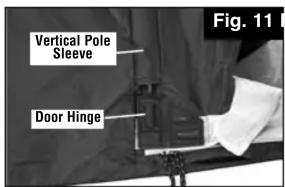
- Assemble Vertical Door Pole (shorter black pole with plastic tips); then insert through zippered vertical pole sleeve on hinged side of door. (Fig. 11)
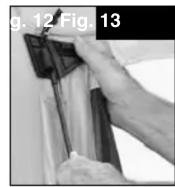
- Insert end of Vertical Door Pole into bottom hinge plate, apply pressure to form a slight bow, then insert other tip of pole into top hinge. Zip up vertical pole sleeve. (Fig. 12 & 13)
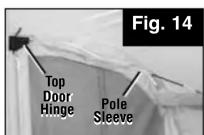
- Assemble Door Pole (longer black pole with plastic cap tips); then insert into zippered pole sleeve at top of door. (Fig. 14)
- Insert end of Door Pole into top hinge plate, apply pressure to form a bow, then insert other tip of pole into the bottom hinge. (Fig. 15)
- Zip up pole sleeve to enclose Door Pole. (Fig. 16)



(continued on other side)
Tent Lighting System
Your tent comes pre-wired with the Coleman® Tent Lighting System. See manual that came with the light and carefully read all instructions before use then save for future reference.
To Attach Rainfly
- Drape Rainfly over tent. Make sure seams on Rainfly are facing down and centered over poles of the tent. (Fig. 17) NOTE: Hook and loop fasteners, located on seams of underside of Rainfly, should be centered over Ridge Poles.

- Assemble thin, black, shock-corded Awning Pole with metal tips; then insert through sleeve in Rainfly above door. (Fig. 18)

- Insert tapered metal tip on Awning Pole into grommet located on web strap clipped to center Leg Pole. (Fig. 19)

- Go to opposite center Leg Pole on other side of door and gradually apply pressure to the pole forming an arch. Insert metal tip into the grommet.
-
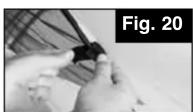
Locate all hook & loop fasteners on underside of Rainfly and wrap around Leg Poles and Awning Pole locations. (Fig. 20)
-
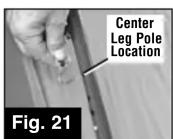
Insert metal hook on elastic straps on Rainfly into the hole on each Leg Pole. (Fig. 21 & 22)

- Loop ends of guylines over stakes, stretch tight, then hammer into ground at an angle as shown. (Fig. 23 & 23A)

natural_image
Black-and-white photo of a camping tent with a labeled inset showing a 23A device (no text or symbols on the tent itself)Self-rolling Windows
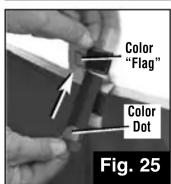
CAUTION: "Springs" may have sharp edges. Handle with care to avoid injury. Keep out of reach of children. NOTE: Carefully unroll metal "springs" stored in bag with stakes. The color marking on each "spring" should match the color of the fabric "flag" sewn to the window or door sleeve opening. (Fig. 24)
- Locate sleeve(s) in window panel, open hook & loop fastener; then insert "spring(s)" with matching color marking. (Fig.24 & 25) NOTE: When inserting into the sleeve(s), the color marking on the "spring(s)" should always face the operator.

- Close hook & loop fastener to secure.
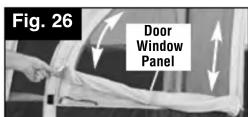
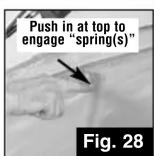
- Before unzipping and opening the window, push in at top to engage "spring(s)" to activate the self-rolling feature. (Fig. 26)
- Unzip to allow the window panel to roll down automatically; zip back to close window panel. (Fig. 27 & 28)
NOTE: Repeat steps above for inserting the color matching "spring(s)" into sleeve(s) for the rest of the windows.

Self-rolling Windows (continued)
CAUTION: All "springs" must be removed from sleeves before tearing down tent to avoid damage to the tent fabric or part. To avoid injury, carefully roll up "springs". Keep out of reach of children. Store rolled "springs in bag with stakes.
Attaching Room Divider
- Divider Panel can be installed through center of the tent by inserting the
toggles through top and bottom fabric loops as shown. (Fig. 29 & 30)


Electrical Cord Access
- Unzip the access panel in the lower left corner of tent and bring in an electrical cord. NOTE: Use only UL approved cords rated for outdoor usage. (Fig. 31)

natural_image
Close-up of hands holding a plant with visible leaves, labeled 'Fig. 31' (no other text or symbols)Cooler Access
The smaller zippered opening at the side of tent is designed for added ventilation and easy access to your beverage cooler.
- To use as a vent, unzip flap to expose screen.
- To use as a cooler access, unzip other flap to make an avenue to bring beverages into tent. (Fig. 32)

To Store
-
All "springs" must be rolled up and placed in bag with stakes.
-
All poles and stakes must be placed in the storage bag to prevent damage to the fabric items placed in the carry case.
-
Make sure tent is clean and dry before placing in carry case.
-
Remove rainfly, spread out on floor of tent, then unzip door & vents before taking tent down for storage.
-
Neatly fold tent to width of pole storage bag, place on tent, roll tightly, and place in carry case.
-
Store in a clean, dry area.
Things You Should Know:
- Under certain conditions (cold weather, high humidity, etc.) condensation will form on the inside of your tent. Condensation is caused by water vapor from your breath, perspiration, or any wet clothing inside the tent. It is NOT LEAKAGE through the tent fabric. It can be minimized by removing wet clothing from your tent and by providing good ventilation through the tent.
- Tree limbs, tree sap, bird droppings, or moisture steadily dripping off tree limbs can cause damage to the tent fabric and its coating resulting in leaks or loss of flame-resistant properties.
- Never store tent, even for a short period of time, without drying it thoroughly and brushing off caked dirt. Do not pack stakes or poles inside your tent. Use a separate storage bag.
- Stakes should be removed by pulling on the stake itself. NEVER PULL ON THE TENT TO REMOVE STAKES AS THIS COULD RESULT IN PROPERTY DAMAGE OR PERSONAL INJURY.
- Tent poles should not be left telescoped together during storage.
- Do not leave your tent set-up for weeks at a time. Be aware that exposure to ultraviolet rays from the sun can seriously damage material and/or cause it to become discolored.
⚠ WARNING: Keep all flame and heat sources away from this tent fabric.
This tent meets the flammability requirements of CPAI-84. The fabric may burn if left in continuous contact with any flame source. The application of any foreign substance to the tent fabric may render the flame-resistant properties ineffective.

The Coleman Company, Inc. • 3600 N. Hydraulic • Wichita, Kansas 67219
1-800-835-3278 • www.coleman.com
MADE IN CHINA • PRINTED IN CHINA
© 2008 The Coleman Company, Inc. Coleman®, , Coleman®, and Weathermaster® are registered trademarks of The Coleman Company, Inc.
4010003995 (20081030)
- Before you begin
- To Set Up Tent
- Hinged, Rigid Door
- Tent Lighting System
- To Attach Rainfly
- Self-rolling Windows
- Self-rolling Windows (continued)
- Attaching Room Divider
- Electrical Cord Access
- Cooler Access
- To Store
- Things You Should Know:
- ⚠ WARNING: Keep all flame and heat sources away from this tent fabric.
Marque : COLEMAN
Modèle : Elite Weathermaster 6
Catégorie : Tente