
PLHR97W - Moniteur Pyle - Notice d'utilisation et mode d'emploi gratuit
Retrouvez gratuitement la notice de l'appareil PLHR97W Pyle au format PDF.


| Type de produit | Moniteur LCD |
| Marque | Pyle |
| Modèle | PLHR97W |
| Taille de l'écran | 7 pouces (17,8 cm) |
| Résolution | 1024 x 600 pixels |
| Format d'image | 16:9 |
| Dimensions (L x H x P) | 18,5 x 12,3 x 2,5 cm |
| Poids | 0,35 kg |
| Alimentation | Adaptateur secteur 12V DC, 1A |
| Consommation électrique | Environ 6 W |
| Connectivité | Entrée AV, VGA, HDMI, USB (pour lecture multimédia) |
| Entrée audio | Prise jack 3,5 mm |
| Sortie audio | Haut-parleur intégré |
| Fonctions principales | Affichage d'images, vidéo, texte; menu OSD; réglages de luminosité, contraste |
| Entretien et nettoyage | Nettoyer avec un chiffon doux et sec; ne pas utiliser de produits abrasifs |
| Sécurité | Ne pas exposer à l'humidité; ne pas ouvrir le boîtier |
| Pièces détachées et réparabilité | Adaptateur secteur disponible; réparation par un professionnel recommandée |
| Informations générales | Utilisation intérieure; température de fonctionnement 0-40°C |
FOIRE AUX QUESTIONS - PLHR97W Pyle
Questions des utilisateurs sur PLHR97W Pyle
0 question sur cet appareil. Repondez a celles que vous connaissez ou posez la votre.
Poser une nouvelle question sur cet appareil
Téléchargez la notice de votre Moniteur au format PDF gratuitement ! Retrouvez votre notice PLHR97W - Pyle et reprennez votre appareil électronique en main. Sur cette page sont publiés tous les documents nécessaires à l'utilisation de votre appareil PLHR97W de la marque Pyle.
MODE D'EMPLOI PLHR97W Pyle
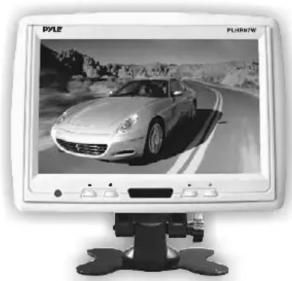
PYLE® view
Operating Instructions
PLHR97W
natural_image
Computer monitor displaying a grayscale image of a car on a road with mountainous background (no visible text or symbols)9" TFT LCD Headrest Monitor w/ Stand

HTTP://WWW.PYLEAUDIO.COM
Appearance and function

1 .Down
2.UP
3.Remote control and IR window
4.Menu
5. Power on/off
Function
Screen size: 9 inches
Display format: 16:9
Resolution:1440×234Dots
System: NTSC/PAL
Wireless Remote Control
Dual Video Input
Reverse Imaging Left/Right Up/Down
Brightness/Contrast/Color/Tint Adjustments
Headrest Shroud and Universal Stand Mount
On Screen Display
Brightness, Contrast, Color
Power supply: DC 12V

flowchart
graph LR
    A["Device"] --> B["Disaster box"]
    B --> C["Red12V"]
    B --> D["Black to ground"]
    B --> E["V2 video input(yellow)"]
    B --> F["V1 video input(yellow)"]
    B --> G["Left Channel (white)"]
    B --> H["Right channel (red)"]
OPERATIONS OF REMOTE CONTROL

Basic operation
- Connect the attached cable to the power source and signal cable. One tip of the cable is connected to the female socket of the monitor, another tip is to the video out line of VCD or DVD. The black cable is connected to ground, red cable is to positive pole. Please mind to connect the black and red cable correctly, or the safety fuse in the disaster box will melt protectively. Connect the left (white) and right(red) channel line with the respective channel audio output of VCD and DVD.
- When power on, the monitor shows VCD or DVD signal. If no signal, the blue screen appears.
- Brightness, contrast, color, tint can be adjusted from the function menu. Just press the "Analog decrease" and "Analong increase", adjust to the best quality of the images.
- There is audio signal output when the monitor is on V1. There is not audio signal output when the monitor is on V2.

Marque : Pyle
Modèle : PLHR97W
Catégorie : Moniteur