
ASW-602AP - Lave-linge SANYO - Notice d'utilisation et mode d'emploi gratuit
Retrouvez gratuitement la notice de l'appareil ASW-602AP SANYO au format PDF.


| Type de produit | Lave-linge |
| Marque | Sanyo |
| Modèle | ASW-602AP |
| Capacité de lavage | 6 kg |
| Vitesse d'essorage maximale | 800 tr/min |
| Classe énergétique | A+ |
| Consommation d'eau par cycle | 49 L |
| Consommation d'énergie par cycle | 0,68 kWh |
| Niveau sonore (lavage/essorage) | 56 dB / 76 dB |
| Nombre de programmes | 15 |
| Programmes spéciaux | Lavage rapide, délicat, laine, coton, synthétiques |
| Alimentation électrique | 220-240 V ~ 50 Hz |
| Puissance absorbée | 2000 W |
| Dimensions (H x L x P) | 85 x 60 x 60 cm |
| Poids net | 62 kg |
| Type d'ouverture | Hublot (avant) |
| Option départ différé | Oui (jusqu'à 24 h) |
| Sécurité enfants | Oui (verrouillage de porte) |
| Entretien et nettoyage | Nettoyer régulièrement le filtre et le joint de porte |
| Pièces détachées disponibles | Oui (hélice, courroie, pompe, filtre) |
| Réparabilité | Indice de réparabilité 8,2/10 |
FOIRE AUX QUESTIONS - ASW-602AP SANYO
Questions des utilisateurs sur ASW-602AP SANYO
0 question sur cet appareil. Repondez a celles que vous connaissez ou posez la votre.
Poser une nouvelle question sur cet appareil
Téléchargez la notice de votre Lave-linge au format PDF gratuitement ! Retrouvez votre notice ASW-602AP - SANYO et reprennez votre appareil électronique en main. Sur cette page sont publiés tous les documents nécessaires à l'utilisation de votre appareil ASW-602AP de la marque SANYO.
MODE D'EMPLOI ASW-602AP SANYO
ASW-602AP
SANYO AUTOMATIC WASHER

ATTENTION
For your protection in the event of theft or loss of this product, please fill in the information requested below:
Model No. ____
Serial No.
(Located on the back of the unit)
Date of Purchase ____
Purchased Price ____
Where Purchased
IMPORTANT SAFEGUARDS
WARNING - To reduce the risk of fire, electric shock, or injury to persons when using your appliance, follow basic precautions, including the following:
- Read all instructions before using the appliance.
- Do not wash articles that have been previously cleaned in, washed in, soaked in, or spotted with gasoline, dry-cleaning solvents, other flammable or explosive substances as they give off vapors that could ignite or explode.
Do not add these substances to the wash water.
Do not use these substances around the appliance during operation. - Do not allow children to play on or in the appliance. Close supervision of children is necessary when the appliance is used near children.
- Before the appliance is removed from service or discarded, remove the Washer Lid to the washing compartment.
- Do not reach into the appliance if the Wash/Spin Bowl or Pulsator is moving.
- Do not install or store this appliance where it will be exposed to temperatures below freezing or exposed to the weather.
- Do not temper with controls.
- Do not repair or replace any part of the appliance or attempt any servicing unless specifically recommended in the user-maintenance instructions.
- Under certain conditions, hydrogen gas may be produced in a hot water system that has not been used for 2 weeks or more. HYDROGEN GAS IS EXPLOSIVE. If the hot water system has not been used for such a period, before using a washing machine, turn on all hot water faucets in the house and let the water flow from each for several minutes. This will release any accumulated hydrogen gas. As the gas is flammable, do not smoke or use an open flame during this time.
- Do not use hot water that exceeds 60°C in temperature.
- Do not splash water on the Control Panel.
- This washer incorporates a large number of plastic parts, do not allow any type of flame near it, or put lit cigarettes or volatile materials on top of it. Also, make sure to keep the washer at least one metre away from heat sources.
- Be sure to ground the washer in order to prevent electric shocks.
- Be sure to plug the washer into an outlet reserved exclusively for safe use with the washer.
NAMES OF PARTS

ACCESSORIES
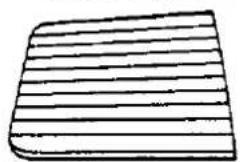
Silent Panel
Hose Band
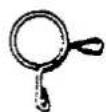
Hose Hook

Drain Hose

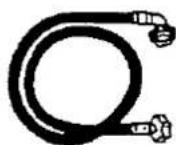
Water Supply Hose (2 each)
NAMES AND FUNCTIONS OF CONTROL PANEL PARTS

![graph TD A["WATER LEVEL SELECTION button"] --> B["This button is used to set the water level. Choose the water level in accordance with the type of laundry and the load size, refer to item (6) on page 10."] B --> C["You can increase the level of water in the Wash/Spin Bowl to a new higher setting if…](/content/2026/06/1313783/images/41ae79691fca79929f6c845e15ecf0396589e75d17559ccb949b63dff9174fce.jpg)
INSTALLATION INSTRUCTIONS
1. Location
(1) Choose a dry spot, out of sunlight.
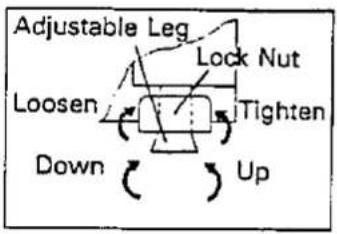
(2) Install the washer on a stable, level surface.
Adjust the Adjustable Leg of the washer if necessary to make the unit level.
2. Install Water Supply Hoses
(1) Attach each elbow end of the Water Supply Hoses to each Water Inlet on the washer.
(2) Attach each other end of the Water Supply Hoses to each faucet.
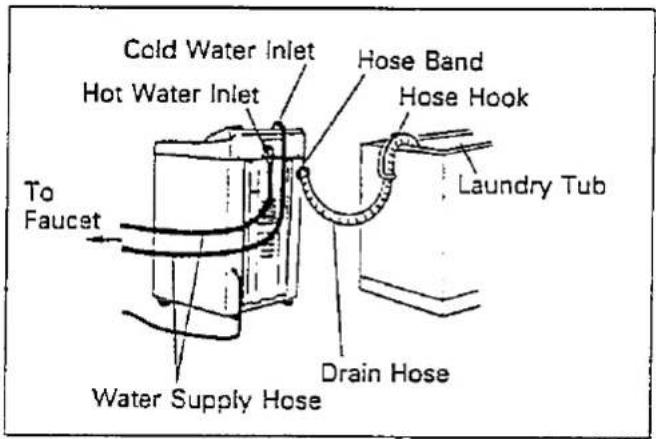
3. Install Drain Hose
(1) Slip the Hose Band onto the end of the Drain Hose, then attach to the drain outlet in the rear of the washer and secure it with a Hose Band.
(2) Attach the Drain Hose to Hose Hook and hook it over a laundry tub or drain bypass.
NOTE:
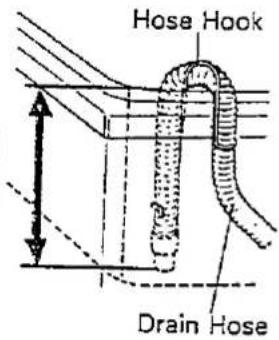
The built-in pump is capable of discharging water to a maximum height of 1.1 metres and minimum height of 0.7 metres.
This must be within 1.5 meters of either side of the location of the washer.

4. Install Silent Panel
(1) Insert the attached Silent Panel into the groove of the front side of the Silent Pan. (The side with vertical stripes is the up side.)
(2) Push straight into the groove until it snaps into the locking position.

5. Plug In The Washer
Plug the Power Cord into a wall socket.
To prevent possible electrical shock, be sure to provide adequate electrical grounding for the washer. Refer to "Grounding Instructions" guide on page 15.
6. Install Hose Hook
Attach the Drain Hose into the Hose Hook as shown in the below illustration.

① Slip a concave part of the bellows part of the Drain Hose into one end of the Hose Hook.
② Bend the Drain Hose fitting the shape of upper part of the Hose Hook.
③ Slip the Drain Hose into another end of the Hose Hook.
NOTE: Attaching or removing the end side Ⓐ of the Hose Hook, take care not to tear the Drain Hose.
WASHING INSTRUCTIONS
Preparation Procedures

① Make sure to fit the Drain Hose secured by a Hose Hook to the laundry tub or drain bypass.
② Connect both Water Supply Hoses to each faucet and turn the faucets on.
③ Plug the Power Cord into an electric outlet and turn the POWER SWITCH on.
• Check to make sure that the washing machine has been grounded.
Washing Procedures
1

① Put the detergent into the washer.
② Load the laundry into the washer.
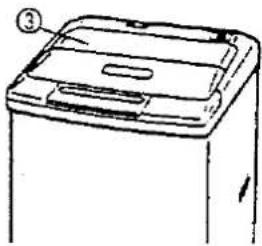
③ Close the Washer Lid.
* Washer will stop operation after the first drain if the Washer Lid is not closed. To restart operation, close the Washer Lid.
2

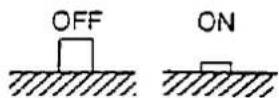
① Turn on the POWER SWITCH.
3

① Press the SENSOR REGULAR WASH button or your desired PROGRAM SELECT START button and the washer operates automatically. After the end of operation, the buzzer will sound and the washer will turn off.
Post-Washing Procedures

① Depress the POWER SWITCH button to turn off the washer.

② After turning off both faucets, detach both Water Supply Hoses from each faucet.

③ Unplug the Power Cord of the washer and turn the switch off.
(1) Automatic Washing Programs (Approx. time in minutes).
| CYCLE OPERATION | SENSOR REGULAR WASH  | HEAVY DUTY  | NIGHT WASH  | SPEED WASH  | PERMANENT PRESS  | BLANKET  | DELICATE  |
| Water Supply | 3 min. | 3 min. | 3 min. | 3 min. | 3 min. | 3 min. | 3 min. |
| Soak | (8)* | 16 | - | - | - | - | - |
| Wash | 8 to 12 | 8 to 12 | 60 | 3 | 6 | 6 | 3 |
| Drain | 3 min. 30 sec. | 3 min. 30 sec. | 3 min. 30 sec. | 3 min. 30 sec. | 3 min. 30 sec. | 3 min. 30 sec. | 3 |
| Water Supply | 3 | 3 | 3 | - | 3 | 3 | 3 |
| Rinse (1) | 2 | 2 | 5 | - | 2 | 3 | 2 |
| Drain | 3 min. 30 sec. | 3 min. 30 sec. | 3 min. 30 sec. | - | 3 min. 30 sec. | 3 min. 30 sec. | 3 |
| Spin-dry | 3 | 3 | 3 | 3 | 3 | 3 | 3 |
| Water Supply | 3 | 3 | 3 | 3 | 3 | 3 | 3 |
| Rinse (2) | 2 | 2 | 5 | 2 | 2 | 3 | 2 |
| Drain | 3 min. 30 sec. | 3 min. 30 sec. | 3 min. 30 sec. | 3 min. 30 sec. | 3 min. 30 sec. | 3 min. 30 sec. | 3 |
| Spin-dry | 4 to 6 | 6 | 5 | 3 | 30 sec. | 3 | 30 sec. |
| Total | 38 min. 30 sec. to 52 min. 30 sec. | 56 min. 30 sec. to 60 min. 30 sec. | 97 min. 30 sec. | 24 min. | 33 min. | 37 min. 30 sec. | 28 min. 30 sec. |
REMARKS
- All cycles and Pulsator speed are set automatically for optimum washing action and efficiency depending on program selected.
- If you want to change washing program, turn off the POWER SWITCH and re-start the desired cycle.
- If you want to change the water level, you can change it every time by pressing the WATER LEVEL button except BLANKET cycle.
- Above times are approximate due to household water pressure.
- When you use HEAVY DUTY cycle, the washer will stop automatically at the end of the Soak function if you choose the WASH only.
- For the Soak function;
A. HEAVY DUTY
Operate twice to Wash for 2 minutes and Soak for 6 minutes.
B. SENSOR REGULAR WASH
Operate twice to Wash for 2 minutes and Soak for 2 minutes.
WASHING HINTS
(2) How To Operate the SENSOR REGULAR WASH Cycle
Press the SENSOR REGULAR WASH button and the SENSOR REGULAR WASH cycle starts the operation, and the most suitable program is selected from the following programs and is set automatically, according to the volume of the laundry.
![graph LR A["Put the detergent and laundry in the Wash/Spin Bowl then press the SENSOR REGULAR WASH button."] --> B["The water is supplied to the sensor water level lower than LOW1, then the washer starts rotating the Pulsator to detect the volume of the laundry.<br>(The WATER LEVEL indicator lights…](/content/2026/06/1313783/images/045e8856f648cf429b4c43457324b0ccbe8245c82918d826bc8f0ffe1f341507.jpg)
| Water level | Wash action | Soaking time | Washing time | Rinse mode | Spin-drying time |
| High | Strong | (8 min.*) | 12 min. | 2 times of deep rinse | 6 min. |
| Medium | - | 11 min. | 2 times of deep rinse | 6 min. | |
| Low 2 | - | 10 min. | 2 times of deep rinse | 5 min. | |
| Low 1 | Gentle | - | 9 min. | 2 times of deep rinse | 5 min. |
- Water level is detected differently according to the kind of cloth. You can adjust the water level, if necessary.
*When the water level is HIGH, the washer will operate automatically soak function for 8 min. according to circumstance.
(3) How To Use the NIGHT WASH Cycle
Use this cycle when you want quiet washing, for example, during the night or early in the morning.
Merits:
- Time to rest the Pulsator during washing and rinsing is programmed longer than usual to lower the operating noise as possible.
• The wash in this cycle has the soaking effect then the laundry get cleaned than usual. - As the Cycle End Buzzer can be deleted, the washer finishes the cycle quietly. Refer to "Delete the Cycle End Buzzer" on page 9.

Notes:
- When you feel the water faucet make noise, adjust and reduce the flow of water by turning the faucet.
- Don't use this cycle for washing clothes with patterns or coloured ones whose colours are easy to come off because colours sometimes come off or tint the other clothes in the wash.
WASHING HINTS
(4) How to Wash a Blanket
Weight: Below 3.2kg of washable blanket made of acrylic fiber with "hand washing" label attached.
Size: Below 140cm by 200cm
- Dissolve detergent in bucket completely and pour the dissolved detergent into the Wash/Spin Bowl.
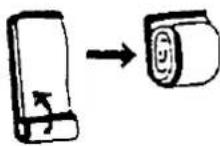
- Fold blanket as indicated below.
- Put the blanket into the Wash/Spin Bowl and close the Washer Lid.
- Press the BLANKET button to start.
- Dry the blanket outdoors in the shade after wash.
- Brush the dried blanket in the direction of the hair or the pile.

1

2

3
4
-
Fold the blanket in half.
-
Further fold into one third.
-
Roll the folded blanket.
-
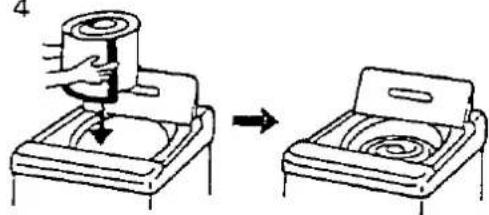
Put the rolled blanket with the hem down into the Wash/Spin Bowl.
(5) How to Delete and Reset the Cycle End Buzzer
Delete the Cycle End Buzzer
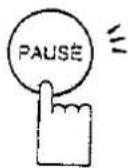
Press the PAUSE button for 4 seconds.
Reset the Cycle End Buzzer
Press the WATER LEVEL button for 4 seconds.

- In both cases, the buzzer will sound that the program has been set.
- When you plug the Power Cord into the wall socket, the Cycle End Buzzer is set to signal.
WASHING HINTS
(6) How to Select the WATER LEVEL
Choose the water level in accordance with the type and amount of laundry being done.
LOW 1 is for loads less than 1/3 full of clothes.
LOW 2 is for loads between 1/3 and 1/2 full.
MEDIUM is for loads between 1/2 and 3/3 full.
HIGH is for loads over 3/4 full.
Relationship between water level, volume of laundry and amount of detergent and bleach.
| WATER LEVEL(Water Volume) | LOW 1(32l) | LOW 2(40l) | MEDIUM(50l) | HIGH(58l) | |
| DETERGENT(High Suds Powder Type) | 43g | 53g | 65g | 77g | |
| BLEACH(Liquid Type) | 75ml | 95ml | 115ml | 135ml | |
| CLOTHES | Sheets | — | — | 1 | 2 |
| Tablecloths | — | 2 | 2 | 2 | |
| Shirts | 1 | 2 | 3 | 3 | |
| Bath towels | 1 | 2 | 4 | 5 | |
| T-shirts | 1 | 1 | 3 | 3 | |
| Pillow cases | 1 | 2 | 3 | 4 | |
| Shorts | 1 | 4 | 3 | 3 | |
| Wash cloths | 4 | 2 | 4 | 4 | |
| Handkerchiefs | 2 | 2 | 5 | 4 | |
NOTES
- Use recommended amount of detergent for your load as shown in chart.
- If the recommended amount of detergent produces too much suds, switch to a low suds detergent, and follow instructions on package.
- For other detergents – Low and normal suds, powders, liquids, non-phosphate powders, follow recommendations on package.
- For SPEED WASH cycle, use half the amount of detergent recommended in the above chart.
For DELICATE cycle, be set automatically the water level LOW2. Use the amount of detergent 53g of LOW2 in the above chart and below 1.5kg of wash load. - Using too little detergent is a common case of laundry problems.
Always measure detergent in a standard measuring cup. - The preshrunk wool with "hand washing" label attached and other delicate fabrics should be placed in a nylon net for extra-protection.
- For the best results, use the about 80% of the load recommended in the above chart.
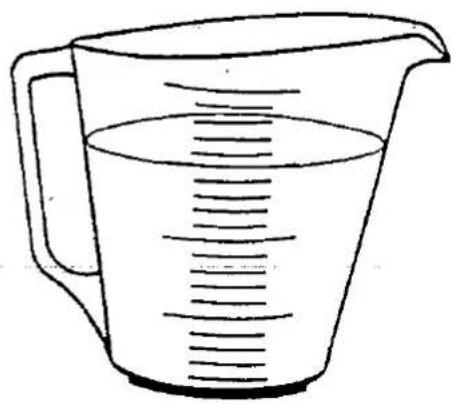
Standard Measuring Cup
(7) How to Save the Suds (wash) Water in the first Wash.
You can save the suds water in any cycle except for HEAVY DUTY and NIGHT WASH cycles.
- Place the Drain Hose into the laundry tub. If the laundry tub does not have a capacity of 45 litres, then a standpipe or overflow drain MUST be fitted, otherwise the laundry place could be flooded.
- Press the SUDS SAVE button. The SUDS SAVE indicator will light up.
- Press any PROGRAM SELECT START button to start the wash cycle. The SUDS SAVE and WASH indicators flash and the RINSE and SPIN indicators light up.
- If you change the wash temperature, press the TEMPERATURE button.
- The washer will stop at the end of the wash cycle after the suds water has been pumped out. And then the buzzer will sound every 5 minutes for one hour, the RINSE and SPIN indicators will light up.
- Reposition the Drain Hose in the bypass inlet of the laundry tub or another tub.
- Press the PROGRAM SELECT START button of the current cycle you have chosen again to complete the rinse and spin cycles. The washer will stop automatically at the end of your chosen cycle.
NOTE: SUDS SAVE function overrules automatic cycles.
Adjust this length to suit your laundry tub or drain bypass.

(8) How to Return the Suds Water for the second Wash.
- Place the Drain Hose in the laundry tub. The tip of Drain Hose must be spaced from the bottom surface of laundry tub, about 10mm.
- Load the laundry into the washer.
- Press the SUDS RETURN button and any PROGRAM SELECT START button. The SUDS RETURN and WASH indicators will flash and the RINSE and SPIN indicators will light up.
- The washer will begin to fill with water about 10 litres and the buzzer will sound before draining for 10 seconds.
- The washer will siphon back suds water.
Put the detergent between 1/2 and 3/4 full into the washer referring the chart on page 10.
A. When you choose the SENSOR REGULAR WASH cycle, the Pulsator will revolve in order to decide a proper water level, and the washer will siphon back again.
B. When you choose the water level beforehand, the washer will siphon back up to your chosen water level. If the suds water is less than your chosen water level, the washer will add water. - After that operation, the SUDS RETURN indicator will light off, the washer will automatically begin to operate complete wash cycle.
NOTES: The washer cannot drain or siphon back when the Washer Lid is open.
Be sure to CLOSE the Washer Lid when you use the SUDS RETURN function.
This is much slower than pumping so allow enough time for the suds water to return.
When the water levels in the laundry tub and the Wash/Spin Bowl are the same, no more suds water will return to the washer.

OTHER FEATURES
(1) SOFTENER DISPENSER
Pour softener to the Softener Dispenser before starting the operation.
SOFTENER VOLUME
| Water level | LOW 1 | LOW 2 | MED | HIGH |
| Softener | 22ml | 28ml | 34ml | 41ml |
Notes:
- In case of using fabric softener of enriched type, dilute it with the same volume of water before supplying.
- Do not supply detergent, bleach and starch to the Softener Dispenser.
- If you use too much detergent, the laundry can not be finished well.

(2) BLEACH INLET
- Dilute bleach with twice the volume of water.
- Pour the bleach into the Bleach Inlet port on the top of the washer.
Refer to the chart on page 10 for proper quantities.
Notes:
- Do not use bleach for coloured fabrics.
• After pouring in the bleach, rinse the Bleach Inlet port with water. - Do not leave water with bleach in the Wash/Spin Bowl for an extended period of time. Drain after use.

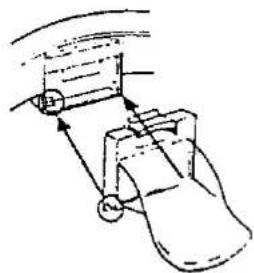
(3) LINT FILTER
a) Removal
Holding the flame of the Lint Filter and pushing down the claw, pull out it from the upper side.

Lint Filter
b) Cleaning
Take the lint out of the filter and rinse in water.
c) Replacement
Holding the flam of the Lint Filter put the claw on the lower side of the flam in the hole on the opposite side of the body. Then push the upper side until it snaps into the locking position.
CAUTION
- Clean the Lint Filter each time you wash.
- Laundry that can damage the net of the Lint Filter should be placed in a nylon net washing bag.
- If the Lint Filter is damaged, a new one can be purchased at your dealer.
CARE AND MAINTENANCE
- Occasionally remove the Water Supply Hose from the Water Inlet and clean the metal filter of the Water Inlet.

- This washer incorporates a large number of plastic parts, so be sure not to bring any type of flame near it, or put lit cigarettes or volatile materials on top of it. Also, make sure to keep the washer at least one meter away from heat sources.

- Be sure not to splash or pour water on the Control Panel where the timer and switches are located.

- Wipe the washer clean and dry with a soft cloth. Do not use brushes, polishing powder, benzine, or other volatiles to clean the washer.

- Do not install the unit in a place where it will be exposed to moisture or rain, for example, in a bathroom or outdoors.

- Be careful during the SPIN cycle. Never put your hands into the Wash/Spin Bowl until it comes to a complete stop, as it can cause injury.

Before Requesting Repair Service
If a malfunction should occur during use, first check the following items:
1. The washer doesn't work at all.
• Is there a power failure?
- Has the required amount of water been supplied to the Wash/Spin Bowl?
- Is the Power Cord securely plugged in?
- Has the fuse or circuit breaker been activated?
- Has the POWER SWITCH been depressed?
- Has one of the PROGRAM SELECT START buttons been depressed?
2. The water doesn't flow into the Wash/Spin Bowl.
• Is the water supply faucet turned on?
- Is the metal filter in the Water Inlet clogged?
- Has the water supply been cut off?
3. The water doesn't drain out.
- Is the Washer Lid open? Check to make sure it is closed.
• Is there anything wrong with the Drain Hose?
• Is it clogged with lint? - Check the Drain Hose placement for maximum height limits as stated on page 5.
4. The washer doesn't Spin.
- Is the Washer Lid open? Check to make sure it is closed.
- Is the laundry clumped on one side of the Wash/Spin Bowl?
If so, be sure to even out the load. - Is the washer vibrating excessively? Check to make sure it is on level ground.
5. The water overflows from the Wash/Spin Bowl.
- The WATER LEVEL switch malfunctions, the washer will turn off and the WATER LEVEL indicators of LOW1, LOW2 and MED. flicker at the same time and the buzzer will sound to indicate a problem. Press the PAUSE button and turn the faucet off before requesting service.
Trouble shooting
On occurring the following troubles, the electronic buzzer alarms the occurrence of the trouble for about 16 seconds and the WATER LEVEL lamps flicker as shown below. At the same time, the washer stops the operation.
Releasing the emergency stop
The trouble indications can be released by pressing the PAUSE button.
| Trouble Indication | Kind of Trouble | Where to check | In order to Restart |
| Lamps of LOW 1, LOW 2 and HIGH flicker. | Water can not be supplied. | Check to find the causes and take countermeasures, referring to the TROUBLE-SHOOTING GUIDE on this page. | Press the PROGRAM SELECT START button of the current cycle again, and the washer restart the operation. |
| Lamps of LOW 1, MEDIUM and HIGH flicker. | Water can not be discharged. | ||
| Lamps of LOW 2, MEDIUM and HIGH flicker. | Spinning is impossible. |
Unbalance problem
If the clothes have collected on one side and the Wash/Spin Bowl has become unbalanced, the microcomputer will detect the unbalanced condition and correct it with an automatic water fill, 2 minutes rinse and drain cycle. It will repeat this procedure until the condition is corrected and then proceed with the program selected.
However, if the unbalanced condition continues after three correction cycles, the WATER LEVEL lamps of LOW 2, MED. and HIGH will begin blinking on and off at the same time and the buzzer will sound to indicate a problem.
- Open the Washer Lid and rearrange the clothes evenly around the Wash/Spin Bowl.
- Close the Washer Lid and press the PROGRAM SELECT START button of the current cycle again.
GROUNDING INSTRUCTIONS
This appliance must be grounded.
In the event of malfunction or breakdown, grounding will reduce the risk of electric shock by providing a path of least resistance for electric current.
This appliance is equipped with a cord having an equipment-grounding conductor and a grounding plug.
The plug must be plugged into an appropriate outlet that is properly installed and grounded in accordance with all local codes and ordinances.
DANGER – Improper connection of the equipment-grounding conductor can result in a risk of electric shock.
Check with a qualified electrician or serviceman if you are in doubt as to whether the appliance is properly grounded.
Do not modify the plug provided with the appliance – if it will not fit the outlet, have a proper outlet installed by a qualified electrician.

SPECIFICATIONS
Overall Dimensions 575(W) × 650(D) × 975(H) mm
Weight.....Approx. 36 kg
Power Source 50 Hz, 240V
Power Consumption....Wash/Spin Motor 360W
Pump Motor 115W
Water Levels LOW 1 :32 litres
LOW 2 :40 litres
MEDIUM : 50 litres
HIGH : 58 litres
Pulsator 160 rpm
Spin-Dryer 800-820 rpm
Spin-Drying Method.... Centrifugal spin-drying
Service Water Pressure...... Below 750 kPa (110 p.s.i)
CORD REPLACEMENT: (IN SERVICE) RETURN TO SUPPLIER FOR REPAIR AND FOR REPLACEMENT OF FLEXIBLE CORD.
SANYO
SANYO Electric Co., Ltd.
OSAKA, JAPAN
- ASW-602AP
- SANYO AUTOMATIC WASHER
- ATTENTION
- IMPORTANT SAFEGUARDS
- NAMES OF PARTS
- ACCESSORIES
- NAMES AND FUNCTIONS OF CONTROL PANEL PARTS
- INSTALLATION INSTRUCTIONS
- LOCATION
- INSTALL WATER SUPPLY HOSES
- INSTALL DRAIN HOSE
- NOTE
- INSTALL SILENT PANEL
- PLUG IN THE WASHER
- INSTALL HOSE HOOK
- WASHING INSTRUCTIONS
- REMARKS
- WASHING HINTS
- HOW TO OPERATE THE SENSOR REGULAR WASH CYCLE
- HOW TO USE THE NIGHT WASH CYCLE
- MERITS
- NOTES
- HOW TO WASH A BLANKET
- HOW TO DELETE AND RESET THE CYCLE END BUZZER
- HOW TO SELECT THE WATER LEVEL
- OTHER FEATURES
- SOFTENER DISPENSER
- BLEACH INLET
- LINT FILTER
- REMOVAL
- CLEANING
- REPLACEMENT
- CAUTION
- CARE AND MAINTENANCE
- BEFORE REQUESTING REPAIR SERVICE
- THE WASHER DOESN'T WORK AT ALL
- THE WATER DOESN'T FLOW INTO THE WASH/SPIN BOWL
- THE WATER DOESN'T DRAIN OUT
- THE WASHER DOESN'T SPIN
- THE WATER OVERFLOWS FROM THE WASH/SPIN BOWL
- TROUBLE SHOOTING
- RELEASING THE EMERGENCY STOP
- UNBALANCE PROBLEM
- GROUNDING INSTRUCTIONS
- SPECIFICATIONS
Marque : SANYO
Modèle : ASW-602AP
Catégorie : Lave-linge