
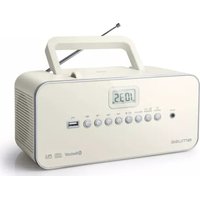
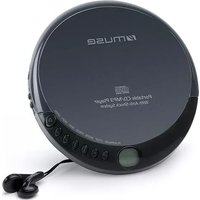
M-32 CM - Système Hi-Fi MUSE - Notice d'utilisation et mode d'emploi gratuit
Retrouvez gratuitement la notice de l'appareil M-32 CM MUSE au format PDF.


| Type de produit | Système Hi-Fi |
| Marque | MUSE |
| Modèle | M-32 CM |
| Dimensions (L x H x P) | 250 x 120 x 300 mm |
| Poids | 3,2 kg |
| Alimentation | 220-240 V, 50/60 Hz |
| Consommation électrique | 30 W (veille : < 1 W) |
| Lecteur CD | Oui, compatible CD-R/RW |
| Radio | FM/AM, syntonisation numérique |
| Amplification | 2 x 10 W RMS |
| Entrées auxiliaires | 1 x RCA (Ligne), 1 x USB, 1 x 3,5 mm |
| Sorties | Casque (3,5 mm) |
| Fonctions principales | Lecture CD, radio, USB, entrée auxiliaire, minuterie, horloge |
| Entretien et nettoyage | Nettoyer avec un chiffon doux et sec. Ne pas utiliser de produits abrasifs. |
| Sécurité | Ne pas exposer à l'humidité ni aux sources de chaleur. Débrancher avant tout nettoyage. |
| Pièces détachées et réparabilité | Contacter le service après-vente agréé MUSE pour les pièces détachées. Réparation par un professionnel recommandée. |
| Accessoires fournis | Télécommande, câble d'alimentation, antenne FM, guide de démarrage rapide |
| Informations générales | Système Hi-Fi compact. Utilisation domestique. Garantie : 2 ans. |
FOIRE AUX QUESTIONS - M-32 CM MUSE
Questions des utilisateurs sur M-32 CM MUSE
0 question sur cet appareil. Repondez a celles que vous connaissez ou posez la votre.
Poser une nouvelle question sur cet appareil
Téléchargez la notice de votre Système Hi-Fi au format PDF gratuitement ! Retrouvez votre notice M-32 CM - MUSE et reprennez votre appareil électronique en main. Sur cette page sont publiés tous les documents nécessaires à l'utilisation de votre appareil M-32 CM de la marque MUSE.
MODE D'EMPLOI M-32 CM MUSE
muse
M-32CM
MICRO SYSTEM CD/MP3/USB
User Manual
natural_image
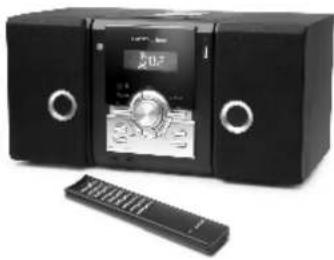
Black electronic device with two speakers and a digital display, accompanied by a remote control (no visible text or symbols)Please read the instruction carefully
before operating the unit.
English
AUDIO CONTROL
-
The player is on/off by pressing STANDBY (2'H9) button.
-
The function is selected cyclically by pressing
STOP / CLEAR / FUNCTION BURON: CD + USB + TUNER + AUX
CD→USB→TUNER→AUX

STAFFLEAR FUNCTION
NOTE: When standby light is 11, unit is in OFF (standby) mode.
ADJUSTING THE SOUND
Press STANDBY button (2/H9) to turn on the unit.
then press VOLUME +/- control (10/H16, 19/H8) to adjust the sound to comfortable level. The vol
to adjust the sound to comfortable level. The volume level will show on display for a few seconds.
- He never will show on display for a few seconds.
MUTE
To cut off the sound from the speakers temporarily, press the MUTE button (H15). The Volume level icon flash on the LCD display (5). Press the MUTE button again to cancel Mute mode and restore the sound from the speakers.
Press MUTE button (H15) to on/off mute function.
Note: The mute on is cancelled when:
a. The power is off/on
b. The Volume is adjusted by the VOL +/- button.
USING HEADPHONES (Headphones Not Included)
Connect a set of stereo headphones with 3.5mm mini plug to the phone jack on the
bottom panel. The speakers are automatically cut off when headphones are in use.
Note. To establish a safe headphones sound level: Start wave volume control at a low setting
Start your volume control at a low setting. Slowly increase the sound until you can hear it comfortably and clearly, and without
clowly increase the sound until you can hear it comfortably, and cleanly, and without distortion.

In full power, the continuous listening of the player may damage the user's hearing.
GB 3
HX-2706 10 MUSE 001 REVO G9.P65 2009.015,10:271
LOCATION OF CONTROLS
-
SPEAKER
-
POWER/STANDBY BUTTON
-
CD DOOR
-
REMOTE SENSOR
-
LCD DISPLAY
-
USB PORT
-
CD OPEN/ CLOSE BUTTON
-
EMSTEREOLED INDICATOR
-
PM STEREO LED INDICATOR S. PLAY (PAUSE BUTTON)
10 VOL · BUTTON
-
F - SKIP / UP BUTTON
-
PLAY MODE BUTTON
-
FOLDER UP BUTTON
-
PROGRAM / CLOCK - ADJ.
BUTTON
- AUX. IN JACK
-
PHONES. JACK
-
PHONES JACK
-
RAND BUTTON
-
B - SKIP / DN BUTTON
-
VOL - BUTTON
-
STOP ■ / CLEAR / FUNCTION
BUTTON
-
TUNING CONTROL
-
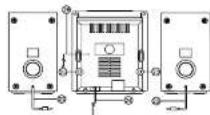
SPEAKER CORD
-
LEFT SPEAKER JACK
-
AG POWER CORD
-
RIGHT SPEAKER
-
RIGHT SPEAKER JACK
- EM WIRE ANTENNA
20.1M WHE ANTE
REMOTE CONTROL
H1. FUNCTION BUTTON
H2. ■ STOP BUTTON
H3. B - SKIP BUTTON
H4. - 10 TRACK BUTTON
H5. FOLDER DOWN BUTTON
HB. PROGRAM/CLOCK BUTTON
H7. RAND BUTTON
HR VOLUME — BU
- COLOR-E LONDON

H9. STANDBY BUTTON
H10.PLAY:PAUSE BUTTON
H11.F - SKIP BUTTON ▶
H12 + 10 TRACK BUTTON
H13. FOLDER UP BUTTON
H14. PLAY MODE BO H15. MUTE BUTTON
HIS MOTE BUTTON HIS VOLUME + BUTTON
THE VOLUME 4 BDITION

GB-1
CLOCK SETTING
The clock is displayed on LCD display at standby mode.
1. Press the PROGRAM / CLOCK-ADJ.
button (14:H6)
2. Press the F-SKIP/UP (11/H11) or
B-SKIP /DOWN (18/H3) to select 12 hours
3. Press the PROGB
3. Press the PROGRAM: CLOCK-ADJ. button (14:H6). The hour digit flash
4. Press the ▶▶ F-SKIP/UP
(1B/H3) to adjust hour digit
5. Press the PROGRAM / CLOCK-ADJ. button (14/H6), the minute digit flash.
6. Press the ▶ F-SKIP/UP [11/H11] or ◀ B-SKIP/DOWN [18/H3] to adjust
minute digit
7. Press the PROGRAM / CLOCK-ADJ. button (14/H5) again, the correct time is
LISTENING TO THE RADIO
- Turn on the unit by pressing STANDBY
button (2:H9) - Press the STOP ■(20/H2) FUNCTION
(20:H1) button to select the tuner - Press the BAND button (17/H7) to select desired band.
- Tune to the desired radio station by using TUNING knob (21) and frequency is displayed.
- Adjust the sound
ANTENNA
For FM reception fully unwind the external FM wire antenna and adjust direction, for
optimum recepti
AFTER LISTENING
Turn off the unit by pressing STANDBY button (2:19)
COMPACT DISC OPERATION
- Press STANDBY button (2/H9).
- Press the STOP ■: FUNCTION button to select CD
- Open the CD door(3) by pushing the CD door Open button [7]
- Place the CD with label side up inside the CD compartment
and close the CD door (3). - After a few seconds, the total number of tracks and total
playing time will appear on the Multifunction display. Press a button (SUI19) to start playing the CD - Press the PLAY/PAUSE button

C. 12 每日


GB 4

Installing Battery
Insert 2 "AAA" UM4 batteries to the remote control prior to use. Make sure to match
their polarities (+/-) to the markings inside the compartment.
NOTES:
- In order to avoid leakage, always remove the batteries when unit will not be used for a long period of time.
- If the remote control is not going to be used for a long time, remove the battery to
If the remote controls not going to be used for a avoid damage caused by battery leakage corrosion.
CAUTION: Danger of explosion if battery is incorrectly replaced. Replace only with
the same or equiv

Before throwing any batteries away, consult your distributor who may be able to take them back for specific recycling.
POWER SUPPLY
-
This micro system operates on AC230V\~50Hz line power supply.
-
The remote control unit operates on 2pcs
"AAA/UM4" battery (excluded). To
power up the remote control, open the
battery door, install the battery
according to the polarity diagram on the
battery compartment, then close the
delivery door.
Important note
If an abnormal display indication or an operating problem occurs, disconnect the AC
power cord. Wait at least 5 seconds, then reconnect the AC power cord.
AUX IN
An external (auxiliary) audio source (i.e., personal CD player or MP3 player) can be connected to this unit and heard through the speakers.
1. Plug one end of cable (not included)
into the AUX IN socket (15) on the uni
2. Plug the other end of the cable into th
Headphone or Line Out socket of the
external source.
3. Press the STOP ■: FUNCTION button (20) on the unit or the FUNCTION button
(H1) on the remote control to select Auxiliary function. "AUX" indicator shows on
the display.

To AC outlet
GB-2
Track number "01", "CD" & the symbol "▶" will be shown during
normal compact disc playback.
Track number "001", "CD", the symbol "▶" & "MP3" will be shown during MP3 playback.
Track number "dd1", "MP3", the symbol "▶" & "USB" will be shown during USB playback.
[Unreadable]
To:
Stop play
Pause play Resume role
Resume play after pause Scan forward and backwar
Skip tracks
Repeat current track
Repeat all tracks
Random play
DISC ERROR
Note: If the disc is dirty, damaged or unreadable, or if the disc is placed upside down, the "no" indicator will appear on the display. If this occurs, clean the disc, insert the disc correctly, or try another disc.
REPEAT, REPEAT FOLDER AND RANDOM PLAYBACK
Press PLAY MODE button (12) during unit ON mode. CD plays with a single track repeat, all tracks repeat or randomly.
FOR MP3 USB PLAYBACK
During Repeat
mode, display s
(1) 2017年1月1日
During Repeat
mode,display s
(1)本说明仅供参考。
During Repeat
mode, display s
(五) 本报告书
During Random
display shows
FOR NORMAL COMPACT
DISC PLAYBACK
During Renest 1
mode, display shows
(1) 2017年1月1日
During Repeat all
mode, display shows
表决结果的总体情况如下表所示:
During Random mode.
display shows

COMPACT
ACK
1 | 0 |
snows
(No text)
all | 01
shows
(2)
n made. 01
ANSOW
GB 5
中
中
中
中
中
[NO TEXT]
[Non-Text]
[Non-Text]
[Non-Text]
[Non-Text]
[Non-Text]
[Non-Text]
[Non-Text]
[Non-Text]
[Non-Text]
[Non-Text]
[Non-Text]
[Non-Text]
[Non-Text]
中
中
中
中
中
中
中
中
中
中
中
中
中
中
中
中
中
-
-
-
-
-
中
中
中
中
-
-
-
-
-
-
-
-
-
-
-
-
NOTE ON CD-R/RW DISCS
- CD-Rs or CD-RWs playback capability at this player may vary depending on quality of media, CD-Burner, speed of burning and application software. Because of non-standardized format definition/production of CD-R/RW, playback-quality and
performance are not guaranteed.
- Manufacturer is not responsible for the playability of CD-R/RW due to recording conditions such as PC performance, writing software, media ability, etc.
- Do not attach a seal or label to either side of the CD-R/RW disc. It may cause a malfunction.
- Do not use your set immediately after transport from a cold place to a warm place, there may be condensation problems.
FOLDER UP / DOWN
- Press FOLDER UP (13/H13) or FOLDER DOWN (H5) button to select desired folder.
- Press ◀ B-SKIP/DOWN button (18/H3) or ▶ F-SKIP/UP button (11/H11) to select desired track. - Press PLAY/PAUSE button (9/H10) to start playing.

+10 / -10 BUTTON
These buttons allow you to advance 10 tracks at a time (+10) or go back 10 tracks at a time (-10).
+10 BUTTON
For example, if Track 1 is playing and +10 is pressed, it will take you to Track 11 (1+10 = 11). You may press +10 (13/H12) repeatedly to advance forward 10 tracks at a time. (For example, when on Track 1, press once to Track 11 (1+10 = 11). Press again to Track 21 (11+10 = 21).) If there are less than 10 higher tracks available, CD will go back to Track 1.
-10 BUTTON
Same as +10 button (see above) except you can go back 10 tracks at a time. For example, if Track 12 is playing and -10 is pressed, it will take you back to Track 2 (12-10 = 2). You may also press -10 (H4) repeatedly (as above) to go back 10 tracks each time -10 is pressed. If there are less than 10 tracks available, CD will go to the last possible track.
PROGRAM PLAYBACK
FOR NORMAL COMPACT DISC PLAYBACK
Programmed playback enables tracks on a disc to be played in the desired order. Up to 20 tracks can be programmed.
- Press the "PROGRAM/CLOCK-ADJ." button (14/H6).
- Press the ◀◀▶buttons to select the desired track number.
- Press *PROGRAM/CLOCK-ADJ." button (14:H6) again to memorize the track.
- Repeat steps 2 and 3 until all desired tracks are programmed.
-
Press the "PLAY/PAUSE" button (9H10) to start. PROGRAM is shown on the CD display.
-
Press "STOP/FUNCTION" button to stop
-
Press "PLAY/PAUSE" buttons (9/H10) to resume programmed playback.
-
Press "FLAT" AUSE buttons (JH10) to resume programmed playback.
- Press "STOP/FUNCTION" button again until "PROGRAM" disappear from the display or turn off the CD player can clear the programmed memory.
FOR MP3 PLAYBACK
Programmed playback enables folders/albums or tracks on a disc to be played in the desired order. Up to 20 folders/albums or tracks can be programmed.
-
Press the "PROGRAM/CLOCK-ADJ." button (14/H6).
-
Press the FOLDER DOWN (H5) /FOLDER UP (13:H13) button to select the desired folder.
-
Press the ◀◀/▶▶ buttons to select the desired track number.
-
Press "PROGRAM/CLOCK-ADJ." button (14/H6) again to memorize the track.
-
Repeat steps 2 to 4 until all desired tracks are programmed.
-
Press the "PLAY/PAUSE" button (9/H10) to start. "PROGRAM" is shown on the CD display.
-
Press "STOP/FUNCTION" button to stop programmed playback.
-
Press "PLAY/PAUSE" button (9/H10) to resume programmed playback.
- Press "STOP/FUNCTION" button again until "PROGRAM" disappear from
the display or turn off the CD player can clear the programmed memory Note : Programming can only be made when the player is in stop mode.
USB OPERATION
-
Connect USB stick or MP3 player into the USB port.
-
Press STOP ■ / FUNCTION button (20) to select USB.
-
Press PLAY / PAUSE button ▶II (9/H10) to start playback.
Note:
- USB connector does not design for communication with computer directly. - Manufacturer is not responsible for the playability of USB disk or MP3 player due to recording condition, capacity, interface compatibility, etc.
- Due to different formats, some USB stick or MP3 players may take longer time to be read.
- USB stick is direct connected or with a cable with max. 0.5m length.
CARE AND MAINTENANCE
-
Clean the unit with a soft, damp (never wet) cloth. Solvent or detergent should never be used.
-
Avoid operating your unit under direct sunlight or in hot, humid or dusty places.
- Keep your unit away from heating appliances and sources of electrical noise such as fluorescent lamps or motors.
COMPACT DISC CARE
- To remove a disc from its storage case
press down on the center of the case
and lift the disc out, holding it carefully by the edges. Dice should be stored
by the edges. Discs should be stored in their games after use to avoid
in their cases after use to avoid scratches.
Hondie 1b
- Handle the disc only by its edges. Never allow your fingers to come in contact with the shiny, unprinted side of the disc.
- Do not attach any tape, stickers, etc and/or write anything on either side of the disc. - Clean the disc periodically with a soft, lint-free, dry cloth. Never use deter gents or abrasive cleaners to clean the disc. If necessary, use a CD cleaning kit.
- If a disc skips or gets stuck on a section of the disc, it is probably dirty or damaged (scratched).
- Do not expose discs to direct sunlight, high humidity, high temperatures or dust, etc. Prolonged exposure to extreme temperatures can warp the disc (such as leaving the disc in your car during summertime).
- When cleaning the disc, wipe in straight lines from the center of the
disc to the outer edge of the disc. Never wipe in circular motions. Note: Always press STOP button and wait for the disc stop rotating before opening the CD door to remove the disc.
- If there is a scratch, dirt or fingerprint on the CD, it may cause tracking error. Before playing, clean the CD with a cleaning cloth. Wipe the CD from the center out. Don't store discs in places with high temperatures or high humidity-they can become warped. After playing, store the CD in its cases.
CLEANING THE LENS
A dirty lens will cause sound skipping. If the lens is very dirty, the player may not work. We suggest using a special cleaning disk (not included) available in most music and Hi-Fi stores. However, if you do not have one, you may use a cotton swab very slightly dampened with alcohol to clean the lens.
GB-8
GB-7
GB-0
CLEANING THE UNIT
- To prevent fire or shock hazard, disconnect your unit from the AC power source when cleaning.
- If the cabinet becomes dusty, wipe it with a soft cloth. Do not use any wax or polish sprays on the cabinet.
- If the cabinet becomes dirty or smudged with fingerprints it may be cleaned with a soft cloth slightly dampened with a mild soap and water solution. Never use abrasive cloths or polishes as there will mar the finish of your unit.
SPECIFICATIONS
RADIO SECTION
Tuning ranges
Antennas:
FM 87.5-108MHz
MW522-1620kHz
MW Built - in ferrite bar
GENERAL
Output power:
Power con Speaker:
Speaker. Phone jack
Power source:
DIMENSIONS
Main uni
Speaker
Weight:
1W + 1W (RMS)
9W
3½ B OHM 2.5MM
3.5MHz AC:230V\~50Hz
WARNING
CAUTION RISK OF ELECTRIC SHOCK DO NOT OPEN ATTENTION: To reduce the risk of electric shock, do not remove the cover. There are no user serviceable parts inside the unit. Refer all servicing to qualified personnel.
The lightening flash with arrowhead symbol within the triangle is a warning sign alerting the user of "dangerous voltage" inside the unit.
The exclamation point within the triangle is a warning sign alerting the user of important instructions accompanying the product.
CAUTION: Invisible laser radiation when open and interlocks defeated. Avoid exposure to beam.
WARNING - To reduce the risk of fire or electric shock, do not expose this appliance to rain or moisture.
PRECAUTIONS
IMPORTANT
- Do not throw batteries in fire
- Do not be exposed to dripping or splashing, and that no object filled with liquids, such as vases, shall be placed on the apparatus.
- Mains plug is used as the disconnect device and it shall remain readily operable. To be completely disconnected the power input, the mains plug of the apparatus shall be disconnected from the mains completely. The mains plug should not be
obstructed OR should be easily accessed during intended use. - Attention should be drawn to the environmental aspects of battery disposal.
- No naked flame sources such as lighted candles should be placed on the apparatus.
- The use of apparatus is only in moderate climates.
- See markings on bottom / back of the product
- Excessive sound pressure from earphones and headphones can cause hearing loss.
- Battery shall not be exposed to excessive heat such as sunshine, fire or the like. Heat- Do not use this unit near sources of heat, including heating vents, stoves, or other appliances that generate heat.
Mounting surface- Place the unit on a flat, even surface.
Ventilation- The unit should be situated with a adequate space around it so that proper heat ventilation is assured. Allow 10 cm (4 in.) clearance from the near and the top of the unit and 5 cm (2 in.) from each side.
- Do not place the unit on a bed, rug, or similar surface that may block the ventilation openings.
- Do not install the unit in a bookcase, cabinet, or airtight rack where ventilation may be impeded.
Object and liquid entry- Take care that objects or liquids do not get inside the unit through the ventilation openings.
Condensation- Moisture may form on the CD Pickup lens when:
- The unit is moved from a cold spot to a warm spot
- The heating system has just been turned on
- The unit is used in a very humid room - The unit is cooled by an air conditioner
When this unit has condensation inside, it may not function normally. Should this occur, leave the unit for a few hours, then try to operate again.
Electric Power
1 Power sources- Use AC house current, as specified in the Operating instructions and marked on the unit.
2 AC power cord
- When disconnecting the AC power cord, pull it out by the AC power plug. Do not pull the cord itself.
- Never handle the AC power plug with wet hands, as this could result in fire or electric shock.
- Power cords should be firmly secured to avoid being bent, pinched, or walked upon.
- Avoid overloading AC power plug and extension cords, beyond their capacity, as this could result in fire or electric shock.
3 When not in use - Unplug the AC power cord from the AC outlet if the unit will not be used for several months or more. When the cord is plugged in a small amount of current continues to flow to the unit, even when the power is turned off.
Electrical Fast Transient (Burst) / ESD Remark:
- In case of misfunction due to electrical fast transient (Burst) or electrostatic discharge, just reset the product (reconnect of power source may be required) to resume normal operation.
If at any time in the future you should need to dispose of this product please note that Waste electrical products should not be disposed of with household waste. Please recycle where facilities exist. Check with your Local Au
■ authority or retailer for recycling advice. (Waste Electrical and Electronic Equipment Directive)
GB-9
GB·10
GB·11
CE

- muse
- M-32CM
- MICRO SYSTEM CD/MP3/USB
- User Manual
- AUDIO CONTROL
- ADJUSTING THE SOUND
- MUTE
- LOCATION OF CONTROLS
- REMOTE CONTROL
- CLOCK SETTING
- LISTENING TO THE RADIO
- COMPACT DISC OPERATION
- POWER SUPPLY
- AUX IN
- REPEAT, REPEAT FOLDER AND RANDOM PLAYBACK
- NOTE ON CD-R/RW DISCS
- FOLDER UP / DOWN
- +10 / -10 BUTTON
- PROGRAM PLAYBACK
- FOR MP3 PLAYBACK
- USB OPERATION
- CARE AND MAINTENANCE
- COMPACT DISC CARE
- CLEANING THE LENS
- CLEANING THE UNIT
- SPECIFICATIONS
- WARNING
- PRECAUTIONS
- IMPORTANT
- Electric Power
Marque : MUSE
Modèle : M-32 CM
Catégorie : Système Hi-Fi