
CMX 95 - Radio SCOTT - Notice d'utilisation et mode d'emploi gratuit
Retrouvez gratuitement la notice de l'appareil CMX 95 SCOTT au format PDF.


| Type de produit | Radio analogique AM/FM |
| Marque | Scott |
| Modèle | CMX 95 |
| Dimensions (approx.) | 25 x 15 x 8 cm |
| Poids (approx.) | 1,2 kg |
| Alimentation | Secteur 230V AC ou piles (4 x LR20) |
| Gamme de fréquences AM | 530 - 1600 kHz |
| Gamme de fréquences FM | 87,5 - 108 MHz |
| Puissance de sortie | 2 x 2 W RMS |
| Fonctions principales | Radio AM/FM, haut-parleur intégré, prise écouteurs, antenne télescopique, sélection de station par molette |
| Entretien | Nettoyer avec un chiffon doux et sec. Ne pas utiliser de solvants. |
| Sécurité | Ne pas exposer à l'humidité. Débrancher en cas d'orage. Utiliser uniquement l'adaptateur fourni. |
| Pièces détachées / Réparabilité | Pour toute pièce détachée, contacter le service après-vente Scott. Réparations par un professionnel. |
FOIRE AUX QUESTIONS - CMX 95 SCOTT
Questions des utilisateurs sur CMX 95 SCOTT
0 question sur cet appareil. Repondez a celles que vous connaissez ou posez la votre.
Poser une nouvelle question sur cet appareil
Téléchargez la notice de votre Radio au format PDF gratuitement ! Retrouvez votre notice CMX 95 - SCOTT et reprennez votre appareil électronique en main. Sur cette page sont publiés tous les documents nécessaires à l'utilisation de votre appareil CMX 95 de la marque SCOTT.
MODE D'EMPLOI CMX 95 SCOTT


SCOTT
CMX 95
VERTICAL MIRROR CLOCK RADIO
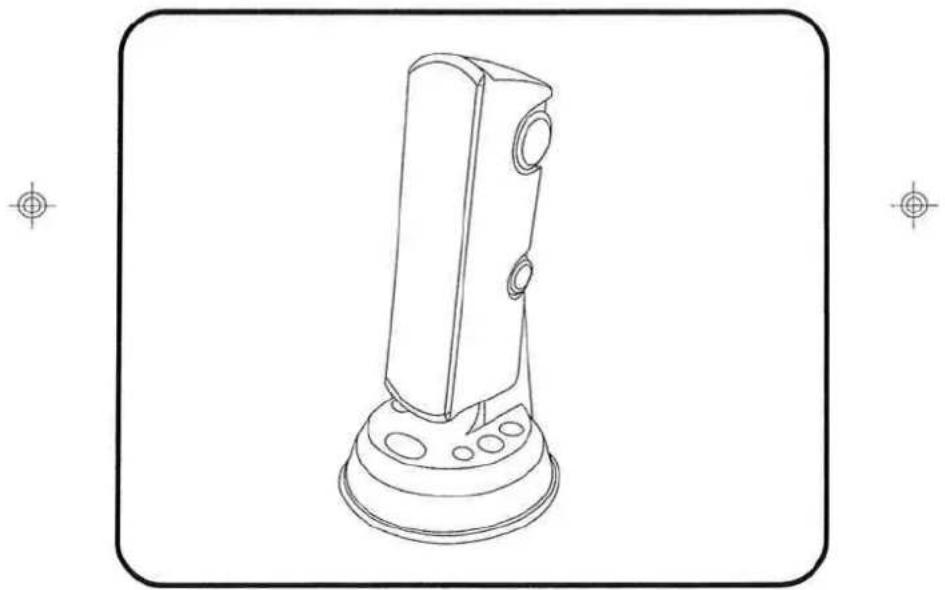
OPERATING INSTRUCTIONS

WARNINGS

ATTENTION
To reduce the risk of electric shock, do not remove the cover. There are no user serviceable parts inside the unit. Refer all servicing to qualified personnel.

The lightening flash with arrowhead symbol within the triangle is a warning sign alerting the user of "dangerous voltage" inside the unit.

The exclamation point within the triangle is a warning sign alerting the user of important instructions accompanying the product.
WARNING
To reduce the risk of fire or electric shock, do not expose this appliance to rain or moisture.
IMPORTANT
DO NOT THROW BATTERIES IN FIRE!
THE APPARATUS SHALL NOT BE EXPOSED TO DRIPPING OR SPLASHING.
ENSURE A MINIMUM DISTANCE OF 5 CM AROUND THE APPARATUS FOR SUFFICIENT VENTILATION.
ENSURE THAT THE VENTILATION IS NOT IMPEDED BY COVERING THE VENTILATION OPENINGS WITH ITEMS, SUCH AS NEWSPAPERS, TABLE-CLOTHS, CURTAINS, ETC..
DO NOT PLACE NAKED FLAME SOURCES, SUCH AS LIGHTED CANDLES ON THE APPARATUS.
TAKE ATTENTION TO THE ENVIRONMENTAL ASPECTS OF BATTERY DISPOSAL.
USE THE APPARATUS ONLY IN MODERATE CLIMATES (NOT IN TROPICAL CLIMATES).
DO NOT EXPOSE THE APPARATUS TO DRIPPING OR SPLASHING.
DO NOT PLACE OBJECTS FILLED WITH LIQUIDS, SUCH AS VASES, ON THE APPARATUS.
In case of misfunction due to electrostatic discharge the apparatus has to be reset by disconnecting it from mains supply.
GB-1

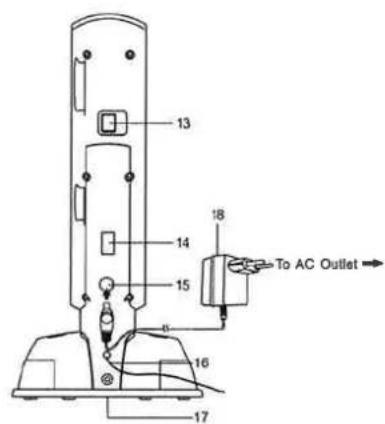
LOCATIONS OF PARTS AND CONTROLS
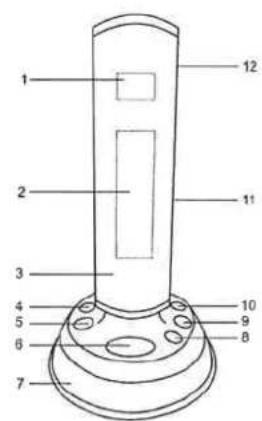

- Alarm indicator
- LED display
- Mirror lens
- Alarm set button
- Time set button
- Snooze button
- Speaker
- Sleep button
-
Minute set button
-
Hour set button
- Volume control
- Tuning control
- Band selector
- Function switch
- AC socket
- Wire Antenna
- Battery compartment
- AC adaptor

POWER SUPPLY
This unit is designed to operate with AC Adaptor (Included) as main supply. Plug one end of the AC adaptor into the AC socket, then plug the other end into AC wall inlet. The 9V type (1x006p not included) battery is used for clock back up only.
LISTEN TO THE RADIO
- Slide the Function Switch to "ON" position.
- Slide the Band Selector to FM or AM position.
- Adjust the Volume Control for a desired listening level and select your favourite station with the Tuning control.
- To turn off the radio, slide the Function Switch to "OFF" position.
TO SET THE TIME
- Press and hold the Time set button.
- Press the Hour set button to advance the hour display.
GB-2




- Press the Minute set button to advance the minute display until the correct time appears on the lime display.
- Release the Time set button. The correct time is shown on display.
TO SET THE ALARM
- Press and hold the Alarm set button while repeating step 2 and 3 described under "TO SET THE TIME" to set the desired wake-up time.
- To check the correct alarm time, press the Alarm set button.
USING THE RADIO / BUZZER ALARM
- Sel the alarm as shown in *TO SET THE ALARM*.
- Follow the procedure in "LISTEN TO THE RADIO" to tune the desired station.
- Set the Volume Control to your required listening level.
- Slide the Function Switch to "AUTO" position. The radio will turn on to wake you up at the preset time.
- To wake to the buzzer instead of the radio, set the alarm as shown in "TO SET THE ALARM". Slide the
Function Switch to "ALARM" position. The buzzer will turn on to wake you up at the preset time.
6 To turn off the radio or buzzer, slide the Function Switch to "OFF" position or press the Alarm set button.
SNOOZE FUNCTION
When the radio or buzzer sounds, press the Snooze button to switch off the alarm. Approximately 9 minutes later,
the alarm will switch on again. This snooze cycle will be activated up to 5 times within an hour period. To stop
the snooze cycle, slide the Function switch to "OFF" position or press Alarm set button.
SLEEP FUNCTION
- Set the Function Switch to "ALARM", "AUTO" or "OFF" position.
- Press the Sleep button. The clock display will show 59 minutes. The radio turns on and off automatically
after 59 minutes. - To reduce the automatic shut off time, hold down the Sleep button and press the Minute set button to adjust to the desired sleep time.
- To set the automatic play for up to 1 hour and 59 minutes, press and hold the Sleep button and press the Hour set button once. The clock will read 1 hour 59 minutes.
- To turn the radio off prior to the preset sleep time, simply press the Snooze button.
ANTENNA
The FM radio has a flexible wire antenna on the back of the unit, uncoll the wire and extend to its full length for best
reception. For AM, the radio is supplied with a built-in directional aerial, rotate the unit for the best AM reception.
SPECIFICATIONS
Power Source:
AC : 230V \~ 50Hz
DC : 9V backup (1x006P)
FM : 87.5 - 108 MH
AM : 540 - 1600 kHz
Dimension:
114(L) × 114(D) × 234(H) mm
Weight:
340g
Due to continuing improvement, the features and the design are subject to change without notice.
ADAPTOR SPECIFICATION
Input: 230V \~ 50Hz
Output: AC:9V/0.4A 3.6VA
Where to place the item
Today's furniture is coated with a wide variety of lacquers and synthetic-coatings that are treated with an extensive range of cleaning products. Therefore, the possibility that some of these substances contain components that react adversely to the rubber feet of the item and soften them, cannot be completely excluded. The rubber feet of the appliance can cause discoloring to furniture surfaces. If necessary, place the appliance on a non-slide surface.

If at any time in the future you should need to dispose of this product please note that Waste electrical products should not be disposed of with household waste. Please recycle where
facilities exist. Check with your Local Authority or retailer for recycling advice. (Waste
Electrical and Electronic Equipment Directive)
GB-3

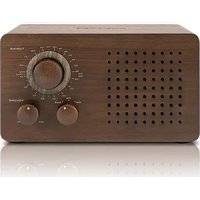


Marque : SCOTT
Modèle : CMX 95
Catégorie : Radio