
IB 772 A - Hob CATA - Free user manual and instructions
Find the device manual for free IB 772 A CATA in PDF.


| Product Type | Induction Hob |
| Brand | CATA |
| Model | IB 772 A |
| Number of Cooking Zones | 4 |
| Cooking Zone Types | Induction |
| Control Type | Touch Controls |
| Power Levels | 9 per zone |
| Timer | Yes, with automatic shut-off |
| Child Lock | Yes |
| Residual Heat Indicators | Yes |
| Automatic Shut-Off | Yes |
| Dimensions (W x D x H) | 590 mm x 520 mm x 55 mm |
| Cut-Out Dimensions | 560 mm x 490 mm |
| Weight | Approx. 8.5 kg |
| Power Supply | 220-240 V / 50-60 Hz |
| Connected Load | 7200 W |
| Installation Type | Built-in |
| Surface Material | Ceramic glass |
| Cleaning | Smooth surface, easy to clean with a damp cloth |
| Energy Efficiency Class | A+ (estimated) |
Frequently Asked Questions - IB 772 A CATA
User questions about IB 772 A CATA
0 question about this device. Answer the ones you know or ask your own.
Ask a new question about this device
Download the instructions for your Hob in PDF format for free! Find your manual IB 772 A - CATA and take your electronic device back in hand. On this page are published all the documents necessary for the use of your device. IB 772 A by CATA.
USER MANUAL IB 772 A CATA
natural_image
Simple diagram with three circles inside a rounded rectangle (no text or symbols)EN
Operating and maintenance instructions for hobs
VI
natural_image
Top-down view of a circular kitchen appliance with three circular cutouts and control buttons (no text or symbols on main diagram)ISB 603 BK
natural_image
Exterior view of a modern office building (no signage)IB 302 BK
natural_image
Two circular electronic components with mounting holes and a control panel, shown against a dark background (no text or symbols on the components themselves)IB 772
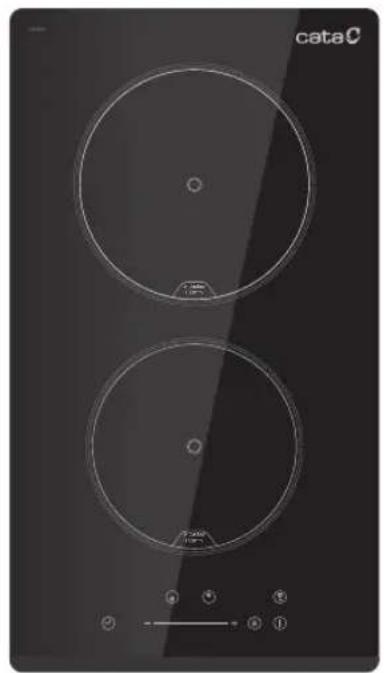
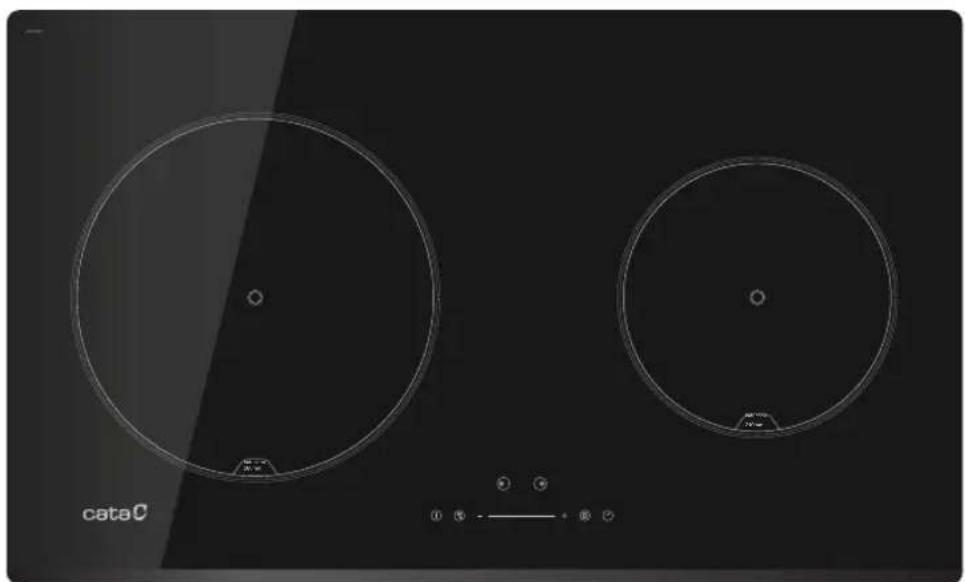
IB 302 BK /A, IB 772 /A, ISB 603 BK /A
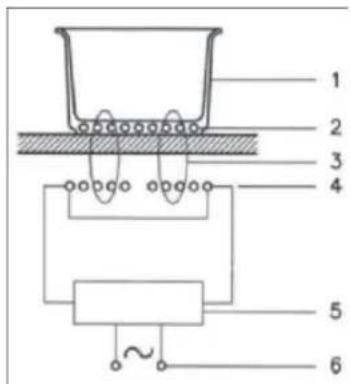
Fig.1 / Hinh 1
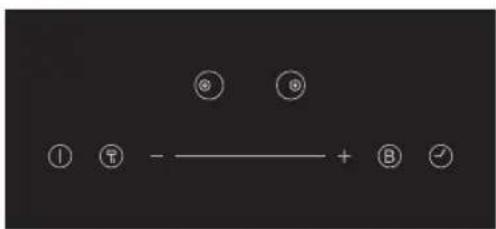
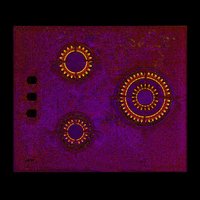
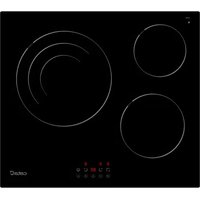
2 zones domino induction hob IB 302 BK /A 2 zones induction hob IB 772 /A
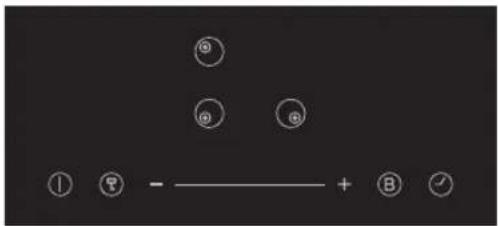
3 zones induction hob IB 603 BK /A
natural_image
Illustration of a cooking pot with an 'X' symbol above it and two upward arrows below (no text or labels)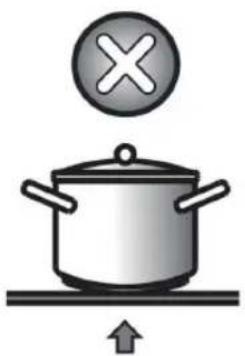
natural_image
Illustration of a cooking pot with a cooking pan and a cross symbol above it, no text or labels present.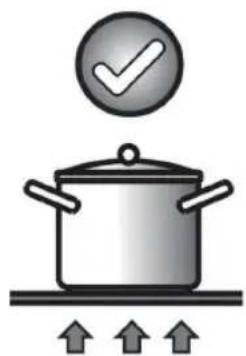
natural_image
Illustration of a cooking pot with a checkmark above it and three upward arrows below (no text or symbols)ig.4 / Hinh 4
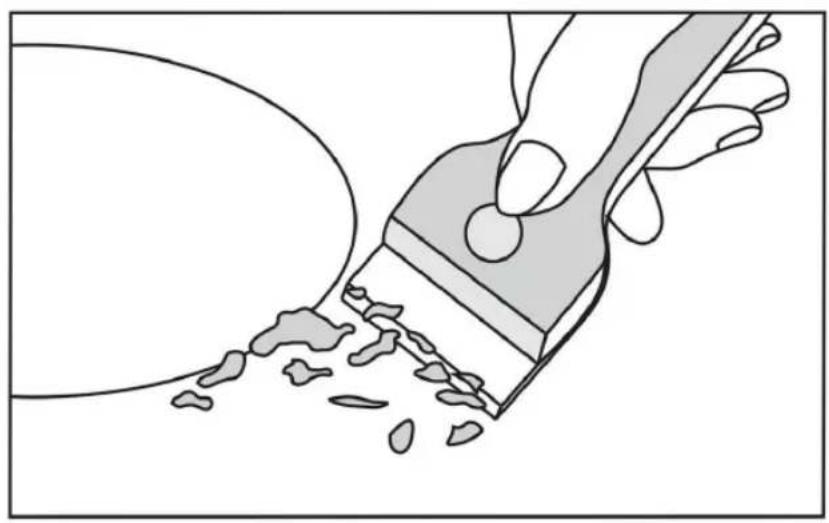
natural_image
Illustration of a hand using a paintbrush to brush residue in a bowl (no text or symbols)Fig.5 / Hinh 5
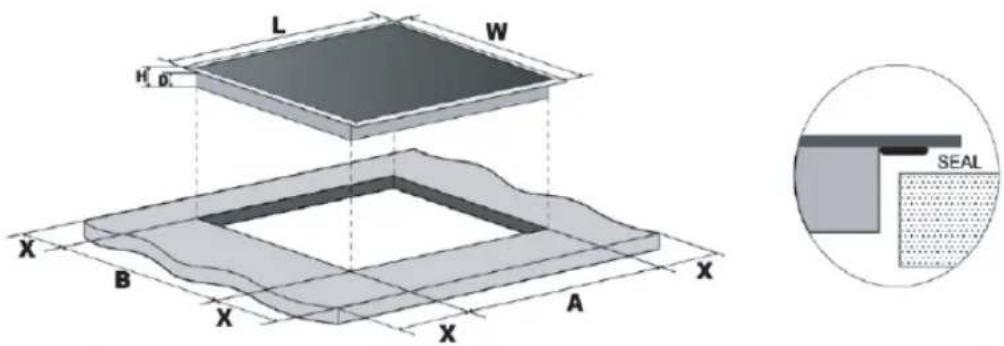
Fig.7 / Hinh 7
EN
THIS APPLIANCE IS CONCEIVED FOR DOMESTIC USE ONLY. THE MANUFACTURER SHALL NOT IN ANY WAY BE HELD RESPONSIBLE FOR WHATEVER INJURIES OR DAMAGES ARE CAUSED BY INCORRECT INSTALLATION OR BY UNSUITABLE, WRONG OR ABSURD USE
Themanufacturerdeclaresthatthisproduct meets all the essential requirements for low voltage electrical material set out in European directive 2014/35/EU and for electromagnetic compatibility as required by European directive 2014/30/EU
PRECAUTIONS
- When the hob is in use keep all magnetizable objects away(credit cards, floppy disks, calculators and so on).
- Do not use any alluminium foil or place any foodstuffs wrapped in alluminium foil directly on the hob do not place any metal objects such as knives, forks, spoons and lids on the hob surface as they will heat up.
- When cooking in anon-stick pan without seasoning, do not exceed 1-2 minutes' pre-heating time.
- When cooking food that may easily stick, startatalow power output level and then slowly increase while regularly stirring.
- After cooking is finished, switch off using the control provided (turn down to "0"), and do not rely on the pan sensor.
- If the surface of the hob is damaged, immediately disconnect the appliance from the mains to prevent the possibility of electric shock.
- Never use a steam cleaner to clean the hob.
- The appliance and accessible parts maybe hot during operation.
- Take care to avoid touching the heating elements.
- Children less than 8 years of age should be kept at a safe distance unless continuously supen/ised.
- This appliance may be used by children aged 8 or over and by persons with reduced physical, sensory
or mental capabilities or lack of experience and knowledge, if they are supervised and have received suitable instructions on safe use of the appliance and understand the dangers involved. Children must not play with the appliance. User maintenance and cleaning should not be carried out by children except under constant supervision.
- Cooking with grease or oil may be dangerous and cause a fire if left unattended. NEVER try to extinguish a fire with water. Rather, disconnect the appliance and then cover the flames with a cover or sheet, for example.
- Fire hazard: do not store elements on
- Cooking surfaces.
- Only counter top protectors designed for use with the cooking appliance and listed in the manufacturer's instructions should be used as suitable protection for the counter top incorporated in the appliance. Use of unsuitable protectors may cause accidents.
WARNING Accessible parts will become hot when in use. To avoid burns and scalds children should be kept away.
Insert in the fixed wiring a mean for disconnection from the supply mains having a contact separation in all poles that provide full disconnection under over-voltage category III conditions, in accordance with the wiring rules. The plug or omnipolar switch must be easily reached on the installed equipment.
This appliance is not intended to be used via an external time or a remote control system.
The manufacturers decline any responsibility in the event of non-compliance with what is described above and the accident prevention norms not being respected and followed.
To avoid all RISK, if the power cable BECOMES damaged, it MUST only be replaced by the manufacturer, by an AUTHORISED SERVICE centre, or by a qualified electrician.
OPERATING PRINCIPLE (Fig. 1)
It exploits the electromagnetic properties of most cooking vessels.
The coil (inducto) which produces the electromagnetic field is operated and controlled by the electronic circuit.
The heat is transmitted to food by the cooking vessel itself. The cooking process takes place as described below.
- Loss of heat is minimum (high efficiency)
- The system stops automatically when the vessel is removed oeven just lifted from the hob
- The electronic circuit guarantees maximum flexibility and fine adjustments.
(Fig.1)
1 Vessel
2 Induced cuent
3 Magnetic field
4 Inductor
5 Electronic circuit
6 Power supply
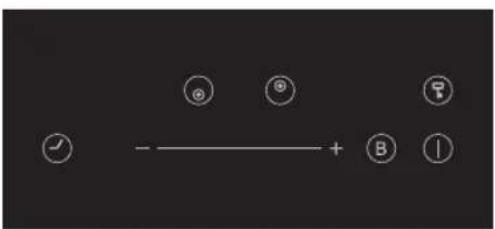
| Reference Description | ||
A Zone select ke  | ||
B Child lock key  | ||
C ON/OFF key  | ||
D Power/Timer slider regulating key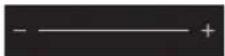 | ||
E Boost control I  | ||
F Timer key  | ||
Installation
All operations relative to installation (electric connection) should be carried out by skilled personnel in conformity with the rules in force. As for the specific instructions see part pertaining to installer.
Using your Induction Hob To start cooking
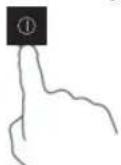
- Touch the ON/OFF control.
After power on, the buzzer beeps once all displays show “-”, indicating that the induction hob has entered the state of standby mode.
-
Place a suitable pan on the cooking zone that you wish to use.
-
Make sure the bottom of the pan and the surface. Of the cooking zone are clean and dry.
- According to the heating zone where the pan is placed, select a relevant zone select key by pressing
"Key (A). The symbol 0. selected will stay fully it.
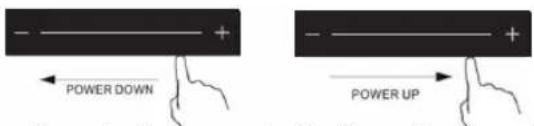
- Adjust heat setting by touching the slider regulating key(D) control.
- If you don't choose a heat setting within 1 minute, the Induction hob will auto turn off
- You can modify the heat setting at any time during cooking.
If the display flashes ⚡ alternately with heat setting
This means that:
- You have not placed a pan on the correct cooking zone or.
- The pan you're using is not suitable for induction cooking or.
- The pan is too small or not properly centred on the cooking zone. No heating takes place unless there is a suitable pan on the cooking zone. The display will automatically turn off after 1 minutes if no suitable pan is placed on it.
When you have finished cooking
- Touching the relevant zone select key(A) that you wish to switch off.
- Press the slider regulating key(D) control to "0" level,
- Beware of hot surfaces
"H" will show which cooking zone is hot to touch. It will disappear when the surface has cooled down to a safe temperature. It can also be used as an energy saving function if you want to heat further pans, use the hotplate that is still hot
Using the Boost function Activated the boost function
- Select the heating zone by touching the zone select key (A)
- Touching the boost control key(E) zone, the indicator show "P." and the power reach Max
Cancel the Boost function
- Touching the relevant zone select key(A) that you wish to cancel.
- Touching the slider regulating key(D) to cancel the Boost function, then the cooking zone will revert to level 9.
- The function can work in any cooking zone.
- The cooking zone returns to level 9 after 5 minutes.
Using Child Lock Function
- You can lock the controls to prevent unintended use (for example children accidentally turning the cooking zones on).
- When the controls are locked, all the controls except the OFF control are disabled.
To lock the controls
Touch the keylock control for 3 seconds. The timer indicator will show "Lo"
To unlock the controls
-
Make sure the Induction hob is turned on.
-
Touch and hold the keylock control for a while
-
You can now start using your Induction hob.

When the hob is in the lock mode, all the
controls are disable except OFF, you can always turn the hob off with the OFF control in an emergency, but you shall unlock the hob first in the next operation.
Over-Temperature Protection
A temperature sensor equipped can monitor the temperature inside the Induction hob. When an excessive temperature is monitored, the Induction hob will stop operation automatically.
Detection of Small Articles
When an unsuitable size or non-magnetic pan (e.g. aluminium), or some other small item (e.g. knife, fork, key) has been left on the hob, the hob automatically go on to standby in 1 minute. The fan will keep cooking down the induction hob for a further 1 minute.
Auto Shutdown Protection
Auto shut down is a safety protection function for your induction hob. It shut down automatically if ever you forget to turn off your cooking. The default working times for various power levels are shown in the below table
| Power level | 1~3 | 4~6 | 7~8 | 9 |
| Default working timer (min) | 240 | 180 | 120 | 90 |
When the pot is removed, the induction hob can stop heating immediately and the hob automatically switch off after 2 minute.

People with a heart pace maker should consult with their doctor before using this unit.
Using the Timer
You can use the timer in two different ways:
- You can use it as a minute minder. In this case, the timer will not turn any cooking zone off when the set time is up.
- You can set it to turn one cooking zone off after the set time is up.
- You can set the timer for up to 99 minutes.
Using the Timer as a Minute Minder
If you are not selecting any cooking zone
- Make sure the cooktop is turned on.
Note: you can use the minute minder even if you're not selecting any cooking zone.
- Touch the Timer key(F). The minder indicator will start flashing "10", and you can set the timer at this point.

- Using the “+r” “b-ons, you can realize the setting of timing from 1 to 99 minutes.
Hint: Touch the “-or” control of the timer once to decrease or increase by 1 minute.
Touch and hold the "−r" control of the timer to decrease or increase by 10 minutes.
Touching the “-nd” “t+ether, the timer is cancelled, and the. timer indicator will turn off.
-
When the time is set, it will begin to count down immediately. The display will show the remaining time.
-
Buzzer will bips for 30 seconds and the timer indicator will turn off when the setting time finished.
Note: minute minder only work at normal model. Setting the timer to turn one or more cooking zones off
If the timer is set on one zone:
- Select the relevant cooking zone which is working
by touching the zone select key (A)
- Press the Timer key(F), the minder indicator will start flashing "10", and you can set the timer at this point.

- Using the “+r” buttons, you can realize the setting of timing from 1 to 99 minutes.
Hint: Touch the “- or “” control of the timer once to decrease or increase by 1 minute.
Touch and hold the “—” control of the timer to decrease or increase by 10 minutes.
Touching the “-nd” to+ether, the timer is cancelled, and the. timer indicator will turn off.
- When the time is set, it will begin to count down immediately. The display will show the remaining time and the timer indicator flash for 5 seconds.

NOTE: The red dot next to power level indicator will illuminate indicating that zone is selected.
- When cooking timer expires, the corresponding cooking zone will be switch off automatically. Other cooking zone will keep operating if they are turned on previously.
- when using "the timer as an alarm" and "the timer to switch off the zones" together, the display will show the remaining time of alarm as first priority. Press cooking zone to show the remaining time of switch off timer.
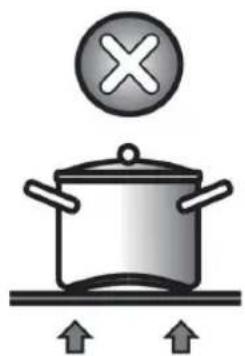
Cooking vessels (Fig. 4)
- A magnet-attracting vessel may be a suitable vessel for induction cooking
- Prefer vessels which are especially declaed to be suitable foinduction cooking
- Flat- and thickbottomed vessels
- A vessel with the same diameter as zones ensures the maximum exploitation of power
- A smaller vessel reduces power exploitation, but does not cause any energy loss we would anyhow not recommend the use of vessels with diameters smaller than 10 cm.
- Stainless-steel vessels with multi-layer or ferritic stainless-steel bottoms when specifically suited for induction cooking
- Cast-iron preferably enamel-bottomed vessels to avoid scatchmg the pyroceram surface
- We do not recommend the use of any glass, ceramic, earthenware, alluminium, coppe 0 non-magnetic (austenitic) stainlesssteel vessels
Maintenance (Fig. 5)
By means of a scaper immediately remove any alluminium foil bits, food spills, grease splashes, sugar maks and other high sugar content food from the surface in order to avoid damaging the hob. Subsequently clean the surface with some towel and appropriate product, rinse with water and dry by means of a clean cloth. Under no circumstance should sponges or abrasive cloths be used; also avoid using aggressive chemical detegents such as oven sprays and spot emovers.
Installe's Instructions Installation
These Instructions are for the qualified technician, as a guide to installation, adjustment and maintenance, according to the laws and standards in force. These operations must always be carried out when the appliance has been disconnected from the electric system
Positioning (Fig. 6)
The fixtu is especially designed to fitting into a wok-top as shown in the corresponding figure. Place the supplied sealing agent along the hob perimeter
Do not install the hob over an oven; in case you do, make sure of the following:
the oven is equipped with an app opriate cooling system there is no wam-ai leakage from the oven towards the hob suitable air-inlets are povided as shown in the figure.
Electrical connection (Fig. 7)
Prior to caying out the electrical connection, please ensure that: the plant characteristics are such as to follow what is indicated on the matrix plate placed at the bottom of the working area; that the plant is fitted with an efficient earth connection, following the standards and law provisions in force.
The earth connection is compulsoy in terms of the law.
Should there be no cable and/or plug on the equipment, use suitable absorption material for the working temperature as well, as indicated on the matrix plate. Under no circumstance must the cable reach a temperature above 50°C of the ambient temperature

THIẾT BỊ NÀY CHỈ SỬ DỤNG TRONG GIA ĐÌNH. NHÀ SẢN XUẤT SỀ KHÔNG CHIU TRÁCH NHIỂM VÊ THƯƠNG TÍCH HOẶC THIẾT HAI NẢO DO LẤP ĐẶT HOẶC SỬ DUNG SAI CẮCH.
Touch and hold the “--” control of the timer to decrease or increase by 10 minutes.
- EN
- THIS APPLIANCE IS CONCEIVED FOR DOMESTIC USE ONLY. THE MANUFACTURER SHALL NOT IN ANY WAY BE HELD RESPONSIBLE FOR WHATEVER INJURIES OR DAMAGES ARE CAUSED BY INCORRECT INSTALLATION OR BY UNSUITABLE, WRONG OR ABSURD USE
- PRECAUTIONS
- OPERATING PRINCIPLE (Fig. 1)
- Installation
- Using your Induction Hob To start cooking
- If the display flashes ⚡ alternately with heat setting
- When you have finished cooking
- Using the Boost function Activated the boost function
- Cancel the Boost function
- Using Child Lock Function
- To lock the controls
- To unlock the controls
- Over-Temperature Protection
- Detection of Small Articles
- Auto Shutdown Protection
- Using the Timer as a Minute Minder
- If the timer is set on one zone:
- Cooking vessels (Fig. 4)
- Maintenance (Fig. 5)
- Installe's Instructions Installation
- Positioning (Fig. 6)
- Electrical connection (Fig. 7)
- THIẾT BỊ NÀY CHỈ SỬ DỤNG TRONG GIA ĐÌNH. NHÀ SẢN XUẤT SỀ KHÔNG CHIU TRÁCH NHIỂM VÊ THƯƠNG TÍCH HOẶC THIẾT HAI NẢO DO LẤP ĐẶT HOẶC SỬ DUNG SAI CẮCH.
Brand : CATA
Model : IB 772 A
Category : Hob