
KEW 2210R - Multimeter Kyoritsu - Free user manual and instructions
Find the device manual for free KEW 2210R Kyoritsu in PDF.


| Product Type | Digital Clamp Meter (Multimeter) |
| Brand | Kyoritsu |
| Model | KEW 2210R |
| Category | Multimeter |
| Dimensions | Approx. 250 x 115 x 55 mm |
| Weight | Approx. 550 g (including batteries) |
| Power Supply | Two AA batteries (1.5V each) |
| Display | LCD, 6000 counts with backlight |
| AC Voltage Range | 0 to 600V AC (auto-ranging) |
| DC Voltage Range | 0 to 600V DC (auto-ranging) |
| AC Current (Clamp) | 0 to 600A AC |
| Resistance | 0 to 60 MOhms |
| Continuity Test | Built-in buzzer (< 50 Ohms) |
| Diode Test | Yes |
| Frequency Measurement | Up to 10 kHz |
| Safety Rating | CAT III 600V, CAT II 1000V |
| Clamp Opening | Approx. 40 mm |
| Auto Power Off | Yes (after approx. 30 minutes) |
| Data Hold | Yes |
| Low Battery Indication | Yes |
| Operating Temperature | 0°C to 40°C (32°F to 104°F) |
| Storage Temperature | -10°C to 50°C (14°F to 122°F) |
| Accessories Included | Test leads, carrying case, batteries, manual |
| Cleaning Instructions | Wipe with dry cloth; do not use solvents |
Frequently Asked Questions - KEW 2210R Kyoritsu
User questions about KEW 2210R Kyoritsu
0 question about this device. Answer the ones you know or ask your own.
Ask a new question about this device
Download the instructions for your Multimeter in PDF format for free! Find your manual KEW 2210R - Kyoritsu and take your electronic device back in hand. On this page are published all the documents necessary for the use of your device. KEW 2210R by Kyoritsu.
USER MANUAL KEW 2210R Kyoritsu
FLEXIBLE CLAMP METE
KEW 2210R

This instrument has been designed, manufactured and tested according to IEC 61010: Safety requirements for Electronic measuring apparatus, and delivered in the best condition after passed the inspection. This instruction manual contains warnings and safety rules which must be observed by the user to ensure safe operation of the instrument and retain it in safe condition. Therefore e, read through these operating instructions before using the instrument.
WARNING
- Read through and understand the instructions contained in this manual before starting to use the instrument.
- Keep the manual at hand to enable quick reference whenever necessary.
● The instrument is to be used only in its intended applications. ● Understand and follow all the safety instructions contained in the
manual. It is essential that the above instructions are adhered to. Failure to follow the above instructions may impair the protection provided by the instrument, and may cause injury, instrument damage and/or damage to the equipment under test.
The symbol △ indicated on the instrument means that the user must refer to the related parts in the manual for safe operation of the instrument. It is essential to read the instructions wherever the symbol △ appears in the manual.
△ DANGER is reserved for conditions and actions that are likely to cause serious or fatal injury.
⚠ WARNING is reserved for conditions and actions that can cause
serious or fatal injury. △ CAUTION is reserved for conditions and actions that can cause
injury or instrument damage.
△ DANGER
● Never make measurement on a circuit in the following categories; Measurement category IV(CAT IV):over 600V
Measurement category IV(CAT IV):over 1000V ● Do not attempt to make measurement in the presence of
● DO NOT attempt to make measurement in the presence of flammable gasses. Otherwise, the use of the instrument may
cause sparking, which can lead to an explosion. ● Never attempt to use the instrument if its surface or your hand is wet.
- Do not exceed the maximum allowable input of any measuring ranges. - Never open the Battery compartment cover during a measurement.
● To avoid getting electrical shock by touching the equipment under test or its surroundings, be sure to wear insulated protective gears.
● Never attempt to make any measurements if the instrument has any structural abnormalities, such as a crack, or if the cover is not
any structural abnormalities, such as a crack, or if the cover is not securely attached.
● The instrument should be used only in its intended application or conditions. Otherwise, safety functions equipped with the
instrument do not work, and instrument damage or serious personal injury may be caused.
WARNING
● Never attempt to make measurement if any abnormal conditions, such as broken case and exposed metal parts are found on the instrument or cables.
- Verify proper operation on a known source before starting to use the instrument or taking action as a result of the indication of the instrument.
- Do not install substitute parts or make any modifications to the instrument. Return the instrument to your local KYORITSU distributor for repair or re-calibration in case of suspected faulty operation.
● Do not try to replace the batteries if the surface of the instrument is wet.
● Ensure that the Clamp sensor is disconnected from the object under test, and that the instrument is powered off when opening the Battery compartment cover for battery replacement.
CAUTION
● This instrument is designed for residential, commercial or light industry applications. Accurate results may not be obtained if
equipments generating strong electromagnetic interferences or strong magnetic fields due to large currents exist in the
neighborhood. ● Set the Function switch to the appropriate position before starting
measurement.
- This instrument isn’t water proofed. Keepaway from water. - Be sure to never off the instrument after use. Remove the
- Be sure to power off the instrument after use. Remove the batteries if the instrument is to be stored and will not be in use for
● Do not expose the instrument to direct sunlight, high
temperatures, humidity or dew. ● Use a damp cloth with water or neutral detergent for cleaning the
- Use a damp cloth with water or hazardous detergent for cleaning the instrument. Do not use abrasives or solvents.
- Marks listed below are used on this instrument.
User must refer to the explanations in the instruction
manual.
Instrument with double or reinforced insulation.
Must wear insulated gears such as a pair of rubber gloves
when connecting / disconnecting the sensor to / from live conductors.
\~ AC
Crossed-out wheel bin symbol (according to WEEE
Directive: 2002/96/EC) indicating that this electrical product may not be treated as household waste, but that it must be
- may not be treated as household waste, but that it must be collected and treated separately.
● Measurement categories(Over-voltage categories)
To ensure safe operation of measuring instruments, IEC 61010 establishes safety standards for various electrical environments.
categorized as O to CAT IV, and called measurement categories.
Higher-numbered categories correspond to electrical environments with greater momentary energy, so a measuring instrument designed for CAT III environments can endure greater momentary energy than one designed for CAT II.
O : Circuits which are not directly connected to the mains power
supply. CAT II : Electrical circuits of equipment connected to an AC electrical
outlet by a power cord. CAT III : Primary electrical circuits of the equipment connected directly
to the distribution panel, and feeders from the distribution panel to outlets.
CAT IV: The circuit from the service drop to the service entrance, and
to the power meter and primary overcurrent protection device (distribution panel).

2. Features
● Flexible and light weight Sensor with air core coil
● Wide measuring ranges up to 3000A (30A/ 300A/ 3000A)
●True-RMS readings ●Data held function
● Data hold function ● MIN MAX function
● Auto-power-off function
- Designed to meet the following safety standard:
3. Specification
● Measuring range and accuracy(23°C±5°C, RH 80% or less)
AC current
| Range | Display range | Accuracy guaranteed range | Accuracy |
| 30A 0 | 00 - 31.49A 1.50 | - 30.00A | ±3%rdg+5dgt(45 – 500Hz)(At the center of the circle formed by the flexible sensor.) |
| 300A 0 | 0 - 314.9A 15.0 | - 300.0A | |
| 3000A 0 | - 3149A | 150 - 3000A |
Crest factor (CF): Full scale CF < 1.6, half scale CF < 3.2.
Effective input crest values are 2 times of the max values of each range.
● Influence of Conductor position
Measurement accuracy is guaranteed when the measured object is placed at the center of the clamp sensor.
The following errors should be considered and added to the
accuracy depending on the distance from the center position.
| Distance from the center | Errors to be considered |
| Radius 25 mm (ø50) | ±1.0% |
| Radius 50 mm (ø100) | ±2.0% |
| Radius 75 mm (ø150) | ±3.0% |
Applicable standards IEC61010-1, IEC61010-2-030
CAT III 1000V / CAT IV 600V Pollution degree 2
IEC61010-2-032, IEC61326-1(EMC)
In-door use, altitude 2000m or less
24: +50
0 to +50 C RMB0% or less (no condensation)
-10 to +60°C RH70% or less (no condensation)
Size AAA battery x 2 pcs
(The use of alkaline LR03 is recommended.)
Approx. 120 hours continuous (with Backlight off)
appears to 2.3V or less
Power off function operates in 15 min, after the
last switch operation.
AC 5000A for 10 sec.
Add 0.1 x specified accuracy, (above 280G as below 480G)
(above 28°C of bet AG8200V for 5 sec
(between clamp sensor and enclosure)
100MΩ or more/ 1000V
(between clamp sensor and enclosure)
Max. 4150mm 130J x700Wx2
120(L)x70(W)x20(H)min Approx. 300g (including
Approx. 1.8m(between clamp sensor and main
unit)
Carrying case MODEL9174 x 1 pce Size AAA battery x 2 pce
Size AAA battery x 2 pcs Instruction manual x 1 pcs
DISTRIBUTOR
Kyoritsu reserves the rights to change specifications or designs described in this manual without notice and without obligations.

5. Getting started
(1) Checking battery voltage
(1) Blocking battery voltage Set the Function switch to any position other than the OFF position. When the indications on the display are clearly legible and the "→" mark is not on, the battery voltage is OK.
If the display is blank or ☐* mark is on, replace the batteries according to Section 8: Battery Replacement
according to Section 8. Battery Replacement.
CAUTION ● When the instrument is left powered on, the Auto-power-off function automatically shuts the power off; the display will be blank even if the Function switch is set to any positions other than the OFF position in this state.
To power on the instrument, rotate the Function switch or press any of the buttons. If the display is still blank, the batteries are exhausted.
Replace the batteries with the new ones.
(2) Checking Function switch position
Set the Function switch to the appropriate range according to the measurement purpose. Confirm that the Data hold function is not activating.
6. Operating instructions
DANGER
● Never make measurement on a circuit in the following categories;
CAT IV over 600V
CAT III over 1000V ● Never open the
● Never open measurement
● To avoid getting electrical shock by touching the equipment under
test or its surroundings, be sure to wear insulated protective gear.
years
(1) Disconnect the Joint
connector according to
the illustration to the right

(2) Clamp onto one conductor under the test, and re-connect the Joint
connector. Hold the conductor at the center of the Clamp sensor (2). Confirm that the joint connector on the Clamp sensor is firmly
(3) Confirm that the Joint connector on the Clamp sensor is firmly connected.
connected
● Jointed part of the Clamp sensor may be disconnected if excessive
force is applied to.
- Clamp onto one conductor only; measurements cannot be made when clamping single-phase (2-wire) or three-phase (3-wire) at the same time.

7. Other functions
7.1 Auto Washington, 45th inst
This function is to prevent the battery from being exhausted by the
instrument being unintentionally left on.
The instrument automatically shifts to the power-off state about 15 min after the last Function switch or other switch operation.
To exit from the Auto-power-off status press any button or set the
Function switch to the OFF position once, and then set it to the
desired range.
mark is displayed on the LCD when the Auto-power-off function is enabled.
[To cancel the Auto-power-off function]
To cancel the Auto-power-off function, hold down the Data hold
button and turn the Function switch from OFF position to any other position
While this fun
LCD.
[To enable the Auto-power-off function again]
Turn the Function switch to the OFF, and then set it to any position.
7-2 Data hold function
This is a function to hold measured values on the display.
Press the Data hold button once to hold the current reading. In this
data hold state, the reading is held even if input varies. The "HOLD"
mark appears button again
7-3 Backlight function
Press the Backlight button and turn on/ off the LCD backlight. The
backlight is automatically turned off in 30 sec.
7-4 MIN MAX function
Displayed values can be toggled in the following sequence by
pressing the MIN MAX button.
Maximum value ("MAX" appears) - Minimum value ("MIN"
Maximum Value ("MAX" appears) - Minimum Value ("MIN" appears) - Present measured value ("MAX MIN" blinks)
Maximum value ("MAX" appears) -.
To disable this function, hold down the MIN MAX button at least 2
sec or rotate the Function switch.
8. Battery Replacement
A PANGER
Do not try to replace the batteries if the surface of the instrument
is wet.
- Ensure that the Clamp sensor is disconnected from the object under test, and that the instrument is powered off when opening
under test, and that the instrument is powered on when opening the Battery compartment cover for battery replacement
● Never open the Battery compartment cover while making
measurement
CAUTION
- Do not mix new and old batteries or mix different types of batteries.
● Install batteries in correct polarity as marked inside.
Replace batteries with the new ones when the empty battery mark is displayed on the LCD. The LCD does not show anything even the empty battery mark, when the batteries are completely exhausted.
[How to replace batteries]
(1) Power off the instrumen
(2) Loosen the screw at the backside
of the instrument and remove the Battery compartment cover.
(3) Remove all the old batteries and
install new ones, two size AAA
batteries, in correct polarity. The
use of alkaline recommended
(4) Reattach the Battery compartment
cover and tighten the screw

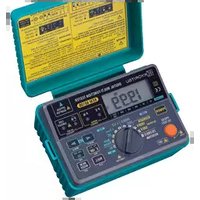
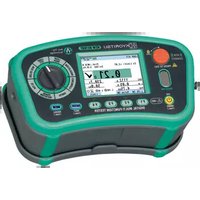
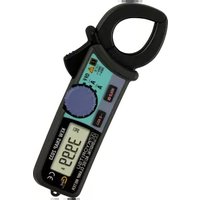
Brand : Kyoritsu
Model : KEW 2210R
Category : Multimeter