
MAM060CPBPBH - Ventilateur domestique MIDEA - Free user manual and instructions
Find the device manual for free MAM060CPBPBH MIDEA in PDF.


| Brand | Midea |
| Model | MAM060CPBPBH |
| Category | 2-in-1 Fan Purifier |
| Working Voltage | 24V --- |
| Rated Power | 33 W |
| Noise Level | ≤ 61 dB |
| Adapter Input | 100-240V~ 50/60Hz 1.5A |
| Adapter Output | 24V 1.5A |
| Filter Model (Replacement) | FQ150CJ-2 (2 pieces) |
| Wind Modes | Normal, Plasmacluster (Ion), Sleep, AI Smart |
| Wind Speed Levels | 10 levels (1-10) |
| Oscillation | Yes (Swing function) |
| Timer | 1-12 hours (Off at 0h) |
| Remote Control Range | Up to 5 meters, within 30° angle |
| Battery Type (Remote) | AAA 1.5V alkaline or manganese (not rechargeable) |
| Forced Shutdown | After 15 hours of continuous operation |
| Intelligent Memory | Restores previous settings (except timer) after power off |
| Screen-Off Function | Display turns off after 30 seconds of inactivity |
| Filter Cleaning Interval | Every 2 weeks (recommended) |
| Filter Replacement Interval | Every 6 months (adjustable based on environment) |
| Safety Features | Overheat protection? Not specified; child lock? Not specified, but supervision advised for children under 8 |
Frequently Asked Questions - MAM060CPBPBH MIDEA
User questions about MAM060CPBPBH MIDEA
0 question about this device. Answer the ones you know or ask your own.
Ask a new question about this device
Download the instructions for your Ventilateur domestique in PDF format for free! Find your manual MAM060CPBPBH - MIDEA and take your electronic device back in hand. On this page are published all the documents necessary for the use of your device. MAM060CPBPBH by MIDEA.
USER MANUAL MAM060CPBPBH MIDEA
natural_image
Technical line drawing of a vertical cylindrical device with a rectangular top and base (no text or symbols)2 IN 1 FAN PURIFIER
USER MANUAL
MAM060CPBPBH
Warning notices: Before using this product, please read this manual carefully and keep it for future reference.
The design and specifications are subject to change without prior notice for product improvement.
Consult with your dealer or manufacturer for details.
The diagram above is just for reference. Please take the appearance of the actual product as the standard.
THANK YOU LETTER
Thank you for choosing Midea! Before using your new Midea product, please read this manual thoroughly to ensure that you know how to operate the features and functions that your new appliance offers in a safe way.
CONTENTS
THANK YOU LETTER 01
SAFETY INSTRUCTIONS 02
SPECIFICATIONS 05
PRODUCT OVERVIEW 06
PRODUCT INSTALLATION 07
OPERATION INSTRUCTIONS 09
CLEANING AND MAINTENANCE 11
TROUBLESHOOTING 13
TRADEMARKS, COPYRIGHTS AND LEGAL STATEMENT 14
DATA PROTECTION NOTICE 15
WARRANTY CARD 16
SAFETY INSTRUCTIONS
Intended Use
The following safety guidelines are intended to prevent unforeseen risks or damage from unsafe or incorrect operation of the appliance. Please check the packaging and appliance on arrival to make sure everything is intact to ensure safe operation. If you find a damage, please contact the retailer or dealer. Please note that for alterations to the appliance are not allowed for your safety concern. Unintended use may cause hazards and loss of warranty claims.
Explanation of Symbols

Danger
This symbol indicates that there are dangers to the life and health of persons due to extremely flammable gas.

Warning of electrical voltage
This symbol indicates that there is a danger to life and health of persons due to voltage.

Warning
The signal word indicates a hazard with a medium level of risk which, if not avoided, may result in death or serious injury.

Caution
The signal word indicates a hazard with a low degree of risk which, if not avoided, may result in minor or moderate injury.

Attention
The signal word indicates important information (e.g. damage to property), but not danger.

Observe instructions
This symbol indicates that a service technician should only operate and maintain this appliance in accordance with the operating instructions.
Read these operating instructions carefully and attentively before using/commissioning the unit and keep them in the immediate vicinity of the installation site or unit for later use!
Caution
- Read rules for safe operation and instructions carefully.
- This appliance can be used by children aged from 8 years and above and persons with reduced physical, sensory or mental capabilities or lack of experience and knowledge if they have been given supervision or instruction concerning use of the appliance in a safe way and understand the hazards involved. Children shall not play with the appliance. Cleaning and usermaintenance shall not be made by children without supervision.
- Never insert fingers, pencils, or any other object through the grille when fan is running.
- Disconnect fan when moving from one location to another.
- Be sure fan is on a stable surface when operating to avoid overturning.
- Keep electrical appliances out of reach from children or infirm persons. Do not let them use the appliances without supervision.
• Household use only.
Warning
• If the supply cord is damaged, it must be replaced by manufacturer or its service agent or a similarly qualified person in order to avoid a hazard.
• To protect against the risk of electrical shock, do not immerse the unit, cord or plug in water or other liquid.
- When the appliance is not in use and before cleaning, unplug the appliance from the outlet.
- Ensure that the fan is switched off from the supply mains before removing the guard.
- The appliance is only to be used with the power supply unit provided with the appliance.
- When the fan was assembled, the rotor blade guard shall not be taken off anymore.
- Prior cleaning unplug the fan.
- The rotor guard shall not be dissembled/opened to clean the rotor blades.
- Wipe the fan enclosure and rotor blade guard with a slightly damp cloth.
SPECIFICATIONS
| MAM060CPBPBHProduct Model | |
| Working Voltage | 24V --- |
| Rated power | 33 W |
| Noise | ≤slant 61dB |
| Parts | Adapter |
| Input | 100-240V~ 50/60Hz 1.5A |
| Output | 24 V 1.5A |
PRODUCT OVERVIEW
Component Name
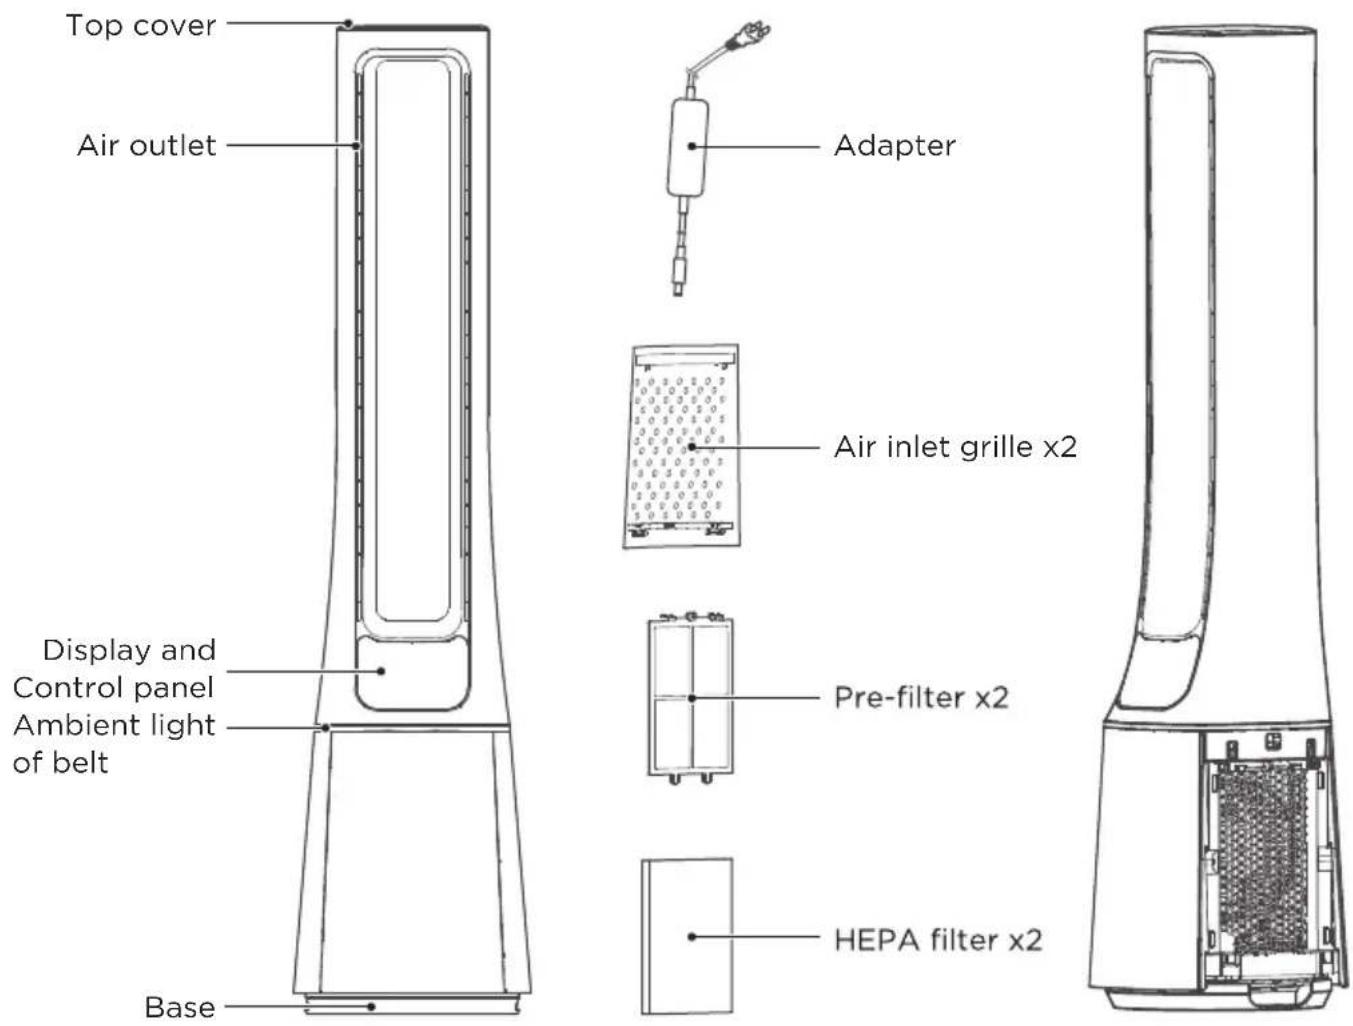
Parts List
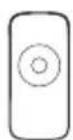
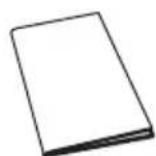
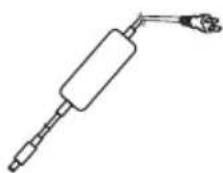
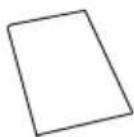
Manual x1 Warranty cardpRemote control x1

NOTE
All the pictures in this manual are for explanation purpose only. Any discrepancy between the real object and the illustration in the drawing shall be subject to the real subject.
PRODUCT INSTALLATION
Installation Procedures
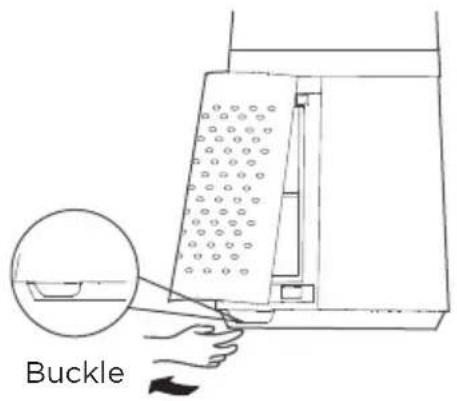
1 Remove the air inlet grille. 2
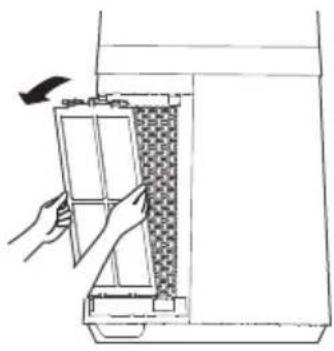
Take out the pre-filter.
Press the raised part on both sides to pull it outwards, and take out the pre-filter.
natural_image
Line drawing of a hand inserting a component into a device with a checkered pattern (no text or symbols)3
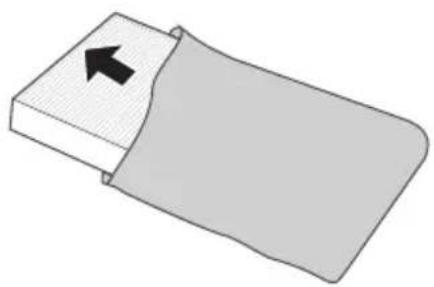
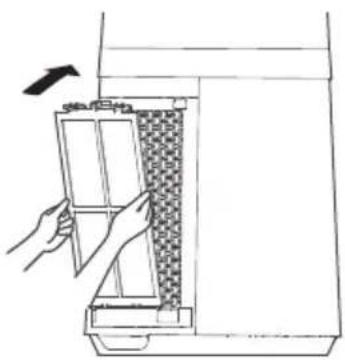
4 Install the HEPA filter.Remove the protective film
natural_image
Simple 3D diagram of a rectangular block with a curved arrow pointing to its top surface, no text or symbols present.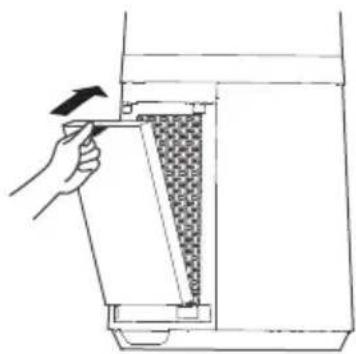
natural_image
Diagram of a hand inserting a component into a container with a checkered pattern (no text or symbols)5 Install the pre-filter.
Align the slot position at the bottom, and buckle up the upper U-shaped buckle.
6 Install the air inlet grille.
Align the upper two buckles and press them tightly, then press the two sides at lower part, slowly and gently buckle the air inlet grille.
natural_image
Line drawing of a hand opening a rectangular device with a textured internal panel (no text or symbols)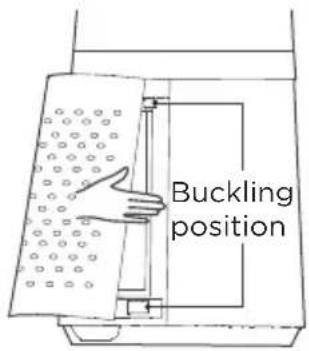
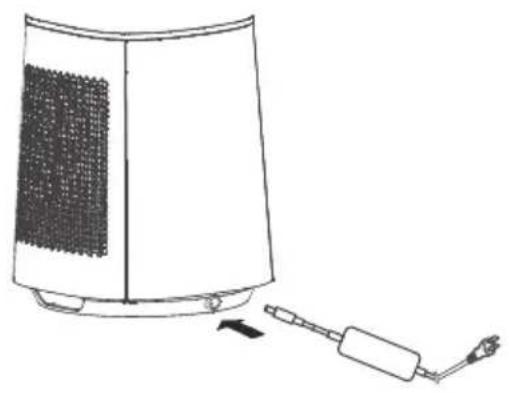
7 Install the adapter, Tighten the plug with the socket position of the base.
8 Plug power supply.
natural_image
Line drawing of a portable air purifier with a connecting plug and cable, no text or symbols present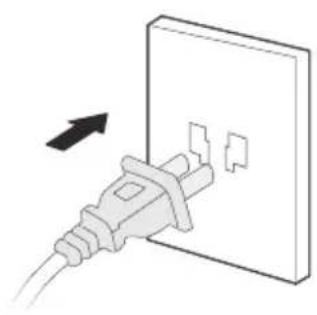
natural_image
Illustration of a plug inserted into an open electrical outlet, showing internal components and wiring (no text or symbols)- It is recommended to clean the filter once every two weeks and replace it once every six months (the cleaning and replacement cycle can be adjusted according to the use environment).
OPERATION INSTRUCTIONS
Control Panel Operations
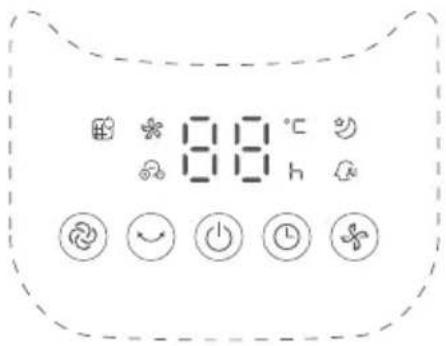
| Function description | |
 | Startup/Standby. |
 | Touch this button to switch the wind mode among normal, plasmcluster, sleep and AI smart. (When the filter replacement reminder light is on, press and hold this button to turn off the reminder light) |
 | Touch this button to start/stop the swing. |
 | Touch this button to switch the wind speed (cycles among level 1-2-3-···-10-1-2). |
 | Schedule to shut down in the power-on state, and schedule to start up in the standby state;Touch this button to set the timer (the display cycles among 0-1-2-···-12-Oh); Oh means that the timer is canceled. |
 | Filter replacement reminder icon; when the icon “” stays on, the filter needs to be replaced; |
 | In AI smart wind mode, the indicator light “AI” is on, and the wind power is automatically adjusted according to changes in ambient temperature. |
 | This indicator light is on in sleep wind mode.Start the sleep wind function, and the fan automatically adjusts the level according to the program; there are three levels: 1, 2 and 3; you can adjust the level of the sleep wind by pressing the wind speed button. |
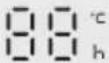 | Displays the wind speed level or set timer, and displays the temperature in the wind mode. |
 | This indicator light is on in ion wind mode.In this mode, plasmcluster is turned on, and level 1~10 wind has plasmcluster. |
Remote Control
- The remote control should be normally used within 5 meters of the front of the product and 30 degrees of the deviation angle.
- The battery contains many heavy metals, acids and bases, etc., which may threaten human's health; Waste batteries should be recycled separately.
Start up or shut down oscillating and air blowing
Press “+, -” to set the wind speed or timing time
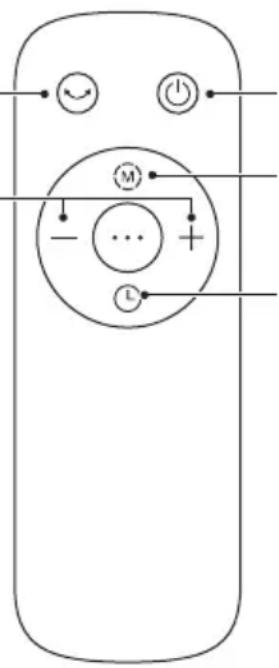
Startup/Standby
Switch the wind type
Set the timed shutdown/ reserved startup
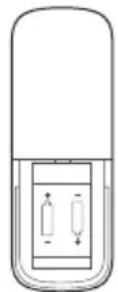
AAA Battery. 1.5V
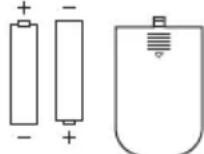
Battery

NOTE
Use manganese or alkaline batteries of type "AAA". DO not use rechargeable batteries.
Additional Features and Maintenance
- Forced shutdown
There is no operation during the running of the fan, after 15 hours of continuous operation, the fan will be forced to shut down automatically.
- Intelligent memory
When the fan is turned off or powered off, it will run in the state before turning off or power off when the power is powered on again (the timing function is not memorized).
- Screen-off function
In case of no operation for 30 seconds during normal operation, the indicator light on the body will be automatically off, but the fan will continue to operate. Press the ON/OFF button to turn off the fan when the screen is off, and press the other button to restore display.
CLEANING AND MAINTENANCE
The fan requires little maintenance. Do not try to fix it by yourself. Refer it to qualified service personnel if service is needed.
- Before cleaning and assembling, fan must be unplugged.
- To ensure adequate air circulation to the motor, keep vents at the rear of the motor free of dust. Do not disassemble the fan to remove dust.
- Please wipe the exterior parts with a soft cloth soaking a mild detergent.
- Do not use any abrasive detergent or solvents to avoid scratching the surface.
- Do not use any of the following as a cleaner: gasoline, thinner.
- Do not allow water or any other liquid into the motor housing or interior parts.
- Be sure to unplug from the electrical supply source before cleaning.
- Plastic parts should be cleaned with a soft cloth moisten with mild soap. Thoroughly remove soap film with dry cloth.
Pre-filter Cleaning
1 Unplug the power cord.
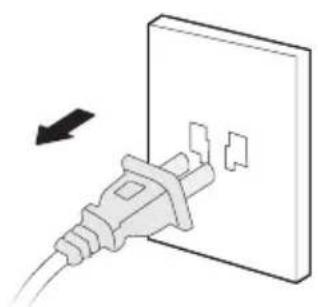
natural_image
Illustration of a plug inserted into an open electrical outlet (no text or symbols)2 Take out the filter.
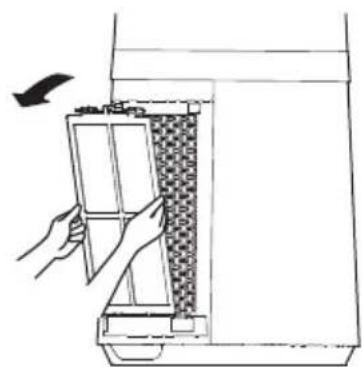
natural_image
Line drawing of a hand opening a device with a bird flying nearby (no text or symbols)3 Remove the dust with vacuum cleaner.
4 Install the machine in reverse order and plug power supply.
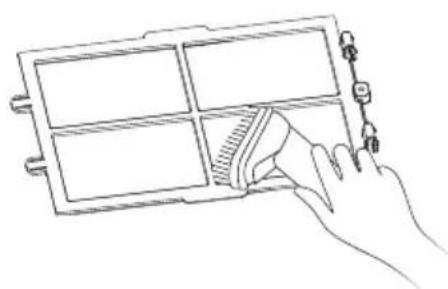
natural_image
Line drawing of a hand holding a tablet device with a pen, no text or symbols present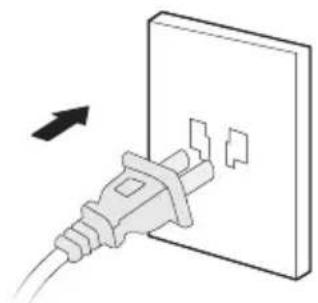
natural_image
Illustration of a plug inserted into a wall socket with an arrow indicating direction (no text or symbols)Filter Replacement
1 Filter model: FQ150CJ-2 (including 2 pieces).
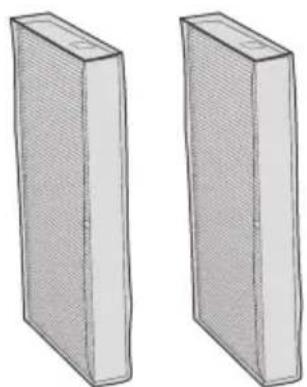
natural_image
Two identical 3D rectangular blocks with textured surfaces, no text or symbols visible3 Replace a new filter.
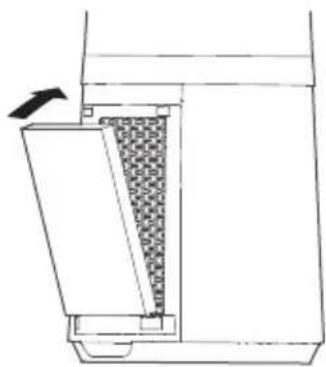
natural_image
Technical line drawing of a mechanical component with a textured internal layer and an arrow indicating direction (no text or symbols)2 When the indicator light for replacement of filter is on, the prompt that reminds you of filter replacement will appear. If it is not replaced in time, the prompt will appear during each startup.

4 Long press the mode button for 3 seconds to turn off the indicator light for filter replacement.

TROUBLESHOOTING
Operation of your appliance can lead to errors and malfunctions. The following tables contain possible causes and notes for resolving an error message or malfunction. It is recommended to read the table below carefully in order to save your time and money that may cost for calling to the service center.
| Cause SolutionProblem | ||
| The machine does not work properly after installed | ·The power cable is not plugged in or has poor contact. | Make sure the plug is properly inserted into the socket. |
| ·The switch on the body is not turned on. | Turn on the switch on the body. | |
| The remote does not work | ·The battery needs replacing. Replace the battery. | |
| ·The remote is being used more than 5m away from the fan. | Use the remote closer to the fan and make sure it is pointing directly at the display panel. | |
TRADEMARKS, COPYRIGHTS AND LEGAL STATEMENT
Midea logo, word marks, trade name, trade dress and all versions there of are valuable assets of Midea Group and/or its affiliates (“Midea”), to which Midea owns trademarks, copyrights and other intellectual property rights, and all goodwill derived from using any part of an Midea trademark. Use of Midea trademark for commercial purposes without the prior written consent of Midea may constitute trademark infringement or unfair competition in violation of relevant laws.
This manual is created by Midea and Midea reserves all copyrights thereof. No entity or individual may use, duplicate, modify, distribute in whole or in part this manual, or bundle or sell with other products without the prior written consent of Midea.
All the described functions and instructions were up to date at the time of printing this manual. However, the actual product may vary due to improved functions and designs.
DATA PROTECTION NOTICE
For the provision of the services agreed with the customer,
we agree to comply without restriction with all stipulations of applicable data protection law, in line with agreed countries within which services to the customer will be delivered, as well as, where applicable, the EU General Data Protection Regulation (GDPR).
Generally, our data processing is to fulfil our obligation under contract with you and for product safety reasons, to safeguard your rights in connection with warranty and product registration questions. In some cases, but only if appropriate data protection is ensured, personal data might be transferred to recipients located outside of the European Economic Area.
Further information are provided on request. You can contact our Data Protection Officer via MideaDPO@midea.com. To exercise your rights such as right to object your personal date being processed for direct marketing purposes, please contact us via MideaDPO@midea.com. To find further information, please follow the QR Code.

make yourself at home

- USER MANUAL
- MAM060CPBPBH
- THANK YOU LETTER
- CONTENTS
- SAFETY INSTRUCTIONS
- Intended Use
- Explanation of Symbols
- Danger
- Warning of electrical voltage
- Warning
- Caution
- Attention
- Observe instructions
- SPECIFICATIONS
- PRODUCT OVERVIEW
- Component Name
- Parts List
- NOTE
- PRODUCT INSTALLATION
- Installation Procedures
- Remove the air inlet grille. 2
- 3
- Install the HEPA filter.Remove the protective film
- Install the pre-filter.
- Install the air inlet grille.
- OPERATION INSTRUCTIONS
- Control Panel Operations
- Remote Control
- Additional Features and Maintenance
- - Forced shutdown
- - Intelligent memory
- - Screen-off function
- CLEANING AND MAINTENANCE
- Pre-filter Cleaning
- Filter Replacement
- TROUBLESHOOTING
- TRADEMARKS, COPYRIGHTS AND LEGAL STATEMENT
- DATA PROTECTION NOTICE
Brand : MIDEA
Model : MAM060CPBPBH
Category : Ventilateur domestique