
EO6082BX2 - Oven Eurom - Free user manual and instructions
Find the device manual for free EO6082BX2 Eurom in PDF.


| Product Type | Built-in Electric Oven |
| Brand | Eurom |
| Model | EO6082BX2 |
| Dimensions (H x W x D) | 595 x 595 x 575 mm |
| Capacity | 60 liters |
| Weight | Approximately 38 kg |
| Power Supply | 220-240 V, 50/60 Hz |
| Power Consumption | 3400 W (max) |
| Energy Class | A+ |
| Cooking Functions | Conventional, Grill, Fan-assisted, Defrost, Rotisserie |
| Temperature Range | 50 °C to 260 °C |
| Interior Material | Enamel |
| Cleaning Type | Standard (manual cleaning recommended) |
| Safety Features | Child lock, Cool touch door, Automatic shut-off |
| Spare Parts Availability | Available through Eurom service centers |
| Repair Index | 7.5 / 10 |
Frequently Asked Questions - EO6082BX2 Eurom
User questions about EO6082BX2 Eurom
0 question about this device. Answer the ones you know or ask your own.
Ask a new question about this device
Download the instructions for your Oven in PDF format for free! Find your manual EO6082BX2 - Eurom and take your electronic device back in hand. On this page are published all the documents necessary for the use of your device. EO6082BX2 by Eurom.
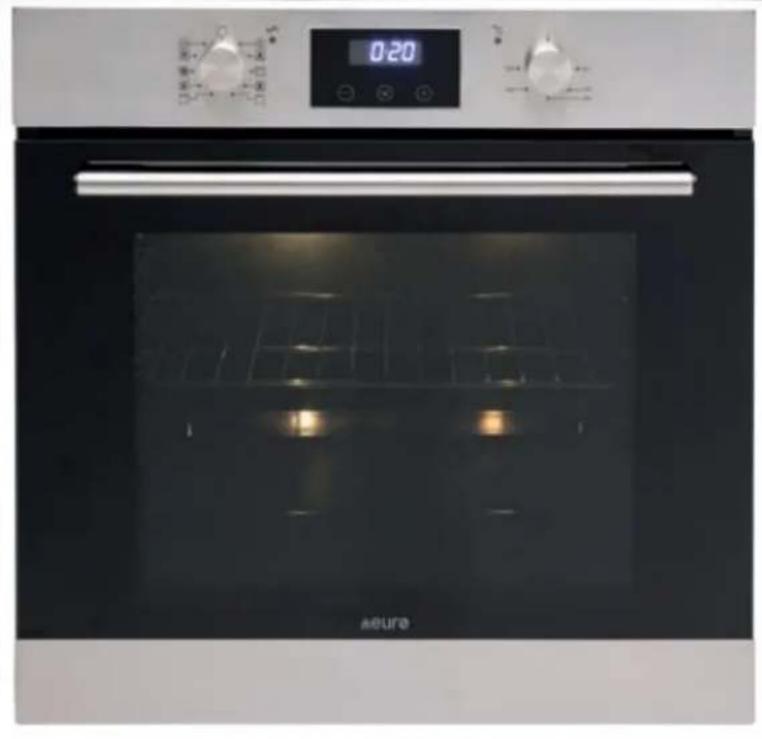
USER MANUAL EO6082BX2 Eurom
cooking
USAGE AND CARE GUIDE
PRODUCT
CODE:
EO6082BX2
natural_image
Exterior view of a modern kitchen oven with digital display and control knobs (no visible text or symbols)Contents
,P SRWDQVDIH\LQIRUP DWLRQ□□
,QVWDODWLRQ□□
3 ULRU□WR□VWDUW□XS□RI□WKH□DSS□LDQFH□
<RXU□QHZ□RYHQ□□
3 URJUDP □DQG□IXQFWLRQ□LQVWUXFWLRQ□□□ 10
Before using your oven 21
7URXE0HVKRRWLQJ 22
%DNLQJ□DQG□JUL00LQJ□WLSV□□ 23□
Important safety information
7KLV□8 VHU□,QVWUXFWLRQ□0 DQXD□FRQWDLQV□LP SRUWDQN□LQIRUP DWLRQ□□LQFOXGLQJ□VDIHW□DQG□LQVWDODWLRQ□SRLQWV□Z KLFK□Z LCOHQDEOH□RX□WR□JHW□WKH□P RVW□RXW□RI□RXU□DSSOLDQFH□□3○HDVH□NHHS□LN□LQ□D□VDIHH□SODFH□VR□WKDW□LW□LV□HDVLO□DYDLDEOH□IRU□IXWXUHUHIUHQFH□□IRU□RX□RU□DQ□SHUVRQ□QRW□IDP LOLDU□Z LWK□WKH□RSHUDWLRQ□RI□WKH□DSSOLDQFH□
Warning
- 7KH□DSS□DQFH□DQG□UV□DFFHVVECH□SDUVV
EHFRP H□KR□GXULQJ□XVH□&DUH□VKRX0G□EH
WDNHQ□R□DYRLG□WXFKLQJ□KHDVLQJ□HCHP HQVV□
• &KLOGUHQVKDCOOEHNHSVDZD\XQ0HVV FRQWLOXRXV\VVXSHUYLVHG - 7KLV□DSS□LDQFH□LV□QRW□LQWHQGHG□IRU□XVH□E\SHUVRQV□LQF□XGLQJ□FKLOGUHQ□□ZLNK□UHGXFHGSK\VLFD□□VHQVRU□RUP P HQWD□FDSDE□LVLHV□□RU□DFN□RI□H[ SHULHQFH□DQG□NQRZ □HGJH□□XQDHVVWKH□KDHY□EHHQ□JLYHQ□VXSHUYLVRQ□RU LQVWUXFWLRQ□FRQFHUQLQJ□XVH□RI□WKH□DSS□LDQFHE\s□D□SHUVRQ□UHVSRQVLECH□IRU□WKHLU□VDIHN\s □&KLOGUHQ□VKRX□G□EH□VXSHUYLVHG□WR□HQVXUH□WKDWWKH\s□GR□QRN□SOD\s □ZLNK□WKH□DSS□LDQFH□□&CHDQLQJ DQG□XVHU□P DLQWHQDQFH□VKDC□QRW□EH□P DGH□E\FKLOGUHQ□
• \$VHDP FCHDQHU LV QRWR EH XVHG - FFHVVLECHSDUWVP D EHF R P H KRV GXULQJ XVH<RXQJ FKLOGUHQ VKRX G EH NHS Z HO DZ D ZKHQ LQ XVH
' R□QRW□XVH□KDUVK□DEUDVLYH□F0HDQHUV□RU□P HND□VFUDSHUV□WR□F0HDQ□WKH□RYHQ□GRRU□JCDVV□DV□WKLV FDQ□VFUDNFK□WKH□VXUIDFH□ZKLFK□P D\ □UHVX□W□LQ WKH□RYHQ□JCDVV□VKDWNHULQJ -
R□QRV□XVH□DEUDVLYH□SURGXFVV□NR□F□HDQ□WKH J□DVV□GRRU□SDQH□WR□DYRLG□VFUDVFKLQJ□LVY 2 WKHUZLVH□VHYHUH□IDLGXXUH□P LJKK□KDSSHQ WR□WKH□DSSOLDQFH
-
7KH□DSS□LDQFH□P XV□QR□EH□LQVND□HG EHKLQG□D□GHFRUDWLYH□GRRU□LQ□RUGHUD□VR DYRLG□RYHUKHDW□LQJ□
- 7KH□DLU□P XVN□QR□EH□GLVFKDUJHG□LQWR□WKH ICXH□NKDV□LV□XVHG□IRU□H[ KDXV□LQJ□IXP HV IURP □DSS□LDQFHV□EXUQLQJ□JDV□RU□RWKHU IXH□V□
Operation

Warning! Danger of explosion
- / LTXLGV□DQG□RWKHU□IRRGV□P XV□QRW□EH□KHD×HG LQ□VHD□HG□FRQWD□QHUV□VLQFH□WKH □DUH□OLDE□H□WR H[ S□RGH□
- ,I□VP RNH□LV□REVHUYHG□□VZ□WFK□RI□WKH□RYHQ
DQG□NHHS□WKH□GRRU□FORVHG□LQ□RUGHU□WR□VALICH
DQX □ICDP HV□
• ' R□QR□D□CRZ □DQ □DFFHVVRULHV□RU□H0HFWULF FDE□HV□WR□FRQ□DFV□WKHK□KR□SDUW□RI□WKH DSS□LDQFH□

: DUQLQJ□□+R□□VXUIDFHV□□5LVN□RI□EXUQV
• ' XULQJXVHWKHDSSQLDQFHHEHFRP HVJKR&DUHVKRXOGEHNDNHQNRDYRLGWRXFKLQJKHDVLQJHCHPHQWVLQVLGHKNKRYHQ
• : DUQLQJ FFHVVLEHSDUVLP D H KRGXULQJ[XVH<RXQJFKLGUHQVKRXGEH NHSDZD
- 1 HYHU P RYH UDFIV RU SDQV Z KHQ NKH DUH KR K: DLN X QALQ NKH FRR
Safety advices

,0 32 57\1 7□□\CZD\V□VZLWFK□RII□WKH□ HOHFWULFLW□VXSSO□D□WKH□P DLQV□GXULQJ□ LQVWDCCDWLRQ□DQG□P DLQWHQDQFH□
* HQHUD, QIRUP DNLRQ
- 7KLVDSSLDQFHLVGHVLJQHGIRUGRP HVVLF KRXVHKRCGXVHDQGFDQEHEXLOWLQWRJD WVDQGDUGNLVKFKHQFDELQHMURKRXVLQJXQLND
- &HUVDLQXV SHVRIYLOXORUODP LQDWHNLNFKHQ IXUQLNXUHDUHDSDUVLFXCDUOVSURQHWRKHDW GDP DJHTRUGLVFRXRUXDWLRQWDWHP SHUDIXUHV EHQRZTKKHJXLGHQLQHVJLYHQDERYH
-
7KH□DSS□LDQFH□VXUIDFHV□Z□□EHFRP H□KR GXULQJ□XVH□DQG□UHWDLQ□KHD□DIWH□RSHUDVLRQ
-
Q GDP DJHFDXVHGIE\WKHQRQIFRP SOLDQFH RIWHP SHUDIXUHRCHUDQFHRIRYHQGXULQJ LQVWDODWLQRURUE\WKHNRRCRVHGLVIDQFH EHIZ HHQWKHTIXUQLNXUHDQGWKHRYHQIZLCOTEH ERUQHIE\WKHRRZQHU
- 7KLV□DSS□DQF□H□V□QR□LQ□HQGH□IR□XVH□E\SHUVRQV□LQ□XGLQJ□FK□GUHQ□Z□LK□UHGXFHGSK\VLFDO□VHQVRU□□RU□P HQND□FDSDE□LCLHV□RU□E\□NKRVH□ZKRODFN□H[ SHULHQFH□DQGNQRZ□HGJH□OXXQHVV□WKH□KDYH□EHHQ□JLYHQVXSHUYLVLRQ□DQG□LQVIXF□LRQ□FRQFHUQLQJ□WKHXVH□RI□WKH□DSS□DQFH□E\ □D□SHUVRQ□UHVS RQVLE0HIRU□WKHLU□VDIHN□
,QVWDODWLRQ□
- 7KHRYHQP XVWDEHQLQVWDXXHGQLQQDFFRUGDQFHZLWK
WKHQLQVWDXXDWLRQELQVVUXFALRQVTDDQGDDX
PHDVXUHP HQWVLP XVWDEHQLIRCCRZHGL
• \$ COOLQVNDODNLRQNZRUNP XVMEHFDUULHGFRXTE\ DFRP SHWHQSHUVRQTRUTTXDLILHGHOHFWULFLDQ
&KLOGUHQ
- 3CHDVHGLVSRVHRIINKHSDFNDJLQJP DWHULDQFDUHIXO\□3DFNDJLQJP DWHULDQFDQJEHGDQJHURXVVKRFKLOGUHQ
- 0 DNH□VXUH□KR□NHHS□FKLOGUHQ□DZ□IURP □NKH DSS□LDQFH□FKLOGUHQ□VKRXOG□EH□VXSHUYLVHG□NR HQVXUH□WKH□GR□QRV□SOD□ZLWK□NKH□DSS□LDQFH□,N□P□JKN□EH□GDQJHURXV□NR□DOORZ□NKH□FKLOGUHQ WR□NRXFK□NKH□DSS□LDQFH□
General Safety
• ' R□QR□S□CDFH□KHDY□RE□HFW□RQ□WKH□RYHQ□GRRU
R□HQDQ□WKHP □RQ□WKH□RYHQ□GRRU□Z KHQ□LW□LV
RSHQ□DV□LW□P D□FDXVH□GDP DJHV□NR□WKH□RYHQ
GRRU□KLQJHV□
• ' R□QRW□S□DFH□N□KRVH□EDNHG□KRW□R□L□□RU□IDW
XQDVN□HQGHG□RQ□XQDVN□HQGHG□DUHDV□□DV□LW□Z□LCC□EH
D□ILUH□ULVN□
• ' R□QRW□SCDFH□SDQV□RU□EDNLQJ□WUD\ V□GLUHFW□RQ
WKH□EDVH□RI□WKH□RYHQ□FDYLW □HYHQ□LI□DOXP LQXP
IRL□LV□SCDFHG□EHORZ □WKHP □
• ' R□QRW□DOORZ□FDE□H□RU□SCXJ□WR□FRP H□LQWR
FRQ□DFW□Z LWK□NKH□KHDNLQJ □DUHDV□RI□DSSCLDQFH□
• ' R□QRW□LQVWD□□WKH□DSSCLDQFH□QH[ □WR□FXUWDLQV□RU VRIW□IXUQLVKLQJV□
• ' R□QRN□DVWNHP S###NRCQLWTRUP P RYH□FRRNLQJ
DSS□DQFHV□E □XV□QJ□WKH□RYHQ□GRRU□RU□KDQG□H
DV□VKLV□P D □FDXVH□GDP DJH□WR□NKH□DSS□DQFH□RU
UHVX□M□LQ□LQWXU □NR□WKH□SHUVRQ□QLINLQJ□WKH
DSS□DQFH□
Electrical safety
- , IWKHVXSSA FRUGLVGDP DJHGQLWP XVMEH UHSDFHGEX NKHOP DQXIDFXUHUUVVHUYLFH DJHQROVLP LDOUX TXDILHG SHUVRQV LQ RUGHUWR DYRLG DKD] DUG
- 7KH□DSS□LDQFH□P XV□EH□S□DFHG□LQ□VXFK□D□Z D□WKDN□WKH□SRZH□VXSS□LV□DFFHVVLLE0H□DW□DC0WLP HV□
- %HIRUH□FRQQHFNLQJ□WKHDSSOLDQFH□NR□WKHDSRZHU VXSS□□FKHFN□NKDA□WKHDSRZHU□VXSS□□YROWDJH DQG□FXUUHQ□UDNLQJ□FRUUHVSROGV□ZLNK□WKH SRZHU□VXSS□□GHNDLOV□VKRZQ□RQ□WKHDSSOLDQFH UDNLQJ□DEH□
-
1 HYHUXVHDQGDP DJHGDDSSLDQFHLVFRQQHFW WKHDSSLDQFHIURP WKHSRZHUVRXUFHDQG FRQIDFWRXUVXSSOLHUJLIUHVGDGP DJHG
• ' DQJHU□RI□HOHFVNLF□VKRFN□□' R□QR□DWNHP SN□WR UHSDLU□NKHDSSOLDQFH□ RXUVHCI□□,Q□FDVH□RIP DCIXQFVLRQ□UHSDLUV□DUH□WR□EH□FRQGXFWHG□E\TXD□ILHG□SHUVRQQH□RQ□ -
7R□DYRLG□GDP DJLQJ□NKH□FRUG□GR□QR□VTXHH] H□EHQG□RU□FKDIH□V□RQ□VKDUS□HGJHV□. HHS□LN□DZD□IURP □KR□VXUIDFHV□DQG□RSHQ□IDP HV□DV□ZHOO
• / D\□RXW\NKH\FRUG\LQ\VXFK\DZ D\□NKDW\QR XQLQ\HQNLRQD\SX\CLQJ\RU\WULSSLQJ\RYHU\CLW\LV\SRVVLE\H
• ' R□QR□RSHQ□KH□DSS□DQFH□FDV□QJ□XQGH□DQ\FLUFXP VWDQFHV□' ' R□QR□LQVHU□DQ\IRUHLJQ□RE□HFWV LQWR□WK□LQVLGH□RI□WK□FDV□QJ□
• 1 HYHU☐XVH☐DFFHVVRULHV☐Z KLFK☐DUH☐QRN UHFRP P HQGHG☐E\ ☐INKH☐P DQXIDF☐XUHU☐ 7KH\ ☐FRX☐G☐SRVH☐D☐VDIHI\ ☐ULVN☐NR☐WKH☐XVHU☐DQG P LJK☐GDP DJH☐WKH☐DSSOLDQFH☐2 QA\ ☐XVH☐RULJLQDC SDUV☐DQG☐DFFHVVRULHV☐
. HHSWKHDSSOLDQFHDZDJURPDDQKRAVXUIDFHV DQGRSHQICDP HV\$CZDVRSHUDWHNKHDSSOLDQFH RQDDHYHQQVNDECHFDHQDGGUVXUIDFH3URKHFFW WKHDSSOLDQFHDJDLQVMKHDNCGXVIGLUHFHXVXQLJKAD PRLVIXUHGGULSSLQJDDQGVSDDVKLQJZDWHU
• ' R□QRN□S□DFH□RE□HF□V□Z□NK□RSHQ□IDP HV□ ○J□FDQG□HV□RQ□NRS□RI□RU□EHV□GH□KH□DSS□LDQFH□
• : \$51,1 * (QVXUHWKDWKNKHDDSSOLDQFHLVVZLWFKHGRIIDEHIRUHUHSODFLQJKNKHODP SORDYRLGWKHSRVVLELOLYN □RIHDCHFWULFVKRFND - 7KH□IL[HG□ZLULQJ□IRU□DSS□LFDQN□VKD□□KDYH□DQ□D□□SR□H□GLVFRQQHFALRQ□GHYLFH□

Safety
●Attention, the glass is extremely fragile. Always wear gloves when handling.
- For your safety, this product is made of tempered glass. This type of glass is highly resistant but has the feature to retain the "memory" of shocks.
- Therefore, it should handle the product with the greatest care to avoid shocks and twists, especially during installation.
- Avoid installing this type of product in areas where it would be highly exposed to shocks.
- Do not let children play with the product.
- Do not stick adhesive film on the glass surface.
In case of breakage, it would generate large pieces that could be dangerous
Electrical connection

Danger of electric shock!
- Any electrical installation must be carried out by an authorised professional.
- All fittings must be installed by a competent person in accordance with local regulations. If in doubt, consult a qualified electrician.
- Important! Always switch off the electricity supply at the mains during installation and maintenance. We recommend that the fuse is withdrawn or circuit breaker switched off at the distribution board whilst work is in progress.
- This product must be earthed - if no earth feed wire is available, consult an electrician.
- Means for disconnection must be incorporated in the fixed wiring in accordance with the wiring rules. To achieve this install appropriate switched fused connection unit.
-
Note A switched fuse connection unit having a contact separation of at least 3mm in all poles should be connected in fixed wiring.
-
Connect the incoming positive, neutral and earth cables to the terminals of the switched fused connection unit. Ensure connections are tight.
- The spur outlet must still be accessible even when your oven is located in its housing to enable the appliance to be disconnected from the mains supply.
Cleaning
- Always disconnect the power supply prior to cleaning the appliance. If the switched fused connection unit is difficult to reach, shut off the power supply by using the corresponding circuit breaker at the distribution board.
- Clean the appliance thoroughly before first use. The oven should be cleaned regularly and any food deposits removed.
- Never clean the oven surfaces by steam cleaning.
- The oven cavity should only be cleaned with warm soapy water, using either a sponge or soft cloth. No abrasive cleaners should be used.
- Any stains that may appear on the bottom of the oven will have originated from food splashes or spilt food, these splashes occur during the cooking process. These could possibly be a result of the food being cooked at an excessively high temperature or being placed in cookware that is too small.
- You should select a cooking temperature and function that is appropriate for the food that you are cooking. You should also ensure that the food is placed in an adequately sized dish and that you use the drip tray where appropriate.
Installation
Before installation
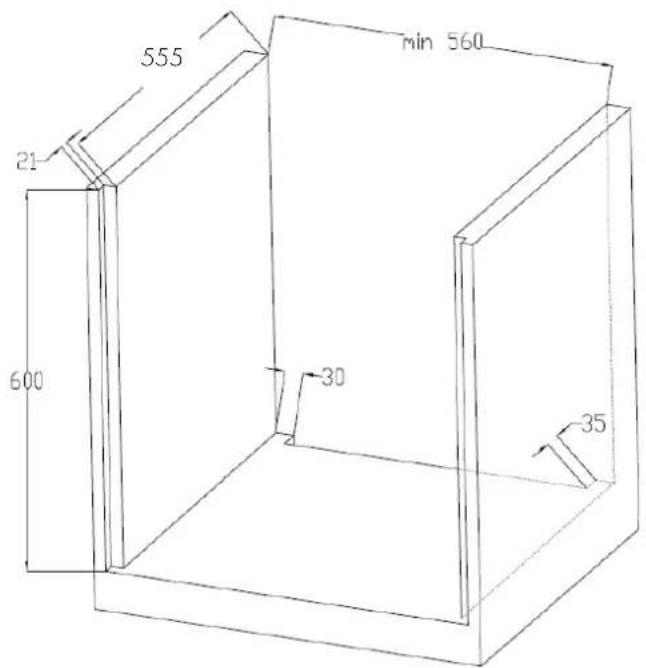
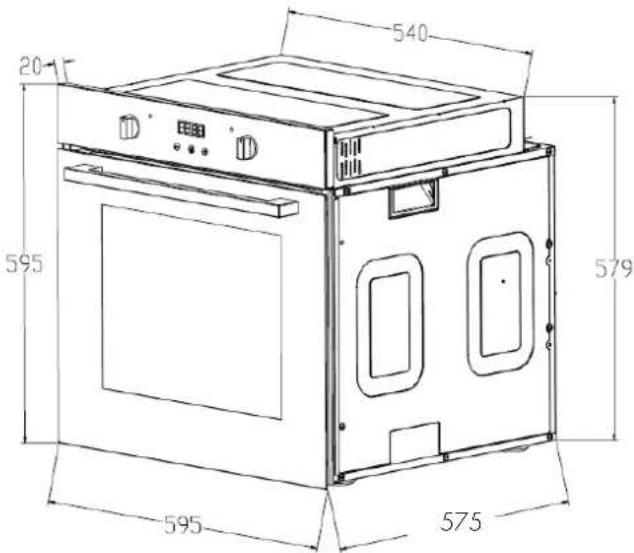
The appliance should be installed built in the cabinet. It should be keep safety distance with appliance and the kitchen walls. Detail check below picture. (values in mm).
- Surfaces, synthetic laminates and adhesives used must be heat resistant(100°C minimum), and neighboring unit fronts up to 70°C.
- Kitchen cabinets must be set level and fixed. A gap of 5 mm is required between the appliance and surrounding unit fronts.
- If there is a drawer beneath the oven, a shelf must be installed between oven and drawer.
Installation method
Installation and connection
▲ Material damage!
The door and/or handle must not be used for lifting or moving the appliance.
- For installation the appliance must be connected in accordance with all local gas and/or electrical regulations.
- Carry the appliance with at least two persons.
- Use the slots or wire handles located at both sides to move the appliance.

Connection to the mains supply
This appliance must be earthed!
- Our company shall not be held responsible for any damage caused by using the appliance without an earthed socket. Risk of electric shock, short circuit or fire by unprofessional installation! The appliance may be connected to the mains supply only by an authorised qualified person and the appliance is only guaranteed after correct installation.
- Risk of electric shock, short circuit or fire by damage of the mains lead! The mains lead must not be clamped, bent or trapped or come into contact with hot parts of the appliance. If the mains lead is damaged, it must be replaced by a qualified electrician.
- The mains supply must correspond to be data specified on the rating plate of the appliance. The appliance mains cable must correspond to the specifications and the power consumption.

Risk of electric shock!
Before starting any work on the electrical installation, please disconnect the appliance from the mains supply.
Installation
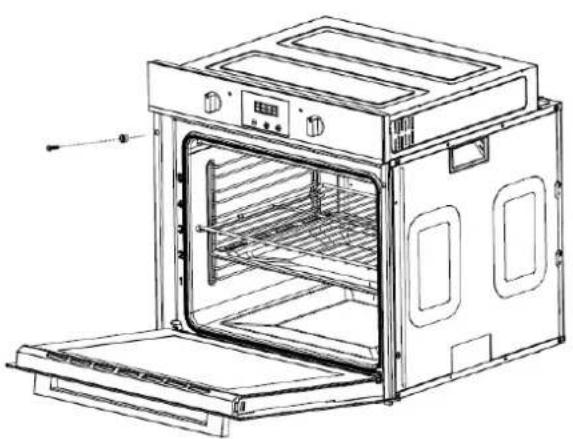
- Slide the oven through the cabinet aperture, align and secure.
- Fix your oven with the 2 screws and washers as indicated in the figure.
natural_image
Line drawing of an open oven with internal grating and ventilation duct (no text or symbols)Final check
- Connect the appliance to the mains supply and switch on the mains supply.
- Check function.
Prior to start up of the appliance
- Once this simple operation has been carried out the oven is ready to use for cooking.
• This appliance is exclusively for domestic use.
• Use the oven to cook food only.
- Before cooking, make sure all oven accessories that are not required are removed from the oven.
• Pre-heat the oven to the cooking temperature before using it.
- Place the cooking trays in the center of oven and leave space in between when using more than one, so that the air can circulate.
- Do not put oven trays on the base of the oven or cover it with aluminium foil. This will cause thermal accumulation. The cooking and roasting times will not coincide and the enamel may be damaged.
- Try to open the oven door as little as possible to see the food (the oven light remains on during cooking).
• Take care when opening the door to avoid contact with hot parts and steam.
Your new oven
A. Oven overview
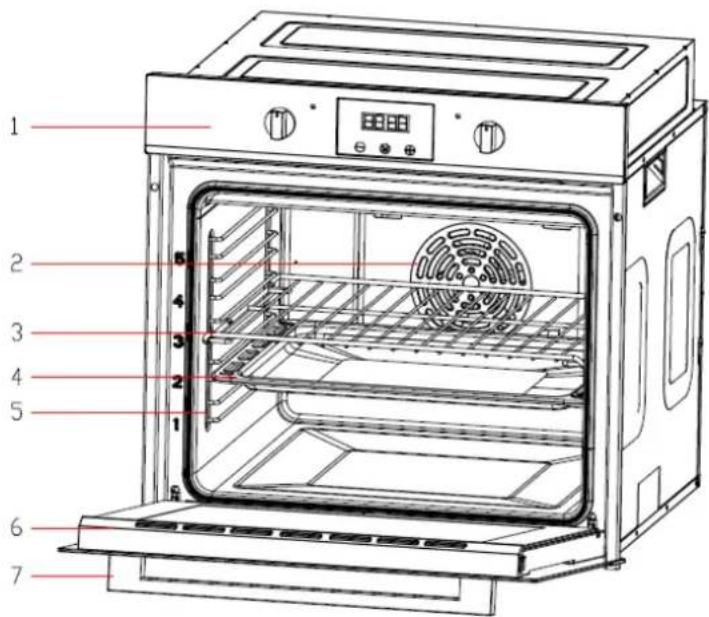
-
Control panel
-
Side shelf
-
Fan motor (inner the cover)
-
Door
-
Wire rack
-
Handle
-
Tray
B. Technical specifications
| Voltage/frequency | 220-240V ~ 50Hz |
| Total power consumption 2800W | |
| Cable type/section | H05VV-F 3*1.5mm ^2 |
| Cable length 1.2m | |
| External dimensions(height/width/depth) | 595/595/575 ( mm ) |
| Installation dimensions(height/width/depth) | 600/600/ min 575 ( mm ) |
| Main oven Multifunction oven | |
| Energy efficiency class A | |
| Oven lamp 25W/300°C | |
| Grill power consumption 2800W |
C. Your accessories
- The accessories supplied with your appliance are suitable for making many meals. Ensure that you always insert the accessories into the cooking compartment the right way round.
- There is also a selection of optional accessories, with which you can improve on some of your favorite dishes, or simply to make working with your oven more convenient.
Inserting accessories
You can insert the accessories into the cooking compartment at 5 different levels. Always insert them as far as they will go so that the accessories do not touch the door panel.
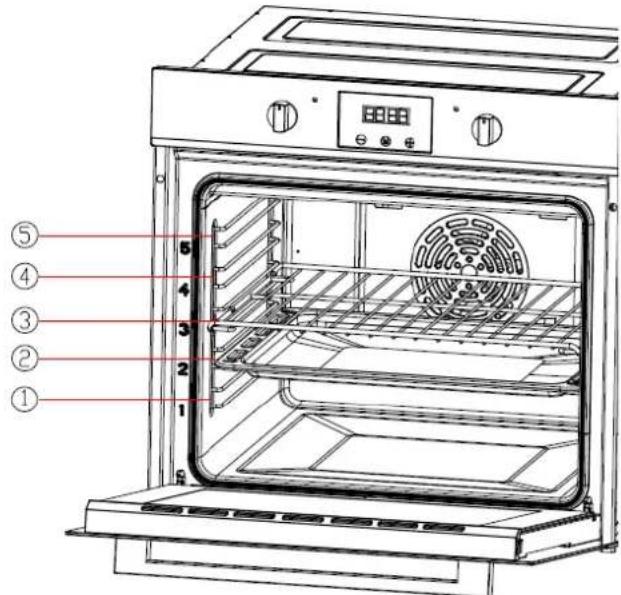
The accessories can be pulled out approximately halfway until they lock in place. This allows dishes to be removed easily.
Note: The accessories may deform when they become hot. Once they cool down again, they regain their original shape. This does not affect their operation.
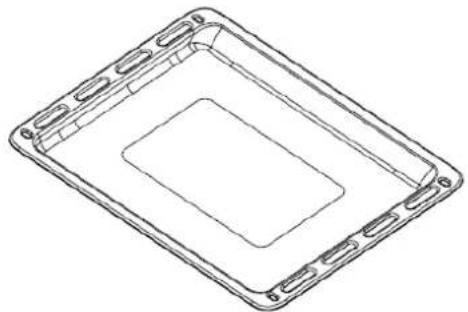
Oven pan
For moist cakes, pastries, frozen meals and large roasts. It can also be used to catch dripping fat when you are grilling directly on the wire rack.
natural_image
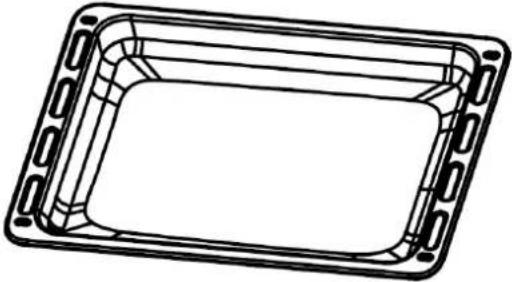
Line drawing of a rectangular electronic component with internal cavity and mounting holes (no text or symbols)Oven deep pan (Optional)
Used for pastries, large roasts, juicy dishes, and for collecting the fat while grilling.
natural_image
Line drawing of a rectangular tray with side connectors (no text or symbols)Wire rack
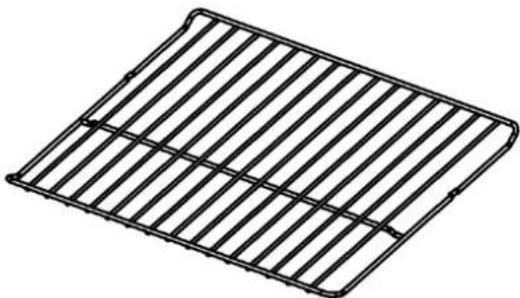
Used for roasting and for placing the food to be baked, roasted or cooked in casserole dishes to the desired rack.
natural_image
Simple line drawing of a rectangular metal grate or rack structure (no text or symbols)Side shelf
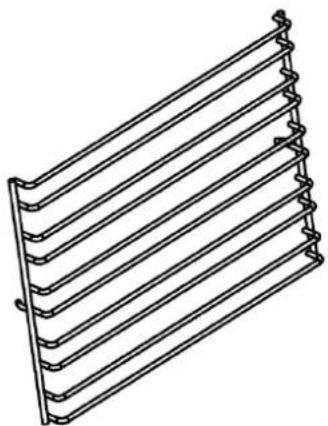
①②③④⑤ on behalf of five different height positions for your choosing. For removable side shelf, you can adjust four different height positions to bake food.
natural_image
Line drawing of a corrugated metal sheet with multiple parallel grooves (no text or symbols)D. Control panel
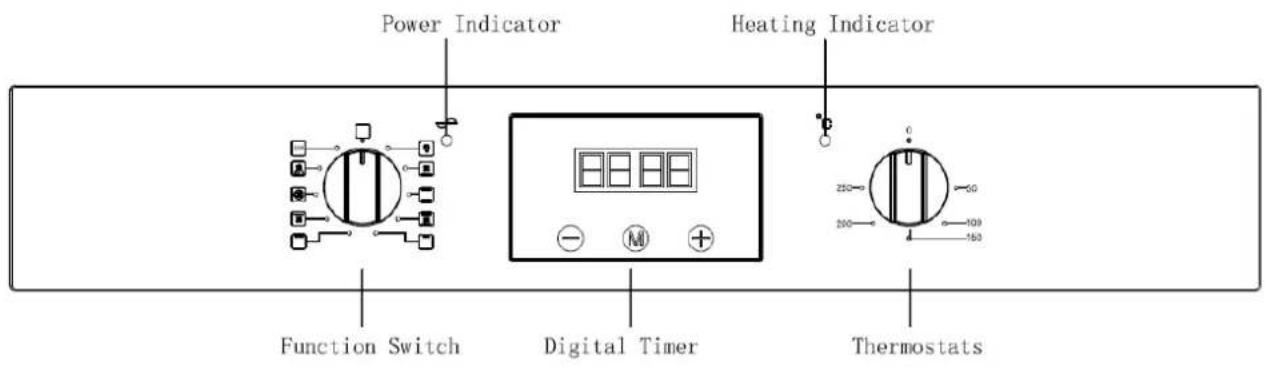
Here, you will see an overview of the control panel. Depending on the appliance model, individual details may differ.
Function selector
Use the function selector to set the type of heating.
This appliance have 10 grill functions available.

OVEN LIGHT: This mode switches on the oven light and other electric devices do not work.

FAN AND BOTTOM ELEMENT: This method of cooking utilises the bottom element in conjunction with the fan, which helps to circulate the heat. This function is suitable for sterilizing and preserving jars.

CONVENTIONAL OVEN (top and lower element): This method of cooking provides traditional cooking, with heat from the top and lower elements. This function is suitable for roasting and baking on one shelf only.
INTENSIVE BAKE: This method of cooking is a conventional cooking method, the oven heat from top element to lower element, and the fan helps to circulate the heat to achieve an even baking result.

HALF GRILL: This method of cooking utilises the inner part only of the top element, which directs heat downwards onto the food. This function is suitable for grilling small portions of bacon, toast and meat etc.

FULL GRILL: This method of cooking utilises the inner and outer parts of the top element, which directs heat downwards onto the food. This function is suitable for grilling medium or large portions of sausages, bacon, steaks, fish etc.
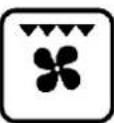
FAN AND GRILL: This method of cooking utilises the top element in conjunction with the fan, which helps to provide a quick circulation of heat. This function is suitable where quick browning is required and “sealing” the juices in, such as steaks, hamburgers, some vegetables etc.

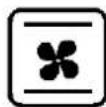
FAN OVEN: This method of cooking uses the circular element whilst the heat is distributed by the fan. This results in a faster and more economical cooking
process. The fan oven allows food to be cooked simultaneously on different shelves, preventing the transmission of smells and tastes from one dish onto another.
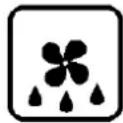
DEFROST: The fan runs without heat to reduce the defrosting time of frozen foods. The time required to defrost the food will depend on the room temperature, the quantity and type of food.
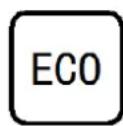
ENERGY SAVING GRILLING MODE: This method of cooking uses the top outer ring and the bottom heating element to control the temperature, making the grilling more energy saving, mainly suitable for large food, oven temperature rises slowly, the heat fully penetrates and the excess heat consumption is reduced.
Digital timer control
1. Control panel
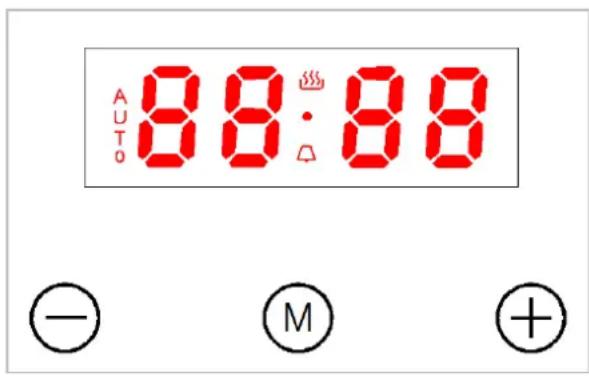
Control panel diagram
1.1 Function icon instruction
| Icons Function | |
| ⊖ | Minus button |
| ⊕ | Plus button/ audible signal selecting key |
| ◎ | Program button |
1.2 Display screen icon instruction
| Icons Function Icons Function | ||
| 1 “Auto” function symbol 4 Clock symbol | ||
| 2 Oven in use symbol | 5 | Display the time, can display system time, clock and cooking time |
| 3 Decimal point symbol |
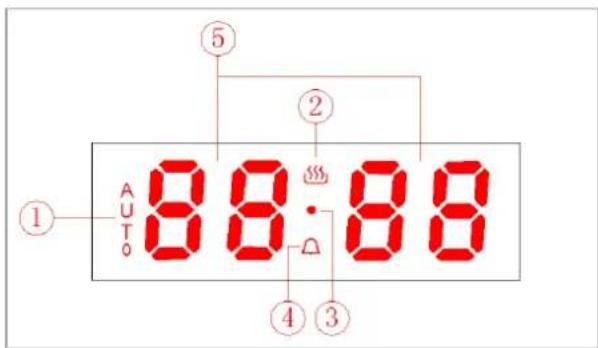
Display section diagram
2. Timer working status
Switching the timer status
The timer has 3 status, they are standby, function to be selected and working status.
Stand-by status: After connected to the power supply, the display screen displays the system time, the decimal point symbol flashes, it is the status before entering cooking function; If exceeds 10 seconds without any operation under standby mode, the display brightness automatically reduces, press any key to recover to the original brightness.
Function to be selected status: Long press program button under standby status, the display screen will show system time, it is the status when oven in use symbol and decimal point symbol keep bright.
Working status: After completed setting any one of the system time, clock, cooking time or cooking end time, the display screen will show system time, and it is the status when corresponding working icon keep bright.
Status switching diagram refer to below:
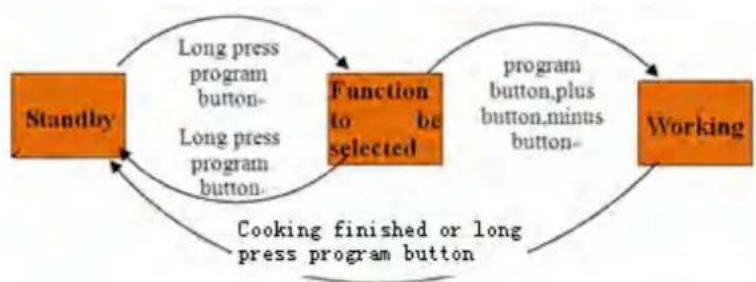
flowchart
graph TD
    A["Standby"] --> B["Function to be selected"]
    B --> C["Working"]
    C -->|Cooking finished or long press program button| A
    B -->|Long press program button| A
    B -->|program button, plus button, minus button| C
Status switching diagram
3. Timer function mode switching
Long press program button “M” for 3s enter to system time setting status, without any operation after 5S,system time, oven in use symbol “” and decimal point symbol “” keep bright display; you can circularly switch the oven timer function mode by program button “M”.
The operation flow and corresponding functional sequence are as followings:
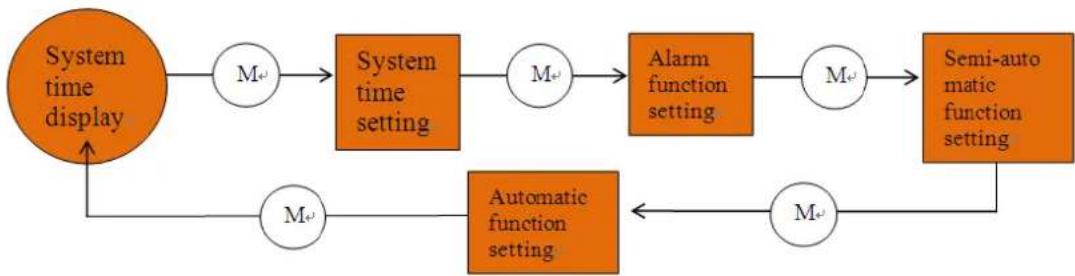
flowchart
graph TD
    A["System display"] --> B["M⊕"]
    B --> C["System time setting"]
    C --> D["M⊕"]
    D --> E["Alarm function setting"]
    E --> F["M⊕"]
    F --> G["Semi-automatic function setting"]
    G --> H["M⊕"]
    H --> I["Automatic function setting"]
    I --> J["M⊕"]
    J --> K["Automatic function setting"]
    K --> L["System time display"]
Timer function mode switching diagram
4. Operation instructions
4.1 Power on
For the first time, the buzzer “beep” for one time to show that the timer enters into the standby state. The clock shows the time of the system and starts the timing. Power-on displays as “0·00”, the display screen displays the system time, the decimal point symbol “• is flashing, 1 second 1 time, like Pic 5. You can push” “to choose 3 kinds of ring tone, The default is the second ring tone. Whenever user wants to adjust the ring tone again, press “⊕”
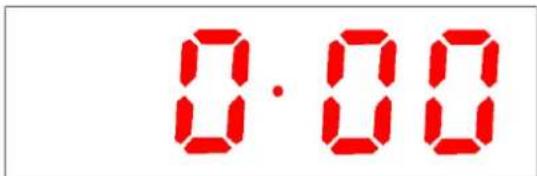
Pic 5 Power-on default clock diagram (standby state)
4.2 Start up and time setting
When the display is flashing, press “ ^M ”for 3 seconds to start up the oven. Then oven in use symbol “ ^### ”lights up and decimal point symbol “●” twinkles. When decimal point symbol “●” twinkles, press “⊕” or “⊖” to set the system time. After choosing the time, lift the finger off the buttons and wait for 5 seconds, then decimal point symbol “●” stop twinkling. It means time is well set. Like pic 8.Whenever user wants to set the time again, In the status of pic 7, push “ ^M ” one time, when user sees decimal point symbol “●” twinkles, then can set the time again.
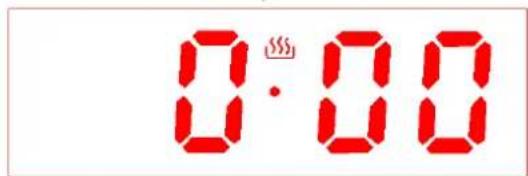
Pic 6 Clock setting state diagram (second icon flickering)
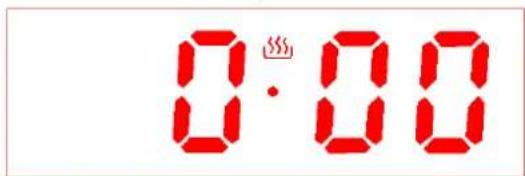
Pic 7 Feature to be selected state diagram (second icon always bright)
Press button ^® again for 3 seconds, oven is turned off and returns to standby status. The display of pic 6 is flashing.
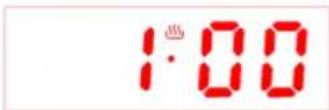
Pic8 System time well set diagram
Note 1: System time setting range is 0:00-23:59.
Note 2: When setting the time for each function of the timer, you can set the time by short press or long press “⊕” and “⊖”, short press will add 1 minute or reduce 1 minute each press of the button, while long press will quickly increase or decrease the time by 1 minute, so it can set the time fast.
4.3 Alarm clock setting function
In the state of function to be selected, when the display shows the system time, oven in use symbol and decimal point symbol keep bright, press two times, then the clock icon twinkles, and the screen display changes to the alarm clock time(First set default display "0·00"), alarm clock time and decimal point symbol always display, like pic 9.When the alarm clock icon twinkles, Press or to set the clock. Alarm clock well set diagram like pic 10 (Set 10 minutes).
Pic 11 Alarm clock working status diagram (alarm clock icon always bright)
Pic 12 Alarm clock time over diagram (alarm clock icon flickering)
For example, set the clock 10 minutes. After 10 minutes, display screen shows system time, oven in use symbol “ ” , decimal point symbol “ ” and system time keep bright, the alarm clock icon “ ” twinkles, buzzer will prompt the user for 5 minutes, reminding the user that the alarm clock time is over .Like Pic 12. Pressing any key can stop the buzzer and extinguish alarm icon “ ” .Like Pic 13.
Pic 13 Cancel alarm clock icon display diagram (After alarm clock over)
Note: Alarm clock time setting range is 0 : 00-23 : 59.
4.4 Cooking time setting function
In the state of function to be selected, press button“ ” 3 times, then the icon “AUTO” and oven in use symbol icon “ ” twinkle. The screen shows the cooking time ( First set default display “0·00” ) ,cooking time and decimal point symbol “ ” keep bright display, see Pic 14.When the icon “AUTO” and oven in use symbol “ ” twinkle, user can set the cooking time by pressing“ “or“ ”.Well set diagram see Pic 15(Set 30 minutes).
Pic 14 Cooking time setting initial state
Pic 15 Cooking time well set state
After choosing the time, lift the finger off the buttons and wait for 5 seconds, then the icon "AUTO" and oven in use symbol "stop twinkling and change to always bright display. It means time is well set. Whenever user wants to adjust the timer, in the working status, push "three times, when user sees the icon "AUTO" and oven in use symbol "twinkles,
it will show the set timer or the time left, and user can adjust the timer again. After setting is done, the display will change back to system time, decimal point symbol “” and system time keep bright. See Pic 16.
Pic 16 Cooking time working status (all the icons always bright)
Pic 17 Cooking time over diagram (all the icons flickering)
Pic 18 Cancel "Auto" function symbol display diagram (After cooking time over)
For example, set the timer 30 minutes. After 30 minutes, display screen shows system time, oven in use symbol“ ” extinguishes, system time keeps bright, decimal point symbol “ ” and “Auto” function symbol twinkle, buzzer will prompt the user for 5 minutes, reminding the user that the cooking time is over .Like Pic 17.Pressing any key can stop the buzzer and extinguish“Auto” function symbol.Like Pic 18.
Note 1 : Cooking time setting range is 0 : 00-10 : 00.
Note 2: Not setting cooking time after power on, the appliance will automatically shut down after working 10 hours, without buzzer reminding function.
4.5 Cooking end time setting function
In the state of function to be selected, press button “ ” 4 times, then icon “AUTO” and oven in use symbol “ ”twinkle, display screen shows cooking end time ( The first setting shows the current system time by default ) ,cooking end time and decimal point symbol “ ” keep bright. Display effect see Pic 19(Suppose current system time is 0:00 ). When the icon “AUTO” and oven in use symbol “ ”twinkle, you can set cooking end time by pressing“ ”or“ ”,well set diagram see Pic 20(Suppose cooking end time is 0:30).
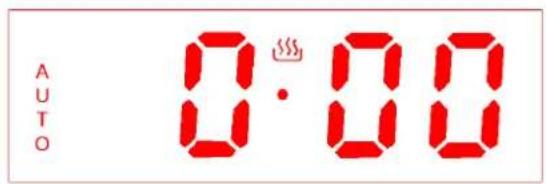
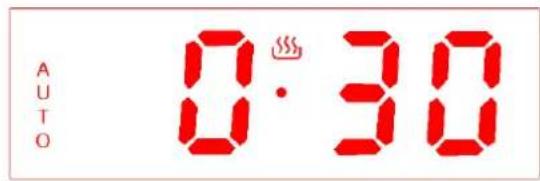
Pic 19 Cooking end time setting initial state Pic 20 Cooking end time well set state
After choosing the time, lift the finger off the buttons and wait for 5 seconds, then the icon "AUTO" and oven in use symbol "###" stop twinkling and change to always bright. Display screen will show system time, decimal point symbol " " and system time keep bright. It means time is well set. See Pic 21.
Whenever user wants to adjust the timer, in the working status, push “M” four times, when user sees the icon “AUTO” twinkles, it will show the set cooking end time, and user can adjust the time again. After setting is done, The display will change back to system time.
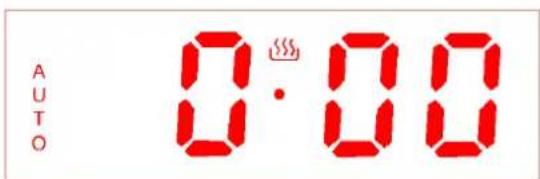
Pic 21 Cooking end time working status (all the icons always bright)
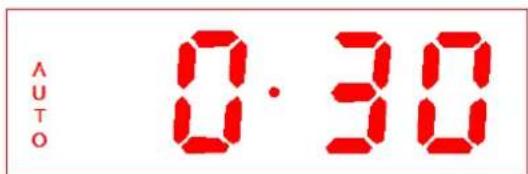
Pic 22 Cooking finished diagram (all the icons flickering)
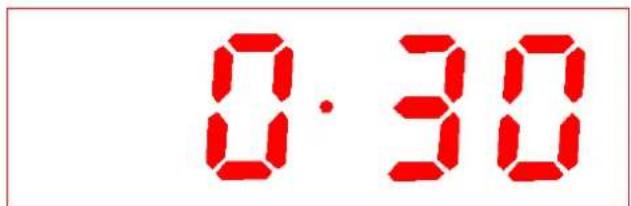
Pic 23 Cancel "Auto" function symbol display diagram (After cooking finished)
For example, the system time is 0:00 like pic 19. Set cooking end time 0:30, like pic 20. When the time reaches 0:30, display screen shows system time, oven in use symbol “###” extinguishes, system time keeps bright, decimal point symbol “●” and “Auto” function symbol twinkle, buzzer will prompt the user for 5 minutes, reminding the user that the cooking is finished .Like Pic 22.Pressing any key can stop the buzzer and extinguish “Auto” function symbol.Like Pic 23.
Note: Cooking end time is beyond current system time plus cooking time, and within 23:59.
4.6 Cooking reservation function
In the state of function to be selected, user can reserve the cooking time, by setting how much time to cook and when to have the dish ready.
First, press button “M” 3 times, then the icon “AUTO” and oven in use symbol icon “.” twinkle. The screen shows the cooking time ( First set default display “0·00” ). When the icon “AUTO” and oven in use symbol “.” twinkle, user can set the cooking time by pressing “+” or “-”.
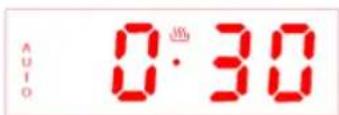
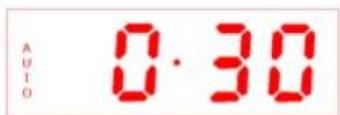
Pic 24 Cooking time well set diagram Pic 25 Reservation function setting initial state
Second, press “ ^M ” one time again, when icon “AUTO” twinkles, user can set the time that expect the cooking finishes at, by pressing “+” or “-”. After choosing the time, lift the finger off the buttons and wait for 5 seconds, then the icon “AUTO” stops twinkling. It means time is well set. Whenever user wants to adjust the timer, in the working status, press “ ^M ” three times to adjust the cooking period, or press “ ^M ” four times to adjust the ending time. After setting is done, The display will change back to system time.
For example, the system time is 0:00. First, set cooking time 30 mins like pic 25. Second, set cooking end time 1:00, like pic 26. Then the oven is back to waiting mode. When the time reaches 0:30, the oven automatically starts to cook. It cooks for 30 mins and stop at the set time 1:00, display screen shows system time, oven in use symbol " extinguishes, system time keeps bright, decimal point symbol " " and "Auto" function symbol twinkle, burrar will prompt the user for 5 minutes, reminding the user that the cooking is finished.
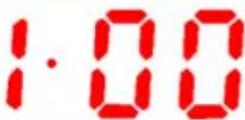
Pic 30 Cancel "Auto" function symbol display diagram (After cooking finished)
Note : Cooking time setting range is within 10 hours.
4.7 Selecting the audible signal
The audible signal has 3 tones. To adjust the signal you should proceed as follows:
- Under standby mode, that is when display screen shows system time, decimal point symbol "●" twinkling, audible signal can be adjusted by pressing the plus button to choose the 3 tones, press one time choose one kind. It is the second kind of tone by default when power on.
Thermostat control knob
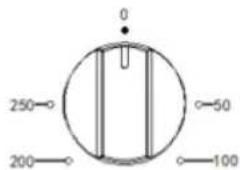
The oven thermostat control knob sets the required temperature of the oven. It is possible to regulate the temperature within a range of 50 - 250°C.
Turn the control knob dockwise.
Tips for saving energy
The following information will help you to use your appliance in an ecological way, and to save energy:
1、Use dark coloured or enamel coated cookware in the oven since the heat transmission will be better.
2、While cooking your dishes, perform a preheating operation if it is advised in the user manual or cooking instructions.
3、Do not open the door of the oven frequently during cooking.
4、Try to cook more than one dish in the oven at the same time, whenever possible.
You can cook by placing two cooking vessels onto the wire grill.
5、Cook more than one dish one after another. The oven will already be hot.
6、You can save energy by switching off your oven a few minutes before the cooking time.
Do not open the oven door.
7、Defrost frozen dishes before cooking them.
How to operate the oven
General information on baking, roasting and grilling
Risk of scalding by hot steam! Take care when opening the oven door as steam may escape.
Tips for baking
1、Use non-stick coated appropriate metal plates or aluminum containers or heat-resistant silicone moulds.
2、Make best use of the space on the rack.
3、It is recommended to place the baking mould in the middle of the rack.
4、Keep the oven door closed.
Tips for roasting
1、Seasoning with lemon juice and black pepper will improve the cooking performance when cooking a whole chicken, turkey or a large piece of meat.
2、Meat with bones takes about 15 to 30 minutes longer before it is cooked than a roast of the same size without bones.
3、You should calculate about 4 to 5 minutes cooking time per centimeter height of the meat.
4、Let meat rest in the oven for about 10 minutes after the cooking time. The juice is better distributed all over the roast and does not run out when the meat is cut.
5、Fish in a fire-resistant dish should be placed on the rack at the medium or lower level.
Tips for grilling
Grilling is ideal for cooking meat, fish and poultry and will achieve a nice brown surface without it drying out too much. Flat pieces, meat skewers and sausages are particularly suited for grilling as are vegetables with a high water content such as tomatoes and onions.
Troubleshooting
The oven may have some abnormal breakdown during working, you can check the fault list before calling to the after-sell service, maybe some breakdown you can repair by yourself.
Normal operation:
When first using the oven, it may have some situation of peculiar smell and smoking for some hours; Open the heating pattern to let the oven burn without anything for 1 hour when use the oven for the first time, then close the heating function, waiting for some time until the oven is cold, open the door and clean the oven.
When oven working, it may have sounds of crisp because of well of metal.
If the heating foods have some moisture, the heating emission hole may blow steam during the working operation.
The fan will start to work after 15 minutes after oven begin to work. Even if the oven is closed, fan will continue to work for 35 minutes.
Please preheat before put food in oven when for baking.
For a long cooking, you can turn off the oven before stop the oven and using the balance heat to finish the cooking.
Malfunction table
| Problem | Reason | Suggestion |
| Oven isn't working | Interrupt electrical current | Check your kitchen light or other appliance if working on |
| Breaker malfunction | Check if your breaker are working on | |
| Forgot to push the timer function | Reset the timer function | |
| Lamp isn't coming on | Lamp have defectiveness | Change for a new lamp |
| No electrical current | Check if the oven have electrical current | |
| Oven stop working in a sudden during working | Power interrupt | Check your kitchen light or other appliance whether still working on |
| Normal close thermostat protective | Check if the cool fan are working, if yes, need change for a new normal close thermostat | |
| Oven not heating | Not adjust the temperature controller | Set up the temperature |
| If this model have timer, you may not set up the time | Set up the timer | |
| No power | Check the power box | |
| Heating element was damaged | Change for a new heating element | |
| Water come out from the glass door when working | Door seal is blow-by | Change for a new door seal |
| Hinge is not strong enough | Change for a new hinge | |
| Oven stop working but the motor cool still working | Oven working for a long time, so cooling oven need for a long timeNormal open thermostat have a problem | Put your hand to the outlet and feel if it is come out for hot air, if yes, it is normalIf the air temperature from the outlet is room temperature, need change for a new normal open thermostat |
If the problem has not been solved: 1. Separate unit from the mains supply(deactivate or unscrew fuse). 2. Call the after-sales service of your store reseller; Do not attempt to repair the appliance yourself. There are no customer service items inside the appliance.
Baking and grilling tips
Baking tips
1、How to establish whether sponge cake is baked through. Approximately 10 minutes before the end of the baking time specified in the recipe, stick a cocktail stick into the cake at the highest point. If the cocktail stick comes out clean, the cake is ready.
2、The cake collapses. Use less fluid next time or set the oven temperature 10 degrees lower. Observe the specified mixing times in the recipe.
3、The cake has risen tin the middle but is lower around the edge. Do not grease the sides of the spring form cake tin. After baking, loosen the cake carefully with a knife.
4、The cake goes too dark on top. Place it lower in the oven, select a lower temperature and bake the cake for a little longer.
5、The cake is too dry. When it is done, make small holes in the cake using a cocktail stick. Then drizzle fruit juice or an alcoholic beverage over it. Next time, select a temperature 10 degree higher and reduce the baking time.
6、The bread or cake(e.g. cheesecake) looks good, but is soggy on the inside (sticky, streaked with water). Use slightly less fluid next time and bake for slightly longer at a lower temperature. For cakes with a moist topping, bake the base first. Sprinkle it with almonds or bread crumbs and then place the topping on top. Please follow the recipe and baking times.
7、The cake is unevenly browned. Select a slightly lower temperature to ensure that the cake is baked more evenly. Bake delicate pastries on one level using Top/bottom heating. Protruding greaseproof paper can affect the air circulation. For this reason, always cut greaseproof paper to fit the baking tray.
8、The bottom of a fruit cake is too light. Place the cake one level lower the next time.
9、The fruit juice overflows. Next time, use the deeper universal pan, if you have one.
10、Small baked items made out of yeast dough stick to one another when baking. There should be a gap of approx. 2 cm around each item. This gives enough space for the baked items to expand well and turn brown on all sides.
11、You were baking on several levels. The items on the top baking tray are darker than that on the bottom baking tray. Always use 3D hot air to bake on more than one level. Baking trays that are placed in the oven at the same time will not necessarily be ready at the same time.
12、Condensation forms when you bake moist cakes. Baking may result in the formation of water vapour, which escapes above the door. The steam may settle and form water droplets on the control panel or on the fronts of adjacent units. This is natural process.
Grilling tips
- When grilling, preheat the oven for approx. 4 minutes, before placing the food into the cooking compartment. Always grill with the oven door closed.
- As far as possible, the pieces of food you are grilling should be of equal thickness.
This will allow them to brown evenly and remain succulent and juicy.
- Turn the food you are grilling after 2/3 of the time.
- Do not add salt to steaks until they have been grilled.
- Add in a little liquid if the meat is lean. Cover the base of the ovenware with approx. 1/2 cm of liquid.
- Add liquid generously for pot roasts. Cover the base of the ovenware with approx. 1-2 cm of liquid.
- Place the food to be grilled directly on the wire rack. If you are grilling a single piece, the best results are achieved by placing it in the centre of the wire rack. The universal pan should also be inserted at level 1. The meat juices are collected in the pan and the oven is kept cleaner.
- When grilling, do not insert the baking tray or universal pan at level 4 or 5. The high heat distorts it and the cooking compartment can be damaged when removing it.
- The grill element switches on and off continually. This is normal. The grill setting determines how frequently this will happen.
- When the roast is ready, turn off the oven and allow it to rest for an additional 10 minutes. This allows better distribution of the meat juices.
- For roast pork with a rind, score the rind in a crossways pattern, then lay the roast in the dish with the rind at the bottom.
- Place whole poultry on the lower wire rack breast-side down. Turn after 2/3 of the specified time.
- For duck or goose, pierce the skin on the underside of the wings. This allows the fat to run out.
- Turn the pieces of fish after 2/3 of the time, whole fish does not have to be turned. Place the whole fish in the oven in its swimming position with its dorsal fin facing upwards. Placing half a potato or a small oven-proof container in the stomach cavity of the fish will make it more stable.
- How to tell when the roast is ready. Use a meat thermometer (available from specialist shops) or carry out a “spoon test”. Press down on the roast with a spoon. If it feels firm, it is ready. If the spoon can be pressed in, it needs to be cooked for a little longer.
- The roast is too dark and the crackling is partly burnt. Check the shelf height and temperature.
- The roast looks good but the juices are burnt. Next time, use a smaller roasting dish or add more liquid.
- The roast looks good but the juices are too clear and watery. Next time, use a larger roasting dish and use less liquid.
- Steam rises from the roast when basted. This is normal and due to the laws of physics. The majority of the steam escapes through the steam outlet. It may settle and form condensation on the cooler switch panel or on the fronts of adjacent units.
Maintenance and cleaning
- The oven should be cleaned after every use. When cleaning the oven the lighting should be switched on to enable you to see the surfaces better.
- The oven chamber should only be washed with warm water and a small amount of washing-up liquid.
• After cleaning the oven chamber wipe it dry. - Never clean the oven surfaces by steam cleaning.
-
The oven cavity should only be cleaned with warm soapy water, using either a sponge or soft cloth. No abrasive cleaners should be used.
-
Any stains that may appear on the bottom of the oven will have originated from food splashes or spilt food, these splashes occur during the cooking process. These could possibly be a result of the food being cooked at an excessively high temperature or being placed in cookware that is too small.
- You should select a cooking temperature and function that is appropriate for the food that you are cooking. You should also ensure that the food is placed in an adequately sized dish and that you use the drip tray where appropriate.
- Outer parts of the oven should only be cleaned with warm soapy water, using either a sponge or soft cloth. No abrasive cleaners should be used.
- If you use any form of oven cleaner on your appliance, then you must check with the manufacturer of the cleaner that it is suitable for use on your appliance.
- Any damage that is caused to the appliance by a cleaning product will not be fixed free of charge, even if the appliance is within the guarantee period.
- Do not use cleaning products containing abrasive materials for the cleaning and maintenance of the glass front panel.
Cleaning the oven
No oven cleaner or any other special cleaning agent is required for cleaning the oven. It is recommended to wipe the oven with a damp cloth while it is still warm.
To clean the side walls and oven door
- Take down left and right side-shelves, method is pushing the bottom of shelves and pull to sides at the same time, push up side shelves and rotate up to level, and pull out the rack.
- Cleaning left and right sides, order of install is opposite to the order of take down.
Detaching and attaching the oven door
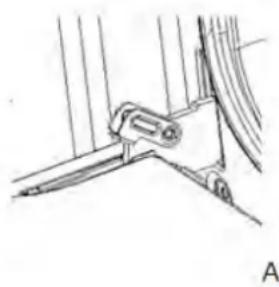
For cleaning purposes and to remove the door panels, you can detach the oven door. Every door hinge has a locking rod, when it is close, door was fixed in place, then the door was not disassembly. If in order to remove down door to open the locking rod, hinge will be locked and would not bite.

When the hinge not locked, it will have a big strength to close in sudden.
Make sure locking rod closed all the time, and insure it was open when remove the door.
Remove the door
• Full open the door.
- Fold up the right and left side of locking rod. (picture A)
- Close the door until reach to stop step, hold on both left and right sides of the door, then re-close the door, upward and downward and pull out the door.
Install the oven door
Accord to the opposite order of door disassembly
- When install oven door, make sure both hinge plug into opening mouth directly.
natural_image
Technical line drawing of a mechanical clamp or bracket assembly (no text or symbols)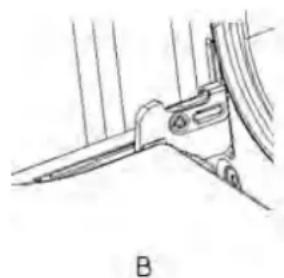
natural_image
Technical line drawing of a mechanical component with no visible text or symbols- Both sides of hinge rabbet must bite up each other.
- When open the door, spread down locking rod (picture B)

If the door drop accidentally or hinges shut up suddenly, do not push you hand in hinges. Please call your after-sell department.
Remove and install door panel
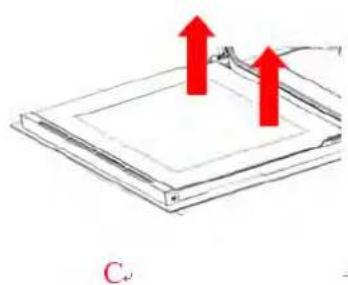
- Remove oven door, put it on a piece of cloth.
- Using one hand to push the outside glass, the other hand to pull the inside glass, hold the glass then pull out the glass.
Notice! Dangerous!
If the glass has some scratches, it may lead to crack. Don't use the glass spatula, acute and corrosive cleaning product or detergent to clean the glass.
natural_image
Diagram of a layered structure with two red upward arrows and label C, no readable text or symbols present.Install
- Plug the inner glass into glass pressure groove.
- Both right and left sides need put down alignment to card slot and push the glass to its place.
- Put on the oven door.
Remove and install side shelves
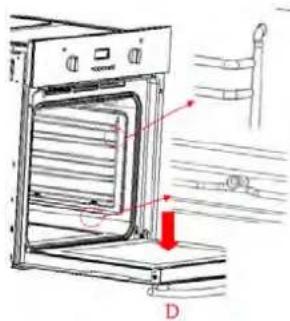
In order to clean sides of oven, you should remove the side shelves to clean the oven
One hand push the side of the cavity, another hand catch the front side of the shelf, pull at the shelf out.
Replacing the oven lamp

If the bulb in the oven Light fails, it must be replaced.
Risk of electric
Shock!
Switch off the circuit breaker in the fuse box.
- Place a tea towel in the oven when it is cold to prevent damage.
- Unscrew the glass cover by turning it anti-clockwise.
- Replace the bulb with one of the same type.
- Screw the glass cover back in.
- Remove the tea towel and switch on the circuit breaker.
Regular inspections
Besides keeping the cooker clean, you should:
-
Carry out periodic inspections of the control elements and cooking units of the cooker. After the guarantee has expired you should have a technical inspection of the cooker carried out at a service centre at least once every two years.
-
Fix any operational faults
Carry out periodical maintenance of the cooking units of the cooker.

Caution!
All repairs and regulatory activities should be carried out by the appropriate service centre or by an appropriately authorized fitter.
Environmental note
Note: Before discarding an old appliance, switch off and disconnect it from the power supply. Cut off and render any plug useless. Cut the cable off directly behind the appliance to prevent misuse. This should be undertaken by a competent person.
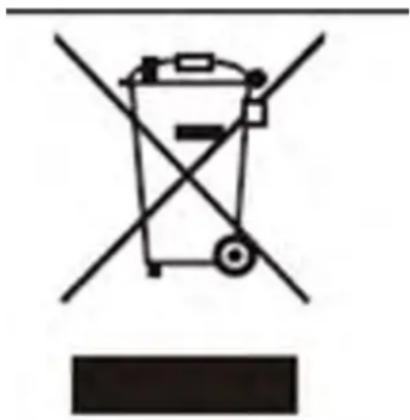
This appliance is marked according to the European directive 2002/96/EC on Waste electrical and Electronic Equipment (WEEE). By ensuring this product is disposed of correctly, you will help prevent potential negative consequences for the environment and human health, which could otherwise be caused by inappropriate waste handling of this product.
The symbol on the product or on the documents accompanying the product
indicates that this appliance may not be treated as household waste. Instead it shall be handed over to the applicable collection point for the recycling of electrical and electronic equipment.
Disposal must be carried out in accordance with local environmental regulations for waste disposal. For more detailed information about treatment, recovery and recycling of this product, please contact your local city office or local waste management office.
The packaging materials that we use are environmentally friendly and can be recycled. Please discard all packaging material with due regard for the environment.
natural_image
Symbol of a trash bin crossed with a diagonal line, no text or numbers presentTest dishes
We provide all kinds of recipes and ideal setting for choice here. It will show you which heating type and which temperature are of best suits for your dishes. You can find information about the appropriate accessories and its insertion height, as well as tips on cooking containers and methods of preparation.
Instructions:
A. The values in the table can always apply to the dishes place in the cold and empty oven. Only pre-heat the oven when it states in the table below. Do not lay the oil-proof paper onto the accessories before pre-heat is completed.
B. The baking parameters given in Tables are approximate and can be corrected based on your own experience and cooking preferences.
C. Please use the accessories provided. Before cooking, check that any accessories that are not required are removed from the oven.
D. Oven glove must be used when removing the accessory or ovenware from the appliance.
Baking and grilling table
| Foods Accessory Heating | function | Rack place | Temperature setting (°C) | Heating time ) | ||
| Cake Round model |  | 2^nd layer | 140-160 30-45 | |||
| Bread | Bake Pan | 2^nd layer | 180-200 10-20 | |||
| Bake Pan | 3^rd layer | 170-190 10-20 | ||||
| Bake Pan |  | 3^rd + 1^st layer | 160-180 | 10-20 | ||
| Thin pizza (cold) Bake Pan | 2^nd layer | 190-210 15-25 | ||||
| Deep pizza (cold) | Bake Pan |  | 2^nd layer | 180-200 20-30 | ||
| Bake Pan +rack | 3^rd + 1^st layer | 170-190 | 25-35 | |||
| Bread piece (9piece) | Rack |  | 3^rd layer | 160-170 10-15 | ||
| Rack | 3^rd + 1^st layer | 160-180 | 15-25 | |||
| Sausage Rack |  | 3^rd layer | 160-180 10-15 | |||
| Ribs Rack | 3^rd layer | 200-220 | 20-35 | |||
| Pork | Bake Pan |  | 2^nd layer | 190-210 70-85 | ||
| Bake Pan | 1^st layer | 180-200 55-70 | ||||
| Beefsteak(3cm thickness) | Bake Pan | 2^nd layer | 190-210 20-35 | |||
| Small whole chicken(1.2Kg) | Rack |  | 2^nd layer | 200-220 50-60 | ||
| Whole chicken (1.6Kg) Rack |  | 2^nd layer | 190-210 50-60 | |||
| Small chicken pieces(150g) | Rack | 3^rd layer | 200-220 30-40 | |||
| Whole goose (3.5Kg) | Rack |  | 2^nd layer | 170-190 60-70 | ||
| Big piece of muttonwith bone (1.2Kg) | Bake pan |  | 2^nd layer | 170-190 60-70 | ||
| Whole fish (1.0Kg) | Rack |  | 2^nd layer | 200-220 30-40 | ||
| Whole fish (1.5Kg) | Rack | 2^nd layer | 180-200 40-50 | |||
Pronto Service + Support: 1800 440 335
Email: service@eurostylegroup.com.au
HEAD OFFICE
65 Glynburn Road, Glynde SA 5070
Ph: 08 8165 1012
www.euroappliances.com.au


- Contents
- Important safety information
- Warning
- Operation
- Warning! Danger of explosion
- Safety advices
- General Safety
- Electrical safety
- Safety
- Electrical connection
- Danger of electric shock!
- Cleaning
- Installation
- Before installation
- Installation and connection
- ▲ Material damage!
- Connection to the mains supply
- Final check
- Prior to start up of the appliance
- Your new oven
- Oven overview
- Technical specifications
- Your accessories
- Inserting accessories
- Oven pan
- Oven deep pan (Optional)
- Wire rack
- Side shelf
- Control panel
- Function selector
- Digital timer control
- Control panel
- Function icon instruction
- Display screen icon instruction
- Timer working status
- Timer function mode switching
- Operation instructions
- Power on
- Start up and time setting
- Alarm clock setting function
- Cooking time setting function
- Cooking end time setting function
- Cooking reservation function
- Selecting the audible signal
- Tips for saving energy
- How to operate the oven
- Tips for baking
- Tips for roasting
- Tips for grilling
- Troubleshooting
- Baking and grilling tips
- Baking tips
- Grilling tips
- Maintenance and cleaning
- Cleaning the oven
- Detaching and attaching the oven door
- Remove the door
- Install the oven door
- Remove and install door panel
- Notice! Dangerous!
- Install
- Remove and install side shelves
- Replacing the oven lamp
- Regular inspections
- Caution!
- Environmental note
- Test dishes
- Instructions:
Brand : Eurom
Model : EO6082BX2
Category : Oven