
ZU2200 - Projector OPTOMA - Free user manual and instructions
Find the device manual for free ZU2200 OPTOMA in PDF.


| Product type | DLP projector |
| Dimensions (L x W x H) | 400 x 300 x 150 mm |
| Weight | 8.5 kg |
| Power supply | 100-240V AC, 50/60 Hz |
| Main features | High brightness projection, keystone correction, motorized zoom, interchangeable lenses |
| Maintenance and cleaning | Clean the air filter regularly, use a soft dry cloth for the lens |
| Safety | Kensington lock device, automatic shutdown in case of overheating |
| Spare parts and Repairability | Replacement lamp, air filter, optional lenses |
| General information | Brand OPTOMA, model ZU2200 |
Frequently Asked Questions - ZU2200 OPTOMA
User questions about ZU2200 OPTOMA
0 question about this device. Answer the ones you know or ask your own.
Ask a new question about this device
Download the instructions for your Projector in PDF format for free! Find your manual ZU2200 - OPTOMA and take your electronic device back in hand. On this page are published all the documents necessary for the use of your device. ZU2200 by OPTOMA.
USER MANUAL ZU2200 OPTOMA
natural_image
Technical line drawing of a rectangular electronic device with ventilation grilles and mounting feet (no text or symbols)TABLE DES MATIÈRES
SÉCURITÉ .... 5
Menu Communication....71
ID Projecteur 71
Optoma Technology Inc. 47697 Westinghouse Drive, Fremont, CA 94539, USA
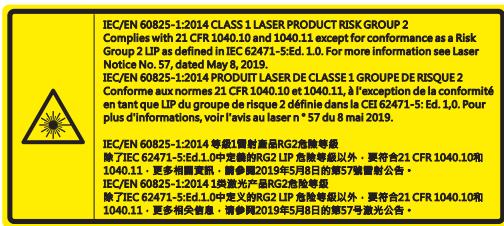
This product complies with performance standards for laser products under 21 CFR Part 1040 except with respect to those characteristics authorized by Variance Number FDA-2021-V-1350 [effective from 2022/10/02]
U.S.A. Only
natural_image
Illustration of a projected projector device with labeled projection (no text or symbols on the device itself)
natural_image
Technical diagram of a device casing with mounting holes and internal components (no text or symbols)natural_image
Technical illustration of a computer rack with two views: one showing internal components and the other showing external hardware (no text or symbols present)INTRODUCTION
Vue de côté

Before installing or replacing the lens, switch off the power to the projector.
Avoid using the remote control or projector keypad button to adjust the lens shift or zoom/focus while the lens attachment process is carried out.
IMPORTANT!
natural_image
Technical line drawing of a mechanical device with labeled ports and a blue circular arrow indicating rotation (no text or symbols present)natural_image
Technical illustration of an electronic device with a rotating cable and labeled ports (no text or symbols present)CONFIGURATION ET INSTALLATION
natural_image
Technical illustration of a rectangular electronic device with ventilation grilles and mounting feet, no text or symbols presentCONFIGURATION ET INSTALLATION
natural_image
3D cutaway view of a mechanical assembly showing internal components and mounting brackets (no text or symbols visible)natural_image
3D mechanical assembly diagram showing internal components and mounting brackets (no text or labels)CONFIGURATION ET INSTALLATION
natural_image
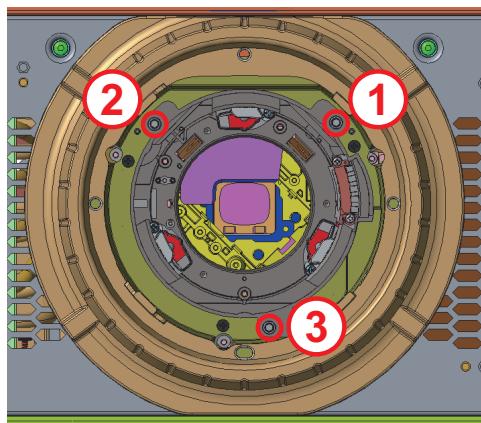
3D mechanical assembly diagram showing internal components and wiring (no text or symbols)
CONFIGURATION ET INSTALLATION
UTILISER LE PROJECTEUR
contour
| Region | Color Zone Description | |----------|-------------------------------------------| | Vert | High (top-left) | | Jaune | Upper right (top-right) | | Rouge | Lower right (bottom-right) | | Magenta | Medium right (middle-right) | | Blanc | Middle left (middle-left) | | Cyan | Bottom left (bottom-left) |Couleur
natural_image
Pure geometric diagram with dashed and solid lines inside a rectangle, no text or symbols present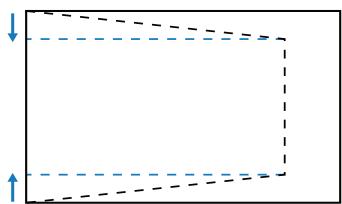
natural_image
Pure geometric diagram with dashed lines and arrows, no text or symbols presentnatural_image
Pure geometric diagram with dashed lines forming a trapezoid and two blue arrows at the base (no text or symbols)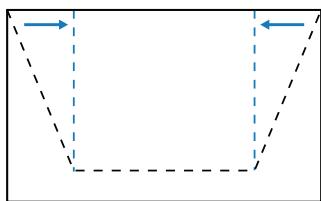
natural_image
Pure geometric shape with dashed lines and arrows, no text or symbols presentnatural_image
Pure geometric diagram of a symmetrical shape with dashed vertical lines and arrows, no text or symbols present.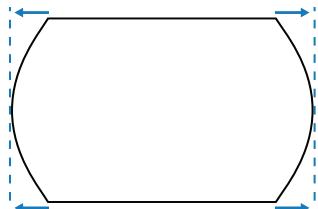
natural_image
Pure geometric shape with dashed blue arrows indicating corners (no text or symbols)natural_image
Pure geometric diagram of a rectangle with curved sides and two arrows indicating upward and downward directions (no text or symbols)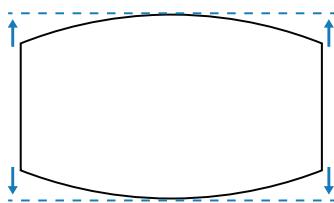
natural_image
Pure geometric shape with rounded corners and dashed lines, no text or symbols presentUTILISER LE PROJECTEUR
natural_image
Pure geometric diagram of a rectangle with dashed internal lines and four corner cells, no text or symbols present.Déformation avancée
| Emplacement PBP | |
PBP, Gauche Principale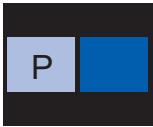 | PBP, Droite Principale |
PBP, Haut Principal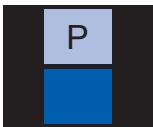 | PBP, Bas Principal |
- Emplacement PIP
| Emplacement PIP | Taille PIP | ||
| Petit | Moyen | Large | |
| PIP, Bas Droite | 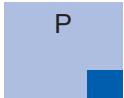 | 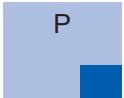 |  |
| PIP, Bas Gauche |  | 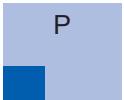 | 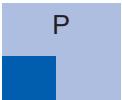 |
| PIP, Haut Gauche | 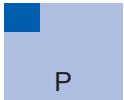 | 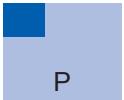 |  |
| PIP, Haut Droite |  | 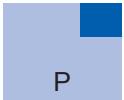 | 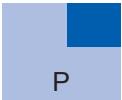 |
UTILISER LE PROJECTEUR
Optoma Management Suite (OMS)
natural_image
Green grid background with a diagonal pink line and a small pink dot at the top-left corner (no text or symbols)(a) Gauche : 0 (0%) / 192 (10%) \~ 960 (50%)
(b) Droite : 0 (0%) / 192 (10%) \~ 960 (50%)
(c) Haut : 0 (0%) / 120 (10%) \~ 600 (50%)
(d) Bas : 0 (0%) / 120 (10%) \~ 600 (50%)
bar
| Category | Value | |---|---| | 1 | 0 | | 2 | 0 | | 3 | 0 | | 4 | 0 | | 5 | 0 | | 6 | 0 | | 7 | 0 | | 8 | 0 | | 9 | 0 | | 10 | 0 | | 11 | 0 | | 12 | 0 | | 13 | 0 | | 14 | 0 | | 15 | 0 | | 16 | 0 | | 17 | 0 | | 18 | 0 | | 19 | 0 | | 20 | 0 | | 21 | 0 | | 22 | 0 | | 23 | 0 | | 24 | 0 | | 25 | 0 | | 26 | 0 | | 27 | 0 | | 28 | 0 | | 29 | 0 | | 30 | 0 | | 31 | 0 | | 32 | 0 | | 33 | 0 | | 34 | 0 | | 35 | 0 | | 36 | 0 | | 37 | 0 | | 38 | 384 | The values are estimated based on the provided code. The labels for the bars represent the numbers '384' and '0' respectively.natural_image
Two-panel grid transformation diagram showing color shift from purple to green and gray to black (no text or symbols)| Pass: | O | k | n |
| Variable | |||

■ System Automatically Send
| I | N | F | O | n |
| Variable | ||||
Character to HEX table
| Character | HEX |
| ~ | 7E |
| 0 | 30 |
| 1 | 31 |
| 2 | 32 |
| 3 | 33 |
| 4 | 34 |
| 5 | 35 |
| 6 | 36 |
| 7 | 37 |
| 8 | 38 |
| 9 | 39 |
| Space | 20 |
| CR (Enter) | 0D |
e.g.
ASCII to HEX
| RS232 Command | ~ | 0 | 0 | 1 | 9 | 5 | 1 | CR | |
| HEX | 7E | 30 | 30 | 31 | 39 | 35 | 20 | 31 | 0D |
| Level 2 | Level 3 | Level 4 | Option / Value | Step | User Data | Write Command | |||
| Command | Response | ||||||||
| CMD | Set Para. | Fail | Pass | ||||||
| Auto Source | Off | ● | ~XX563 | 0 | F | P | |||
| On | ~XX563 | 1 | F | P | |||||
| Quick Resync | Off | ● | ~XX315 | 0 | F | P | |||
| On | ~XX315 | 1 | F | P | |||||
| Active Inputs | VGA | ● | ~XX408 | 5 | F | P | |||
| HDMI1 | ~XX408 | 1 | F | P | |||||
| HDMI2 | ~XX408 | 15 | F | P | |||||
| DVI-D | ~XX408 | 2 | F | P | |||||
| Display Port | ~XX408 | 20 | F | P | |||||
| 3G-SDI | ~XX408 | 22 | F | P | |||||
| HDBaseT | ~XX408 | 21 | F | P | |||||
| Latency Adjustment | Normal | ● | ~XX220 | 0 | F | P | |||
| 2D Ultra | ~XX220 | 1 | F | P | |||||
| Backup Input | Auto Switch | Off | ● | ~XX264 | 0 | F | P | ||
| On | ~XX264 | 1 | F | P | |||||
| Current Signal | (read only) | X | |||||||
| First Input | HDMI1 | ● | ~XX265 | 7 | F | P | |||
| HDMI2 | ~XX265 | 8 | F | P | |||||
| HDBaseT | ~XX265 | 16 | F | P | |||||
| Display Port | ~XX265 | 15 | F | P | |||||
| Second Input | HDMI1 | ● | ~XX266 | 7 | F | P | |||
| HDMI2 | ~XX266 | 8 | F | P | |||||
| HDBaseT | ~XX266 | 16 | F | P | |||||
| Display Port | ~XX266 | 15 | F | P | |||||
| Backup Input Status | Active/Inactive (read only) | X | |||||||
| Backup Input Change | Changed/No Change (read only) | X | |||||||
| Backup Input Info. | Current Signal | (read only) | X | ||||||
| Backup Input Status | Active/Inactive (read only) | X | |||||||
| Backup Input Change | Changed/No Change (read only) | X | |||||||
| Read Command | ||||
| Command | Response | |||
| CMD | Value | Fail | Pass | |
| ~XX133 | 1 | F | O | k 0 |
| ~XX133 | 1 | F | O | k 1 |
| ~XX274 | 1 | F | O | k 0 |
| ~XX274 | 1 | F | O | k 1 |
| ~XX275 | 1 | F | O | k 7 |
| ~XX275 | 1 | F | O | k 8 |
| ~XX275 | 1 | F | O | k 16 |
| ~XX275 | 1 | F | O | k 15 |
| ~XX276 | 1 | F | O | k 7 |
| ~XX276 | 1 | F | O | k 8 |
| ~XX276 | 1 | F | O | k 16 |
| ~XX276 | 1 | F | O | k 15 |
| ~XX277 | 1 | F | O | k 0=Inactive1=Active |
| ~XX278 | 1 | F | O | k 0=No Change1=Changed |
| ~XX279 | 1 | F | O | k a=0 Nonea=1 DVia=2 VGaa=7 HDMI1a=8 HDMI2a=15 Display Porta=16 HDBaseTta=18 3G-SDI |
| ~XX277 | 1 | F | O | k 0=Inactive1=Active |
| ~XX278 | 1 | F | O | k 0=No Change1=Changed |
| Level 2 | Level 3 | Level 4 | Option / Value | Step | User Data | Write Command | |||
| Command | Response | ||||||||
| CMD | Set Para. | Fail | Pass | ||||||
| First Input | By First Input (read only) | X | |||||||
| Resolution | (read only) | X | |||||||
| Horz Refresh | (read only) | X | |||||||
| Color Space | (read only) | X | |||||||
| HDR | Yes/No (read only) | X | |||||||
| Second Input | By Second Input (read only) | X | |||||||
| Resolution | (read only) | X | |||||||
| Horz Refresh | (read only) | X | |||||||
| Color Space | (read only) | X | |||||||
| HDR | Yes/No (read only) | X | |||||||
| VGA | Phase | 0-100 | 1 | ● | ~XX74 | 0~100 | F | P | |
| Resolution | (read only) | X | |||||||
| HDMI | Output | HDMI 1 | ● | ~XX309 | 5 | F | P | ||
| HDMI 2 | ~XX309 | 6 | F | P | |||||
| HDMI 1 EDID | 1.4 | ● | ~XX236 | 1 | F | P | |||
| 2 | ~XX236 | 2 | F | P | |||||
| HDMI 2 EDID | 1.4 | ● | ~XX237 | 1 | F | P | |||
| 2 | ~XX237 | 2 | F | P | |||||
| HDBaseT | EDID | 1.4 | ● | ~XX238 | 1 | F | P | ||
| 2 | ~XX238 | 2 | F | P | |||||
| Reset | X | ~XX178 | 1 | F | P | ||||
| Read Command | |||
| Command | Response | ||
| CMD | Value | Fail | Pass |
| ~XX275 | 1 | F | O k a=7 HDMI1a=8 HDMI2a=16 HDBaseTa=15 Display Port |
| ~XX276 | 1 | F | O k a=7 HDMI1a=8 HDMI2a=16 HDBaseTa=15 Display Port |
| Level 1 | Level 2 | Level 3 | Write Command | Read Command | |||||||||
| Command | Response | Command | Response | ||||||||||
| CMD | space | Set Para. | Fail | CMD | space | CMD Value | Fail | Pass | |||||
| When projector in standby, RS232 have to support | |||||||||||||
| Power On | ~XX00 | 1 | F | ~XX124 | 1 | F | O | k 1 | |||||
| Power On with password | ~XX00 | 1 ~nnnn | F | ||||||||||
| Information | Info String | ~XX150 | 1 | F | O | k abbbb bcc ddddee (Note*1) | |||||||
| Light Source Hours | ~XX108 | 1 | F | O | k nnnnn (hour digits) | ||||||||
| Other Items | |||||||||||||
| Power Off | ~XX00 | 0 | F | ~XX124 | 1 | F | O | k 0 | |||||
| Power On | ~XX00 | 1 | F | ~XX124 | 1 | F | O | k 1 | |||||
| Re-Sync | ~XX01 | 1 | F | ||||||||||
| AV Mute | Off | ~XX02 | 0 | F | ~XX355 | 1 | F | O | k 0 | ||||
| On | ~XX02 | 1 | F | ~XX355 | 1 | F | O | k 1 | |||||
| Freeze | Unfreeze | ~XX04 | 0 | F | |||||||||
| Freeze | ~XX04 | 1 | F | ||||||||||
| 3D Sync Out | To Emitter | ~XX232 | 0 | F | |||||||||
| To Next Projector | ~XX232 | 1 | F | ||||||||||
| 3D Frame Delay | 1~200 | ~XX233 | 1~nnn | F | |||||||||
| Output 3D state | 2D | ~XX130 | 1 | F | O | k 0 | |||||||
| 3D | ~XX130 | 1 | F | O | k 1 | ||||||||
| System Auto Send | Standby Mode | I N F O 0 | |||||||||||
| Warming up | I N F O 1 | ||||||||||||
| Cooling Down | I N F O 2 | ||||||||||||
| Out of Range | I N F O 3 | ||||||||||||
| lightsource Fail (LED Fail) | I N F O 4 | ||||||||||||
| Thermal Switch Error | I N F O 5 | ||||||||||||
| Fan Lock | I N F O 6 | ||||||||||||
| Over Temperature | I N F O 7 | ||||||||||||
| LightSource Hours Running Out | I N F O 8 | ||||||||||||
| Cover Open | I N F O 9 | ||||||||||||
| lightsource Ignite Fail | I N F O 10 | ||||||||||||
| Format Board Power On Fail | I N F O 11 | ||||||||||||
| Color Wheel Unexpected Stop | I N F O 12 | ||||||||||||
| Over Temperature | I N F O 13 | ||||||||||||
| FAN 1 Lock | I N F O 14 | ||||||||||||
| FAN 2 Lock | I N F O 15 | ||||||||||||
| FAN 3 Lock | I N F O 16 | ||||||||||||
| FAN 4 Lock | I N F O 17 | ||||||||||||
| FAN 5 Lock | I N F O 18 | ||||||||||||
| LAN fail then restart | I N F O 19 | ||||||||||||
| LD lower than 60% | I N F O 20 | ||||||||||||
| LD NTC (1) Over Temperature | I N F O 21 | ||||||||||||
| LD NTC (2) Over Temperature | I N F O 22 | ||||||||||||
| High Ambient Temperature | I N F O 23 | ||||||||||||
| System Ready | I N F O 24 | ||||||||||||
| I N F O 25 | |||||||||||||
| FAN 6 Lock | I N F O 26 | ||||||||||||
| FAN 7 Lock | I N F O 27 | ||||||||||||
| FAN 8 Lock | I N F O 28 | ||||||||||||
| FAN 9 Lock | I N F O 29 | ||||||||||||
| FAN 10 Lock | I N F O 30 | ||||||||||||
| FAN 11 Lock | I N F O 31 | ||||||||||||
| FAN 12 Lock | I N F O 32 | ||||||||||||
| FAN 13 Lock | I N F O 33 | ||||||||||||
Optoma Technology, Inc. 47697 Westinghouse Drive. Fremont, Ca 94539
888-289-6786 510-897-8601 services@optoma.com
Canada
Optoma Technology, Inc. 47697 Westinghouse Drive. Fremont, Ca 94539
888-289-6786 510-897-8601 services@optoma.com
Amérique Latine
Optoma Technology, Inc. 47697 Westinghouse Drive. Fremont, Ca 94539
888-289-6786 510-897-8601 services@optoma.com
Europe
Unit 1, Network 41, Bourne End Mills Hemel Hempstead, Herts, HP1 2UJ, United Kingdom www.optoma.eu Téléphone réparations : +44 (0)1923 691865
Benelux BV
Randstad 22-123 1316 BW Almere Les Pays-Bas www.optoma.nl
+31 (0) 36 820 0252 +31 (0) 36 548 9052
France
Bâtiment E +33 1 41 46 12 20 81-83 avenue Edouard Vaillant +33 1 41 46 94 35 92100 Boulogne Billancourt, France savoptoma@optoma.fr
Espagne
C/ José Hierro,36 Of. 1C 28522 Rivas VaciaMadrid, Espagne
+34 91 499 06 06 +34 91 670 08 32
Allemagne
Am Nordpark 3 41069 Mönchengladbach Allemagne
+49 (0) 2161 68643 0 +49 (0) 2161 68643 99 info@optoma.de
Scandinavie
Lerpeveien 25 3040 Drammen Norvège
+47 32 98 89 90 +47 32 98 89 99 info@optoma.no
https://www.optoma.com/kr/
Japon
https://www.optoma.com/jp/
Taiwan
https://www.optoma.com/tw/
Chine
Room 2001, 20F, Building 4, No.1398 Kaixuan Road, Changning District Shanghai, 200052, China
Australie
https://www.optoma.com/au/
+86-21-62947376 +86-21-62947375 www.optoma.com.cn
Brand : OPTOMA
Model : ZU2200
Category : Projector