
GHBFW47BG - Household Fan GEMINI - Free user manual and instructions
Find the device manual for free GHBFW47BG GEMINI in PDF.


| Product Type | Household Fan |
| Brand | Gemini |
| Model | GHBFW47BG |
| Height (with stand) | 135 cm |
| Fan Diameter | 45 cm |
| Weight | 3.2 kg |
| Power Source | AC 220-240V, 50Hz |
| Power Consumption | 50 W |
| Speed Settings | 3 speed levels |
| Oscillation | Yes, 90° wide-angle oscillation |
| Tilt Adjustment | Yes, manual up/down tilt |
| Control Type | Remote control and touch panel |
| Timer Function | Yes, up to 8 hours |
| Airflow Modes | Normal, Natural, Sleep |
| Noise Level | ≤ 60 dB (max speed) |
| Material | ABS plastic, metal stand |
| Safety Features | Overheat protection, stable base, fan guard |
| Cleaning Instructions | Wipe with damp cloth; do not immerse |
| Spare Parts Availability | Blades, guard, remote control available |
| Repairability | User-replaceable fuse and blades |
| Included Accessories | Remote control, user manual |
| Manufacturing Year | 2021 |
| Warranty | 2 years |
Frequently Asked Questions - GHBFW47BG GEMINI
User questions about GHBFW47BG GEMINI
0 question about this device. Answer the ones you know or ask your own.
Ask a new question about this device
Download the instructions for your Household Fan in PDF format for free! Find your manual GHBFW47BG - GEMINI and take your electronic device back in hand. On this page are published all the documents necessary for the use of your device. GHBFW47BG by GEMINI.
USER MANUAL GHBFW47BG GEMINI
Read all instructions carefully before using this product.
- This product is for domestic indoor use only. If this product is used for any commercial, industrial, rental or other purposes, product warranty will be VOIDED.
- This product is not intended for use by children or persons with reduced physical, sensory or mental capabilities, or lack of experience and knowledge, unless they have been given supervision or instruction concerning use of this product by an adult responsible for their safety.
- Mind your children and DO NOT let children play with this product.
- Cleaning and user maintenance shall not be made by children without supervision.
- Check the voltage indicated on the rating label before using this product.
- If the supply cord is damaged, it must be replaced by the manufacturer, its service agent or similarly qualified persons in order to avoid hazards.
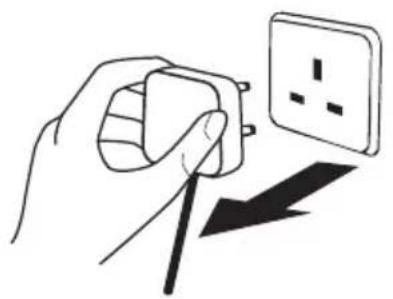
- Unplug this product from the power source before cleaning and maintenance.

WARNING!
To avoid fire, electric shock, or personal injury, please be sure to observe the following requirements; Please follow the local electrical regulations.
- This product is only suitable for indoor use and should not be used outdoors.
- This product must not be repaired or modified by non-professional or unauthorized personnel.
- Before plugging in the power supply, please check whether the rated voltage indicated by this product is the same as the voltage in your home.
- When the machine is in operation or idle, it should be placed more than 1.5 meters away from fire and potential fire. Avoid direct sunlight.
- It is forbidden to use in places with flammables, or explosive objects, subject to heat, deformation, discoloration and deterioration. It is forbidden to use in places with heavy dust.
- It is forbidden to use in places with hanging objects, where it can be easily bumped into or hit, or on an unstable surface.
- It is forbidden to use the method of plugging (unplugging) the power cord to replace the power on and power off switch.
- It is forbidden to use this product as heating equipment for animals or plants.
- To avoid overheating, it is forbidden to cover the product.
- It is strictly forbidden to insert any wire or other foreign matter into any hole in the machine, in order to avoid electric shock.
- DO NOT use if the product shows signs of obvious damage after a fall.
-
It is strictly forbidden to immerse the machine in water.
-
Never use the machine directly facing an electrical outlet or under a power outlet.
- It is strictly forbidden to share the socket with other high-power appliances.
- DO NOT directly pull the power cord to move the body.
- If the machine is covered or incorrectly placed, it can cause a fire hazard. Therefore, it is not allowed to use a programmable automatic power-on device, timer, or any other device with the product.
- When the product is in use, the power cord should be placed behind the body. Placing the power cord in front will cause it to overheat and be damaged, or even cause an accident.
- Children, elderly people or patients who have lost the ability to take care of themselves, please use this appliance under the supervision of an adult, to prevent accidents.
- If this product fails, please turn off the power and unplug the power cord immediately. This product must be repaired by the manufacturer's maintenance department or a similarly qualified professional.
- Before use, check that the power cord and the plug are in good condition. If the power cord is damaged, in order to avoid danger, the user must not disassemble or replace it. Replacing the power cord must be performed by the manufacturer's maintenance department or a similarly qualified professional.
- To avoid burning when using this product, please DO NOT let bare skin directly contact with the surface of the air outlet.
- This product is only suitable for use in dry environment. DO NOT use around a bathtub, sprinkler or swimming pool.
- If there is a gap between the plug and the socket, or the plug has become very hot, maybe the socket needs to be replaced. Consult a qualified electrician to replace the outlet.
- This product must be connected to an EMSD certified fixed socket with the correct rated power. It is strictly forbidden to use adopters, extension cords, or share the socket with other appliances.
This product uses PTC heating, providing heat by hot air, which can quickly increase room temperature. It is safe, efficient and energy saving.
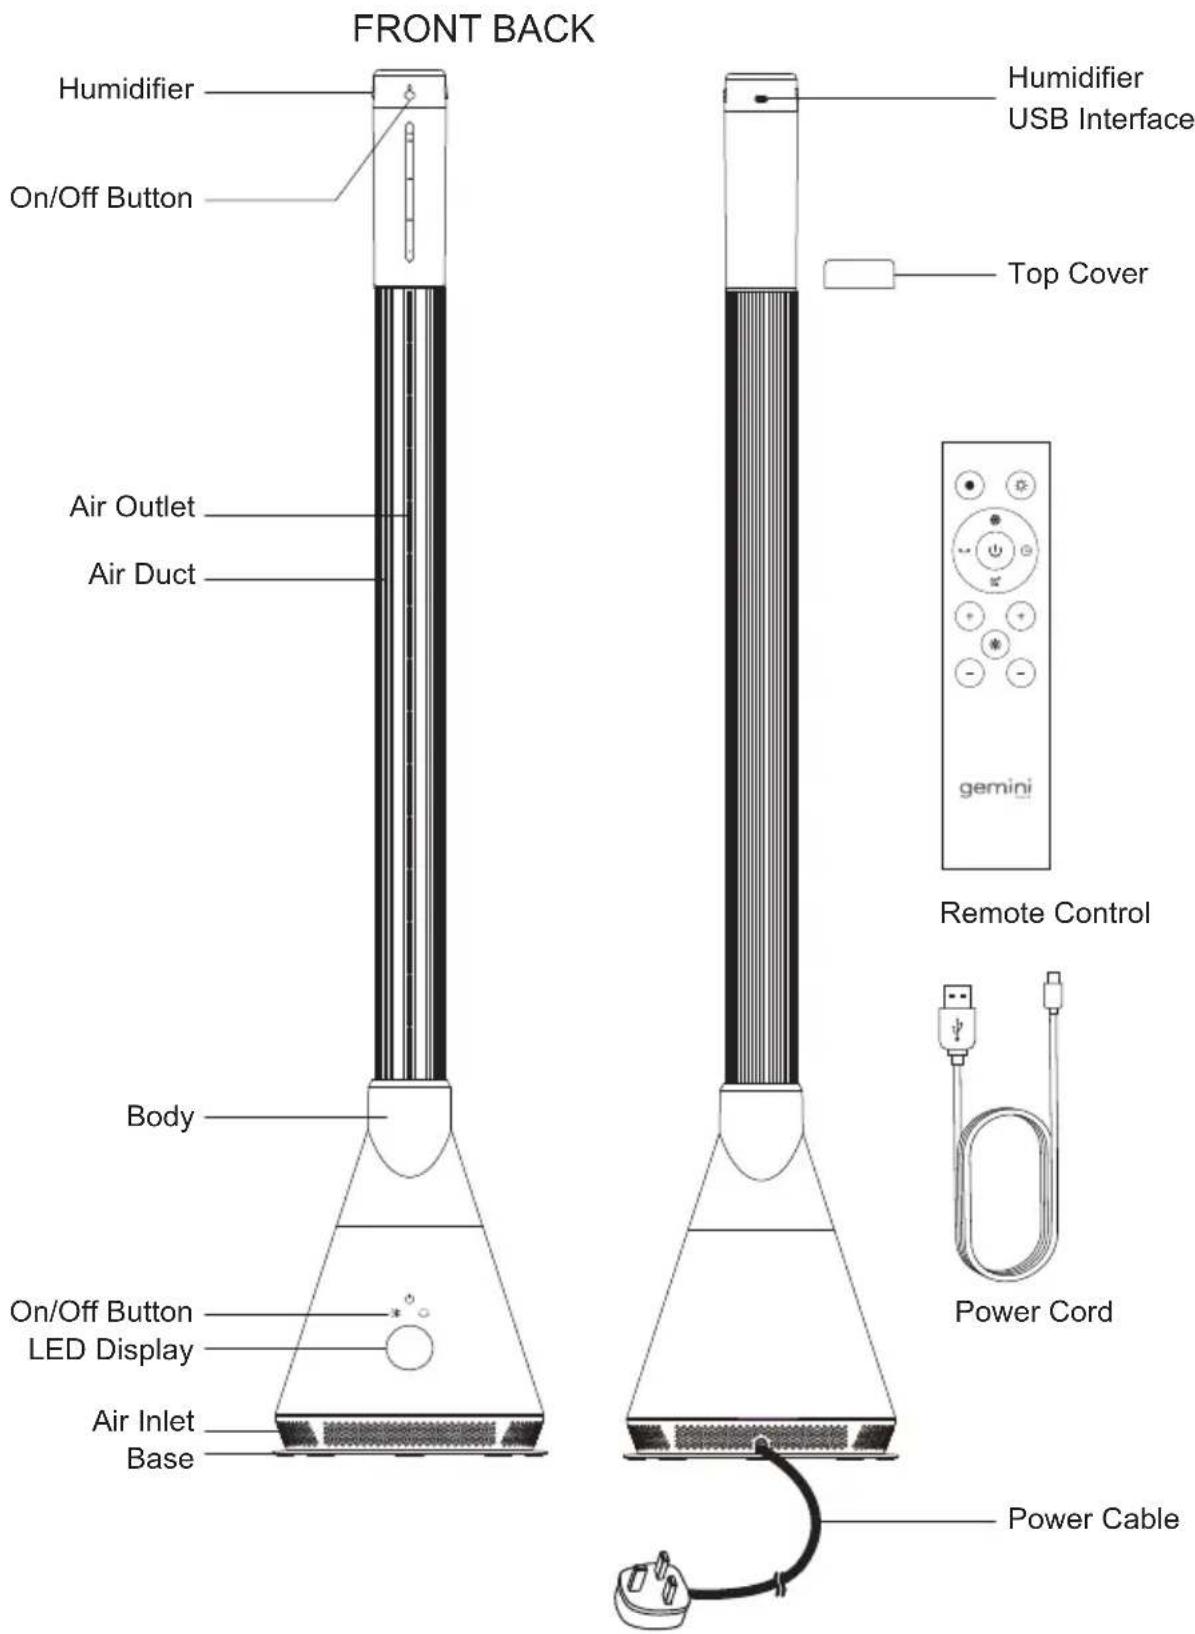
Location
- Please put this product in a horizontal position. Avoid putting it on a slope or a soft surface to prevent it from falling over. Please do not use it in high temperature area with high humidity, such as bathroom and kitchen.
- Avoid blocking the Air Inlet and Outlet during use. Please keep the product far away from the curtains, so that they will not block the Inlet/Outlet and obstruct the product from working.
- Do not place objects within 1 meter in front of the Air Outlet to ensure that the volume of cool air would not be reduced. Pay attention to the effects on warm air blowing on objects.
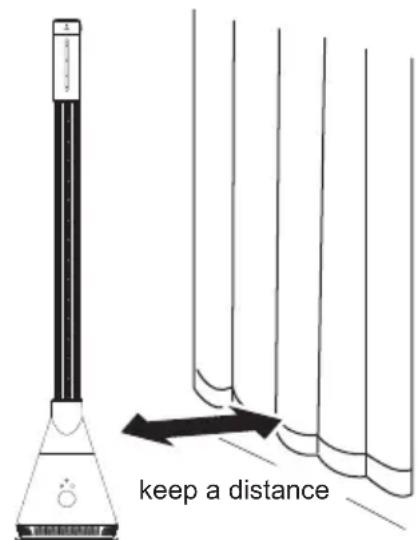
Do not cover, high temperature!

Caution:
This product includes an Overheat Protection Sensor, which is an automatic fail-proof safety protection that cuts off power automatically when the product is accidentally tipped over or overheats. If this sensor is triggered and the product is stopped, unplug the machine and let it cool. Check and remove any obstructions before restarting the product and be sure to place it on a hard, level surface.
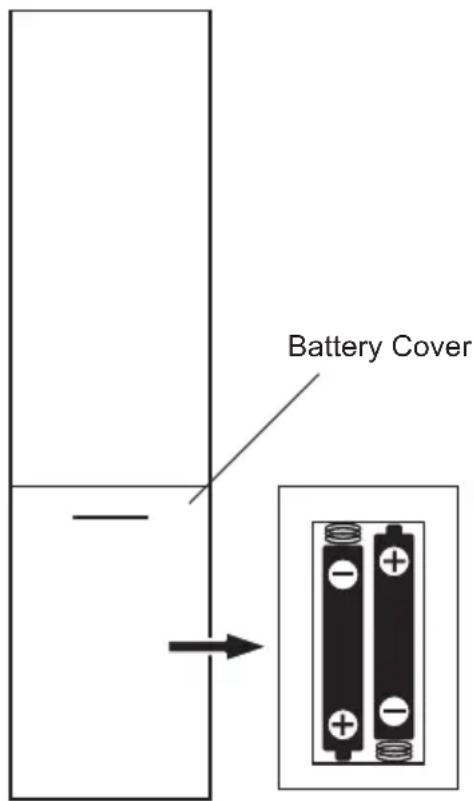
Battery Installation Method
- Open the Remote Control Battery Cover.
- Load two new AAA (No. 7) dry batteries.
- Close the Battery Cover of the Remote Control.
NOTE:
- Do not charge this battery. Please keep out of reach of children. If swallowed, please seek medical advice promptly.
- Please insert the battery + - orientation correctly.
- If you do not use the Remote Control for a long time, remove the battery.
- Dispose of used batteries in accordance with local laws or regulations.
Insert the plug into the socket, the product enters the standby state.
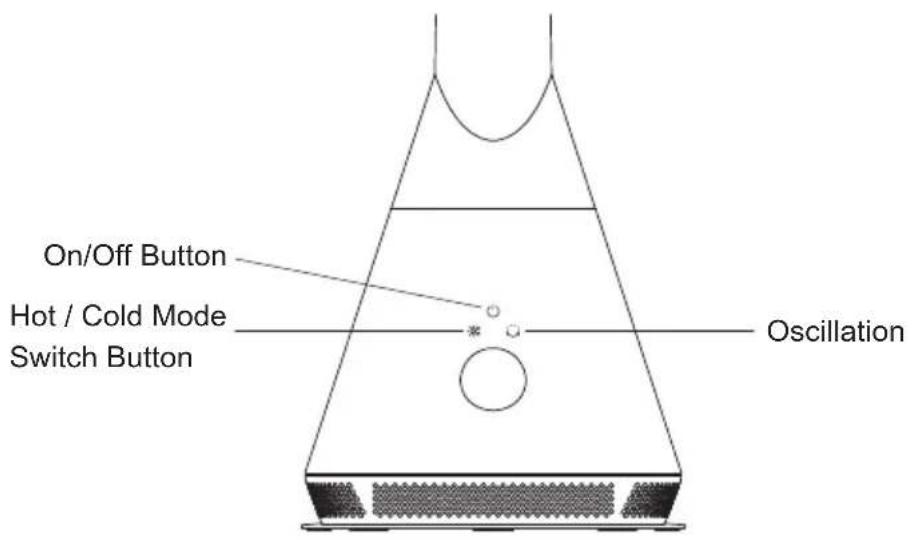
On/Off Button ⏻
- Shert press "On/Off" Button, the buzzer will beep once and the product start running.
- PLong press "On/Off" Button for 1 seconds, the buzzer will beep once, and then stop running after you release the hand.
- When the machine is running in "Cool Mode", press "On/Off" Button on the body to switch the air volume from 1 to 9.
When the machine is running in "Warm Mode", press "On/Off" Button on the body to switch the air volume from 1 to 4.
(You can also use the "+ -" Buttons on the left side of the Remote Control.)
Hot / Cold Mode Switch Button

Press and hold the cold/warm switch button for 1 second to switch the cold/warm mode.
Oscillation
Press this key to switch the swing(left&right) angle in turn: 30°,60°,90°,120°,Off.
Remote Control
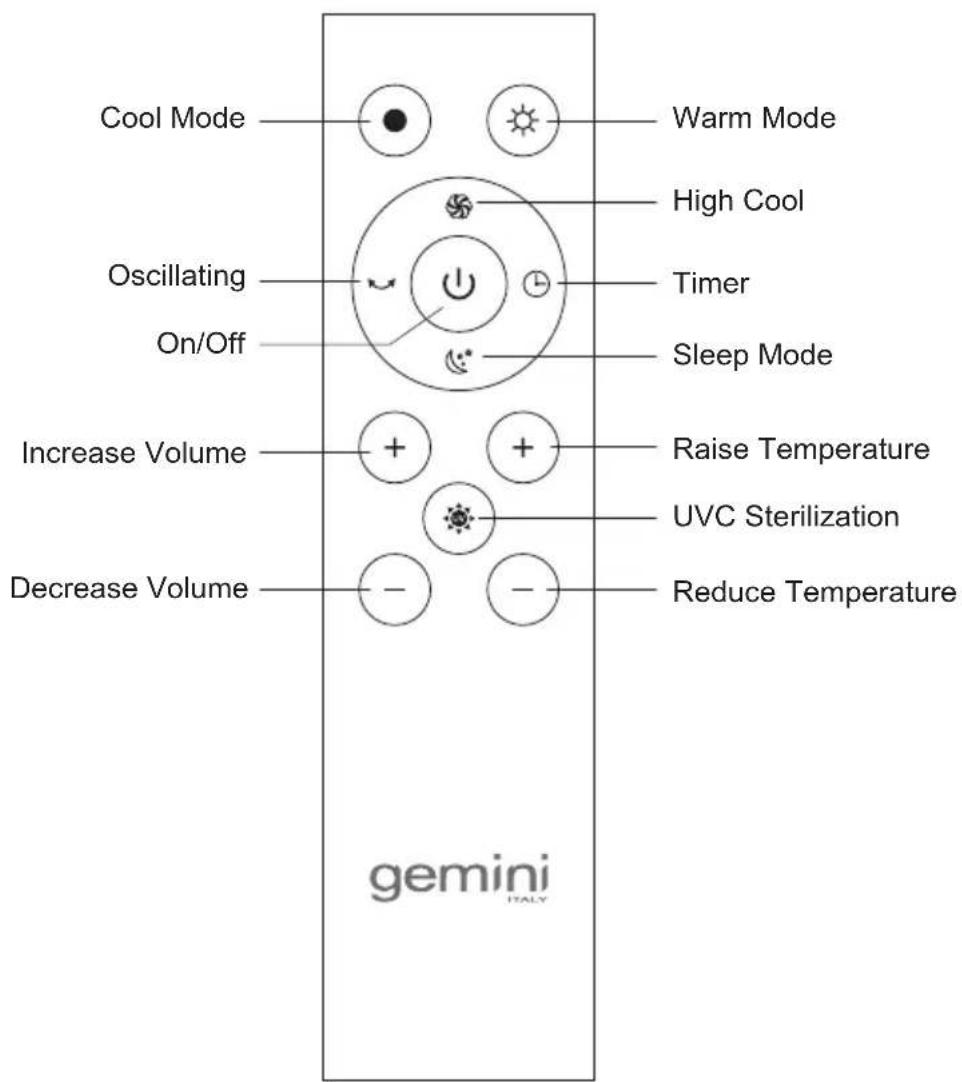
Operating Instructions
 On/Off On/Off | The product can be switched on and off by pressing the “On / Off” Button. |
 Sleep Mode Sleep Mode | Press “Sleep Mode” Button on the Remote Control.The display shows “-L -” and the fan speed becomes lowest.Press again to exit Sleep Mode.(You can also exit the current mode by pressing the Wind Strength + - button.) |
 High Cool High Cool | Press “High Cool” Button on the Remote Control.The display shows “-H -” and the fan speed become highest.Press again to exit High Cool Mode.(You can also exit the current mode by pressing the Wind Strength + - button.) |
 Oscillation Oscillation | Press this key to switch the swing(left&right) angle in turn: 30°,60°,90°,120°,Off. |
 UVC Sterilization UVC Sterilization | Press “UVC” Button to activate UVC Disinfection function, display panel will show “.”.Press button again to turn off UVC Disinfection function (otherwise UVC Disinfection will automatically turn off after 1 hr). |
 Cool Mode Cool Mode | Press “Cool Mode” Button to activate the Cool Mode.During Cool Mode, the LED Display does not show “oC”.Note: The default Start Mode is Cool Mode. |
·  Increase / Decrease Air Volume Increase / Decrease Air Volume | Press “+” Button on the left side of the Remote Control to increase the volume of air;press the “-” Button on the left side of the Remote Control to decrease the volume of air.Cool Mode can be used for 9-level settings, Warm Mode can be set for 4 levels. |
 Warm Mode Warm Mode | Press “Warm Mode” Button to activate Warm Mode.During Warm Mode, LED Display shows “oC”.Note: During Warm Mode, both High Cool and Sleep Mode are not available. |
·  Raise / Reduce Temperature Raise / Reduce Temperature | In Warm Mode, press “+ -” Buttons on the right side of the Remote Control to set the Temperature (5-35°C).Note: this button does not work during Cool Mode. |
 Timer Timer | Press “Timer” button to set off-timer for 1 to 8 hours. After timer is set, all other functions are still operable. When timer countdown is completed, the product will automatically stop operating; if user wishes to restart the product, please press “On/Off” Button again. When the product is powered off, the timer will also be cancelled. |
Operating Instructions
Remote Control
The Remote Control should be pointed at the Remote Control Signal Receiver on the display to maximize the remote control signal. Effective distance: 5M.
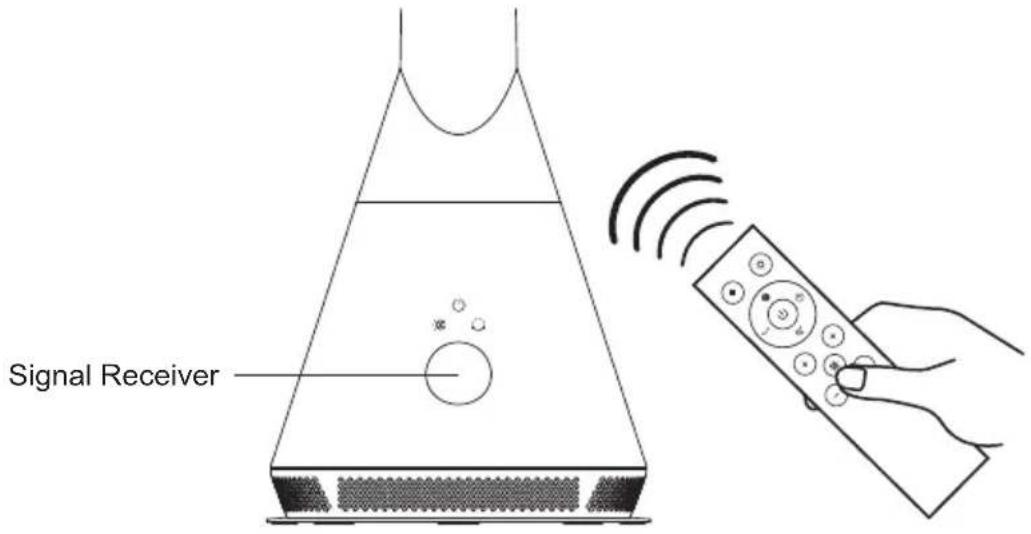
Note:
Remote Control error sometimes occurs due to the overlap of the channel frequencies. For example:
-
This product may react to the remote control of another appliances nearby; or
-
When using the remote control of this product, other electrical appliances may react.
In order to avoid misuse, please operate this Remote Control away from any other appliances.
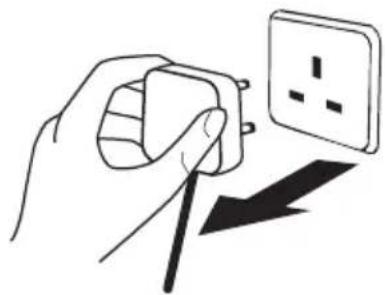
Since using the Remote Control to turn it off would not cut off electricity completely. When the product will not be used for a prolonged period of time, please unplug the power cord.
natural_image
Illustration of a hand holding an electrical socket connected to a wall with a black arrow indicating downward force (no text or symbols)Warm Mode
- Press "Warm Mode" Button and the display shows the ambient temperature.
- Press “+ / -” Buttons on the right side to set the temperature, and the digital display will be flashing, which can be set to 5-35°C.
- 10 seconds after the desired temperature is set, the flashing will stop.
- The temperature being set should be higher than the ambient temperature, so that the heating function will be turned on.
- When the ambient temperature reaches the set temperature, the heating function will stop and turn into a cool breeze.
- When ambient temperature dropped to be lower than the set temperature, the heating function will automatically be activated.
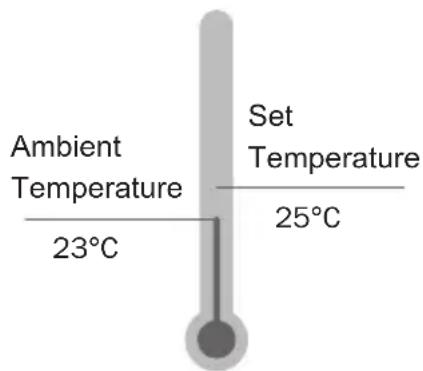
Set Temperature > Ambient Temperature: Warm Mode Turns On. Set Temperature ≤ Ambient Temperature: Warm Mode Stops.
Note: The default temperature of the setting is 25 °C.
In Warm Mode, when the ambient temperature is below 0^ C, the display only shows 01, does not display negative temperature value.
After Warm Mode has run over 9 hours, the machine will automatically stop running. Restart by pressing the host On/Off Button on the Body or by using the Remote Control.
Note:
Please use Remote Control to set temperature; the body of the product does not support this operation.
Using The Humidifier

WARNING!
- DO NOT tilt the humidifier or place it upside down, to avoid the humidifier falling off and getting damaged.
- DO NOT refill the water tank when the humidifier is placed on top of the heater, to avoid causing electric shock or fire due to short circuit.
Note:
WARNING!
- The humidifier is suitable for use when the ambient temperature is between 5^ - 40^ , and relative humidity is lower than 80% .
- Use only purified water below 40^ with the humidifier.
-
When using the humidifier for the first time or taking it out of storage after a prolonged period of time, please clean the water tank thoroughly before use.
-
Hold the humidifier firmly by the lid, and lift up to remove the humidifier lid and water tank from the top of the product (diagram 1).
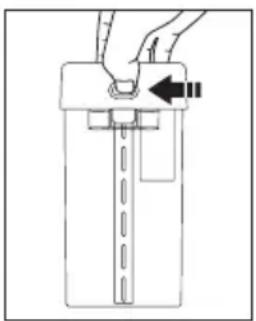
- Press the catch locks on both sides of the humidifier lid to separate the lid from the water tank (diagram 2).
- Fill the water tank with purified water. DO NOT fill to above the maximum water mark (Diagram 3).
- Attach the lid back on to the water tank, and place the humidifier back onto the top of the product (diagram 4).
- After refilling, let the humidifier sit for 1 minute to allow the wick become fully saturated before turning on the humidifier.
- Press "On/Off" Button once to activate Low Humidifying Mode (maximum running time is 8 hours). Indicator lamp lights up constant in blue.
- Press "On/Off" Button twice to activate High Humidifying Mode (maximum running time is 4 hours). Indicator lamp lights up constantly in purple.
- Press "On/Off" Button again to turn off the humidifier. Indicator lamp turns off.
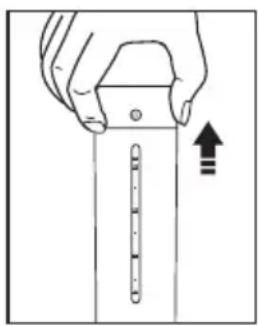
natural_image
Illustration of a hand holding a tool with a ruler and an upward arrow, no text or symbols present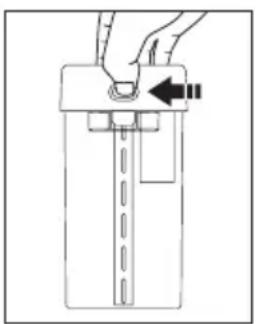
natural_image
Diagram of a hand holding a vertical object with a black arrow pointing to it, no text or symbols present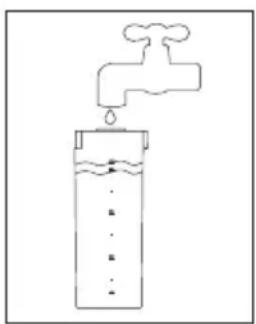
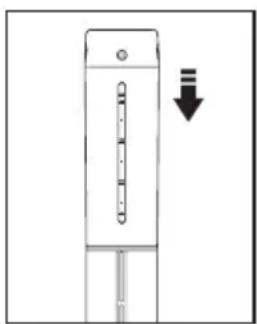
natural_image
Diagram of a vertical device with internal components and a downward arrow indicating direction (no text or symbols)Low Battery Indicator and Recharging
- When the humidifier is turned on, and there is less than 10% power left in the battery, the indicator lamp will flash in red for 5 times every 1 minutes.
- Recharging when the humidifier is turned off: Indicator lamp flashes in green; when battery is completely charged, indicator lamp will light up constant in green, and go dark after 1 minute. Humidifier will remain in turned off status.
-
Recharging when the humidifier is turned on: Indicator lamp flashes in green 5 times, then turn back to blue or purple depending on the Humidifying Mode used at the time.
-
The phone connect with WIFI.
- Please download APP "TUYA smart" or "SMART life" or scan the QR code as below to download APP.


TUYA smart SMART life
- When using the App first time.you need to register an account.
- Press and hold the Power button for 5 seconds until it beeps 3 times. when "F" appears and blinks .press "confirm indicator rapidly blink" to continue.select your WIFI network and input password. press "confirm" to continue.
- Login APP and click “+” or “add device” at the upper right corner. click “all device” on right side and choose the fan.
- The App will automatically match the device. after a match is found. you will be prompted and you can rename your device. press "done" to finish.

WARNING!
Unplug the power supply and wait till the product has completely cooled down before cleaning and performing maintenance.
natural_image
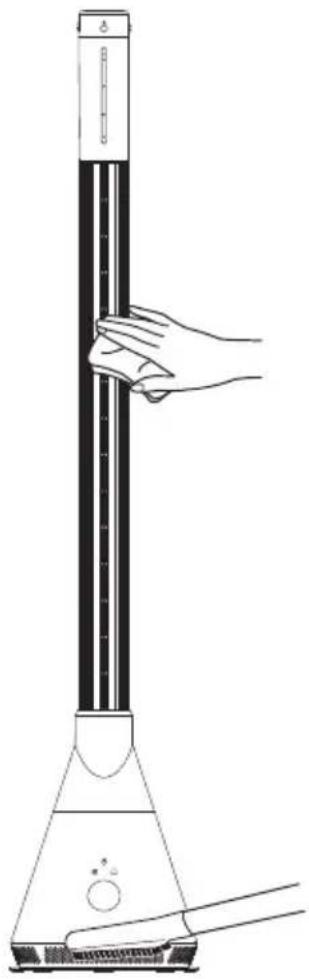
Illustration of a hand holding an electrical socket connected to a wall with a lightning bolt symbol (no text or labels)Surface Cleaning
- Please do not put the product into water or splash it, which may cause the machine to be damaged.
- Do not use banana oil, benzine, alcohol, bleach or metal objects to wipe the surface of the fan, which may scratch the surface or cause discoloration.
- Wipe the surface with a soft, dry cloth. If it is very dirty, use water with a mild detergent and wipe with a soft cloth. Then wipe with a dry soft cloth.
Air Inlet/Outlet
- Use a soft brush or a vacuum cleaner to clean the dust at the Air Inlet and Outlet. Please clean it regularly to avoid the buildup of dust. Too much dust is
Remote Control
- Gently wipe the surface of the Remote Control with a soft, dry cloth. If you don't use the product for a long time, please remove the batteries inside the Remote Control to avoid battery consumption.
natural_image
Line drawing of a hand holding a vertical cylindrical object with a base, next to a conical flask (no text or symbols)Humidifier

WARNING!
DO NOT immerse humidifier in water or liquids.
Note:
Use only purified water with the humidifier. DO NOT use tap water as it may cause scale to build up inside the tank and decrease its humidifying efficiency.
- When cleaning the water tank, add a few drops of detergent into the tank, fill up with tap water and let it soak for 15 minutes, then use a soft brush to clean off the scale built up inside the tank.
- Change water frequently and clean out the tank every week to keep the humidifier clean.
- If humidifier will not be used for a prolonged period of time, please pour out any residual water and wipe the tank dry. Wipe down the humidifier thoroughly and let it air dry completely before putting it into storage.
Storage
- If the product will not be used for a prolonged period of time, place it in a plastic bag after cleaning. Please avoid storing in a place with vibration (car trunk) or a place heated or cooled by another appliance. Please avoid placing it in direct sunlight, or a place with high temperature and/or high humidity. Please keep it out of reach of young children.

WARNING! Do not disassemble the machine or repair it yourself.
| Problem Possible Cause and Solution | |
| Has plugged in power but the product does not work | Is the plug properly inserted into the socket? |
| Remote Control does not work Are the batteries dead?Are the batteries inserted correctly?Is the Remote Control aligned with the Signal Receiver? | |
Technical Specification
| Model | GHBFW47BK / GHBFW47BG |
| Voltage 220-240V~ | |
| Frequency 50 - 60 Hz | |
| Power 30 W (Cool Mode) / 2000 W (Warm Mode) / 5 W (Humidifier) | |
| Swing Range 30° / 60° / 90° / 120° | |
| Timer Range 1-8 hours | |
| Humidifier Water Tank Capacity 320 ml | |
| Product Dimensions (H)1190 mm (W) | 235 mm (D)235 mm |
| Net Weight 4 kg |
Specifications are subject to change without prior notice.

警告!
使用本產品前,請仔細閱讀所有說明。
natural_image
Illustration of a hand holding an electrical socket connected to a wall with a power outlet (no text or symbols)暖風模式功能說明
natural_image
Illustration of a hand holding a tool with a ruler and an upward arrow indicating motion (no text or symbols)圖1 圖2 圖3 圖4
natural_image
Simple line drawing of a hand holding a container with a handle, no text or symbols present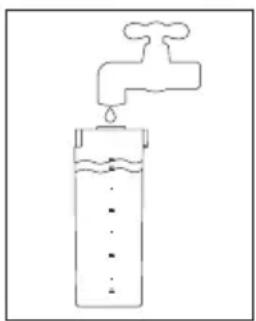
natural_image
Simple line drawing of a test tube with a faucet and liquid, no text or symbols present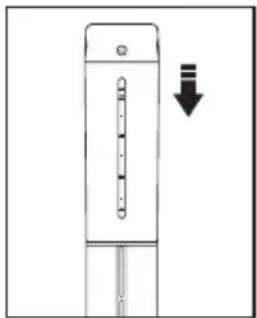
natural_image
Diagram of a vertical device with a downward arrow indicating a decrease or drop (no text or symbols present)低電量提示及充電
塗鴉智能 智能生活

natural_image
Illustration of a hand holding an electrical socket connected to a wall with a power outlet (no text or symbols)產品表面
natural_image
Line drawing of a hand holding a vertical cylindrical device with a base, next to a conical flask (no text or symbols)加濕器
購買日期 Date of Purchase:
單據編號 Invoice No.:
The product specifications may be changed without prior notice.
Please contact customer service for details if necessary.
說明書內容以英文版本為準
If there is any inconsistency or ambiguity
between the English version and the Chinese version, the English version shall prevail.
保養登記
Warranty Registration

於網上登記新產品保養
Register your product online
www.dchtoolbox.com
小電維修服務 - 自攜點
Repair Service - Collection Points


Gilman
since 1841

DCHToolBox
大昌行電器維修中心
- WARNING!
- Location
- Caution:
- Battery Installation Method
- NOTE:
- On/Off Button ⏻
- Hot / Cold Mode Switch Button
- Oscillation
- Operating Instructions
- Remote Control
- Warm Mode
- Using The Humidifier
- Low Battery Indicator and Recharging
- Surface Cleaning
- Air Inlet/Outlet
- Humidifier
- Storage
- Technical Specification
- 警告!
- 暖風模式功能說明
- 低電量提示及充電
- 產品表面
- 加濕器
Brand : GEMINI
Model : GHBFW47BG
Category : Household Fan