
C2R-AUDI - Car audio interface PAC - Free user manual and instructions
Find the device manual for free C2R-AUDI PAC in PDF.


| Product Type | Vehicle Integration Module |
| Brand | PAC |
| Model | C2R-AUDI |
| Dimensions (L x W x H) | 4.5 x 2.5 x 1.2 inches |
| Weight | 0.3 lbs |
| Power Source | 12V DC (vehicle battery) |
| Input Type | Speaker-level or RCA |
| Output Type | Vehicle data bus (CAN/other) |
| Compatible Vehicles | Select Audi models (e.g., A3, A4, Q5) |
| Primary Function | Retain factory audio features when upgrading aftermarket stereo |
| Controls | None (plug-and-play) |
| LED Indicator | Yes (power/status) |
| Included Accessories | Wiring harness, module, instruction manual |
| Installation | Plug-and-play (minimal wiring required) |
| Operating Temperature | -20°C to 80°C |
| Housing Material | Plastic |
| Certifications | CE, RoHS |
| Warranty | 1 year limited |
Frequently Asked Questions - C2R-AUDI PAC
User questions about C2R-AUDI PAC
0 question about this device. Answer the ones you know or ask your own.
Ask a new question about this device
Download the instructions for your Car audio interface in PDF format for free! Find your manual C2R-AUDI - PAC and take your electronic device back in hand. On this page are published all the documents necessary for the use of your device. C2R-AUDI by PAC.
USER MANUAL C2R-AUDI PAC
Introduction and Features
The C2R-AUDI interface allows the replacement of a factory radio in select Audi vehicles with CANbus radios. The C2R-AUDI also provides a secondary output for adding an optional PAC Steering Wheel Control (SWC) retention interface (SWI-RC, SWI-CP2, SWI-X). The C2R-AUDI also provides data bus driven outputs such as retained accessory power (RAP), vehicle speed sensor (VSS), illumination, reverse trigger and parking brake.
Important Notes
- A PAC steering wheel interface must be used in conjunction for SWC retention.
- Only one of the two provided radio harnesses will be used. Remove the factory installed radio to determine the correct harness for your particular vehicle.
- Vehicles without a factory amplifier: Connect the aftermarket radio's front and rear speaker wires to the 22-pin plug (dock-n-lock connector) or 16-pin plug (ISO Connector).
- Vehicles with a factory amplifier: To determine whether the amplifier needs RCA or speaker level input, check the OEM side of the 22-pin or 16-pin connector (depending on which connector your vehicle has behind the radio) to see if the speaker wires are populated. If so hook the front speaker outputs to the main connector and the rear RCA outputs to the 22-pin connector (dock-n-lock connector) or 16 / 20-pin connector (ISO Connector). If there are no factory speaker wires located in the OEM main connector then you will need to hook all 4 of the RCAs from the C2R-AUDI harness to the aftermarket radio's RCA outputs. The blue RCA has no function at this time (dock-n-lock connector only).
- The Red accessory wire supplies +12v, 1 Amp max when key is in the accessory or ignition position (see fig. 1: If more current is needed).

Wiring Connection Chart
Vehicle Connector
| Yellow Battery +12v | |
| Black Ground | |
| White Front | Left + input |
| White / Black | Front Left - input |
| Gray Front | Right + input |
| Gray / Black | Front Right - input |
| Green | Rear Left + input |
| Green / Black | Rear Left - input |
| Purple | Rear Right + input |
| Purple / Black | Rear Right - input |
Interface Connector
| Red / White Parking Brake Output (-) |
| Purple / White Vehicle Speed Output |
| Blue / White Amp Turn On Input |
| Red Accessory Output |
| Orange / White Illumination Output (+) |
| Green Reverse Output (+) |
Illustration / Schematic
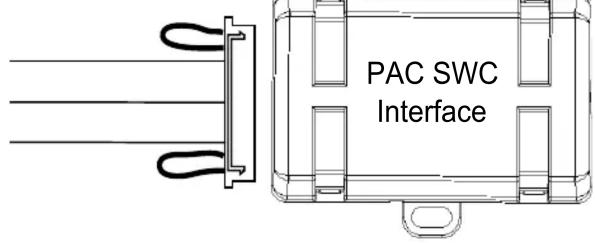
Wiring SWCConnection

Connect to Radio
Specific SWC
Interface
Installation Steps
- Remove the factory radio.
- Make all connections between the aftermarket radio's harness and the supplied vehicle harness, as described in the wiring connections chart on page 1.
- Be sure to connect the Blue / White wire even if the vehicle is not equipped with an amplifier.
- Connect the C2R-CHY4 harness to the vehicle's harness.
- If retaining SWC, then follow the steps in the next section "SWC Output Connector"
SWC Output Connector
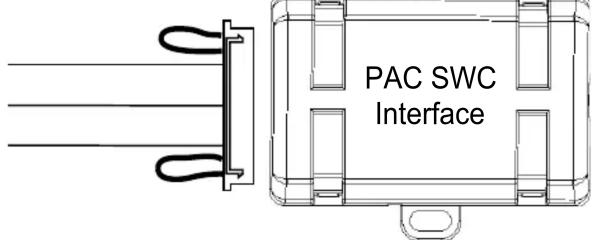
- The harness has a SWC output connector. For ease of installation, all necessary connections for an SWI have been made for you. Both loops should remain intact.
- When using this SWC output connector with the SWI-RC, the SWC interface must be programmed for version 2 (refer to SWC interface programming instructions for exact programming sequence and button assignment order).
- When using this SWC output connector with an SWI-CP2, you can either program the SWC interface with a PC, or set the DIP switches according to the PC app.
Connect to Radio
Specific SWC
Interface
Testing and Verification
- Turn the ignition on. The LED on the interface will turn on and the +12v accessory wire will turn on.
- Turn on the radio and check balance and fade.
- Verify that all SWC are functioning properly.
- Turn off vehicle and remove key. RAP will be active and will keep the radio on for 10 minutes or until the driver's door is opened.
- The LED and radio will turn off when RAP turns off or the driver's door is opened.
Technical Support
Technical Support
support@PAC-audio.com
866-931-8021

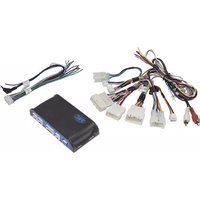
Brand : PAC
Model : C2R-AUDI
Category : Car audio interface