
SELATI640X - Other Kitchen Appliances CORBERO - Free user manual and instructions
Find the device manual for free SELATI640X CORBERO in PDF.


| Product Type | Built-in Induction Hob |
| Brand | Corbero |
| Model | SELATI640X |
| Number of Cooking Zones | 4 |
| Control Type | Touch control with digital display |
| Power Supply | 220-240 V ~ 50/60 Hz |
| Total Power | 7400 W |
| Dimensions (W x D x H) | 590 x 520 x 50 mm |
| Cut-out Dimensions | 560 x 490 mm |
| Net Weight | Approx. 8.5 kg |
| Safety Features | Child lock, automatic shut-off, residual heat indicator, overheat protection |
| Functions | Booster, timer, pause, keep warm, pan detection |
| Cleaning | Ceramic glass surface, wipe with damp cloth and mild detergent |
| Installation | Built-in, requires qualified electrician |
| Spare Parts | Available through authorized service centers |
| Energy Efficiency Class | A (estimated) |
Frequently Asked Questions - SELATI640X CORBERO
User questions about SELATI640X CORBERO
0 question about this device. Answer the ones you know or ask your own.
Ask a new question about this device
Download the instructions for your Other Kitchen Appliances in PDF format for free! Find your manual SELATI640X - CORBERO and take your electronic device back in hand. On this page are published all the documents necessary for the use of your device. SELATI640X by CORBERO.
USER MANUAL SELATI640X CORBERO
natural_image
Modern kitchen interior with white cabinetry, stainless steel HVAC unit, and glassware (no visible text or symbols)Corberō
IVORI622W & SELATI640X/B/W
natural_image
Exterior view of a modern kitchen ventilation unit (no visible text or symbols)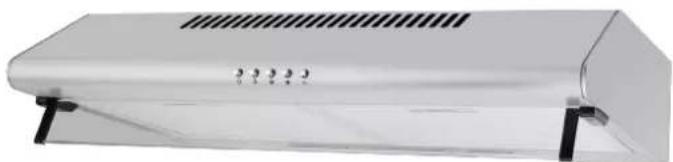
natural_image
Exterior view of a modern office building (no signage)ES Page 2
POR Page 14
ENG......Page 24
Corberō
CAMPANA EXTRACTORA
IVORI622W/SELATI640X/SELATI640B/SELATI640W
natural_image
Exterior view of a modern kitchen ventilation unit (no signage or text visible)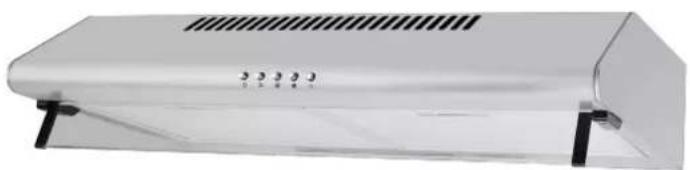
natural_image
Exterior view of a white rectangular electronic device with ventilation grilles and mounting feet (no visible text or symbols)Introducción
natural_image
Exterior view of a modern kitchen ventilation unit (no signage or text visible)natural_image
Line drawing of a kitchen fan with a chimney and heat exchanger (no text or symbols)B
natural_image
Line drawing of a kitchen appliance with a control knob and fan (no text or symbols)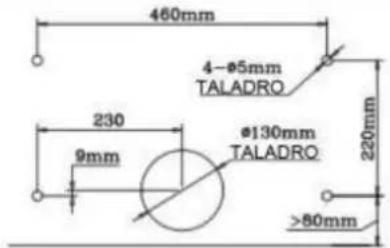
natural_image
Two technical diagrams showing a 3D rectangular structure with internal components and directional arrows, labeled 1 and 2 (no text or symbols present)natural_image
Exterior view of a modern kitchen ventilation unit with ventilation duct and door (no visible text or symbols)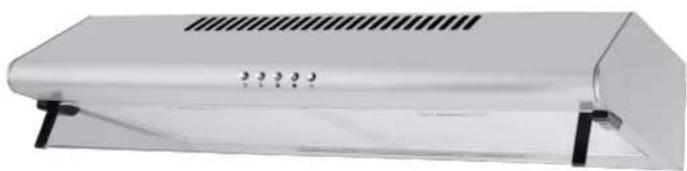
natural_image
Exterior view of a white rectangular electronic device with ventilation grille and mounting feet (no visible text or symbols)natural_image
Exterior view of a modern kitchen ventilation unit (no signage or text visible)a
| 1 | Painel de Controlo |
| 2 | Luz |
| 3 | Filtro de alumínio para gordura |
Peças fornecidas
B
natural_image
Technical line drawing of a kitchen appliance with handle, ventilation duct, and control panel (no text or symbols)natural_image
Two technical diagrams showing a 3D panel layout with arrows indicating direction, no text or symbols present.SELATI640X/SELATI640B/SELATI640W
natural_image
Exterior view of a modern kitchen ventilation unit with ventilation duct and door (no text or symbols visible)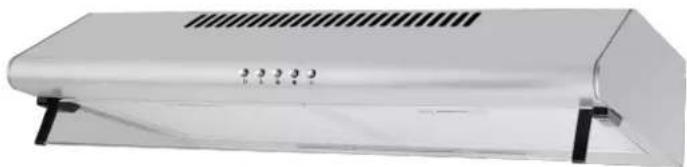
natural_image
Exterior view of a white industrial ventilation duct with ventilation grilles and mounting feet (no text or symbols visible)English manual
Introduction
Thank you for choosing our product. We hope you enjoy using the device.
Symbols used in this instruction manual
Important information for your safety is clearly marked. It is essential that you follow these instructions to avoid accidents and damage to the device:

WARNING:
Warns of health hazards and indicates possible injury hazards.

CAR E FU: L
Refers to possible dangers in the device or other objects.
NOTE: Highlights tips and information.
General information
Carefully read the instruction manual before using the appliance and keep the instructions and receipt. you pass the device on to another person, you must also pass on the instruction manual.
- This appliance has been designed exclusively for private use and for the intended purpose. Not inte for commercial use.
- It should only be used as described in the user manual. Do not use it for any other purpose. An use will be considered contrary to the intended use and may cause property damage or personal injury.
- The device can only be used when it is correctly installed.
- Do not use outdoors. Keep away from heat sources, direct sunlight and moisture. Do not touch with hands.
- Do not use the device unsupervised.
- When not in use, for example for cleaning, user maintenance or when there is a fault, switch off appliance and, if possible, disconnect the plug (pull the plug itself and not the cable) or switch off tl
- The appliance and, if possible, the electrical cable must be regularly inspected for damage. If any damage is found, the device must not be used.
- For safety reasons, modifying or tampering with the device is prohibited.
- To ensure the safety of children, all packaging elements must be kept out of their reach (plastic boxes, polystyrene parts, etc.).
WARNING:
Do not allow small children to play with the plastic bag. There is a danger of suffocation!
Unpack the device
- Remove the device from its packaging.
- Remove all packing material such as plastic bags, padding material, zip ties and cartons.
- To avoid danger, inspect the device for shipping damage.
- If there is any damage, do not operate the device. Contact your distributor.
NOTE:
Production residues or dust may have accumulated in the device. We recommend cleaning the according to the "Cleaning and maintenance" chapter.
Device overview
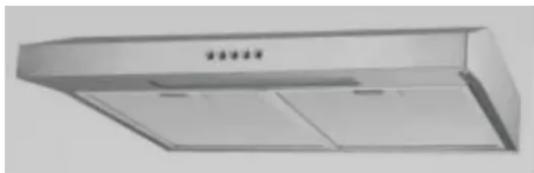
NOTE: Original devices may differ from those illustrated here.
natural_image
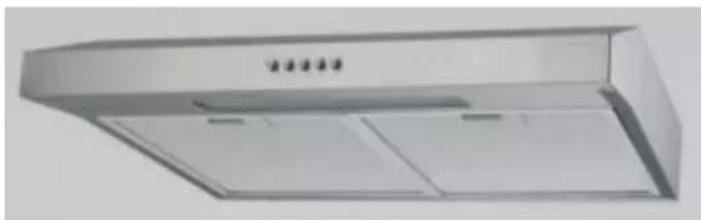
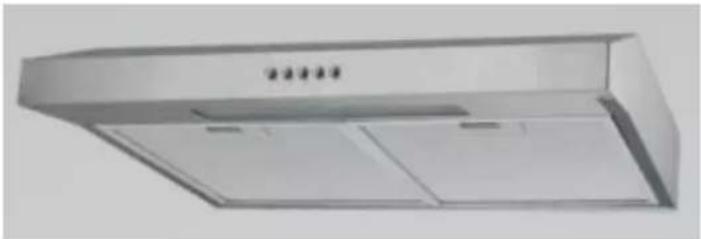
Exterior view of a modern kitchen ventilation unit (no signage or text visible)| 1 | Control Panel |
| 2 | Light |
| 3 | Aluminum grease filter |
Parts provided:
- connecting piece with check valves
- extraction outlet cover
- Mounting material incl. mold to perforate
4-1 Carbon filter SELATI640X/B/W)
Installation
A safety distance must be left between the hob and the lower part of the hood:
The distance should be between 60 - 75 cm. In the case of gas appliances, the distance must be 65. If the gas stove installation instructions specify a greater distance, this distance must be taken into account.
Smoke outlet selection
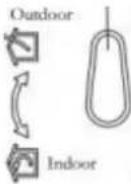
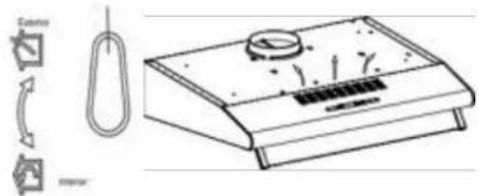
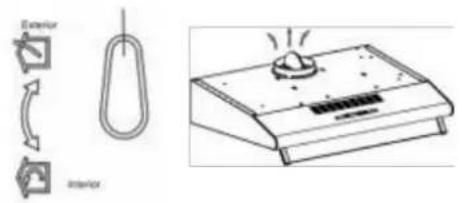
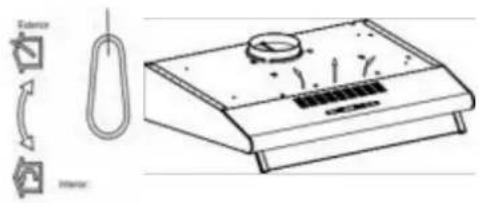
You can use the hood in two ways, as described below.
A: Extractor mode B: Re-circulation mode
A
B
natural_image
Technical line drawing of a kitchen appliance with fan, handle, and control panel (no text or symbols).For this, the lever on the motor fan unit must be set to the corresponding position.
Fit the connection for exhaust mode and the cap for re-circulation mode over the air outlet. Please also find the instructions provided in the "Assembly" section.
Extractor mode
WARNING:
- Exhausted air cannot be evacuated through an exhaust pipe used for gas waste from appliances fueled by gas or other appliances fueled by other fuels.
- When exhaust air is vented, relevant local authority regulations must be fulfilled.
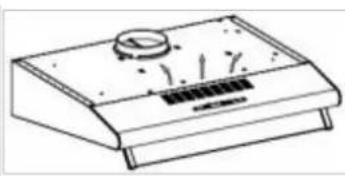
The extractor hood has an air vent at the top to extract cooking odors outside.
- Normally, extracted air is evacuated vertically. If there is a suitable recess above your kitchen, the exhaust air is evacuated through the wall modules and through the base of this recess to the outside.
- If your kitchen has a duct under the wall modules, the exhaust duct can be installed so that the exhaust air can be discharged horizontally through the wall.
Re-circulation mode
- If it does not have a direct exhaust opening to the outside, the hood can also be operated in recirculation mode (i.e. without an exhaust opening to the outside, the filtered air is returned to the room). In this case, an activated carbon filter must be used as described in "Installing the activated carbon filter for circulation mode".
- Activated carbon filter is included for the models SELATI640X/B/W
Assembly
WARNING:
When assembling or inserting the extractor filter and charcoal filter, the appliance must not be connected to the power supply.
If mounting accessories are not used, there is a risk of electrocution
CAREFUL:
- Before installation, check that the wall or wall module has sufficient load capacity to support the hood.
- When drilling holes in the wall, you should always make sure there are no electrical wires or other objects that could be damaged.
NOTE: Recommendations for installation
- During installation, ask someone else to help you.
- Wear protective gloves to avoid injury from sharp edges.
Wall mounting Mounting underneath the wall module
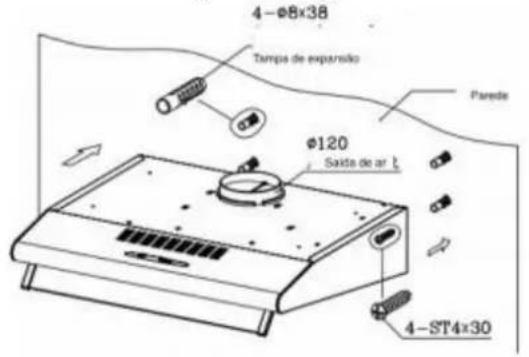
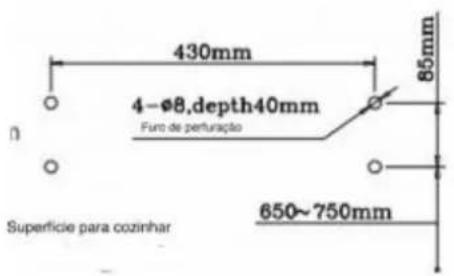
- Mark the holes required for wall mounting using the provided drilling template and check them with a spirit level.
- Drill two holes in the wall and place the dowels. Then tighten the mounting screws until they come out about 8mm from the wall.
- Hang the hood and tighten the screws through the hood body. Make sure the mounting is secure and the position is horizontal.
Mounting under a wall module
- Hold the cover in the specified position on the cabinet and mark the drilling points from the module corresponding to the four screw holes. Check them with a spirit level.
- For extractor mode it is also necessary to create an opening of approx. ∅ 130 mm at the b
- If the power supply cable is routed through the module, it must also pass through the hole.
- Drill four ∅ 5 mm mounting holes through the base of the module. Screw the device with the screws,
including the washers, under the wall module and screw the nuts through the hood body.
- For extractor mode, insert the connecting piece with check valves from the top, over the air outlet. For this purpose, an extractor tube (not supplied) with an inner diameter of ∅ 120 mm must be insta and connected to the outside through an extraction opening.
- For re-circulation mode, close the air outlet by fitting the cover.
- Reinstall the grease filter screen or aluminum grease filter.
Activated carbon filter installation for re-circulation mode
natural_image
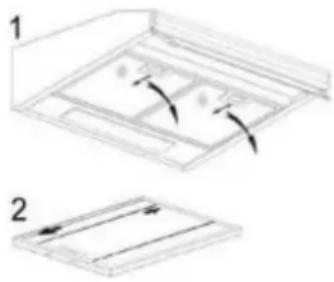
Two technical diagrams showing a 3D panel layout with arrows indicating direction, no text or symbols present.- Remove the aluminum grease filter (1).
- Insert the previously assembled charcoal filter parts onto the grease filter and fix the filter parts, each with two metal screws (2) (supplied with the charcoal filter).
- Reinstall the aluminum grease filter with the charcoal filters attached.
NOTE:
The charcoal filter absorbs odors and must be replaced at least every six months, regardless of use.
Electrical connection
WARNING:
- Connection to the mains must comply with local rules and regulations. Incorrect connection can cause electrocution!
- Do not modify the appliance plug. If the plug does not fit properly into the outlet, have the correct outlet installed by an authorized service technician.
- Accessibility to the socket must be ensured so that the device can be disconnected from the power supply in an emergency.
- Make sure your power supply matches the device's specifications. Specifications are indicated on the rating plate.
- Plug the power cord into a properly wired and grounded wall outlet.
specifications are indicated on the rating plate.
Operation/ functioning
The hood is operated using buttons. The light and fan must be turned on and off with the respective switches.

Fan
0 ON/OFF

power Medium

High Power


Light

Low power:
The engine starts running at low speed. This setting is suitable for low-heat cooking or for dishes to produce little or no steam to circulate the air around the stove.

Medium power
The engine runs at moderate speed. This setting is suitable for normal cooking..

High Power:
The engine runs at high speed. The setting is suitable if large amounts of smoke and steam need to extracted or filtered (e.g when frying).
NOTE:
If there is a lot of steam, the fan should be turned on a few minutes after cooking is finished. Or fan if necessary, otherwise it will consume too much energy.
Cleaning and maintenance:
The appliance and its functioning will be kept in perfect condition if the hood and the filter are clean regularly. The hood and accessories must also be cleaned regularly for hygienic reasons.
e

WARNING:
■ Before cleaning or maintenance work, the appliance must always be switched off and th must be pulled out or the fuse must be disconnected.
- Let the appliance cool down before cleaning it.
Do not use steam cleaners to clean the appliance, as moisture can enter electrical com
- of electrocution! Hot steam can damage plastic parts. The device must be dry before us
CAREFUL:
Do not use a wire brush or other sharp, abrasive items.
Do not use acidic or abrasive cleaners.

• To clean the lid surface, use a mild detergent and a soft cloth to avoid scratching the lid.
- The device can be used again after everything has dried properly.
- If you use the hood in recirculation mode, you must regularly replace the activated charcoal filter (s lacing the activated charcoal filter"
Cleaning the aluminum grease filter
WARNING: Risk of fire!
-- Grease residues on the aluminum filter can ignite if exposed to high temperatures. It is therefore important that the grease filter is cleaned/replaced regularly. Cleaning the aluminum grease filter
-- Grease and fumes are deposited in the filter and can build up if not cleaned regularly. We recommend that you clean the grease filter monthly:
- Remove the aluminum grease filter by sliding the latch back into the slot, gently push the filter and pull it forward.
- Wash the grease filter in a solution of hot water and neutral detergent. Immerse the filter in the solution.
- Then clean with a soft brush, rinse well with warm water and let dry.
- Alternatively, the grease filter can also be washed in a dishwasher (up to 60 °C). Slight discoloration may occur in the dishwasher. This does not affect the function of the grease filter.
Activated carbon filter replacement
The activated carbon filter absorbs odors and must be replaced at least every six months, depending on usage. Order the charcoal filter from your dealer or accessory store. To order, use the reference number indicated in the "Technical data".
- See "Installation of activated carbon filter for recirculation mode".
- Remove the old charcoal filter by turning it counterclockwise.
lamp replacement
WARNING:
Let the lamp cool down before replacing it. There is a risk of burns!
- Use the correct bulb: 1*1.5 LED or 2*1.5W LED
- Remove the aluminum grease filter
- Remove the burnt out bulb and insert the new one.
- Reinstall the aluminum grease filter
Repairs
◇ Incorrect or poorly performed repairs can endanger the user.
Repairs to household appliances should only be carried out by a specialist authorized.
✿ A damaged power cord must only be replaced by a qualified electrician.
Problem solving
Before contacting an authorized specialist
The following problems can be solved by you by checking the possible cause.
| Problem | Possible Cause | Solution |
| The device does not work or does not work properly | - The device is connected to the network electric?- Have you adjusted the power level yet | -- Connect the plug correctly to the socke Check the fuse.- Check fit. |
| The device does not work well | - Has the power level been set correctly?- Is the grease filter dirty?- Is the carbon filter necessary for the (correct) re-circulation installed?- Is the air outlet free for extractor mode? | - Check fit. The kitchen is not properly ventilated.- Clean the grease filter (see "Cleaning t aluminum grease filter").- Check the charcoal filter (see "Replacing activated charcoal filter").- Check the air outlet. |
| the light does n it works | The lamp is faulty, installed incorrectly, n positioned correctly in its holder. | Check the lamp (see "Replacing the lamp"). |
| Oil drips on the device | O The grease filter is dirty. | Clean the grease filter. |
NOTE: If a problem persists after following the above steps, contact your dealer or an authorized technician.
Technical data
| Model | IVORI622W | SELATI640B/W/X |
| Voltage and Frequency | 220-240 V~, 50 Hz | 220-240 V~, 50 Hz |
| Lighting | 1*1.5W LED | 1*1.5W LED |
| Total Power | 61.5W | 191.5W |
| Protection Class | I | I |
| Net weight | aprox. 6kg | aprox. 7.5kg |
| Energy Class | C | D |
| Max Aspiration | 192.7M3/H | 400M3/H |
Accessory available.
Activated carbon filter for recirculation moleAT1640X/B/W
Summary of dimensions
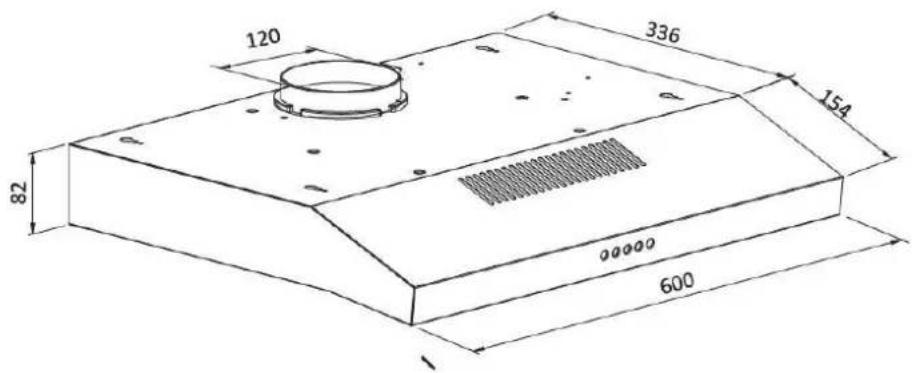
IVORI622W
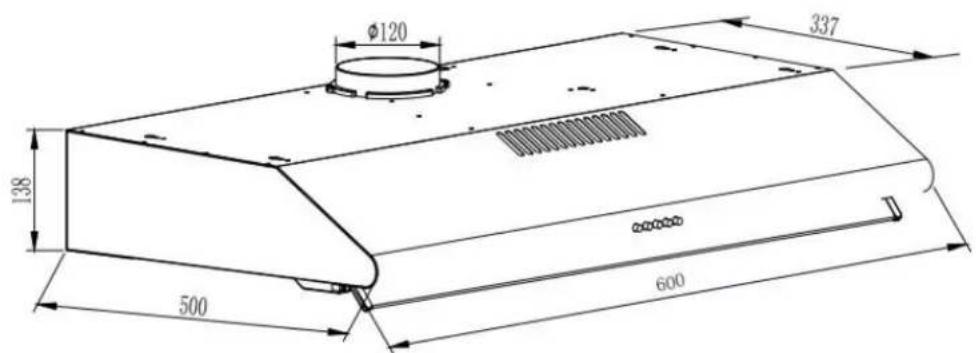
SELATI640X/SELATI640B/SELATI640W
We reserve the right to make technical and design changes to incorporate continued product development.
Elimination
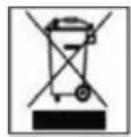
"Waste Bin" symbol
Protect our environment; do not throw away electrical equipment in the household waste. Return electrical equipment that is no longer in use to designated collection points for disposal.
This helps to avoid the potential environmental and health effects of improper disposal.
This will contribute to recycling and other forms of reuse of electrical and electronic equipment. Please contact the appropriate local authorities for information on how to dispose of your equipment.equipment.
WARNING: If the appliance has to be taken out of service or discarded, remove or disable the existing fasteners and screw
KURBIN LANE S.L.
Po FERROCARRIL, 335
08860 CASTELLDEFELS
(ESPANHA)
TELF: 902 107 122
NIF: B-65050288
CERTIFICADO DE GARANTÍA
The presentation of the purchase invoice accompanied by this guarantee certificate is essential.
Covered Risks.
This appliance is guaranteed against any malfunction, provided that it is intended for domestic use, proceeding to its repair within the warranty period and only by the authorized SAT network.
Our Corberó appliances have the manufacturer's legal warranty that covers any breakdown or defect for 36 months, from the invoice date of January 1, 2022. If necessary, we take care of any possible incident whenever it is due to a defective component or manufacturing fault. Warranty Exceptions
Warranty Exceptions
- That the date of the certificate does not coincide with the date of sale of the original invoice.
- Faults produced by blow, by fall or any other cause of force majeure.
• If the device has been manipulated by unauthorized personnel. - Faults produced or derived as a consequence of improper use, installation defects, or modifications to the device that alter its operation.
- Start-up, maintenance, cleaning, components subject to wear, lamps, aesthetic parts, oxidation, plastics, rubbers, housings and crystals.
- Microwave ovens (with the exception of built-in ones) and tabletop ovens in the event of any incident of operation, they must be taken to the nearest technical service by the customer. They are not collected or repaired at home.
- Electric thermos guarantee. 3-year warranty including travel and labor costs that correspond to the repair of the product, having to have maintenance once every 12 months. Especially if you have installed a gas appliance, keep in mind as the owner of the installation, the obligation to carry out a complete review of the equipment, (according to Royal Decree 238 / 2013, of April 5. RITE. IT3, M. Lo thermos electrical and boilers that include hot water storage tanks, for the benefit of the Guarantee to apply, it is mandatory that the magnesium anode is operational and that it performs the protection function adequately. For this, it is recommended that the anode be checked biannually by the Official Service and is renewed when necessary Periodicity that must be annual in those areas with critical waters (CaCO3 content greater than 200mg / L , that is, from 20^ of hardness) Deposits without the correct state of the protection anode are not covered by the warranty Regardless of the type of tank or product, all heating or DHW overpressure valves must be channeled to avoid damage and n the house due to water discharges. The product warranty does not cover damages caused by not channeling the water spilled by this valve.
- Guarantee of pellet stoves, Gas Stoves, it is necessary to have the start-up accreditation from Corberó SAT, to benefit from the 3-year guarantee service.
"THESE EXCEPTIONS VOID THE WARRANTY, THE REPAIR BEING CHARGED TO THE CUSTOMER"
Period covered in devices according to the law of guarantees in the sale of consumer goods Current law is "RD 7/2021"
Official Technical Service: 911 08 08 08
Hours of operation Monday to Friday from9h00 a 19h00. Telephone contact_ 911 08 08 08 Contact email_info@corbero.es web_ www.corbero.es
Official Technical Service Address_Vidal i Ribes 8-10 08950 Esplugues de Llobregat Barcelona
CERTIFICADO DE GARANTIA
- Corberō
- Introducción
- Peças fornecidas
- Introduction
- WARNING:
- CAR E FU: L
- General information
- Unpack the device
- NOTE:
- Device overview
- Installation
- Smoke outlet selection
- Extractor mode
- Re-circulation mode
- Assembly
- CAREFUL:
- Mounting under a wall module
- Activated carbon filter installation for re-circulation mode
- Electrical connection
- Operation/ functioning
- Cleaning and maintenance:
- e
- Cleaning the aluminum grease filter
- WARNING: Risk of fire!
- Activated carbon filter replacement
- lamp replacement
- Repairs
- Problem solving
- Elimination
- "Waste Bin" symbol
- CERTIFICADO DE GARANTÍA
- Covered Risks.
- Warranty Exceptions
- Official Technical Service: 911 08 08 08
- CERTIFICADO DE GARANTIA
Brand : CORBERO
Model : SELATI640X
Category : Other Kitchen Appliances