
F-YCT17V - Dehumidifier PANASONIC - Free user manual and instructions
Find the device manual for free F-YCT17V PANASONIC in PDF.


| Product Type | Compressor Dehumidifier |
| Model | F-YCT17V |
| Brand | Panasonic |
| Dehumidification Capacity | 17 L/day (at 30°C, 80% RH) |
| Power Supply | 220-240 V, 50 Hz |
| Power Consumption | 250 W |
| Dimensions (H x W x D) | 590 x 370 x 250 mm |
| Weight | 14 kg |
| Water Tank Capacity | 4.5 L |
| Airflow | 180 m³/h |
| Noise Level | 45 dB(A) |
| Refrigerant | R-134A |
| Special Technologies | nanoe™ X, ECONAVI, Moisture Sensor |
| Functions | Continuous Drainage, Timer (1-9h), Auto Restart, Anti-Mold, Clothes Dry Mode |
| Filter Type | Washable Pre-Filter (every 2 weeks) |
| Maintenance | Clean filter every 2 weeks; wipe exterior with damp cloth |
| Safety Features | Auto Shut-off (full tank), Overheat Protection, Front Panel Safety Lock |
| Spare Parts Available | Air Filter (CZ-F002CP), Drainage Hose, Remote Control (optional) |
| Repairability Index | 8.0 / 10 (based on French standards) |
| Room Size Recommendation | Up to 35 m² (medium room) |
Frequently Asked Questions - F-YCT17V PANASONIC
User questions about F-YCT17V PANASONIC
0 question about this device. Answer the ones you know or ask your own.
Ask a new question about this device
Download the instructions for your Dehumidifier in PDF format for free! Find your manual F-YCT17V - PANASONIC and take your electronic device back in hand. On this page are published all the documents necessary for the use of your device. F-YCT17V by PANASONIC.
USER MANUAL F-YCT17V PANASONIC
natural_image
Line drawing of a portable electronic device with control panel and ventilation slots (no text or symbols)Panasonic®
Operating Instructions
Dehumidifier
Model No. F-YCL17N
This product is for indoor use only
Contents
< Page >
Safety Precautions 2\~4
Part Names 5
Preparing for use
Operating method 6
Control panel and Functions 7\~9
Correct Usage 10
Removing a Full Tank 10
Continuous Drainage 11
Maintenance 12\~13
Operation
Troubleshooting 14
Contact Manufacturer Immediately 15
(Emergency Treatment)
Specifications 16
Troubleshooting
Correct use will help you save electricity
Warranty card included Separately
Thank you for purchasing this Panasonic product.
- Please read these operating instructions carefully, in order to use the product correctly and in a safe manner.
- Also, be sure to read the "Safety precautions" section (pages2\~4), before use.
- Keep the warranty documentation in a safe place along with the operating instructions for future reference.
Safety precautions
Always pay attention to these precautions
To prevent users and others bodily harm or property losses, we are explaining the precautions that must be observed.
■ Ignoring the symbols denoting incorrect operation, can result in harm or level of damage, described in the following two categories.

WARNING: This symbol indicates the "Possibility of death or serious injury".

CAUTION: This symbol indicates the "Possibility of injury or damage to property".
■ Meanings of symbols that always observed are as shown below.

This symbol indicates an action that "requires caution".


This symbol indicates a "never do this" action.


This symbol indicates an "always do this" action.

WARNING
■ Do not do anything that may damage the power cord or power plug.

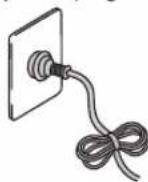
Please do not cut, modify, bend strongly, pull, place heavy objects on top of or tie the power plug with nylon straps or wires; continual use of damaged power plugs may result in electric shock, short circuit or fire.
- If the included power cord is damaged, it must be replaced by the manufacturer, the manufacturers authorized service agent or registered electrician in order to avoid a safety hazard
■ Do not disconnect the power plug with wet hands.

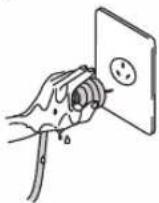
Electric shocks may occur.
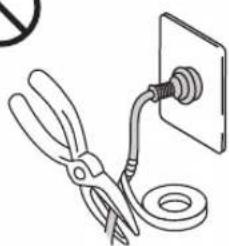
■ Avoid the power cord if it is damaged or modified

natural_image
Illustration of a pair of scissors securing a wall-mounted cable with a ring (no text or symbols)Damage from heavy objects placed on the power cord, heating the power cord or pulling on the power cord may cause fire or electric shock.
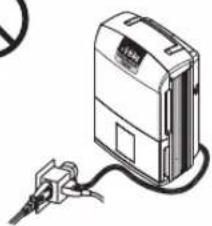
■ Do not use overloaded the rated current of the power outlet and wiring equipment.

natural_image
Illustration of a portable electronic device with a cable and plug, no text or symbols presentUse too many branch lines will exceed the rated current, it may cause a fire by overheating.
■ Do not use a damaged power cord

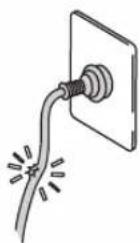
Using a damaged power cord may result in short circuit or fire. Please consult with the manufacturer or an authorized service agent.
■ Do not start or stop the unit by inserting or pulling out the power plug.

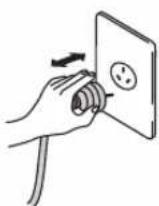
It may cause fire or electric shock by overheating.
■ Insert the power plug completely

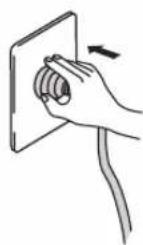
If the power plug is not inserted securely, fire due to overheating may occur.
- Do not use damaged power plugs or loose wall sockets.
■ Do not use the voltage other than as specified for unit.

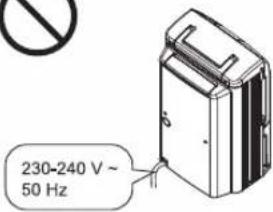
It may cause fire or electric shock by overheating.

WARNING
■ Do not insert fingers or other objects into the air inlet.

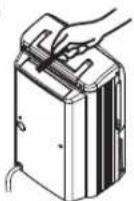
The rotating fan inside the unit could cause injury.
■ Do not unplug roughly.

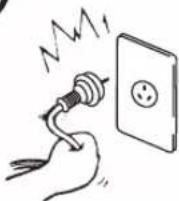
Unplugging roughly may damage the power cord and may cause electric shock, short circuit or fire.
■ Do not place the unit near a heater.

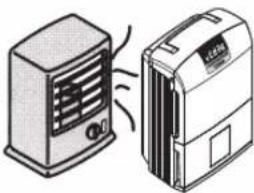
natural_image
Illustration of a heat exchanger and an industrial control unit (no text or symbols)Plastic parts may melt and cause fire.
■ Periodically clean the dust and dirt on the power plug.

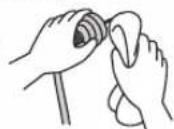
Dust may accumulate on the power plug in humid conditions and may cause the insulation to fail and cause a fire.
- Disconnect the power plug and wipe it with dry cloth. If not using the unit, disconnect the power plug.
■ Never try to repair the unit by yourself.

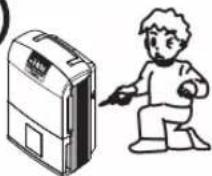
Fire or electric shock may occur.
- Consult the manufacturer or the manufacturers authorized service agent.
■ Do not stretch the power cord.

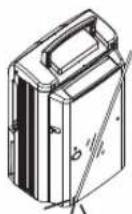
Trapping the power cord as in the above illustration, may cause a short circuit or broken wires (which may cause a fire or an electric shock.)
■ Switch off the unit and pull out the power plug if smoke or an abnormal smell is detected.

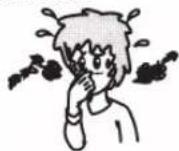
It may cause fire or electric shock by overheating.
- Consult the manufacturer or the manufacturers authorized service agent.
■ Do not pull on the power cord when carrying or storing the unit.

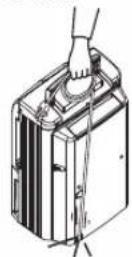
Pulling on the power cord as in the above illustration may damage the wires inside the cord and fire or electric shock may result.

CAUTION
■ Please monitor indoor temperature during prolonged operation.

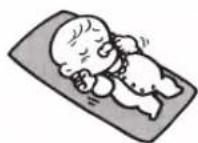
During operation, heat from the unit can cause indoor temperature to rise, upsetting homeostasis, potentially making people feel unwell.
■ Do not use in places where water may splash onto the unit.

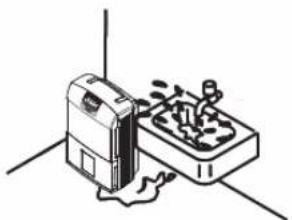
natural_image
Isometric illustration of a device connected to a tray with mechanical components (no text or symbols)Fire or electric shock may occur.
Place the unit on a level and sturdy floor.

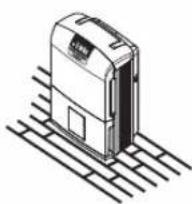
natural_image
Isometric line drawing of a device with grid lines, no text or symbols presentIf the unit tilts water will overflow, and wet the property potentially causing fire or electric shock.
■ Do not use unit near flammable gas.

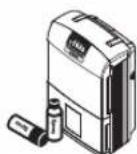
If flammable gases permeate the surrounding space, it may cause fire.
■ Do not use in confined spaces such as closets.

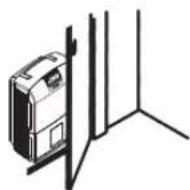
If there is insufficient ventilation, overheating and fire may occur.
■ Do not use in places exposed to direct sunlight, wind or rain.

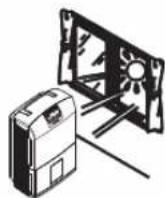
Resulting heat may cause fire or electric shock.
Safety Precautions
This unit is not intended for use by persons (including children) with reduced physical, sensory or mental capabilities, or lack of experiences and knowledge, unless they have been given supervision or instruction concerning use of the unit by a person responsible for the safety. Children should be supervised to ensure that they do not play with the unit.

CAUTION
- Do not use in place where there are artworks or academic documents.
- Do not place flower vases or other water container on top of the unit.
- Do not wash the unit directly with water.

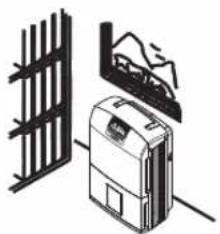
natural_image
Illustration of a portable air conditioner unit with a grid panel and front-mounted screen (no text or symbols)Deterioration of stored articles may occur.

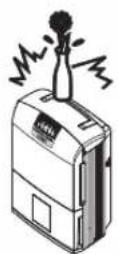
Water may spill into the unit and fire or electric shock may occur.

natural_image
Line drawing of a hand using a tool to adjust or install a mechanical component (no text or symbols present)Water leakage may cause electric shock.
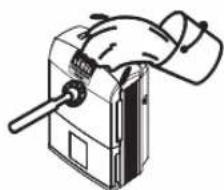
■ Do not place any heat or flame producing instrument in air outlet of the unit.
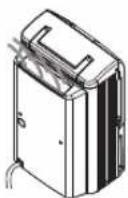
■ Do not cover the air inlet or air outlet with cloths or towels.
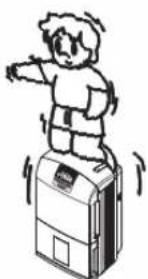
■ Do not sit or climb on the unit.
■ Do not hold the unit by the louver when moving or lifting it.

Incomplete combustion may cause carbon monoxide poisoning.

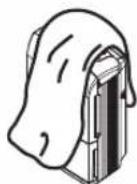
Air circulation will decrease and overheating or fire may occur.

natural_image
Illustration of a person standing on a device with motion lines indicating movement (no text or symbols)You may fall over, and injury may occur.

The unit may fall down and injury may occur.
■ Before moving the unit, turn off the power and empty the tank.
■ Before cleaning the unit, the unit must be powered off and unplugged from the electrical outlet.
If the unit will remain unused for a long period, disconnect the power plug, for safety.
■ After prolonged use, perform periodic inspection.


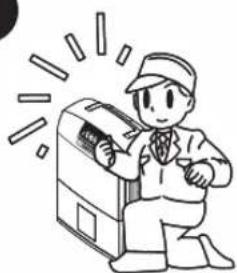
natural_image
Cartoon illustration of a person in uniform using a machine with motion lines indicating speed (no text or symbols)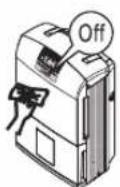
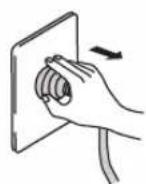
Failure to empty the tank may result in water leakage resulting in fire, electric shock or water damage to furniture.
The high-speed rotation of the fan inside may cause injury.
Accumulation of dust and foreign objects may occur and may lead to overheating and fire may occur.
Particularly the air filter and drains should be checked routinely to avoid overheating and leakage, resulting in house fires and items wetted.
Part Names
Front
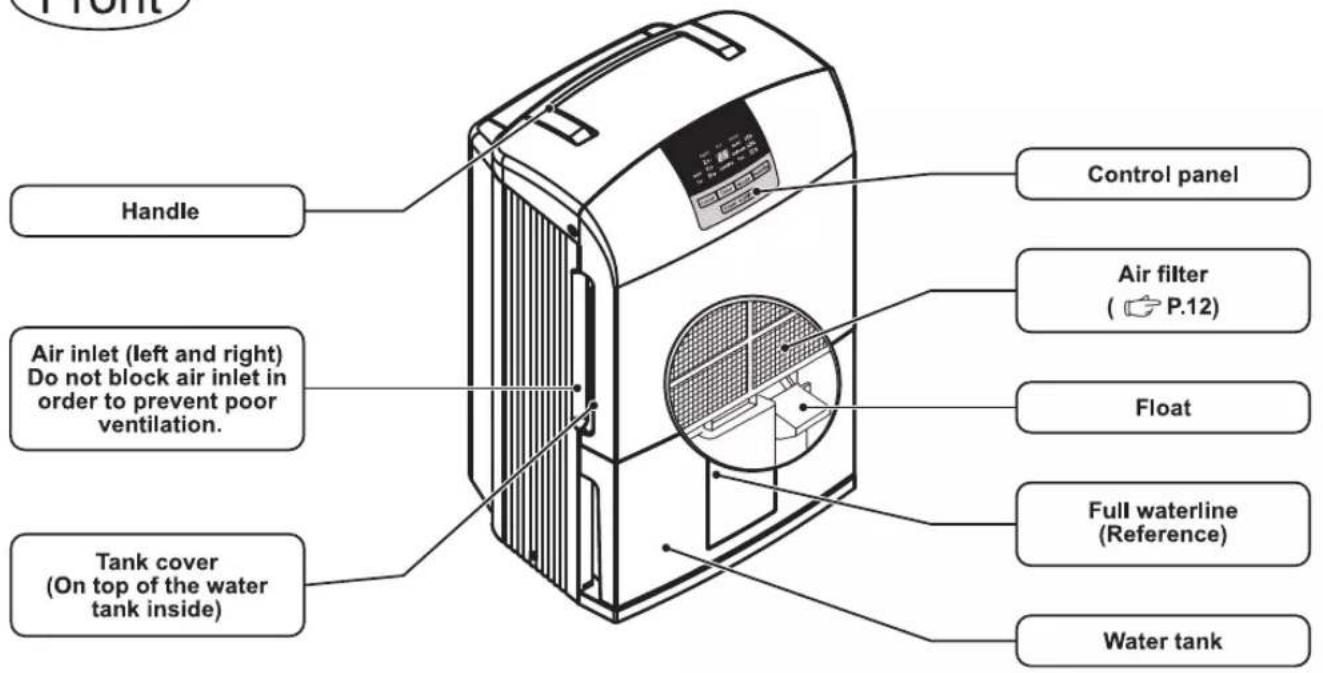
Back
Note
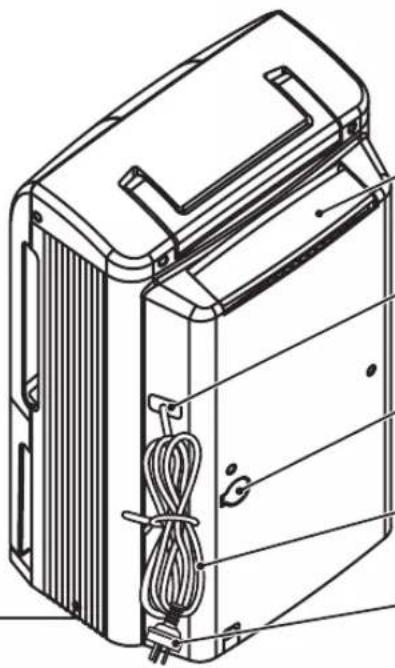
Caster (On the bottom of the unit / 4 pieces)
- Casters only move laterally.
CAUTION
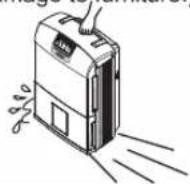
- Use care when moving the unit over carpet, or when the tank is filled with water. (The unit may fall over causing spills, which may result in electrical shock, fire or damage to, furniture.)

natural_image
Technical line drawing of a portable electronic device with attached cable (no text or symbols)Louver (air outlet)
Power cord hook
Drain pipe interface ( P.11)
Power cord
Power plug
※Remove cover from plug before use.
Where to use
- At least 20 cm distance from the wall. (Walls and furniture near the unit, may be stained by electrostatic.
● At least 1 Meter distance from any TV, radio (To prevent screen interference, noise)
Operating method
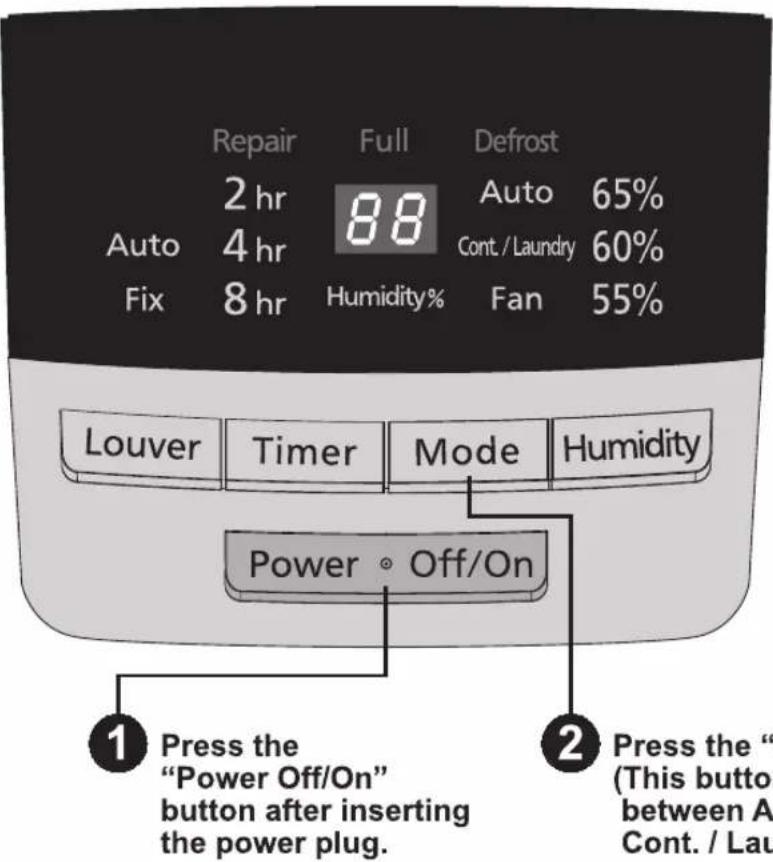
Press the "Mode" button (This button can switch between Auto (dehumidify), Cont. / Laundry, Fan).
Note
● Operating indoor temperature is between 5 - 35 °C.
The unit might not operate properly if used in a room with a temperature exceeding this range.
● This unit can be used for daily life, such as eliminating uncomfortable humidity and to help dry laundry etc. However, an environment with comfortable humidity cannot be maintained when the humidity is below approximately 50 %.
- This unit will stop operating when there's a power outage and will resume into standby mode when power is restored.
- Do not operate this unit again within 3 minutes of turning the unit off in order to ensure the usage life of the compressor.
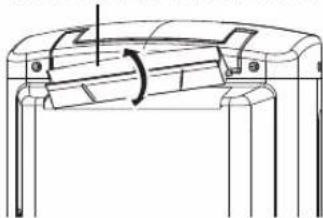
If louver has been removed
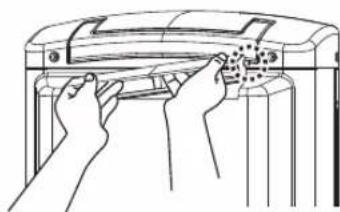
Installing the louver
1 Insert the left side hole into the projection at the left side in the main unit.
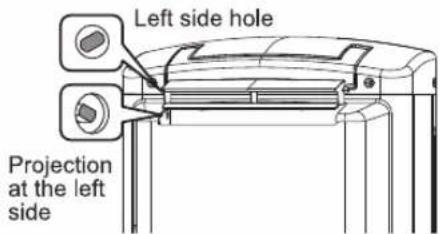
Turn louver up and down to make it easier to be inserted
natural_image
Technical line drawing of a mechanical component with a rotating shaft and mounting base (no text or symbols)2 Set the louver so that it is horizontal, then bend it out slightly at the middle.
3 Insert the right side into the unit.
natural_image
Line drawing of hands installing or adjusting a component on a device (no text or symbols visible)Control panel and Functions
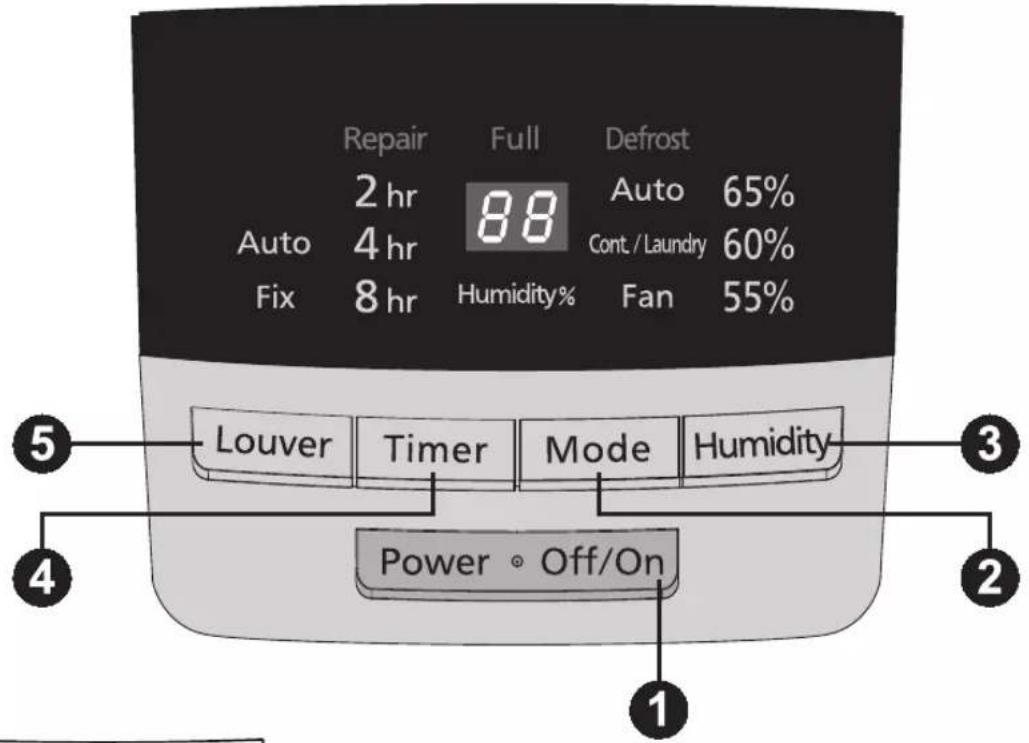
1 Power · Off/On
Press the "Power Off/On" button after inserting the power plug and the dehumidifier will start operating Cont. / Laundry mode for 4 hours with the dehumidifying louvers set as all on; press the same button again and the will stop operating.
2 Mode
"Mode" button (this button can switch between Auto (dehumidify), Continuous/Laundry and Fan).
Auto (Operates with low air volume)
● Humidity sensor detects the ambient level of humidity and keeps indoor humidity at the most suitable level for the human body; the "Humidity" function can be selected to adjust the humidity if you feel uncomfortable.
● Dehumidifier operates during high ambient humidity and stops at low ambient humidity. (But the fan motor will continue to operate). (around 57 %)
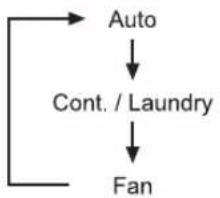
flowchart
graph TD
    A["Auto"] --> B["Cont. / Laundry"]
    B --> C["Fan"]
Cont./Laundry (Air volume changes according to the following usage conditions)
● Continuous dehumidify can be used to help dry wet laundry.
- When the button for Cont./Laundry is pressed, the unit will operate in Cont./Laundry mode for 4 hours, and "4 hours" will light up on the "Timer" display; the unit will operate with high air volume at this time.
(Every time the Cont./Laundry button function is selected for the first time, the unit will automatically select the default setting of 4 hours.)
● To change the Cont./Laundry time, please press the "Timer" button to change the time settings; the following changes will be set every time the button is pressed. (Operates with high air volume at this time)
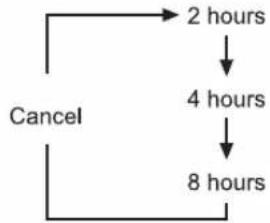
flowchart
graph TD
    A["2 hours"] --> B["4 hours"]
    B --> C["8 hours"]
    D["Cancel"] --> A
● The unit will operate with low air volume when the Timer is cancelled. (Operates continually at this time)
Fan (Operates with low air volume)
Control panel and Functions
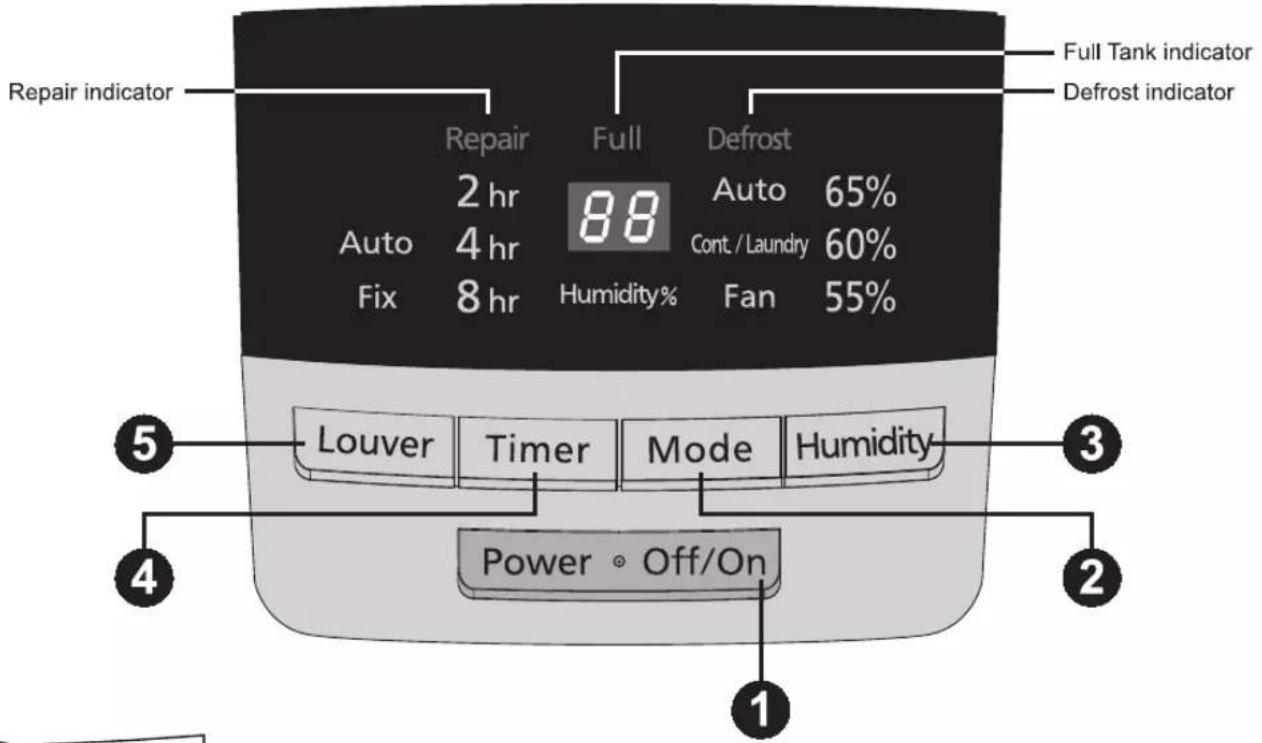
3 Humidity
● The dehumidifier can operate according to the humidity set after pressing the "Humidity" button.
● To change the humidity set, press "Humidity" during flashing 65 % 60 % 55 %. (Cycle method 65 %, 60 %, 55 %)
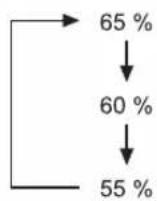
● "Auto(dehumidify)" will be displayed after pressing the "Humidity" button, and performs dehumidifying operations.
The "Humidity %" light will turn off after the "Humidity" button is pressed. The level of humidity set will flash for approximately 10 seconds and then the "Humidity %" will light up again displaying the current humidity.
- Pressing the "Mode" button will cancel the "Auto(Dehumidify)" setting and allow you to change the operating mode.
4 Timer
● Timer function can be set; the unit will automatically stop when the time on the timer is reached.
- Pressing the "Timer" button while the unit is operating, will result in the below changes every time the button is pressed.
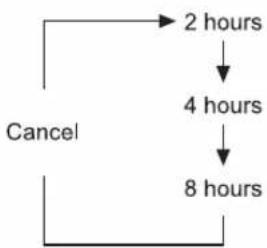
flowchart
graph TD
    A["2 hours"] --> B["4 hours"]
    B --> C["8 hours"]
    D["Cancel"] --> A
Note
- If no button pushes are detected in a 24 hour period, the unit will automatically cease operation.
● The compressor will stop operating if the indoor temperature exceeds the range of 5-35°C. (But the fan motor will continue to operate)

Louver
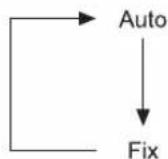
● "Auto" will be displayed on top when the "Louver" button is pressed; the louver will automatically swing up and down.
● This function can also set the air direction; when the louver swings to the desired air direction angle, press the "Louver" button again. "Fix" will be displayed on the control panel.
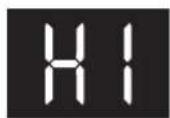
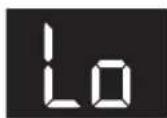
* "Hi" will be displayed when the humidity is over 85%, and "Lo" will be displayed when it is lower than 24%.
* Please check the following when the "Repair" indicator is flashing.
● When the unit tips over
① Disconnect the power plug.
② Hold the unit to an upright position (wipe away any spilled water).
③ Let the unit stand for half a day or more without using it (to dry the unit completely in case any water has spilled inside)
④ Insert the power plug again and start dehumidification.
● Is the body of the unit tilted too much?
→Disconnect the power plug and ensure that the unit is sitting level. Reconnect the power cord and start dehumidification.
● Have any magnets or metallic objects been placed on top of the unit?
→Disconnect the power plug, remove the magnets or metallic objects from on top of the unit. Reinsert the power cord and begin dehumidification.
*When the "Full" indicator is flashing, it means that the water in the tank is full. No functions can be executed until the water inside the tank has been emptied.
* When the "Defrost" indicator is flashing, it means that the unit is currently defrosting. In Defrost condition, the unit will only respond to the "Power Off/On" button. All other button operations are invalid until the Defrost operation has completed.
※Power Off and Anti-mildew:
* When operation stops (manual power off or timer power off), the unit will continue fan operation for approximately 3 minutes in order to reduce internal vapor and prevent mildew from forming; this function can be cancelled if not needed by pressing the "Power Off/On" button after entering this function.
* Sometimes the unit will not enter this function due to the operating time of the compressor.
Correct Usage
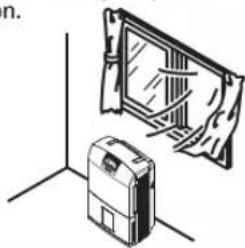
Dehumidifying function will not operate efficiently
If doors / windows are left open, or keep being open or closed repeatedly. It will also result in higher power consumption.
natural_image
Illustration of a wall-mounted device and a rectangular device in a corner, no text or symbols presentClean the air filter frequently.
Dehumidifying capabilities will be reduced if the air filter is blocked by foreign objects or dust, and will result in higher energy consumption.
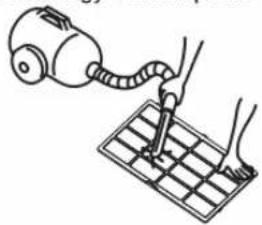
natural_image
Illustration of a hand using a vacuum cleaner to press or install a grid on a surface (no text or symbols present)Do not place the unit inside the closet.
Position the unit in the closet doorway and ensure that clothing does not block the air inlet.
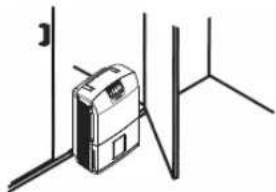
natural_image
Simple line drawing of a cabinet placed inside a room with vertical supports (no text or symbols)Use when washed items have difficulty becoming dry.
Face and operate the dehumidifier towards the washed objects to help drying.
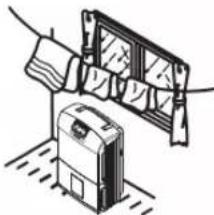
natural_image
Illustration of a device with a mounted device and a wall-mounted panel, no text or symbols presentUse in a kitchen that can easily become humid due to steam.
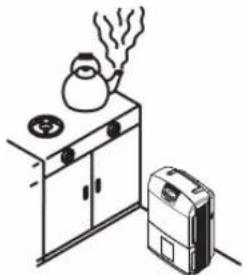
natural_image
Simple line drawing of a kitchen setup with a steaming lamp and a portable air conditioner (no text or symbols)Used to prevent frosting and the forming of mildew.
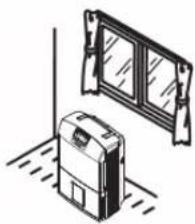
natural_image
Illustration of a cabinet and window with diagonal lines indicating floor or ground (no text or symbols)Removing a Full Tank
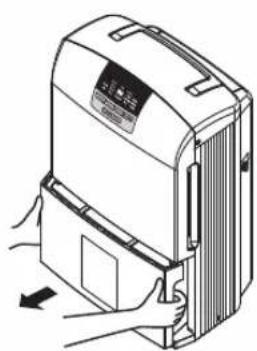
※When the water level of the tank reaches full waterline (approximately 4.8 litres), the unit will stop operating automatically ("Full" indicator flashes).
※Please follow steps ①-③ to empty the tank:
1 Slowly remove the water tank with both hands.
natural_image
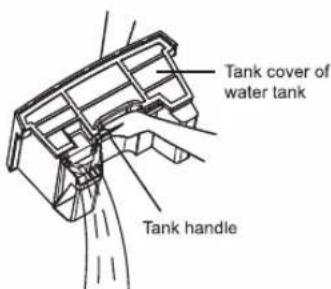
Diagram of a device with hands operating a button, showing internal components and a label (no text or symbols present)2 Hold the Tank handle and empty the water.
(Please empty the water according to the gesture in the figure below)
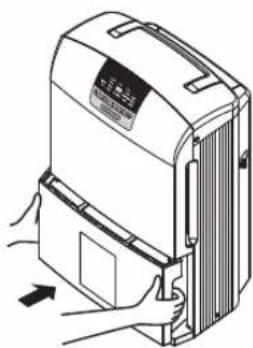
3 Reinsert the water tank gently with both hands.
natural_image
Illustration of a device with hands holding a button, showing internal components and a control panel (no text or symbols)● To prevent water from spilling, pull the water tank out in a parallel position.
Note
● The water tank can be emptied without removing the tank cover (point 2).
- Do not touch internal components after removing the water tank, or it may cause the unit to malfunction.
- Please reinsert the water tank completely; If the water tank is not correctly reinserted, the unit will not operate when the "Power Off/On" button is pressed. Remove the water tank and carefully reinsert again.
Continuous Drainage
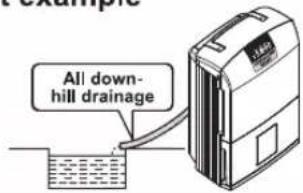
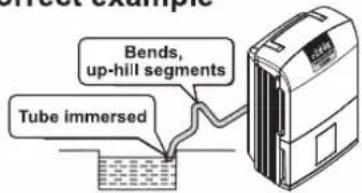
If there is adequate drainage nearby, the unit can be connected directly to the drain pipe and use the continuous drainage function.

CAUTION
■ Drainage hose must be securely installed

Please avoid bending or kinking the drain hose, make the drainage go as far as it will go. Poor drainage may result in leakage, this in turn may cause damage to furniture.
■ The ambient temperature of drain pipe must not fall below 0°C

Water in drain pipe may freeze and block drainage, resulting in leakage and damage to furniture.
Install the hose
Correct example
Incorrect example
Items to be purchased
● Hose
Length: 30cm longer than the distance between dehumidifier and the drain.
Internal diameter: 15mm
Note
When the temperature of water in the drain pipe is much cooler than the ambient temperature, the surface of drainage pipe may develop condensation. Please take insulation measures if necessary.
1 Disconnect the power plug and remove the water tank.
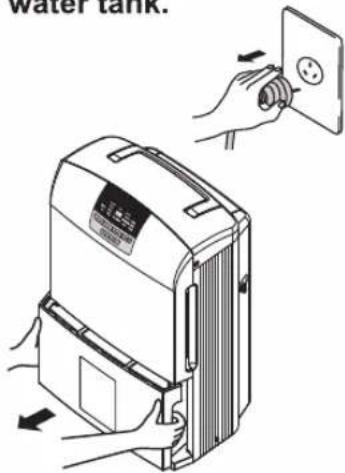
2 Open the drain pipe interface
(Just rotate the drain pipe interface 90 degrees; please do not remove it)
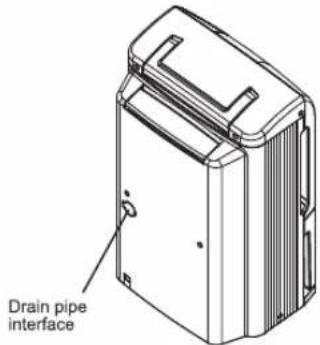
● Clean the drain pipe interface.
3 Remove the sealing device
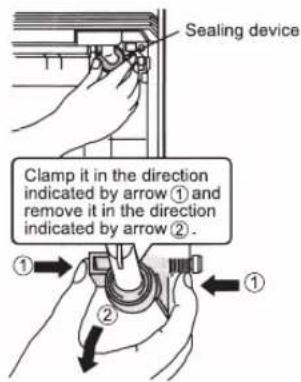
4 Connect the hose to the drain pipe
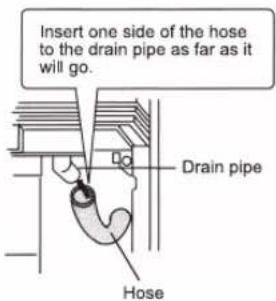
5 Insert the water tank
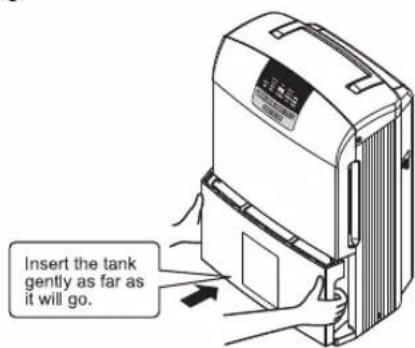
- Improper installation may cause the unit to operate incorrectly.
Note: When restoring to the water tank drainage, improper installation may result in water leakage; please refer to the above instructions.
Maintenance

CAUTION
● Always be sure that the unit is off and the power plug is disconnected when cleaning. (The electric fan inside rotates with high speed and may cause injury)
● Do not wash the praluct with water. (This may result in electric shock)
- Do not clean the product with solvents such as benzine or thinner, and do not apply insect sprays. (This product may become cracked and injury may occur. This may cause damage to the product resulting in injury, furniture damage, short circuit, electrical fire or electrical shock.)
Maintaining the unit
- Please wipe it with a soft, dry cloth.
- Please do not use hot water with temperature above 40 °C, volatile substances (thinners, benzene) and scouring powder etc. during maintenance.
(If using a chemically treated cloth, please read the manufacturers instructions that came with the cloth.)
Cleaning the air filter (Suggest once every two weeks)
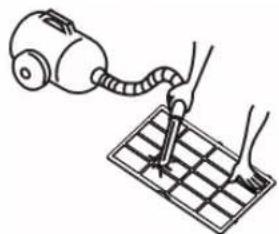
1 Remove the front panel and then remove the air filter.
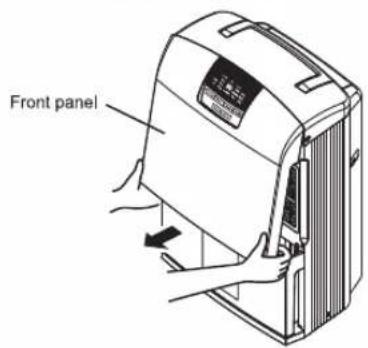
2 Remove dust and dirt using a vacuum cleaner etc. Do not operate the unit with a wet air filter inserted.
For stubborn stains, clean with water mixed with diluted kitchen detergents (neutral detergents), and then place it in the shade for it to dry completely.
natural_image
Illustration of a hand using a vacuum cleaner to test or adjust a grid-patterned surface (no text or symbols present)3 Install the air filter
Perform the removal of the air filter operation in reverse.
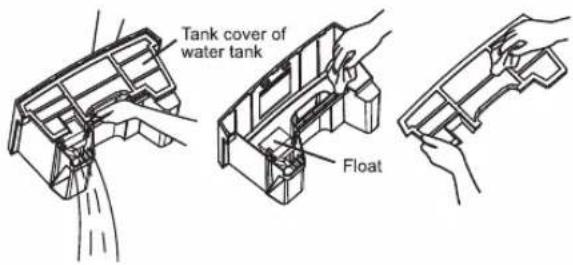
Cleaning the water tank
1 Clean the interior, exterior and tank cover of the water tank after removing the water tank.
(Please do not remove the float)
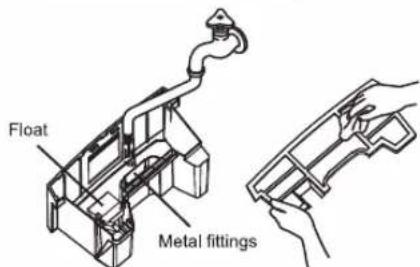
● Take care not to damage the float.
- Do not remove the float.
- Do not remove metal fittings of the tank.
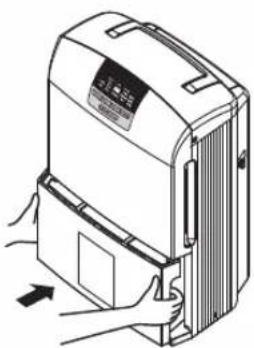
② Reinsert the water tank after wiping it clean
(Please reinsert the tank cover of the water tank)
natural_image
Illustration of a device being adjusted for a door panel, showing hand positioning and control buttons (no text or symbols)Maintenance
Note
● Never remove the float. If the float is removed, the unit will not operate even if the "Power Off/On" button is pressed. Do not remove the Styrofoam (plastic foam) attached to the float.
If it is removed, the tank full detection mechanism will not work and the unit will not stop operating even if the water tank is full, which will cause leakage.
Please push the water tank as far as it will go in when reinstalling it.
The unit will not operate even if the "Power Off/On" button is pressed if the water tank is not properly installed.

CAUTION
● Water may leak if the water tank was not properly installed. (May cause water leak resulting in damage to furniture, fire or electric shock.)
If not using the unit for long periods of time
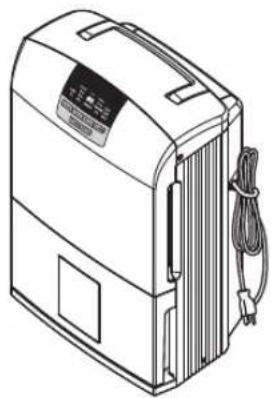
1 Disconnect the power plug, tie the power cord up with the strap and place it in the cord holder.
natural_image
Line drawing of a portable electronic device with a coiled cable and control panel (no text or symbols)② Empty the water in the water tank, wipe the water tank dry, reinsert the top cover and reinstall the water tank.
(Do not remove the float)
Note
● Store the unit in a place with no exposure to direct sunlight.
(Direct sunlight exposure may cause the unit to deform and decolorize)
- Do not store it by laying it down.
(May cause malfunction or abnormal sounds)
Troubleshooting
Please check the followings first
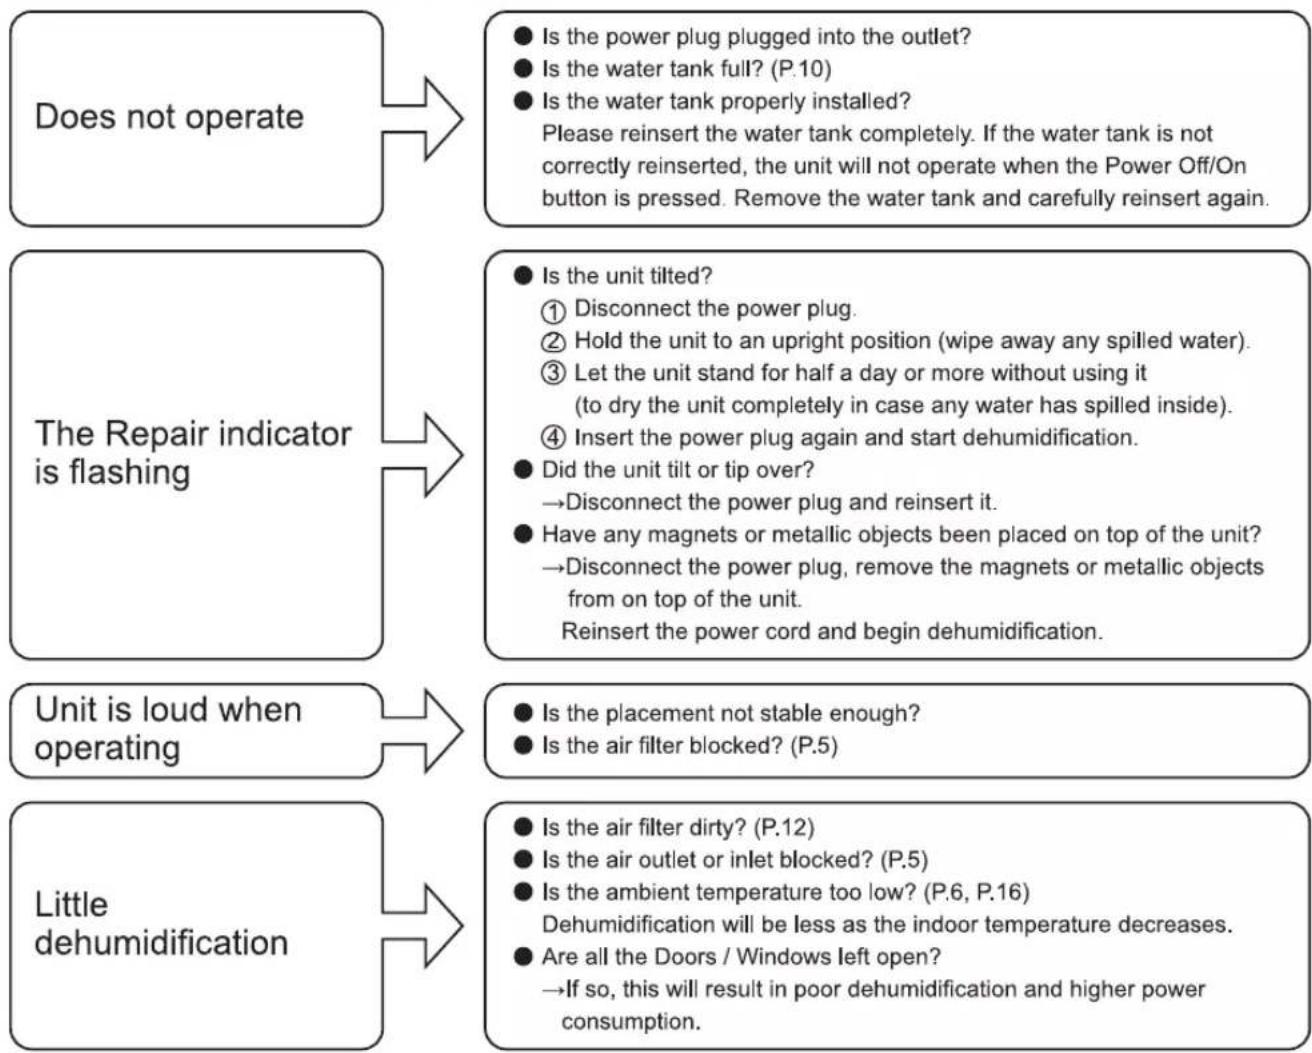
flowchart
graph TD
    A["Does not operate"] --> B["Is the power plug plugged into the outlet?"]
    A --> C["Is the water tank full? (P.10)"]
    A --> D["Is the water tank properly installed?"]
    A --> E["Please reinsert the water tank completely. If the water tank is not correctly reinserted, the unit will not operate when the Power Off/On button is pressed. Remove the water tank and carefully reinsert again."]
    F["The Repair indicator is flashing"] --> G["Is the unit tilted?"]
    G --> H["① Disconnect the power plug."]
    G --> I["② Hold the unit to an upright position (wipe away any spilled water)."]
    G --> J["③ Let the unit stand for half a day or more without using it (to dry the unit completely in case any water has spilled inside)."]
    G --> K["④ Insert the power plug again and start dehumidification."]
    G --> L["Did the unit tilt or tip over?"]
    L --> M["→Disconnect the power plug and reinsert it."]
    G --> N["Have any magnets or metallic objects been placed on top of the unit?"]
    G --> O["→Disconnect the power plug, remove the magnets or metallic objects from on top of the unit."]
    G --> P["Reinsert the power cord and begin dehumidification."]
    Q["Unit is loud when operating"] --> R["Is the placement not stable enough?"]
    Q --> S["Is the air filter blocked? (P.5)"]
    T["Little dehumidification"] --> U["Is the air filter dirty? (P.12)"]
    T --> V["Is the air outlet or inlet blocked? (P.5)"]
    T --> W["Is the ambient temperature too low? (P.6, P.16) Dehumidification will be less as the indoor temperature decreases."]
    T --> X["Are all the Doors / Windows left open?"]
    T --> Y["→If so, this will result in poor dehumidification and higher power consumption."]
No problems
The following conditions of the dehumidifier happen for their respective reasons; please do not worry and continue to use the unit.
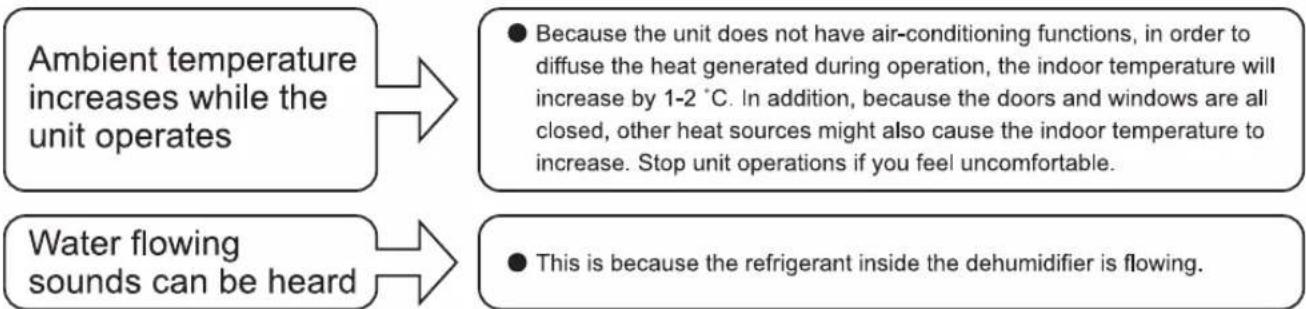
flowchart
graph LR
    A["Ambient temperature increases while the unit operates"] --> B["● Because the unit does not have air-conditioning functions, in order to diffuse the heat generated during operation, the indoor temperature will increase by 1-2 °C. In addition, because the doors and windows are all closed, other heat sources might also cause the indoor temperature to increase. Stop unit operations if you feel uncomfortable."]
    C["Water flowing sounds can be heard"] --> D["● This is because the refrigerant inside the dehumidifier is flowing."]
Error display

flowchart
graph LR
    A["E0-E3 display"] --> B["● Error<br>→ Please disconnect the power plug and contact the manufacture or authorized service agent immediately."]
If the abnormality still remains after following the treatments described above, please disconnect the power plug and contact the manufacturer or authorized service agent immediately.
Contact Manufacturer Immediately (Emergency Treatment)
Stop operating immediately, disconnect the power plug and contact the manufacturer or authorized service agent immediately if the following symptoms occurred.
● The "Power Off/On" function is not operating properly.
● The GFCI (ground-fault circuit interrupter) or the fuse burns frequently.
● The power cord and power plug overheats abnormally.
● Smells like something is burning or there are abnormal sounds when operating.
● Water leaks from the unit.
● Other abnormal malfunctions.

WARNING
If the supplide power cord is damaged, it must be replaced by the manufacturer, authorized service agent or registered electrician.
Kind Reminder

Did these symptoms occur?
● Unable to operate or stops suddenly during operation when power is connected.
● Power is only sometimes connected when the power cord is moved.
● Abnormal sounds or vibrations occur when the fan is rotating.
● The unit itself overheats abnormally, and smells like something is burning.
● Other abnormalities or malfunctions.
When these symptoms occur, in order to prevent accidents from happening, please turn off the power, disconnect the power plug and contact your purchasing manufacturer or authorized service agent by our company for repairs.
Specifications
| Model No. | F-YCL17N | ||
| Power supply | 230-240 V ~ 50 Hz | ||
| Power plug shape | ◎ | ||
| Operating condition | Temperature | 30 °C | |
| Relative humidity | 80 % | ||
| Water removal (L/Day) | Hi | 17.0 | |
| Power consumption (W) | Hi | 300 | |
| Water tank capacity (L) | 4.8 | ||
| Weight (kg) | 14.0 | ||
| Dimensions (WxHxD) (mm) | 360X605X260 | ||
* The unit consumes approximately 2.0 W of power when operation is off. (While power plug is inserted)
Customer's record
For the model number and serial number of this product, please refer to the back side of the machine.
Please record them in the space provided and keep for future reference.
| MODEL NO. F-YCL17N | SERIAL NO. |
| DATE OF PURCHASE | MANUFACTURER NAME |
| MANUFACTURER ADDRESS | |
| MANUFACTURER TELEPHONE NUMBER | |
Panasonic Corporation
Web Site : http://www.panasonic.com
©Panasonic Ecology Systems Co., Ltd. 2015 All Rights Reserved.
- Panasonic®
- Operating Instructions
- Dehumidifier
- Model No. F-YCL17N
- Contents
- Safety precautions
- WARNING
- CAUTION
- Part Names
- Front
- Back
- Note
- Where to use
- Operating method
- If louver has been removed
- Installing the louver
- Control panel and Functions
- Power · Off/On
- Mode
- Humidity
- Timer
- Louver
- ※Power Off and Anti-mildew:
- Correct Usage
- Dehumidifying function will not operate efficiently
- Clean the air filter frequently.
- Do not place the unit inside the closet.
- Use when washed items have difficulty becoming dry.
- Use in a kitchen that can easily become humid due to steam.
- Used to prevent frosting and the forming of mildew.
- Removing a Full Tank
- Slowly remove the water tank with both hands.
- Hold the Tank handle and empty the water.
- Reinsert the water tank gently with both hands.
- Continuous Drainage
- ■ Drainage hose must be securely installed
- ■ The ambient temperature of drain pipe must not fall below 0°C
- Items to be purchased
- ● Hose
- Disconnect the power plug and remove the water tank.
- Open the drain pipe interface
- Remove the sealing device
- Connect the hose to the drain pipe
- Insert the water tank
- Maintenance
- Maintaining the unit
- Cleaning the air filter (Suggest once every two weeks)
- Remove the front panel and then remove the air filter.
- Remove dust and dirt using a vacuum cleaner etc. Do not operate the unit with a wet air filter inserted.
- Install the air filter
- Cleaning the water tank
- Clean the interior, exterior and tank cover of the water tank after removing the water tank.
- ② Reinsert the water tank after wiping it clean
- If not using the unit for long periods of time
- Disconnect the power plug, tie the power cord up with the strap and place it in the cord holder.
- ② Empty the water in the water tank, wipe the water tank dry, reinsert the top cover and reinstall the water tank.
- Troubleshooting
- Please check the followings first
- No problems
- Error display
- Contact Manufacturer Immediately (Emergency Treatment)
- Kind Reminder
- Did these symptoms occur?
- Specifications
- Customer's record
- Panasonic Corporation
Brand : PANASONIC
Model : F-YCT17V
Category : Dehumidifier